Contains ten Story Episode Mission Cards, eight Story Epilogue Cards, ten Side Mission Cards, 16 Ace Cards, 20 Reward Cards and one Ace Campaign Rule booklet.
What Is Race to Minsk?
Race to Minsk is the second in a series of Ace Campaigns, a narrative-driven system of Flames Of War battles. Ace Campaigns are extremely flexible in allowing players to tailor their campaign to fit their playgroups needs. There are three different modes that you can play the campaign in: Story Mode, Extended Mode, and Aces Mode. Story mode is your shortest campaign that only uses the Story and Reward cards, while Extended allows you to play longer campaigns by adding in side missions. The Aces mode can be used with Story Mode or Extended Mode and allows players to create their own unique commander with special abilities that will give them an edge during the course of the campaign.
Story Mission Cards The first thing to do is to play the current mission. In the first turn, Episode 1: Storming Forward. Read the narrative text to give you and your opponent context for your battle. Then follow the instructions on the mission card to set up your game. Once everything is ready, play your game!
Once the mission has been resolved, locate the next mission indicated on the Story Mission you just completed. That will be your next Story Mission. Then discard all other Story Mission Cards with that same Episode number as the new mission.
In this Example if the Allies win the Storming Forward mission, then the next mission will be Smash the Defences. If the Axis win, then the next mission would be A Strong Position.
Side Mission Cards Side Missions are used in the Extended Play mode, for those who want a longer campaign. In the extended mode, more missions and rewards are added to the mix. Side missions are played between the story missions and all missions grant players rewards that they can use in future games. This mode is ideal if you want to spend a little more time playing games and earning rewards.
Side Missions are bonus games that you can play after the main Story Missions. They give you an opportunity to try out new Ace abilities (while playing Aces Mode) and earn valuable rewards. Once a side mission has been played, set it aside and do not shuffle it back into the deck, this means that you never play the same Side Mission twice in a campaign.
Reward Cards Completing missions will earn you rewards that you can use in subsequent missions. Rewards are sorted into tiers, one for each phase of the game following a Story Mission. The higher the tier level, the more powerful the effect the reward will have.
Once used, reward cards are shuffled back into their respective tier decks.
Ace Choosing an Ace Before playing their first game, players choose an Ace set to use throughout the campaign. This set includes two Infantry Ace sets and two Tank Ace sets. These Aces will have abilities better suited to their type, so for example, a tank ace is better off leading a tank force.When a player chooses an Ace, one of that player’s formation commanders becomes the Ace for the campaign. Any abilities and special effects granted by the Ace are limited to Units in that Ace’s Formation.
Ace Abilities Completing missions will earn you rewards that you can use in subsequent missions. Rewards are sorted into tiers, one for each phase of the game following a Story Mission. The higher the tier level, the more powerful the effect the reward will have.
Once used, reward cards are shuffled back into their respective tier decks.
Flexible Campaign System The Ace Campaign system is meant to be flexible, and fit your group’s needs making even easier for you and your friends to set up and play in a campaign, or to set up a story driven Tournament, the set can do that too.
The system can grow as well, as more and more sets come out you will gain more and more cards to add to your Ace Campaign sets, giving you even more Aces to choose form, new story missions, more side missions and even more Reward cards.
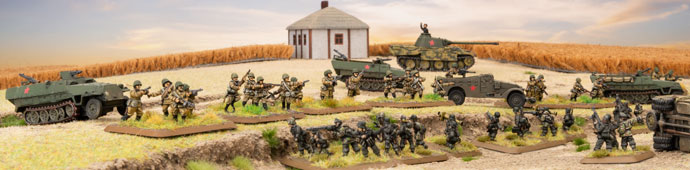
With the D-Day series of books coming to a close it is time to shine the spotlight on the Eastern Front. The first in our series of three Bagration books is Bagration: Soviet covering the Soviet forces on the Eastern Front in 1944.This book is jam packed full of interesting Soviet Formations and Units, as well as plenty of background, and three new river crossing themed missions.
The Bagration: Soviet book starts with background covering the pivotal events of Operation Bagration, the Soviet Army’s massive offensive against the Germans centred on Byelorussia that began on 22 June 1944.
The front end of the book also features a comprehensive special rules section, Know your Tanks and Know your Infantry section to familiarise you with what you will find in the following pages.
The Force diagram is packed full of choices with nine Tank, five Infantry, and one Recon formation to choose from, as well as expansive support choices.
You will also find scattered throughout the book plenty more background covering the units and battles of Operation Bagration.
IS-2 Guards Heavy Tank Regiment
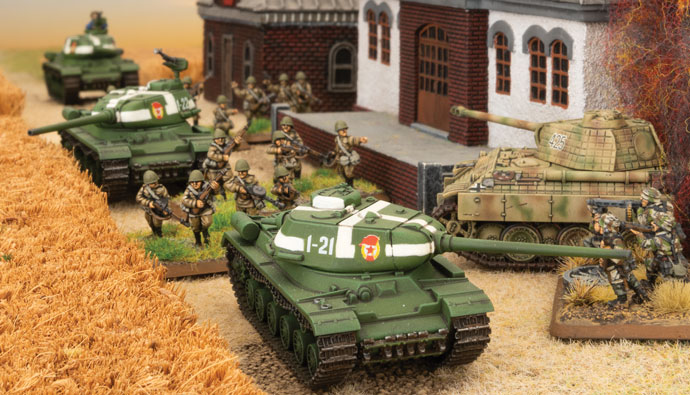
The first Formation is IS-2 Guards Heavy Tank Regiment. This hard hitting formation is equipped with IS-2 heavy tanks organised into a HQ of one IS-2, two to four IS-2 Guards Heavy Tank Companies of 3-5 IS-2 tanks. One of these can be armed with the IS-85 instead, for less hitting power, but a higher ROF. These Guards tanks are rated Confident 4+, with a Counterattack 3+ and Last Stand 3+. They are Veteran Skill 3+, but are Hit On Aggressive 3+.
The fifth Unit can be an infantry choice of a SMG Company, Hero SMG Company or Engineer-Sapper Company.
IS-2 is a formidable beast with armour front 10, side 8, and top 2. It is armed with a 122mm gun with a range 28”/70cm, ROF 1/1, anti-tank 14, with Brutal and Slow Firing. Additional armament includes a 12.7mm AA MG, and a MG.
IS-85 Guards Heavy Tank Regiment
Our second Formation is the IS-85 Guards Heavy Tank Regiment. This is organised in a similar manner to the IS-2 formation, but equipped with the IS-85 tank. The IS-85 was created from an early batch of IS tanks when the 122mm guns were not ready for production. Three Guards Heavy Tank Regiments were equipped with them in early 1944.
IS-85 has the same thick armour as the IS-2, with armour front 10, side 8, and top 2. However, it is armed with a 85mm gun with a range 28”/70cm, ROF 2/1, anti-tank 12. Additional armament includes a MG (the 12.7mm AA MGs were not fitted until IS-2 production was in full swing).
This will also see the release of the plastic SBX62 IS-2 Guards Heavy Tank Company, which can do both the IS-2 and IS-85 tank. Keep an eye out for the Spotlight on this great kit.
Heavy SP Artillery Regiment
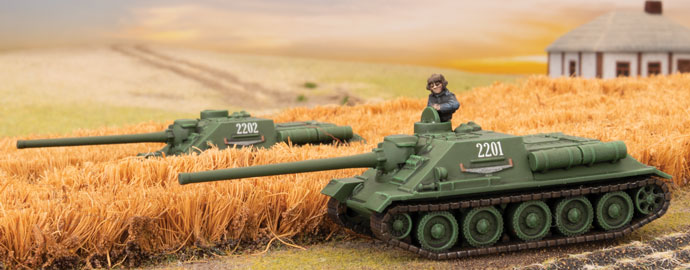
The third Formation in Bagration: Soviet is the Heavy SP Artillery Regiment armed with the ISU-122 or ISU-152 heavy assault guns. These powerful weapons are almost as heavily armoured as the IS tanks with armour front 9, side 8, and top 2. The ISU-122 is armed with a 122mm gun and can fire both direct or as artillery. Artillery range is 72”/180cm, with AT 3 and FP 3+. Direct fire range is 28”/70cm, ROF 1/1, AT 14 and FP 2+ with Brutal, Forward Firing, and Slow Firing. They also have an option to be fitted with a 12.7mm AA MG.
The ISU-152 is similar, but armed with a 152mm gun. Artillery range is 64”/160cm, with AT 3 and FP 2+. Direct fire range is 20”/50cm, ROF 1/1, AT 13 and FP AUTO with Brutal, Forward Firing, and Slow Firing.
These ISU assault guns are rated Confident 4+, with a Counterattack 5+ and Last Stand 3+. They are Trained Skill 4+, Assault 5+, and are Hit On Aggressive 3+.
Formation allows you to field a mix of ISU-122 and ISU-152 in Heavy SP Batteries of two to five ISUs, commanded by an HQ of one IS-2 tank. The fifth unit of the formation is an infantry unit of a SMG Company, a Hero SMG Company or an Engineer-Sapper Company.
Both the ISU-122 and ISU-152 can be made from the ISU plastic kit, an excellent kit that will be released with Bagration: Soviet. Check out the Spotlight featuring this fantastic plastic model SBX63 ISU Heavy SP Battery.
Medium SP Artillery Regiment
The fourth Formation is the Medium SP Artillery Regiment. This Formation is commanded by an Headquaders of one T-34 (85mm) and made up of two to four Tank-killer Batteries armed with SU-85, SU-85M or SU-100. A fifth unit can be either a SMG Company or a Hero SMG Company. As specialist tank-killer formations they are rated Fearless 3+ with Counterattack 4+, Skill is Veteran 3+ with Assault 5+, and they are Hit On Careful 4+.
SU-85 will be familiar to those who have built Soviet forces for Mid-war. It was armed with an 85mm gun with range 28”/70cm, ROF 2/1, anti-tank 12 with Forward Firing. It armour is front 5, side 5, top 1.
During the first production run of what would become the SU-100, the 100mm gun was not initially ready, so a batch was made with the new hull mounting the 85mm gun. These became known as the SU-85M. These have the same gun as the SU-85, but their armour is front 7, side 5, top 1.
The third unit option is the SU-100 which mounts the 100mm gun on the above hull, giving it a range 32”/80cm, ROF 1/1, AT 15, FP 2+ with Forward Firing and Slow Firing.
All three models are available as plastic kits in SBX64 SU Tank-killer Battery.
Light SP Artillery Regiment
This section ends with the Light SP Artillery Regiment, a simple formation with an HQ of T-70 light tank and two to four SU-76 Light SP Batteries, and either a SMG Company or a Hero SMG Company. The Light SP Artillery are rated Confident 4+, with Counterattack 6 and Last Stand 3+, Skill Trained 4+, with Assault 6, and Hit On Aggressive 3+.
The SU-76 assault gun can either fire as artillery or in direct fire. Artillery range 72”/180cm, AT 2, FP 4+. In direct fire it has range 24”/60cm, ROF 2/1, AT 9, FP 3+ with Forward Firing. It is also lightly armoured with front 4, side 1, top 0.
A new plastic SU-76 kit makes this formation a really interesting option. See the SBX65 SU-76 Light SP Battery spotlight.
Engineer-Sapper Battalion
The first of the Bagration: Soviet infantry formations is the Engineer-sapper Battalion. This offers the unique Soviet assault engineers with their camouflage suits and body armour. The formation is organised as an HQ of two PPSh SMG teams, and two to three Engineer-Sapper Companies. They can also take an attached tank unit of IS-2 Guards Heavy Tank Company, ISU-122 Heavy SP Battery, ISU-152 Heavy SP Battery, or OT-34 Flame-tank Company.
The Engineer-Sappers have some diverse options with which to tailor your unit. The basic build is made up of 8-20 PPSh SMG teams with one or two DP MG teams for extra long range firepower. However, they are also armed with Smoke Pots which can be used once per game to drop a two-gun Smoke Bombardment before they assault. They are also Pioneers who are expert at clearing mines. Their body armour gives them a save on a 6 in Assaults.
The tailoring comes in the unit options with Panzerfausts, anti-tank rifles, Maksim HMGs, Flame-throwers, and 82mm mortars all available to enhance their fighting abilities.
Check their excellent models in the SBX67 Engineer-Sapper Company spotlight.
Hero Shock Rifle Battalion
In the opening battles of Operation Bagration it was the men of the Hero Shock RIfle Battalions that initially assaulted the German front lines supported by the Guards heavy tanks or heavy SP artillery.
This formation can be made up of Hero Shock Rifle Companies, Storm Groups, or Hero SMG SMG Companies. The formation also has machine-gun, 82mm and 120mm mortars, scouts, and 45mm anti-tank companies.
The Hero Shock Rifle Companies are a little larger than the Hero RIfle Company found in Fortress Europe, having benefited from reinforcements in preparation for Operation Bagration. These troops are excellently rated being Fearless 3+, Veteran 3+ and Hit On Aggressive 3+. They can have 9 to 13 DP MG & M1891 rifle teams and Komissar giving them Motivation 2+ while the Komissar is still with the unit. They can also add anti-tank rifles, HMGs, and Flame-throwers for additional firepower.
These troops can be represented using the excellent plastic troops of SBX79 RIfle Company.
Instead of one of your Hero Shock Rifle Companies and your Hero SMG Company, you can choose to take up to two Storm Groups. These troops are armed with 6-7 PPSh SMG teams, a PTRD anti-tank rifle, a Maksim HMG, and a 82mm mortar, and can add an additional Maksim HMG and a Flame-thrower. There are very experienced troops rated Fearless 3+, Veteran 3+ with Assault 2+ and are Hit On Careful 4+.
These troops have their own box, SBX81 Storm Group.
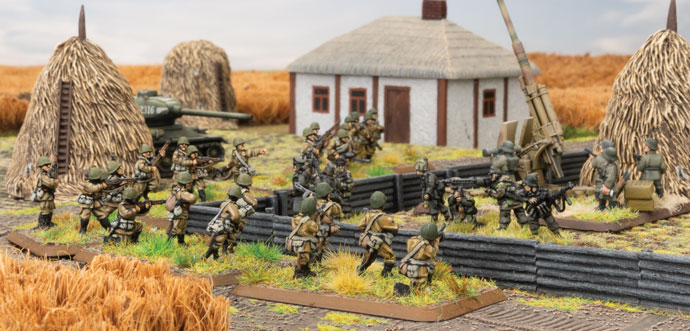
Rifle Battalion
Not all the troops assaulting the Germans on 22 June 1944 were veteran shock troops, some from the Rifle Battalions that made up the bulk of the Red Army. These troops can be just as determined.
A RIfle Battalion is made up of an HQ, two to three Rifle Companies, one of which can be a Penal Company, and a SMG Company. The formation also has its own machine-guns, mortars, anti-tanks and scouts.
The riflemen have motivation of Confident 4+, but the presents of their Komissar gives them 3+. Their skill is Green 5+, but they Assault on 4+. Their Hit On is Aggressive 3+. These can be big units with 15 to 22 DP MG & M1891 rifle teams and a Komissar. To this they can add HMGs, anti-tank rifles and flame-throwers.
The Penal Company offers you some assault troops with which to soften up the enemy. These troops have nothing to lose, so have motivation Fearless 3+ with a Komissar bringing that to 2+. They are skill Green 5+, but Assault on 3+. However they only pass Tactics on 6. Their Hit On is Aggressive 3+ and Save on 4+.
The Scout Platoon, which can be taken with the Hero Shock Rifle Battalion and Rifle Battalion, provides the formation with some Spearhead troops to infiltrate the enemy’s positions.
These troops can also be represented using the excellent plastic troops of SBX79 Rifle Company and SBX80 SMG Company.
The third section of Bagration: Soviet covers troops given the job of rushing through the broken German lines to cause havoc among the retreating troops. These are the troops of the Motor Rifle Divisions.
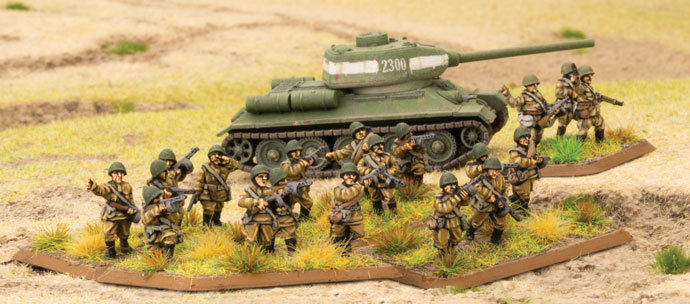
Hero T-34 (85mm) Tank Battalion
Hero Troops are the troops that have been in battle for a while and have been reduced down to a core of competent soldiers.
The Hero T-34 (85mm) Tank Battalion is the first of out all T-34/85 formations. With an HQ of a T-34 (85mm) and two to three Hero T-34 (85mm) Tank Companies this formation has plenty of punch. It is further backed up by its own anti-aircraft platoon, a Hero SMG Company, a 82mm Mortar Company, and choice of 45mm, 57mm or 76mm Anti-tank Companies.
These Hero troops are rated Confident 4+, Trained 4+ with Tactics 3+, and are Hit On Aggressive 3+.
Hero T-34 (85mm) Tank Companies are compact Units of three or four T-34 (85mm) tanks. These tanks have good protection with armour front 6, side 5, and top 1. They are armed with the 85mm gun with range 28”/70cm, ROF 2/1, AT 12, FP 3+, and MGs.
These are available in plastic where you can either get a box of five with SBX66 T-34 Tank Company or jump in with both feet and grab 21 T-34 tanks in the SUAB12 T-34 Tank Battalion.
This formation also sees a new anti-aircraft option with the ZSU M19 Anti-aircraft Platoon. This unit is armed with the Lend-lease American M17 AA half-track. Its Quad .50 cal AA MGs give it range 20”/50cm with ROF 5/3, AT 4 and FP 5+ with Dedicated AA. The half-track is lightly armoured to protect it from small arms fire with front 1, side 0 and top 0.
This will be an all plastic kit available with SBX78 ZSU M17 Anti-aircraft Platoon.
Hero T-34 Tank Battalion
The Hero T-34 Tank Battalion allows you to take a mix of T-34 (76mm) and T-34 (85mm) tank in your Hero T-34 Tank Companies. The formation also contains options for a Hero T-70 Tank Company or a Hero Valentine Tank Company. This formation offers a real variety of different tanks. It also has its own anti-aircraft, Hero SMG Company, 82mm mortars, and anti-tank guns.
The T-34 (76mm) is armed with a 76mm gun with range 24”/60cm, ROF 2/1, AT 9, FP 3+ with Overworked (+1 To Hit for Moving)
The T-70 is a light tank armed with a 45mm gun. It is quite well-armoured for a light tank with front 4, side 2, top 1. The 45mm gun has a range 20”/50cm, ROF 1/1, AT 7, FP 4+ with Overworked.
The British Valentine was supplied to the Soviets as part of the Lend-lease program. Though the British thought of it as an infantry tank, the Soviets designated it a light tank and gave it to light tank companies. The Valentine is therefore quite well-armoured with front 6, side 5, top 1. The Soviets got a mix of types, some with 2 pdr guns others with 6 pdr guns. The 2 pdr gun has a range 24”/60cm, ROF 2/1, AT 7, FP 4+ with No HE. The 6 pdr gun has a range 28”/70cm, ROF 2/1, AT 10, FP 4+ with No HE, No MG and Overworked. The Valentine (2 pdr) also has a MG.
To field these troops have a look at these for the T-34s SBX66 T-34 Tank Company or SUAB12 T-34 Tank Battalion. For the T-70s check out SBX68. For the Valentines see SBX69.
Hero Motor Rifle Battalion
The Hero Motor Rifle Battalion is a well-equipped formation with its core of infantry, its own selection of support weapons like machine-guns, mortars, and anti-tank guns, and it also has its own tanks and reconnaissance troops.
The Hero Motor Rifle Company that make up two to three of your formation units are well-rated with Confident 4+ motivation backed up by a Komissar (3+ motivation). Their skill is Veteran 3+, with 2+ in Assaults. Their Hit On rating is Aggressive 3+. They have 7-10 DP MG teams (Range 16”/40cm, ROF 2/2, AT 2, FP 6) and a Komissar. They can add PTRD anti-tank rifle teams and Maksim HMG teams for more firepower.
These troops can also be represented using the excellent plastic troops of SBX79 RIfle Company and SBX80 SMG Company.
Their fourth infantry unit is the Hero SMG Company (which is included in many formations throughout the book as you may have noted). This simple, but effective unit is armed with 5-7 PPSh SMG teams (Range 4”/10cm, ROF 3/3, AT 1, FP 6 with Pinned ROF 1) and a Komissar team. They have the same ratings as the Hero Motor RIfle Company.
Use SBX80 SMG Company to field these excellent troops.
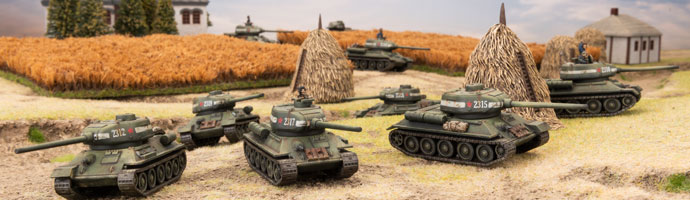
T-34 Tank Battalion
The T-34 Battalion is a mixed unit with both T-34 (76mm) and T-34 (85mm) tanks. They can also have a light tank company with either T-70 or Valentine light tanks. Their formation also contains anti-aircraft, mortars, anti-tank and SMG troops.
To field these troops have a look at these for the T-34s SBX66 T-34 Tank Company or SUAB12 T-34 Tank Battalion. For the T-70s check out SBX68. For the Valentines see SBX69.
Motor Rifle Battalion
Like the Hero version of these troops, the Motor Rifle Battalion formation is almost fully contained combined arms force, with its own machine-guns, mortars, anti-tank, anti-aircraft, reconnaissance and tanks. These troops have a motivation of Confident 4+ with a Komissar making it 3+, skill is Trained 4+, but with 3+ in Assaults. They are Hit On 3+, and Save on 4+.
The Motor Rifle Companies are quite large with between 10 and 28 DP MG teams and a Komissar. They can also add anti-tank rifles and HMGs to this total.
They can also take the SMG Company with the same ratings, but armed with 15-22 PPSh SMG teams and a Komissar. They can also take a couple of additional Flame-throwers (Range 4”/10cm, ROF 4/4, AT 2, FP AUTO, with Flame-thrower, Heavy Weapon, and Pinned ROF 2).
These troops can also be represented using the excellent plastic troops of SBX79 RIfle Company and SBX80 SMG Company.
Reconnaissance Company
The final formation in Bagration: Soviet is the Reconnaissance Company. This formation has a good mix of troops and units. It is built around a core of submachine-gun infantry which can fight on foot or be transported in Lend-lease M3 scout cars or captured German Sd Kfz 251 half-tracks. Both transport options give some protection from rifle and machine-gun fire. The formation is rated motivation Confident 4+ with Last Stand 3+, skill Veteran with Assault 2+, and Hit On Aggressive.
The Armoured Reconnaissance Platoon can have 4-6 PPSh SMG teams mounted in either of the above transport options. This unit used the Spearhead rule.
If you take the foot option are four Recce DP MG teams with an option to add a Flame-thrower. They also use the Scout rule in addition to Spearhead.
To field the infantry from an Armoured Reconnaissance Platoon or a Reconnaissance Platoon use SBX80 SMG Company.
For the M3 Scout Transports use SU206 M3 Scout Transport. For the Sd Kfz 251 use GBX152 Sd Kfz 251 Transports.
The Formation can also have its own 82mm mortar Company, 76mm anti-tank Company, and tank company.
Last, but not least they come with their own little armoured cars, the BA-64. This gives you another Spearhead unit. The BA-64 Armoured Car Platoon has 3-7 BA-64s, these can be armed with MGs or PTRD anti-tank rifles. They armoured to protect them from small arms fire with front 1, side 1, top 0.
The new plastic BA-64 comes in the SBX76 Armoured Car Platoon box.
Support
The support is full of great stuff to support your Soviet force in the field. There are OY-34 and KV-8 Flame-tank Companies for burning your way through the defences of the enemy. A good selection of Tank-killer Companies, armed with 45mm guns, 57mm guns, 76mm guns, and 100mm guns. The 100mm gun packs a mighty punch with range 32”/80cm, ROF 1/1, AT 15, FP 2+, with Slow Firing and Forward Firing.
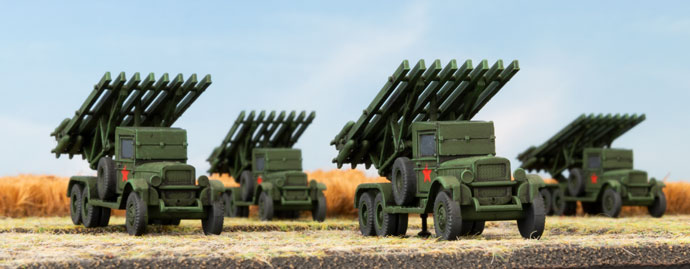
For artillery support you can have the infamous Katyusha rocket launcher, 76mm, 122mm, or 152mm artillery batteries. You can also now take the new BA-64 armoured car to mount our artillery observer.
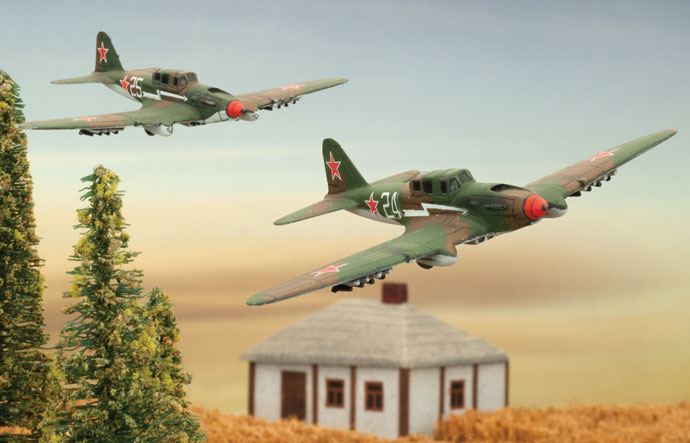
For air support you can choose from two variants of the IL-2 Shturmovik, one with 23mm guns (Range 6”/15cm, ROF -/2, AT 6, FP 5+), bombs and rockets, or one with a 37mm gun (Range 8”/20cm, ROF -/2, AT 8, FP 4+), as well as bombs and rockets.
After the support you will find a sample army based on the new Soviet Start Force Heavy Assault Group, a painting guide, a basing guide, a Eastern Front Terrain guide, and section on City Fighting.
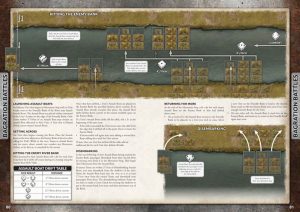
Bagration Battles
The final section in the book introduces River Crossing rules. River crossing were a common feature of the battles on the Eastern Front, and during Operation Bagration in particular. We have included rules so you can recreate these set piece battles in Flames of War.
You will find River Assault rules, three River Crossing missions, a Linked Campaign incorporating the new missions along with missions from the rulebook. The book ends with a comprehensive catalogue on Bagration: Soviet models, your easy guide to collecting your Soviet Force.
The book is packed full of content, and there is probably a formation or two to tempt anybody looking and getting into Flames Of War on the Eastern Front. Enjoy!
Bagration: Soviet is live on Forces, and on the Digital app so you can start putting together a force to take the fight back to the Germans and begin the push to Berlin!Check out everything you need to know about Digital right here…
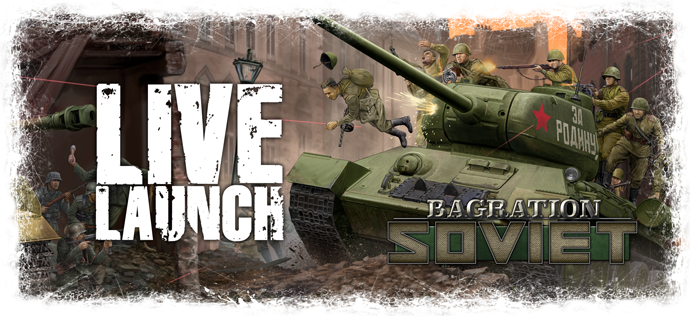
Today we are returning the to the Eastern Front where the Soviet juggernaut is preparing to throw itself at the German Army in an attempt to breakthrough and open the doors to Berlin.
Inside the Bagration: Soviet book you will find:
• Background on the Soviet Red Army during 1944, including Operation Bagration and the breakthroughs that followed.
• Instructions on how to build an IS-2 Guards Heavy Tank Regiment, IS-85 Guards Heavy Tank Regiment, Heavy SP Artillery Regiment, Medium SP Artillery Regiment, SU-76 Light SP Artillery Regiment, Engineer-Sapper Battalion, Hero Shock Rifle Battalion, Rifle Battalion, Hero T-34 (85mm) Tank Battalion, Hero T-34 Tank Battalion, Hero Motor Rifle Battalion,
T-34 (85mm) Tank Battalion, T-34 Tank Battalion, Motor Rifle Battalion, and Reconnaissance Company.
• Three new Bagration themed missions.
Over the course of the day you can expect to see articles, list builds, videos, hobby guides and plenty more, so by all means jump in and check it out.
Join us on September 18th through 19th as we launch Bagration: Soviet. Join us as we update the Live Launch Website with new articles and videos throughout the weekend.
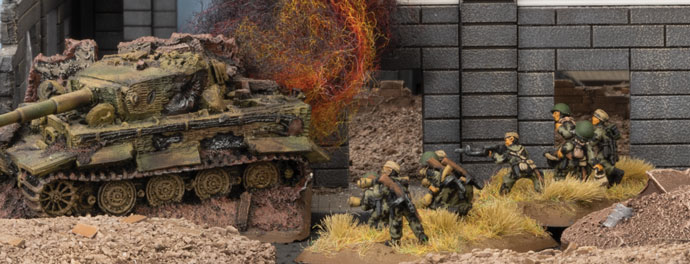
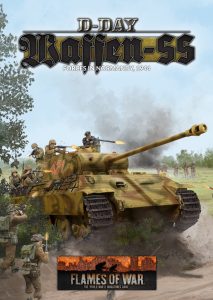
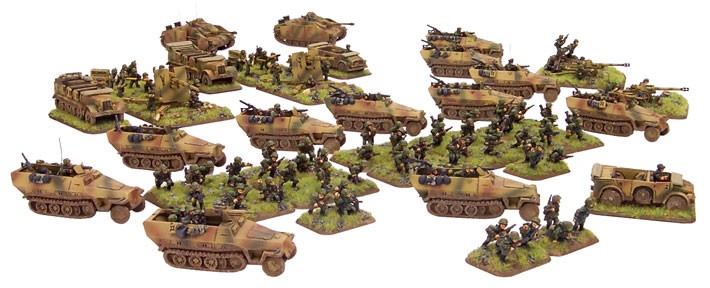
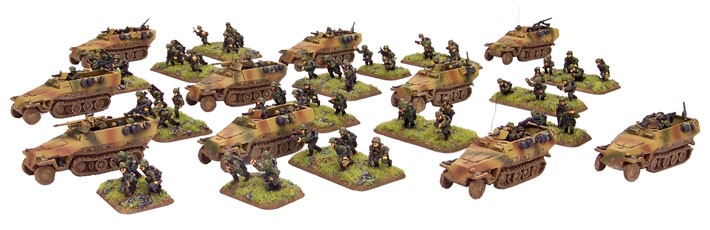
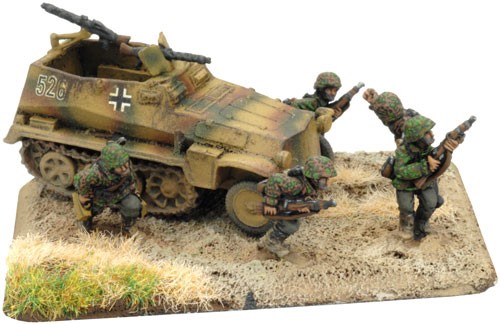
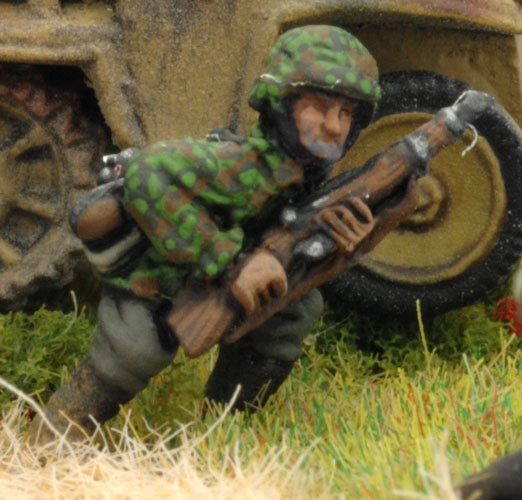
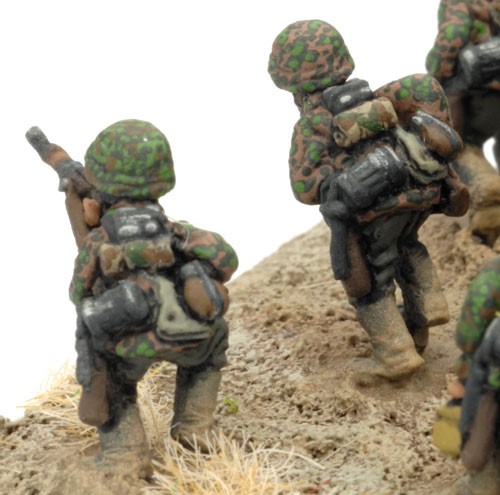
Usually I’m the class Sovietophile, however when I’m not painting Soviets I’m painting Waffen-SS. They have the coolest camouflage uniforms and are very rewarding to paint. I have been looking forward to the Late-War release as a chance to dust them off.
This has been an on and off again project for me that started as a staff 600 point challenge. You can find out more here…
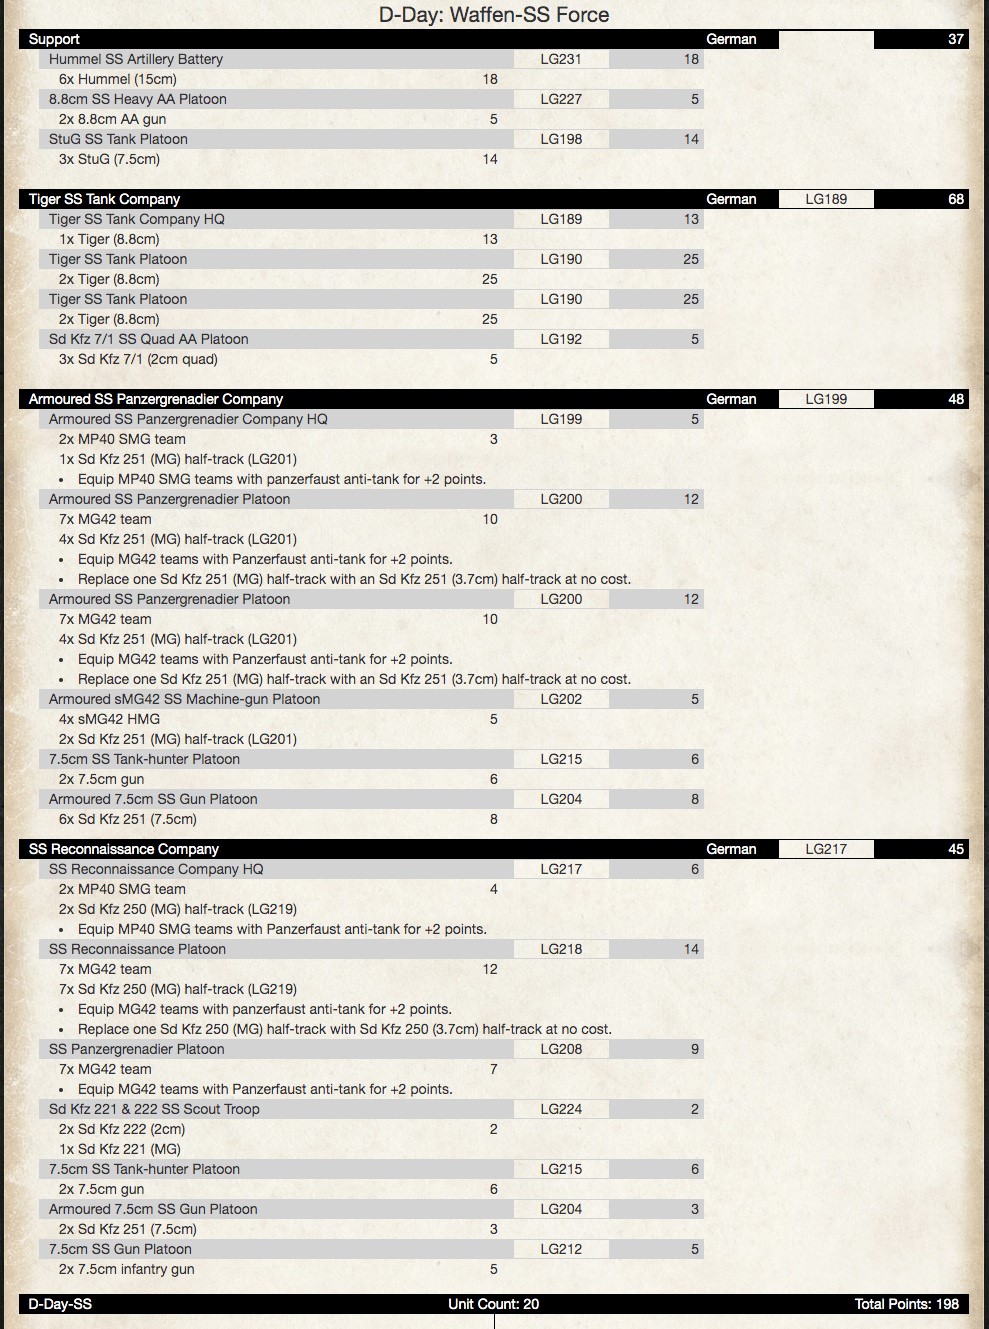
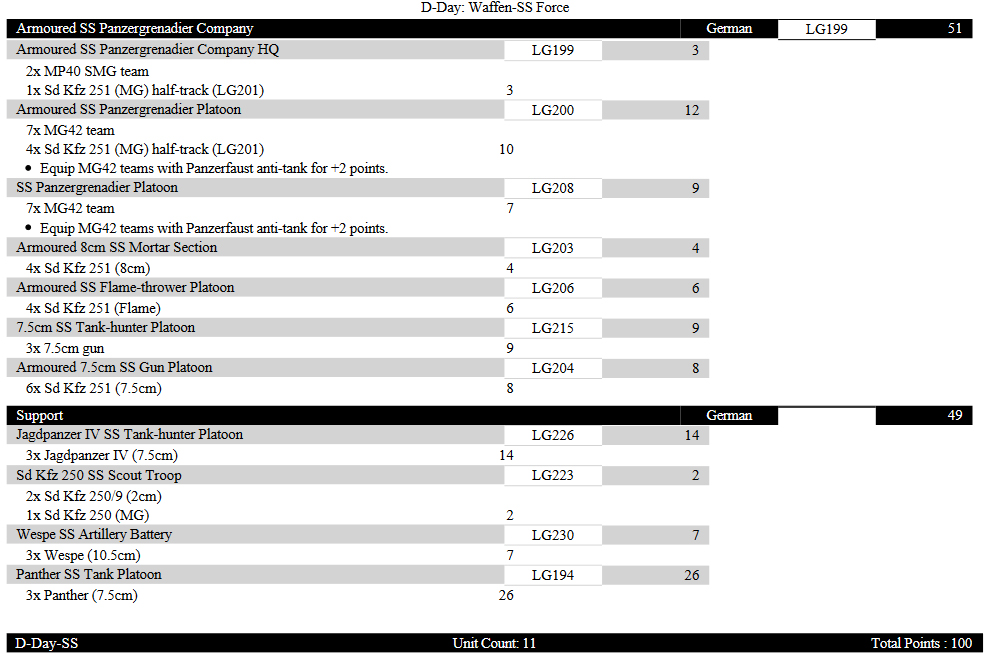
I have been adding units here and there to this army over the last 10-12 years as tournaments have come up or new, interesting, units have been added. Out of morbid curiosity I made a list in Forces of War to see how much I actually had.
I was actually surprised at how few points it came out to, but that is mainly because I have no big points sinks other than the Tigers and Hummels, the rest is all infantry and half-tracks.
I never painted many tanks for the force because I always found it difficult to fit them into a force because they used to be Fearless Veteran under previous versions, which made them way to expensive. With the latest book I can see myself gearing up to finally add some more turrets to my army.
Panthers, I’m looking at you.
Since its close to 200 points I may have to have a large throw-down against the Big Four allies.
We’ve enjoyed putting together today’s Live Launch but we would really like to hear from you about what content you have enjoyed the most, and what you would like to see us do in the future!
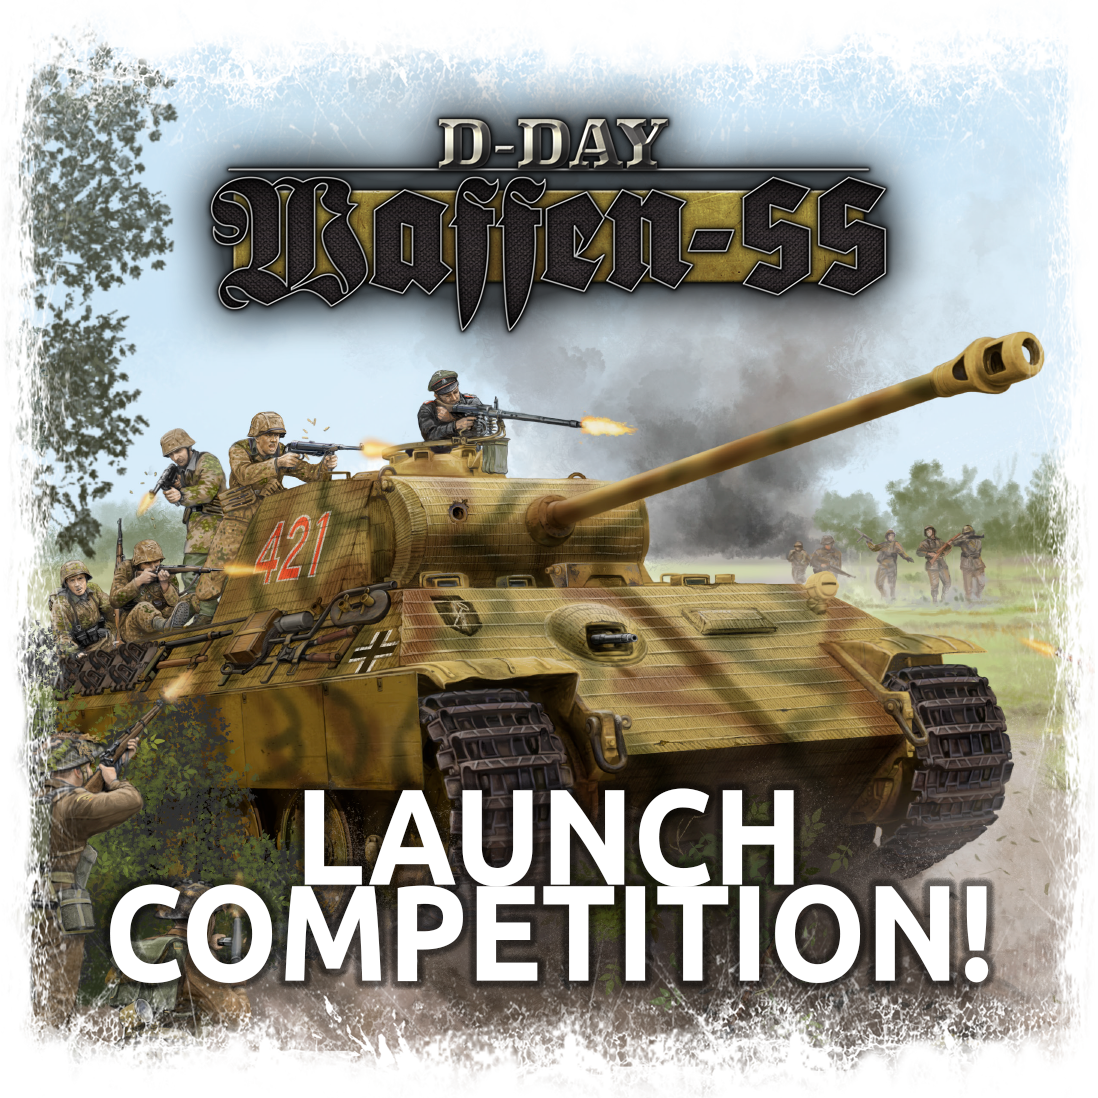
Head over to our Instagram or Twitter (or both if you want to double your chances), follow and post your comment, and we will pick a random reply to win a copy of the D-Day: Waffen-SS book and Army Deal! How easy is that?
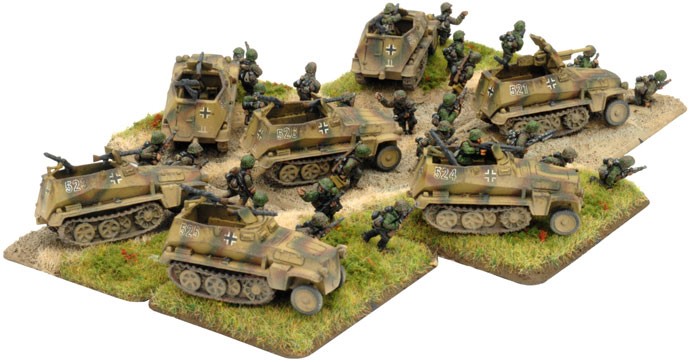
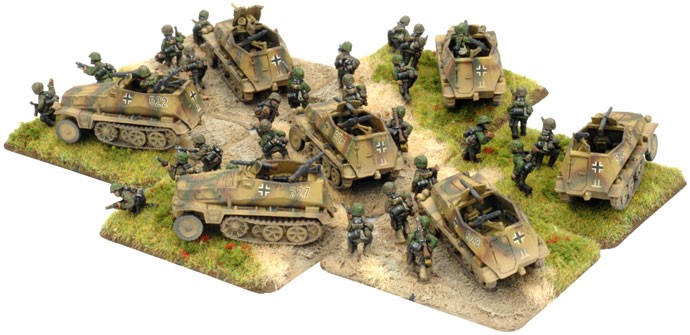
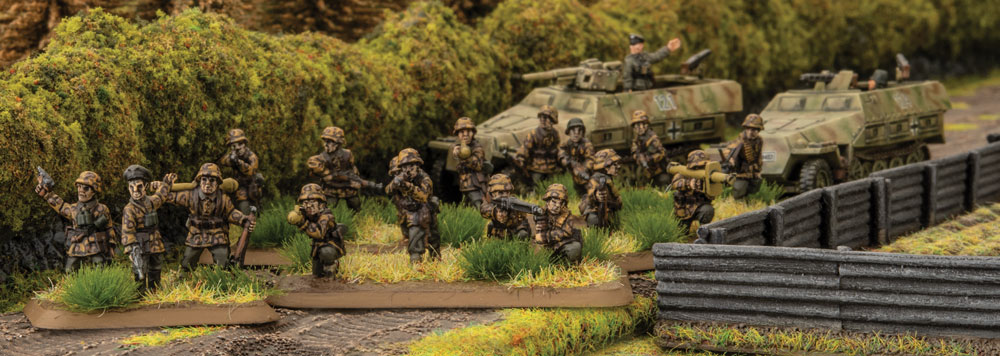
This time I’m going to be looking at a fun list for me. Ever since I’ve seen the D-Day: German books came out, I have been really tempted to start an Armoured Panzergrenadier list. I just really like the models, an almost entirely mechanised force, and its fast aggressive play style. Because it is essentially light armour, you will need to find a weak spot in opponents’ line to exploit. You do this by using your excellent mobility to manoeuvre around defences or focus your firepower to blast through it. To do this you will need tanks. Now Tigers may be ideal for this, but Tigers are easy and everyone takes them, I like a challenge, and I’ve never been one for doing what everyone else is doing!!
I really enjoy playing fast maneuverable lists with, good attacking power (glass cannons), using the terrain and movement orders to get the best from your forces. But it is a hard list to play, you may lose a few battles until you really perfect your list and the play style, but it is ALWAYS FUN!! Which is why most of us play right!!??
So I’ve gone with Panthers, they are a bit faster and a bit cheaper compared to Tigers, and you just have to watch their flanks, but they do have great frontal armour and excellent guns!! But they are vulnerable to getting shot in the side in defensive fire when assaulting, and against anything with high AT weapons in assault, so they have their limitations. But they are not there to do the assaulting, they are there mostly for blowing shit up and looking awesome!!
Assaulting is what the HQ, Armoured Panzergrenadiers, and Flame Thrower Halftracks are for!! But you will need to soften the enemy up first, as you don’t have the numbers to have a slog-fest of attrition. This list is very much about picking a target, focusing it, destroying it (or making it combat ineffective) and then moving onto the next target. You will need to have a plan here for your target selection, both for what units you want to attack and what enemy attacking units you want to take out first.
The idea here is that your aggressive unit placement and movement will put your opponent off balance. He will probably have a plan against the objective you are going to defend, but will need to pull more and more forces away to deal with your attacking units.
Also, an easy option for Reserves is the Panthers and Jagdpanzer IV, a quick 40 points if you do have to put forces in Reserve. Although you are lacking the normal Lucky card I take to try to make sure your Reserves turn up when you need them to.
So let’s talk about the units….
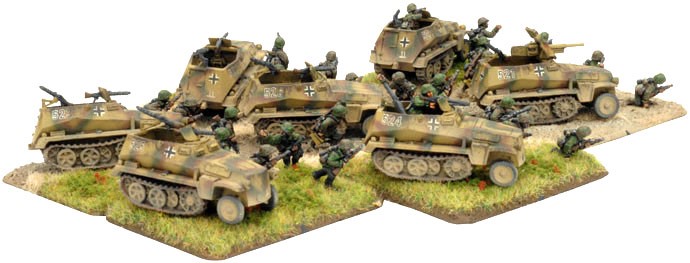
One different unit here I don’t normally take is the Flame Halftracks. The Armoured SS Flame-Thrower platoon is very cheap for the amount of devastation they can cause. Normally flame tanks cost almost as much as normal tanks, but don’t have the large main gun, but a very short ranged flamethrower. But at 6 points for 4 Half-tracks, capable of spitting out 16 shots a turn (at 4” range), that require the enemy infantry to re-roll any saves they make, and auto destroys any dug in infantry or gun teams, I’m prepared to see how it works out! Now admittedly they cannot charge into combat, but they can shoot in defensive fire if an infantry unit is dumb enough to charge you.
But what they can do is roll up to the defended position and unleash hellfire all over it, pinning the unit automatically and hopefully significantly reducing the defenders. These are the perfect unit to soften up the enemy before your main assault, the auto pin is especially useful. The only thing to be careful of is protecting them as they advance as they have very little armour.
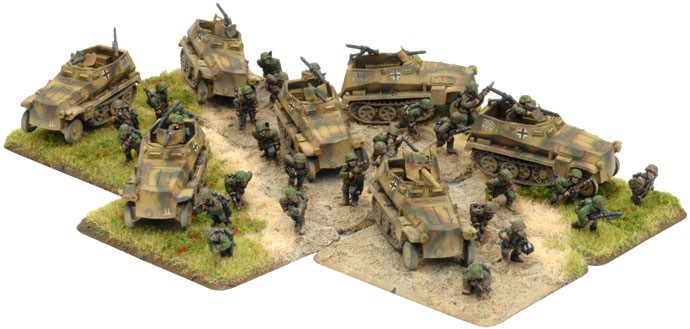
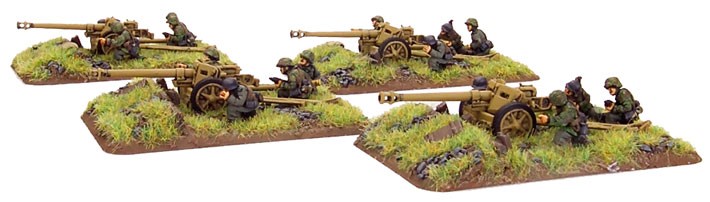
The defending units for you will be the Panzergrenadier platoon, the mortars and Wespes, the 7.5cm anti-tank guns. You should have a solid base with those units to defend one objective. Units like the Jagdpanzer IV and 7.5cm Armoured Gun Platoon can be used as either in an offensive or defensive way, and once the enemy attacking units are blunted, can be quickly repositioned in attack.
Also the great thing about your artillery units, the mortars and Wespe, is that they are mobile, so if they do try to counter battery you, you can easily move once they have ranged in on you. If you are lucky you can even attempt a blitz to move, and still fire or bombard in the same phase.
I do have to let you know how much I really like the 7.5cm Armoured Gun Platoon, and that it’s one of my favourite units of this list. It pretty much exemplifies the ‘Glass Cannon’ unit type. They have almost no armour, reasonable manoeuvrability, and a good cross check. Strapped to the half-track is an AT9 HEAT cannon with 24” range and 3+ Firepower check, and 6 of them can SPAM 12 shots a round with a good Blitz roll. Put them behind a hill, and a quick Blitz, a salvo and a Scoot and Shoot will give a lot of tank lists headaches. Also as they are part of your formation, they can be affected by the Old Hand rule, so a 3+ Tactics check instead of 4+ as long as your HQ is within 6”.
I also want to add how much I like the Old Hand rule for the SS in Late War. The improved 3+ Tactics roll, as long as the Formation HQ is within 6” of the Formation Unit Leader, is a great mechanic. It has a lot of character, with the core veteran SS officers having to pass on years of hard won combat experience, not in the practice fields with time and patience, but having to pass it on to barely trained replacements in the crucible of battle. It really represents how many veteran SS Divisions from the Eastern Front had been bled dry or had troops re-assigned from veteran units to form new ones (eg. 17th SS or 10th SS Divisions, and 1st SS replacements). It also shows how the Germans were really struggling for both man-power and experienced troops at this point of the war. They were reaching their limits, and it was starting to show, and this simple rule illustrates it well,
So your Formation HQ unit is very important in SS Formations, and to me it suggests using them aggressively, to keep them moving around the battlefield, so your formation units can get the best out of their movement orders and tactics rolls, as well as the normal HQ benefits of re-rolls.
I will say this list will not be easy for a beginner to use, it requires you to know not only the strengths and weaknesses of your own list, but your opponents as well. But…. once you get the hang of it, I find these kinds of lists immensely fun to play.
So if you want to play a different sort of list, with a bit of a challenge, I suggest you give it a go. But most importantly always have fun!

 Contains ten Story Episode Mission Cards, eight Story Epilogue Cards, ten Side Mission Cards, 16 Ace Cards, 20 Reward Cards and one Ace Campaign Rule booklet.
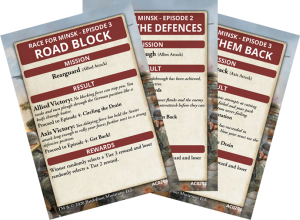 Story Mission Cards
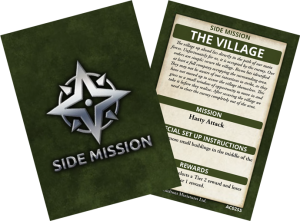 Side Mission Cards
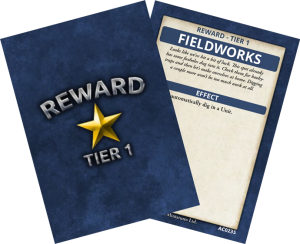 Reward Cards
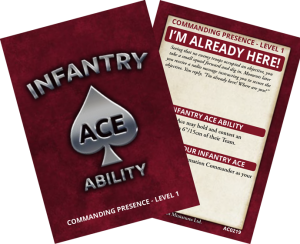 Ace Choosing an Ace
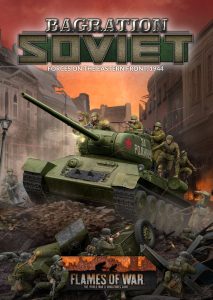 with Wayne Turner


 Bagration Battles


 Assaulting is what the HQ, Armoured Panzergrenadiers, and Flame Thrower Halftracks are for!! But you will need to soften the enemy up first, as you don’t have the numbers to have a slog-fest of attrition. This list is very much about picking a target, focusing it, destroying it (or making it combat ineffective) and then moving onto the next target. You will need to have a plan here for your target selection, both for what units you want to attack and what enemy attacking units you want to take out first.
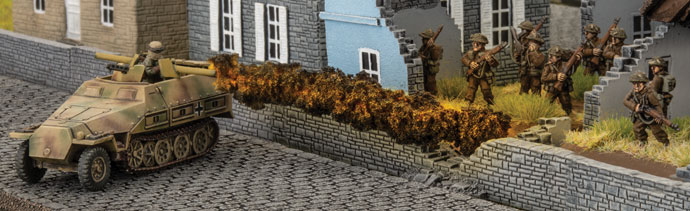
 The defending units for you will be the Panzergrenadier platoon, the mortars and Wespes, the 7.5cm anti-tank guns. You should have a solid base with those units to defend one objective. Units like the Jagdpanzer IV and 7.5cm Armoured Gun Platoon can be used as either in an offensive or defensive way, and once the enemy attacking units are blunted, can be quickly repositioned in attack.
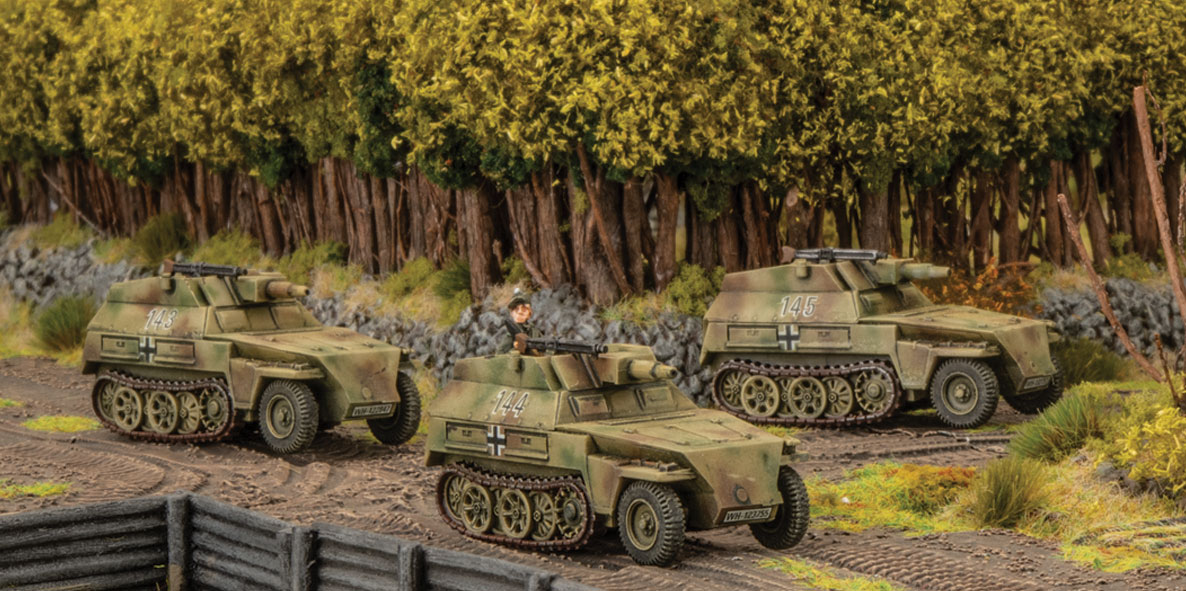
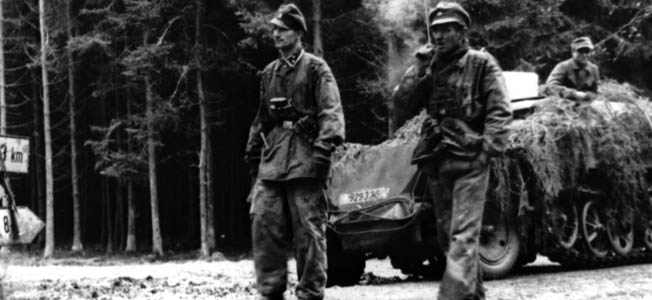 I also want to add how much I like the Old Hand rule for the SS in Late War. The improved 3+ Tactics roll, as long as the Formation HQ is within 6” of the Formation Unit Leader, is a great mechanic. It has a lot of character, with the core veteran SS officers having to pass on years of hard won combat experience, not in the practice fields with time and patience, but having to pass it on to barely trained replacements in the crucible of battle. It really represents how many veteran SS Divisions from the Eastern Front had been bled dry or had troops re-assigned from veteran units to form new ones (eg. 17th SS or 10th SS Divisions, and 1st SS replacements). It also shows how the Germans were really struggling for both man-power and experienced troops at this point of the war. They were reaching their limits, and it was starting to show, and this simple rule illustrates it well,