The first Flames Of War models I ever painted were Panzer III’s and Tigers from the 1942 list in Ostfront. They were very much a beginner painters army, so Iron Cross presented the perfect opportunity to revisit Midwar Panzer Grey.
I wanted to pick a composition of tanks that would work for both FOW and TANKS!. I settled on 5x Panzer III’s and 1x Tiger, with the aim to work on some Assault Pioneers at a later date to create a Flames Of War force.
TANKS!
Tiger I (early) – 29 points
Panzer III (long) – 14 points
Panzer III (long) – 14 points
Panzer III (long) – 14 points
Panzer III (long) – 14 points
Panzer III (long) – 14 points
Total – 99 points
(this leaves me with 1 point spare to pick an upgrade later)
Flames Of War Grenadier Company
HQ – 2 points
Assault Pioneer Platoon – 14 points
Assault Pioneer Platoon – 14 points
Panzer III (uparmoured) Tank Platoon – 40 points
Tiger Heavy Tank Platoon – 29 points Total – 99 points
Time to get to work!
—DAY 1—
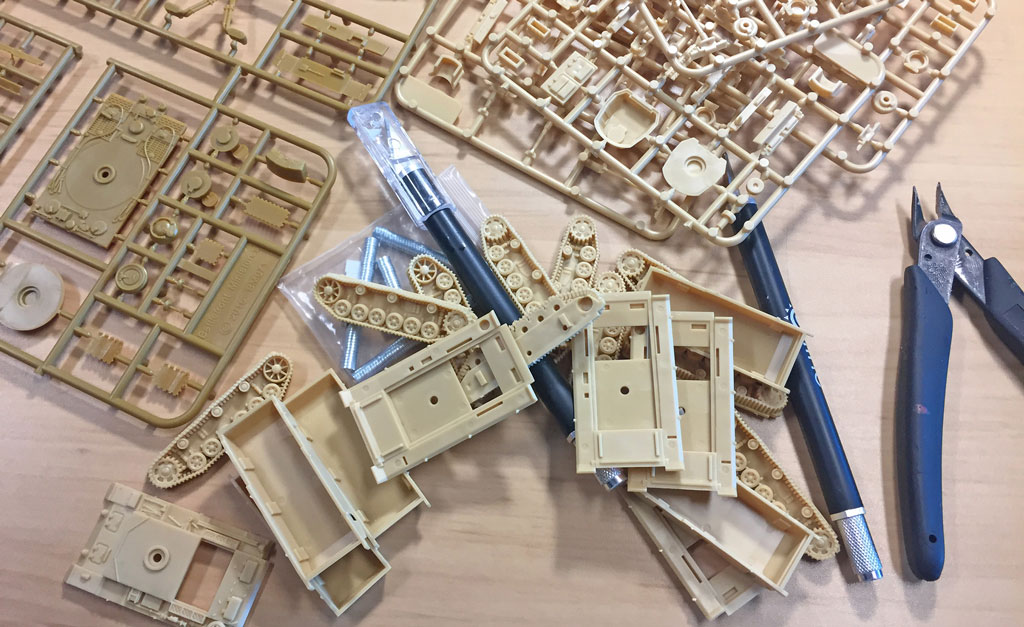
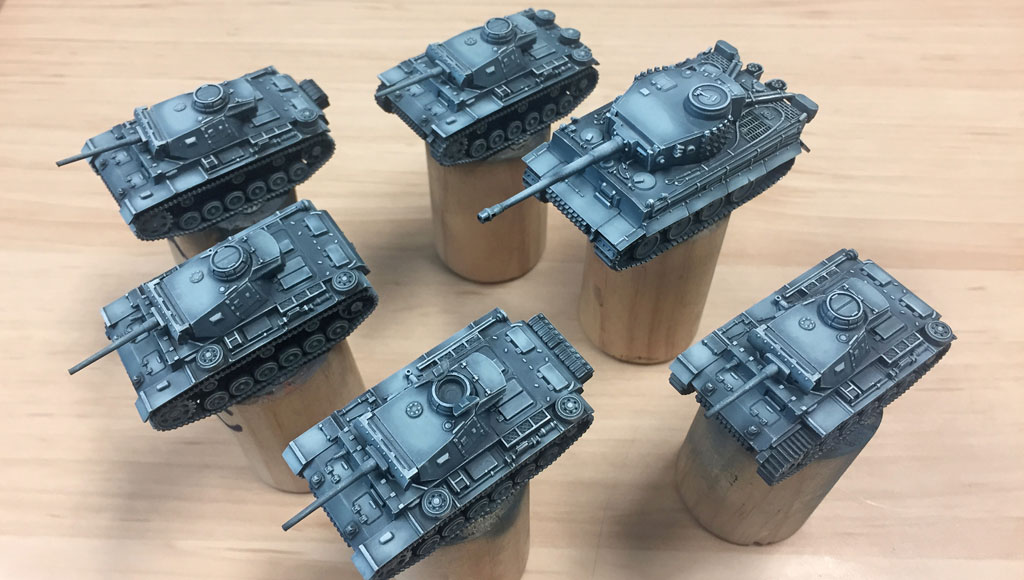
Assembly went fairly quickly, and more time was probably spent deciding how much extra stowage to add. In the end I decided to keep it pretty minimal as I already have an Afrika Korps force festooned with stowage. However I did modify some mudguards to be missing to add variety. After lunch I tested out some colours and decided to start with a fairly dark blue-ash grey, and work it up by adding white. I did about three stages with the airbrush. I purposefully went brighter than I usually would, knowing that it would likely get quite dark again with washes/weathering. This brought me to the end of day one. I was happy to get to this point and pleased with the results so far.
—DAY 2—
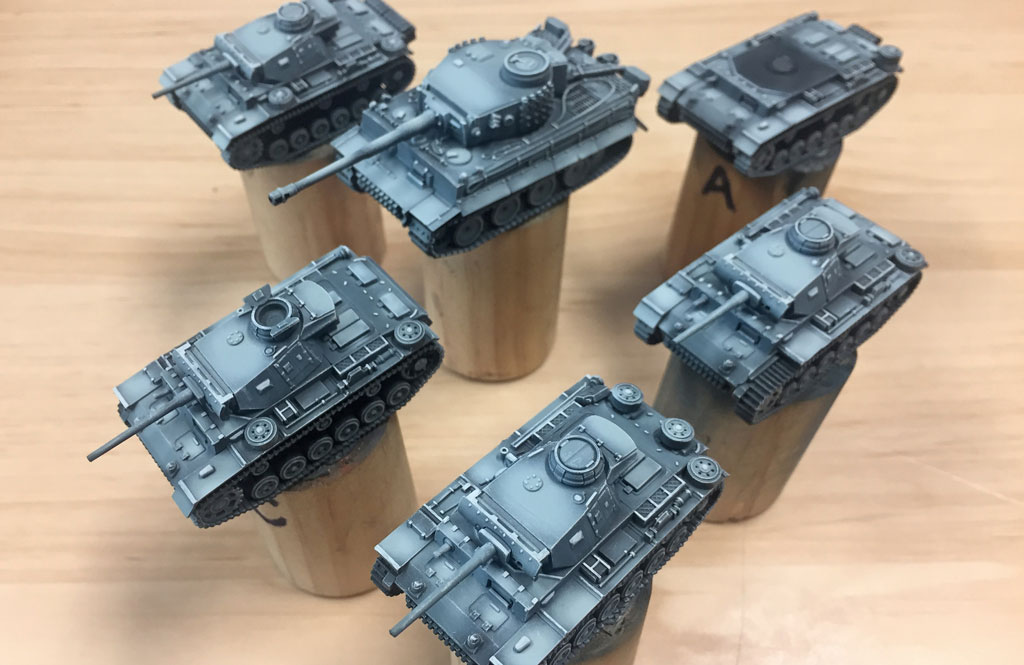
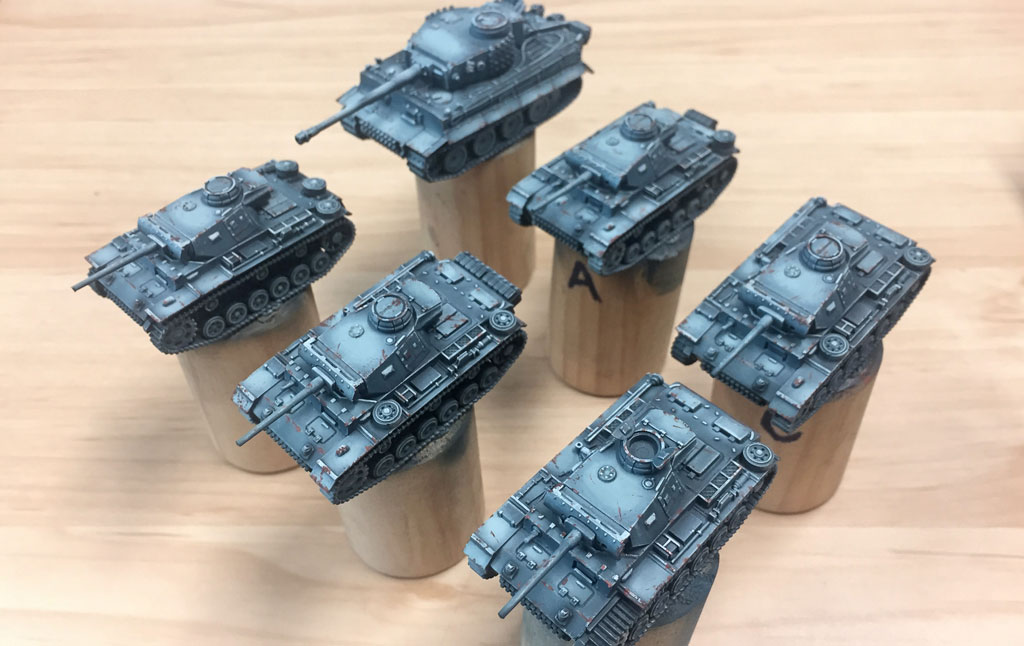
The next step was to add some definition to the details. I did this with a dry brush and selective highlight with a pale grey blue.
To start to tone everything down and blend in my highlights, I coated everything with a very thin Panzer grey filter.
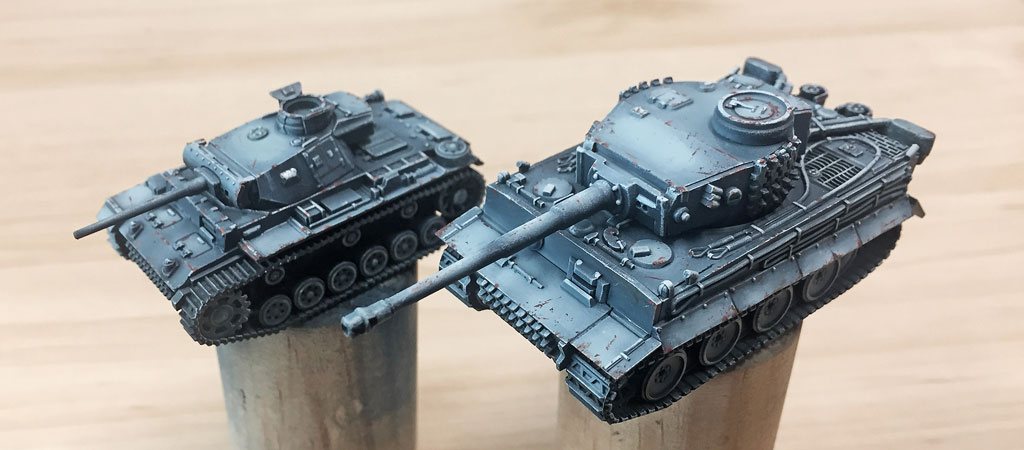
To cap off the day I applied some chipping using a fine brush and sponge. I used a red brown to simulate red oxide primer.
I feel like I’ve good headway with these, and can hopefully get them finished in the not too distant future. After painting in the details and decals, all that will be left is some weathering.
Then it’ll be time to plan the Pioneer platoons…~Victor
Picking a Force
My basic force will be a 100-point Mixed Tank Battalion:
KV-1 Tank Company – 5x KV-1 tanks (40 points)
T-34 (early) Tank Company – 10x T-34 (early) tanks (52 points)
T-60 Tank Company – 9x T-60 tanks (8 points)
With fifteen 76mm guns, and twenty-four tanks in total, this force has a lot of firepower, as well as a lot of armour. It’s more suited to attacking than defending, appealing to my more aggressive side.
If I have to keep some reserves, they will be the KV-1s. That puts two big units on table at the start of the game, and hopefully, the KVs will arrive where and when they are needed (although historically, their slow speed and tendency to break bridges with their immense bulk made that a dubious proposition!).
This force doesn’t have any HQ, but I’m not too fussed about that. My tanks all have a reasonable Remount rating and a good Last Stand rating, so even if the enemy does smash through my thick armour, my tanks will fight to the end anyway. If I need to launch an assault to clear infantry off an objective, the big KVs are both motivated and equipped (with their turret-rear MGs) for the job.
Going a Bit Lighter
If I feel like something a bit speedier (well not that much speedier, the Valentine’s still pretty slow!), I can also field a T-34 Tank Battalion:
T-34 (early) Tank Battalion HQ – 1x T-34 (early) tank (5 points)
T-34 (early) Tank Company – 10x T-34 (early) tanks (52 points)
Valentine Tank Company – 10x Valentine II tanks (24 points)
T-60 Tank Company – 10x T-60 tanks (9 points)
That’s only 90 points, so there’s room for a bit extra. Some of the things that appeal are:
An SMG company – get rid of one T-34 and I get 16 teams of close-combat infantry.
A 76mm anti-tank company – four 76mm guns for fire support fit perfectly.
A Katyusha rocket battery – the new model is awesome, and a bit of artillery would be good, especially with a Salvo template.
A Shturmovik assault company – armoured aircraft dropping anti-tank bomblets, what’s not to like.
I’ll work out which of these (or perhaps go for all of them!) once I’ve finished the tanks.
What I like about this force is that it has a whole 31 tanks, most of them heavily armoured, to simply roll over the enemy. Having faced it in playtesting, it’s a scary lot of tanks to see coming at you. What I need to watch out for though, is a disciplined opponent who avoids letting me pick on part of their force, and focuses their fire on knocking out one of my units with focused fire before moving on to the next. Once I lose the T-34s, things get a lot more tricky as they have all of my big guns.
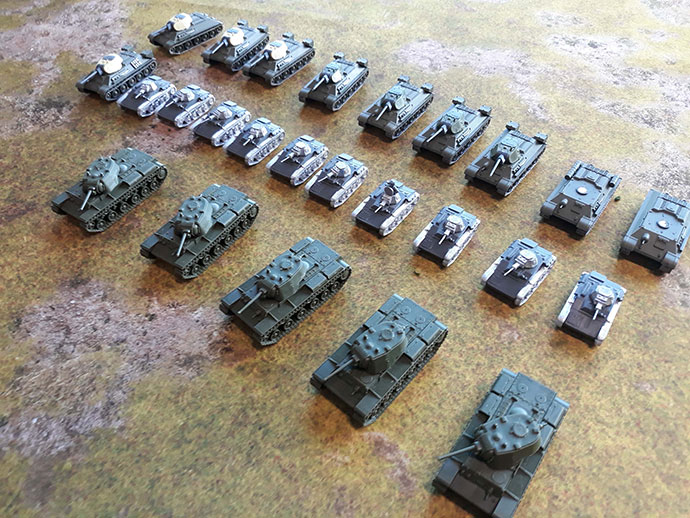
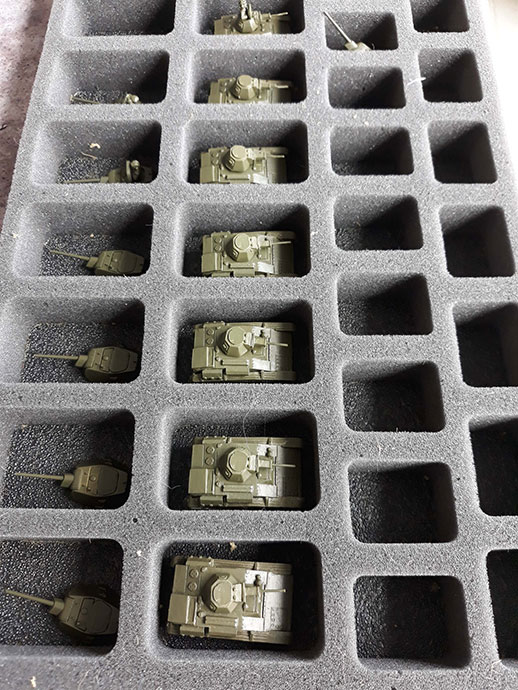
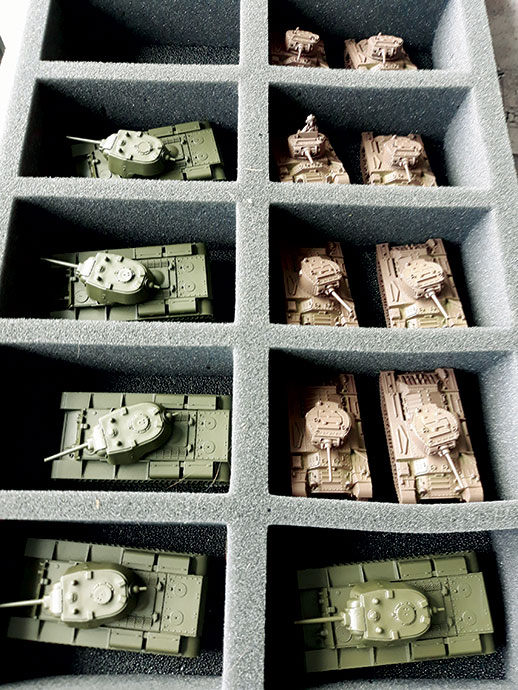
Preparing For Battle
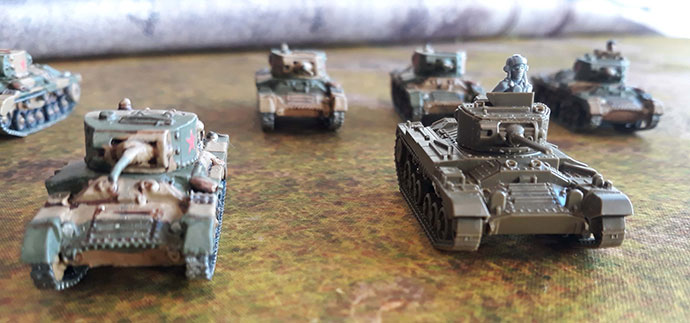
My progress from concept to the battlefield is still progressing as I write this, but here’s a quick photo survey of my progress so far.
Stay tuned for a complete army photos on the Flames Of War website (once everything is done).
When Mike first suggested the idea of playing some Sniper Wars, I thought this would be a great opportunity to kill two birds with one stone
Paint up a Sniper for my Germans (as I don’t have one).
Have a go at painting up one of our new plastic buildings as a test.
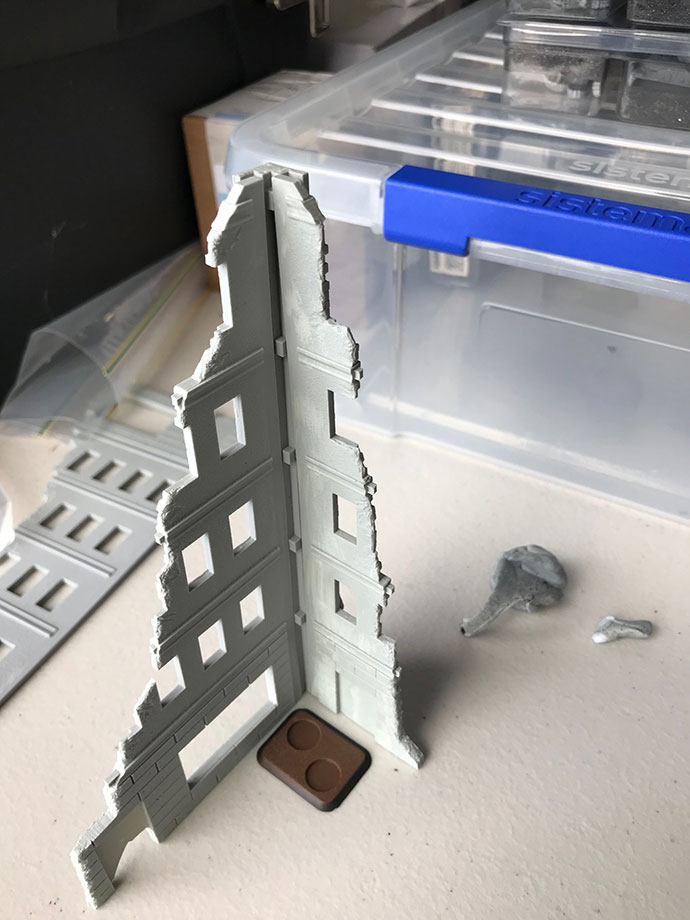
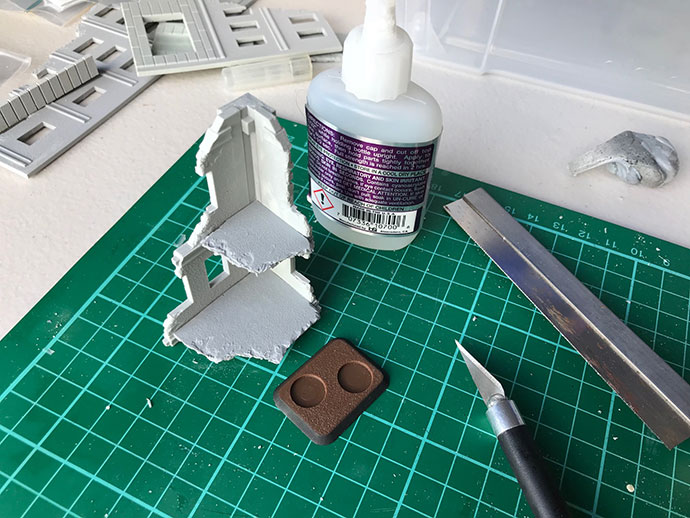
I started out with quite an ambitious plan where I was going to build my sniper nest four stories up in one of the new plastic buildings, on a small base that plugged in to a large base. I felt that due to the weight and height of the building I’d need to have it “nest” inside something that was a bit more stable. Looking at the picture to the left you can see how I came to that conclusion.
Like all great plans I hit a few snags… primarily that time is always my enemy when it comes to hobby projects. Thinking a little smaller I cut my idea down (literally).
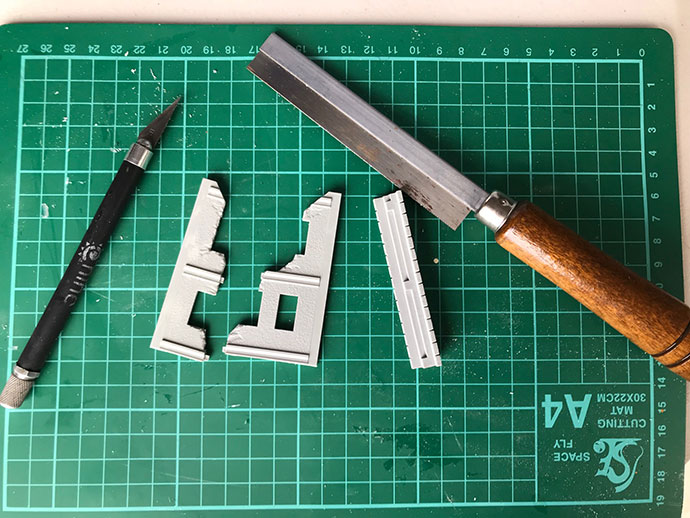
I grabbed a couple of the test resin building sections that were cast up as part of the design and approval process and chopped them down to size with my trusty bone saw.
Chop
Glue
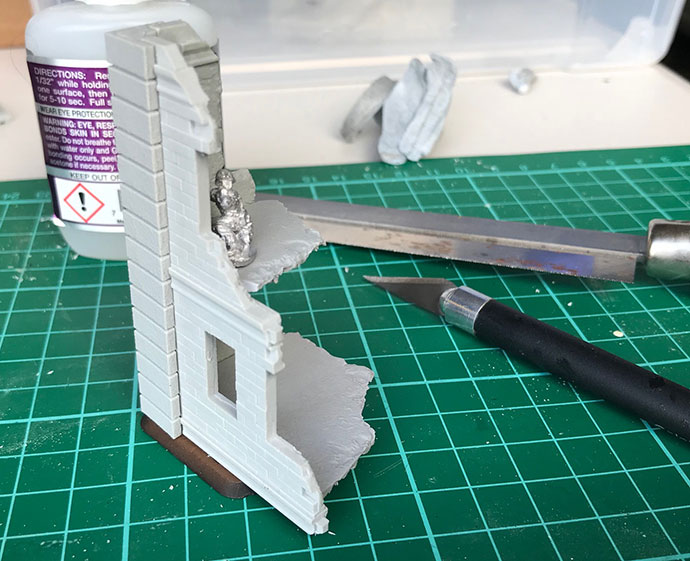
And done…
With the building now a slightly more manageable size I am hoping to get it painted up over the course of the Live Launch, or worst case, in the following weeks. Either way, with The Block: Stalingrad looming in my future it is certainly in my best interests to make the time to finish up this small test piece!
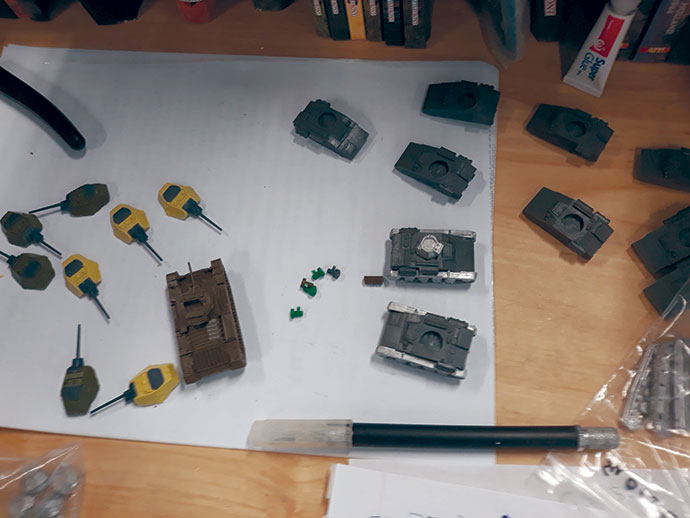
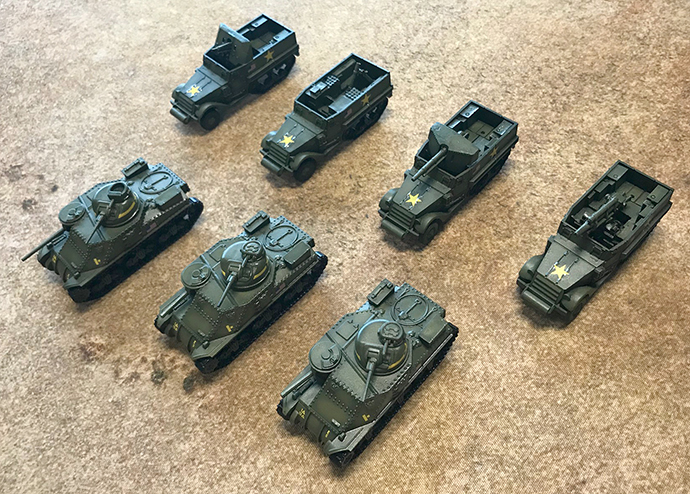
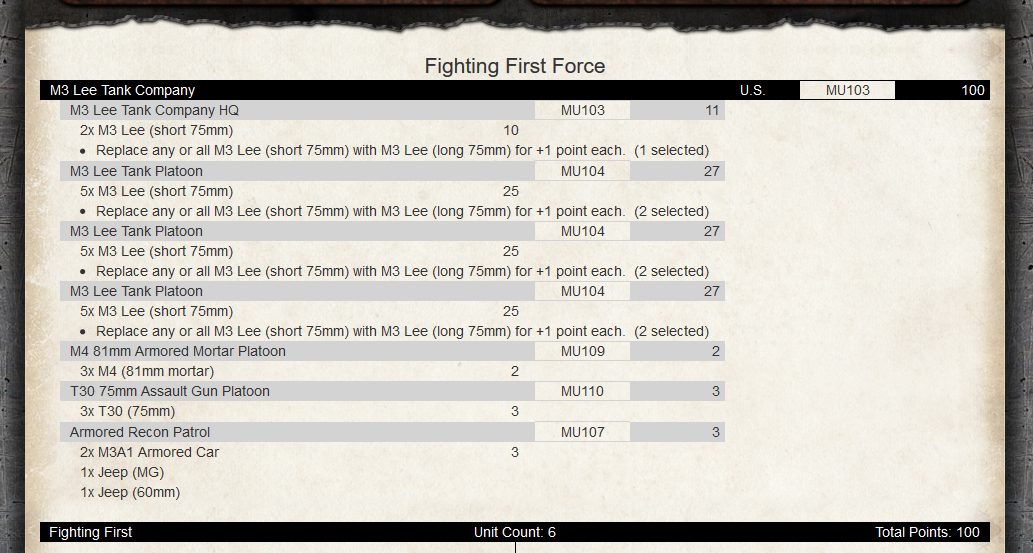
As I mentioned in a previous article I don’t have much to do for my Soviets under Enemy at the Gates so I’ve chosen to use the Live Launch as an opportunity to chip away at my M3 Lee Tank Company from Fighting First.Like a number of my colleagues I was quite taken with the US forces in Fighting First and there is something appealing about applying a large number of yellow decals to a tank. I am sure Soviet players get the same feeling when adding big red stars to their tanks.
My army is completely painted, excluding detail work like stowage, tools, wheels and vehicle interiors – so using the term completely is probably a little misleading? Over the launch I’m working in finishing up the decals – each Lee has something like eight different decals that need to be carefully attached. Next up is tools and stowage. I can never be sure how much I’ll actually achieve during one of our Live Launches as I seem to spend more time behind a computer screen than behind a paint brush.
I am really excited to get the army finished and on the table. It has been spending too much time sitting in limbo slowly being painted rather than running around the table shooting up Panzer IIIs (or whatever else my friends choose to throw at me).
(or, Phil talks about his On Again, Off Again Relationship with the Red Army’s Tanks)
One of the great things about Enemy of the Gates is that it’s finally given me the impetus to finish a tank force for the Red Army!
Long Long Ago…
My first Soviet tanks were five Valentines – the original sculpt from very long ago. I don’t recall the reason for painting them (it might have been a game against Pete using Battlefront’s infantry to bulk out the force), but for a long time they remained my only Soviet tanks, in fact my only Soviet forces at all.
Then, about five years ago, I built a bunch of the brand new plastic T-34 tanks in a big rush for a Kursk campaign at CanCon – during which I seem to recall I lost an entire tank brigade’s worth of tanks!
This was never really a complete force, as I borrowed bits and pieces to make up the numbers whenever I used them.
A New Beginning
With the arrival of Enemy at the Gates, it was time to finally commit to the Red Army and the liberation of the Motherland from the hated Fascists! I’ve always had a fascination with the odd mixed tank brigades that formed the Soviet Union’s tank forces in the darkest days of 1942. Each battalion combined KV heavy tanks with T-34 medium tanks and T-60 or Valentine light tanks in an attempt to simplify the assignment of tanks as the Red Army relearned how to conduct sophisticated operations after the disasters that had destroyed the pre-war army in 1941. With every battalion essentially the same, there was no need to decide what type of tank should go where!
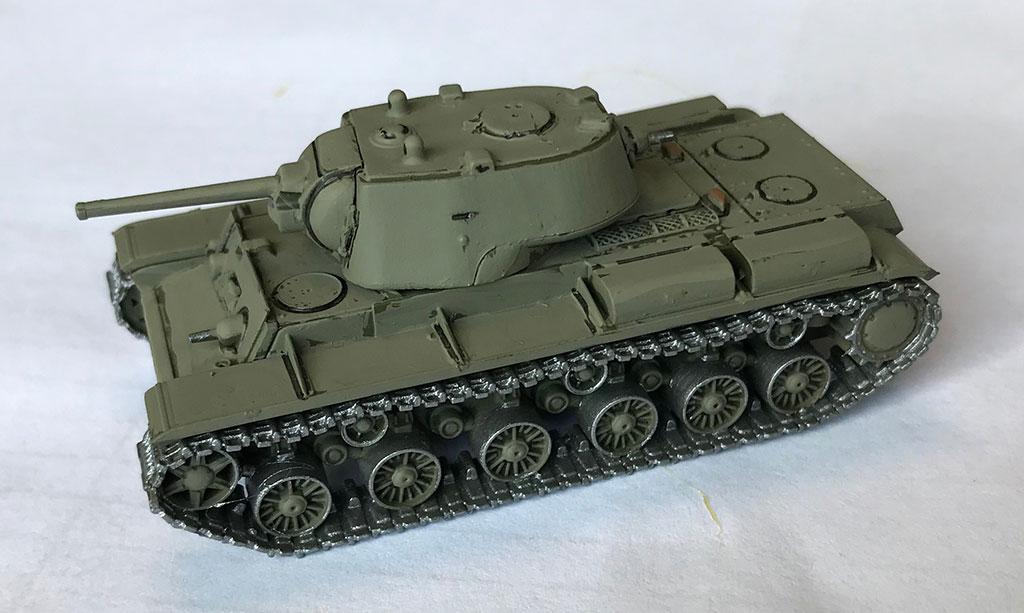
KV-1
The new KV-1 kit made that part of the force and easy decision – this just so big and ugly, I had to have as many as possible! While personally, I have a preference for the later, sleeker, and faster KV-1s, I decided to make mine the earlier KV-1 themed for the fighting around Rzhev.
The KV-1 has plenty of armour and a deadly 76mm gun, so it’s a bit of a beast. My only concern is that they are so slow that they need to keep rolling forward as fast as possible if they are going to get anywhere, and even then, they will be out-paced by my light and medium tanks, making coordination tricky.
When Red Banner (the Kursk-era Soviet book) comes out, I think I’ll make some KV-1s as an alternative choice to my KV-1s for a later version of the force (I don’t need many, and they are an easy kit to put together and paint, so it won’t be any drama). The KV-1s is much faster (it’s speedier than the German Panzer III or the American Sherman!), but still has thick armour and the same 76mm gun, with improved layout giving it a better Cross rating and more accurate shooting on the move.
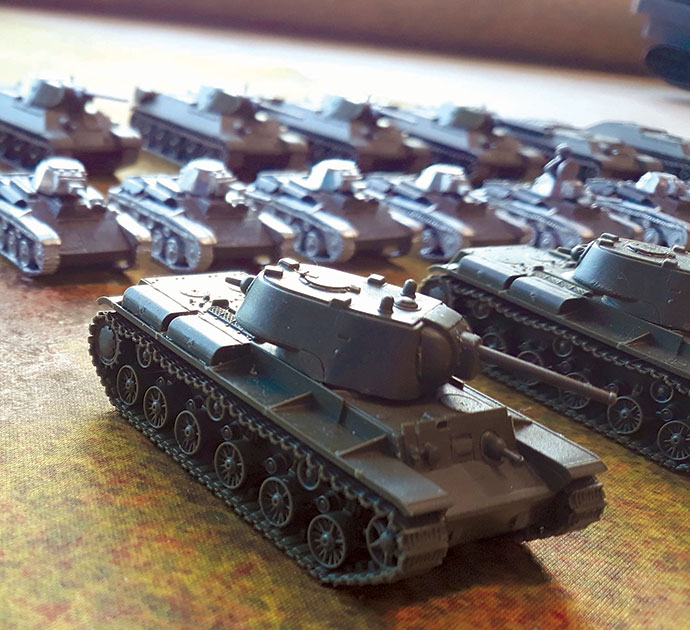
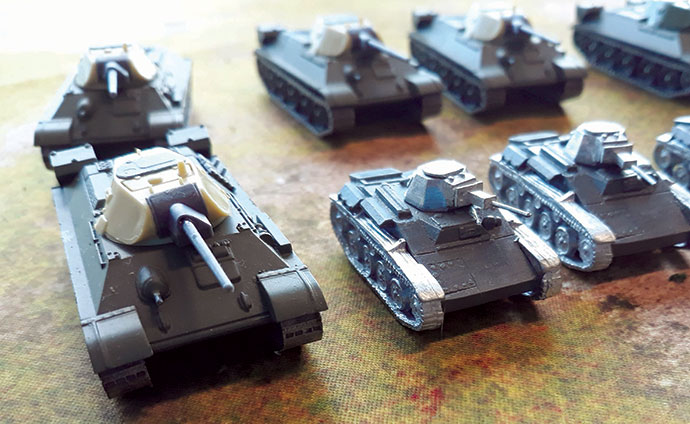
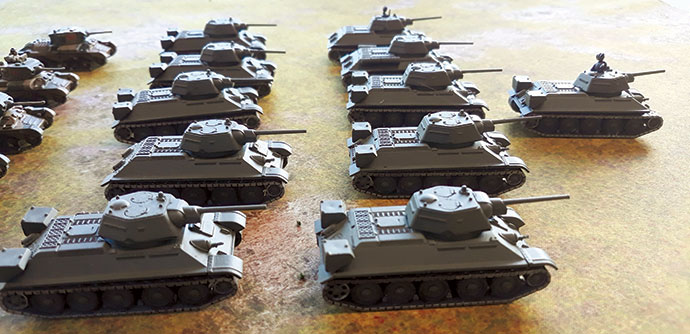
T-34
Since the early T-34 differs from the later ones I already have, I just painted the turrets of the new ones to go with my existing hulls to get my force into action quickly. Once everything else is done, I’ll paint up the hulls as well to double the size of the T-34 force!
I really like the T-34. It looks sleek and fast, and it is. It has the same 76mm gun as the KV-1, and almost as much armour as the KV-1s. This combination gives it plenty of options. Against light tanks (up to and including the short-barrelled Panzer III!), they can shrug off the enemy shooting while sitting in an advantageous position and blowing them away. Against heavier opposition, they can use their speed to overwhelm a part of the enemy force, flanking them if necessary to punch through their thinner side armour!
T-60
The final part of my force was planned to be the T-60 light tanks. These are an amazing piece of engineering. They are the size of a British Universal Carrier, and like them are powered by a truck engine (based on the famous Ford Model A!). Unlike the open-topped Universal Carrier, they are a proper tank with a turret mounting a 20mm gun and co-axial machine-gun, and for something so small, quite decent armour.
The role I have in mind for the T-60 is similar to how I use my Universal Carriers with my British. They’ll probe where the enemy is weak, either drawing enemy forces away from the main battle, or potentially taking an objective and winning the game!
Help! I Can’t Stop!
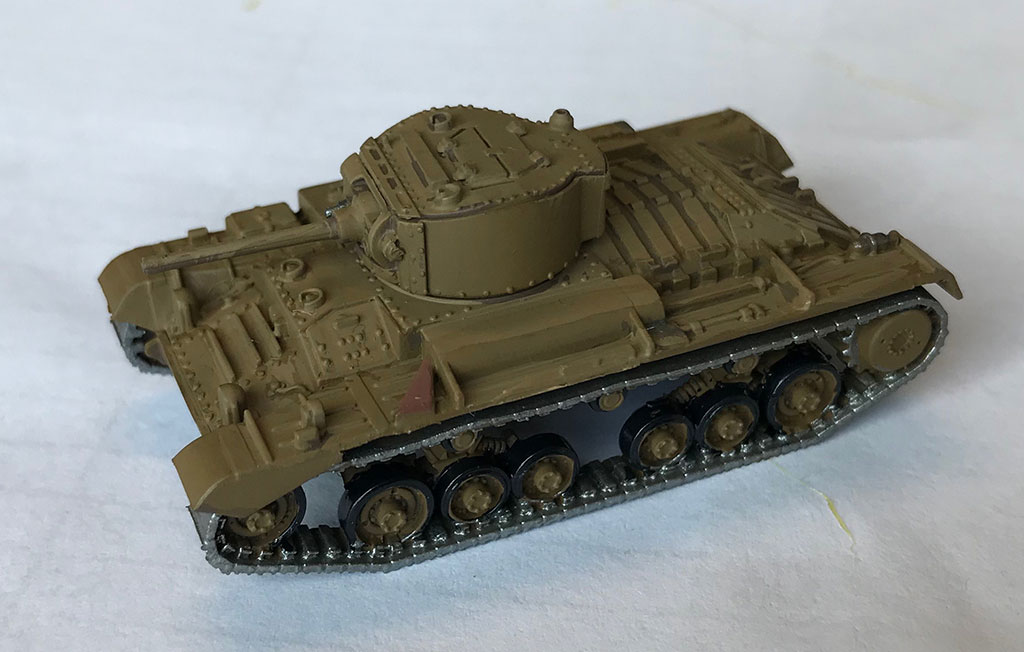
At this point, I should have moved on to painting my force, but the new Valentine models are so great that I just had to replace my old Valentines as well to give me more options.
The first tank I ever saw and climbed inside was a Valentine, and I’ve always had a soft spot for them. NZ had 255 Valentines, and used them to equip its Territorial armoured regiments until 1960, as well as using them in the Pacific during WWII, so there’s a connection there too.
With the Valentines, I can either replace any other the other types. While the idea of replacing the T-34s to create a mix of KV-1 heavy tanks and lots of light tanks is popular, it doesn’t appeal to me as I view the T-34 as the mainstay of my force. Replacing the T-60s with Valentines is a better idea, but the increased cost means that I have to reduce the number of heavy and medium tanks to do this. The trade off is good in some ways, as the Valentines can stand up to a lot more punishment (their armour is thicker than a T-34!), but it changes their role as they have to achieve more to justify their points.
My personal preference is to replace the KV-1s with the Valentines. This gives me more tanks and frees up some points for a bit of support.
Hello all, and welcome to this article on how to paint Soviet Naval Infantry, also known as The Black Death.
With the Eastern Front Books approaching, I was approached by Brian Sullivan to paint an army for him. He really liked how the Black Death fought in area surrounding the Black Sea, and wanted to field a Strelkovy Company painted up as Naval Infantry. Some plastic Strelkovy were added to beef up the Naval Infantry’s numbers.
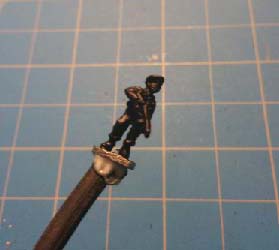
The Naval Infantry have a fairly basic uniform. It’s black with a white brim on their sailor caps. I started off color priming with the black from the Quartermaster Paint Set.
For the face and hands I used the European skin from the new Quartermaster paint set.
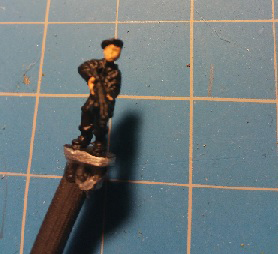
Next, I painted the weapons. I used Battlefield Brown for the wooden stocks and Dark Gun Metal for the rest.
I used Boot Brown for the belts and rifle slings.
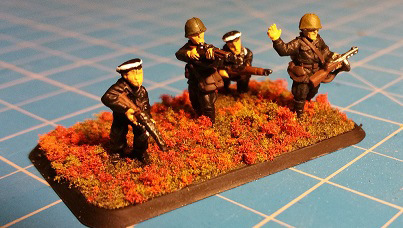
Next I painted the white brim around the cap.
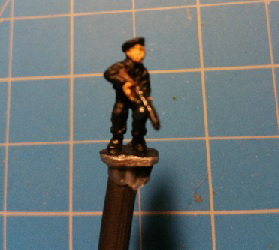
In this photo, you can see 2 Naval Infantry, and 2 Strelkovy painted as Naval Infantry. Apparently the Naval Infantry had a variety of different colored helmets, with Black, Dark Green, and Olive Green being used.
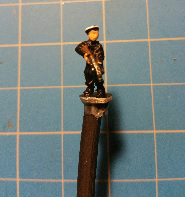
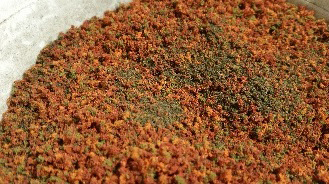
For the basing, Brian wanted an autumn basing since the color makes it stand out. Gale Force 9 Marsh Blend and Autumn Flocking were mixed to a 50/50 ratio, and I based the stand with that mixture.
And here is the end result. It really stands out from the normal sea of Brown that Strelkovy are usually painted. It’s also a different take on Russian Infantry, and being able to field them with a Command Card, only adds to the excitement of seeing them in Enemy at the Gates.~Ed
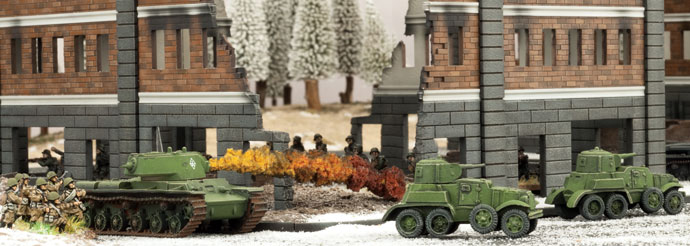
The Block is a local New Zealand and Australian TV series where contestants spend 12 (or so) weeks completely renovating a series of houses competing to see which house will sell for the most at the end of the season…
With the impending release of the Stalingrad plastic buildings it felt like a great time to launch a little in-Studio challenge where v0lunteers each take a set of the plastics to see what they could come up with. Unlike the competitors in the TV version we won’t be winning piles of cash, but rather the respect of our peers.
To make it more interesting we will pick a start and finish date (to ensure that nobody gets a head start) and then over the course of a few weeks complete a sample building. Once the allocated time period is up we will invite the Flames Of War community to pick a winner. Best of all, someone in the community can win some of these great new plastics just for voting (bonus prize for voting for me – Chris).
Time to meet the contestants Casey
As quite a keen amateur builder Casey is no stranger to a hammer and nails, of course he is also yet to meet a gaming miniature that couldn’t be airbrushed. He also has a leg up on the rest of the contestants as he painted the buildings shown in the two books.
Wayne
Having built many buildings shown in Flames Of War books over the years, Wayne has certainly earned the title of builders apprentice. With the release of the pre-painted Battlefield in a Box range of buildings though he might have let his skills decline?
Mike
One of the alpha-hobbyists in the building he is often leading the charge on any hobby project, having written some of the best scenery enhancement (or “pimping” for short) articles on the Flames Of War website.
Chris
Voted as most likely to glue himself to something, Chris is not the most likely candidate to take out The Block: Stalingrad. He is however a bit of a dark horse so cannot be written off early.
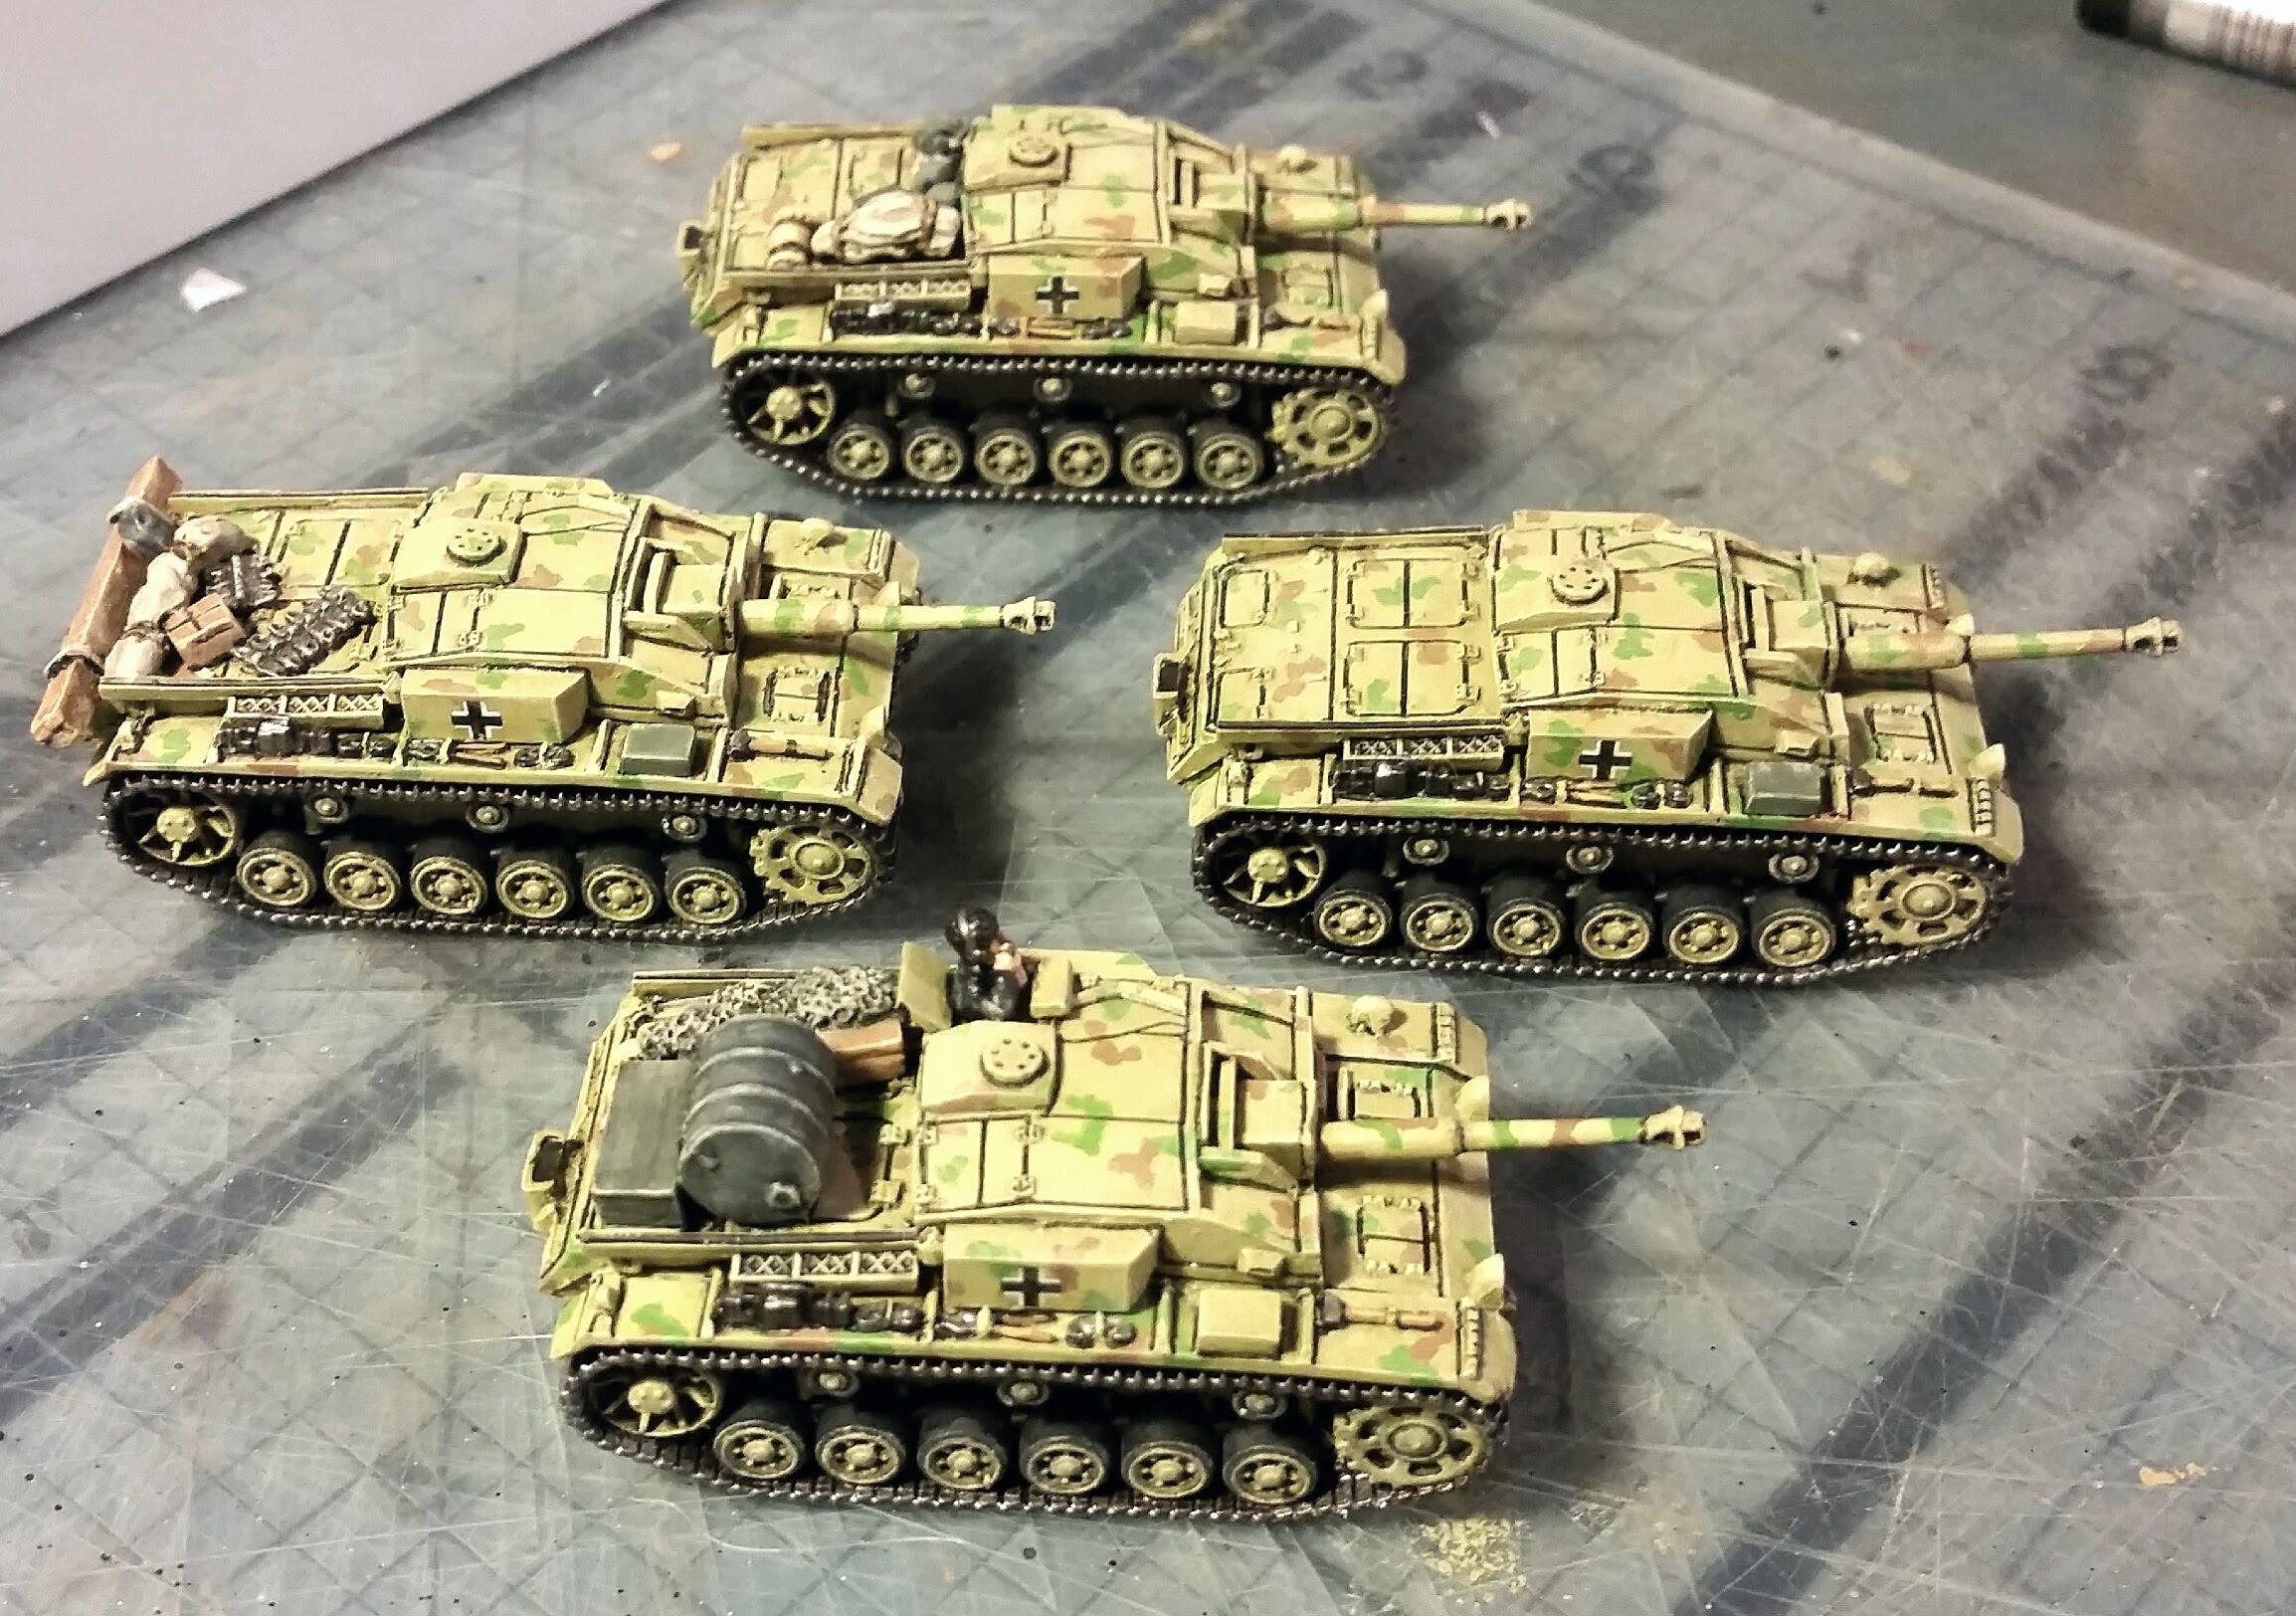
One of the first 15mm tanks I ever painted, indeed probably one of the first miniatures I ever painted, was an old Battlefront StuG F/8 assault gun. I had just completed a 1/35th scale kit of an F/8 and when I started into Flames of War all those years ago, my first question was, ‘what StuGs do they make?’. My friendly local hobby dealer, er I mean, retailer, pulled an F/8 off of the shelf and handed it to me. From then on, StuG F/8s have become a staple in every German Mid War army I’ve used.
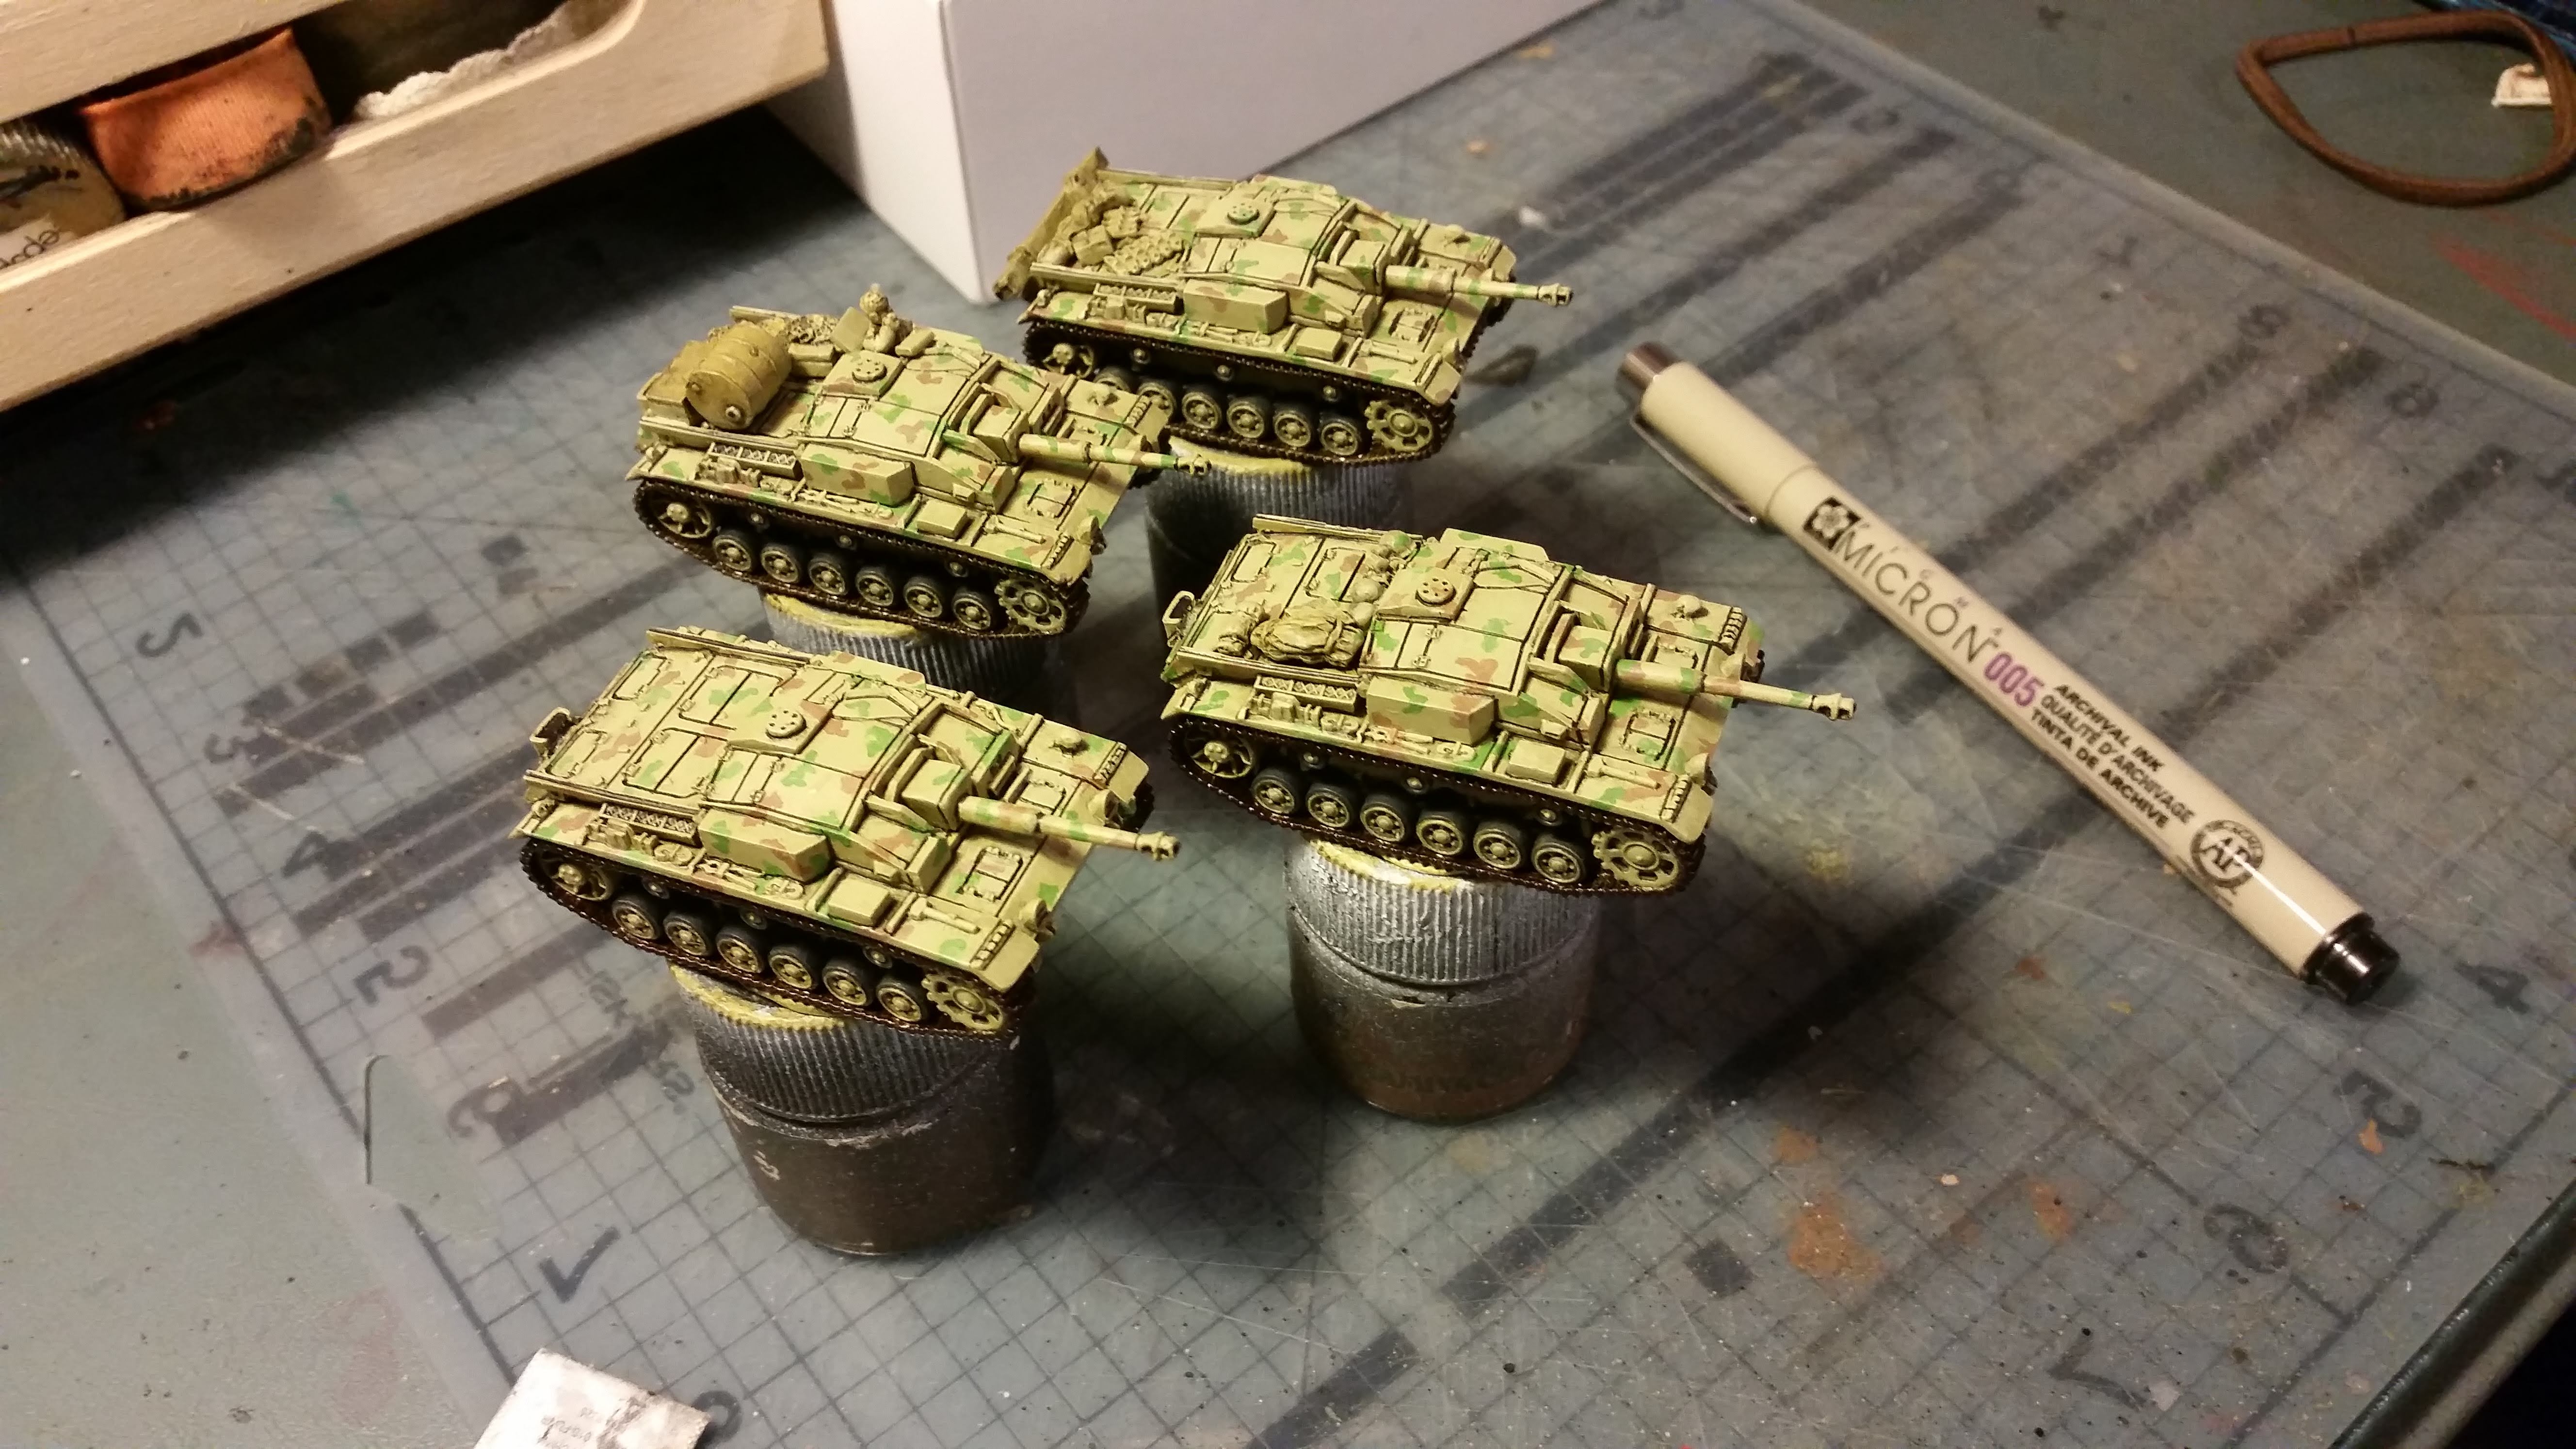
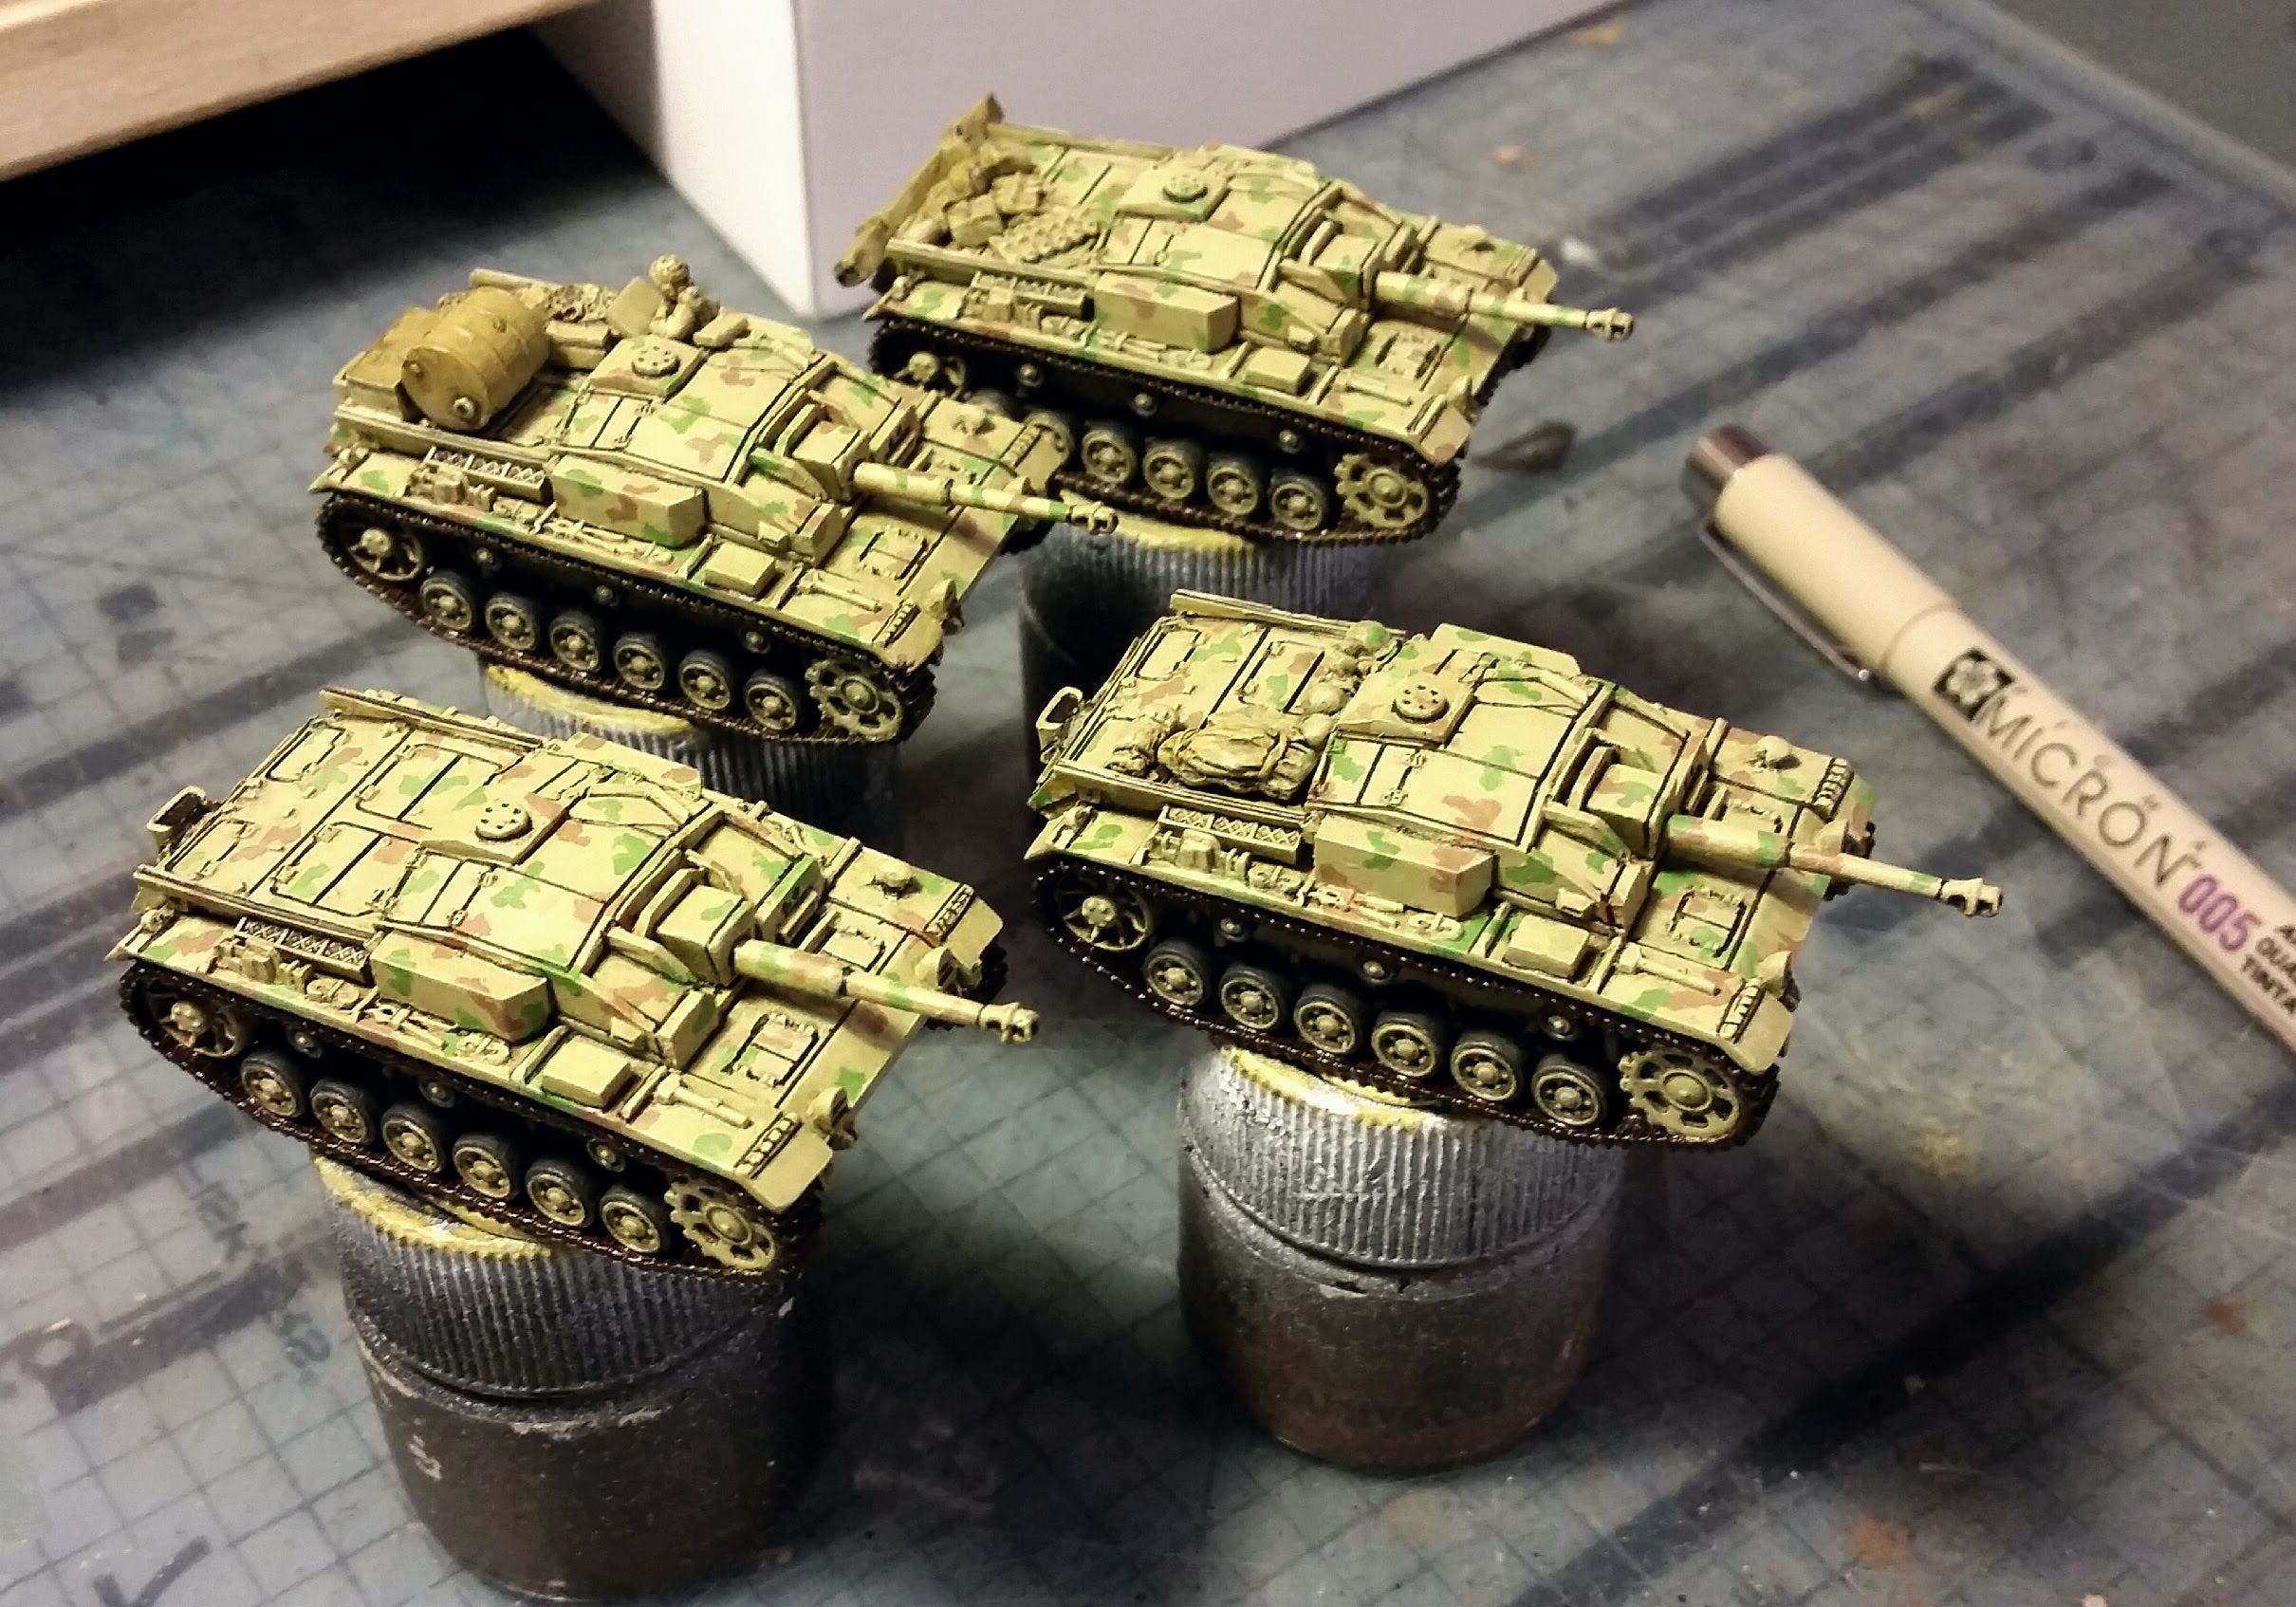
The StuG Ausf (model) F was a vehicle trapped between the old and new. It occupied a narrow window (about 8 months) between the short and long barrelled assault guns. The main change in the Ausf F was its more powerful medium 7.5cm gun with the newer block mantlet and an extractor fan added on the top. The rest of the tank matches the older models with clean, flat surfaces. The StuG F8 variant incorporated additional armour, schurzen side skirts, a machine-gun shield, and other features seen on later models. In the end, the StuG Ausf F a transitional tank, and I’m drawn to that sort of thing. I enjoy recognizing and shining a light on tanks that mark important steps in tank development, and the StuG Ausf F is a good example of that.
StuG units went wherever the infantry went, dealing with counterattacks and blowing away obstacles blocking the way. So, to that end, my Iron Cross force is a StuG Batterie, a force from the Iron Cross command cards, backed by a platoon of grenadiers. In game terms, the StuG (long 7.5cm) has some excellent features, such as its gun with a respectable rating of anti-tank 10. This will give me an answer to medium tanks, such as the T-34, and a fighting chance with heavy tanks like the KV. They have an average armour profile with a front of 5 and side of 3, enough to give them some protection, but also helps to keep their points down at 9 points each. I’ve taken a full battery of 10 assault guns divided into an HQ of one StuG and three platoons of three tanks each.
With the remaining 10 points, I’ve backed my tanks with some infantry to keep enemy infantry off my tanks and to hold objectives. I can spend these points as either a grenadier platoon with some heavy machine-guns to form a solid defense, an assault pioneer unit to utterly wipe out a target with flame-throwers and submachine-guns, or a balance of the two with a panzergrenadier platoons. For starters, I’ve gone with panzergrenadiers since I have them painted, but I’ll probably experiment with the other configurations as we go!
With that, I’ve got 10 StuGs on my painting table, so it’s time to get stuck in!

 After lunch I tested out some colours and decided to start with a fairly dark blue-ash grey, and work it up by adding white. I did about three stages with the airbrush. I purposefully went brighter than I usually would, knowing that it would likely get quite dark again with washes/weathering. This brought me to the end of day one. I was happy to get to this point and pleased with the results so far.
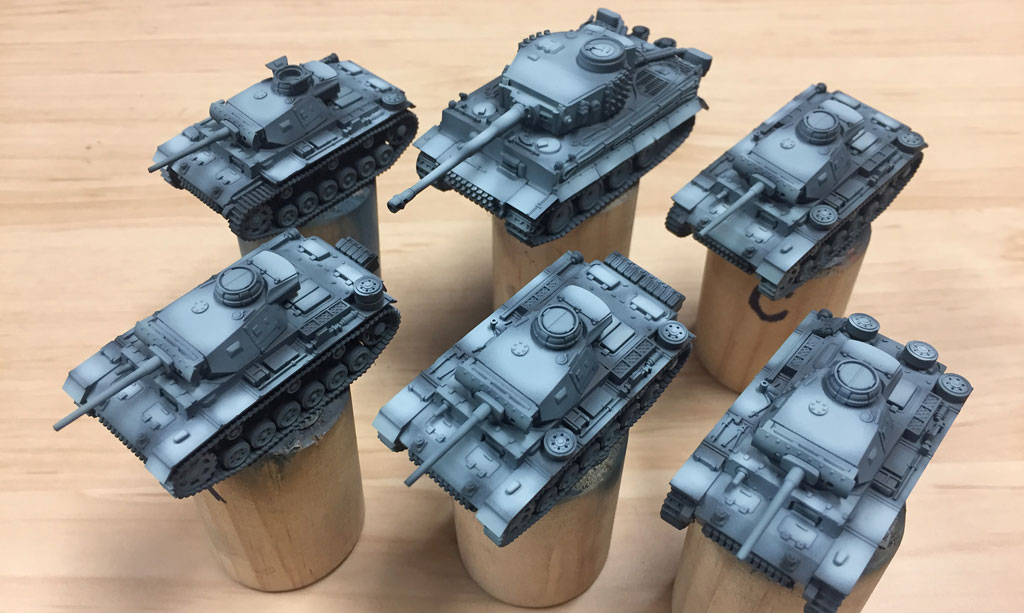
 ~Victor