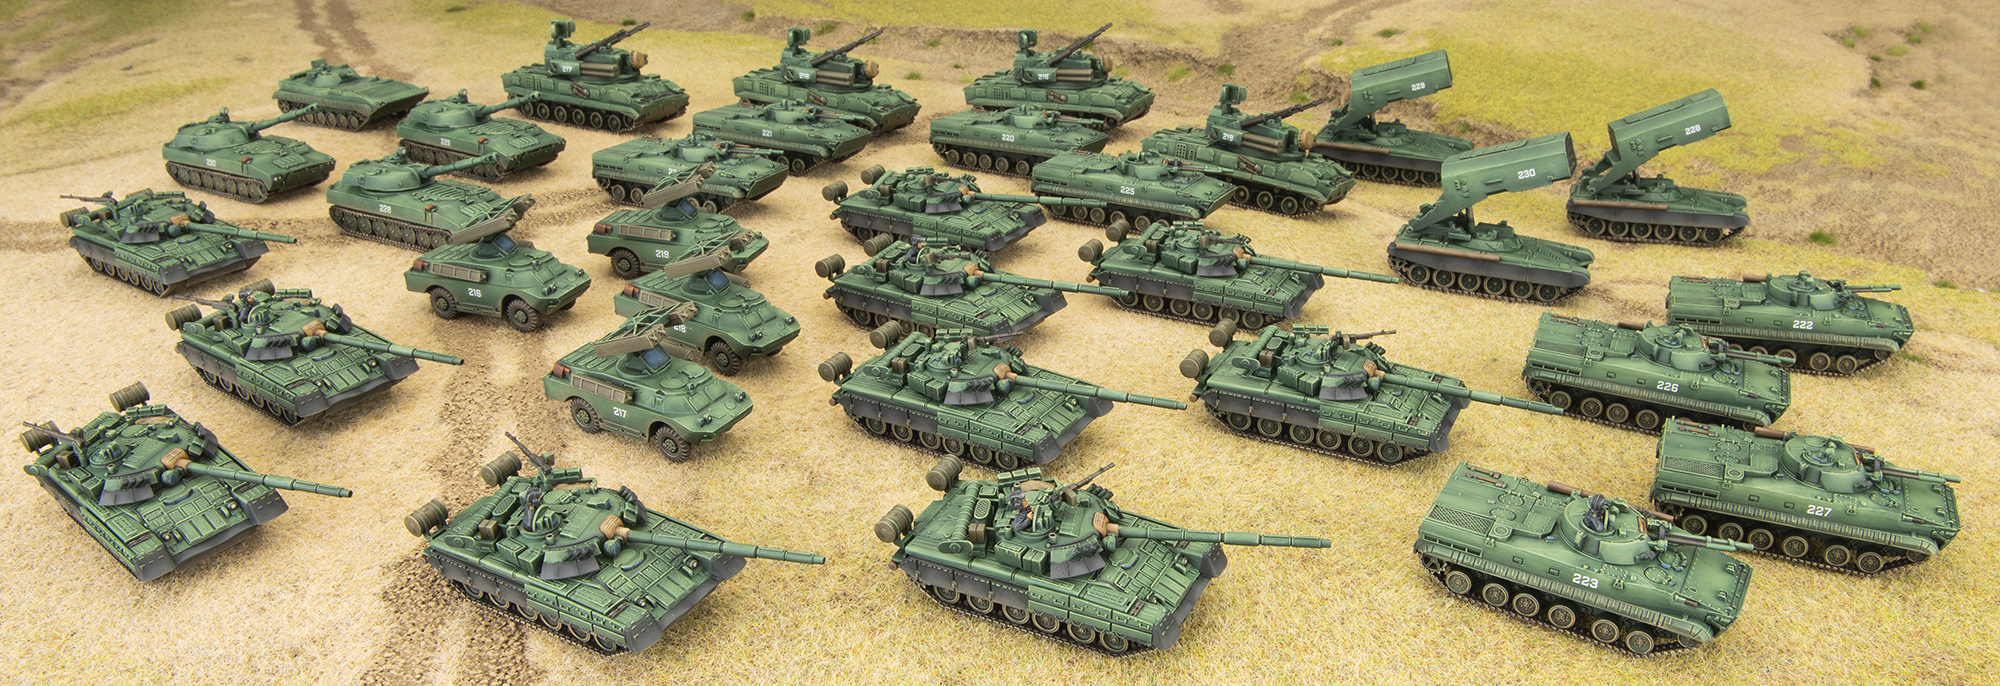
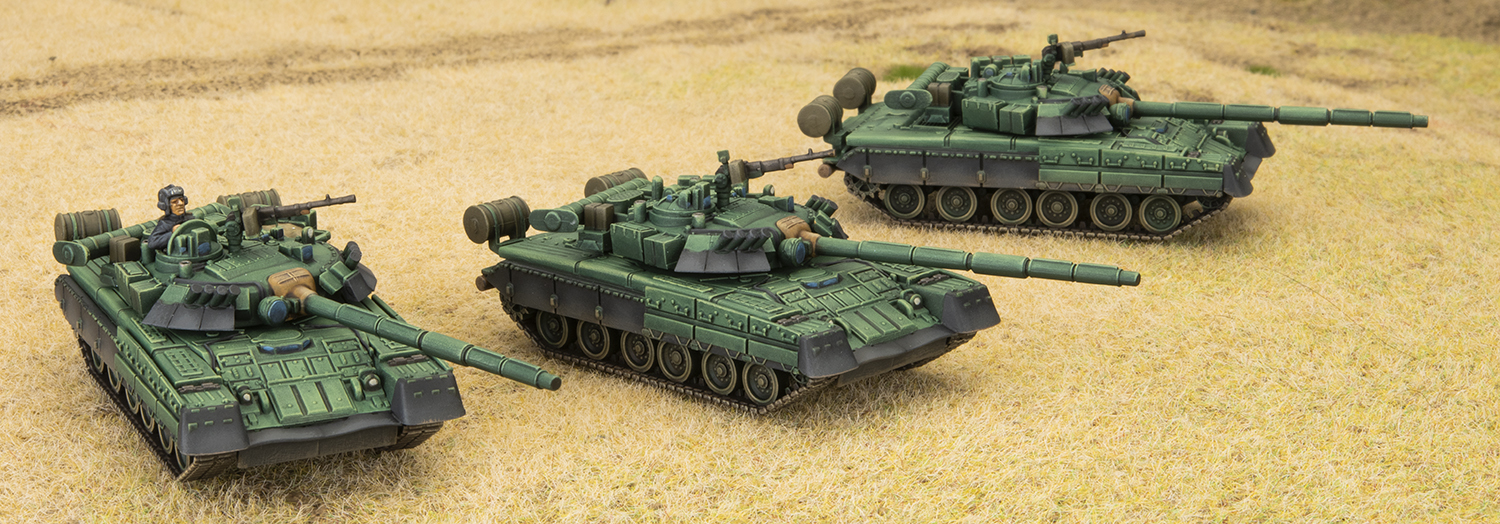
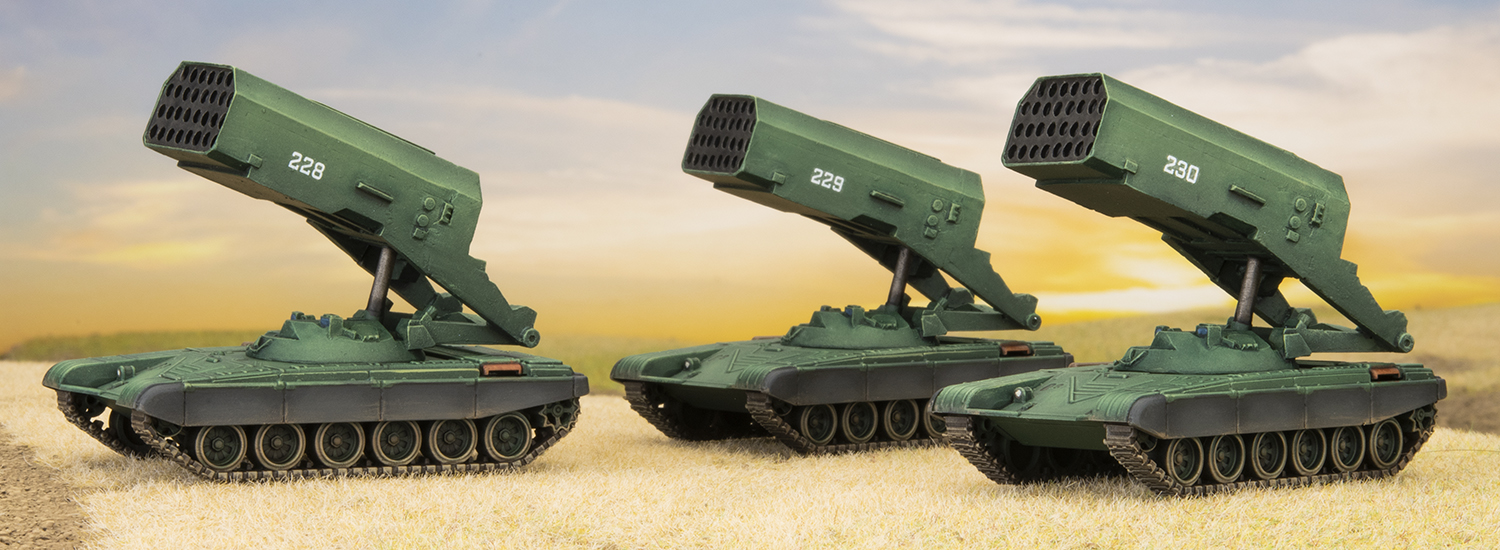
With this force I toiled for a while about whether or not to do camouflage or plain green. There are some really cool camo schemes out there for Soviet tanks, and it was very tempting. However when my army lists started to contain more and more vehicles (tune in for Victors WWIII Soviet list at 3pm) , I settled on plain green to ensure I’d get them all finished in the time frame. But what shade of green?
As you will have seen in Chris and Evan’s article (What is soviet green?) there no one green to rule them all. I’ve painted plenty of drab olive greens before, so I aimed for something more vibrant.
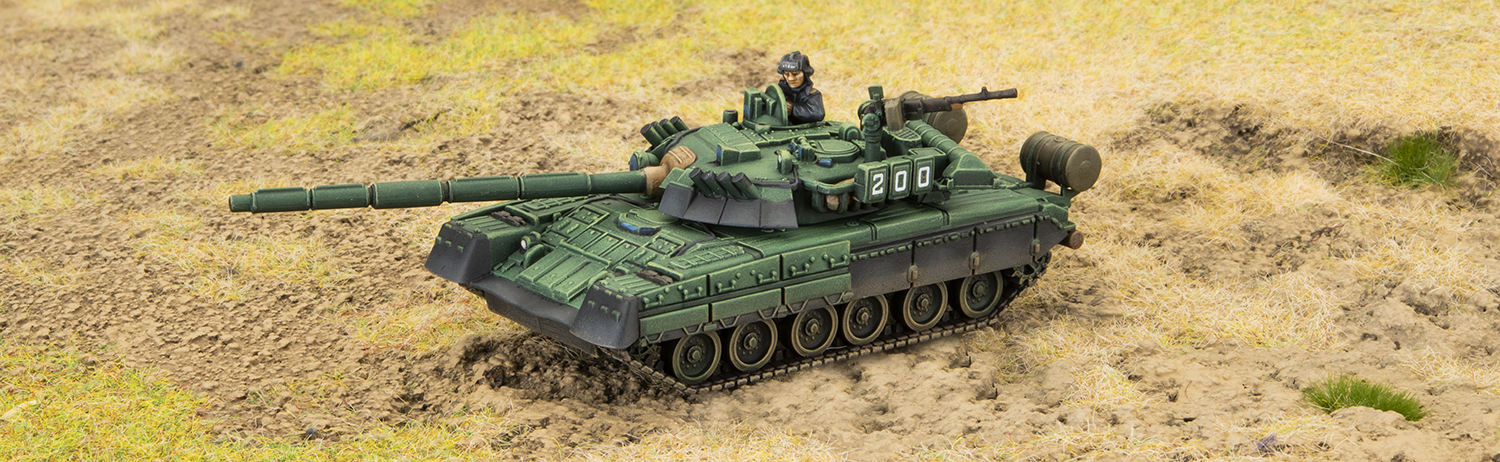
I started by airbrushing a dark green, and then panel fading with a pale green, intentionally going quite light. Next was a dry-brush and a wash to tone it all down, followed by a second dry-brush to bring back the edges. This is a really quick way to get a lot of tonal depth on your tanks quickly.
The result is quite an intense green, more towards blue than yellow. It won’t be for everyone tastes, but I’m quite happy with it and it pops on the table.
I chose to paint the rubber parts to add another colour to break up the green. In reality they would likely be painted the same time as the tank, but there are examples with bare rubber. Same goes for the wooden un-ditching logs, tools, and exhausts where paint might have come off and rusted over time.
Another additional colour I used was an olive drab, which I used for anything consumable (MG ammo tins, fuel drums, missile canisters, etc).
So even with a “green horde” I’ve managed to get some other colours in there which hopefully add some visual interest without looking too patch work.
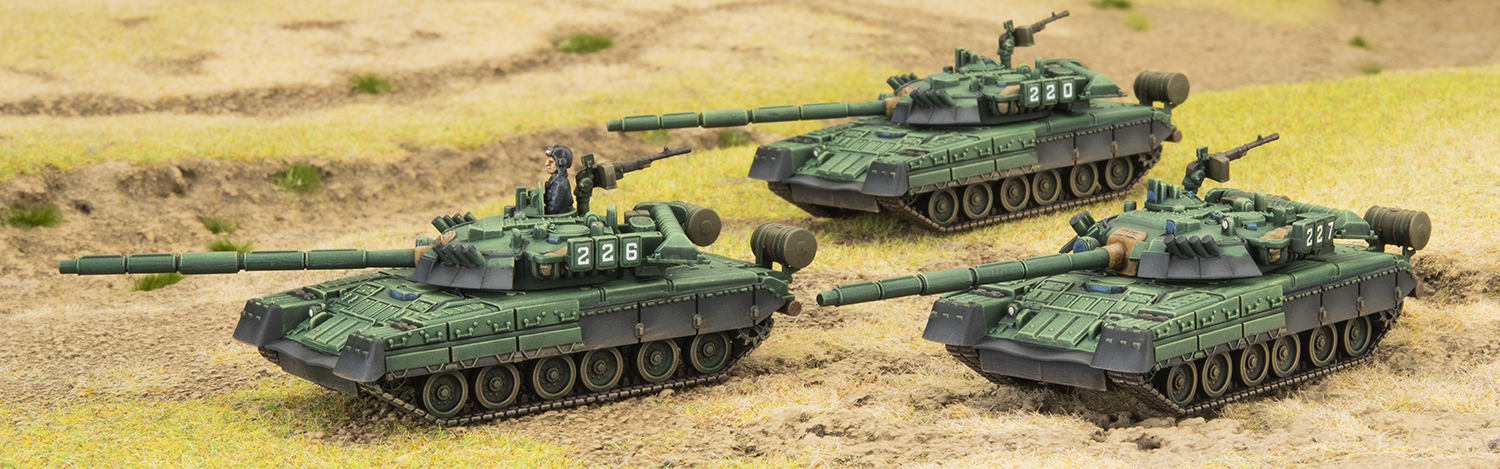
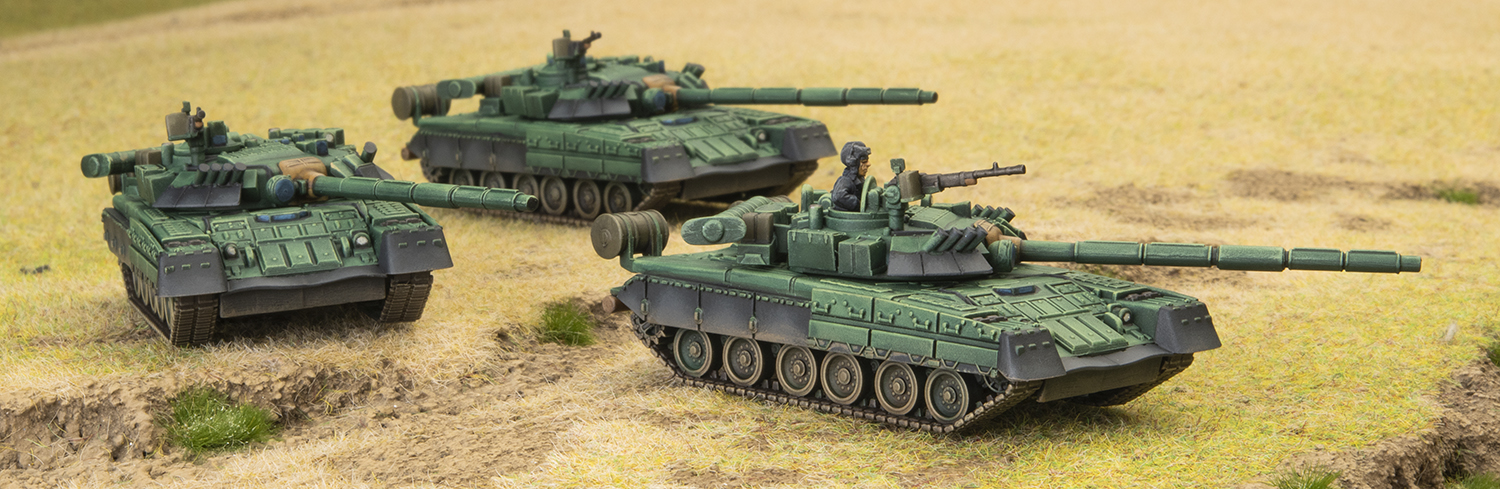
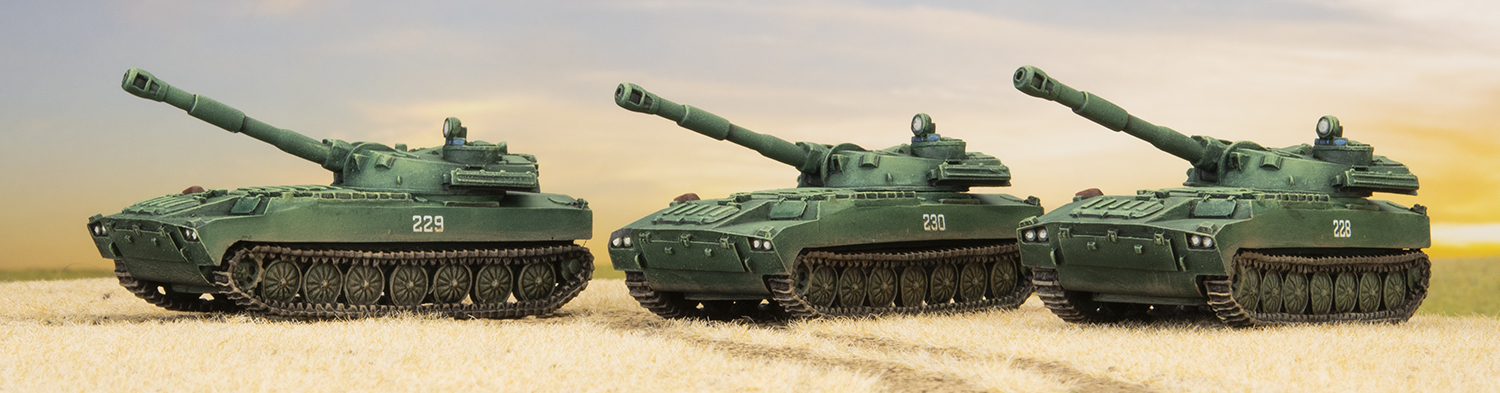
That’s 34 vehicles completed in 18 evenings, the largest army I’ve ever painted, and the fastest. Time for a break before I work on the infantry to ride in the BMP-3’s. I’m looking forward to using these all in a game soon!
Pete the Wargamer takes us through painting the T-80 in meticulous detail, with paint colours and brushing techniques to pick out the most minute feature on your new model.
There is a wealth of content on our YouTube channel, as well as those of some of the great community contributors that can help you build and paint your armies. Some of it may be for previous books, but are still a great resource today. For example…
Over the past year you may, or may not have been following the Big Four Of Late War, otherwise known as Chris, Casey, Wayne and Victor as they head down the Late War Journey, building completely new armies.
Casey, as our resident Soviet-o-phile decided to paint Soviets (as you would expect) but came up with a very unique winter scheme.
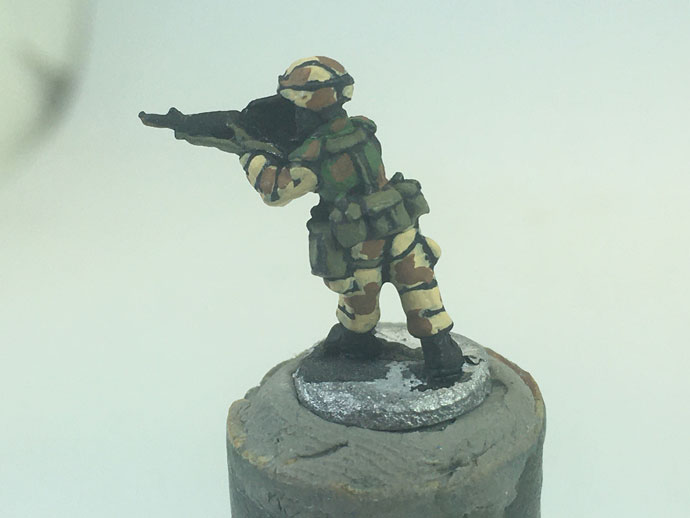
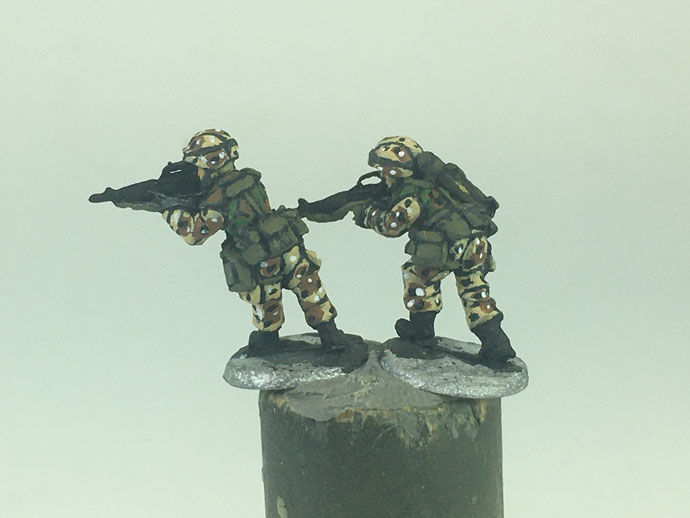
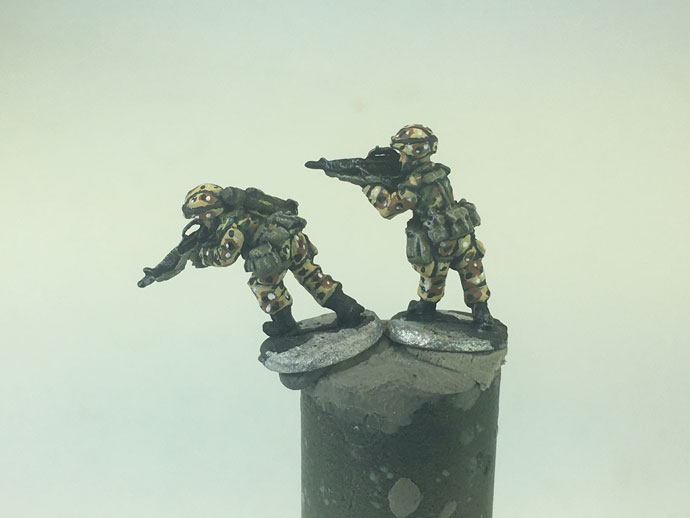
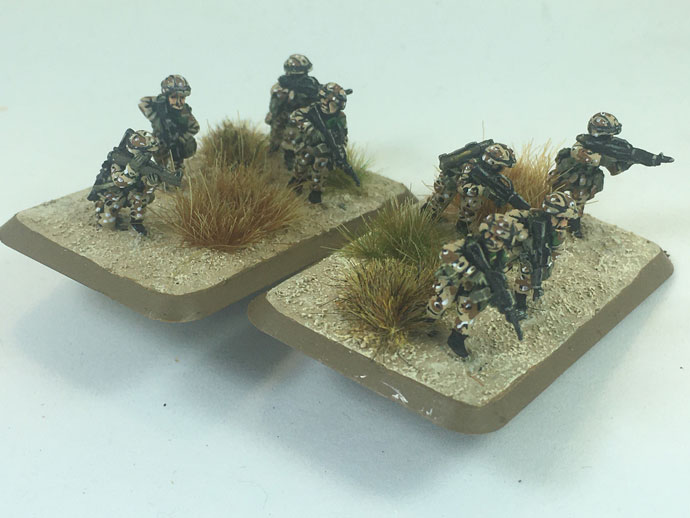
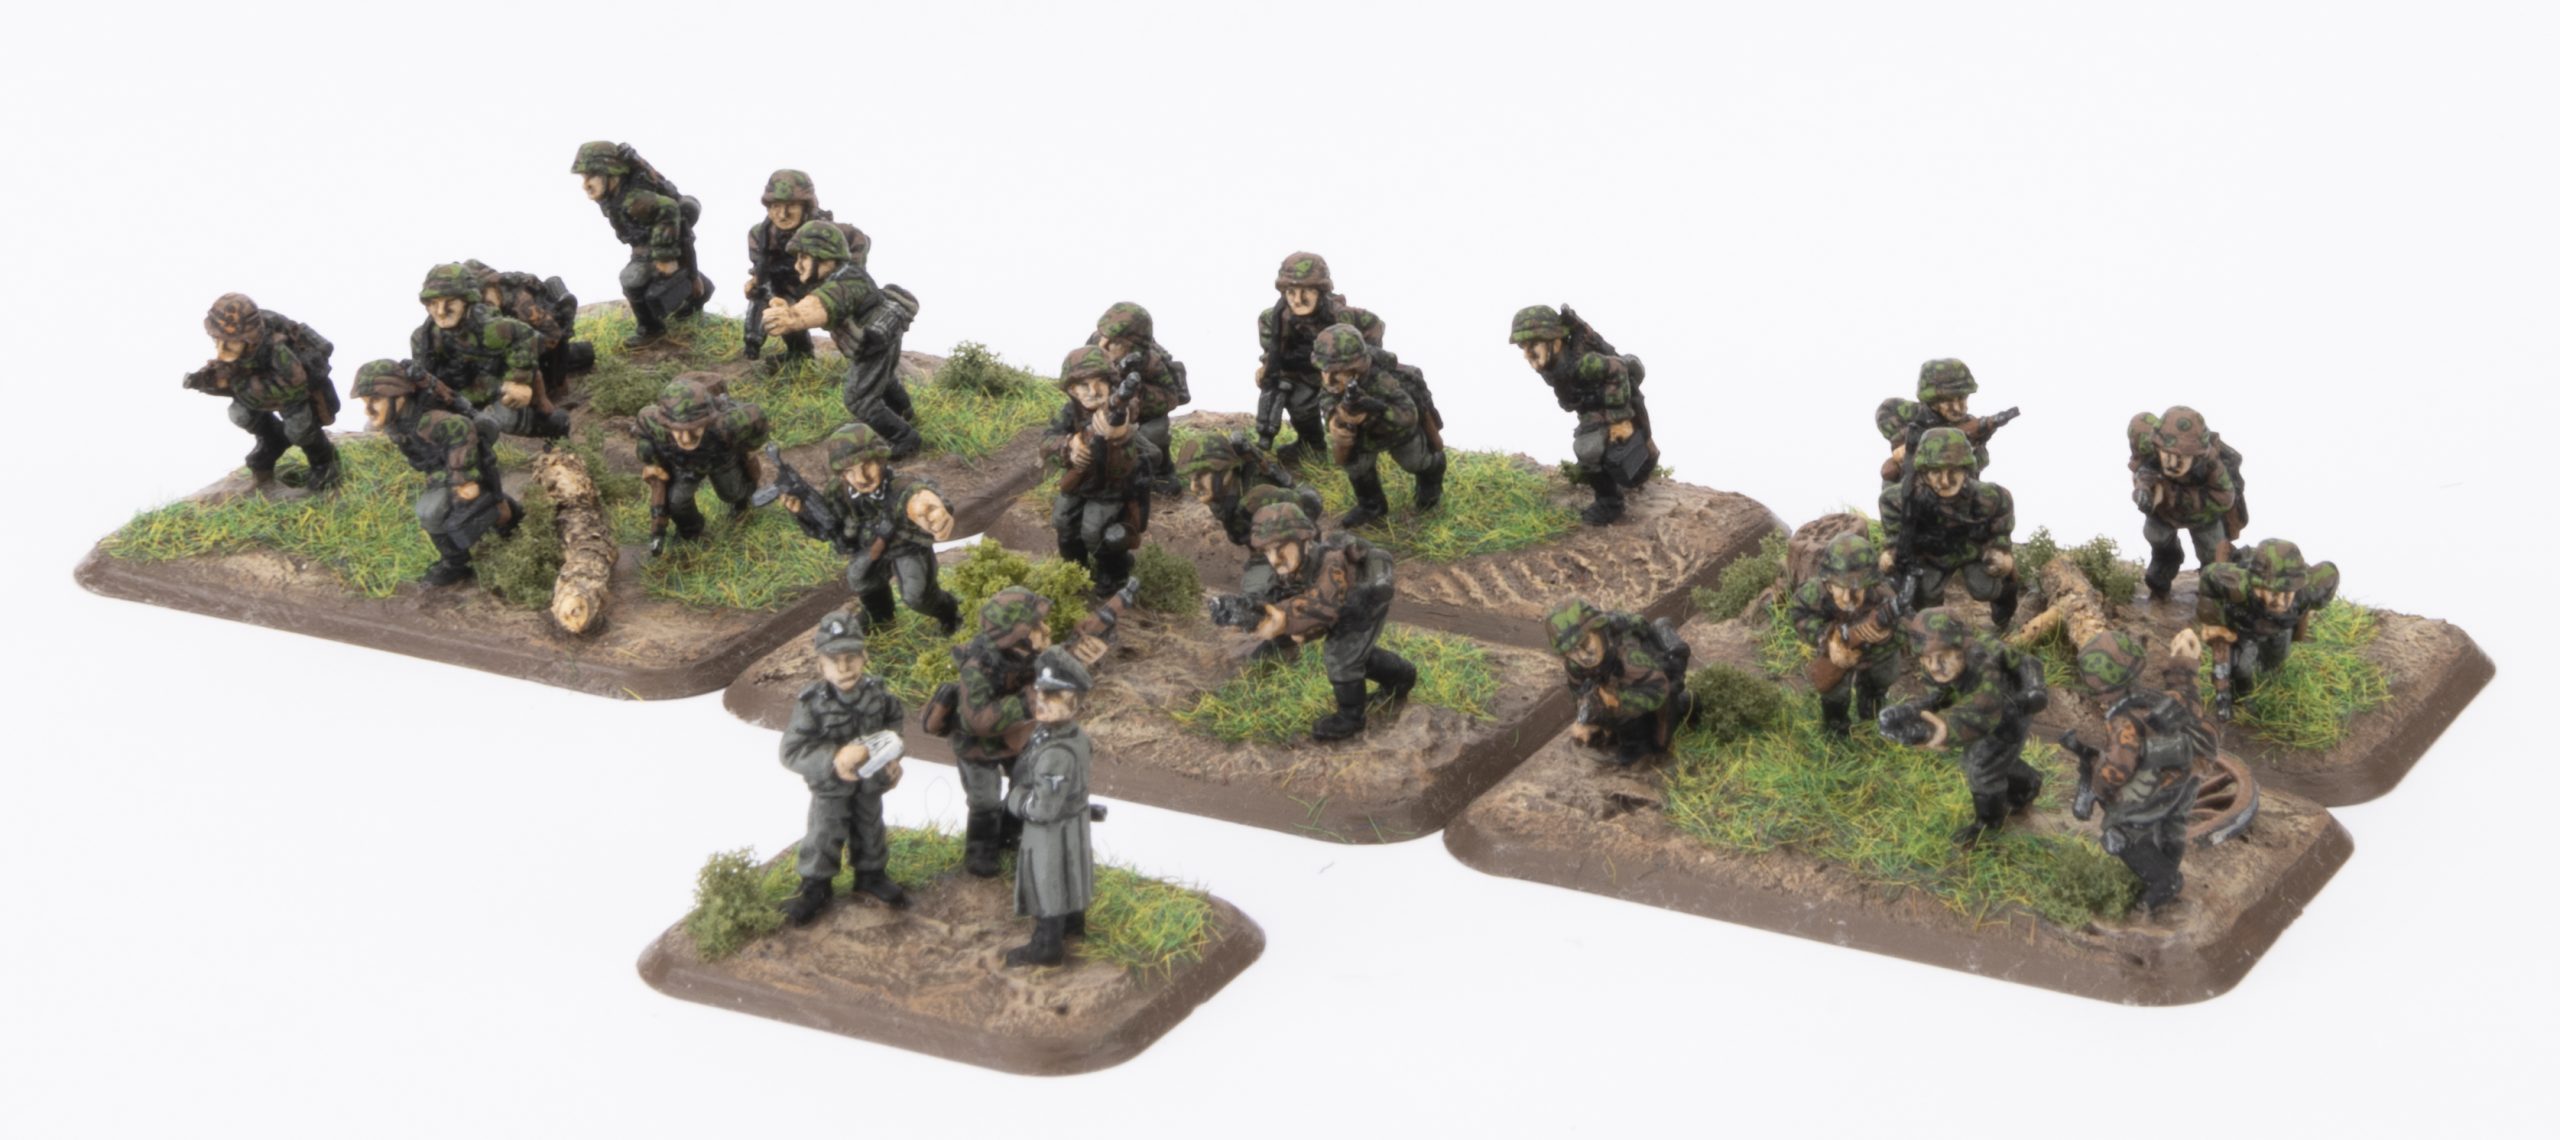
Many years ago Simon Hooker wrote a great article on the Flames Of War website and ever since it has been Evan’s “go-to” whenever he needed to paint SS figures. We wanted to share it with you again today in case you missed it among all the other great content on the website. All we’ve done is updated the article with some great pictures of Evan’s own Waffen-SS (Mid War) infantry.
Plane Tree
A Major of an SS reconnaissance section was the first to suggest the Waffen SS be equipped with camouflage clothing.
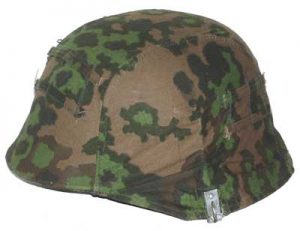
This lead to the development and widespread use of camouflage zeltbahns (Tent/Poncho), smocks and helmet covers within the SS. The use of the Wehrmacht’s splinter pattern zeltbahn predates those used by the SS, but I will go further into this pattern in another article.
The earliest clothing was tested in 1937 by a professor who based his studies on the effect of sunlight through trees. The Plane Tree pattern is the earliest used by the SS and can be seen in pre-war photos.
It is a reversible material that has a “spring” green and “autumn” brown side which a soldier can change depending on the surrounding vegetation. Plane Tree camouflage clothing was used up until around 1944.
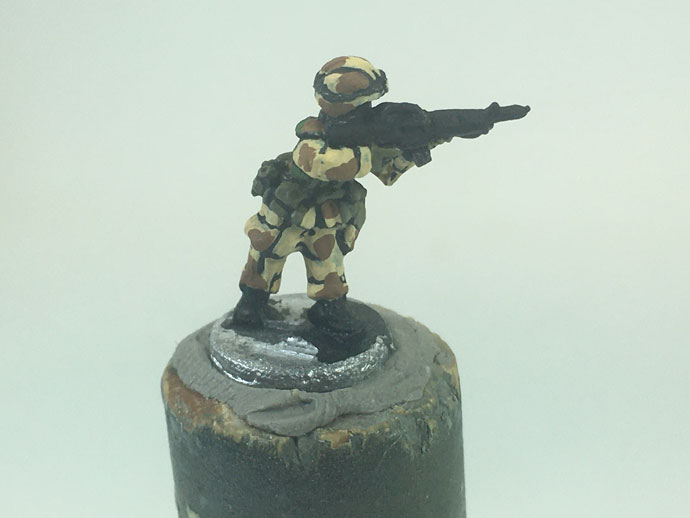
For Painting Plane Tree camouflage I start with a black undercoat, in fact I start with a black undercoat on all my WWII miniatures as the colours tend to turn out a little bit more drab.
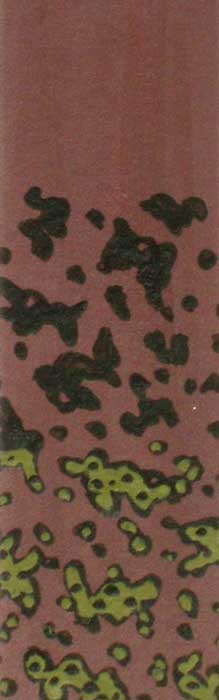
The first step is to get the base colour for the camouflage material, as you can see by the photograph of the Plane Tree; the “spring” side uses green to start with and then adds other colours on top. I paint camouflage in the same steps as the material is printed; that way, you get a closer look to the real thing.
Now on to colours. I use GW paints mainly due to the fact that I have easy access to this range and have made up my own colour recipes for consistency. Please experiment with different brands of paint to get the colour to match and let me know what colours you come up with (Particularly Vallejo as I’m just starting to explore this range).
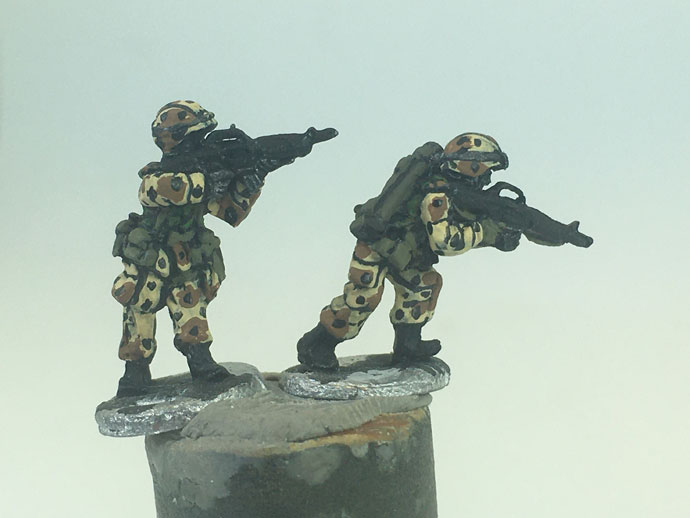
The “spring” side colour scheme starts with a base coat mixture of 50:50 Castellan Green and Elysian Green. If you look at the photo of the soldier wearing the Plane Tree smock you can see two shades of green. In 15mm scale you would never be able to distinguish between these two shades, so one shade of green is enough.
The next step is to add some random shapes and dots in a 50:50 mixture of Rhinox Hide and Steel Legion Drab.
Once this has dried a third and final colour is added. Officially this should be black, but of all the examples of Plane Tree clothing I’ve seen, the black is always a washed out shade. This time a 50:50 mixture of black and Castellan Green is added in further random shapes and dots.
To finish the pattern off, using the base colour green, add small dots on top of the black shapes. You should get a pattern like the one in the step-by-step guide and your Plane Tree camouflage is complete.
Spring Plane Tree
Vallejo
Base Green
German Camo Bright Green (833)
Brown
German Camo Medium Brown (826)
Black/Green
German Camouflage Extra Dark Green (896)
Oak Leaf
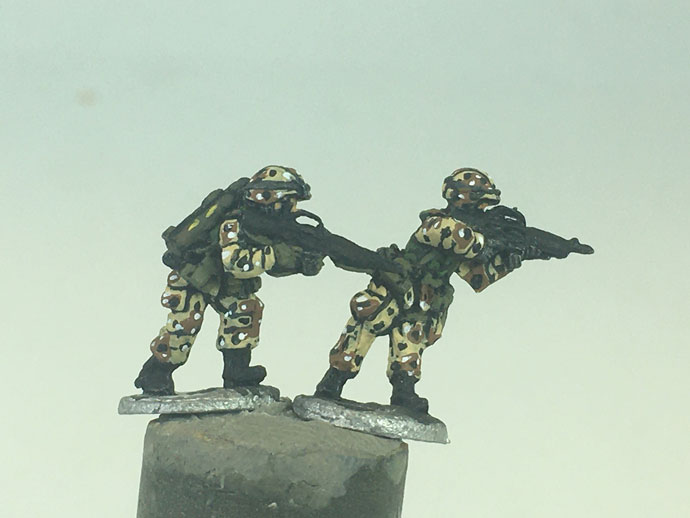
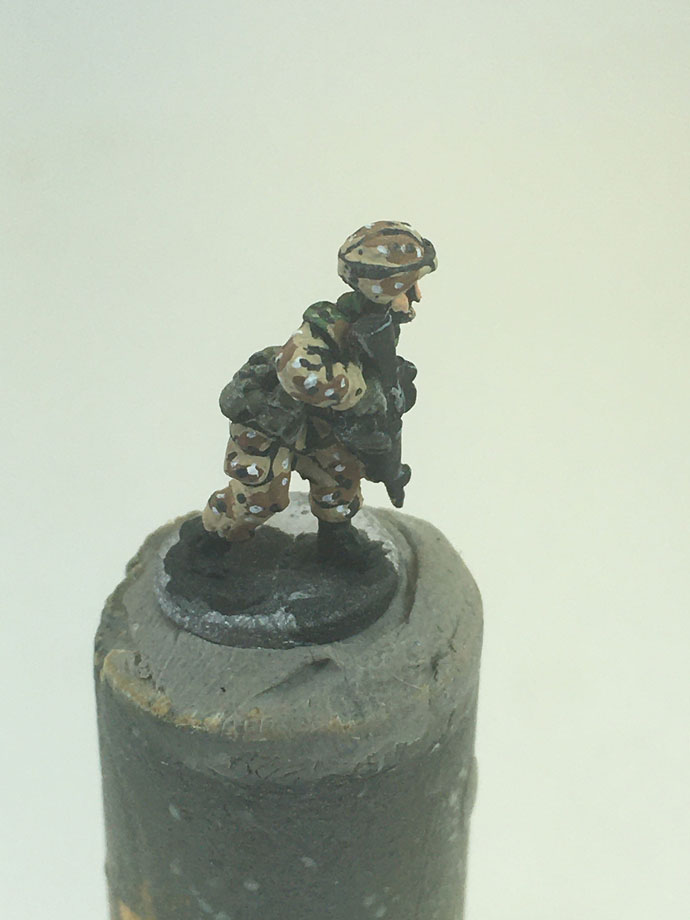
Oak Leaf camouflage was introduced in 1942-43 and followed the same principles of creating a pattern of sunlight through trees as the plane tree did. In addition to zeltbahns, smocks and helmet covers, padded reversible winter parkas and panzercrew overalls were made from this material.
Like Plane Tree, Oak Leaf was reversible with one side being “spring” green/brown and the other “autumn” orange/brown. Oak Leaf was the most common of the SS reversible materials and saw use up until the end of the war.
Spring Oak Leaf
Vallejo
Base Brown
German Camo Pale Brown (825)
Dark Green
German Camo Dark Green (979)
Green
German Camo Bright Green (833)
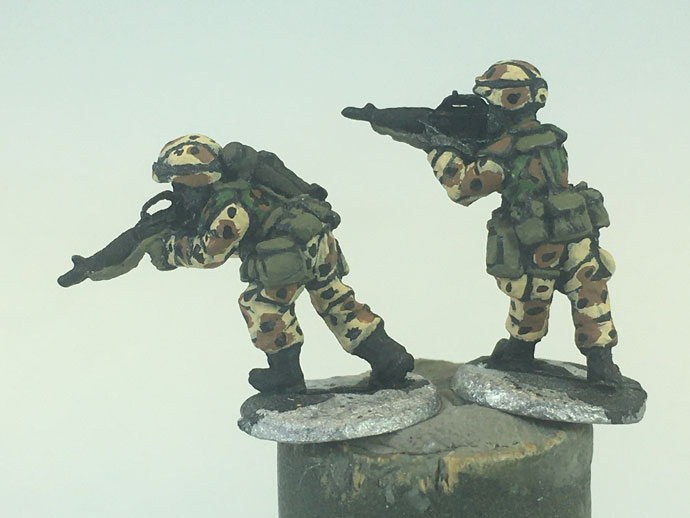
The base colour for “spring” Oak Leaf is brown, so the first colour I apply to the undercoated figure is a 50:50 mixture of Rhinox Hide and Ushabti Bone. I tend to use bleached bone rather than white as it gives a dustier looking colour.
The next step is to add a dark green, made up of 2 parts Castellan Green to 1 part black, in the form of random shapes and dots.
Once the dark green has dried, mix up a light green using the same formula as that used for the Plane Tree base (50:50 Castellan Green/Elysian Green). Add the light green to the dark green shapes and dots, being careful to leave a dark green border as seen in the step by step guide.
To finish the camouflage off add a few dark green dots to the light green shapes. There you have it: completed Oak Leaf camouflage.
As I mention both Plane Tree and Oak Leaf are reversible. I’ve only used the “spring” colours as the army I’m building is based around the time of the Normandy campaign. If you’re collecting a German army around the time of the battle of the bulge for example, then you’ll want to paint your camouflage in autumn colours. The best way to do this would be to use the guide above, but replace the colours with autumn hues.
A search on the internet, your local library or book store should reward you with the colours you need to get the autumn look.
So what are you waiting for grab your miniatures, paint brush and paints …and get painting.
Thanks to Simon for this great article…
Additional painting tip from Evan
I’ve painted some autumn camo. I just used the same technique for the “spring” camo pattern as in Simon’s article above, but I swapped two of the colours for the “Spring” camo.
I kept the base brown, but swapped the Dark Green for Camo Black Brown (822 and the Light Green for Light Brown (929) – and then I just followed Simon’s instructions. This, worked really well for me.
WWIII: American has been on my desk for a while, and I’d seen the awesome new Bradley sprue around the office, but with plenty of other projects to work on, I didn’t think I’d be starting another army.
Then Tuesday rolled around, Chris reminded me the launch was this weekend, and I found myself flipping through the book and hunting for sprues!
I decided on an M3 Bradley Armored Cavalry Troop.
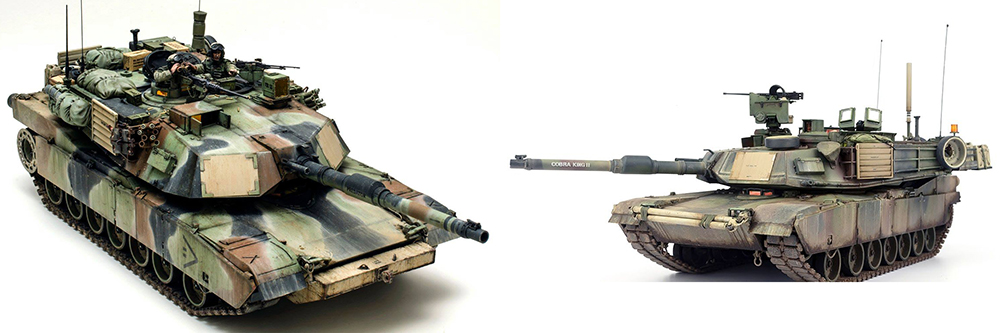
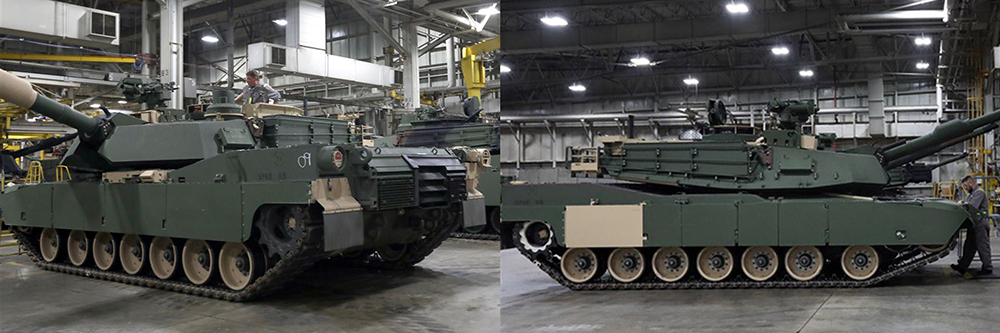
My first hobby step as always is to hunt through google and books for reference images, and maybe something interesting I can do. I’m doing Gulf War British, so I was pretty set on doing something green.
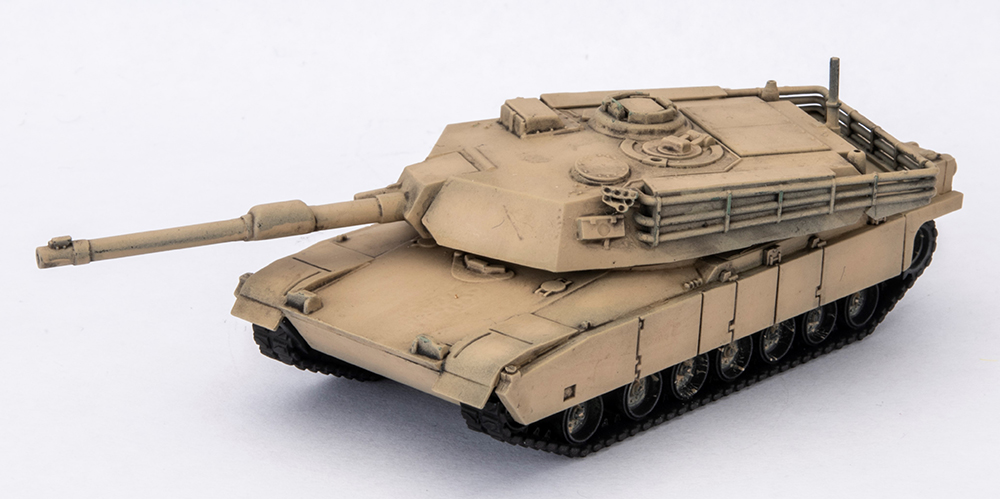
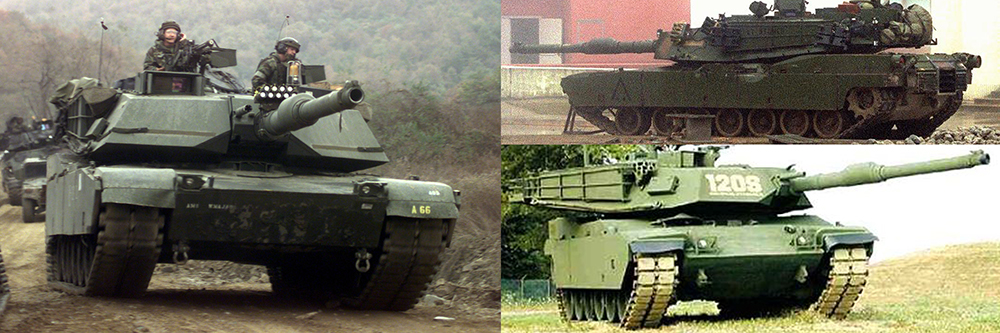
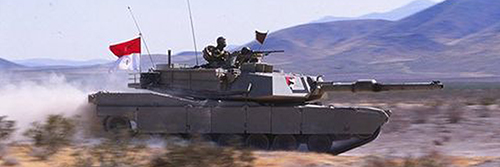
Scale modellers are also good inspiration. The below examples are M1A2’s, but they capture the look I want.
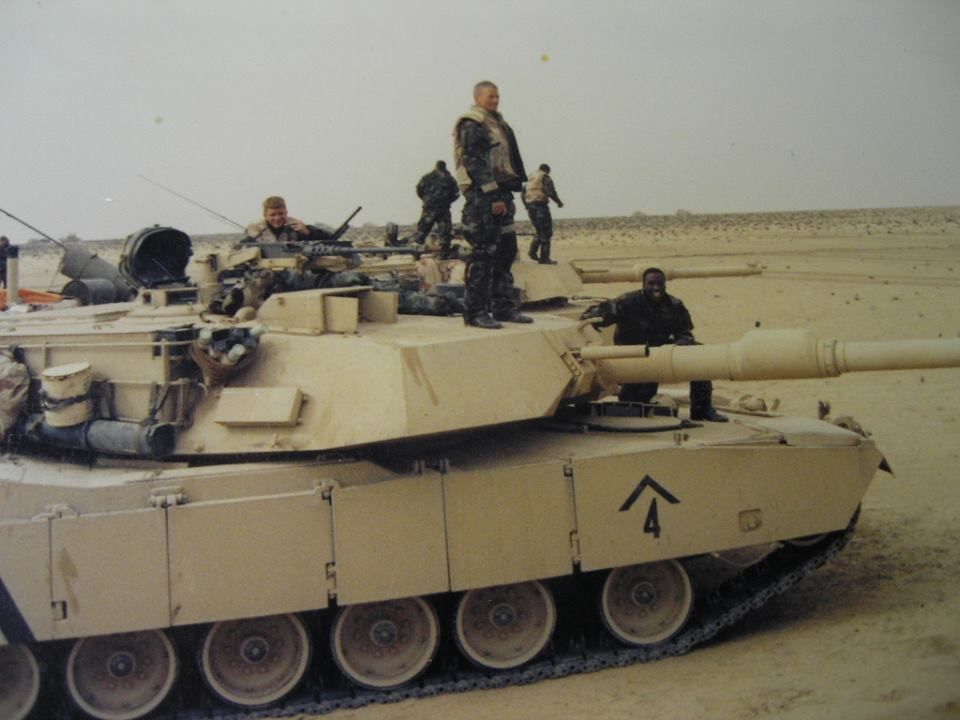
What stood out to me was desert yellow vehicles with forest green replacement parts.
So I’ve decided to apply the same logic to forces fighting in Europe. It’s 1991, the first Gulf War has just ended, but the Soviets are still causing problems along Iron Curtain. Equipment and replacement parts that were destined for the desert are now being shipped hastily to a more lush climate. There are some picture of this, but it’s usually on later M1A2 tanks.
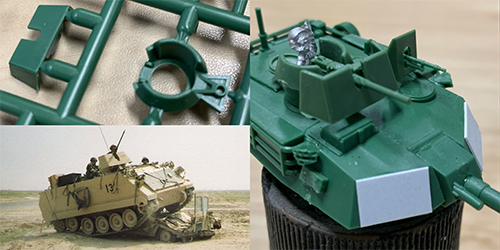
Being a Cavalry force, I took some liberties and added MG shields usually found on Vietnam ACAV M113’s. I have a few spare from building VADs.
Combat Identification Panels (CIP) were developed after the Gulf War, so again I’m using a bit of “what-if” logic and assuming they got these ready for the theoretical fighting in Europe.
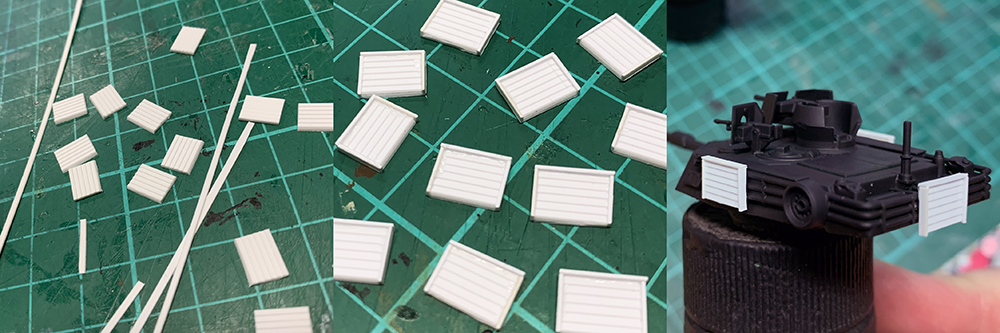
To make these, I used some plasticard sheets (1mm spaced Clapboard, and 0.5 thick plain). The cutting was fiddly, but with a sharp knife and plastic glue it was surprisingly quick and easy.
The painting was pretty straight forward, as I’m aiming to get the army done daily quick.
Here’s the main colours:
FOREST GREEN
– Tamiya Field Grey (Airbrush)
– Army Painter Army Green dry brush
– Citadel Biel Tan Green shade
– Citadel Nuln Oil recess shade
– Army Painter Army Green dry brush
DESERT YELLOW
– Vallejo Green Ochre
– Vallejo Buff dry brush
– Vallejo Pale sand dry brush
To continue the cavalry theme, I used some decals from the Vietnam M113 kit, and also added some matching penants on the aerials, made with folded paper, PVA glue, and paint.
Overall it’s a pretty quick and rough paint job, but with hopefully some interesting elements to make the army stand out. Now I’m looking forward to seeing this scheme on Bradleys, Humvees, and the rest of the support vehicles. I’ll look into adding stowage at a later date to the whole force.
Not everyone will love this paint job, but I think one of the great things about WWIII: Team Yankee is the “what-if” nature of it. It allows for some cool modelling opportunities.
It may not be historically accurate, but lets call it “historically plausible”.
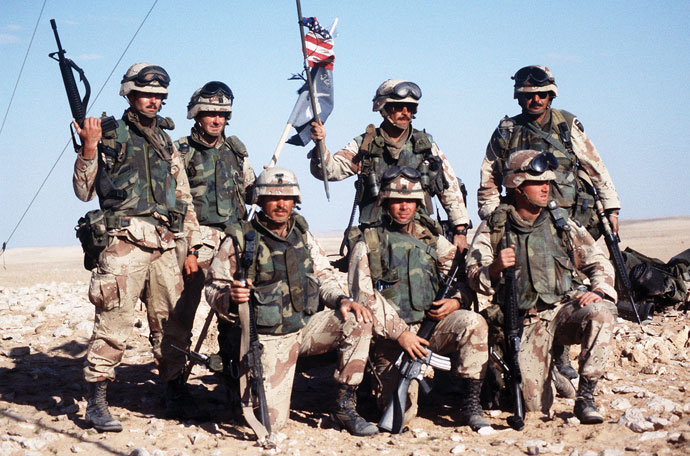
Like many gamers I found the Battle of 73 Easting to be a very interesting, if rather one-sided affair, almost an analogy for the entire Desert Storm operation. It reiterated the concept of violence of action and the unrestricted use of speed, strength, surprise, and aggression to achieve total dominance against your enemy.
The release of WWIII: American finally gives me the chance to take Captain McMaster and Eagle Troop, and put it on the tabletop. Plus, it gives me a great reason to build and paint some Bradleys!
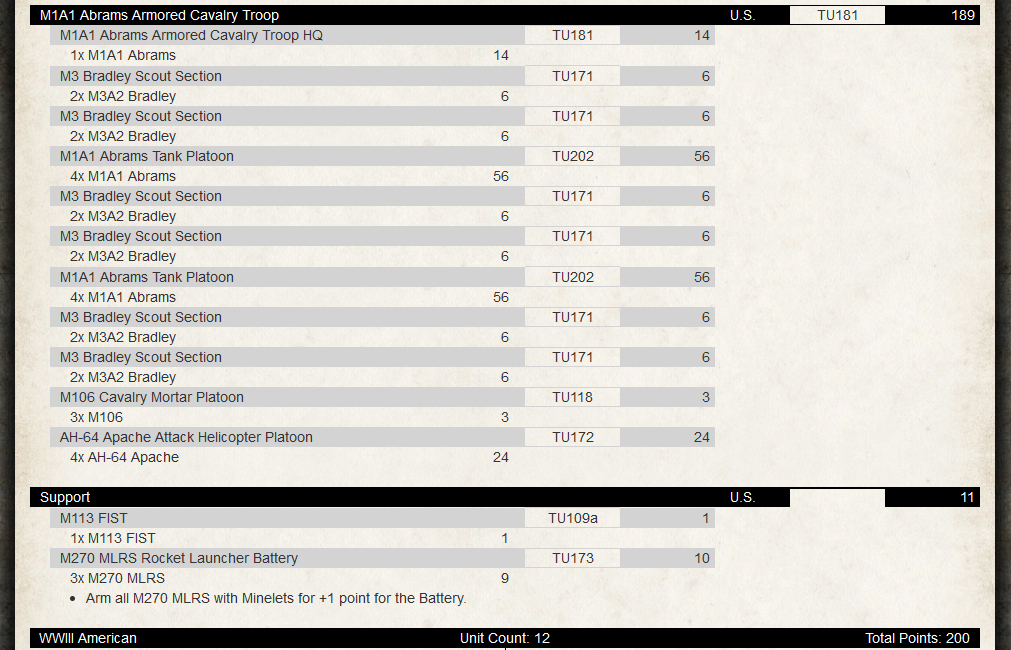
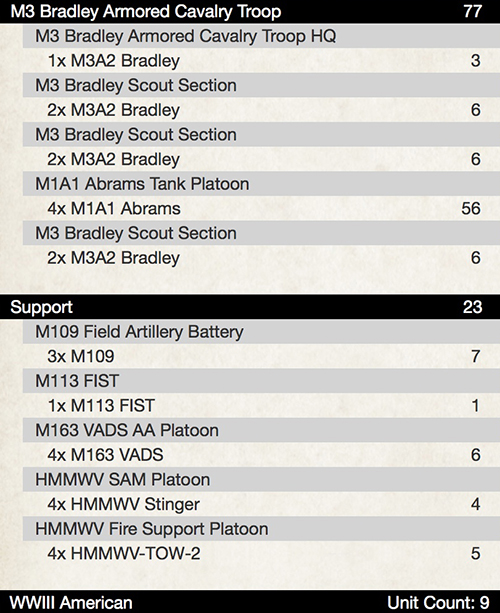
The Army List:
Click on the image for a bigger version
As you can see, I have managed to cram in an entire Armoured Cavalry Troop, with some supporting elements in to only 200 points…
Next step is the building and painting. If you keep an eye on the Big Four Of Late War Instagram account you may have seen Victor and I starting to build our armies, as well as working on some test models to figure out how we are going to paint them.
I’ve decided to copy Evan’s method, which you may have seen in our Facebook Groups, which involves airbrushing the model Buff, then some panel fading with a Buff/White mix (in my test model this has not really shown up well so may need some work), then apply a filter over the whole model, pin wash, and finally give the model an overall drybrush with Iraqi Sand (and/or Pale Sand… to be confirmed after more testing). Finally, I’ll add some stowage and decals to give the model a slightly less “one colour” look.
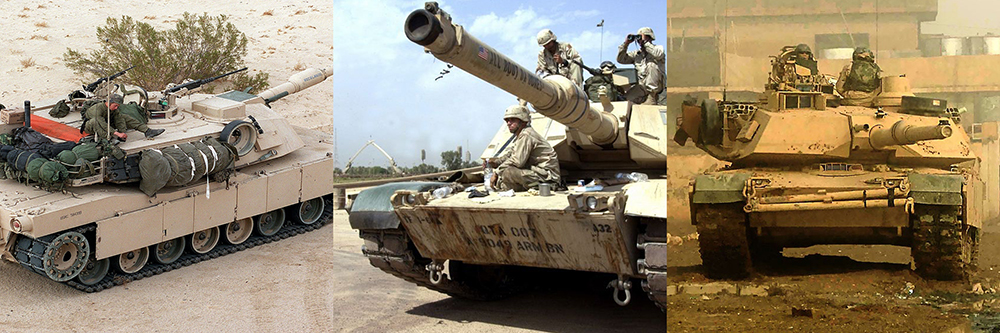
As you can see from the real world photo below, and my initial test model the sand colour is fairly pale, but once I add some stowage items painted in Woodland, it should perk up the model. Unfortunately (for me) the troopers of Eagle Troop disposed of their European green camo nets as soon as they could so you won’t be seeing any of those on my models. Likewise, their vehicles were freshly painted not long after their arrival in Saudi Arabia so no funky looking green bits where panels or trackguards have been replaced.
We’ve already started discussing the next event on the New Zealand gaming calendar (FlamesCon) in October and it is very tempting to knuckle down and get enough of the army completed so I can take it along. Lets see how that works out….
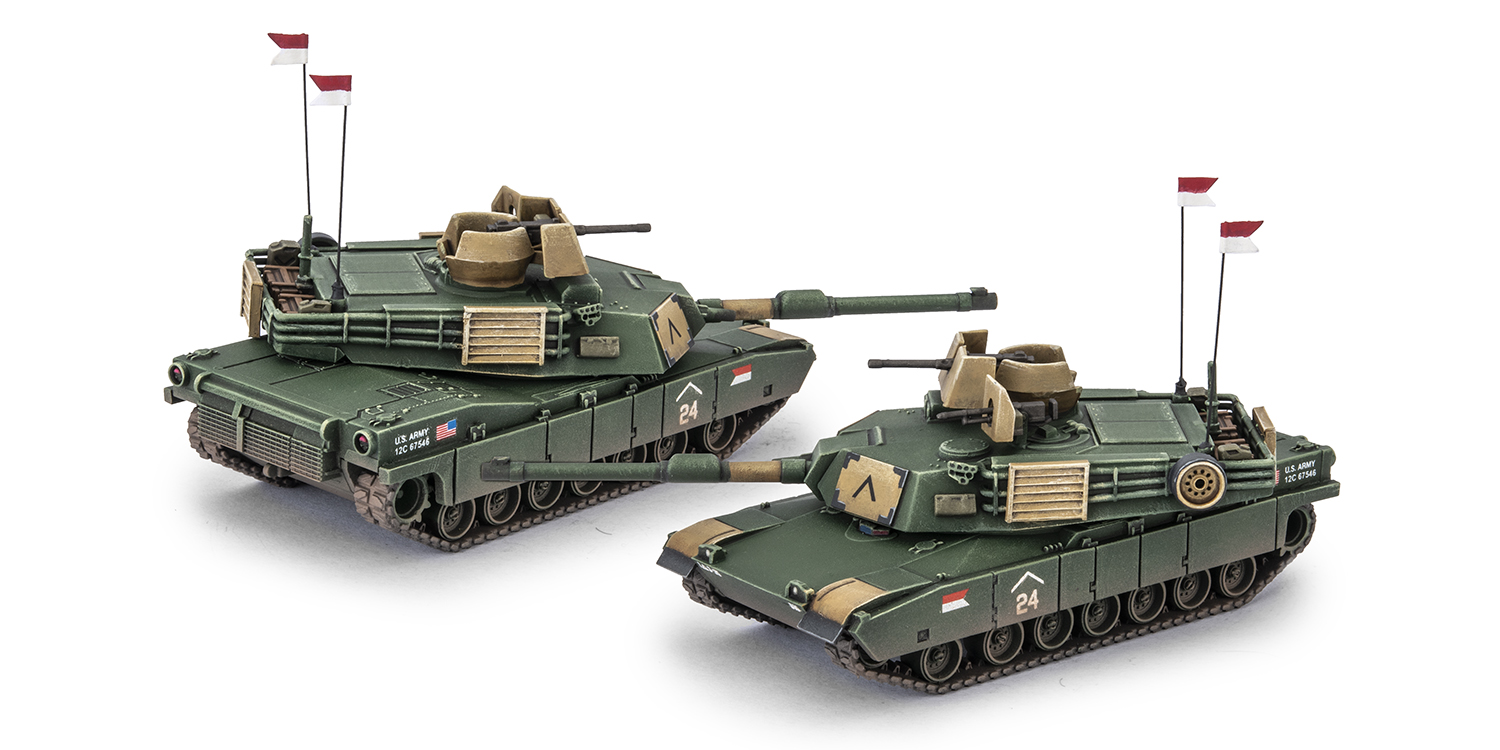
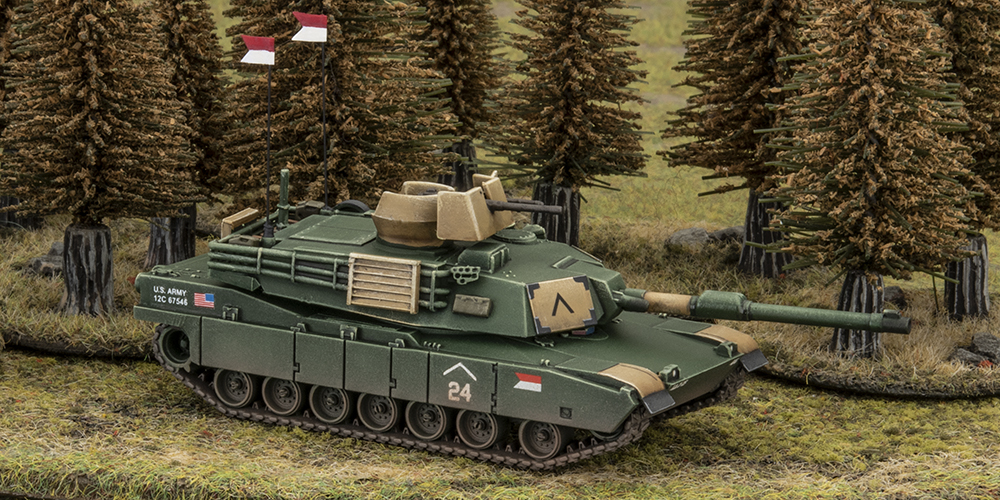
Pete the Wargamer shares a simple but really effective way of painting the new M2 Bradley (or any American vehicle) in a Forest Green European colour scheme.
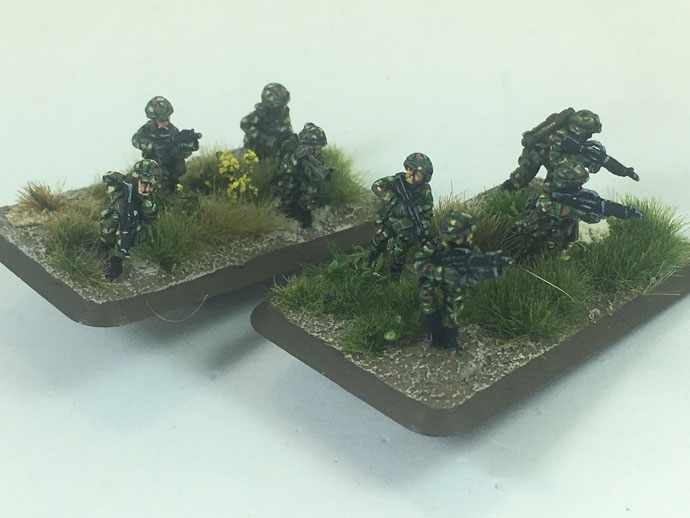
With the timeline for World War III: Team Yankee expanding out somewhat I decided to paint my US forces in a Desert Storm type paint scheme instead of adding to my existing Euro force. After some research that meant the infantry would have to be in Desert “Chocolate Chip” uniforms but with Woodland pattern body armour. All the paint I used is from the Vallejo model colours range.
European Uniforms I’d already painted two platoons of US infantry in Woodland pattern for my Euro US force so I just copied that again for their body armour jackets. I also copied the same colours for all the web gear and weapons, Russian Uniform (924) on the web gear and pouches, black for the M16s and Olive Drab (887) for the LAWs etc.
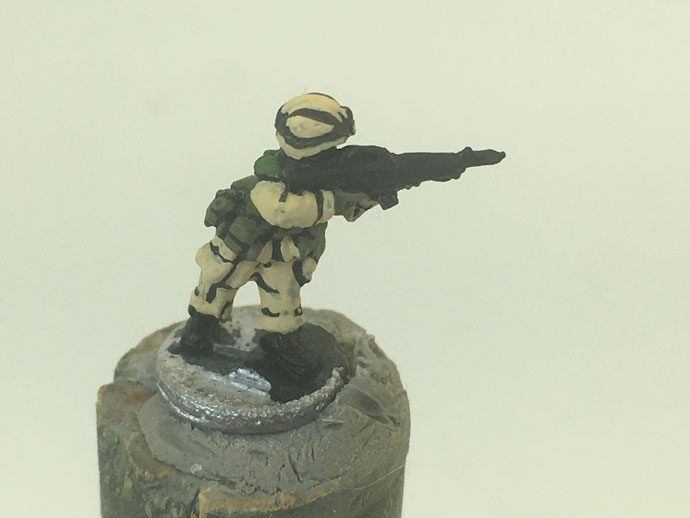
The base colour I used was a quite bright USA Uniform (922), the effect darkens up when the rest of the camouflage scheme is done so the extra brightness to start off with works well here I think. Next I added large blotches of Beige Brown (875). Finally, I painted thin strips of Black and Dark Sand (847), I try to do these in “Y” or “V” type shapes. One thing I also do is think about where the clothing seams are and stop blotches of the brown at those lines. Also resist the temptation to add too much at the beginning, less is definitely more here!
Chocolate Chip After a black undercoat I start off with base colours for the uniform (Dark Sand 847), body armour (USA Uniform 922) and the webbing and pouches (Russian Uniform 924). I block paint in the three colours leaving thin black lines around the clothing and equipment, sometimes I rush this and have to go back later and re-do some of the black lining if I’ve covered too much or want to tidy up. I also use the Russian Uniform on the hands to represent the gloves commonly worn as well.
The next step is to add cloud like blotches of Beige Brown (875) on both the uniform and the body armour. Don’t go too far, try and leave plenty of the original colours and remember those seams and joints.
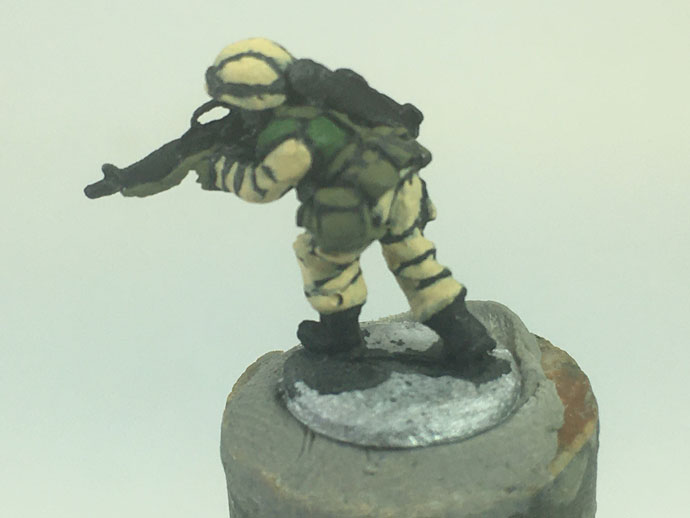
Now we get down to the trickiest part, the dots and stripes! Using a #00 sized brush I add dots to the uniform equally on the sand and brown portions, again don’t add too many as it’s all too easy to fill up the space and loose the overall effect – plus it takes longer the more dots you do!
Once you’re happy with the dots add the stripes on the body armour portion of the figure. I try and use “Y” or “V” shaped strips running on the edge of the brown to green edges. This can also be a good time to do any edge or joint tidying up with the black paint out and a fine brush in hand.
Continuing with the dot theme I go to the white dots next. They show up best against the beige brown blotches but I still put a few on the sand areas as well. I try to sometimes superimpose the white against some of the black dots for some extra colour pop.
Finally, for the body armour I go back to the Dark Sand colour and add the same type of stripes I did previously with the black. This time I try and cross over the black stripes where possible to get more of a colour pop again.
Once I’m happy with that I finish off by adding the face flesh colour, paint any equipment like LAW or Dragons etc in Olive Drab (887) with some fine yellow lines added for the instructions text and finish off by adding a dry brush over just the weapons, gloves and web gear/pouches with Deck Tan (986) to bring out the detail again separate from the uniform and body armour.
Then before they’re game ready with the desert basing of your choice. I use Acrylic house paint test pot brown mixed with Vallejo pumice gel followed by highlight drybrush with Vallejo Dark Sand.


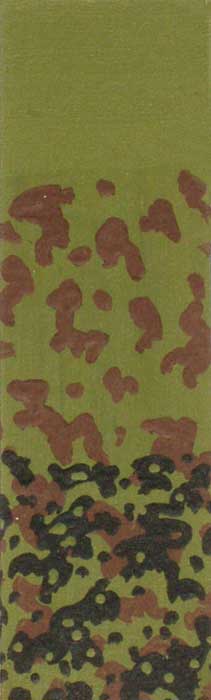 The first step is to get the base colour for the camouflage material, as you can see by the photograph of the Plane Tree; the “spring” side uses green to start with and then adds other colours on top. I paint camouflage in the same steps as the material is printed; that way, you get a closer look to the real thing.
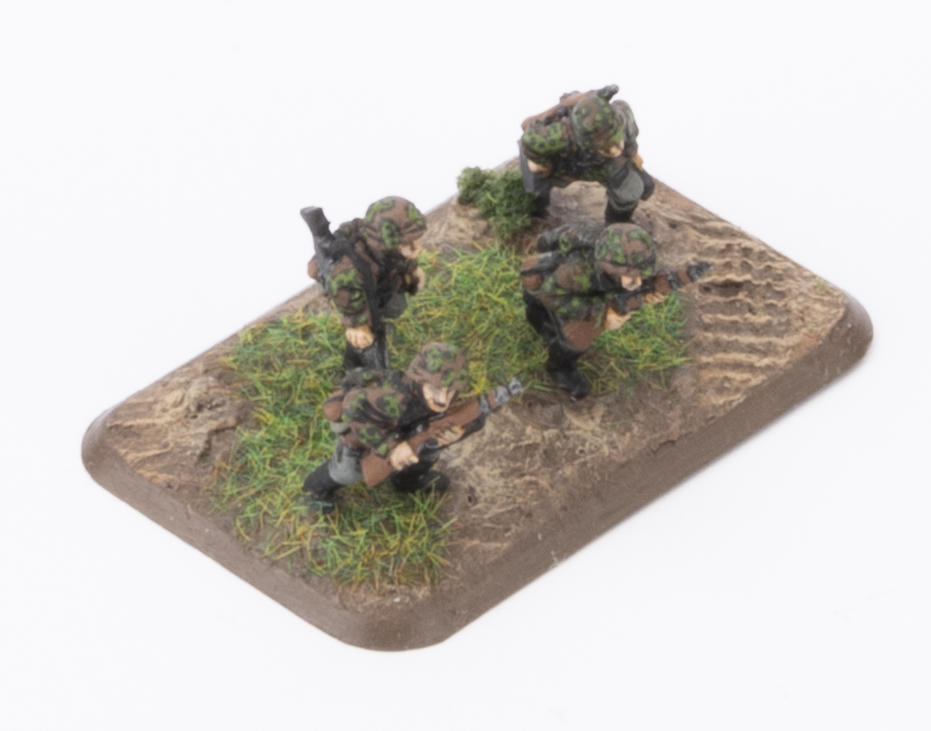
 The base colour for “spring” Oak Leaf is brown, so the first colour I apply to the undercoated figure is a 50:50 mixture of Rhinox Hide and Ushabti Bone. I tend to use bleached bone rather than white as it gives a dustier looking colour.
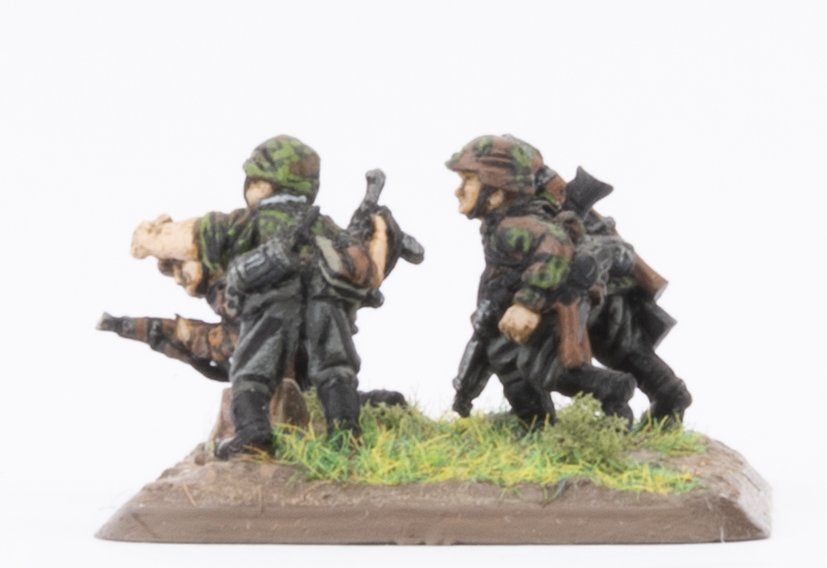
 A search on the internet, your local library or book store should reward you with the colours you need to get the autumn look.
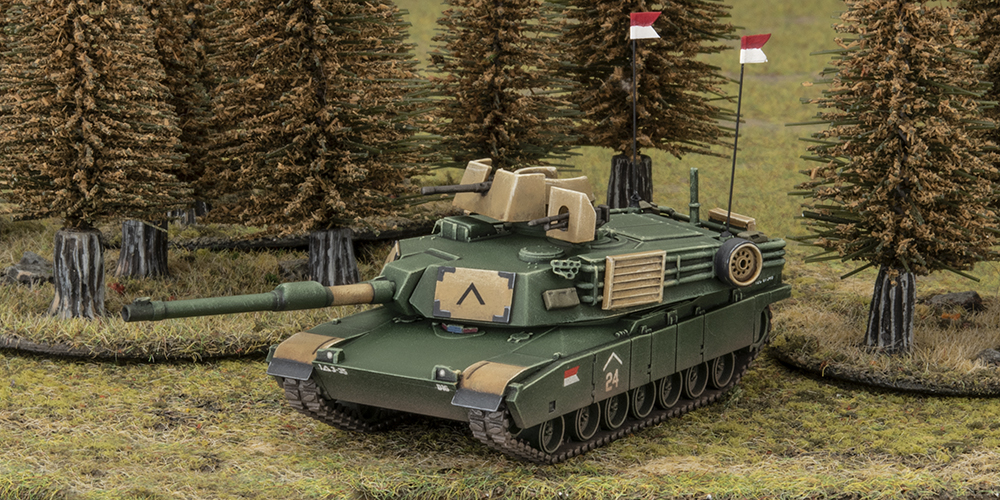
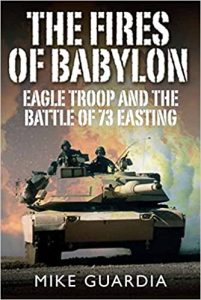 The battle itself has been covered in a variety of places, but for an interesting read about not just the day in question, but also the men involved I can recommend