
 With James Brown
If you want to field large Tankovy units in a hurry, chances are you won’t be interested in giving yourself any extra work. But if you have some spare time and you want to show off your modelling skills, you can give your new tanks that little something extra to make them stand out from the crowd.
Adding Wire Grab Bars
There’s nothing wrong with the moulded plastic grab rails – they paint up very nicely. But if you want to add a bit more realism, it’s actually a lot easier than it looks to replace them with wire.
You will need:
■ Hobby knife.
■ Wire.
■ A pin vice with a drill bit roughly the same diameter as the wire, but preferable slightly bigger.
■ Pliers – ideally two pairs: one with flat jaws and one with tapered, notched jaws.
■ Clippers/sprue cutters.
■ Superglue or green stuff epoxy putty.
First things first: choosing the right wire. It needs to be flexible enough that you can bend it into a crisp 90-degree angle, but rigid enough for the finished model to survive reasonable handling. I used .5mm copper wire, but slightly finer or heavier gauges will do fine, as long as you have a drill bit to suit.
 Bending The Wire
 Bending The Wire
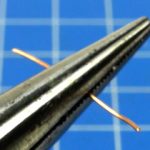
A pair of tapered, serrated pliers is very helpful for getting a consistant size. Measure along the grip of the pliers until you find a notch 1.5mm narrower than the length of the grab bar you want to make, to allow for the extra width added by the curve of the wire at the bends; I found 1.5mm was perfect for the gauge of wire I used, but your results may vary, so you should experiment a bit, bending a few practice grab bars and carefully measuring them until you have identified the correct notch. Or I should say notches, because you will need two different lengths of grab bar:
5.5mm – 4 per tank (for the T-34/85 turret sides and rear, and the T-34/76 turret sides)
7mm – 6 per tank (for the T-34/76 turret rear, and the hull sides)
Mark the notches clearly with paint or a pencil, and voila – your pliers are now a precision wire-bending tool, letting you churn out dozens of nifty grab bars super-fast. OK, to be honest, it’s going to take a while, but probably not as long as you think.
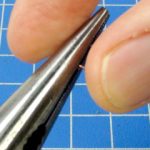
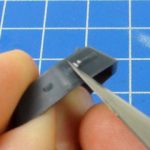
The method is simple. Grip a short piece of of wire between the pliers at the marked notch. Bend down the ends with your fingers. If you have another pair of pliers, use them to crimp the ends down tightly, to give as sharp a bend as possible. Or you can press the ends firmly against a hard surface.
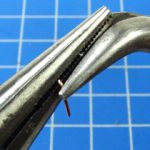
After removing the wire from the ridged pliers, you can further sharpen up the bend by squeezing tightly on either side of the bend, refining that 90-degree angle.
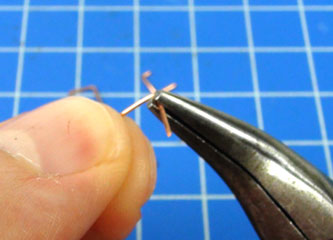
Clip off the excess wire with clippers or sprue cutters, leaving a few millimetres to stick into the tank.
Drilling The Holes
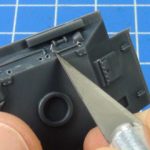
Drill a hole at each end of the moulded plastic grab bars. I recommend using the tip of your hobby knife to bore a small hole first. This makes it a little easier to hit the exact point where you want each hole, and the drill bit will naturally centre itself there.
Be careful with the placement of your holes. Try to ensure they are at the same height, or your grab bars will end up on a crazy angle.
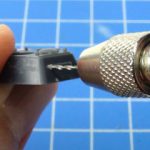
Drill all the way through the plastic to the other side.
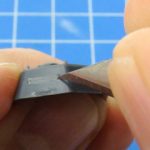
Once you have drilled the holes, carefully shave off the plastic grab bars with a sharp hobby knife. Take care not to cut any of the detail on the hull when removing those grab bars
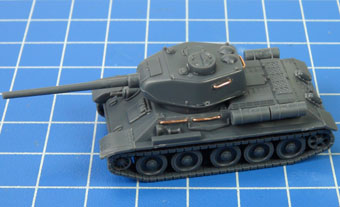
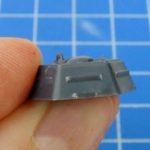
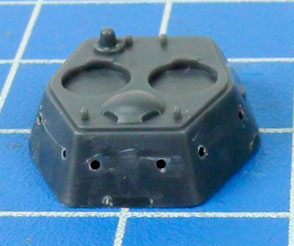
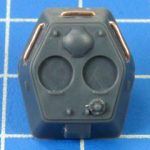
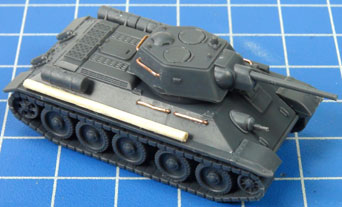
The 76mm turret with holes drilled, ready to insert the wire grab bars
Adding The Grab Bars
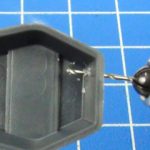
Insert your grab bars into the holes. How closely you want them to sit against the surface of the tank is a matter of taste. To strictly match correct scale, they should be pressed right up against the surface. But you’ll probably prefer to leave a small gap, just for the look of it.
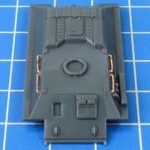
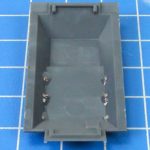
Once you have all of the grab bars positioned to your liking, you can fix them in place from the inside with either a drop of superglue or a small blob of epoxy modelling putty (ie green stuff or similar). Obviously this means you need to add them before attaching the bottom parts of the turrets and hull.

Bending Mudguards
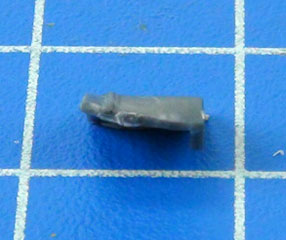
Looking at historical photos of T-34s, you’ll quickly notice that the mudguards – made of relatively thin sheet metal – were prone to bending and crumpling. They could also be quite easily removed, so the easiest customisation option is to simply leave them off.
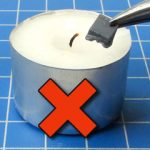
Heating up the plastic until it becomes soft and pliable seems like it would be a good idea. But there is a very specific temperature window where the plastic is soft enough to bend but not so hot that it melts completely. An open flame is not much use – hold the part even slightly too close and it will instantly melt into a vague blob. A heat gun (if you haven’t used one of these, it’s essentially a juiced-up hair dryer) gives you more control, but you can still easily ruin the plastic part if you’re not extremely careful.
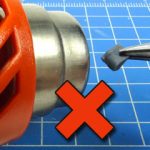
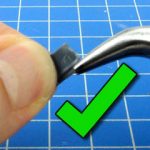
 After quite a lot of experimentation with different heat sources, I have come to the conclusion that it’s not worth the effort. By all means give it a try if you’re feeling brave – you can get some very effective-looking results if everything goes right. But I think the best option is the simplest: just grip the mudguard firmly with your pliers and bend it by brute force.
 Unditching Logs
 Unditching Logs
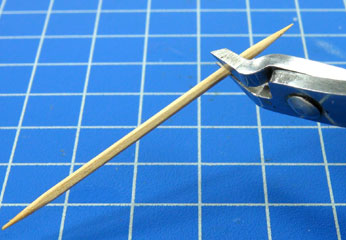
Also crude but effective – you can clip the ends off toothpicks to simulate the improvised unditching beams (ie. logs) which were often carried on Soviet tanks. Toothpicks already have a suitably woody texture, which you can enhance by scratching up the surface a little with your hobby knife. Either simply glue the ‘log’ in place, or else wind around a few coils of heavy sewing thread or fine fuse wire, to simulate rope securing the log in place.
I’m sure these detailing techniques won’t be for everyone, but for those creative types who feel like adding a little something extra to their tanks, good luck, and I look forward to seeing your work in person or on the Facebook Groups.
~ James
