The 50th ‘Tyne and Tees’ Division in Normandy

with Andy Parkes and Wayne Turner

1939-40
In 1939 the 50th Division was organised as a Motor Division and served in France in 1940, taking part in the evacuation at Dunkirk. After escaping, it was re-organised as a Infantry Division in Britain. It was sent on 22 April 1941 to North Africa and was reinforced by the 69 Brigade from the disbanded 23rd ‘Northumbrian’ Division

North Africa and Sicily
The division saw service in the Desert Campaign, where it lost the 150 Brigade at Gazala. Under-strength, it took part in the retreat to El Alamein, acting in reserve. During the 2nd Battle of El Alamein it was positioned in the south. It was reinforced with the 1st Free French Brigade and 1st Greek Brigade for its planned attack on the Italian Folgore (Airborne) Division. It was supported by elements of the British 7th Armoured Division. Later in the battle it was transferred north to take part in Operation Supercharge.

In Tunisia the 50th Division assaulted the Wadi Akrit position, and was then involved in the Sicily landings of 1943, where it landed at Avola.

The 168 Brigade was attached from the 56th Division during the campaign.

Northwest Europe
In October 1943 the division was withdrawn to Britain for reforming and training before landing on D-Day. The 231 Brigade (an independent unit formed from regular troops stationed on Malta) were permanently attached, and the 56 Brigade was temporarily attached for the initial beach assault. Later the 56 Brigade was transferred to the 49th ‘West Riding’ Division.

D-Day
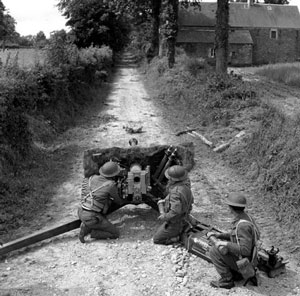
For D-Day the 50th Division was given the beach code named “GOLD” to land on. It covered an 8km area between la Riviére in the west to Le Hamel in the East. The German defences in this area were manned by the 4th Company 441. Ost Battalion (4/441 Ost) and 7/736 Grenadier Regiment belonging to the 716. Infanteriedivision, which were located on the east flank, and I Battalion/916. Grenadier Regiment of the 352. Infanteriedivision. Manning the marshy area between these two formations were elements of the 3/441Ost. Weapons in this area were 5cm PaK38 guns in open concrete emplacements and 7.5cm guns mounted within pill boxes.

To the rear were several artillery batteries covering the beach area (Mont Fleury, Creully, Crépon, Ryes and Marefontaine farm).

The role of the 50th Division was to establish a beachhead between Arromanches-les-Bains and Ver-Sur-Mer, then head towards Route Nationale 13 (RN13) linking Bayeux to Caen.

The first wave was made up of the 231 and 69 Brigades; once the assault was complete, the follow-up formations of 56 and 151 brigades would push inland towards RN13 supported by tanks of the 8 Armoured Brigade.

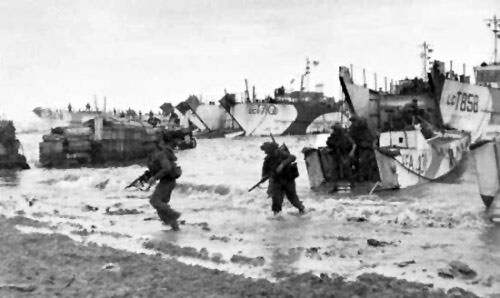
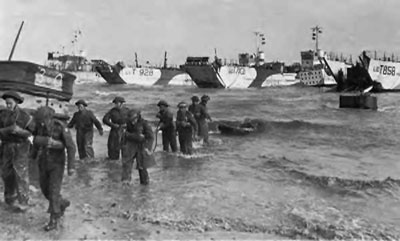
The assault started at 07.25 hrs on the “King” sector of Gold beach, almost an hour late. The Green Howards, came ashore supported by DD tanks of the 4th/7th Royal Dragoon Guards. Following a massive bombardment from HMS Warspite and HMS Ramilles, the assault came in from a distance of seven miles out, unlike the Americans who had deployed from twelve miles out. The DD tanks were not deployed out at sea, but they were landed directly on to the beaches. This meant that the assaulting troops had armour supporting them directly on the beaches.

The 8 Armoured Brigade supported the 69 Brigade with the 4th/7th Royal Dragoon Guards on the right flank directed on Riviére, and on the left the Sherwood Rangers Yeomanry supported the 231 Brigade at Le Hamel. The 24th Lancers were held in reserve to be landed later in the afternoon, but due to bad weather and congestion they did not land until 7 June.

Due to the shelved nature of the beach, the landing craft grounded early and the troops had to wade ashore. The defences in this area were weak and the troops easily subdued the defenders. They then pushed on inland to silence the gun batteries behind.

On the “JIG” sector the 1st Battalion, Hampshire Regiment landed, but due to delays were without the support of tanks. Heavy machine-gun fire caused the death of the 1st Hampshire’s commanding officer and also their second in command (2iC) within minutes of landing.

The battle for Le Hamel ground to a halt and casualties mounted, but direct support by the 147th Field Regiment, Royal Artillery (2nd Army) helped to reduce the strongpoint and it was finally taken at 16.00 hours.

By the end of the day nearly all of the 50th Division’s objectives had been captured. In the east contact was made with the Canadians South of Tierceville. The 69, 56 and 151 Brigades dug in on a line from Vaux-sur-Aure to Coloumbs. The 56 Brigade completed the day one mile short of Bayeux, 151 Brigade group reached the Caen-Bayeux road and the 69 Brigade had linked up with the Canadians and advanced a massive eight miles inland. The 7th Battalion, Green Howards had advanced so far they had to be pulled back to Coloumbs. Patrols from the 2nd Gloucester’s had reached the outskirts of Bayeux.

To the west, Arromanches was reached at 2000 hours and reported clear of enemy an hour later.

The men of the 47 Royal Marine Commando dug in on Hill 72 south of the Longues-Sur-Mer battery; their objective of the Port en Bessin would not fall until the 8 June, after serious heavy fighting.

Fighting Inland
The next day the bridgehead was enlarged, St Leger was captured and the leading elements of the Sherwood Rangers entered Bayeux to a warm reception.

8 June saw the 8 Armoured Brigade form a mobile column consisting of the 61 Recce Regiment, 1st Dorsets, 288 Anti-tank Regiment, RA, plus A Company of the Cheshire Regiment. An advance was ordered on a two-axis front with the 61 Recce Regiment on the right and 24th Lancers on the left.

On 7 June the 6th Green Howards had been ordered to advance and by 10.00 hours had passed through Rucqueville en-route for Ducy-Ste-Marguerite. Meanwhile the 7th Battalion Green Howards had begun an assault on the wireless station west of the Coloumbs-Loucelles road. The attack, conducted by the A and C Companies with B Company in support, was a complete success and resulted in 50-60 prisoners being taken. Both battalions then dug in and started receiving reinforcements and conducting fighting patrols in the area until 11 June when, the advance began again.

9 June saw A company 1st Dorsets, with 4/7 Dragoon Guards in support, moving through Audrieu south of the Caen rail line, while the Sherwood Rangers moved west around Audrieu to find an open flank. As the 8th Durham Light Infantry (DLI) became available, they were attached to the Sherwood Rangers and moved towards Point 103 mounted on the tanks. By 13.00 hours they were firmly ensconced on Point 103 and the 24th Lancers and 147th Field Regiment, RA were ordered to move up.

An attack was ordered on St Pierre for 17.30 hours using the 8th DLI and 4/7 Dragoon Guards, supported by self-propelled guns of 147th Field Regiment and machine-guns of the 5th Cheshires. A captured POW reported that St Pierre (1km east of Tilly-sur-Seulles) was lightly held, but it was found later that this was incorrect. It was finally cleared of enemy by 19.00 hours. By the evening of 9 June St Pierre was held and the 1st Dorsets along with the 4/7 Dragoon Guards were on Point 103.

10 June saw the 8th DLI being attacked by elements of Panzer Lehr Panzerdivision to try to clear the British from St Pierre.

Attacks were also directed to clear Point 103 from the west. By the afternoon all attacks had been beaten off with heavy casualties to the Germans (2 Tigers, 4 Panzer IVs, and 3 75mm SPs). In the evening an American liason officer arrived and gave the 50th Division access to a 155mm Artillery Regiment allowing targets to be engaged outside the range of 147th Field Regiment’s guns.

On 11 June an attack on Cristot to the East of Point 103 using 69 Brigade was planned against elements of 12. SS-Panzerdivision. The 7th Green Howards were to advance on the left flank to secure Brouay and make contact with the Canadians at Putot-En-Bessin. Meanwhile 6th Green Howards were to attack Cristot with support from 4/7th Dragoon Guards and 147th Field Regiment. The attack failed to capture its objective and stalled one field short of Cristot and the attack on Brouay failed to penetrate the defensive positions.

On 12 June further attacks were planned to extend the bridgehead, an attack on the Tessel-Bretteville feature was organised and carried out in the morning. It was to be a two-part attack with the first objective the high ground overlooking La Caude Rus, and the second part the Juvigny to Fontenay-Le-Pessel road. The first objective was captured, but further progress was stalled by Tigers and Panthers in the woods around Point 102. Meanwhile the 69 Brigade had tried to clear the woods between Cristot and St Pierre, but suffered heavy casualties.

Orders were then received for the 50th Division to hold the line from Point 103 to La-Belle-Epine, the 8th DLI were pulled back from St Pierre and the Sherwood Rangers were ordered to cover the withdrawal.

This left the 69 Brigade holding Point 103 with the 5th East Yorks in support, while the 146 Brigade (49th ‘West Riding’ Division) held the Loucelles road.

Tilly-sur-Seulles
With its infantry brigade still waiting to land, 22 Armoured Brigade of the 7th Armoured Division was sent forward to assist the 50th ‘Tyne and Tees’ Division in taking Tilly-sur-Suelles. The mission was to follow the 50th Division’s 56 Brigade and, once they had opened a hole in the line, to exploit it all the way to Villers-Bocage and then press on to Evrecy, deep in the German rear.

On 11 June the 50th Division attacked in the area of Tilly-sur-Seulles, Juvigny, Hottot-les-Bagues, and la Senaudiere, only to find the newly arrived Panzer Lehr Division also attacking head on into the same area. As the forces clashed the 7th Armoured Division moved forward in support. Even with their support, the attack stalled well short of its intended line.

After another attack on St Pierre on the evening of 11 June the town was abandoned. The 8 Armoured Brigade withdrew to rest and refit and their positions were taken over by the 49th Division, which allowed the 50th Division to concentrate on Tilly-sur-Seulles.

On 14 June they launched an attack led by the 151 and 231 Brigades supported by the 4/7 Dragoon Guards. The objectives were the villages of Lingévres and Verriéres. The 6th DLI took Verriéres and pushed south towards Hottot-les-Bagues. Once more they faced the Panzer Lehr’s Panzergrenadiers through the difficult bocage country, where the defenders were always at an advantage. The attack was supported by heavy air and artillery support. The 9th DLI advanced towards Lingévres. They soon came under fire from a large wood astride of their axis of advance. Heavy casualties were taken, but they were finally were able to advance through the wood into the village. The village was taken and defensive positions were organised against German counter-attacks. The inevitable counter-attack arrived and quickly knocked out four 6 pdrs, but the supporting 4/7 Dragoon Guards were more successful, knocking out six Panthers. The Germans attacked again at 1615 hours from the west. Three more Panthers were knocked out by the DLI anti-tank gunners.

Much like the 9th DLI the 6th DLI were fired on from the wood in the line of their advance. They too were supported by a squadron of the 4/7 Dragoon Guards. They took the village, but could not advance any further forward. During the night they withdrew from the village to the north.

The following day the attack was taken over by the 56 Brigade, who completed the capture of Tilly-sur-Seulles. On 15 June the 231 Brigade took Hottot-les-Bagues with the 1st Hampshires. A German counter-attack supported by tanks ejected them from their prize, and another attack was arranged with the 2nd Devonshires leading. The village was once again held by evening, but the brigade command withdrew the battalion as the hold on the village was not secure. This allowed the Germans to attack Tilly-sur-Seulles and re-occupy it. The town was finally taken on 17 June. In the meantime the 50th Division became bogged down, and little further progress was made for the rest of June.

Another push to take Hottot-les-Bagues was launched on 9 July, but was pushed back by the Germans. Another attack was arranged by 11 July to be carried out by the 231 Brigade supported by the Sherwood Rangers. It was supported by a massive rolling barrage. Progress was made, but the village was not taken. It wasn’t until 19 July, after the Germans had withdrawn across the whole division front, that the village was finally securely in British hands.

Operation Bluecoat
The next major action of the 50th Division was in August during Operation Bluecoat. XXX Corps (7th Armoured, 43rd and 50th Divisions) objectives were Villers-Bocage, Aunay-sur-Odon and finally Mont Pincon. The operation began on 30 July and initially progress was slow. The 50th Division was held up at Amaye-sur-Seulles.

The British pushed the front line back by 13km (eight miles), seized the German dominated high ground south of Caen and drove a wedge between the German Seventh Army and Panzer Group West. Mont Pincon was finally taken by the 43rd ‘Wessex’ Division on 6 August.

The operation was not strategically vital in itself, but it facilitated the US advance by concentrating the increasingly depleted German forces on the Caen area.

After France
The 50th Division was considered to have performed well in Normandy; in fact, out of the three divisions that were veterans of the desert (the others being 7th Armoured Division and 51st Highland) it performed the best. It was one of the driving forces behind the British advance. However, it was exhausted by the end of the battle.

It later played a minor role in Operation Market Garden, where the 231 Brigade was detached to help support the advance of Guards Armoured. The division stayed in northwest Europe until December 1944, when it was again returned to Britain, this time for the remainder of the war, and was converted into a training division. At the end of the war, it was sent to Norway and converted into British Ground Forces, Norway.

The 1st Czechoslovak Independent Armoured Brigade Group (CIABG)

Since I’ve been spending my recent months learning Czech and enjoying Czech cinema, I was inspired to tackle the CIAB as a D-Day: British project. I am still cooking it up, so I will be sharing the project in short while on the home page, but for the time being I highly recommend everyone check out this Flames Of War article from which I got most of my info. 

– Alex 

The 1st Czechoslovak Independent Armoured Brigade Group 
with Jonathon Forsey

The opening of the Second Front in Europe on 6 June 1944 gave the exiled Czech troops who had been training in the UK the chance to take the fight to the Germans and, they hoped, the chance to take part in the liberation of their homeland.

Some Czech troops who had made their way to the UK had combat experience in the desert, others formed support units. This nucleus of troops formed an Infantry Brigade in mid April 1943, later converted to an Armoured Brigade in September 1943.

The men of the 1st Czechoslovak Independent Armoured Brigade Group (CIABG) were anxious to get to grips with the enemy who had forced them from their homes, but had to wait until 30 August 1944 before the Brigade was deployed to France, initially assembling at Falaise.

The Brigade
The Brigade, under General Alois Liska, was trained, organised and equipped along British lines. The troops who assembled at Falaise comprised a powerful mechanised all-arms force.

The Brigade HQ comprised Cromwell IV tanks and Sherman OP tanks for forward observers. The main “teeth” of the Brigade were found in the two (later three) armoured Regiments. The 1st Armoured Regiment under Maj. S. Rezabek and the 2nd under Lieut. Col F. Seda were similar, each comprising an RHQ of Cromwell VII tanks and a troop of Sherman Firefly VC tanks armed with the formidable 17pdr gun. Forward observers were carried in Cromwell IV OP tanks.

The Regiments each had an Armoured Recce Troop with Stuart VI Light tanks, and three squadrons, (‘A’,’B’ and ’C’) with Cromwell IV and VII tanks, plus Cromwell VIII 95mm Close support tanks in the SHQ. There were no Firefly or Challenger tanks in the squadrons themselves.

The Brigade’s Motor Battalion under Lieut. Col J. Chvalkovsky contained veterans who had seen service in North Africa, plus retrained troops of the former 200th (Czech) Light AA Regiment. The Battalion was organised along British lines, with troops riding in M5 halftracks and Universal Carriers, the Battalion including its own recce element in M3A1 White scout cars, plus 20mm Polsten AA guns and attached 6pdr anti tank guns, 3” Mortars and Vickers Medium Machine Guns.

The Brigade had its own Armoured Reconnaissance Squadron under Major V. Velimsky, comprising Stuart VI light tanks, Humber Scout cars and a small number of Cromwell tanks.

This unit was later expanded into the Brigade’s 3rd Armoured Regiment when the Brigade adopted a relatively static existence in the winter of 1944/45. This Armoured Regiment differed from the first two in the Brigade by being equipped with heavy Churchill III/IV and VI Infantry tanks. However, the Churchill’s did not see any offensive action during the siege.
The Brigade’s AT Battery, the “oddil K.P.U.V” under Maj. A. Sitek initially contained two troops of 17pdr anti-tank guns, initially towed by Chevrolet 30cwt trucks, later by Morris EA 4 x 4 vehicles. A third troop was added in the winter of 1944/45.

The Field Artillery Regiment under Col S.Rajmon initially comprised two batteries (“P” and “Q”) of towed 25 pound guns, with a further battery, (“R” Battery) added during the winter of 1944/45.

These core units were supported by an AA Troop with towed 40mm Bofors guns and an overworked and slightly under strength Engineer Company which was again expanded during the 1944/45 winter.

To the disappointment of the men of the CIABG, they were not to press East. Instead, they were directed to the Coast, with the mission of containing the remaining German bastions of the once formidable Atlantic Wall. The Allied advance stranded substantial German forces in ports along the coast and the defenders of these ports had been ordered by Hitler to hold them to the last.

To Dunkirk
Liska’s men, as part of First Canadian Army (and later part of 21st Army Group) were assigned the role of containing the German garrison trapped in the port of Dunkirk. Canadian troops of the 2nd Canadian Infantry Division had arrived at Dunkirk in September 1944, contained the defenders and handed over the task of besieging the valuable port to the CIABG on 6 October 1944. The task was to contain the powerful but essentially immobile garrison, rather than to storm the port.

The siege role ill suited the Czechs, who had insufficient manpower for the task and lacked the specialist engineering vehicles necessary to reduce the inland defences.
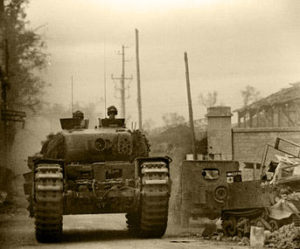
The successful, but costly, captures of Le Havre, Dieppe, Boulogne and Calais had given the Allies caution. Dunkirk as a prize was not required at the cost of significant casualties. The mobile formation had to content itself with maintaining an impenetrable cordon around the city, prohibited by the French authorities from mounting any prolonged bombardment of the historic centre.

The Czechs were not alone in their task, being supported by Canadian and British heavy AA units, whose 3.7” AA guns were employed in the direct role, as were the additional 40mm Bofors guns of the 125th Light AA Regiment.

The 7th Royal Tank Regiment lent the support of its heavy Churchill tanks. A shortage of infantry was in part addressed by the formation of two battalions of Free French infantry formed from the local F.F.I (Forces Francaises d’Interieur) under Lieut. Col Lehagre, equipped and armed by the British.

The Defenders
Dunkirk, as part of the “Atlantic Wall”, possessed formidable defences to protect itself from attack from sea. These included concrete bunkers, pill boxes, coastal defence and anti-aircraft emplacements.

The inland part of the perimeter was defended by areas of flooded low country, bunkers, fortified farm houses, improvised pillboxes and thousands of mines, including British mines captured after the evacuation in 1940.

The defenders were well stocked with artillery, having over 80 pieces with calibres ranging up to 200mm, plus nearly 100 anti-tank guns of various calibres. Defenders were also plentiful, if their quality was uneven. At the time of the eventual surrender of the port to the CIABG on 8 May 1945, there were over 11,000 troops. These men were drawn from Luftwaffe, Kriegsmarine, Festung and Wehrmacht units, including 226th infantry Division, 346th, 711th, 49th and 97th Divisions and the 26th and 1046th Fortress Battalions. Of the total, approximately 2,000 were part of the Waffen-SS Reinecke Group. In accordance with common German practice, the defenders formed ad hoc Kampfgruppe to defend specific sectors of the perimeter. Losses during the siege amounted to approximately 1,000 men.

The Siege
As the CIABG lacked the means and the orders to take Dunkirk, the Czechs set about establishing a cordon to contain the garrison and prevent any breakout by valuable troops. The CIABG’s mission was to harass the defenders, engage in aggressive patrolling and cut off coastal supply routes.

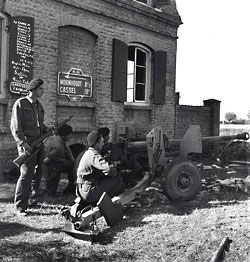
Despite the relatively static nature of the operation, the men of the CIABG were occasionally able to demonstrate their prowess and mobility in mobile battle. On 28 October 1944, elements of the 2nd Armoured Regiment and the Motor Battalion conducted a feint which drew defenders out from their prepared positions.
A lightning riposte against the exposed German infantry saw over 40 casualties inflicted on the defenders at a cost of only two casualties to the CIABG. This operation drew significant praise for the manner of its execution from higher levels, including Field Marshal Montgomery.

These opportunities were, however, rare and morale did suffer as it became apparent that the Brigade was not to be permitted to join the U.S. forces which were heading toward the Czechoslovakian homeland. Only a token force of 150 men was permitted to accompany the U.S. Troops headed toward their eventual meeting with advancing Soviet forces.

On the positive side, casualties incurred during the siege were relatively light, amounting to 167 dead, 461 wounded and 40 missing. One peculiarity was that the availability of Czechs who had been forced to fight in the German Army, but who had been captured or deserted to the Allies meant that the Brigade actually grew over time, enabling the strengthening and addition of units as outlined above.

The CIAB In Flames Of War
There are two options for fielding the CIAB in D-Day: British. The Czechozlovak Motor Company can of course be represented with the D-Day: British Motor Company. Both Cromwell formations could be used to represent the CIAB tank companies for different purposes. Use the Armoured Recce Squadron to represent the Czechoslovak Cromwells, or use the Desert Rat Cromwell Armoured Squadron to represent the Czechoslovak Crowells with the HQ Friefly VCs apportioned out to the Cromwell troops in the company you’re representing.

The Marksman

with Garry Wait

One of the newest, most exciting weapons featured in the British Army book is the Marksman Self Propelled Anti Aircraft Gun (SPAAG). Following the Falklands War, Prime Minister Margaret Thatcher was livid at the losses sustained by the Royal Navy and the British Army, in part due to issues with the Rapier towed antiaircraft missile systems. Problems were experienced due to the need to “zero” the system and calibrate after each road move or unloading from a Naval landing craft. This meant valuable time of 15 minutes was wasted while cables were laid, stabilising of the sights and the calibration of the Blindfire radars was done.

It was acknowledged that the British Army’s reliance on missile systems was overoptimistic and a few within the Ministry of Defence noted that the Argentines had been pleased to have available Swiss Oerlikon twin 35mm Antiaircraft weapons on ground mounts for the Falkland Island defences.
Some of these weapons had even been captured and pressed into use with the RAF Regiment, who were delighted to have a solid backup to the longer ranged but troubled Rapier system.

Thatcher met with Minister of Defence Michael Heseltine in 1985 to discuss options as tensions had historygrown extremely hot with the Soviets. When the Iron Lady asked about options, Heseltine’s private secretary had a brainstorm. He pointed out that the Finns had expressed interest in a Marconi systems private development, the Marksman. This was a modular turret that could be mated to almost any Main Battle Tank. The Finns had in fact ordered a prototype system to be tested and put onto a modified Polish made T55. Although the testing was in the preliminary stages, the weapon
had shown promise.

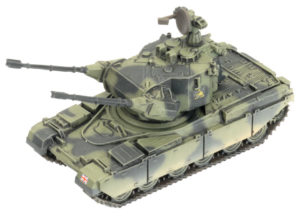
The Prime Minister jumped at the idea, especially when advised that 15 fire units of twin 35mm Oerlikon KDA guns that had been captured in perfect order from the Argentine Army and were still currently in use with RAF Regiment reservists of 1339 Royal Air Force Auxiliary Wing. These weapons were confiscated by Royal Ordinance Factory in short order and integrated with seven other sets of 35mm that were in testing along with the sole prototype unit. This gave the factory enough for seven batteries of three Marksman SPAAG’s as an initial production run. More guns would be forthcoming from Krauss Maffei who provided spares from their busy Gepard production lines.

With the Challenger tank coming on line and taking over from existing MBT regiments, two squadrons of recently replaced Chieftains were stripped of their turrets and assigned to the fledgling project. For the first time since the Crusader SPAAG of World War II, the British Army had access to a world
class self propelled anti aircraft gun. Done in complete secrecy, this weapon would even surprise the average “squaddie” who expressed their shock and admiration at the exciting new designs when displayed for the first time on Salisbury Plain.

The Marksman provide an outstanding gun platform and was noted to be even more stable than the T55 the Finns had provided for testing, as the Chieftain was larger and more robust for the heavy recoil of the twin cannons. Some wag tried to describe it as a Brit Gepard, which was shouted down by indignant Royal Ordinance Factory staff. One superintendent pointed out that not only was it better armoured than the Gepard, it also had a laser rangefinder for engaging ground targets out to 8 kilometres, Marconi radar enabling air targets to be engaged out to 12 kilometres and fully stabilised gun sights for the commander and gunner. British technology had actually improved on the work of the Bundeswehr’s prized SPAAG.

More than a few officers bemoaned the fact that it had taken the Cold War turning hot to get the stingy taps of the Treasury to open a little more to provide funds for this superb weapon. Having access to ammunition kindly provided by the Argentine Army had proved helpful in getting reluctant bean counters to sign off on the process.

Initially, as the British Army was already heavily committed with the British Army of the Rhine, operators from the Royal Air Force Auxilary Regiment were integrated with British Army Chieftain crews to provide composite teams to operate the new equipment. This ensured a clever mix of
experienced gunners to operate the expensive new electronics and qualified drivers to maintain the frustrating Leyland engines of the Chieftain tanks. As Corps assets within British Army of the Rhine, the new vehicles were extremely popular and the seven batteries tended to see lots of action in the
Third World War. It was a particularly innovative weapon that took the battlefields in World War III as the Marksman. British troops soon found that the Marksman worked very well as a “backstop” support to the highly
successful Tracked Rapier. Occasionally ground commanders got overconfident and put the Marksman in the front line as a fire support weapon. Even with the thick hull armour of the Chieftain chassis, the vehicles didn’t stand up long against infantry RPG fire and cases are known of local commanders being castigated for such waste of scarce resources for inappropriate missions.

In game terms, you will find the system works very well as a complement to the existing missile systems as a mobile and well armoured platform capable of medium range effective AA support. As summarised to the troops on issue originally :

DO :

  • Keep the Marksman at range, behind the front line armoured forces it’s designed to protect.
  • Prioritise against air targets which are the bread and butter of the Marksman system.
  • Protect the Marksman with combined dismounted and armoured forces, ensuring it’s not swamped by enemy infantry.
  • Team up the Marksman with Tracked Rapier and if possible Blowpipe to ensure the full range of Air Defence assets are used appropriately. The key is to have Rapiers at the back, Blowpipe in concealing terrain scanning the skies while the Marksman keeps up with the armoured thrust forward.
  • Plan the use of the Marksman carefully, using it’s excellent rate of fire and mobility to provide an umbrella of firepower over your vulnerable armoured spearhead.

DON’T :

  • Risk the Marksman unit as a solo asset, remember you’re part of a larger team.
  • Assume that the Marksman is a dedicated armour killer. You only carry 20 rounds per gun of APFSDS ammunition. Make them count. Your primary mission must be air defence, the anti vehicle ammunition is not there for use as a primary choice.
  • Overestimate the range of the guns. Unlike the missile systems of the Rapier and Blowpipe that you’ve become used to, the Marksman is lethal – except at shorter ranges. Use the mobility of the vehicle to make the enemy pay. You have exceptional firepower and mobility and this should be used carefully.
  • Run the depleted formation, Marksman provide best support as a full unit.
  • Expose the Marksman to enemy fire until you’ve cleared the way. This secret weapon is priceless and not to be squandered in small scale efforts.

In conclusion, the combination of the two forces used here – Royal Tank Regiment and Royal Artillery – bring to mind the two mottos, which are respectively “Fear Naught” and “Ubique” (which translates as “Everywhere”) The Marksman truly allows your armoured crews to Fear Naught, Everywhere.

The Puma in Normandy

with Rich Hamilton

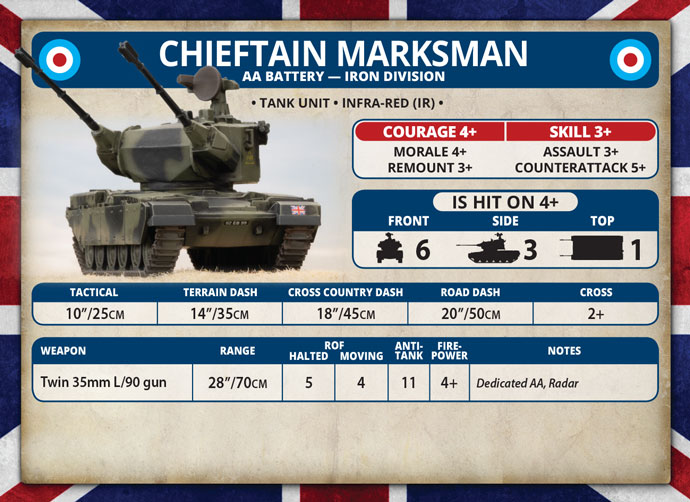
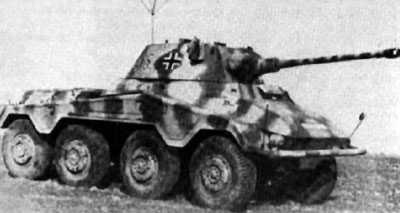
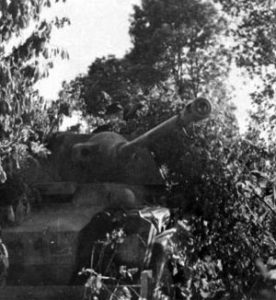
One of the many neat bits of kit you can find in D-Day: German is the Puma and its variants. To give you a bit of background on this unique beast before you bring it to the table we’ve unleashed another great historical article form the Flames Of War archive.

“The best patrols I had were those with clean guns. Even worthwhile targets were only reported and not engaged; that is the business of others. A troop leader with a tendency to bang away is useless for reconnaissance purposes since he is soon located by the enemy and chased like a rabbit. A report giving the location of an enemy tank leaguer is of infinitely more value than five shot-up lorries.”

– Oberst a.D. Fabian von Bonin von Ostau on German armoured reconnaissance tactics

The 234 series of armoured cars was one of the most advanced concepts in wheeled fighting vehicle designs to appear during the war. It had improvements in armour, speed and range. In its original 1940 concept the 234 series was to operate in hot climates. The Czech firm Tatra produced its air-cooled V-12 diesel engine that had an out put of 220hp. The Bussing organization made the hull, which was made of monocoque construction. Daimler-Benz and Schichau were jointly responsible for the turret.

The Puma also addressed the most common complaint among armoured car crewmen; the lack of firepower when forced to engage the enemy. It included the same 50mm KwK L/60 gun carried in the Panzer III Ausf J and L tanks in a cramped enclosed turret with all around traverse. The gun did feature a muzzle break and the vehicle carried 55 rounds for the main gun. The weight of the 50mm gun and turret did result in the loss of some speed for the Puma, but this proved to be insignificant in the vehicles combat performance.

By the time of the Normandy campaign the basic organization of the armoured recon battalion had changed from its original 1939 organization.

Battalion Headquarters
Staff Company (Stabskompanie)
No. 1 Armoured Recon Company (Panzerspahkompanie)
No. 2 Recon Company (Aufklarungskompanie)
No. 3 Recon Company
No. 4 Heavy Company
Supply Company (Versorgungskompanie)

In practice this organization was only theoretical. The Pumas were to make up the Panzerspähkompanie of all Panzer divisions, but by the summer of 1944 there were not enough Pumas to fill the organisational needs of Germany’s Panzer divisions.

The Sd Kfz 234/2 would see action in Normandy in three Panzer divisions. 2. Panzerdivision and Panzer Lehr Panzerdivision were both fully equipped with the “Puma” having a compliment of 26 vehicles. The 2. Panzerdivision’s along with the Panzer Lehr division’s Pumas can be represented with the D-Day: German. First SS Panzer “Liebstandarte Adolf Hitler” also had a number of Puma armoured cars but did not posses a full compliment of them.

The combat techniques of the Puma were to see but not be seen and engage the enemy only when necessary. The radio was its most important weapon for its primary mission. Most of the time the Pumas were organized into three car groups for intelligence gathering missions on enemy movements and locations.
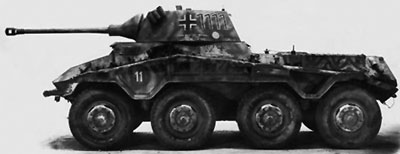
Of all the missions the Puma crew were assigned infiltration was the most difficult. Oberst a.D. Fabian von Bonin von Ostau explains: “The initial penetration into unknown enemy territory was difficult. For this purpose our own local attacks were taken advantage of before the enemy could recover his balance. When one had achieved some penetration, the advance became easier.”

German crews learned important techniques to improve stealth such as easing the vehicles in to gear and running in low gear so they made very little noise. This was opposed to American crewmen who were known for ‘gunning’ their engines and thus giving away their positions to a skilled observer.
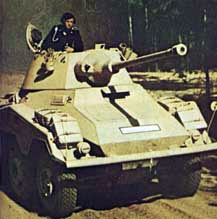
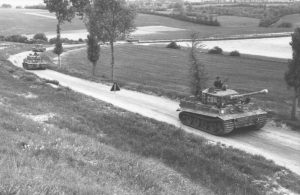
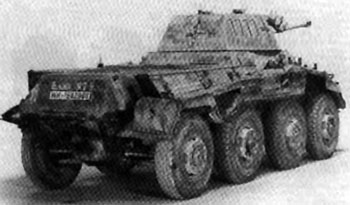
The Puma were used to find the enemy, screen the flanks, and the companies were only used together in certain situations such as to screen the division during a withdrawal. According to Heinz Guderian they conducted “the ground reconnaissance for the panzer divisions they were assigned to. Only in open terrain, when being followed or to protect a withdrawal is the company used together.” The Puma performed well in its traditional roll and even showed strength on the attack.

The Pumas first saw combat in Normandy with the Panzer Lehr division’s drive into the invasion zone on 8 June. A few days later on the night of 13 June Pumas of 2nd Panzer Division engaged elements of the US 26th infantry near Caumont which had inconclusive results.

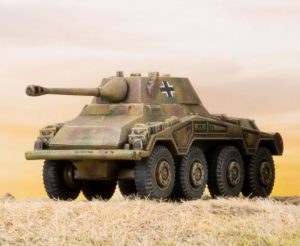
The Panzer division’s greatest enemy in Normandy proved to be the Allied fighter-bombers and the Pumas struggled with the foe as well. The stealth and infiltration techniques practiced by the Aufklärungs companies whose emphasis was on seeking cover during the day did help a high percentage of Pumas to survive the heavy damage the Panzer division took during Normandy. Of the original 26 Pumas from the Panzer Lehr division that started the campaign 8 survived Falaise Gap. In that same time only 20 tanks survived out of the starting strength of 109.

As the Panzer divisions involved in the Normandy campaign were rebuilt in the fall of 1944 the Sd Kfz 234/2 was no longer available in any numbers and was replaced with the more readily available Sd Kfz 234/1 and Sd Kfz 234/3 at that time. With the end of the campaign in Normandy, so too ended the reign of the Puma as the Panzer division’s premiere armoured car.

Sources
Milsom, John and Peter Chamberlain, German Armoured Cars of World War II, Charles Scribner’s Sons, New York: 1974.

Perrett, Bryan, German Armoured Cars and Reconnaissance Half-Tracks 1939 – 1945, Ospresy Publishing, New York: 1999.


German Heer Panzer Divisions in Normandy

with Steve Bernich

D-Day: German offers Flames Of War players all they need to field any of the Heer Panzer Division of Normandy. This article has everything you’d want to know before sinking your teeth into one of these colourful and storied unit miniature form.

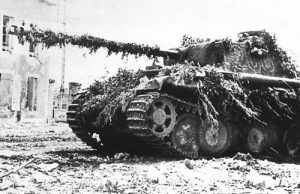
The Normandy Campaign is well known for many battles and engagements in which the Wehrmacht was on both ends of the offensive onslaught that would mark the battle for northern France and the eventual breakout in late August. The early morning hours of 6 June 1944 would find the Germans mounting a determined resistance that would soon be forced back on it’s heels by the overwhelming material superiority that the Allied armies brought to bear.

Key to Hitler’s strategy of pushing the “little fish back into the pond” was the ability of the Panzer divisions to halt the Allied offensive at the beachhead. However, because of the Fuhrer’s own belief that a larger invasion was imminent at Pas de Calais, several key Panzer divisions were held from the Normandy campaign until it was too late while Generalfeldmarschall Rommel had to make do with only four divisions under his command.

Many of the panzer divisions that would see action in the two months of the Normandy campaign were Waffen SS and not necessarily under the command of the standard Heer army generals. However, the 2., 9. and 116. Heer Panzer divisions would all see action in northern France alongside the 21. and 130. Panzer Lehr Panzer divisions.

Playing the 2., 9. or 116. Panzer divisions in Flames Of War  can be done with the D-Day: German book and Command Cards.

2. Panzerdivision

The 2. Panzerdivision was already a veteran force by 1944, having fought in almost every theatre up to that point including Poland in 1939, Western France in 1940, the Balkans in 1941, the Eastern Front from 1941 to 1943 before being transferred to the West in 1944. The experience paid off as its Allied opponents considered it an equal to the Waffen SS divisions. However, that experience would not be able to save the 2. Panzerdivision from the onslaught that shook Northern France in the summer of 1944.

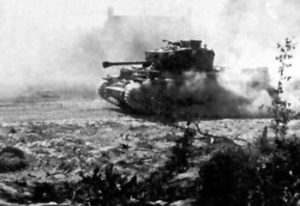
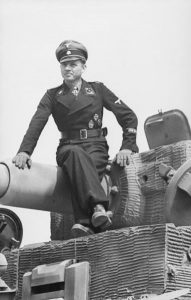
Commanded by aristocratic Heinrich von Luttwitz, it was stationed at Amiens for refitting from January of 1944 as part of 15. Armee. On the eve of the invasion, the 2. Panzerdivision was several hundred men over strength and reported 94 operational Panzer IVs and 73 Panthers; a very strong division. In preparation for the invasion, the 2. Panzerdivision was put under direct command of Generalfeldmarschall Erwin Rommel. Only four divisions (2., 21., 116. and 130. Panzer Lehr Panzer divisions) were given to Rommel who suggested that the key to counterattacking the invasion, no matter where it came, was to have Panzer divisions rolling onto the Allied positions before they could establish a strong beachhead.

The rest of the Panzerwaffe would be held under Hitler’s direct command, to counterattack a possible second invasion site.

However, Rommel’s control would still not be enough to get the 2. Panzerdivision into position until 13 June. The division was forced to detour approximately 160 miles through the French countryside due to bridges destroyed by Allied air strikes and Allied air superiority, which made panzers moving during the day the equivalent of a suicide mission. Lead elements supported Panzer Lehr and SS Schwere Panzerabteilung 101 in the attack on Villers-Bocage. Several of the 2. Panzerdivision’s tanks were lost, but the village was recovered from the British 7th Armoured Division under the onslaught of the three tank forces coming from its north, south and east sides. That evening, elements of the 2. Panzerdivision were used at a gap in the German lines near Caumont, with preparations to launch an attack the following morning. However, the attack was never launched as a bombardment of Allied air, artillery and naval guns opened on their start positions. Oberfeldwebel Hans Erich Braun, with the 38.
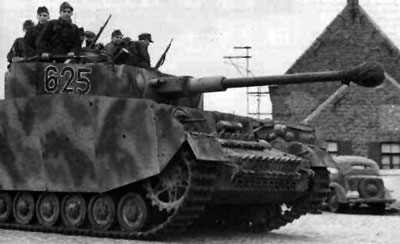
Panzerjägerabteilung attached to the 2. Panzerdivision, described it as “a hurricane of fire” which “raged through the countryside, wrapping everything in grey smoke and dirt.” (Hargreaves, pg.81)

After being stymied at Caumont, the rest of the division finally caught up to its forward positions a week later. The 2. Panzerdivision was finally able to form a coherent fighting force. For the rest of June, the 2. Panzerdivision operated in and around Caumont. The Panther battalion was detached to help stop the British Operation Epsom. Division reports indicate that the Panthers alone were responsible for 53 destroyed British tanks and 15 anti-tank weapons in a single day.

In the third week of July, the 352. Infanteriedivision relieved 2. Panzerdivision, but the rest was short lived. Strength reports indicate it was rated “Kampfwert I”, which indicates the ability to take on any offensive mission. Operation Cobra began on 25 July and the tanks of the 2. Panzerdivision were too valuable to let sit idle while the Americans broke through the German lines. On 28 July Fieldmarschall Guenther Hans von Kluge ordered the 2. Panzerdivision into action against the Americans from its position near Caen. Crossing the Vire River, the 2. Panzerdivision took a position at Tessy-sur-Vire, flanking the American breakout. They helped stop the US XIX Corps near Troisgots, but soon had to withdraw because of the threat of envelopment by American infantry.

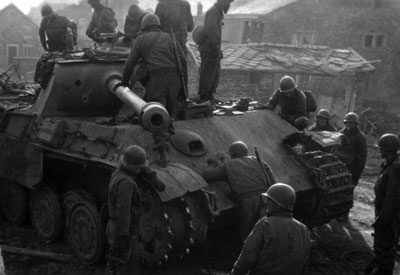
The Normandy campaign gave the Panzerwaffe little time to rest between engagements, between the constant press of the enemy and Hitler’s frantic attempts to stem the tide. Perhaps most famous of his costly counterattacks was Operation Luttich, or “Liege”, named for a battle in World War I. The operation was to feature a three pronged assault to open a ten mile wide thrust behind the American armoured spearhead during Cobra, effectively isolating the attacking elements from their supply depots, as well as aiming to have the German lines reach the sea at Avranches. The divisions involved were to be the 2. and 116. Panzer divisions, the 1. and 2. SS-Panzer divisions as well as the 17. SS-Panzergrenadierdivision on the southernmost flank of the attack.

The original jump off date was 6 August, but due to too many of the units involved not being ready, Kluge delayed for 24 hours. Kluge would receive the harshest of criticism for not starting the operation on time, but the fact was that any mass of German armoured divisions was likely to attract Allied air power, which hampered the movement of tanks to their start points.

Despite of delays, the attack was launched on a foggy morning on 7 August. The fog allowed 2. Panzerdivision to penetrate 7 miles into Allied lines before being stopped by Combat Command B of the US 3rd Armored division. The Panther battalion had reached St. Barthelemy, just north of Mortain, an American strongpoint. As the Panzer V tanks inched through the village, the American ambush began a stretch of intense fighting. The Panthers did not retreat, Luttwitz was determined to bludgeon his way through the town. In spite of the anti-tank guns and bazookas arrayed before the Panther battalion, they reached the other side of St. Bathelemy two intense hours later. Advancing out into clear terrain, it was not long before a flight of approximately 20 Typhoon fighter-bombers spied the concentration of German armour and pounced, sending them back into the relative safety of the village. American counterattacks were vicious and strong, and by 9 August, 2. Panzerdivision found itself back at its start positions.

With the failure of Operation Luttich, it became quite clear to most German forces in Normandy that the best plan of action was to retreat to the east, away from the encircling American, British and Canadian armies. In fact, by the second week of August, the Allies were working to encircle the German 7th Army in and around Falaise, birthplace of William the Conqueror. Many rear echelon units of the panzer divisions were already streaming east with whatever they could carry.

In fact, many vehicles of all types, including armoured fighting vehicles were being abandoned on the roadways. The risk was simply too great that a moving German vehicle would be attacked by the Allied air forces.

The 2. Panzerdivision was no different in this regard and after being forced back past Mortain, the division did an about face and attempted to breakout from Falaise and then to the Seine River where a new defence could be mounted. From 14 August on, elements of the 2. Panzerdivision would try to get to the small village of St. Lambert where the last remaining bridge over the Dives River still stood. The Dives was small as far as rivers go, but a bridge would enable some of the armoured vehicles to cross expediently without fear of bogging in the thick mud. The bottleneck at the bridge would be a site of horrible carnage that many soldiers on both sides would soon wish to forget.

By 21 August, the 2. Panzerdivision had in fact escaped from the Falaise pocket with little more than an infantry battalion left. It didn’t have a single surviving tank.

After Falaise, the division was once again went through a period of refitting and rest and would see action during the Wacht Am Rhein (Watch on the Rhein) offensive in December of 1944 where it suffered heavy losses. Near the end of World War II, the 2. Panzerdivision fought in the Mosel region and later in Fulda as part of the Thuringen Panzer Brigade before finally surrendering to American forces in May 1945.

Order of Battle – 2. Panzerdivision
Commanding Officer Heinrich von Luttwitz

2. Panzergrenadier Regiment
Panzergrenadier Bataillon I
Panzergrenadier Bataillon II
304. Panzergrenadier Regiment
Panzergrenadier Bataillon I
Panzergrenadier Bataillon II
3. Panzer Regiment
Panzer Abteilung I
Panzer Abteilung II
74. Artillerie Regiment
Panzer Artillerie Abteilung I
Panzer Artillerie Abteilung II
Panzer Artillerie Abteilung III
2. Panzer Aufklarungs Abteilung
273. Heeres Flak Abteilung
38. Panzerjager Abteilung
38. Panzer Pionier Bataillon
38. Panzer Nachrichten Abteilung
38. Divisional Support Units

9. Panzerdivision

The 9. Panzerdivision was another veteran division of various theatres before the Normandy Invasion. The 9. Panzerdivision saw action in the Western Campaign, notably in Belgium in 1940, the Balkans in 1941 for a brief period of time.

They then spent 1941 through early 1944 on the Eastern Front in various engagements including Kursk and the River Dnieper where it suffered heavy losses. Finally, the 9. Panzerdivision was transferred to northern France for rest and refitting in April of 1944 where it absorbed the 155. Panzer Reserve Division to get back to full strength.

The division would not be ready for action during the Cobra breakout by American Armored divisions, but it would be used to try and halt the advance shortly before the general collapse and attempts to escape through Falaise. Without its Panther battalion, the 9. Panzerdivision was set to oppose the advance of the Allied XV Corps composed of the U.S. 5th Armored Division and the French 2nd Armored Division. Unfortunately, the 9. Panzerdivision barely slowed the American offensive due to it being committed in bits and pieces as units arrived at their start points, as opposed to in one cohesive counterattack. With their backs against the Alecon supply dumps, there was little to fall back to. In fact, after a series of intense tank battles from 10 to 12 August, the supply dump itself was little more than an empty inferno. The division itself found itself surrounded and unable to fight, having lost approximately 100 panzers.
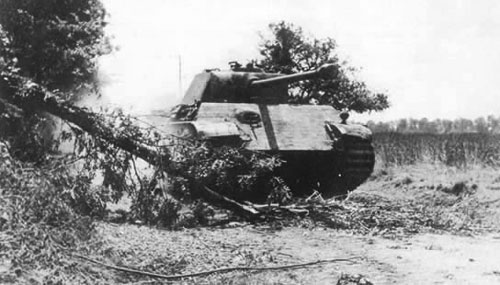
Escaping through Falaise, it again had to rebuild and would later see action at Aachen and in the Ardennes campaign before it finally surrendered to the Allies in the Ruhr pocket.

Order of Battle – 9. Panzerdivision
-Commanding Officer Oberst Max Sperling

33. Panzer Regiment
Panzer Bataillon I
10. Panzergrenadier Regiment
Panzergrenadier Bataillon I (half-track)
Panzergrenadier Bataillon II (motorized)
11. Panzergrenadier Regiment
Panzergrenadier Bataillon I (motorized)
Panzergrenadier Bataillon II (motorized)
50. Panzerjager Abteillung
9. Panzer Aufklarungs Abteilung
76. Panzer Artillerie Regiment
86. Panzer Pionier Bataillon
287. Heeres Flak Abteilung

116. Panzerdivision – Greyhound Division

The 116. Panzerdivision, the “Greyhound Division”, was formed in March of 1944 in France. It was comprised of the 16. Panzergrenadierdivision and the 179. Panzer Reserve Division and was sent to Pas de Calais, north of the Seine River, in preparation for the Allied invasion.

Initially assigned to Generalfeldmarschal Erwin Rommel’s Armee Group “B”, it had the ability to respond without Hitler’s authorization when the invasion occurred, unlike many of the other panzer divisions in the region. It was considered veteran due to the 16. Panzergrenadierdivision’s experience on the Soviet front and was rated as “Kampfwert I”, indicating it was ready for any and all duties.

The Greyhounds did not join the battle for Normandy until late in July. They were still conducting training exercises and were held in reserve should a British breakthrough at Caen occur. When the Americans captured St. Lo they were called up and sent into action on 28 July in the Vire River area. Heinz Guther Guderian, the 116. Panzerdivision Operations Officer and son of the famous tank commander, would later write that “fate did not smile on the 116. Panzerdivision” when describing the action of 29 July. A panzer battalion commander was immediately killed on their advance towards the American lines, halting the panzer columns and sending the supporting panzergrenadiers into hiding in the surrounding woods. Allied fighter-bombers pinned them down and force them to hold position, as breaking cover would invite further attacks. By 30 July, they saw heavy fighting against VII Corps, preventing the US 2nd Armored Division from advancing past Villebaudon and Percy. However, the combination of the Jabos (jagerbomber, American fighter bombers) and stiff resistance on the ground stopped the 116. Panzerdivision from getting further than they did the day before.
The Greyhound division changed to a defensive role along the Vire River to hold the key road junction at Pontfarcy until 3 August. Their counterattacks were all but ignored by the surging US 2nd Armored Division. The 116. Panzerdivision, which up until that point had seen little but defeat, got its chance on 7 August as part of the 3 pronged attack of Operation Luttich. Initially successful due to heavy ground fog, the 116. Panzerdivision found itself being sent back to its jump off position within two days. When ordered to remount the attack, aristocratic commanding officer Generaleutnant Graf von Schwerin refused to send his men and tanks into battle, well aware of the danger to the German army as the Allies began to encircle their positions. Corps commander Freiherr von Funck who accepted no excuses, even ones that made sense, sacked Von Schwerin.

Rumour has it that Von Schwerin then circulated a note to his troops telling them privately that they should head east at the earliest opportunity and attempt to escape from the pocket that was forming around Falaise.

Heading east fitted into high command’s plans. There was an attempt to have Panzer Group Eberbach, then comprised of parts of 1. SS-Panzer, 2. Panzer and 116. Panzer divisions, to stop Patton’s drive on Avranches. The plans for the attack were changed to a drive north in an attempt to stop the spearhead of US 5th Armored and French 2nd Armored divisions, hopefully destroying both. The attack was held until 14 August in Argentan when cooler heads prevailed. Perhaps it was the fact that the three panzer divisions could muster only 70 tanks between them convinced the German generals that it was time to head east out of the Falaise area.

Generalfeldmarschall Guenther Hans von Kluge, Army Group B commander asked for permission to withdraw on 16 August, got no response from OKW, so he then ordered a fighting withdraw of all units at 2pm on that same day. Hitler finally responded two hours later with the same idea, but added that 2. SS-Panzer and 116. Panzer divisions should strike forward in an attempt to widen the German exit for more German troops to escape in the hopeful confusion. The attempt was somewhat successful with the US 90th Infantry Division’s roadblocks at Le Bourg-St. Leonard being the primary target. The American riflemen controlled a ridge that had views of several of the escape routes just to the north of their position. The 90th was pushed off, but counterattacked and reclaimed the ridge that evening.

The next 24 hours saw intense fighting for control of the area, culminating in the US troops taking it permanently. After that attack, the men of the 116. Panzerdivision joined the general chaos of the attempts to escape the Falaise pocket.

By 21 August, the Greyhound division only had 12 functioning tanks when they reached the north bank of the Seine River, where they had begun less than a month earlier. In September 1944 the 116. Panzerdivision as the only unit garrisoning Aachen when the attack by US 3rd Armored Division began. Having little time to rest, the 116. Panzerdivision also saw action in Dusseldorf and most famously in the Battle of Hurtgen Forest in November. December saw them attacking near St. Vith as part of the Ardennes offensive and in February 1945 they defended the Roer River against First Canadian Army and British XXX Corps. They saw another month of aggressive defensive combat against the Allies and surrender when hostilities in the Ruhr pocket ceased in April 1945.

Order of Battle – 116. Panzerdivision
-Commanding Officer – Generaleutnant Graf von Schwerin

60. Panzergrenadier Regiment
Panzergrenadier Bataillon I
Panzergrenadier Bataillon II
156. Panzergrenadier Regiment
Panzergrenadier Bataillon I
Panzergrenadier Bataillon II
16. Panzer Regiment
Panzer Abteilung I
Panzer Abteilung II
146. Panzer Artillerie Regiment
Panzer Artillerie Regiment I
Panzer Artillerie Regiment II
Panzer Artillerie Regiment III
116. Panzer Aufklarungs Abteilung
281. Heeres Flak Artillerie Abteilung
228. Panzerjager Abteilung
675. Panzer Pionier Bataillon
228. Panzer Nachrichten Abteilung

By the end of the Normandy Campaign, the Wehrmacht’s panzer forces in the west had lost nearly all of their armoured units. Between the devastation of such places as Roncey, Falaise, the Seine River, as well as the Allied superiority in both the air as well as artillery, the Panzerwaffe suffered an insurmountable daily toll in the cost of both vehicles and men. The Germans were facing a materialschlact, a battle of attrition that cost the panzer divisions too much compared to their opponents. The Allies could afford to lose tanks as the massive material build up at the coast quickly replaced them, whereas the Germans felt every tank they lost and rarely received replacements. Instead vehicles were abandon in many cases when they could have been repaired if recovered. “The truth was that the Panzerwaffe, designed by its architects as a weapon of mobile strategic offence, was being steadily battered to pieces while performing a static tactical defence. Such counterattacks as it was able to make… were quickly halted and smashed up.” (Perrett, pg. 209). The cost would be astounding in both men and material.

By the time the Falaise Gap was closed, several divisions, including Panzer Lehr, 2. Panzer, and the 10. SS-Panzer divisions had no tanks at all and the five remaining divisions (9., 116., 21., 12. SS, 2. SS) had only about 60 tanks between them.” (Zaloga, pg. 89)

Wittman’s Last Day

with Chris Townley (Battlefront NZ)

Like many Flames Of War players, I have quite an interest in the German Big Cats (Tigers, Panthers and so on) and have featured them in many of my armies. I cannot put my finger on the primary reason for my love of these tanks, but it is probably a combination of factors including in-game performance, and real-world respect.

With the D-Day: German book I found myself really wanting to build a few lists (nothing like new plastic kits passing across your desk to get you excited) but thanks to my Big Four commitments I was reluctant to dive down the rabbit hole – that was until inspiration hit me! I have a box of partially assembled Tigers sitting in the man-cave (okay, garage) at home that I started and then stopped after being distracted by something else shiny!

Five Reasons I Love The New Plastic Tiger…

Now, you cannot think about Tigers without thinking about Michael Wittmann and his exploits in Normandy. His actions have become somewhat legendary amongst the modelling and gaming communities. We even made a specific model for him back in the day (see the article here…)

I’m drawn to building a list around him for a few different reasons;

  1. I can slowly build an all-Tiger force of seven (or eight) vehicles
  2. Because it is a compact force, I can really go to town on the models
  3. He faced off against the British and Canadian forces in Normandy and was probably killed in an engagement with a Firefly tank (AT 14 beats Front Armour 9 all day!). Having just finished my Firefly tanks it could make for a good match up.
  4. It can be fun to build a specific real-world force, based on actual events, with no plans to growing the project outside its specific scope. Thanks to the internet I can actually track down all the tank numbers and details for the tanks that he rolled out with on that fateful day. 

So what’s my plan? First step, start building the army. I am going to be heavily inspired by Blake’s outstanding article over on the Flames Of War site – stop reading this now, click this link and come back – which is overflowing with great ideas.

Next, do a little reading and figure out a how to paint them.

Lastly, find someone in the Studio to play a game against and hit them with seven Tigers and a small pile of Tiger Ace Command Cards! 

The Fallschirmjäger in Normandy

with Richard Chambers

D-Day: German gives contains Formations and Command Cards for representing the Fallschirmjäger forces present in Normandy during the Allied Invasion of France. This article covers the history of those key units so you have all the info you need to model your FJ force on one of these historical forces.   

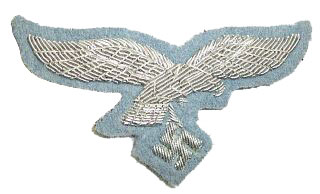
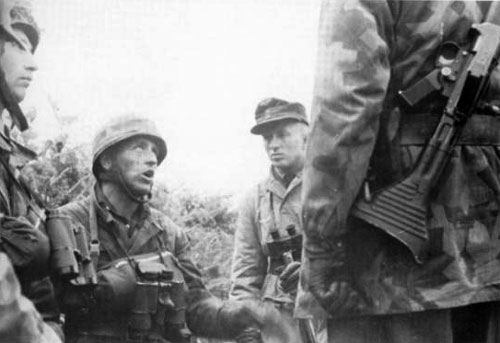
The best German infantry units based in France in 1944 were the regiments of the Fallschirmjägerdivisions or parachute divisions. Although they were actually Luftwaffe troops, these units were by this time in the war, tactically subordinated to Army command.

Towards the end of 1943, Hitler had approved a plan proposed by Göring to rapidly expand the size of the Fallschirmtruppen.

Up until this point in time the German Airborne forces consisted of 2 Parachute Divisions (1. and 2. Fallschirmjägerdivision) which had formed the XI Flieger Korps. Under Göring’s ambitious scheme, these two units would provide cadres to form two more airborne division, the 3. and 4. Fallschirmjägerdivisions.

The 1st and 4th Airborne Divisions would together become I. Fallschirm-Korps (I Parachute Corps) while the 2nd and 3rd Divisions would constitute II. Fallschirm-Korps (II Parachute Corps), two parachute armies with an anticipated strength of 100,000 first rate soldiers, equal in status to Himmler’s Waffen SS units in recruiting, weaponry and training. 5. Fallschirmjägerdivision was then formed in March 1944 and also joined II. Fallschirm-Korps.

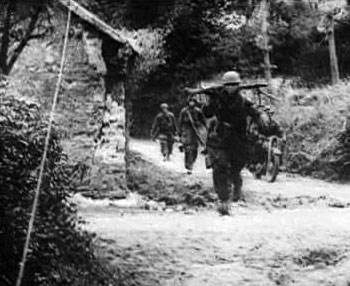
II. Fallschirm-Korps, commanded by General Eugen Meindl, was allocated by the Commander of the Western Theatre, Field Marshal Gerd von Rundstedt, to the Seventh Army, commanded by General Friedrich Dollmann, in Brittany. It would in May 1944 be made up of the following units:

• 2. Fallschirmjägerdivision (refitting in Koln-Wahn, Germany after recently returning from the Eastern Front – soon to be headquartered in Brest, France);
• 3. Fallschirmjägerdivision (headquarters at Huelgoal, Brittany);
• 5. Fallschirmjägerdivision (headquarters at Rennes, Brittany); and
• 6. Fallschirmjägerregiment (formally a regiment of 2. Fallschirmjägerdivision, but attached to II. Fallschirm-Korpsand based in the Lessay-Monte Castre-Carentan area)

By D-Day, Göring’s grand plan to rival the Waffen-SS was far from reality. Some units of the II. Fallschirm-Korps such as the 6. Fallschirmjägerregiment and 3. Fallschirmjägerdivision were generally well equipped and had excellent personnel.

Together they could easily be considered the most competent infantry units at von Rundstedt’s disposal and they fought with distinction throughout the campaign.
2. Fallschirmjägerdivision and 5. Fallschirmjägerdivision were by comparison, poorly trained, undermanned and badly equipped. However, they too fought with the esprit-de-corps of all Fallschirmtruppen and helped forge a combat reputation respected by all Allied opponents.

6. Fallschirmjägerregiment
In October 1943, as part of the general expansion of the Fallschirmtruppen, 6. Fallschirmjägerregiment was transferred from 2. Fallschirmjägerdivision to 3. Fallschirmjägerdivision, where it was split into various cadres and deactivated.

In November 1943 the Regiment was activated again and began to reorganise in January 1944 with the goal of having the training and equipping of its troops completed within four months. As 2. Fallschirmjägerdivision was in action on the Eastern Front, 6. Fallschirmjägerregiment was subordinated directly to the Fallschirmjäger Armee.

The Regiment was organised along the same lines as a standard German Army Infantry Regiment, having three battalions, each of which was made up of three rifle companies and a heavy company. The 13th Company was a heavy mortar company, the 14th an anti-tank company and the 15th an engineer company. As of 6 June 1944
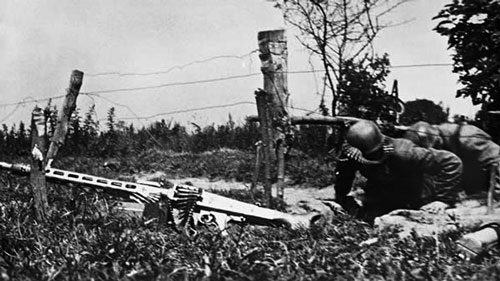
6. Fallschirmjägerregiment was arranged as follows:

6. Fallschirmjägerregiment
– Commander: Major von der Heydte
– Adjutant: Hauptmann Peiser

I. Bataillion
– Commander : Hauptmann Emil Priekschat
– Adj: Oberleutnant Reese
– 1. Kompanie (Rifle): Oberleutnant Billion
– 2. Kompanie (Rifle): Oberleutnant Schulz
– 3. Kompanie (Rifle): Hauptmann Bucher
– 4. Kompanie (Heavy): Leutnant Scherer

II. Bataillion
– Commander: Major Rolf Mager
– Adj: Hauptmann Schulte
– 5. Kompanie (Rifle): Hauptmann Herrmann
– 6. Kompanie (Rifle): Leutnant Bruunklaus
– 7. Kompanie (Rifle): Leutnant von Socha-Borzestowski
– 8. Kompanie (Heavy): Oberleutnant Graf Bethusy-Huc

III. Bataillion
– Commander: Hauptmann Horst Trebes
– Adj: Leutnant Treuherz
– 9. Kompanie (Rifle): Oberlautnant Wagner
– 10. Kompanie (Rifle): Oberleutnant Prive
– 11. Kompanie (Rifle): Oberleutnant Märk
– 12. Kompanie (Heavy): Oberleutnant Pöppel

– 13. Schwere GrW.Kompanie (Heavy Mortar): Oberleutnant Nahde

– 14. Panzerjägerkompanie (Anti-tank): Leutnant Geck

– 15. Pionerekompanie (Engineer): Hauptmann Hauch

The total fighting strength of 6. Fallschirmjägerregiment at this time was 3,457 officers and men. This was considerably larger than an equivalent Army unit and the rifle companies of the Regiment had twice as many light machine-guns as a standard Infantry Division’s companies. The men were also of a higher quality compared with many of the other more standard units at this time. At least a third of the officers and a good portion of the non-commissioned officers were veterans, having fought in Crete, North Africa and Russia. The remainder of the men were all volunteers, with the average age across the Regiment being 17 ½ years. Morale was excellent and interestingly enough the whole Regiment was jump trained, each man having made six day-time and three night-time jumps.

The main weakness of the 6. Fallschirmjägerregiment was the same as all of the regiments and divisions of von Rundstedt’s army – they simply lacked any real transport capability. Each company in the Regiment had an average of two trucks, and the seventy trucks across the whole unit were of fifty different makes – German, French, Italian and even British.

In May 1944 the Regiment was deployed to Normandy and spread out amongst the towns at the base of the Cotentin peninsula. These were Lessay, Periers, Raids, St Georges-de-Bohon, Meautis, Baupe and Monte Castre. It was assigned to LXXXIV Corps and for supply purposes attached to 91. Luftlandedivision, an air-landing division. Together they formed the strategic reserve for the Corps.

D-Day
From the first moments of the airborne invasion of France 6. Fallschirmjägerregiment was in action against American paratroopers from the US 101st Airborne Division. Scattered fire-fights continued throughout the night, until about 0600 on 6 June the Regiment was given orders to assemble and clear the region between Carentan and St. Mere-Eglise of enemy troops. It was no easy task to withdraw troops currently spread out, in action and with limited transport and get them to the assembly point so it took until early afternoon for the initial movement and reorganisation to be completed.

The troops then moved through Carentan which Major von der Heydte had already determined was not occupied by American troops. 3. Bataillion initially remained behind in the town with the 13th Company, protecting the Regiment’s rear areas, while the regimental command post was set up at St. Come du Mont. 1. Bataillion moved out towards St. Marie-du-Mont while 2. Bataillion advanced on St. Mere-Eglise.
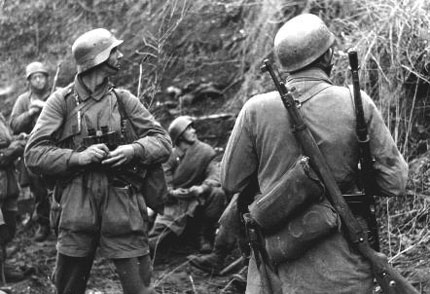
At first the advances made good time, but by midnight both battalions were in heavy contact just short of their objectives. 1. Bataillion found the US paratroopers at St. Marie-du-Mont had linked up with the 4th Infantry Division moving inland from Utah beach. Earlier in the evening and again before dawn on 7 June waves of American gliders and paratroopers began to drop across the entire combat area, and the two battalions, found themselves low on ammunition and increasingly cut-off from the Regimental rear areas.

2. Bataillion successfully withdrew and attempted to link up with the now surrounded 1. Bataillion but was unable to move more than a few hundred yards east of St. Come du Mont. By now 1. Bataillion was trying to extricate itself to the south. While crossing through open fields and marshes north of the Douve River it came under fire from small groups of the 501st and 506th Parachute Infantry Regiments (PIR). The American troops were able to bluff the 1. Bataillion into believing they were facing overwhelming US strength and the majority of the battalion surrendered, with only 25 men escaping to Carentan.

Other elements of the 506th PIR, supported by 6 Sherman tanks of the 746th Tank Battalion and the guns of the 65th Armoured Field Artillery Battalion, advanced on St. Come du Mont which von der Heydte had now protected with 2 battalions of his own troops. While the US paratroopers made headway, they could not dig the Jäger out from their defences amongst the solid Norman hedgerows. The attack was called off so a much larger assault could be launched the following day.
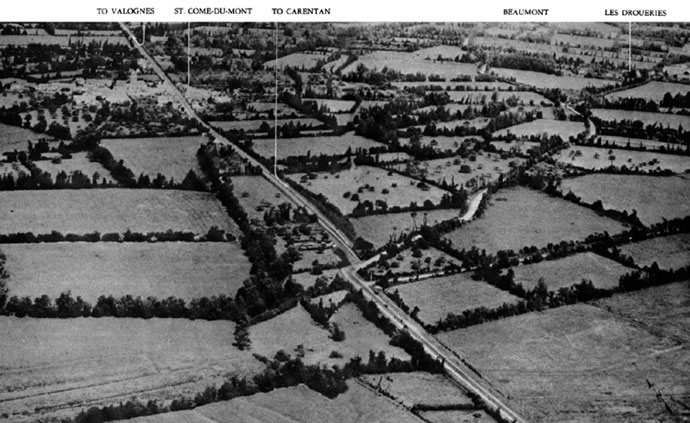
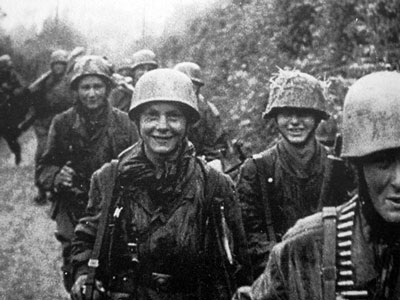
On 8 June St. Come du Mont was defended by III. Bataillon, 1058. Regiment, 91. Luftlandedivisionand two companies from III. Bataillon, 6. Fallschirmjägerregiment. Against them the Americans launched the 1st and 2nd Battalions, 506th PIR, 3rd Battalion 501st PIR, 3rd Battalion, 327th Glider Infantry, 8 light tanks and the 65th Armoured Field Artillery Battalion.

The Glider Infantry and 501st PIR attempted to encircle the town and cut off the German’s retreat, while the units of the 506th PIR advanced directly into St. Come du Mont. An intense artillery barrage (2500 105mm rounds in the first 1 ½ hours) smashed into the defenders and as the 1058. Grenadiers started to show signs of cracking, von der Heydte decided that with no more reserves to commit, it was time to withdraw. His men were forced to fight their way past the 501st PIR, but the majority of the German forces were able to escape to the west and retreat back into Carentan.

Carentan
The Americans immediately began to prepare an assault on Carentan, readying four regiments (501st, 502nd and 506th PIR and 327th Glider Infantry) for the attack A two pronged attack down the main causeway in Carentan (502nd) and across the river flats to the east of the city (327th) was put into action. The causeway was a six to nine feet high embankment above the marshland with four bridges that crossed the Douve and its associated canals. The German defenders had destroyed one of the bridges.
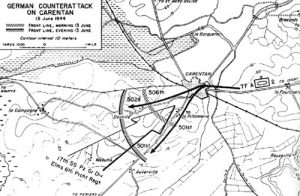
In the mid afternoon of 10 June men from the 3rd Battalion, 502nd PIR advanced in single file down the causeway. They soon came under heavy machine-gun fire from the Fallschirmjäger in a farmhouse and bocage which took a heavy toll on the US paratroopers. The fourth bridge was also blocked by a Belgian Gate, which meant, just one man could squeeze through at a time. The Americans were held at this point until past midnight, when they were able to filter men past the barricade.

On the morning of 11 June, an intense artillery barrage was arranged to force the Jäger out of the farmhouse. This failed, and it wasn’t until the US Battalion Commander personally led a dramatic charge against the position that the German paratrooper’s rifle pits and machine-gun posts in front of the building and along the hedgerows were knocked out. Three American battalions had been used in the action thus far and this attack had finally exhausted 502nd PIR meaning the 506th PIR would have to take over the advance.

327th Glider Infantry had also slowly made headway and by the morning of 11 June they were just a few hundred yards from the eastern outskirts of Carentan, where they were finally stopped by German fire.

By now von der Heydte’s men were running seriously short of ammunition. Supplies had not been able to come forward due to the shortage of motor transport and the Allied air forces interdiction of the Normandy road network.

This had also held up any reinforcements that were trying to reach Carentan. The only resupply came during the night of 11/12 June when ammunition was air dropped to the Fallschirmjäger southwest of the city.

On the evening of 11 June 501st and 506th PIR were committed to the battle and throughout the night the US paratroopers watched as Carentan was subjected to near continual naval gun fire, artillery, mortar and tank destroyer bombardment. At 0200 hours on 12 June 506th attacked Hill 30 to south of the city and from there, at 0500 hours they assaulted the city. From the northeast 327th Glider Infantry also drove into Carentan, with the two units meeting up at 0730. 501st PIR circled the city, linking up with 506th PIR, closing the trap around German defenders. Remarkably, the German defenders seemed to offer little resistance.

Unbeknownst to the Americans, von der Heydte had recognised the danger and before dark on 11 June had withdrawn from Carentan and set up a new defensive line to the southwest of the city.  This line held against the attacks by 501st and 506th PIR that resumed on the afternoon of 12 June.
On 12 June the reinforcements that were meant to assist 6. Fallschirmjägerregiment in holding Carentan finally arrived, the 17. ‘Gotz von Berlichingen’ SS-Panzergrenadierdivision. Annoyed that Fallschirmjäger had given up the city, Brigadeführer Ostendorff, the SS Commander, at first sought von der Heydte’s arrest for defeatism, but was eventually calmed down by his superiors. The Jäger were now subordinated to the SS Division and on 13 June, together they launched a counter attack to regain Carentan.

The attack, supported by assault guns from 17. SS-Panzerabteilung hit both 501st and 506th PIR at 0630 and drove them back towards the city. II. Bataillon, 6. Fallschirmjägerregiment managed to get into Carentan and took up positions near the railway station, however they were forced to retreat when 502nd PIR and a combat group made up of a battalion of tanks and a battalion of armoured infantry from 2nd Armoured Division and supported by the 14th Armoured Field Artillery Battalion were committed to the battle. By the early afternoon the initiative had swung back to the Americans and the attack was repulsed. This was the last time German forces attempted to retake Carentan.

The next few weeks saw less activity in this sector of the battlefield as the American units there passed over to the defensive while the main US operations shifted to the taking of Cherbourg. The Americans around Carentan sought to consolidate their gains and bring in reinforcements. The 6. Fallschirmjägerregiment remained active, patrolling and probing the US defences, whilst constantly preparing their own defences with bunkers, mines and barbed wire.

St. Germain-sur-Seves
Mid July found 6. Fallschirmjägerregiment entrenched around the village of St. Germain-sur-Seves on a small ‘island’ bordered by the Seves River, marshland and creeks. All of this area was heavy bocage country. Opposing them was the US 90th Infantry Division, a unit that had fought hard and suffered heavy casualties thus far in the campaign and who was now largely made up of green replacements. The 90th had been tasked with taking St. Germain-sur-Seves as a prelude to the main attack on St. Lo.
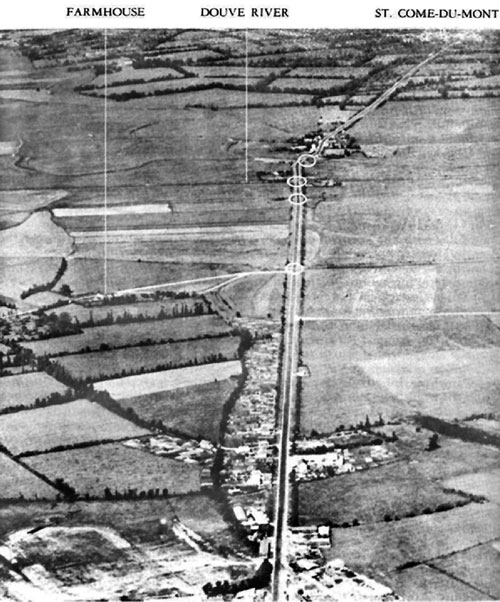
At 0630 hours on 22 July after a heavy artillery barrage 358th Regiment of 90th Infantry Division breached the forward lines of III. Bataillon, 6. Fallschirmjägerregiment penetrating more than a 800 yards inside German lines. But here there was little cover for the advancing American troops and they came under a steady crossfire. Around midday, von der Heydte ordered his 16. Kompanie, commanded by Oberfeldwebel (Sergeant) Alexander Uhlig to counterattack the Americans, re-establish the German main line of defence, and if possible capture a couple of prisoners.

Major von der Heydte had incorrectly assumed that the American attack was a small reconnaissance in force and that Uhlig’s company of 32 men would be enough to successfully complete the mission.

However, after a brief survey of the battlefield Uhlig realised his unit would be facing at least 300 US soldiers. Seemingly unconcerned by this disparity at 1800 he launched his attack into the right flank of the 358th 1st battalion and over the next three hours his men drove the Americans back 350 yards. Four Jäger were lost in the attack, but as Uhlig had been unable to take any prisoners he decided to continue.

As he listened to the US infantry digging in overnight, Uhlig decided that he would need to launch his next attack from the other flank to achieve surprise. He then went looking for reinforcements and was promised 2 MG42 heavy machine-guns and 16 men from 3. Bataillon. He also found a tank commander from the 2. ‘Das Reich’ SS-Panzerdivision who arranged for 3 panzers to support the attack the next morning.

Uhlig positioned the MG 42s to stop any reinforcements from reaching the American’s forward positions, and also to block the unit he would be attacking from retreating back to the US main lines. The machine-gunners were ordered not to fire in support of the initial assault, keeping their presence as a surprise.
The first assault began around 0700 on 23 July, and it took two more attacks to break the Americans. Down to just one panzer by this time, the third assault broke through to the 1st Battalion’s command post and the men of that unit began to fall back in panic or surrender. Many of those that retreated were cut down by the two emplaced MG 42s who now opened fire.

Uhlig’s company of 50 men and one panzer had captured over 200 American soldiers through the effective use of his limited resources, terrain, close armour support, well-positioned machine guns and their cumulative effect on a green battalion.

Immediately after the battle, the Jäger witnessed several US Army chaplins trying to help the wounded men in no-man’s land. Impressed by their bravery an impromptu ceasefire began, later formalised by von der Heydte into a three hour truce which also allowed an exchange of wounded prisoners.

On 24 October 1944 Alexander Uhlig was awarded the Knight’s Cross for his actions near St. Germain-sur-Seves in July. He would later be captured by members of the 90th Infantry Division and survive the war.
Cobra

6. Fallschirmjägerregiment was still operating with 2. ‘Das Reich’ SS-Panzerdivision when American forces launched Operation Cobra. The regiment, together with the SS troops were forced to break out of the Roncey Pocket in the final days of July 1944.

Days later 6. Fallschirmjägerregiment was again almost surrounded in the Villedieu pocket, but acting on his own initiative von der Heydte led his Regiment out of the trap.

On 31 July what remained of 6. Fallschirmjägerregiment was attached to 353. Infanteriedivision. Formed into a small kampfguruppe the Jäger made up the infantry division’s reserve and were moved to wherever the action was thickest or a penetration in the German main line of resistance most likely.

On 10 August the 6. Fallschirmjägerregiment was ordered to disengage and move to Nancy in Northeastern France for refitting.

The 6. Fallschirmjägerregiment suffered approximately 3000 casualties during the Normandy Campaign.

Luftwaffe Field Divisions

with Phil Yates

With the release of D-Day: German comes a series of Command Cards used to represent various specific units from the German defence of Normandy. One such Command Card, Air Force Soldiers, gives players the chance to field 16. Luftwaffe Feld-Division. This card could equally be used to represent many of the Luftwaffe Field Divisions of the war, so we dug up an article from the archives outlining the history of the Luftwaffe Field Divisions- perhaps there’s one here for you to represent on the table with D-Day: German…

In the desperate winter of 1941, the Heer, the German Army, was on the defensive after its failed advance on Moscow. Every available unit was thrown into the battle, including the Luftwaffe Fallschirmjäger (air force paratroops). One such unit was the Luftlandesturmregiment,  Air-landing Assault Regiment, under Generalmajor Meindl. The regiment’s casualties were so severe that it was withdrawn early in 1942.

However, Generalmajor Meindl and his staff remained behind and formed Division Meindl from spare Luftwaffe ground crew. Under the veteran Fallschirmjäger commander the division fought well in the defence of Cholm.

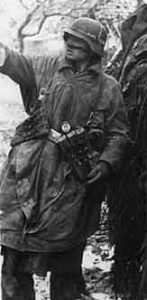
By the spring of 1942, the Army’s need for troops to replace its casualties was so acute that they convinced Hitler to transfer surplus troops from the Luftwaffe to the Heer. Reichsmarshall Herman Göring, Commander In Chief of the Air Force, was furious. Not only would his personal empire be diminished, but also the reactionary Army, the very organisation responsible for the failures of the previous year, would corrupt his loyal National Socialist airmen.

Instead he offered 22 Luftwaffen Felddivisionen, 22 Air Force Field Divisions, that would remain under air force control, although under army command. The success of Meindl’s division swung the balance, and Göring got his way.

The first ten of these divisions were organized in September of 1942, and, still in their air force-blue uniforms, dispatched to the Eastern Front.

Unfortunately, despite their brand new equipment (the envy of army units still fighting with old, worn out gear from previous battles), they had very little infantry training and little heavy support. Unlike Meindl’s division, their officers were airmen with no knowledge of ground combat at all. As a result, the first Luftwaffe field divisions did not perform well when they entered combat. The remaining divisions formed in early 1943 were little better.

At least one half-formed division was overrun by the spearhead of a Soviet attack while marching to the front, still having conducted no training at all! In November 1943, all remaining Luftwaffe field divisions were converted to regular infantry divisions under full army control.

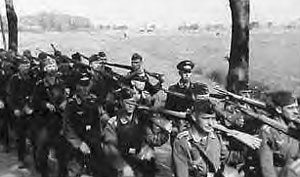
Luftwaffe field divisions were approximately half the size of their Heer counterparts.

A normal Infanteriedivision had three regiments each of three infantry battalions and an artillery regiment. A Luftwaffe Felddivision had only four Jäger (light infantry) battalions and a single battalion of artillery (often only equipped with out-dated mountain guns or heavy mortars). On top of this, whereas the Infanteriedivision had an anti-tank battalion, a reconnaissance battalion, and a pioneer battalion, the Felddivision often had only one company of each.

The best-equipped divisions had full battalions, but even then, the anti-tank battalion only had 15 anti-tank guns in three companies, one of nine 5cm PaK38, and two each of three 7.5cm PaK40, and no other anti-tank guns in the entire division! There were two positive features though. Firstly, each division had a full Luftwaffe anti-aircraft battalion with four powerful 8.8cm FlaK18 anti-aircraft guns. Secondly, the divisions were entirely equipped with trucks as gun transports and supply vehicles. They had no horses at all.

Divisional Histories

1. Luftwaffe Felddivision (Generalleutnant Gustav Wilke)
Relieved the Spanish 250. Infanterie Division, the famous Blue Division, in November 1942, taking up positions north of Lake Ilmen between Moscow and Leningrad.

This was supposed to be an easy sector, and remained quiet until January 1944 when the Red Army launched a massive attack through the division’s sector, wiping the division out in a matter of days.

The division’s artillery was initially only one battalion of 7.5cm GebK15 mountain guns. It was strengthened by two more battalions in 1943, although the battalions may have only had two batteries of four guns each!

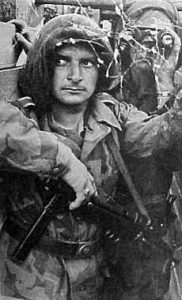
2. Luftwaffe Felddivision (Oberst Hellmuth Pätzold)
Was formed at the same time as 1. Luftwaffe Felddivision and was similarly equipped. Additionally it had a company of six StuG D assault guns. The division occupied a sector of the Rzhev salient in November 1942. Unusually, its positions were facing west!

On 25 November the southern part of the division was overrun by a massive Red Army attack, although the northern flank held on until 9 December. The division was rescued by 19. Panzerdivision and Grossdeutschland and reoccupied its positions.

The division was attacked again in October 1943 in its new positions near Nevel, abandoning most of its heavy equipment and retreating rather hastily (as the German Army delighted in pointing out to the Luftwaffe). The division continued to fight on until disbanded in January 1944.

3. Luftwaffe Felddivision (Generalleutnant Robert Pistorius)
Formed at the same time as 1. & 2. Luftwaffen Felddivision, this division occupied positions south of Nevel (north of Vitebsk just west of the Rzhev salient). It had a fairly quiet time until Christmas Eve, 1943 when it was attacked by the 5th Tank Corps. The division was quickly cut off and overrun, being disbanded in January 1944.

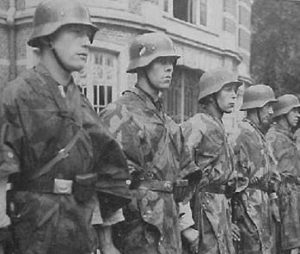
4. Luftwaffe Felddivision (Oberst Hans-Georg Schreder)
Took up position south of 3. Luftwaffe Felddivision near Nevel. Initially it had one battalion of two batteries of 10.5cm NW40 heavy mortars for its artillery. It gained four more batteries in two more battalions during the summer of 1943. The division was heavily engaged in the battle around Vitebsk, and later absorbed the remnants of the 3. Luftwaffe Felddivision after its disbandment. 4. Luftwaffe Felddivision fought on until it was destroyed in the Vitebsk pocket in June 1944.

5. Luftwaffe Felddivision (Oberst Hans-Bruno Schulz-Heyn)
While the first four divisions fought in the north around Moscow, 5. Luftwaffe Felddivision was sent south to Army Group B in the Caucasus. It was posted to defend Krasnodar, near the Black Sea, with the Rumanian Cavalry Corps. On 11 January 1943 the Red Army launched Operation Mountain to push Army Group B from the Caucasus. The attack split 5. Luftwaffe Felddivision in two. Half remained with the Cavalry Corps, while the other half fought with 4. Gebirgsjägerdivision further north. The fighting continued until May, by which time the division was reunited in the Kuban bridgehead, the only remaining German toehold in the Caucasus. In late May, the division withdrew to Crimea to reorganise before moving to the front lines at Melitopol, just north of the Crimean Peninsula, in September where it absorbed 15. Luftwaffe Felddivision as replacements for previous losses. On 9 October 1943, the Red Army launched another major offensive that cut off the Crimean Peninsula. The division was retreated westward and fought on until disbanded in May 1944.

6. Luftwaffe Felddivision (Generalleutnant Rudolf Peschel)
After defending Velikiye Luki, north of the Rzhev salient, in heavy fighting in November and December 1942, 6. Luftwaffe Felddivision took up position between of 2. & 3. Luftwaffen Felddivisionen near Nevel in July 1943. There it received additional artillery batteries to form weak second and third artillery battalions.

It remained there until the attacks of January 1944.

It fought off heavy attacks with the help of the Hornisse tank-hunters of 519. Panzerjägerabteilung, winning the Knights Cross for the divisional commander and Obergefreiter Heinz Reichmann. It then absorbed the remnants of 2. Luftwaffe Felddivision to replace its losses. The division was destroyed in the Vitebsk pocket in June 1944.

7. Luftwaffe Felddivision (Generalmajor Wolf Freiherr Von Biedermann) 
Was hastily rushed to the front to hold the line on the Chir River after the encirclement of Stalingrad. It was involved in continuous fighting until March, 1943 when it was disbanded and the survivors used to strengthen 15. Luftwaffe Felddivision. Oberleutnant Emil Eitel won the Knights Cross during this period.

The division’s artillery was a single battalion of 7.5cm GebK15 mountain guns. They were supported by a company of five StuG D assault guns.

8. Luftwaffe Felddivision (Generalleutnant Wilibald Spang)
Although 8. Luftwaffe Felddivision was supposed to be organised the same as 7. Luftwaffe Felddivision, it was slightly different due to the way it was formed. Kampfgruppe Statel (formed from rear-area Luftwaffe troops retreating from Stalingrad under Oberst Rainer Statel) was already in combat on the Chir River when the rest of the division, newly arrived from Germany, was assigned to a different sector.

While moving up to their assigned positions, the anti-tank battalion and leading battalions ran headlong into the Soviet spearhead and were annihilated. The survivors of the division fought on throughout the winter. In April 1943 what was left of the division was used to strengthen 15. Luftwaffe Felddivision.

9. Luftwaffe Felddivision (Generalmajor Ernst Michael)
The next series of Luftwaffe divisions had a little longer to organise and actually had two regiments of three infantry battalions. In the case of 9. Luftwaffe Felddivision they were 17. & 18. Luftwaffen Jägerregimenter (light infantry regiments). Although the division had no assault guns, it did have two weak battalions of artillery, and in theory, full battalions of anti-tank, pioneers, and infantry reconnaissance.

It joined the divisions guarding the Soviet troops trapped in the Orienbaum pocket on the coast just west of Leningrad in December 1942. It initially occupied an 11-mile front, but this was later increased to 23 miles. Far too long a stretch for such a weak division. One battalion briefly fought with 227. Infanteriedivision around Lake Ladoga, before returning to guard the pocket in March 1943.

The sector was quiet until 14 January 1944, when a massive Soviet attack by the 2nd Shock Army burst through the division. The attack by five infantry divisions and a tank brigade destroyed the Luftwaffe division in just four days.
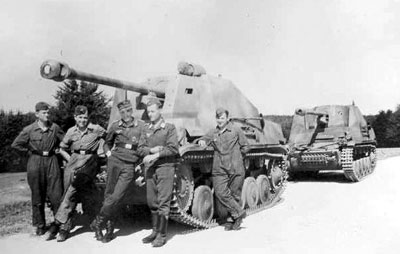
10. Luftwaffe Felddivision (Generalmajor Walter Wadhehn)
Like 9. Luftwaffe Felddivision, 10. Luftwaffe Felddivision spent most of its life guarding the Orienbaum pocket. In January 1943 a Kampfgruppe or battlegroup from the division fought near Lake Ladoga, supported by four Tiger tanks from 502. schwere Panzerabteilung and Marder tank-hunters of 563 Panzerjägerabteilung.

The same attack that destroyed 9. Luftwaffe Felddivision rolled over the division, although Kampfgruppe Helling fought on until the division was officially disbanded in February 1944. The commander of 19. Luftwaffe Jägerregiment, Oberst Matussek, won the German Cross in Gold for his valiant defence.

Unlike the 9. Luftwaffe Felddivision, the division had three battalions of artillery. One with twelve 10.5cm NW40 heavy mortars, and two battalions of twelve 7.5cm GebK15 mountain guns.

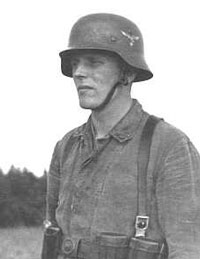
11. Luftwaffe Felddivision
This division was formed in Greece for guard duties and did not see combat until late 1944 as it retreated through the Balkans.

12. Luftwaffe Felddivision (Generalleutnant Herbert Kettner)
One of the two really good Luftwaffe field divisions, 12. Luftwaffe Felddivision was part of Army Group North from February 1943 until the end of the war. It had 23. & 24. Luftwaffen Jägerregimenter, each of three battalions, and two battalions of artillery, each with twelve old 1897-model French 75mm guns. Its anti-tank battalion had twelve new 7.5cm PaK40 anti-tank guns, twelve 2cm FlaK38 anti-aircraft guns, and ten StuG assault guns with long 7.5cm guns.

In February 1943 they entered combat near Lake Ladoga north of 1. Luftwaffe Felddivision. They stopped a Soviet attack in their area winning two German Crosses in Gold in the process. They fought hard and well in the January 1944 fighting and in the subsequent retreats. They were finally cut off in the Courland pocket and ended the war fighting in East Prussia.

13. Luftwaffe Felddivision (Generalmajor Hans Korte)
Entered the line south of 12. Luftwaffe Felddivision in February 1943. It took part in the July 1943 battles, but was destroyed in the retreat in January 1944.

14. Luftwaffe Felddivision 
This division spent the war performing garrison duties in Norway.

15. Luftwaffe Felddivision (Generalmajor Eduard Muhr)
This division was scratched together from local air force units around Rostov in November 1942. It absorbed the survivors of 7. & 8. Luftwaffen Felddivisionen in April 1943 and received its artillery regiment from France in May. Its first battles were in July 1943 near Taganarog on the Sea of Azov just west of Rostov. The division was surrounded, but broke out leaving most of its heavy weapons behind. Hauptmann Eitel won a posthumous Knights Cross leading 30. Luftwaffe Jägerregiment through enemy lines.

In October the remnants were at Melitopol on the Dnepr River when they were overrun again. The survivors were absorbed into 5. Luftwaffe Felddivision south of Zaphorye.

16. Luftwaffe Felddivision
Fought in France, 1944 and destroyed at Caen soon after D-Day.

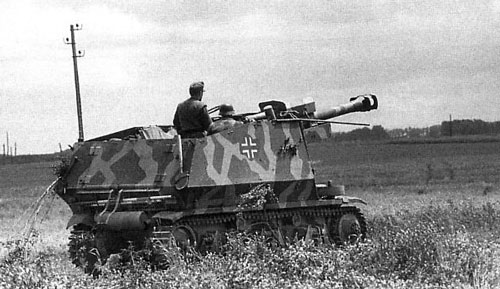
17. Luftwaffe Felddivision
Destroyed defending the Seine crossings in France, 1944, during the breakout from Normandy.

18. Luftwaffe Felddivision
Destroyed in the Mons pocket in France, September 1944.

21. Luftwaffe Felddivision (Generalmajor Richard Schimpf)
21. Luftwaffe Felddivision was formed from Division Meindl, which had five regiments each of four infantry battalions, but little else. Division Meindl was formed as an overall command for the numerous air force security battalions and hastily formed defence battalions that suddenly found themselves in the front lines during the Soviet 1941 winter offensive. When it was formed in February 1942, the regiments were all attached to infantry divisions between Leningrad and Moscow.

1. Luftwaffe Feldregiment was with 218. Infanteriedivision in and around the Cholm pocket.
2. Luftwaffe Feldregiment was with 5. Jägerdivision near Staraya Russia.
3. Luftwaffe Feldregiment was with 12. Infanteriedivision in and around the Demyansk pocket.
4. Luftwaffe Feldregiment was with 18. Infanteriedivision (mot) around Lake Ilmen.
5. Luftwaffe Feldregiment was with 290. Infanteriedivision in and around the Demyansk pocket.

Between then and December 1942, when 21. Luftwaffe Felddivision was formed, the division was reunited and held the southern flank of the newly opened corridor to Demyansk and Cholm. The newly formed division only had four regiments, the fifth having been disbanded. It gained an artillery regiment with French guns in the summer of 1943, along with an assault gun battery of four long-barrelled StuG III assault guns (increased by a further six StuG IV in 1944) and ten 7.5cm PaK40 guns. Each regiment was also reported as having as many as ten 7.62cm PaK36(r) anti-tank guns. At this point it was easily the strongest Luftwaffe field division in existence.

The division was involved in heavy fighting from March 1944 until it surrendered in the Courland pocket at the end of the war.

22. Luftwaffe Felddivision
Disbanded before fully formed.