![]() Thanks for watching, reading and of course interacting over on Social Media, it has been great fun to share this new book with you and hopefully you have picked up some great ideas on how you can build a new American Army for WWIII: Team Yankee.
Thanks for watching, reading and of course interacting over on Social Media, it has been great fun to share this new book with you and hopefully you have picked up some great ideas on how you can build a new American Army for WWIII: Team Yankee.
Join the Battlefront team as we launch Bagration: Soviet

![]() Thanks for watching, reading and of course interacting over on Social Media, it has been great fun to share this new book with you and hopefully you have picked up some great ideas on how you can build a new American Army for WWIII: Team Yankee.
Thanks for watching, reading and of course interacting over on Social Media, it has been great fun to share this new book with you and hopefully you have picked up some great ideas on how you can build a new American Army for WWIII: Team Yankee.
With Garry Wait
I have heard much confusion and discussion about the TOW missile and the new WWIII: American book. One of the most exciting things about the new book is not only the new toys but the options to get more mileage out of existing weapons systems. To my mind, the most fascinating upgrade is to TOW missile systems.
Let’s look briefly at what TOW actually is before discussing how to get the most out of your TOW system in World War III.
Initially produced by Hughes Helicopters and still produced to this day by US Company Raytheon, some fifty years after first produced. The TOW system (which stands for “Tube-launched, Optically tracked, Wire Guided or TOW for short) was first produced in 1970, just in time to see trials in the tail end of the Vietnam War. The original BGM71A missile (to use it’s US designation) saw action in 1972 when it was used on 24 April against of all things, a captured US made M41 light tank. The original use of TOW saw mainly helicopter firings used although a ground mount was also available initially. The armoured solutions you see in World War III came along much later. This early version had a range of some 3,000 metres and reduced armour penetration.
During the Cold War the Improved TOW BGM71C came out with better range and better AT through a new warhead, with the BGM71B (known as TOW-ER or Extended Range) being identical to BGM7A except for having the improved range of 3,750m. This Improved TOW BGM71C missile is what was sold to various NATO forces as well as Israel and Iran in the Oil Wars book and represents a hugely successful system. With the base sight being thermal imaging as standard using the AN/TAS-4, as an all-weather weapon it is unsurpassed for production levels (although there is debate about whether this night sight was supplied to Iran).
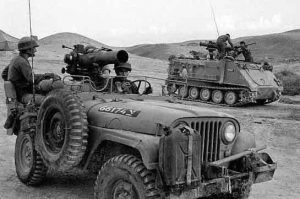 With AT21 and range 48”/120cm in game, the Improved TOW represents a threat to all but the most advanced tanks on the table and can account for anything up to Front Armour 18 reasonably in my experience. The first outing for the Improved TOW was in Lebanon in 1982 where IDF General Peled’s TOW jeeps exploited the vulnerabilities of Syrian T72’s in spectacular fashion. This action saw up to nine T72’s destroyed for no tank losses on the Israeli side.
(Read more about Peled and his Special Manoeuvre Force here)
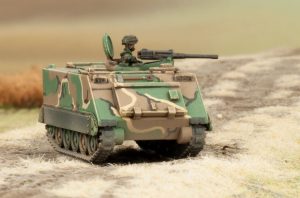
Apart from US forces, the Improved TOW system is also available in game to British (Lynx Helicopter), Canadians (M150 TOW tank destroyers), Netherlands (YPR765 PRAT), Iranians (on AH1 Cobra, M113 and Jeep), Israelis (AH1 Cobra, M113 and Jeep) and West Germans (Jaguar 2).
That makes it a very widespread system indeed. In all cases, apart from the Iranians, it provides a thermal imaging system for the firing post which incrementally improves the weapons performance.
Now, in the new United States World War III book, we see the new BGM71D system, also known colloquially as the TOW-2. This new weapon has the same range but a bigger enlarged warhead that provides significantly better hitting power. The Improved TOW missile warhead was 141 cm long while the newer TOW-2 adds an additional 10cm of length, all of which is heavy explosive filler although both have the same 152mm (6”) diameter warhead. This part is important as it means the TOW-2 is backwardly compatible with older launchers.
The new warhead offers AT23 which is a quantum leap forwards for democracy and freedom loving NATO forces and is introduced as standard on the M2 Bradley IFV (Infantry Fighting Vehicle) and M3 Bradley CFV (Cavalry Fighting Vehicle). If you take any TOW-2, you must upgrade ALL other TOW launchers at a cost of one point extra per unit. So that means if you run AH-1 Cobras supporting a Bradley equipped Cavalry force, you need to up the cost by an additional one point per flight to accommodate the far more lethal TOW-2. Currently the TOW or TOW-2 system is available to the US Army in M2 and M3 Bradley, M901, HMMWV and AH-1 Cobra systems, while the USMC can use the same options in the HMMWV and the LAV-AT systems.
The only issue with the TOW system was the requirement to keep the seeker sight on the target to guide the weapon onto the unlucky focus of the operator. With a speed of 200 metres per second and two seconds to allow for the gyroscope stabilised warhead rocket to kick in, it is a nerve wracking 20 seconds to get to a target at maximum range, all the while with a heightened level of enemy attention upon the operator!
If you’re facing some serious frontline enemy – or are involved in a NATO training exercise versus Challengers or other US forces – where you will be facing front armour of 19 or more, I’d recommend this as a small price to pay to keep your grunts comfortable in their fox holes. A well-run US force can accommodate the best missile in the game and the TOW-2 is clearly this with excellent range, hitting power and night vision to suit. Nothing will scare a T-64 commander more than facing TOW-2 missiles which can comfortably outrange their main gun rounds.
At a pinch, you can even use it to clear enemy out of bunkers OR engage helicopters although I only recommend this after you’ve cleaned up the enemy’s heavy armour.
If TOW-2 is so good, why wouldn’t you buy it, I hear you ask?
In many cases it will be overkill. Against most Oil Wars forces – apart from our good friends in the IDF – you won’t need the additional expense of the TOW-2. If facing T-72 or earlier model Soviet equipment, it’s a proven fact that the Improved TOW is more than sufficient to deal with 1960’s Soviet technology. Why waste a brand-new missile on an outdated ride?
When facing APC’s, even the much-vaunted British Warrior IFV won’t be any challenge for a US Improved TOW missile after all.
But much like the USSR in the Cold War, you need to balance the budget. TOW-2 is a lovely option to have available but may be a sledgehammer to smash open a walnut shell – capable but likely to leave a mess.
~Garry
With Chris Allen
“Sergeant Ferris!” Lieutenant Armstrong bellowed as he walked up to his platoon for the first time, just having arrived with the reinforcements.
“Sir”
“I know I’m new here but we’ve got to police up these tanks.”
“Sir?”
 “Sergeant if you look at anyone else’s tanks they’re bare hulls, maybe a little kit in the bustle but our tanks, Sergeant there’s more kit on theses tanks than in the quartermasters shop, look at that one, does that tank have a DShK on it?
Sergeant Ferris blinked, looked up at the sun and looked back down, blinked again, “Sir, we could have left it for the commies to pick back up, but in all honesty it’s kinda a good luck charm. Plus you should have seen how confused they were when we opened up on them with it one time, the Int guys said there was comms chatter for days about friendly fire”
“Fine, but sergeant you can’t tell me we need that many Jerry’s on a tank, I’ve been assured we’ll receive nightly resupply, in my experience on course…”
“Lieutenant, I’m happy you’ve been assured, but in my experience in battle”, he let his word hang “when resup’ doesn’t show for two days because things get hot and we get caught behind the lines, those jerry’s keep us killing Ivan and get us back home.”
 The Lt looked down, and then back at the tanks. “Sergeant, is that a case of beer on the back of that tank?”
A head popped up from the back of the tank, the young man stared down from the tank “Sir, you ever tasted a beer after killing commies?”
“No”
A wry and knowing smile crossed the sergeant’s lips as the Lt looked back down “You will”
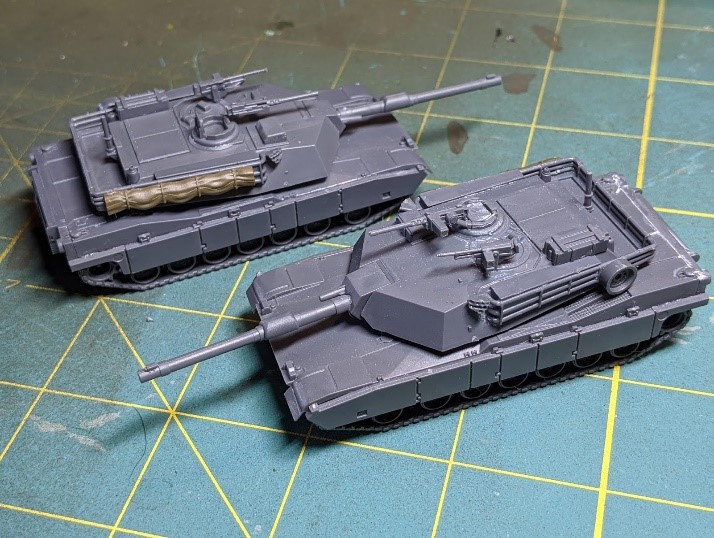
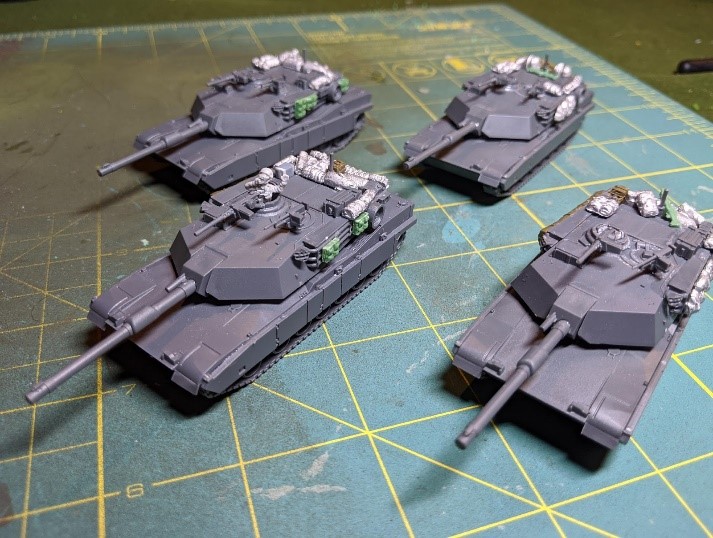
With some social distancing going on it’s a great time to not only start something new but spend a little extra time making it something special, something of your own. I’ve been playing Soviets since the introduction of the game, but after moving across the country I wanted to start a second force to help introduce the game to new players. There was no more appropriate or iconic force to pit against the Soviet threat than the might of the American military. So picking up a box of Bannons Boys I wanted to make something that really showed the differences in the two forces.
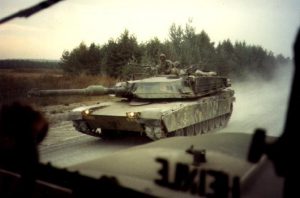
My Soviet force is a monument of simplicity, uniformity and application of conscript forces. So what better way to make the opposition stand out and show the divide of culture and doctrine than to make each vehicle individual. With this as the concept there was only one option, the M1A1 Abrams main battle tank.
With the new Team Yankee Americans book coming out, we all knew that the M1A1 Abrams was about to appear in the game, so what better opportunity to jump in ahead of the release to have built a model we all have access to but isn’t yet on the table!
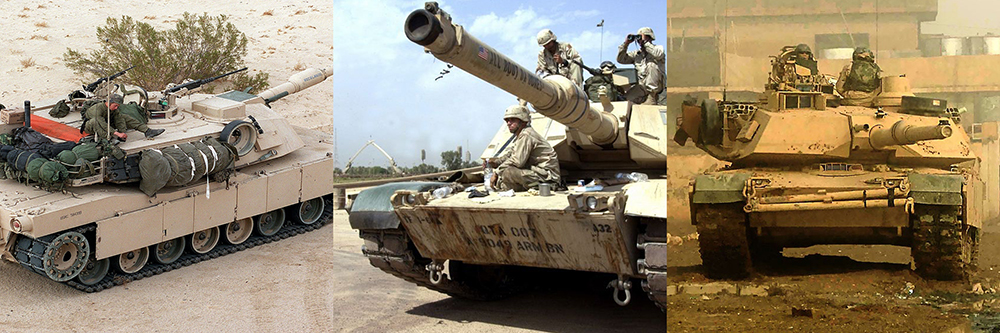
 All you need to do is type in Abrams in google and you’ll find pages upon pages of pictures of Abrams tanks through the years, and every single one looks different. But the pictures give great inspiration for stowage, paintjobs and just getting the models on the table. I tried to find pictures from Operation Reforger and other major exercises but also looked for inspiration in the conflicts in Iraq. While I didn’t want to put on all the really modern pieces like recognition panels and such there were tons of examples of how to stow kit on a high speed tank.
 I didn’t have too look far to find what I needed to accomplish this. Battlefront is amazing at providing us with extra pieces of kit to customize our forces and make them not simply markers on the table but our own private armies to command. Looking at most sprues you’ll find extra pieces, boxes, road wheels, guns and such, all ripe for the picking and enabling us to make our toy tanks individual and our own.
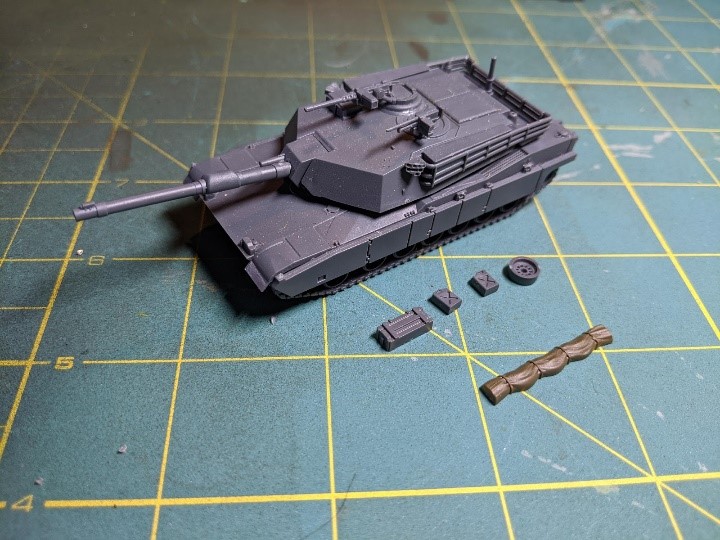
For my Abrams I found some of the parts in the following places:
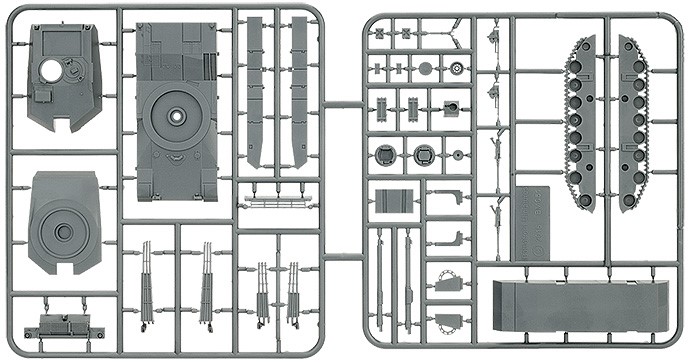
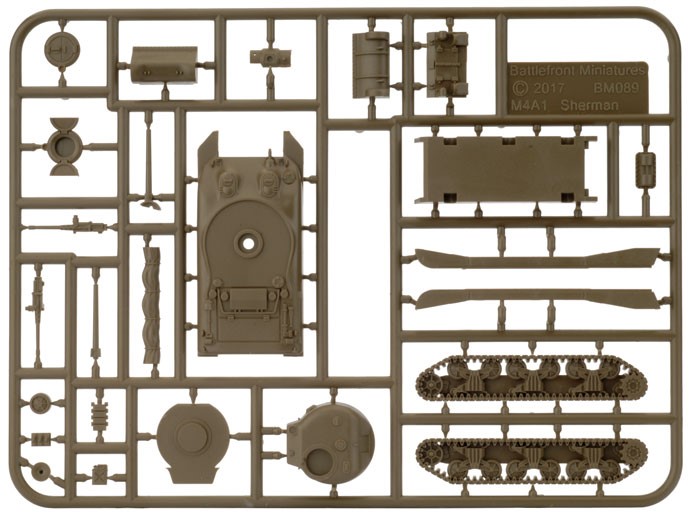
The Abrams sprue itself: Road wheels, jerry cans, tool boxes, even extra machine guns are all there.
The Sherman Sprue out of hit the beach: tarps, jerry cans, oil cans.
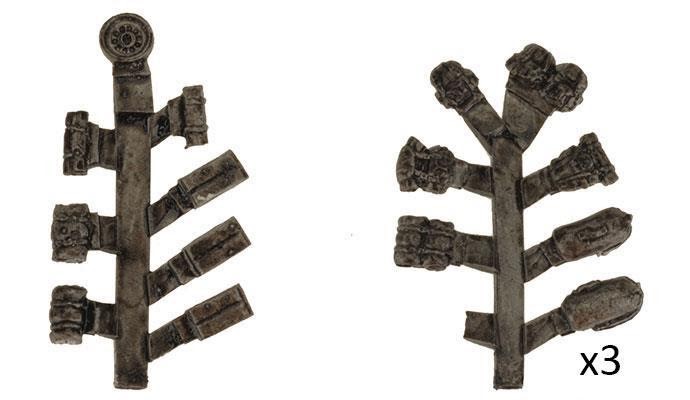
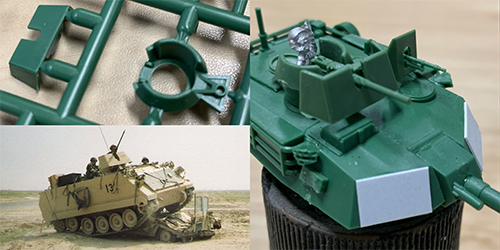
TUSO10 US Vehicle Stowage (below): This blister is life. With rucksacks, kit bags, ammo crates, road wheels, tarps and wrapped kit, this has a lot of everything you want. I need to order more to customize up my Americans as I expand the force.
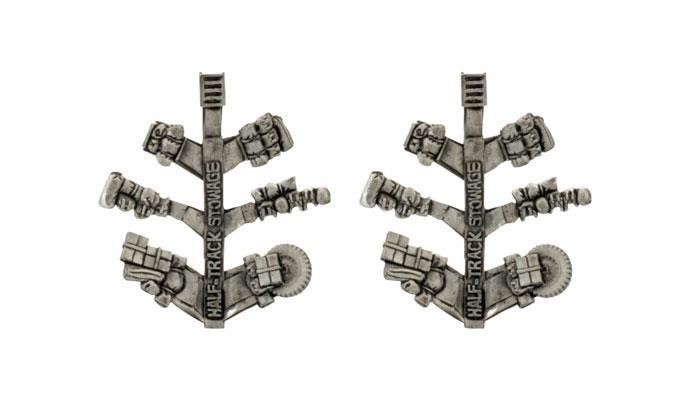
USO212 Half-Track Stowage (above): This is full of wrapped kit and equipment and is pure gold for adding strapped down equipment to vehicles in any era and if you have it for your Mid or Late War Americans, you can use it to give a little love to your Team Yankee Americans.
These made up the mainstay of my bits, but I scrounged weapons like machine guns off of M113 and T-62 Sprues, there are literally great bits on almost every sprue that can work and add to your force being unique and your own.
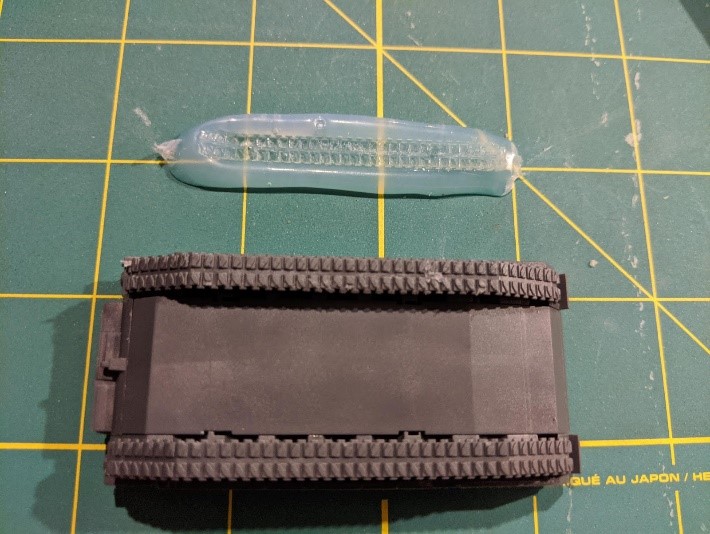
The one bit I wanted but couldn’t get was spare tracks. There is spare track on the Leopard-2 sprue but it’s not quite right for the Abrams. So what’s a guy to do? Improvise, adapt, overcome.
To be honest I didn’t know if this was going to work, but it did.
I laid down a thick bead of hot glue onto my cutting mat and let it cool down to where it was starting to get that white colour back and I pushed the Abrams track down into it and let it fully cool. I carefully pulled the Abrams off of it and voila a push mold for an Abrams track.
I mixed up some GF9 green stuff and poured some water into the push mold (poor mans release agent) and in a few minutes I had more track than I knew what to do with. If I was to do it again (Which I did) I’d of put the hot glue on a large Popsicle stick so I could reuse it and move it easily.

This is the mindset a modeler needs, everything can be a bit, or become one. I cut up and shaped sprues and squared them to become boxes of rations, and a case of beer.
Now came the fun part, adding it all together.
If you’re a Sergeants Major or First Sergeant, skip ahead a paragraph, you won’t care to follow where I’m about to lead you. Uniformity only goes so far. Every armoured vehicle I’ve ever lived out of was different. There were some key things in some key places, stretchers, admin boxes, tools. After that it was up to the vehicle commander, and each had their likes, wants and needs. This for an army on the table means variety but commonality and can make a cohesive army of individuals.
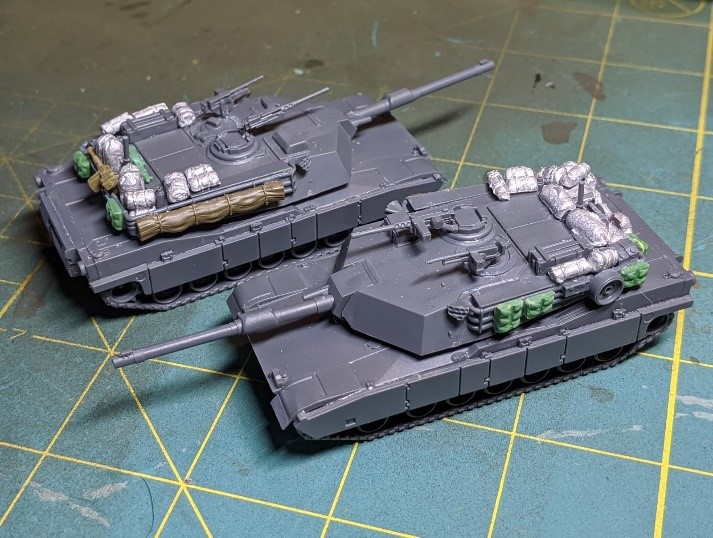
I started my Abrams platoon by picking what my key essential kit would be. For my vehicles it was an ammo box made into an admin box, two jerry cans, a road wheel and the vital sleeping tarp. I picked where these were going to go by test fitting with blue tac and glued them down on the four tanks. This gave me a base to work from and individualize further.
With that I was open to do what I like but I ensured to keep the blow out doors of the protected ammunition and the antenna mounting points free and clear of stowage. It’s a safety thing. And knowing is half the battle.
I wanted these tanks to be really lived in and so I made sure that each crew member would have not only a ruck but a kit bag, a bit much sure but the tanks doing all the lifting so who cares, might as well bring everything you might need.


I tested and moved around stowage to make each vehicle individual, but the common items and open space of the blowout panels made the platoon cohesive. They looked not uniform, but common.
Things really started to come together and each story started to tell its own story of the crew manning it. In the field I’ve seen no end to crazy things strapped to tanks by the crew so the machine guns, boxes of MREs or even a case of beer started to come together.
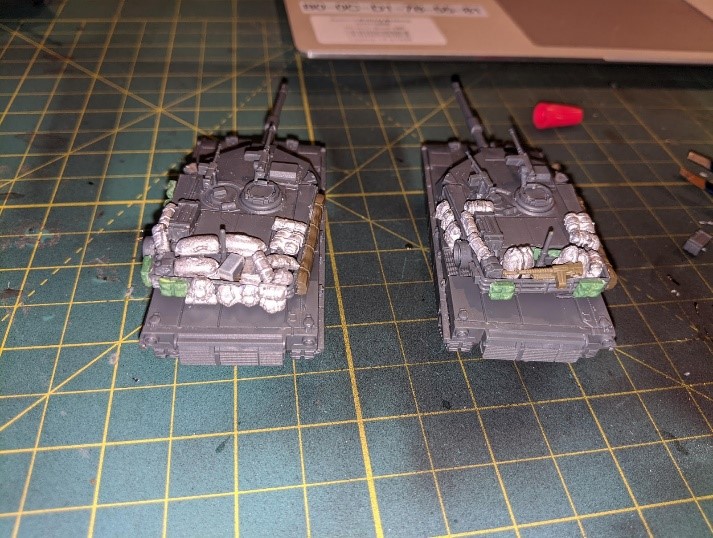
One thing I will note is that if you plan on putting this much stuff on your Abrams I suggest magnetizing the turrets. I didn’t. And then once I had more than doubled the weight of the model, all on the rear of the turret, I had to dig out the pins and insert magnets. They work amazingly well and I have no issue with the turrets tipping now. Learn from my pain.
In the end I’m really happy with how the platoon turned out. It’s my first American unit for Team Yankee and I think it’s going to set a trend for my force.
Now I just need to figure out if I’m adding camouflage nets and find a paint scheme I like. I’m thinking NATO 3 Colour so they can blend in with the allies.

The new Team Yankee American book is going to add a lot of fun and flavour to the game and I for one can’t wait to see the iconic M1A1s hitting the table. Some people love the look of stock tanks, stripped down to the essentials, ready to fight light and fast, I know I do with my Soviets. For my Americans I want a lived in tank that nobody is going to confuse as anyones but mine, and the M1A1 has the stowage capacity and cool factor to help make this happen.
Happy hobbying.
~Chris
With Chris Allen
With World War III: American being released there are a ton of new and exciting options available for players. From new Formations, to new variants and weapons players are spoiled for options and this definitely extends to the support options commanders can choose from. Few things are as connected to victory on the modern battlefield as artillery and so we’ll take a quick look at the new kid on the block the M270 MLRS and compare it to the workhorse of fire support the M109.
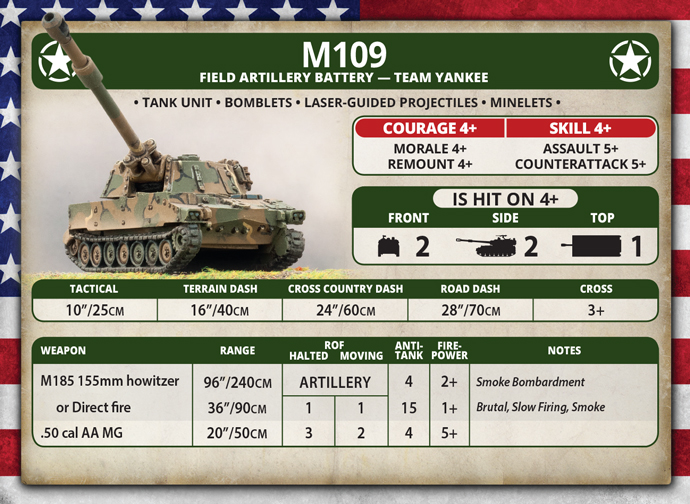 American players have had the supporting fire of M109s since the beginning of the game. It’s a tried and tested unit that provides a lot of flexibility for commanders. Its 155mm shells provide AT 4 artillery fire with a 2+ Firepower, it’s solid. It’s got pretty solid armour for a self-propelled artillery system, has smoke and the option for specialist rounds like DPICM, Minelets and copperhead rounds. Fully kitted out this unit is a high end swiss army knife, it can do it all, or be taken without upgrades to provide good old direct fire support to your combat teams.
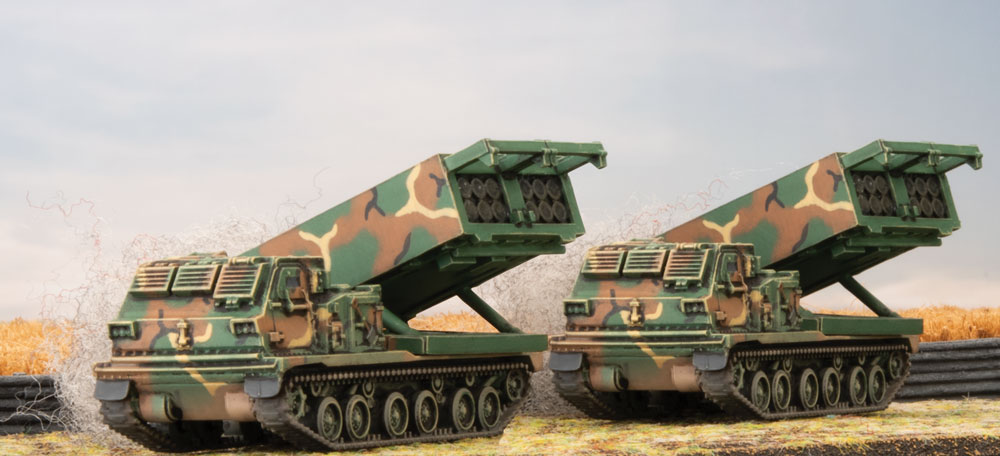
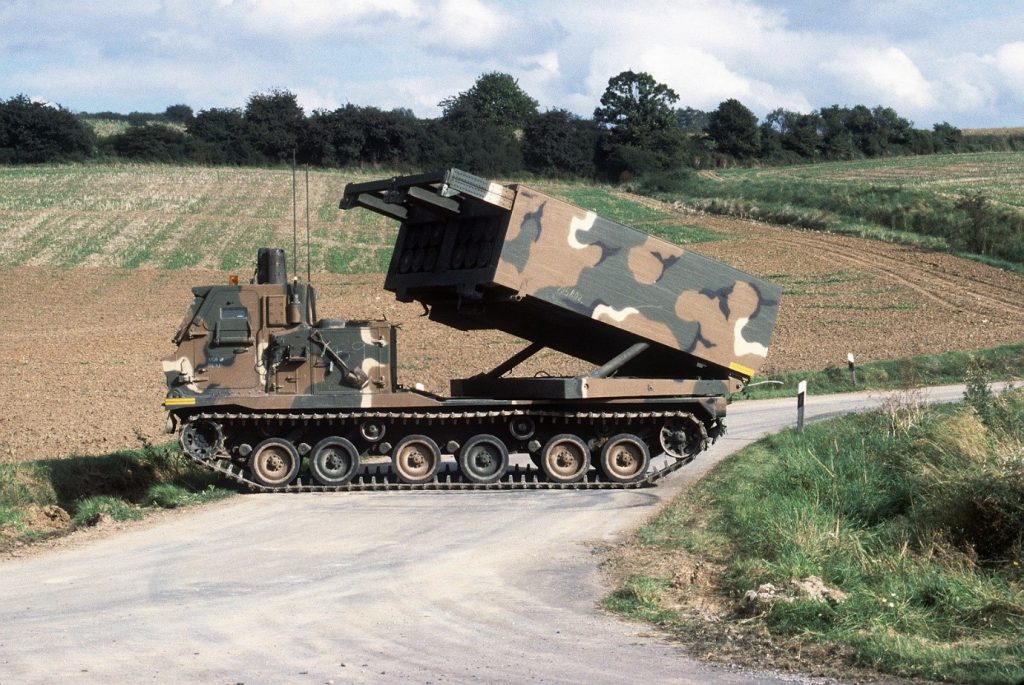
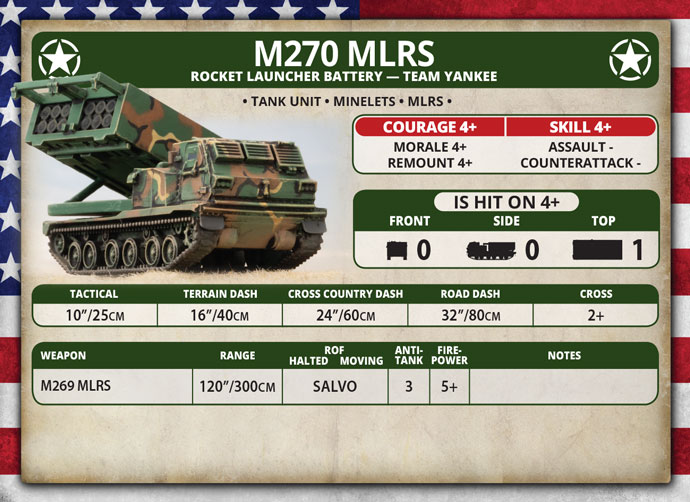 The M270 MLRS is the new big fire support option for U.S. forces. While it came out with Team Yankee British, the MLRS is going to be available for the British, American and German forces. This new artillery system provides a few things for the American forces in World War Three, not the least of which is a really sweet model. I’m a big fan of the look of MLRS systems and with the armoured cabin and huge rocket bank I was in from the moment it was released.
Looking at the M270 MLRS’ stats there’s nothing huge to immediately write home about. Lightly armoured it’s just beyond unarmoured with 0/0/1, it can take Minelets for 1 point and has a AT of 3 with a 5+ FP on it’s Salvo. This is where a lot of people write off this vehicle, but there is a lot more under the hood than most people see. In my opinion the largest negative is that the MLRS cannot provide a smokescreen and so loses some flexibility.
Another unit with mines is always amazing. The MLRS is about board control, plain and simple this unit helps you dominate table space more than anything else, and mines are a great way to do this. With the MLRS rule letting 3 teams count as 6 you can drop 2 minefield tokens and cover a key gap, or route forcing your opponent to make tough decisions.
Salvo fire is huge. People always forget just how big salvo fire is. An artillery template is 6”x 6” or 36 square inches, the Salvo template at 10”x 10” provides 100 square inches, or just under three times the area enabling it to hit a lot more targets. The downside to this is almost all of your shots will cover terrain features and as such will be harder to rang in. An MLRS battery really loves having an M113 FIST team to make sure it can range in on 4s if you’re planning on repositioning it or using the mines.
The MLRS rule makes each team firing count as 2 teams, so your three-team battery of MLRS for 9pts fires as six teams and rerolls all misses to hit. When you compare this to a similar pointed unit like the minimum M109 unit at 7pts you start to see how effective this system can be. Rerolling all misses in three times the area gives you dominating fires. This is especially effective against infantry and unarmoured tank teams that a single hit will also pin, but enough AT 3 against top armour will put dents in a lot of armoured units.
The firepower as we initially discussed is what commonly turns people off of the MLRS, at 5+ it looks like it’ll be ineffective but when you start to run the numbers the MLRS more than holds its own.
The table below describes the likelihood of any team under the respective artillery or salvo template being hit, infantry dying, dying to a repeat bombardment and the same for dug in against 3+ to hit and 4+ to hit infantry.
| 3+ to Hit | |||||
| System | To hit | Inf Fail | Repeat | Dug in | Repeat |
| MLRS X3 | 88.9% | 29.6% | 49.9% | 9.9% | 16.5% |
| M109 x3 | 66.7% | 22.2% | 37.0% | 18.5% | 30.9% |
| 4+ to hit | |||||
| System | To hit | Inf fail | Repeat | Dug in | Repeat |
| MLRS X3 | 75% | 25% | 41.7% | 8.3% | 13.9% |
| M109 x3 | 50.0% | 16.7% | 27.8% | 13.9% | 23.1% |
The MLRS rule drives your hit percentage up massively, and it provides a bigger advantage against harder to hit teams like 4+ infantry or teams out of line of sight. This translates to more infantry kills in the open, providing kills almost ⅓ of the time against Soviet and other 3+ to hit infantry and ¼ of the time against 4+ infantry. With the size advantage salvo brings, you are hitting almost 3 times as much area, letting you hit more teams, more often, potentially multiple units, and then killing more often.
Against dug in teams the 5+ fire power is a detriment, but hitting teams more often brings the numbers up and you find that the MLRS is roughly half as effective at killing dug in teams as the M109. When you remember that the system hits almost three times the area this evens out pretty nicely. The area advantage is where the MLRS shines, as it can almost completely cover the area where defenders can hold an objective from the start of the game. This lets you blanket the area and just bath the enemy in fires until they move or die. Few players will leave units to sit under a template all game, and those that do will regret it.
If an MLRS system is targeting an objective and given multiple turns to fire, there isn’t going to be much left to defend the objective and paired with robust reserves like the new M1A1 Abrams you can have a game winning combination that is very hard to deal with.
MLRS also excels as a cut-off for all of the above reasons. With 100 square inches of table space covered if you protect an objective or key terrain with the MLRS template and call a repeat, on average about 50% of Soviet teams are going to die. That is a crushing level of fire that few forces can accept to take, and being pinned under that template and having it continue basically spells death for anything that doesn’t make it out quickly. Making a no go zone for enemy infantry allows you to shape the battlefield and force players into a bad position.

The M270 MLRS is a gem of a unit that adds another key tool to the American arsenal. Does it replace the M109? Nope not even close. But what it does is give you another option for how you want to take apart your opponents. The M109 provides dominating specific fires and a toolbox of ways to assist your army with specialist munitions while the M270 MLRS provides board control, being a murder machine for troops in the open and can truly perform area denial on its own because of this. What does this mean for American commanders? There is the right system available to support your battle plan waiting to be called upon to hit the table.
~Chris
With Nick Azzaro (and Brandon and Lonnie)
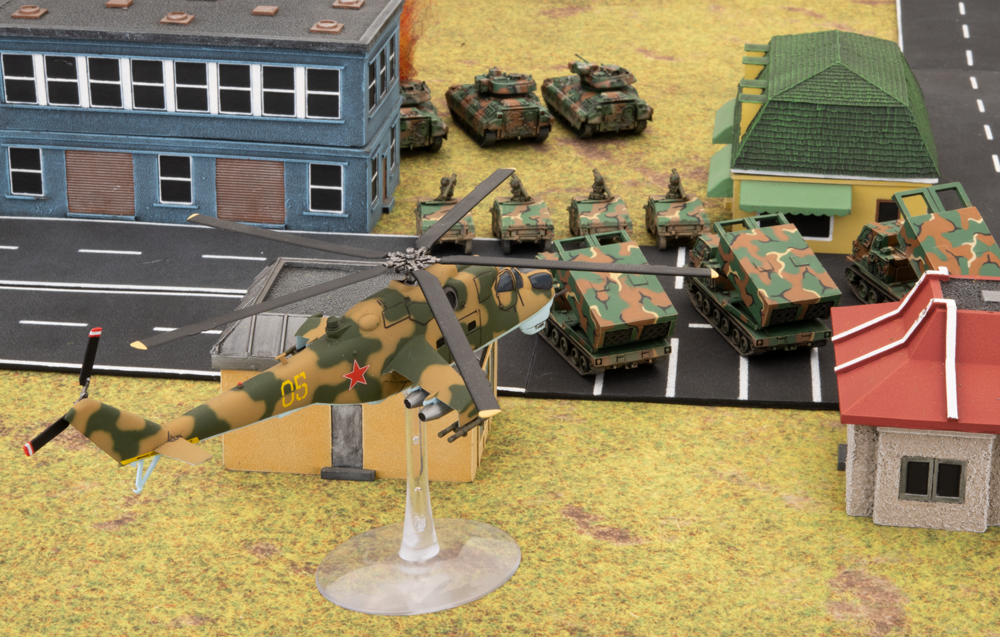
The stage was set for a confrontation outside a small town. The US forces had occupied the town prior and were dead set on defending it from the Soviet interlopers. The buildings would provide cover for the Americans as the hills and valleys outside the town would help mask the Soviet advance. As the sun rose over the small town, shots rang out.
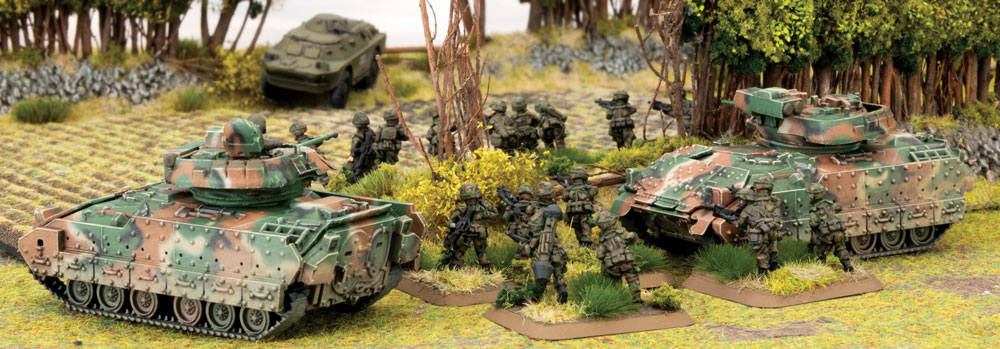
Brandon’s American list hinged on the new Bradley. The appeal is that for a relatively low points cost, he can bring to bear a large amount of firepower in the form of their TOW-2 missiles. Even in this smaller 50 points game, Brandon was able to bring eleven M2 Bradleys, across three platoons in addition to his Combat Team HQ, using the M2 Bradley Mech Combat Team formation. He fleshed out the rest of his list with three MLRS Rocket Launcher Batteries and four HMMWVs with Stinger AA missiles.
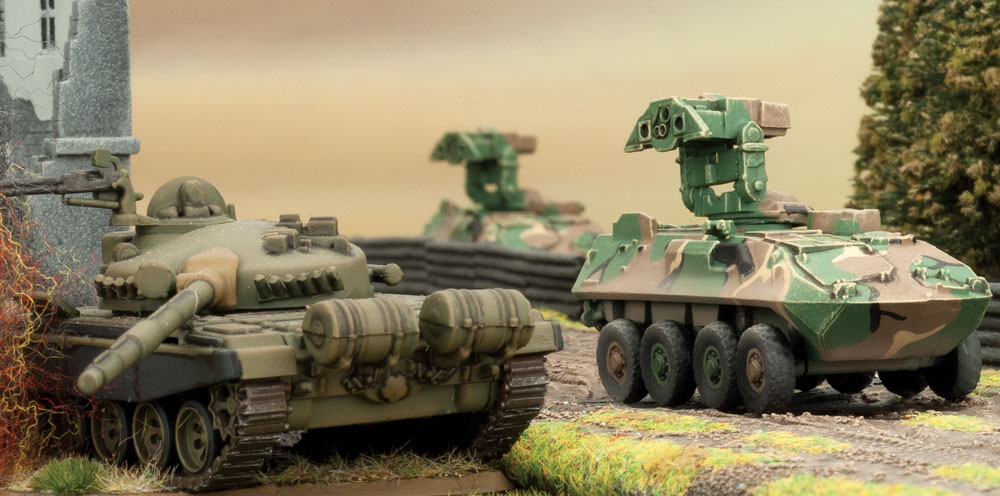
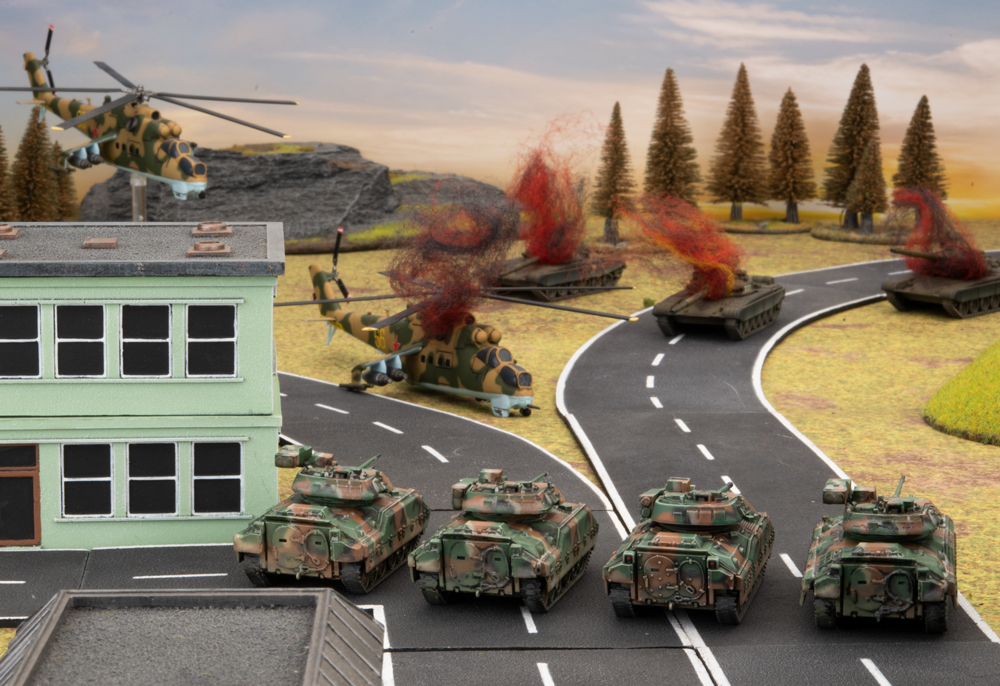
Lonnie brought the Red Thunder with a Soviet list utilizing the T-72 Tank Battalion. As such, he had his Battalion HQ T-72 accompanied by two additional companies of four T-72s each. He rounded out his forces with a small BMP-1 Motor Rifle Company and two MI-24 Hinds.
The scenario would see Brandon defending the small town from Lonnie’s Soviets in a scenario of their own devising. (With a late game surprise element.) Brandon deployed his Bradleys in a defensive perimeter around the edge of the town protecting his more vulnerable HMMWVs and Rocket Batteries in the interior, along with his HQ Bradley. Lonnie’s deployment was mostly along the long board edge opposite from Brandon’s perimeter as his plan was to overwhelm Brandon’s deadly yet somewhat softer Bradleys with the firepower from his T-72s. His Hinds would start off the board and his BMPs, filled with eager Soviets, would begin further back in his line. However, with Brandon winning first turn, this plan was not to be.
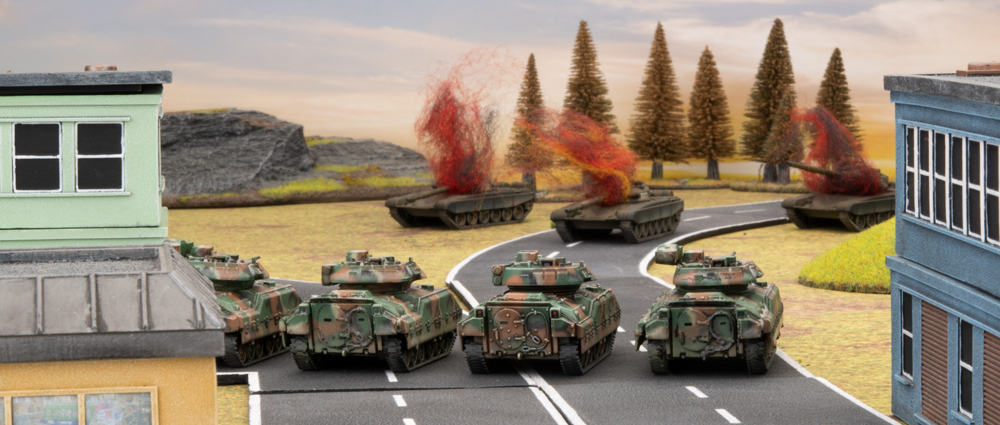
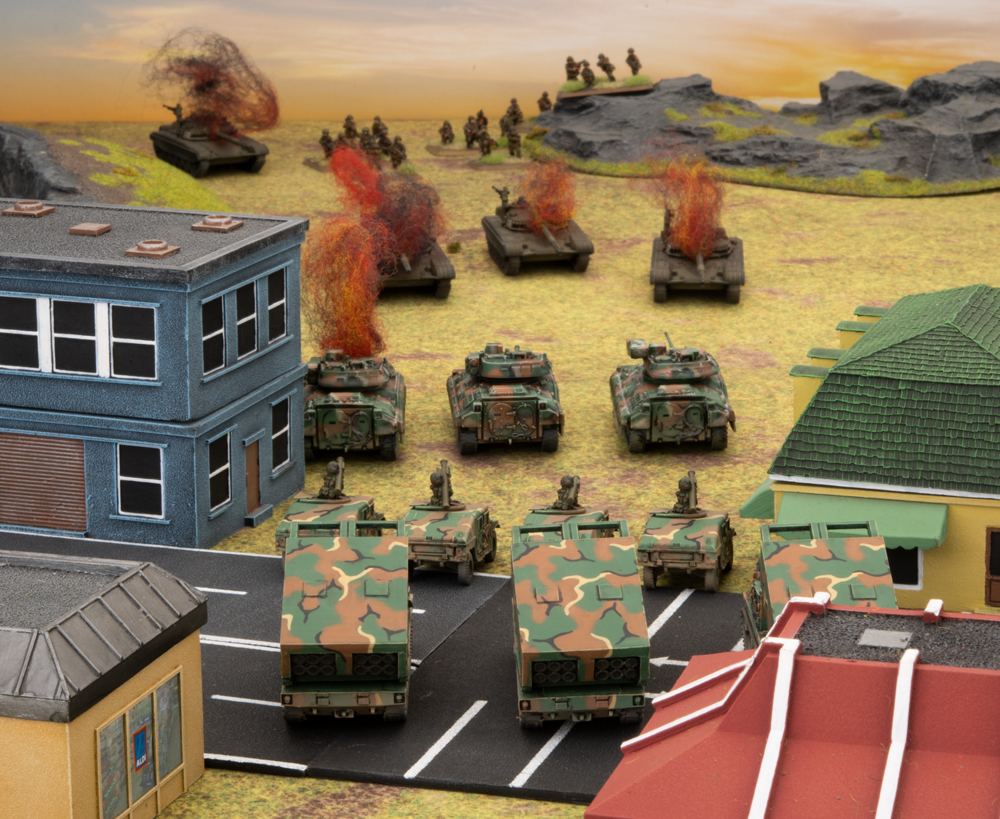
Brandon kicked the game off with a bang. Having sufficient fields of fire, he would strike first and hope to cripple any counter attack before it could form. All his Bradleys opened fire with their TOW-2 missiles to great effect. His Bradleys closest to the T-72s blasted three of the Soviet tanks off the table with the last remaining fleeing instead of facing another barrage. Brandon’s middle platoon of Bradleys only had line of sight on the T-72 command tank and made short work of it as well. The last platoon of Bradleys had the least amount of luck only being able to destroy a single T-72 leaving three of his comrades in the hunt. The American luck would continue to fizzle out as the MLRS batteries were unable to range in on the distant BMPs. However, it was a bloody and eventful turn seeing the Americans gain a strong early advantage that the Soviets would have to work to surmount the rest of the game.

Having taken a browbeating in the American turn, the Soviets were looking to get some modicum of revenge. But first they had to shore up their defenses. Lonnie disembarked his infantry from his BMPs into the cover of a shallow ravine and then shuffled the BMPs out of sight for their own protection. The remaining three T-72s would then advance with the cover of some escarpments on their right. Finally, the Reds would hope to change their fortunes with the arrival of the Hinds. The Hinds went straight to their 57mm UB-32 rocket launchers and looked to drop a salvo on a large portion of Brandon’s Bradleys. The Bradleys would fire their Bushmaster guns in vain prior to the barrage. However, it wouldn’t matter in the end as the Soviets failed their firepower rolls and left the Bradleys unharmed. The T-72s would have slightly more luck firing downrange at the central Bradleys and destroying one. But this was not the counter punch the Soviets had hoped for. They would now need to survive another turn of American shooting.
The American turn began with the HQ tank moving into firing range of the Hinds and the HMMWVs trying to get a better angle on them as well. Both the HQ tanks and the HMMWVs fired at the Hinds to no effect. The Bradley platoon nearest to the Hinds unleashed their Bushmaster guns at full tilt and managed to down one of the menacing flying tanks, however. The Bradleys on the far edge continued their punishing barrage on the T-72s. But due to some unfortunate dice, only one T-72 bailed out and the remaining two were unscathed. The rocket batteries tried to finish off the T-72s but failed in this task. The Soviets were down but they were not out and it was again their turn.
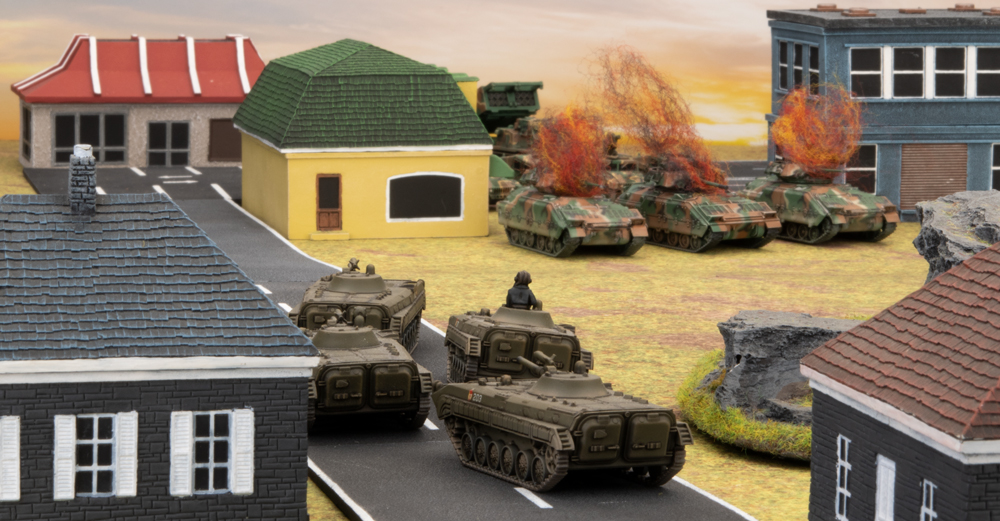
The crew of the T-72 remounted and the company advanced. The infantry and now-empty BMPs also closed the distance. The single remaining Hind moved right into the thick of the American defense in hope of punishing some of the softer interior targets. Its plan was thwarted however; as it was about to fire, the unit of Bradleys that had fired out of turn before turned their sights on it. It was blown out of the sky before it had a chance to make a difference. The T-72s, in a desperate bid for revenge, fire on the Bradleys on the far end and manage to destroy one, thus securing a small victory in an otherwise troubled advance. But it was about to get more troubling for the Reds.
 The third turn began with the combined fire from two of the Bradley platoons finishing off the remaining T-72s while the third platoon moved onto the offensive. The MLRS rocket batteries fired on the infantry but they proved to be too dug in to be removed easily. So the turn moved to the Soviets who had their small BMP motor rifle company facing down a nearly unscathed American force.
 Lonnie began his turn by advancing his Soviet infantry taking advantage of the cover afforded to him by his own destroyed tanks. The BMPs unleashed their Sagger missiles on the center group of Bradleys and managed to secure another kill. The Soviets were on the ropes, but they intended to bleed the Americans if they could. However, numbers were against them and it seemed that the days may be numbered for these comrades.
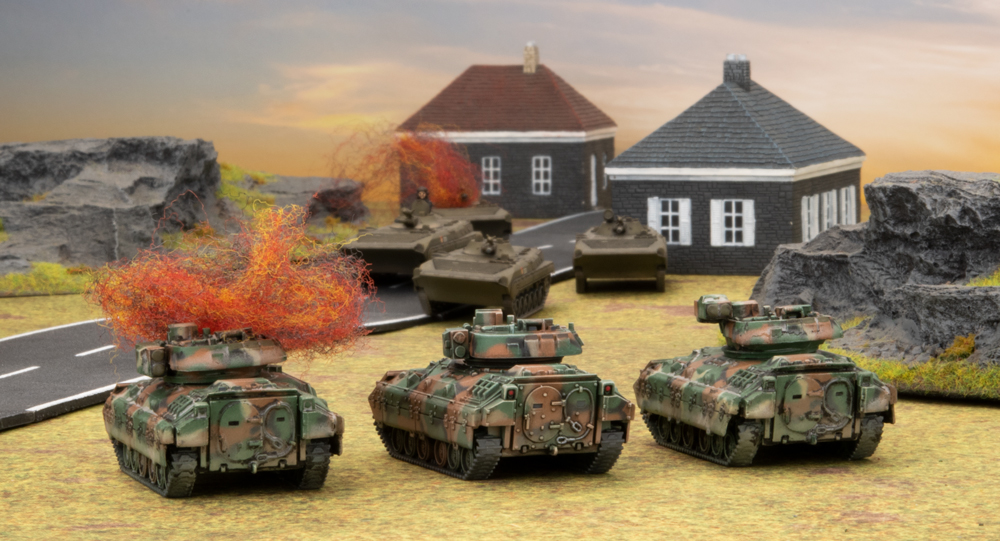
The fourth American turn would prove less bloody purely because there were hardly any targets left to destroy. The Bradleys that had dealt with the Hinds moved out of sight beyond the escarpments and the others on the far side destroyed one of the remaining rogue BMPs. The MLRS fired on the BMPs as well but only managed to spook them. The turn shifted to the Soviets, though the writing was on the wall.
In a last defiant effort, the infantry fired off their RPGs over the escarpment at the cost of a single Bradley and the BMPs tried and failed to destroy another. This ended up being the last turn as Lonnie conceded a gentlemen’s victory to Brandon instead of facing down a hail of TOW-2 missiles.
In the end, the Bradleys proficiency for destruction in the first turn left Lonnie’s Soviets an insurmountable climb. The constant pressure the Bradleys provided just wouldn’t let the Soviet advance get enough steam to crack the perimeter. Truly, the Bradley has demonstrated its efficiency and may be a contender for most aggravating transport to face, up there with the BMP. It was most definitely on the Bradley’s back that Brandon’s American victory was earned.
Happy 4th of July.
~Nick
Pete the Wargamer shares a great way of painting the new M2 Bradley (or any American vehicle) in the Desert MERDC scheme, without using any advanced techniques.
with Victor Pesch
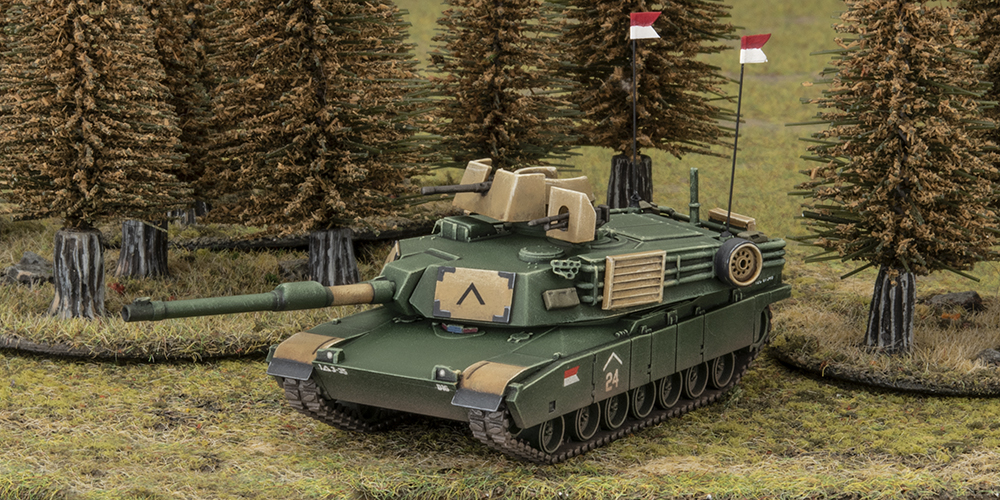
WWIII: American has been on my desk for a while, and I’d seen the awesome new Bradley sprue around the office, but with plenty of other projects to work on, I didn’t think I’d be starting another army.
 Then Tuesday rolled around, Chris reminded me the launch was this weekend, and I found myself flipping through the book and hunting for sprues!
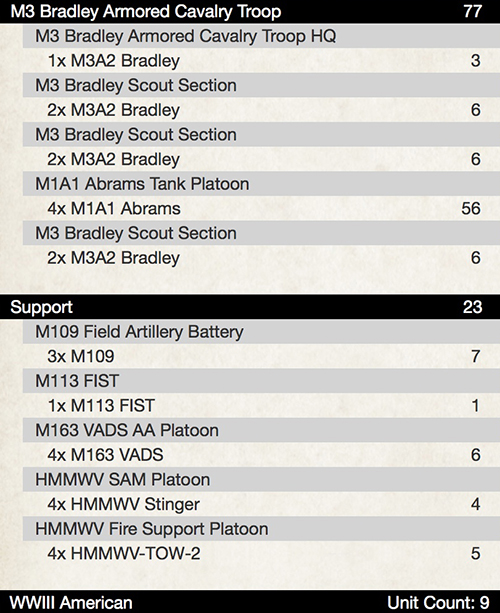
I decided on an M3 Bradley Armored Cavalry Troop.
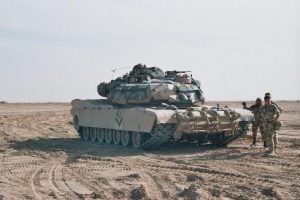
My first hobby step as always is to hunt through google and books for reference images, and maybe something interesting I can do. I’m doing Gulf War British, so I was pretty set on doing something green.
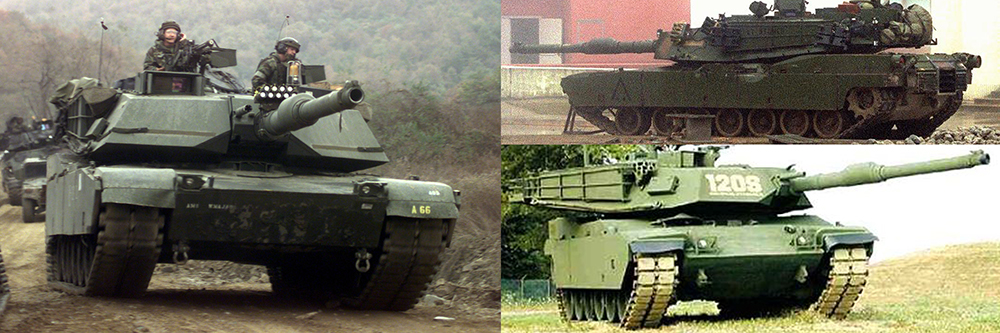
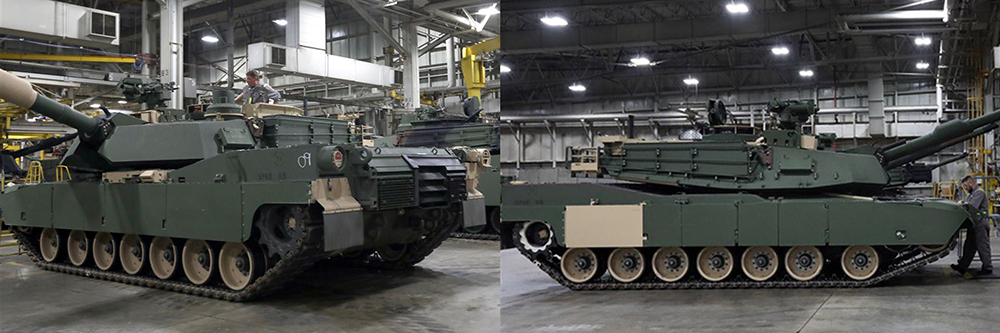
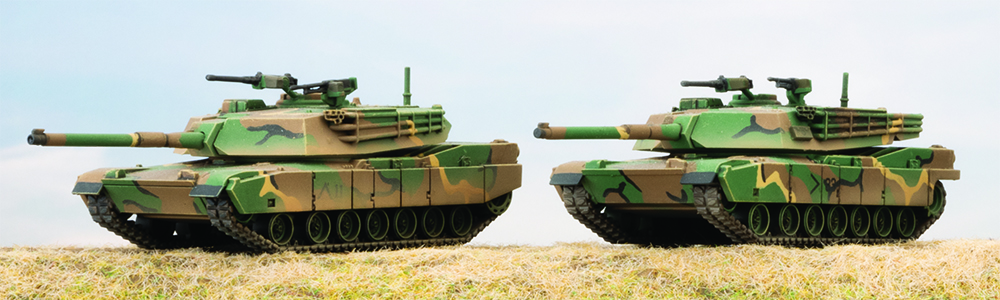
Scale modellers are also good inspiration. The below examples are M1A2’s, but they capture the look I want.
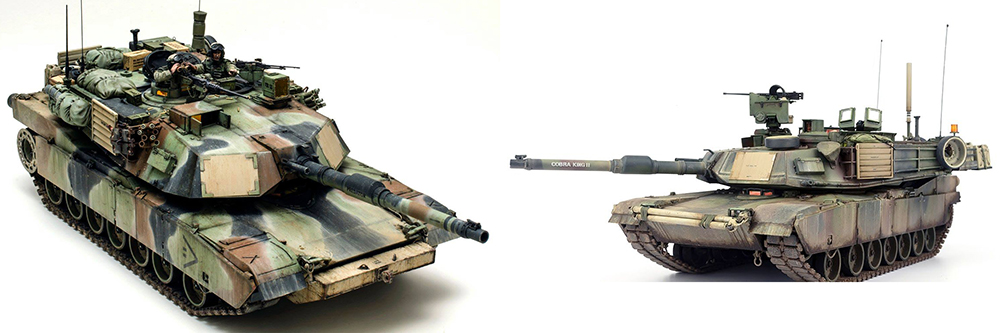
What stood out to me was desert yellow vehicles with forest green replacement parts.
So I’ve decided to apply the same logic to forces fighting in Europe. It’s 1991, the first Gulf War has just ended, but the Soviets are still causing problems along Iron Curtain. Equipment and replacement parts that were destined for the desert are now being shipped hastily to a more lush climate. There are some picture of this, but it’s usually on later M1A2 tanks.
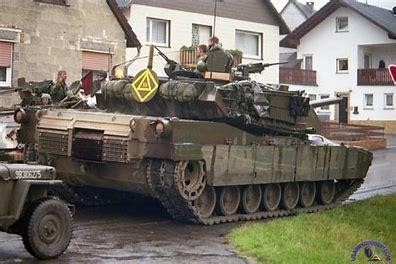
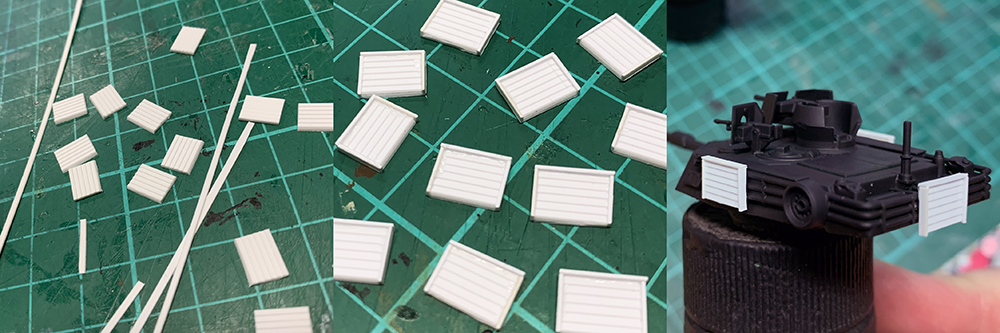
 Being a Cavalry force, I took some liberties and added MG shields usually found on Vietnam ACAV M113’s. I have a few spare from building VADs.
Combat Identification Panels (CIP) were developed after the Gulf War, so again I’m using a bit of “what-if” logic and assuming they got these ready for the theoretical fighting in Europe.
 To make these, I used some plasticard sheets (1mm spaced Clapboard, and 0.5 thick plain). The cutting was fiddly, but with a sharp knife and plastic glue it was surprisingly quick and easy.
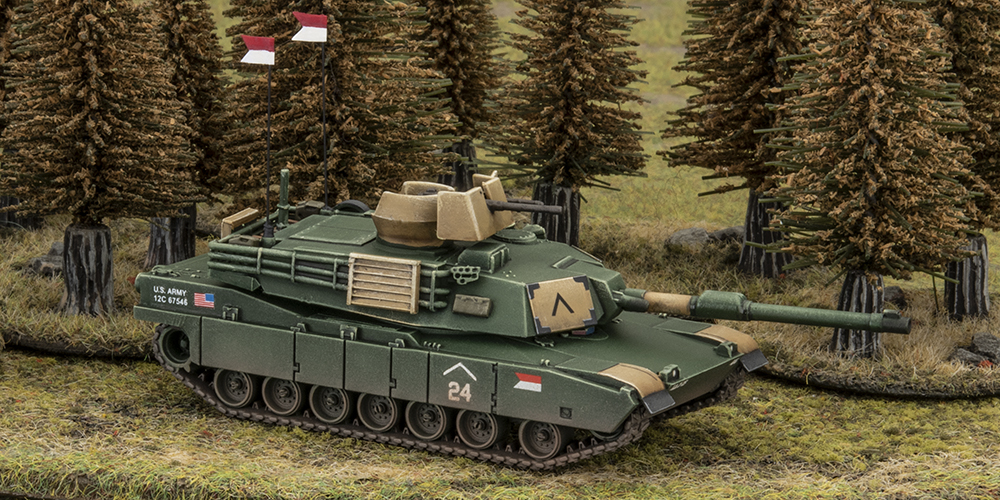
The painting was pretty straight forward, as I’m aiming to get the army done daily quick.
Here’s the main colours:
FOREST GREEN
– Tamiya Field Grey (Airbrush)
– Army Painter Army Green dry brush
– Citadel Biel Tan Green shade
– Citadel Nuln Oil recess shade
– Army Painter Army Green dry brush
DESERT YELLOW
– Vallejo Green Ochre
– Vallejo Buff dry brush
– Vallejo Pale sand dry brush
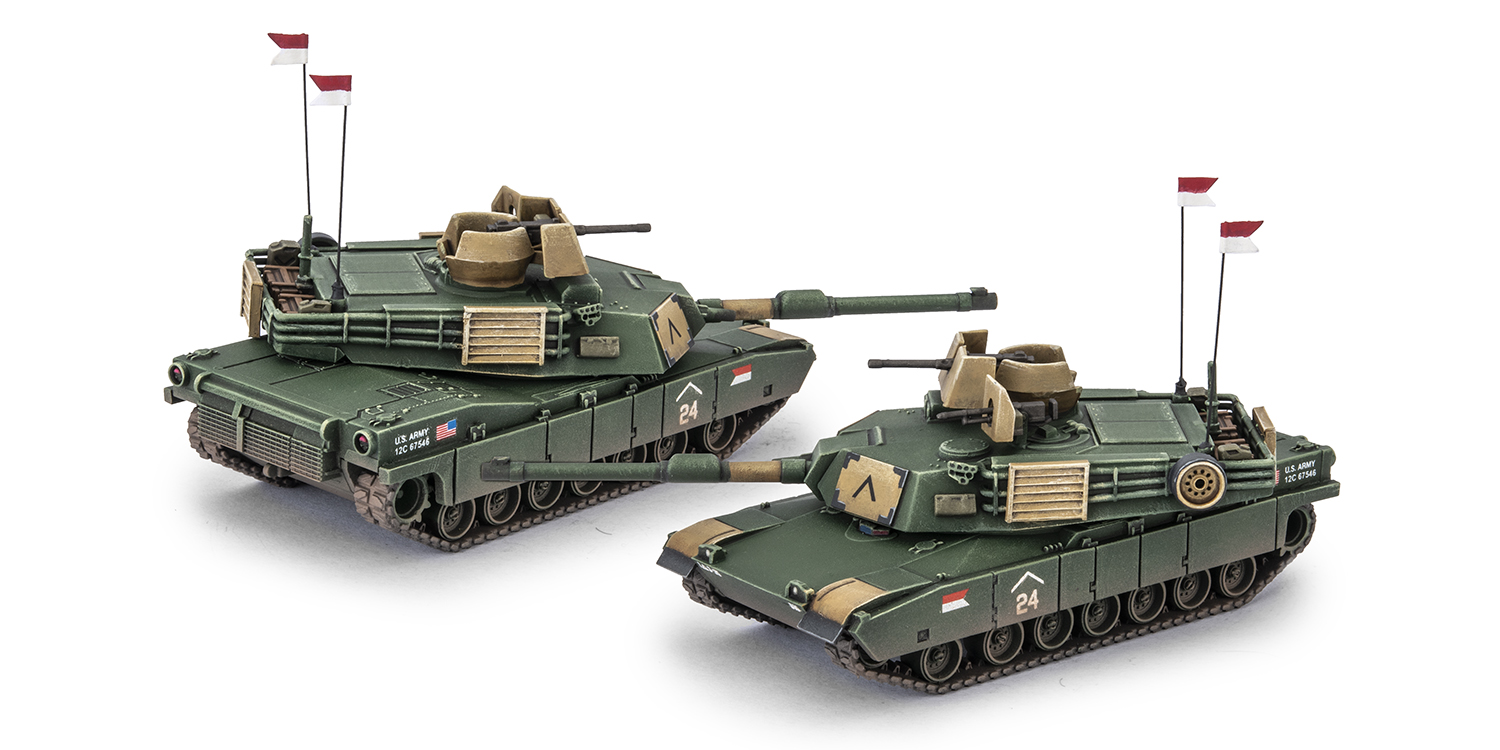
To continue the cavalry theme, I used some decals from the Vietnam M113 kit, and also added some matching penants on the aerials, made with folded paper, PVA glue, and paint.
Overall it’s a pretty quick and rough paint job, but with hopefully some interesting elements to make the army stand out. Now I’m looking forward to seeing this scheme on Bradleys, Humvees, and the rest of the support vehicles. I’ll look into adding stowage at a later date to the whole force.
Not everyone will love this paint job, but I think one of the great things about WWIII: Team Yankee is the “what-if” nature of it. It allows for some cool modelling opportunities.
It may not be historically accurate, but lets call it “historically plausible”.
– Victor
with Chris Townley
 A year ago, the Big Four (of Late War) were driving back from Panzerschreck 2019, where we had spent the weekend playing 150 point doubles games of Team Yankee. Like any post event road trip, we found ourselves talking about two things:
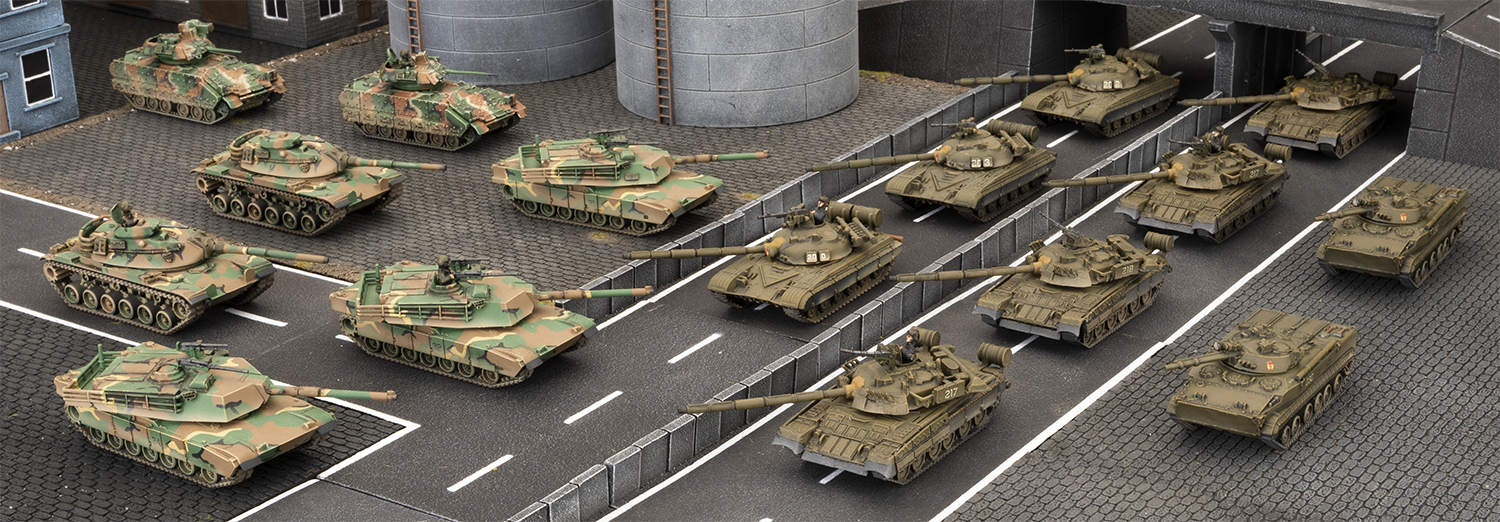
We found ourselves discussing the future (now the present) of World War III: Team Yankee and the effect that T-80, M1A1HC, Leopard 2A5 and Challenger tanks were going to have on army building. Suddenly you can roll out tanks costing as much as 18 points each that are essentially an army in their own right once you put a full-strength platoon on the table.
This led us to the next logical point in the discussion, we wanted to play with a company of tanks and supporting equipment, not a platoon. For Flames Of War players it is one of the things that the three periods (Early, Mid and Late) solve. In Mid War a Panther tank is the king of the battlefield, but I can realistically only fit a few in the average force, but roll over to Late War and there are much nastier cats, so I can field an (understrength) company in 100 points.
Returning back to World War III: Team Yankee and there is no way to sandwich 8-10 Abrams, a platoon of infantry in Bradleys, some artillery and Apaches in 100 points without making some serious compromises and at the end of the day we wanted to play with the models we wanted to play with.
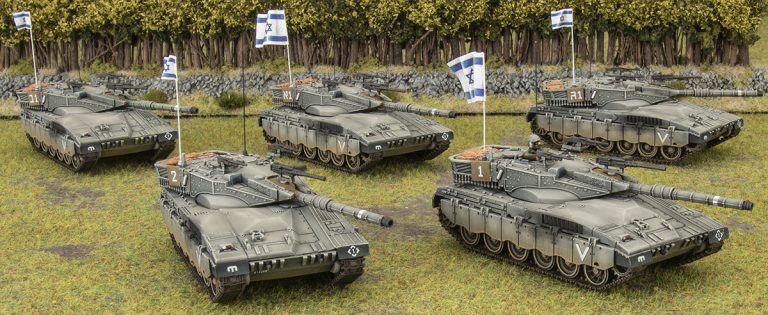
This was when we started discussing Big Games For Big Gamers – the idea of going up to 150-200 points but with a little peer based pressure on what was a “Big Games” army. Now you have to remember that I had just finished a weekend of pushing round 35 points of Czechoslovakians that still had 48 models and I wanted something a little faster to game with. With this in mind we agreed to keep our Black Platoon selections “points heavy” – so no army building with Czechoslovakian T-55 Tank Battalions (31 tanks for 40 points) but instead focusing on T-64s and T-80s, M1A1s, Leopard 2s, Merkavas and Challengers. Our support units could be whatever we wanted, but once again this was a chance to play with full strength batteries of M109s, adding in minelet and bomblet, rather than focusing on maximising the value of every last point.
I am the last person to tell you that building a horde of anything in World War III: Team Yankee is wrong. I still have a fantasy to build an Iranian force with a pile of infantry, Chieftains and M60s, and my Czechoslovakians still have another 20-30 T-55s and T-72s to paint, not to mention the extra supporting units like RM-70s and Hinds. Instead it was about creating an environment where we could play games that we thought would be fun, not too asymmetric (6 tanks vs 60), and let us put all of our cool toys on the table.
The focus of this is having fun, so I’d encourage you to talk to your gaming group about trying something similar. You don’t need a hard and fast set of dos and don’ts, just do what feels right and start off with a company of whatever tank you have been wanting to field, but couldn’t do in a 100 points, and then add in the other stuff to make it an interesting force.
You can find a link to my “Big Games For Big Gamers” Eagle Troop Force here…
As you can see it is not exactly loaded with options, but other than some Chaparral SAM Launchers, I have everything that I want, and once I get this pile painted I can start substituting out some of the M3 Bradley Scout Sections for a few more support units like Chaparrals, Humvees, VADS or infantry.
~Chris
With John Lee
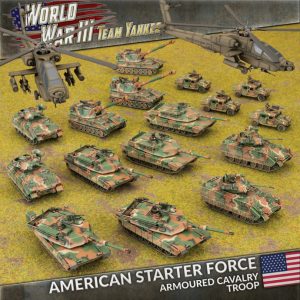 With the launch of the WW3 American, I thought I would take a look at how could a new player or someone on a budget, get a force on the table that would be competitive or at least hold its own with such iconic equipment as the Abrams, Bradley and Apache helicopter. For the new player, it opens the door to playing WW3 without needing to buy, assemble or paint too much and get into playing the game quicker.
So, if we look at what we get in the excellent value starter set, that might help decide what formation to run. The starter set contains the following:
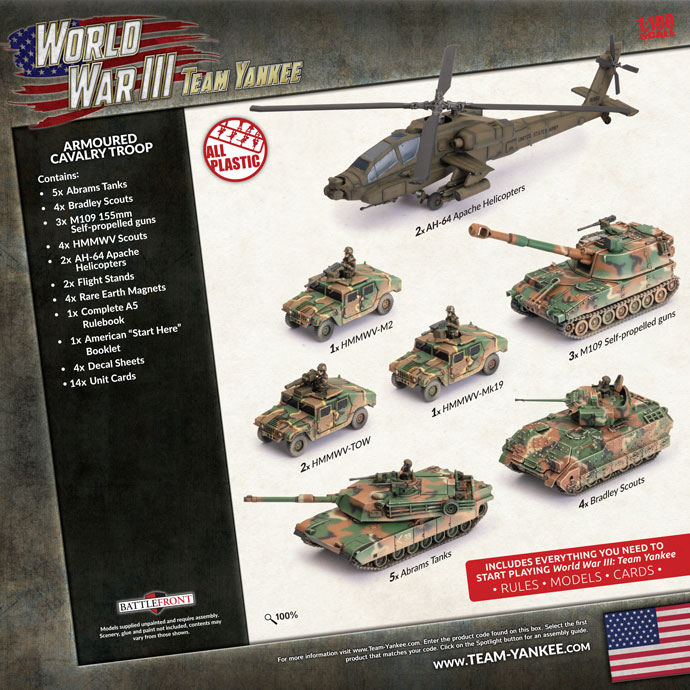
The bonus here is that the rulebook is included in the box – so the new player makes a saving right away. Now if we look at what formations are in the WW3: American book, we can see what we can maximize from what we get in the starter box. The best formation to maximize this is the M3 Bradley Armored Cavalry Troop. Let us look at what units comprise this formation:
I like this formation a lot – combined arms – even includes helicopters! Looking at the formation and what we get in the starter box, we can use everything for the formation except for the Humvees. That is an amazing start. I do have a plan for the Humvees though as we explore later in the support part of building two lists – one at the standard 100pts and one at the 2020 US 120pts (exactly the same list but using our smarts to change out the type of Abrams between the two).
OK – lets build a rounded out 120pt list to start with.
The UH-1 Huey’s are optional as you will only really use them if you plan to transport the infantry across from one side of the board to the other – so is a consideration for not purchasing right away.
Adding in the AA options in the support section you now have used the Humvees from the starter box. To run the list at 100pts just run the M1A1 Abrams as IPM1 Abrams. 5pts less each and with four in the formation equals 20pts. Done. You can use the M1A1s to represent IPM1s and just let your opponent know – should not be a problem.
Looking at the composition of the force we have several units that are multi or dual role. M3 Bradley’s can take out helicopters, light vehicles, infantry with its Bushmaster 25mm AT8, and tanks with its AT23 missile and can spearhead and has scout! M247 Sergeant York can take on aircraft and light vehicles, infantry with its ROF5/4 AT7 40mm gun. The apache is a beast with its AT25 hellfire missiles, ROF 6/3 AT8 30mm chain gun and is hard to shoot down. Two artillery options to dig out infantry. M1A1 or IPM1 Abrams to duke it out with other tanks and/or assaults.
With reserves at 48pts for 120pt army you would put the M1A1 Abrams platoon and either the M109 Artillery Battery, UH-1 Huey Rifle Platoon or M247 Sergeant York AA Platoon depending on the mission. For the 100pt army probably the IPM1 Abrams and AH-64 Apaches.
To buy this army you need to only purchase the following for under $300:
| 1 x TUSAB04 Starter Box | 100 |
| 1 x TUBX03 M113 Platoon | 36 |
| 1 x TUBX10 M247 Sergeant York AA Platoon | 54 |
| 1 x TUBX13 Rifle Platoon | 30 |
| 1 x TUBX21 AH-64 Apache Helicopter | 35 |
| 1 x WW3-03 World War III: American Book | 20 |
| Total | 275 |
An easy option and versatile option to get into WW3 that is great on the budget and gives you the most bang for your buck starting a new force. Its also easy from here to expand on what you have already to play other formations. Enjoy!
~John
With Chris Townley
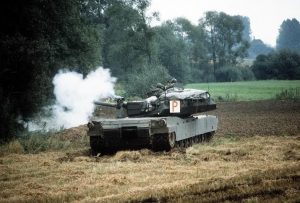
Like many gamers I found the Battle of 73 Easting to be a very interesting, if rather one-sided affair, almost an analogy for the entire Desert Storm operation. It reiterated the concept of violence of action and the unrestricted use of speed, strength, surprise, and aggression to achieve total dominance against your enemy.
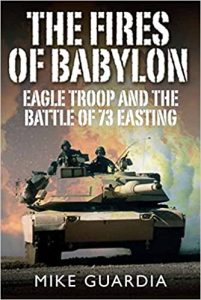 The battle itself has been covered in a variety of places, but for an interesting read about not just the day in question, but also the men involved I can recommend The Fires of Babylon: Eagle Troop and the Battle of 73 Easting.
The release of WWIII: American finally gives me the chance to take Captain McMaster and Eagle Troop, and put it on the tabletop. Plus, it gives me a great reason to build and paint some Bradleys!
The Army List:
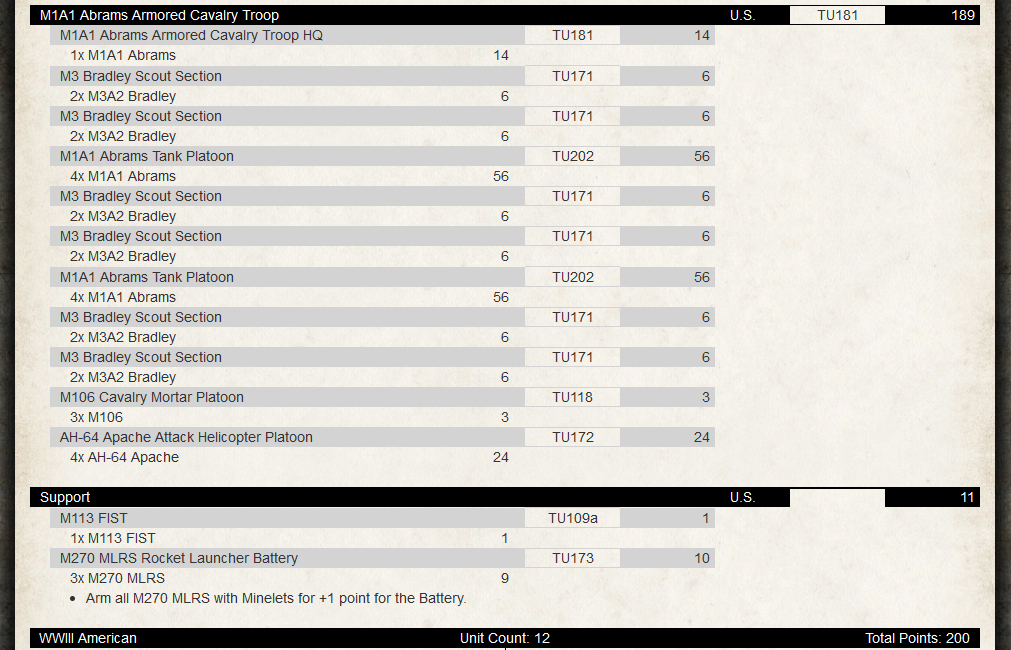
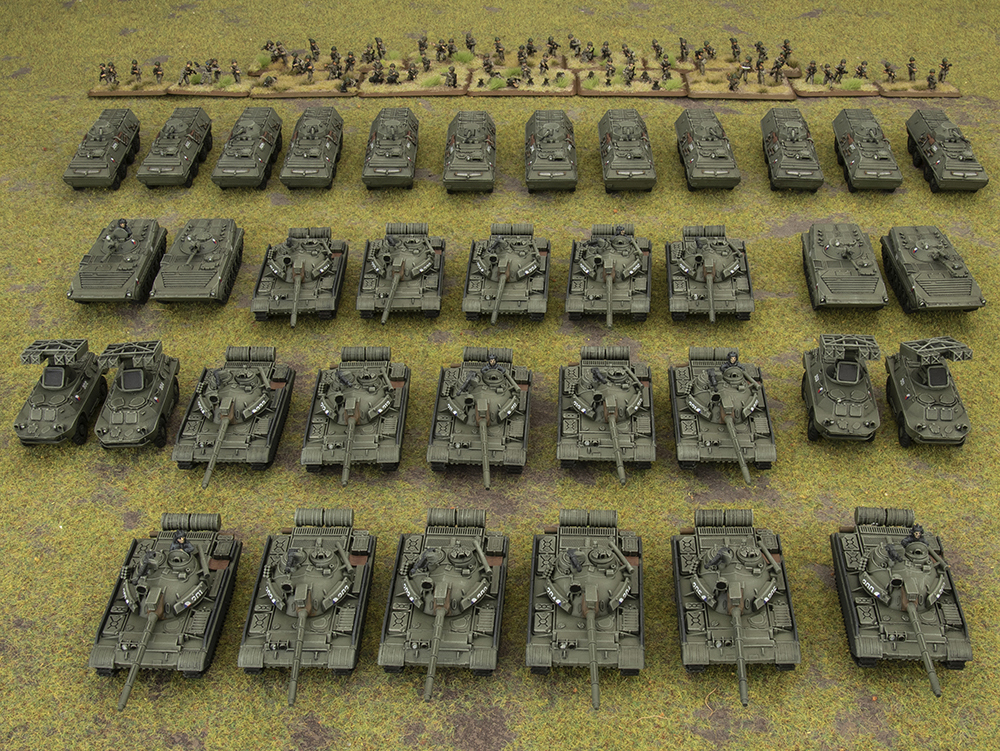
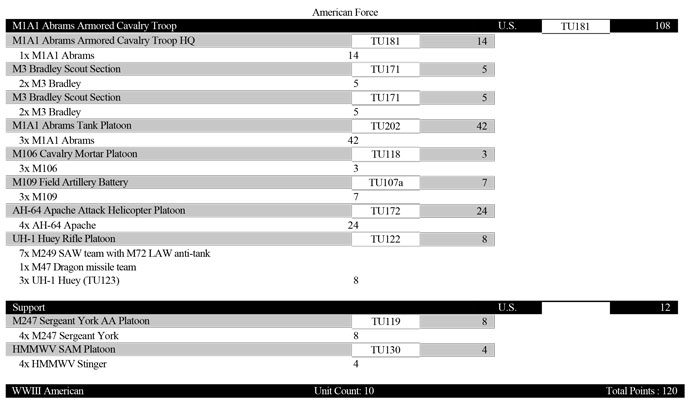
As you can see, I have managed to cram in an entire Armoured Cavalry Troop, with some supporting elements in to only 200 points…
Next step is the building and painting. If you keep an eye on the Big Four Of Late War Instagram account you may have seen Victor and I starting to build our armies, as well as working on some test models to figure out how we are going to paint them.
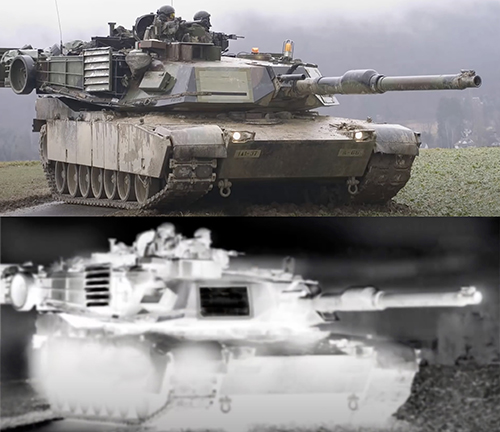
I’ve decided to copy Evan’s method, which you may have seen in our Facebook Groups, which involves airbrushing the model Buff, then some panel fading with a Buff/White mix (in my test model this has not really shown up well so may need some work), then apply a filter over the whole model, pin wash, and finally give the model an overall drybrush with Iraqi Sand (and/or Pale Sand… to be confirmed after more testing). Finally, I’ll add some stowage and decals to give the model a slightly less “one colour” look.
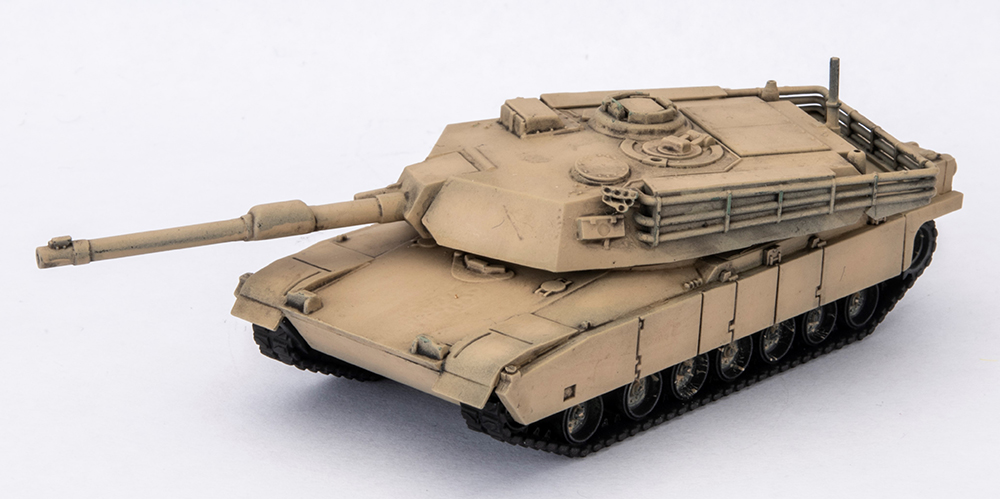
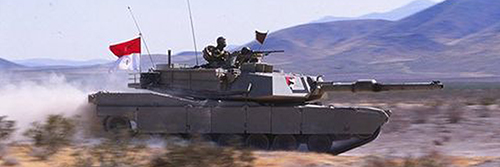
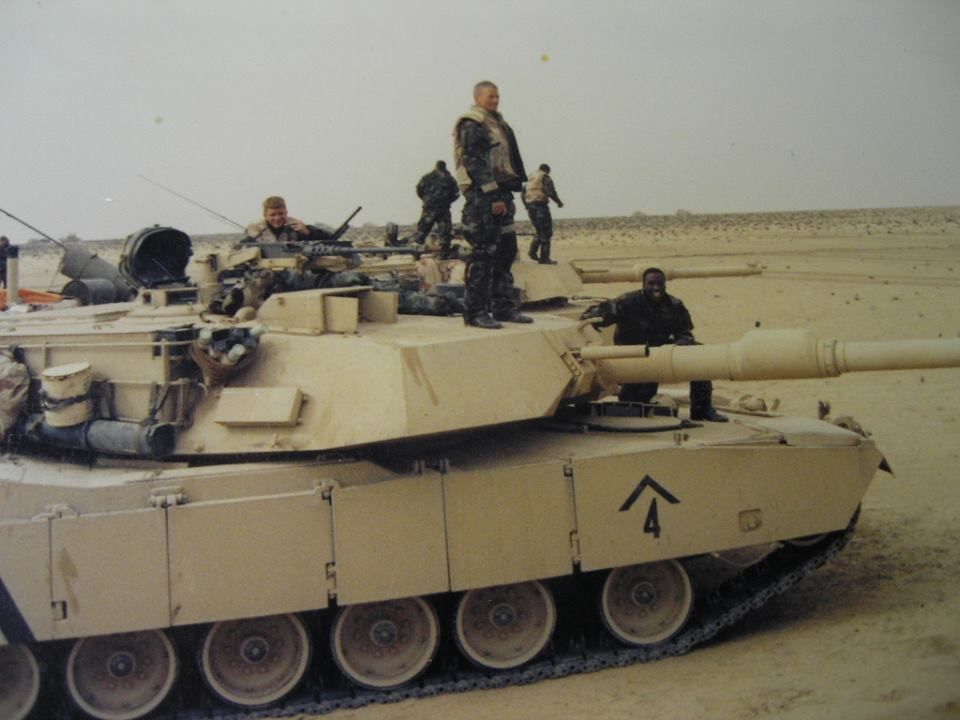
As you can see from the real world photo below, and my initial test model the sand colour is fairly pale, but once I add some stowage items painted in Woodland, it should perk up the model. Unfortunately (for me) the troopers of Eagle Troop disposed of their European green camo nets as soon as they could so you won’t be seeing any of those on my models. Likewise, their vehicles were freshly painted not long after their arrival in Saudi Arabia so no funky looking green bits where panels or trackguards have been replaced.
We’ve already started discussing the next event on the New Zealand gaming calendar (FlamesCon) in October and it is very tempting to knuckle down and get enough of the army completed so I can take it along. Lets see how that works out….
~Chris