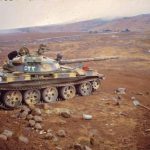
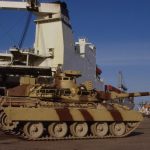
When we first started working on the original Fate Of A Nation booklet I spent a lot of time reading about Israeli actions in the Golan Heights during the 1967 and 1973 wars. Before then I knew very little about the Syrian side of these wars and I found it particularly eye opening. When we published the hardback version of Fate Of A Nation we needed a Syrian Army painted for all of the photos – I of course jumped at the opportunity because the fixed deadline meant I would get a lot of models painted in a relatively short period of time (I love a hard deadline when it comes to hobby projects).
The release of Oil War has meant that this project gets a second life for a relatively small amount of extra painting. Now I am sure you are thinking “Syrians in Oil War? I thought it was just Israelis, Iranians, and Iraqis?” Well that was the plan originally, however when Wayne was working on the book, he found that the Syrian forces in the mid-80s were sufficiently similar to the Iraqi forces that with a few rules you could fit the Syrian forces too, giving the Israelis a traditional foe to go head to head with.
Reviewing what models I already had finished I don’t have enough for a whole army (yet) but by expanding what I have already and adding in some new units I’ve come up with a fun list.
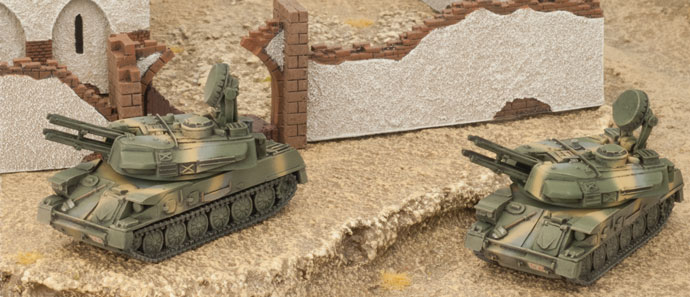
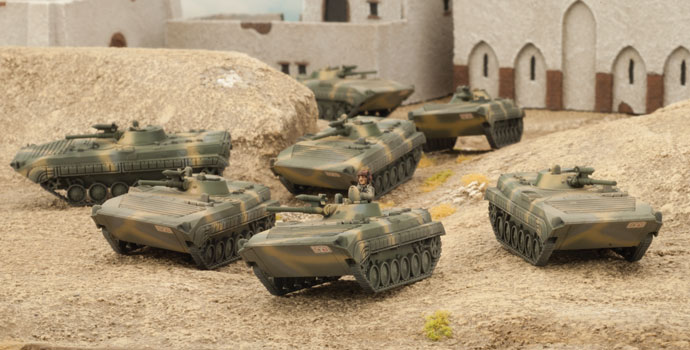
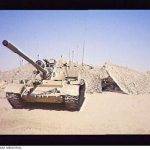
I started out with a T-62 Battalion with a total of 11 tanks. To give it some extra sticking power I added a Mech Company mounted in BMP 1s along with an attached SA-7 AA missile team. The AT-3 Saggers on the APCs significantly add to my Formations firepower. To round out the Formation I added a pair of ZSU-23-4 AA tanks. With this Formation coming in at a total of 24 points I then turned to…
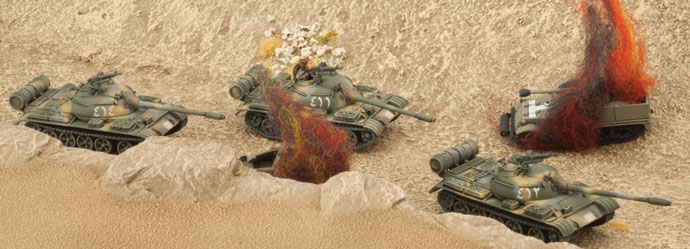
A T-55 Battalion. This Formation has a total of 16 tanks (3 platoons of 5 and an HQ tank). Like the T-62 Battalion I added platoon of infantry in BMP 1 APCs and a pair of older ZSU-57-2 AA tanks. This Formation comes in at 23 points and if I had more painting time, I would be tempted to duplicate it and add the same again to my army.
Rounding out the Force is a Scout Platoon of 4 BRDM-2s – this is primarily (okay, solely) because I want a unit to help me Spearhead across the table. Next up is a platoon of SA-8 Geckos. These are some of the coolest (or perhaps oddest) models we have ever made and I have been looking for an opportunity add these to an army but never found the right option. This seemed like a good chance! Completing the army is 8 Gazelle HOT helicopters – I chose these for a few reasons, one, HOT missiles are the business when it comes to cracking open enemy tanks thanks to their AT 23 missiles, secondly, I already have some Hinds in progress for my Czechs and wanted to build and paint something different, and thirdly, Syrian Gazelle helicopters proved to be a thorn in the side of the Israeli forces in ’82, making them flavourful choice. Now as it stands my army comes in 80 points (you can see why I mentioned the idea of duplicating the T-55 Battalion to bring me up to 100 points) but I think this is a nice starting point to aim for. Right now, I have just under half of the army painted (32/73 teams) by taking my existing troops from Fate Of A Nation and rather than creating a project that is bigger than Ben-Hur I think keeping it sensible and aiming for a finished 80 points is better than a “never completed” 100 points!
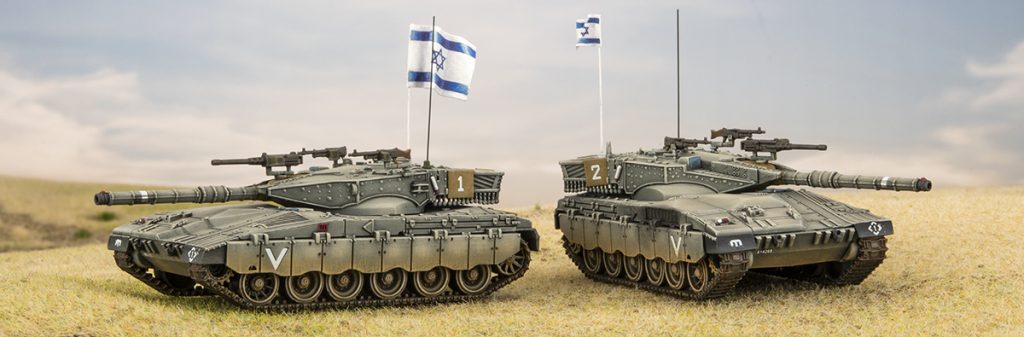
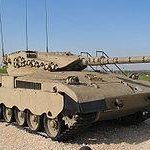
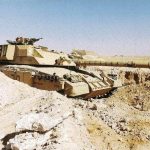
When I first saw the prototypes of the Merkava model we were making, I knew I’d have to do an army. I was lucky enough to do the graphic design for the book so I became further interested in the Israeli forces. As soon as the plastics arrived in the office, I commandeered 11 of them and got to work.
So far the force is an HQ of 2 tanks, and 3 platoons of 3 tanks. This comes to 77 points, so still plenty of room for all the support goodies which I’ll work on in the future.
I plan to add Perehs, VADs, TOW Jeeps, and some Recce. But for now I’ll be using the Merkavas later in a battle with Chris, along with borrowed support from the studio collection.
Keep an eye out for future articles where I’ll point out some of the interesting details of the Merkava, as well as some tips for making flags.
Oil War is out at last! And I think everybody has been waiting impatiently for this book for a wee while now, I certainly have.
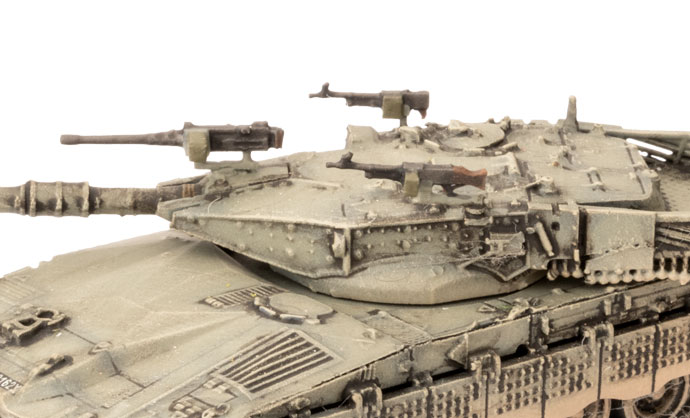
One of the highlights of Oil War for many people I think is the new plastic Merkava tank model for the Israelis, a legendary tank of the 80s and beyond.
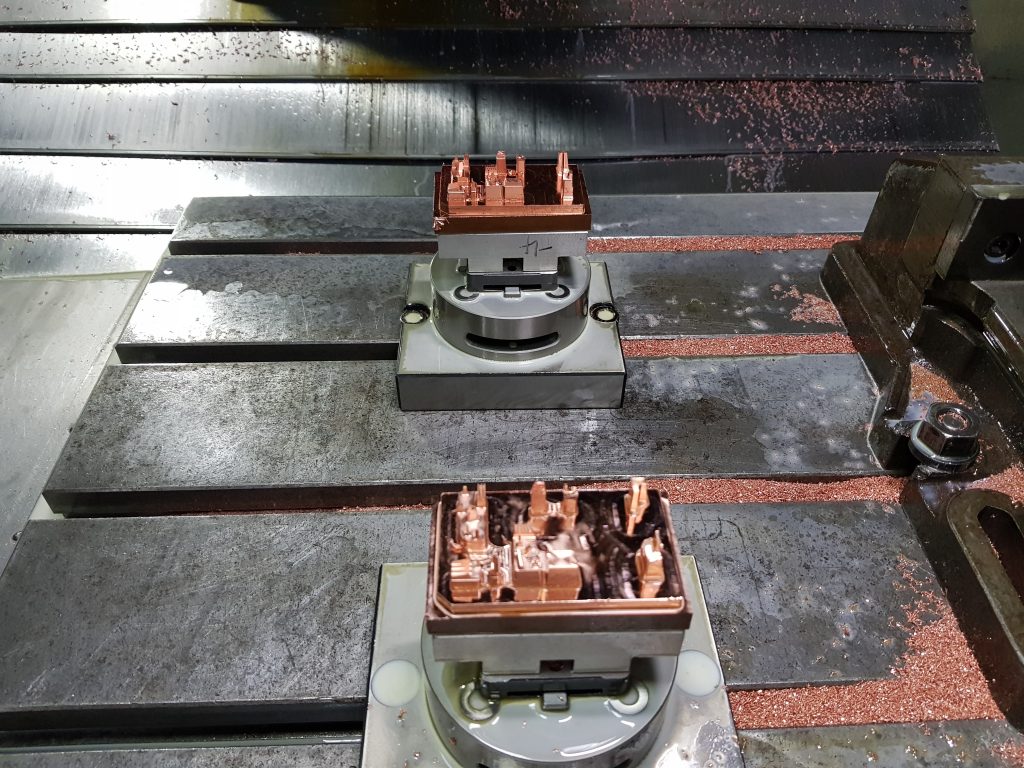
We thought you might like to see a little bit of what happens during the creation of a plastic tank for Team Yankee and the following images show some of that process.
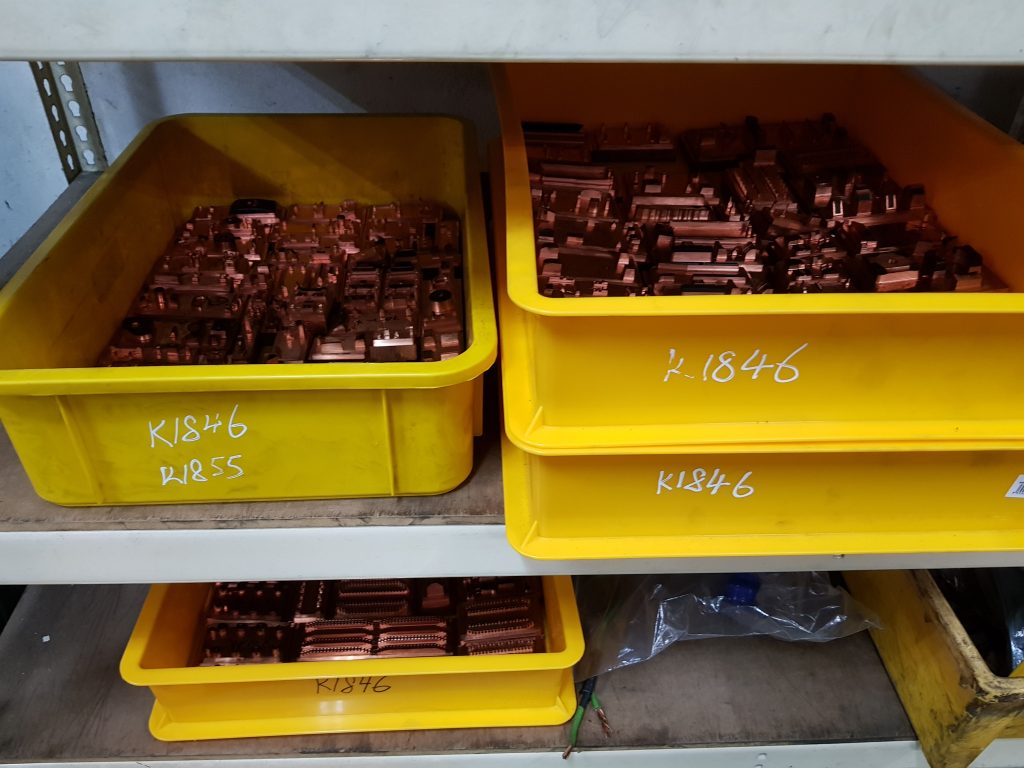
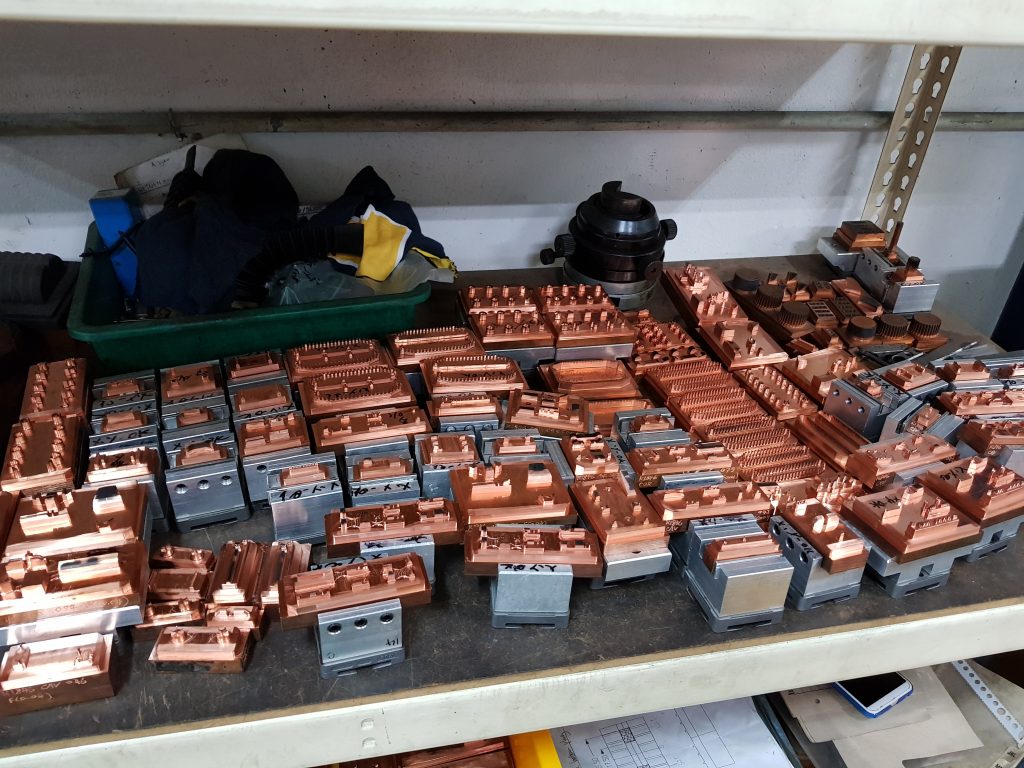
These are some of the electrodes being CAD machined in copper, each part is made in copper as a positive item. Copper is soft and easy to machine and is a great electrical conductor which suits the EDM process very well (EDM Wiki page: https://en.wikipedia.org/wiki/Electrical_discharge_machining)
The collection of copper electrodes for all the parts that make up the Merkava tank. These are assembled into a positive copy of the tool about to be created to inject plastic into after the EDM process
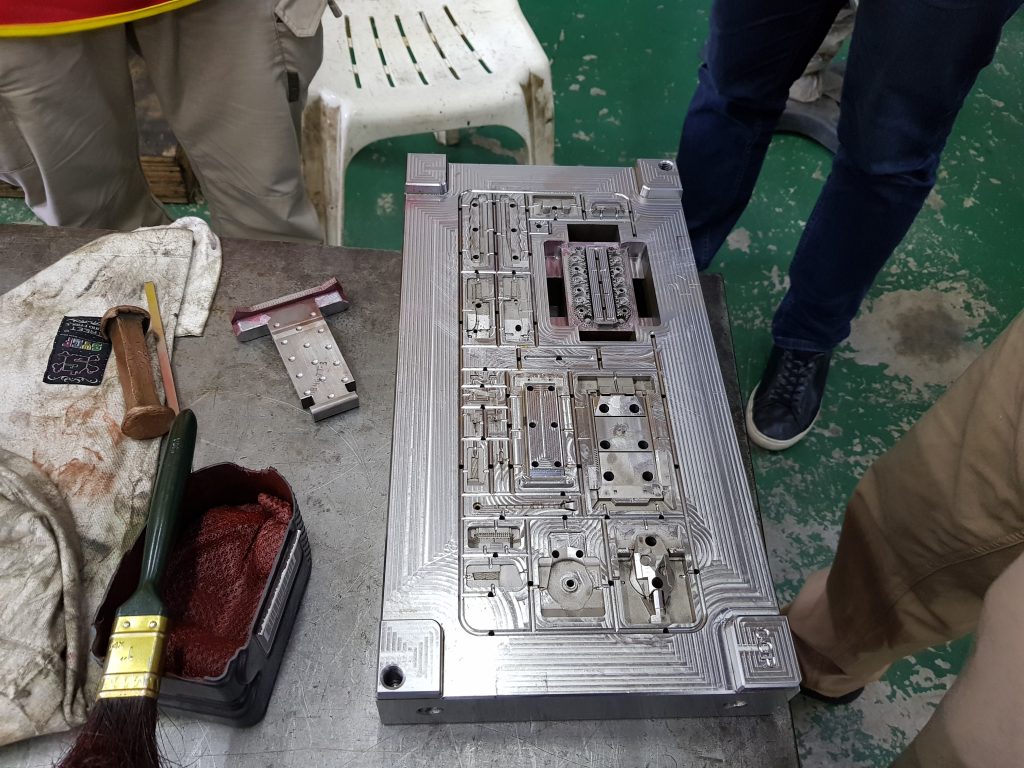
After the EDM electrode sparking has created all the cavities in both the steel plates the toolmaker then adds water channels to allow cooling water to flow through during the injection of plastic in production. The tracks for the Merkava use “sliding core” technology to get the track plate detail without needing any assembly, if you look to the left of the main block you’ll notice the bottom of the track run on a separate piece of steel. This side of the tool also has the ejector pins to push out each freshly moulded frame of plastic.
This steel block is called the Cavity side of the tool, it has most of the external detail on it and is set deeper into the steel block so takes longer to spark erode out the detail . Water channels are also added to this side.
Once all the engineering is finished then the tool is set up and several shots of plastic are injected to get test samples of the frame, any fine tuning will be done after these are inspected (yes it’s super exciting to get a hold of the test shots to assemble and know you’re the first to do it 🙂 )
With the release of Oil War we at Battlefront are taking a trip back to the desert. In this book we seek to examine the first days of a major conflict between the two superpowers of the Cold War era spreading out to encompass Western Asia. As part of this enlarging of the conflict as we have envisioned it, we examine four armies, Israel, Iran, Iraq, and Syria. The book sets down some organisational structures and basic philosophies of use that each of these armies employed based on their long or on-going experiences of fighting in this inhospitable environment. They determine everything from what equipment and tactics they use, to how they paint their military equipment. Twentieth century warfare is dominated by ranged combat, as such, the problem has three prongs. Spotting a target, identifying the target, and ensuring the target is within range of the weapon system/s at your disposal. The battlefield of the 1980s is an interesting cross-section of emerging technologies that seek to make the three tasks above more simple, and older ideas and technologies that are more tried and tested.
Items like Thermal Imagers and Laser Rangefinders do indeed make the problems of spotting, identifying, and ranging potentially more simple, however at the time these pieces of technology were bulky, expensive, and difficult to maintain.
So while parts of an army might have access to some or all, the vast majority of troops still only have the Mk.1 eyeball, and this is where camouflage comes in. So what is the basic purpose of camouflage? Some of you already know, but some will not. The answer is that camouflage, especially with regards to large pieces of equipment (for instance a Main Battle Tank), is used to fool the human brain into thinking that the object being viewed is not there, something else or at a different distance than it is. Some environments make this task more simple as the terrain comprises of a large number of obstacles that can be used to obscure the target in part, or in total. These types of terrain features are not nearly as prevalent in a desert. The terrain in desert environments is often marked by flat open areas providing little in the way of natural cover and concealment. Therefore the paint job on your Tank is fairly unlikely to fool anyone into thinking that it is a small hill or clump of trees as it might in Europe.
The only way that this is going to work in an arid desert environment is to bury the item in the sand, while this is a workable option for static defences it is not an ideal situation if mobile warfare is the name of the game. The armies examined in Oil War approach the problem from two directions. Israel and Iran choose to paint their ground based military equipment in a drab light green grey colour. The reason is that these armies are expecting to fight in varied terrain, from the desolate Negev desert to the more temperate Golan Heights and Southern Lebanon in the case of the IDF. Therefore they have decided to go with a neutral colour that will not stick out in either type of environment when clean, and with local dust will do a good job of blending in, thus rendering the vehicle more difficult to detect.
Iran/Israeli Colours
Color 70.886 Green Grey
Vallejo Model Color 70.886 Green Grey
Vallejo Model Color 70.886 Green Grey
This approach does a good job of concealing, therefore making the task of locating the target more of a challenge, however it does not address the problems of target identification and ranging to the same degree.
Iraq and Syria approach the issue by employing camouflage patterns. These are more terrain specific and more time consuming to apply, but do break up the shape of the piece of equipment more effectively, therefore making accurate target identification and ranging more difficult, at the expense of being able to be used in multiple environments without being changed.
Iraqi Colours
Vallejo Model Color 70.819 Iraqui Sand
Vallejo Model Color 70.819 Iraqui Sand Vallejo Model Color 70.890 Reflective Green
Vallejo Model Color 70.819 Iraqui Sand Vallejo Model Color 70.890 Reflective Green
Other armies briefly mentioned in the book generally approach the problem in much the same way.
Syrian Colours
Vallejo Model Color 70.836 London Grey; Vallejo Model Color 70.819 Iraqui Sand; Vallejo Model Color 70.890 Reflective Green;
So for instance, the US forces for the most part were deploying for Exercise BRIGHTSTAR in Egypt, therefore would for the most part be using the Grey Desert version of MERDC, which consists of a sand coloured base, overpainted with field drab, earth yellow and black.
US Colours
Vallejo Model Color 70.821 German Camo Beige WW2
Vallejo Model Color 70.821 German Camo Beige WW2; Vallejo Model Color 70.873 US Field Drab; Vallejo Model Color 70.977 Desert Yellow; Vallejo Model Color 70.950 Black
Vallejo Model Color 70.821 German Camo Beige WW2; Vallejo Model Color 70.873 US Field Drab; Vallejo Model Color 70.977 Desert Yellow; Vallejo Model Color 70.950 Black
Whereas the Soviet forces are depicted as using their ubiquitous drab green. However, this does not Have to be the case. Team Yankee takes place in an alternate reality, so you could paint your Soviet models in the green and beige camouflage pattern used by them during their military involvement in Afghanistan during the 1980s, equally US forces could be using the all over light sand colour as seen during the 1991 Gulf War, as could your Iraqi forces.
Soviet Colours
Vallejo Model Color 70.887 US Olive Drab; Vallejo Model Color 70.976 Buff; Vallejo Model Color 70.950 Black
Vallejo Model Color 70.887 US Olive Drab; Vallejo Model Color 70.976 Buff; Vallejo Model Color 70.950 Black
If you do choose to paint your forces in camouflage, it is a good idea to see if an existing template exists. If so, use that if historical accuracy is your jam.
French Colours
Vallejo Model Color 70.819 Iraqui Sand; Vallejo Model Color 70.873 US Field Drab
Vallejo Model Color 70.819 Iraqui Sand; Vallejo Model Color 70.873 US Field Drab
This also generally means that the hard work of figuring out colour placement and shape, in order to best break up the shape of the piece of equipment, has already been done.
British Colours
Vallejo Model Color 70.976 Buff
Vallejo Model Color 70.976 Buff; Vallejo Model Color 70.924 Russian Uniform WW2
Vallejo Model Color 70.976 Buff
However, in the case of camouflage schemes that have been applied without a template (for instance Iraq or Syria), a good way to approach the situation, is to either find historical photographs to help give you a general look and feel, applying basic camouflage principles (for instance ensuring that no surface is entirely one colour) or a combination of both. In this way you will be able to ensure a more lifelike appearance to your miniatures.
It comes as no surprise to anyone that has followed our various Arab-Israeli releases over the years that I have strong interest in the fighting between the Israelis and their Arab neighbours over the course of the 20th century. The release of Oil War lets me take that interest over from Fate Of A Nation and bring it in to Team Yankee. I’m very excited!
Looking through the list I was of course hoping to leverage some of my previously painted models to build the basis for a new army, just like I am doing with my 1973 Syrians (more on this later). Of course, the major flaw in that plan was that whilst Magach 6 (M60 Patton) tanks are awesome, not only do I not have any painted for my ’73 force, they are just not as cool as the new Merkava tank! Possibly one of the best-looking armoured vehicles and certainly one of the most iconic! To begin with, I decided to add a full-strength Company of these bad boys, choosing to use the Merkava 2 models with their improved armour stats (slightly more front armour, as well as improvements to the side and HEAT protection). Coming in at 7 points each of these, 11 models made for 77 points. That’s more than enough for a few toys!
If I was to say that there was a flaw to the Merkava tanks, it would be their 105mm gun – knowing that their main opponents would be older generation Soviet tanks (which the 105mm can deal with easily) the early models do not have the same hitting power as other Western tanks that have the nastier 120mm gun. To balance this out I decided to add anti-tank missiles… lots of anti-tank missiles. A platoon of the top-secret Pereh tanks meant I got a super unique looking model, something that can hit anyone, anywhere, anytime, and an AT 21 missile.
I also added a platoon of Jeeps with TOW missiles – I love the Sayur Company (from Fate Of A Nation) and the thought of adding Jeeps zipping around the table really appeals to me. I also took the opportunity to add a Jeep Recce Platoon to my Merkava Formation for the same reason…
To round out the Force I chose to add a pair of M163 VADS for some AA protection, along with a pair of M48 Chaparral SAM launchers. This gives me some close in firepower that can be used to knock down close air support and choppers, or hordes of Syrian (or Soviet) infantry, along with the heavier Sidewinder missiles (on the M48) that can engage airborne targets anywhere on the tabletop. Being relatively small platoons means I will need to keep them behind the lines or risk losing them however… My plan is fairly simple – hit hard, hit fast and hope that the armour of the tanks will see me through. None of my platoons are very big so I when I start suffering casualties, I will need to rely on the superior Morale of the army to keep my troops on the table, but I think I have a good combination of equipment to give me a fighting chance against most enemies.
Thinking about the long term I’d love to add a few more units to the army to give me some extra flexibility – a M113 Mech Infantry Platoon, AH-1 Viper Attack Helicopter Platoon (or two), Redeye SAM Platoon and aircraft will be high on my “to-do” list!
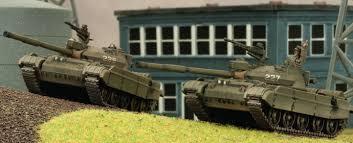
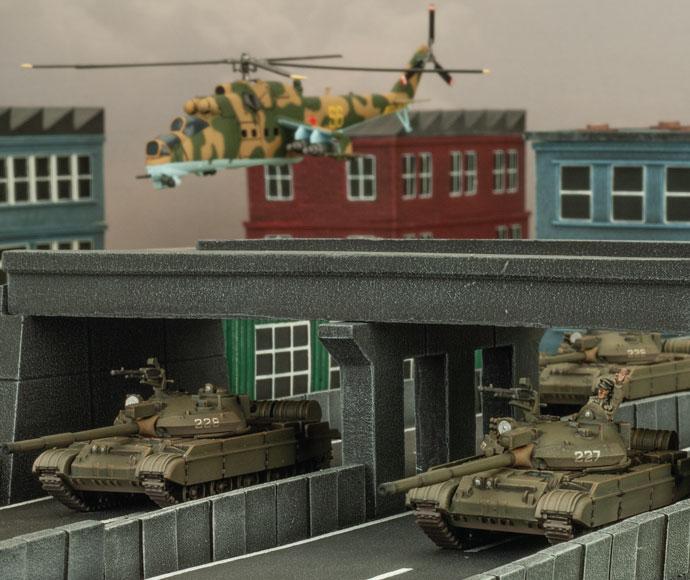
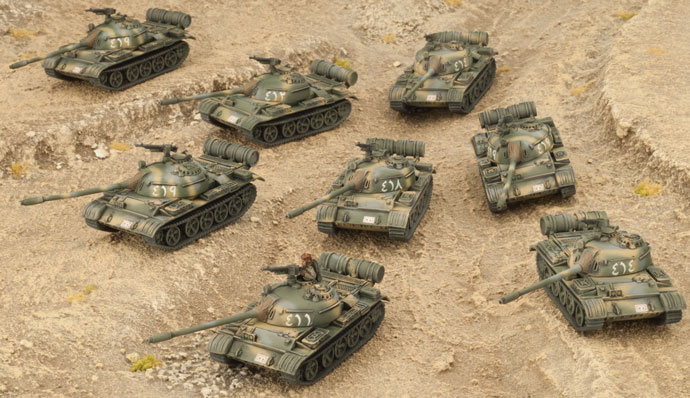
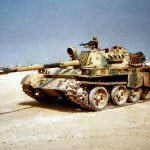
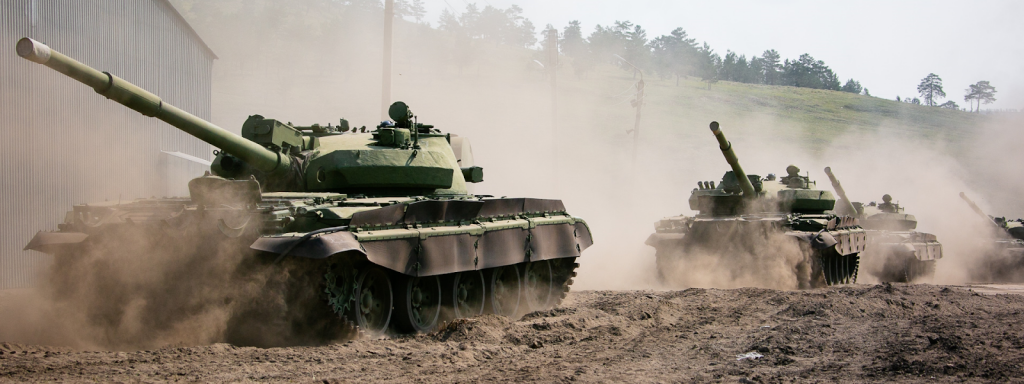
If you read my article Hell on the Highway: A Soviet guide to the BTR-60 then you probably figured out that I have a love for second line kit. So when the venerable T-62M plastic kit came out lets just say mistakes were made, my wife had many questions- Why are there so many tanks? Where did all these tanks come from? Why do you need this many tanks? A battalion of tanks later and I had the opportunity to put together and play second line Soviet troops the way they were meant to be, aggressively. Battlefront had put out an interim list on their website, but with the introduction of Oil War, Soviet forces are getting another list and unit to add to the arsenal.
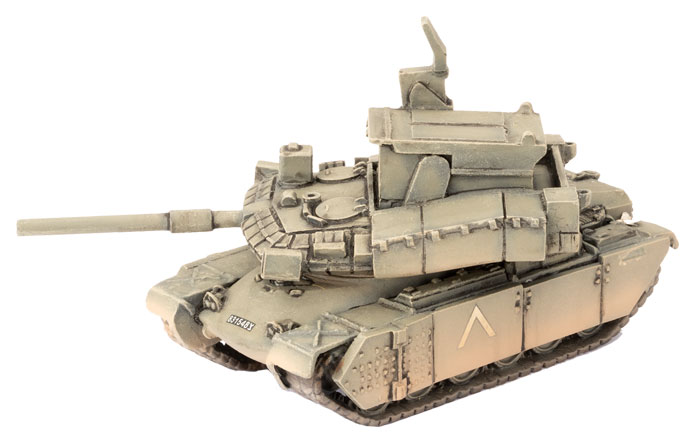
The T-62 was born out of the early 60s as a replacement for the T-54/55. While it was not as popular as an export due to expense it did replace the T-55 internally within the Soviet Union. What the T-62 brought to the table was a smoothbore gun, the first of its kind in Soviet service and would be game changing on the battlefield with an ability to reach out and touch someone unlike other tanks. Modernisations to the Soviet tanks were constant and in the 85 period we see modern features like laser range finders on the older tank, but what hadn’t changed was it still had a hell of a gun.
The T-62 is a beautiful kit, and my favourite to date, giving you the option to build the T-62 for use in Fate of a Nation, in Team Yankee with forces like the Iraqis and Iranians, or the modernized T-62M with Soviet forces. While I’m a huge fan of the T-72, the visual appeal of the T-62Ms turret instantly made me want to paint up these beasts, and in Soviet fashion, in great number.
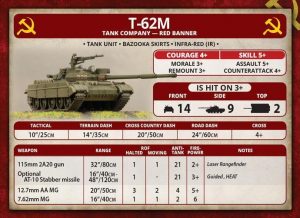
So what do you get with a T-62M? We’ll look at 4 features of the T-62, firepower, armour, maneuverability, and cost. Bottom line up front: you get a glass hammer.
This tank is all gun. With AT 21 with a range of 32” the T-62M packs the same punch as the T-72M, capable of running and gunning and being a threat to almost anything on the table. While AT 21 isn’t the scariest sight to front armour 18 and 19 tanks, remember quantity has a quality all its own. Many armies have learned this against the BMP-2, but the BMP-2 can’t move and shoot against targets and cunning NATO opponents will use that against you to devastating effect. The T-62Ms ability to manoeuvre while firing will help put opponents on the back foot and I would argue this is what it excels at. The gun is only ROF 1 like other Soviet tanks and this will limit the damage per turn you can inflict but when used appropriately can threaten tanks but just pull apart support units and really unbalance the field for the rest of your army to exploit. The 115mm 2A20 gun doesn’t have the brutal characteristic Soviet tankers are used to with the T-64 and T-72 but the supporting machine guns do a pretty decent job of digging out enemy infantry if push comes to shove.
The T-62M also has the option to take the AT-10 Stabber missile which can reach out to 48”, a whopping 4 feet but can only do so stationary. What makes this a great option is the sheer number of tanks you can get and supply with these missiles for the bargain basement price of 2 pts. A single unit of these in ambush is not only cheap but can threaten an entire table with AT 21 missiles and be a really bad day for an advancing enemy force. So if you’re building a force made to defend with counter attacking tanks with one company in ambush the T-62M can provide a terrifying and cheap option. But more on tactics later.
The T-62M does have armour, it does, just not much. This puts it in an odd place, it has enough armour to protect it from IFV fire and the lightest of man portable anti tank weapons, but even light tank guns like the 105mm found on older models of NATO equipment are more than capable of ripping through the T-62M. Tanks like the Leopard 1 or the AMX-30 are perfectly equipped to take on these tanks with both the number and the gun to do the job where as heavier more modern tanks like the Leopard 2 are over equipped. With side armour 9 the tank is more heavily armoured than the T-72 but is still vulnerable to a great variety of weapons. With Bazooka skirts this is a little better bumping up to side armour 10 against HEAT but with weapons like the Carl Gustav and the RPG-7 on the table this is of little benefit. You can’t depend on the side armour to save you so make sure you can’t be hit in the side where possible and you’re doing great.
While the T-62M can move and shoot, it doesn’t do it as well as more modern tanks like the T-72, Leopard 2 or Abrams. The terrain dash of 14 inches combined with a cross value of 4+ makes it hard to really depend on the tank in rough terrain. Moving through woods and other complex terrain is not where the tank is at it’s best, and it is more adept at moving around terrain, keeping in formation and putting fire down range. I wouldn’t overlook the Cross Country dash of 20” that can be used to quickly re-position and threaten flanks and objectives. Moving that many tanks on that many angles can quickly force your opponent to make some bad decisions.
So lastly you have cost, and these tanks are going cheap. At 5 points for 3 tanks and 29 pointe for a full company of 10, they start out really cheap and don’t finish off too far away from that. A Headquarters tank and 3 minimum sized companies will only set you back 18 pts, so the T-62 is the Soviet tank that can fit in any and all Soviet lists, or be the list with all sorts of room for support.
T-62M tactics aren’t that dissimilar to other Soviet tank tactics but have some interesting nuance in the sheer weight you bring to the fight combined with their lack of protection. As discussed above the T-62M hits hard but doesn’t take a hit well. This tanks survivability comes from numbers not individual tanks staying power, and the numbers bring about a new level of mobile offensive output. So with this in mind crafty commanders should keep a few key concepts in mind when performing basic Soviet doctrine.
Know what you want to do, and try and do it as best as possible. This is easier said than done but one thing that makes designing and playing a list a lot more fun and easier is using the battle plans mission selector in the more missions packs. This lets you design a list to play the way you want it to and have it turn out that way arguably more often than not. It helps offensive minded players play offensively and defensive lists get dug in. It can be used against you but that’s half the fun of the pregame fight. If you haven’t tried it out I highly suggest it. So figure out if you want to attack, defend or something in the middle and design the list to play how you want to fight.
Soviet attacks generally come in three flavours, frontal and flanking attacks and the envelopment. Now for obvious reasons Soviet planning at all times attempted to avoid frontal attacks as they were the most costly and tended to get bogged down in defences and played to the enemy’s strengths. On the table we see great similarity to this and I would argue this is why ‘alpha striking’ or using your ability to shoot first is often the worst choice for Soviet players and specifically Soviet tankers. With all the advantages at play for a defender, concealment and being gone to ground, most NATO targets will require 6s to hit. While the T-62 does come in great number it doesn’t overcome the low rate of fire of our tanks and so opening fire on your first turn is often a mistake, as it can make the hunter become the hunted, with muzzle flashes identifying each and every tank for NATO forces to then engage in brutal return volleys.
So then what’s a Soviet tanker to do? Move, move fast, move often, keep moving, never look back. While flanking movements and envelopments don’t really make sense in their conversion from tactical and strategic actions to the table top in TY their base principles remain the same and give really good guidance for Soviet tanks. The whole point of either of these at their fundamental level is to force your opponent to react and move from a position of advantage to a position more exploitable. A flanking attack is about attempting to limit the amount of a force that can defend, and put it in a position where it is least suited to act offensively. It uses superior speed and violence to rapidly force an opponent to do something. Getting tanks up table quickly and when possible to the side of units often has this effect. It can allow a Soviet player to mass tanks along a relatively short frontage and do some damage.
“But I can’t just drive up, they’ll shoot me!” you say, but this is where smoke and the planned fire comes into play. With smoke to cover your advance to the enemy you can arrive up table with little to no damage and be in a position to really threaten the enemy hopefully forcing them to move to react. If you have a second artillery group you may even be able to cut large platoons like British infantry in half if you look to assault with larger platoons of tanks on subsequent turns or just again cut the field up letting your tanks do the work.
Where envelopment comes into play is repeating the flanking idea across multiple parts of the table. Once you get an opponent moving it opens up shots from other angles and this is where multiple platoons of tanks really comes into its own. Driving the majority of your force up the right flank may make the enemy reposition and become highly vulnerable to shots from the left and vice versa. This is where keeping them moving and forcing NATO tanks out of their prepared positions pays off for the patient Soviet tanker. You create situations where you give your opponent more problems than they have solutions.
Creating a defensive tank list are words that I’m sure set many folks’ hair on fire so we won’t call it a defensive T-62M list, but rather a counter attacking list. Soviet tank formations have an infantry company organically and can take a second as support. This is more than enough to hold for a few turns and can buy your tanks the time and space to show up and do the real work. The beauty of this is that NATO forces have to come out of hiding to attack and lose many of the advantages they hold sitting back in terrain. They are forced to come out and expose themselves in the open and this is where large units of tanks in ambush(along with the pre discussed missiles) can have a hay day. Add in large units coming in from reserve on all sorts of angles and you create beautiful killing fields. Where this succeeds is the sheer number of tanks you can bring to the fight and it is a lot of fun flipping the script on NATO forces this way.
However you choose to play them incorporating the T-62M into Soviet lists is simple and I would argue a fun if not a great decision for Soviet players. There are three basic ways to incorporate the T-62M into Soviet lists, individual companies, full formations and multiple formations.
First and simplest a single company of T-62M can replace a company of T-64 or T-72 in an Infantry formation, this option lets players pick up a single box and try the T-62M out for themselves to figure out how best they can work for them within an established list. Think about all the fun of having a cheap run and gun unit that can cut down a Leopard 2 in a BMP-2 list.
Second you can field a single formation based around the T-62M, 3 bulked out companies of T-62Ms is still cheap and will allow you to fill out your army with support options for a combined arms approach. This type of list will have resilient units and the ability to take loses while continuing on, using the cost effectiveness of the T-62M to give you a balanced but tank filled army. This is the approach I’m taking and I’ve been loving how it’s been working with BTR-60s and a ton of artillery in support, it looks the part of a second line unit pushed into service. A little bit of research done and I found a unit that retired in the 90s with mostly T-62Ms filling the ORBAT.
Lastly the T-62M due to cost is a prime candidate for platoon level operations and can be run with multiple formations of minimum sized units. While these don’t have the staying power of a full formation, they make up for it in minor cost savings, and more importantly direct support with units like infantry companies artillery and air defence becoming even more available and present in your force. This option also enables players to take a T-62M coy as a supporting formation to an allied force, making your Warsaw Pact list more flexible and interesting.
The T-62M is a really fun and exciting addition to Soviet lists. What it lacks in top end ability it makes up in numbers and the ability to hit like a freight train. The T-62M really epitomizes the Soviet design philosophy of bringing more and bigger guns to a fight at the expense of everything else, combined with the continued development and use of equipment in service. Combine that with a turret so ugly only a mother can love and you have the visual interest and playability that has players like me hooked. The T-62M will be taking the fight to NATO and sympathetic forces in the Middle East and Europe with the introduction of Oil War and I for one can’t wait to show my friends how much work this glass hammer can do.

 When we first started working on the original Fate Of A Nation booklet I spent a lot of time reading about Israeli actions in the Golan Heights during the 1967 and 1973 wars. Before then I knew very little about the Syrian side of these wars and I found it particularly eye opening. When we published the hardback version of Fate Of A Nation we needed a Syrian Army painted for all of the photos – I of course jumped at the opportunity because the fixed deadline meant I would get a lot of models painted in a relatively short period of time (I love a hard deadline when it comes to hobby projects).
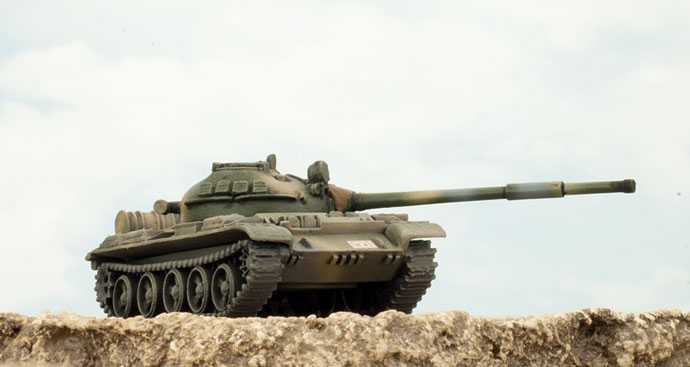
 Now as it stands my army comes in 80 points (you can see why I mentioned the idea of duplicating the T-55 Battalion to bring me up to 100 points) but I think this is a nice starting point to aim for. Right now, I have just under half of the army painted (32/73 teams) by taking my existing troops from Fate Of A Nation and rather than creating a project that is bigger than Ben-Hur I think keeping it sensible and aiming for a finished 80 points is better than a “never completed” 100 points!
 So far the force is an HQ of 2 tanks, and 3 platoons of 3 tanks. This comes to 77 points, so still plenty of room for all the support goodies which I’ll work on in the future.
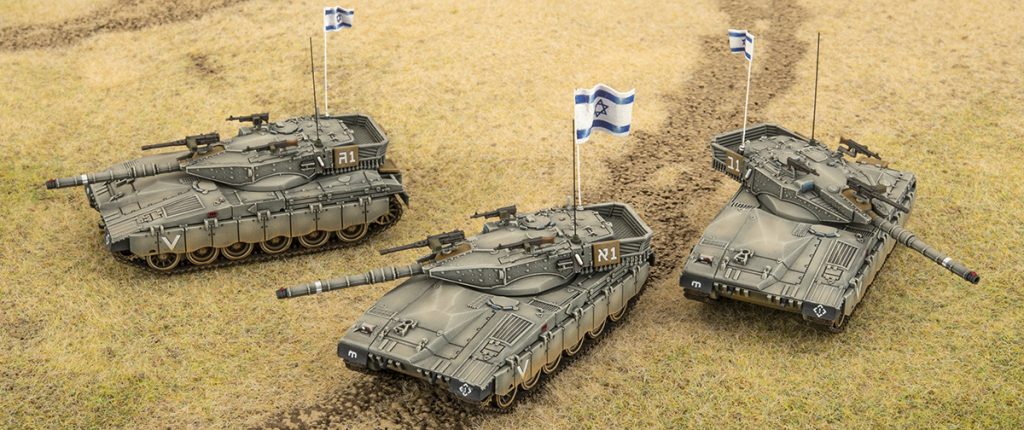 I plan to add Perehs, VADs, TOW Jeeps, and some Recce. But for now I’ll be using the Merkavas later in a battle with Chris, along with borrowed support from the studio collection.
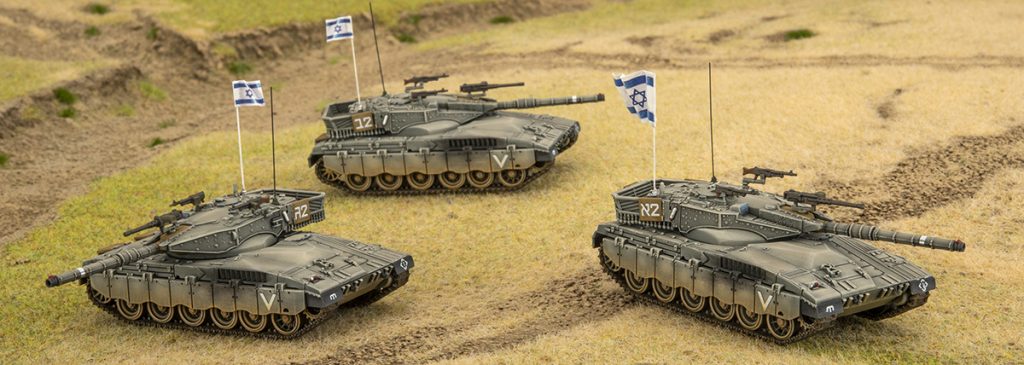 Keep an eye out for future articles where I’ll point out some of the interesting details of the Merkava, as well as some tips for making flags.
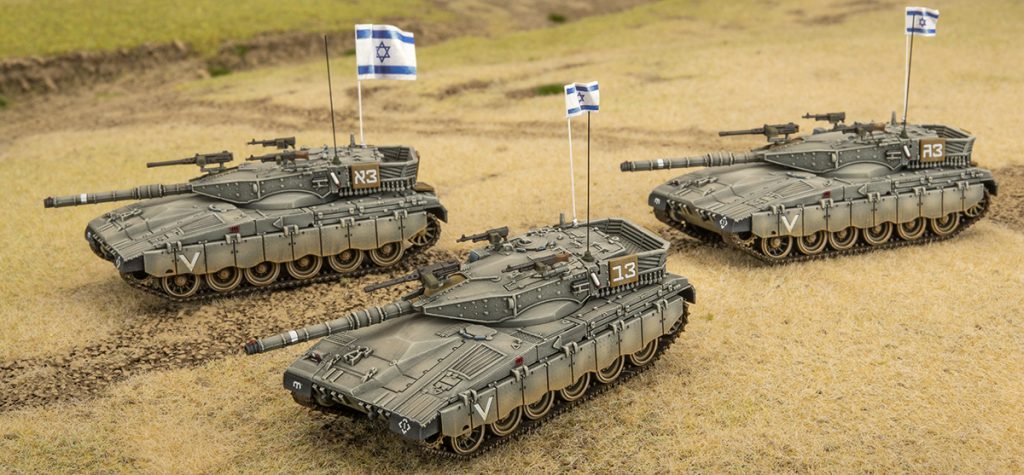

 After the EDM electrode sparking has created all the cavities in both the steel plates the toolmaker then adds water channels to allow cooling water to flow through during the injection of plastic in production. The tracks for the Merkava use “sliding core” technology to get the track plate detail without needing any assembly, if you look to the left of the main block you’ll notice the bottom of the track run on a separate piece of steel. This side of the tool also has the ejector pins to push out each freshly moulded frame of plastic.
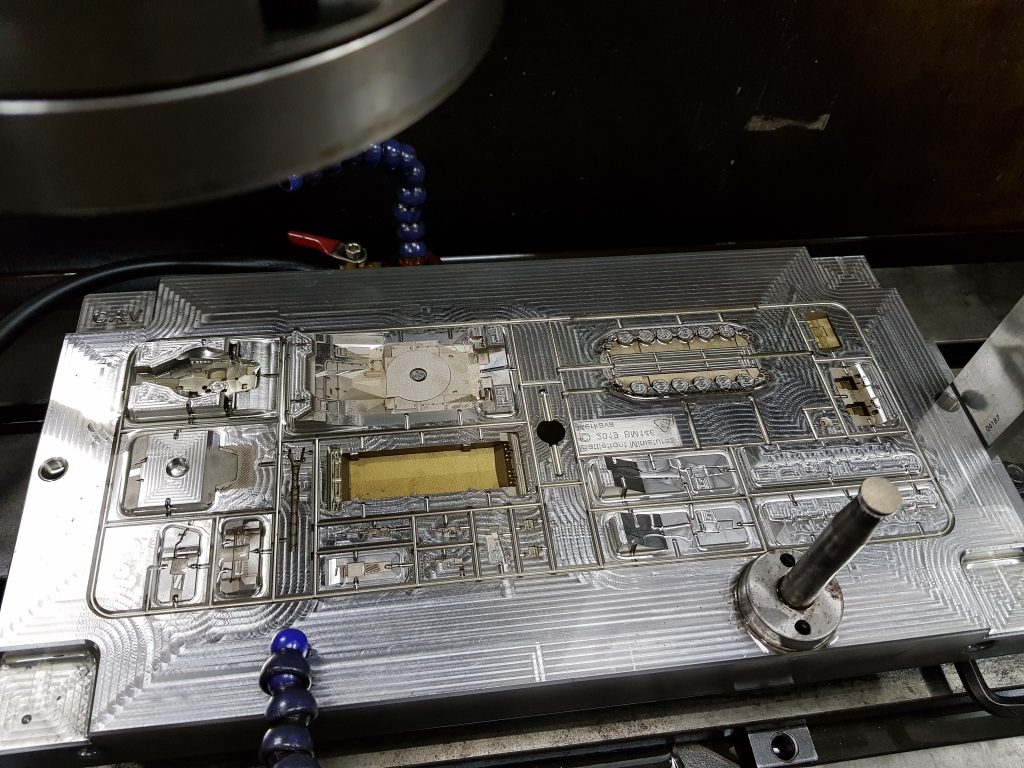


 This tank is all gun. With AT 21 with a range of 32” the T-62M packs the same punch as the T-72M, capable of running and gunning and being a threat to almost anything on the table. While AT 21 isn’t the scariest sight to front armour 18 and 19 tanks, remember quantity has a quality all its own. Many armies have learned this against the BMP-2, but the BMP-2 can’t move and shoot against targets and cunning NATO opponents will use that against you to devastating effect. The T-62Ms ability to manoeuvre while firing will help put opponents on the back foot and I would argue this is what it excels at. The gun is only ROF 1 like other Soviet tanks and this will limit the damage per turn you can inflict but when used appropriately can threaten tanks but just pull apart support units and really unbalance the field for the rest of your army to exploit. The 115mm 2A20 gun doesn’t have the brutal characteristic Soviet tankers are used to with the T-64 and T-72 but the supporting machine guns do a pretty decent job of digging out enemy infantry if push comes to shove.
 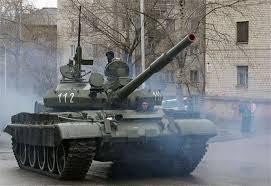 The T-62M does have armour, it does, just not much. This puts it in an odd place, it has enough armour to protect it from IFV fire and the lightest of man portable anti tank weapons, but even light tank guns like the 105mm found on older models of NATO equipment are more than capable of ripping through the T-62M. Tanks like the Leopard 1 or the AMX-30 are perfectly equipped to take on these tanks with both the number and the gun to do the job where as heavier more modern tanks like the Leopard 2 are over equipped. With side armour 9 the tank is more heavily armoured than the T-72 but is still vulnerable to a great variety of weapons. With Bazooka skirts this is a little better bumping up to side armour 10 against HEAT but with weapons like the Carl Gustav and the RPG-7 on the table this is of little benefit. You can’t depend on the side armour to save you so make sure you can’t be hit in the side where possible and you’re doing great.
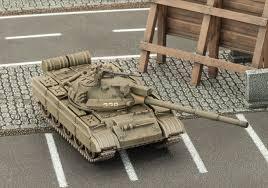 Soviet attacks generally come in three flavours, frontal and flanking attacks and the envelopment. Now for obvious reasons Soviet planning at all times attempted to avoid frontal attacks as they were the most costly and tended to get bogged down in defences and played to the enemy’s strengths. On the table we see great similarity to this and I would argue this is why ‘alpha striking’ or using your ability to shoot first is often the worst choice for Soviet players and specifically Soviet tankers. With all the advantages at play for a defender, concealment and being gone to ground, most NATO targets will require 6s to hit. While the T-62 does come in great number it doesn’t overcome the low rate of fire of our tanks and so opening fire on your first turn is often a mistake, as it can make the hunter become the hunted, with muzzle flashes identifying each and every tank for NATO forces to then engage in brutal return volleys.