with Andrew Haught
Victor and I decided to sit down for a quick TANKS battle while we work on our larger Flames Of War forces during the live launch.
We decided to do the battle of Prokhorovka, which ended up being one of the largest tank battles in military history. We were playing a themed game, and to this end we put as many tanks as we could into our 100 point lists. We chose King of the Hill as our battle to force the action to be in the middle of the table.
I put together some Factory Fresh T-34s and a pair of KV-1s.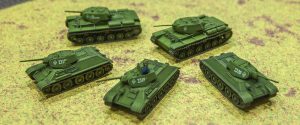
Victor went with 5 Panzer III (Longs) and a Tiger tank, which he wrote an earlier article about…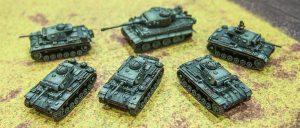
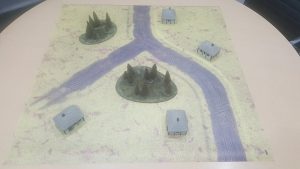
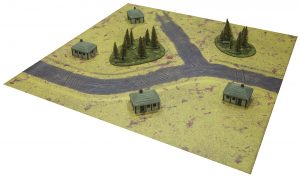
We started setting up terrain; I wanted to make sure there was a forest near the middle and Victor wanted to put some houses up so he could advance in cover. Next we rolled for Attacker and Defender, Victor became the attacker and I became the Defender. I chose the side that gave me a forest through which to advance my KV 1s.
Moving to deployment, I deployed my T-34s first. With the Factory Fresh upgrade these three tanks were only initiative 1! Yikes. I placed my tanks in the centre of my table, planning on using my fast speed to move into the centre woods and gain a foothold near the objective. Victor Deploys the rest of his tanks next, he places them along his table edge in a wide spread, hoping to spread out and surround me. My KV-1s are placed last, I place them within pouncing distance of the small forest, with the plans to move into the forest to gain cover during the first turn.
Turn One Movement
Both Victor and I stuck to our plans, Victor getting cover in and around the buildings and me moving all my tanks into the forests.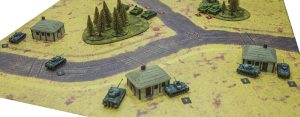
Turn One Shooting
Well this was lucky, for me, I opened up with my KV-1s and managed to do 1 normal damage and an Ammo Explosion to one of Victor’s Panzer III (Number 14), this was enough to kill him at the end of the turn. First Blood goes to the KV 1s!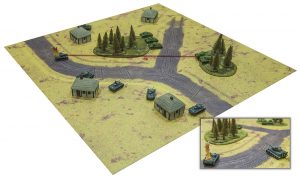
Due to the high movement and defence the Germans fail to land a hit during this turn. One of the T-34s managed to get one cheeky damage of on one of Victor’s Panzer III (Number 11).
Turn One Command
The Germans used their Blitzkrieg to move towards the objective and get into good positions for the next turn.
Turn Two Movement
The T-34s move deeper into the forest, getting within an arrow of the objective and forming a firing line. Two of the Panzer IIIs make moves for the objective, while the other two move down my flanks. The Tiger stays still as do the KV-1s tanks.
Turn Two Shooting
Once again my KV-1s focus on one of Victors Panzer III tanks (Number 12) and they deal 4 damage, killing it at the end of the turn. All the Panzer IIIs shoot at various targets each having their shots bounced against my armour and high movement. The Tiger fires last and scores three hits against one of my T-34s (Number 17). In retaliation all my T-34s shoot back but blinded by rage they were not able to score even a single hit.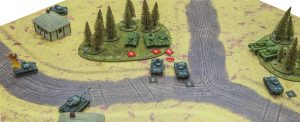
Turn Two Command
The Germans used their Blitzkrieg to get into good positions for the next turn.
Turn Three Movement
The T-34s did some ducking and weaving in the forest to maximise their defence. Two of the Panzer IIIs stayed stationary. Victor moves the Tiger closer to the objective and the remaining Panzer III moves into the woods flanking my KV-1s tanks. The KV-1s, in their arrogance choose to ignore the Panzer sneaking up their flanks and remain stationary.
Turn Three Shooting
Once again my KV-1s focus on the Tiger only scoring one hit in the end. The Panzer III on the flank of my KV 1s tanks fires and scores 3 damage on one of them. The rest of Victor’s tanks try to take out some of my T-34s and all their shots missed. My T-34s focus on the Tiger tank, and they only score one hit.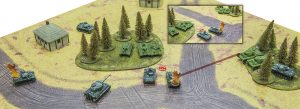
Turn Three Command
The Germans decide to skip their movement Blitzkrieg.
Turn Four Movement
The T-34s moved into a more tactical position. Victor moves his Tiger into the forest to counter some of my movement decisions. The Panzers III tanks stay stationary. I moved the KV-1s once to destroy the tank that flanked them in the previous turn.
Turn Four Shooting
The KV-1s deal enough damage to kill the Panzer III (Number 15) in the small woods at the end of the turn. The The Tiger and a Panzer III both shoot at one of my T-34s (Number 16) and score enough hits to destroy it at the end of the turn. The remaining Panzer III tanks fail to hit their targets. The T-34s fire on one of the Panzer IIIs (Number 11), scoring only one hit in total.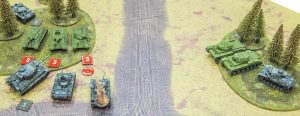
Turn Four Command
The Tiger and a Panzer III (Number 13) Blitz closer to the objective.
Turn Five Movement
I move my T-34s three times to get them in a better position, the Tiger stays stationary, while the Panzer III (Number 13) moves two times to the flank of one of my T-34s. Fresh from their kill last turn the KV-1s are out of of the woods to threaten another Panzer III.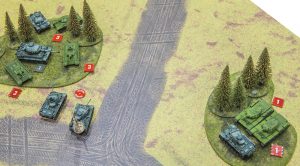
Turn Five Shooting
Once again my KV-1s focus on a Panzer III (Number 13), the first tank scoring enough hits to leave it with only one damage left, they also manage to bail it, preventing it from shooting this turn. Victor’s Remaining tanks fire on one of my T-34s (Number 20) only scoring one damage.
Turn Five Command
The bailed Panzer III (Number 13) fails to repair its Bailed Out damage, and the remaining Panzer III (Number 11) Blitzes back a bit to get nearer the objective.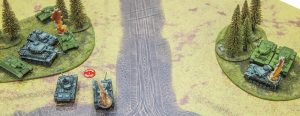
Turn Six Movement
The T-34s stay still, as does the Tiger. The unbailed Panzer III moves to a more defensible position while the KV-1s moves twice to get into range to contest the objectives.
Turn Six Shooting
Seeing the damaged Panzer III (Number 13) only had one health left, I thought it would be quick work to dispatch it with my KV-1s—but I was wrong. I failed to score even a single hit. The remaining Panzer III and Tiger shot at one of my T-34s (Number 17) scoring one hit and bailing it out, it survives with only one hit left. My unbailed T-34 (Number 20) fails to land a hit. 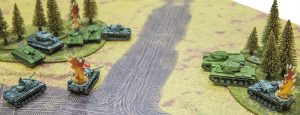
Turn Six Command
Nether tank was able to repair the bailed damage, and Victor decides he likes his tanks’ placement and choose not to Blitz move.
Turn Seven Movement
No movement, every tank decides to remain stationary.
Turn Seven Shooting
The KV-1s manage to do four damage to the Tiger, leaving it with one damage point left. The Panzer III and Tiger shoot and destroy one of my T-34s (Number 20). My unbailed T-34(Number 20) unleashes its final shots scoring no hits.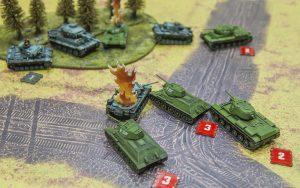 Turn Seven Command
Nether tank was able to repair the bailed damage, and Victor decides he likes his tanks’ placement and choose not to Blitz move.
Turn Eight Movement
No movement, every tank decides to remain stationary.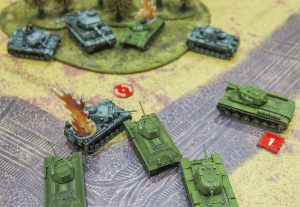
Turn Eight Shooting
The KV-1s managed enough damage to kill Victor’s Tiger and one of his Panzer IIIs (Number 11). In retaliation, Number 11 kills my bailed out T-34. The Tiger’s final shots deal 3 damage to my already damage KV-1s almost knocking it out.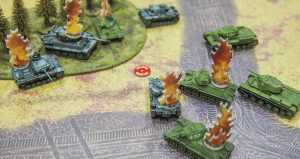
Turn Eight Command
Victor was was able to repair the bailed damage on his Panzer III (Number 13) Finally!
Turn Nine Movement
13 moves into cover, the KV-1s stay stationary.
Turn Nine Shooting.
The KV-1s was able to deliver the final hit on the last Panzer III (Number 13). Before it dies the Panzer III fires back and manages to destroy my damaged KV-1s, leaving just one of my KV-1s tanks still alive at the end of the game. Soviet Victory!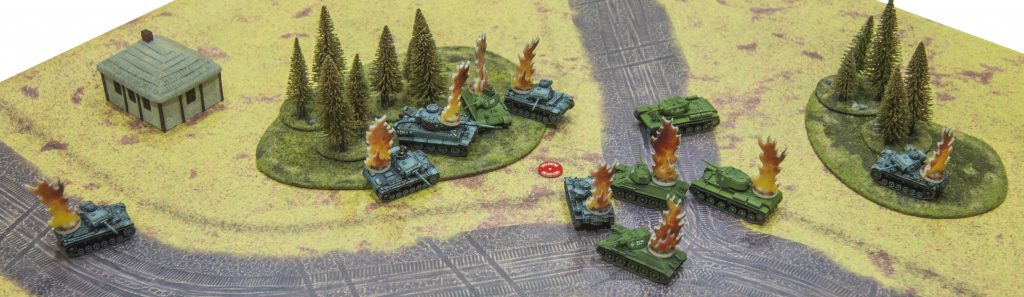
Man, that was close game; I got some lucky shoots right away with my cool KV-1s tanks and Victor getting the constant damage throughout with his Panzer III Long horde! I really like the factory fresh card, in this game the downsides didn’t come in and it gave me the points I needed to add my two KV-1s tanks that did most of the damage I dealt in the game.