with Victor Pesch and Wayne Turner (Battlefront NZ)
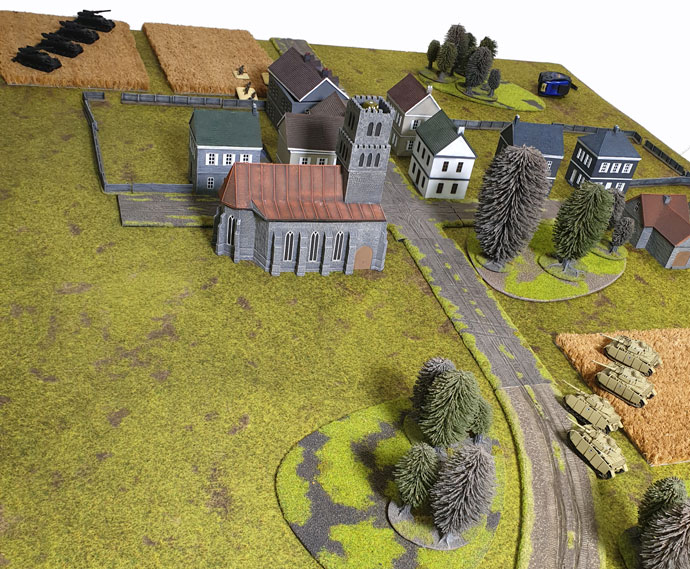
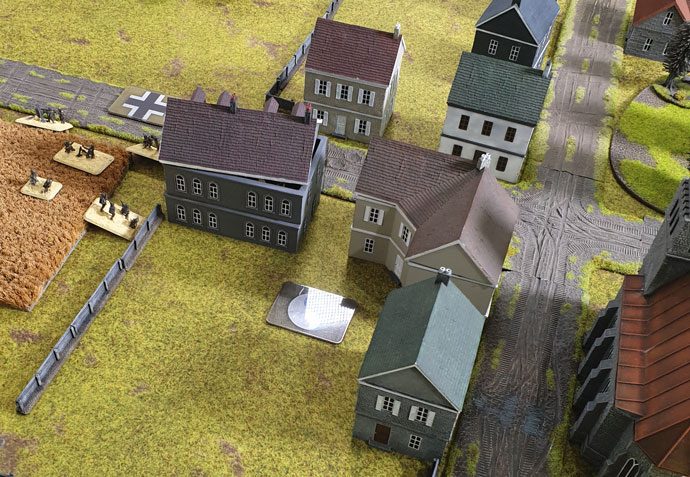
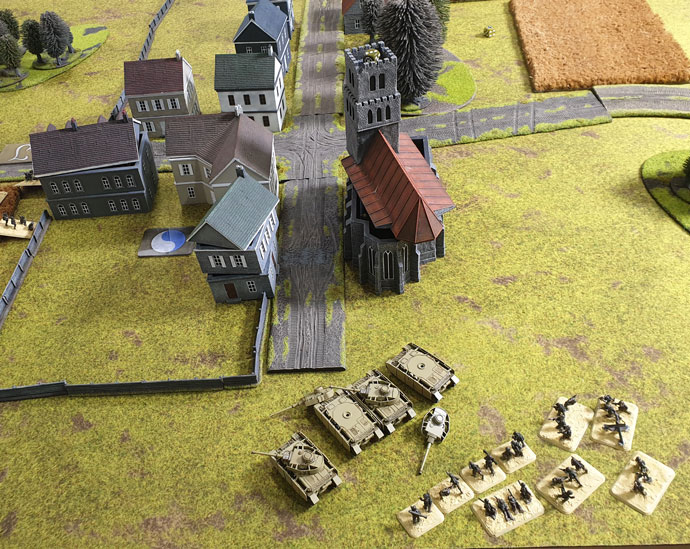
To round out our D-Day: German coverage, Wayne and Victor threw down their expertly-painted forces on a stunner of a table and duked it out. There can be only one winner- check it out here…
Join the Battlefront team as we launch Bagration: Soviet

with Victor Pesch and Wayne Turner (Battlefront NZ)
To round out our D-Day: German coverage, Wayne and Victor threw down their expertly-painted forces on a stunner of a table and duked it out. There can be only one winner- check it out here…
with Alex and Patch
Check out my suggestions for setting up a table so you can have dynamic and exciting battles whenever you play Flames Of War. If you like the terrain I used here you can pick your own sets, and more, up right here…
with Andrew, Ashleigh, and Luke
Bloody Omaha Mini Campaign,
Game 1 Andrew Vs Ashleigh
Battle Report by Andrew
Today we decided to play a quick day long Bloody Omaha Ace Campaign! The plan was to use the Bloody Omaha deck to play three games, using our hobby league 50 point armies, playing among the NZ league members that I could. We decided to roll off the first mission in the campaign as we only had time to play three games. The Germans won the roll so I started my first game against Ashleigh (she was playing for the Germans). Her British army consisted of nothing but armor, a nasty match up for my 50 point 29th infantry division Assault Company. We were both running our 50 point hobby league armies.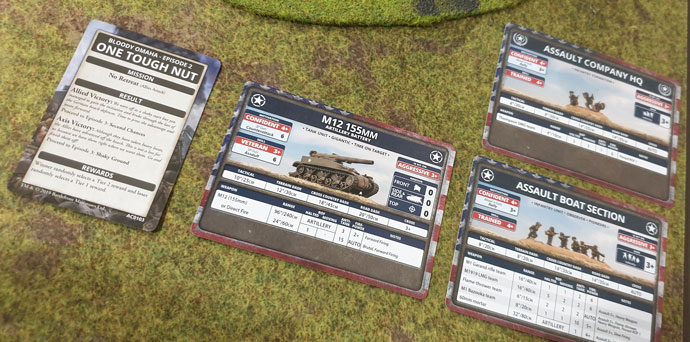
Setting up the game we were playing the Episode 2 card, One Tough Nut. This mission is No Retreat! Since both Ashleigh and I are playing Allied forces we rolled off to see who was defending, luckily I am defending. I quickly choose to defend the city thinking that was my best bet.
 The game started off as you would think, the tanks moved forward and took pot shots at range against my infantry. On my first turn I ambushed my 155 artillery to hit Ashleigh’s Churchill tanks, I managed to knock out one. Luckily Ash had one Churchill that stayed bailed and I was able to weather the return fire only suffering a few bailed out artillery tanks.|
 The game went on trading shoots with not much changing; I started moving my infantry through the buildings from reserves. This lasted until one turn when Ashleigh killed 5 infantry teams in one platoon with one round of shooting form her Carriers! I knew I would have to move!
 My next turn saw my artillery take out Ashleigh’s Churchill tanks and my bazookas getting lucky killing two Stuarts with moving shoots! Both the Churchill and Stuart tanks ran away! In reaction Ashleigh moved back and started shelling me from range, I responded by taking pot shots with artillery bombardments among her tanks, the third turn of bombardments I hit four of her tanks, all but one of them rolled a 1! With firepower 2+ my artillery took out the core of Ashleigh list, and it was just a matter of a few more morale rolls before her tanks retreated off the table.
 A victory for my 29th infantry Division. I would move on to my next game with Luke, due to having just played Hasty attack in our last game we played, Luke and I decided to play Dust Up instead.
Bloody Omaha Mini Campaign,
Game 2 Andrew Vs Luke
Battle Report by Andrew
I also got to play in game two, this time I am playing against Luke. He brought his panzer IVs and again I was facing an all tank list.
I decided to do my normal reserves at 50 points for this match up even though I didn’t get to put my 155s in ambush. I stuck my two infantry units around the objectives and my 155 in the back comer prepping for an artillery strike.
Luke places a single Panzer IV unit in his deployment area and I was suddenly filled with hope, I only had to knock out one tank unit, then I could get to his objectives with my reserves!
 Turn one went to Luke and he rushed me, I was not expecting that, but I prepared myself for conflict sooner than I thought.
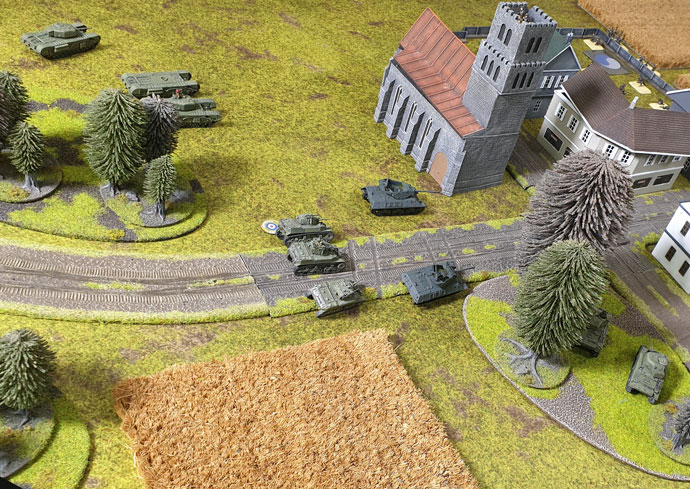
Turn one nothing really happened on turn two I saw that Luke was rushing for my 155s. He moved behind the church making hard for me to direct fire at him. I instead fired on him with infantry I had in the town, they moved forward through the buildings and opened up on his tanks, doing nothing. “Well”, I thought “That’s my artillery dead next turn”.
 Luke next turn had him wanting to Blitz around the building, 4 Panzer IVs would make quick work of my FA0 artillery tanks. But he failed the roll and then failed to hit me at all! Luck was on my side and I decided to open up on his tanks with my 155s! I knocked out two tanks! I really could not have asked for more.
Next turn I only lost two of my 155s, a bargain my 2 artillery for two Panzer IV tanks. On my turn I was able to bring in an infantry platoon from reserve, and they killed the last two tanks! Hurrah, now to deal with the rest of Luke’s tanks coming in from the other side of the table!
 Luke’s next turn he move his HQ and his other panzer 4 platoon up and destroyed the last of my 155s. ouch well it isup to my bazookas to hold him off.
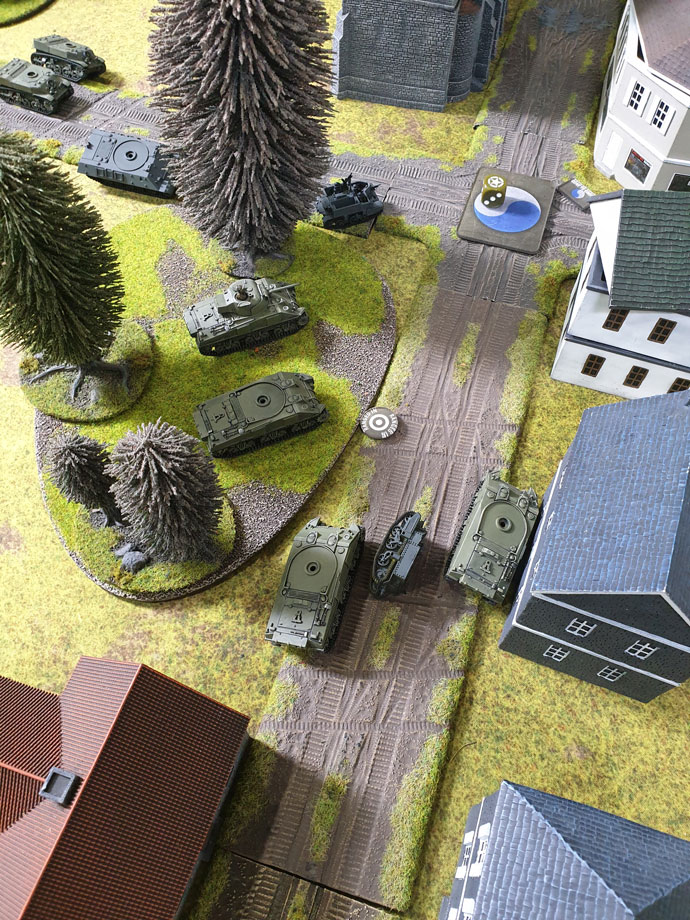
On my turn I moved one of my infantry platoons to reinforce the forward objective and got one more reserved that made a beeline to Luke’s table edge getting 2 turns away from capturing the objective!
Feeling the pressure Luke assaults my infantry and two of me bazookas bail two of his tanks on their way in. He misses, my bazookas miss on their assault. Luke fails his counter assault and I take his two bailed tanks! His company command moves in to assault and my bazookas straight up killed both of Luke’s HQ tanks, winning me the game, and earning themselves a nice medal to boot!
 Another Victory for the 29th Infantry Division! We moved on from the Second Chances card to Rat Catchers, for this game Phil and Cameron are facing each other, Phil playing for the Allies and Cameron for the Axis. I’ll leave it to Phil to write up that final battle report.
with Andrew Haught (Battlefront NZ)
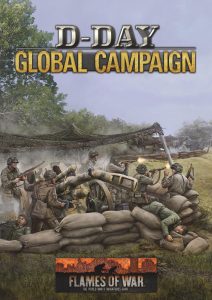 This week we take a closer look at the D-Day: Global Campaign Battlefront and the crew over at OnTableTop are running later this year. We have done several campaigns with OnTableTop in the past for Team Yankee and those who played in those will recognize this campaign- even though there are a few key differences. The campaign itself will have players fighting their way through the battles of Normandy taking over Routes and securing Areas that will earn their side a bonus when fighting in that route during the next week.
This Global Campaign kit is flexible and can be played during the online campaign, linking both your store’s campaign and the online campaigns together; or it can be played offline at any time using just the campaign kit. Each kit will have a ruleset, a campaign map, recruitment posters, and a set of stickers to mark your progress.
The online part of the campaign will link gaming communities from across the world together to fight over a global map. Along with recording your games and adding your side’s victories you can also write up your battle reports and share them with the online community, earning cool achievements and giving your side even more of an edge.
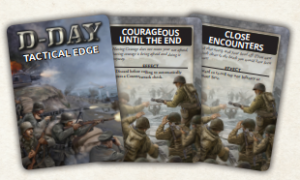 Did I say edge? Well, here is a non-obvious segue way into talking about Tactical Edge cards! Those who are participating in the Hobby League you will earn Tactical Edge cards to use during this campaign. These cards give you a one use boost for any game you play during the campaign, giving you an “edge” in your games. If you didn’t take part in the Hobby League then you don’t have to worry about these cards, unless your opponent has, then be afraid! Be very afraid!
Just kidding, the cards are cool and have cool effects, but none of them are game-breaking on their own, so if you don’t have them and your opponent does it’s not the end of the world.
Well that’s it for our first look at the Global Campaign, later on we will go even more in depth on what’s in the campaign kits and we will go over how the campaign will work. For now why not join in the global discussion over on our Facebook forums and let us know what side you will be representing in the global campaign.
with Lonnie Mullins (Battlefront US)
The Germans are coming and, not being a German player, I’m planning on beefing up my American D-Day Forces to counter the Panzer IVs, Panthers, and Tigers (oh my) that I hear Brian talking about and expect to be dealing with. I expect to be dealing with somewhere between 9 and 17 tanks so I’ve got to be smart about what I’m taking.
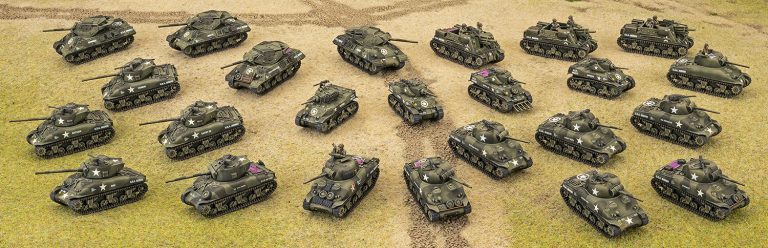
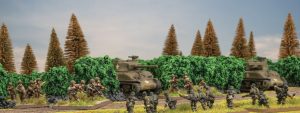 I love the Armored Rifle Company but I just don’t have the time to paint that many infantry up fast enough for our league, having let my “paint figure quickly” skill atrophy over time. I don’t relish being hit on a 3+ so my plan is for a complete Veteran M4 Sherman Tank Company.
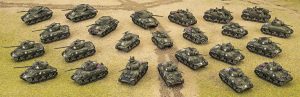
My force consists of 23 Sherman Tanks of various configurations and 2 support vehicles and is broken-down as follows:
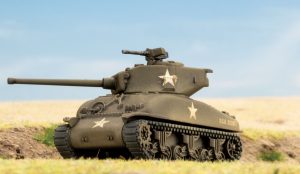 My 76mm tanks are going to be the biggest threat to any German armor I encounter and are thus, the most likely targets of enemy counter fire. That being said, all of the smoke that I can lay down with the 75mm and 105mm Sherman Tanks should be sufficient to protect my boys from too much steel coming their way and hitting them until they get into range.
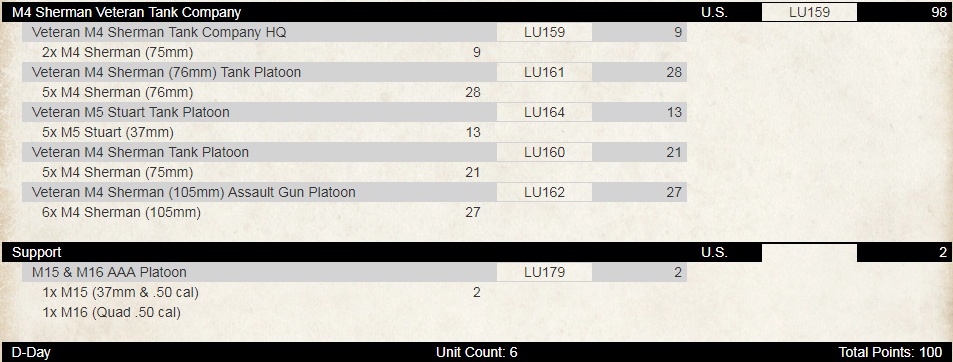 My hope for my screen of M5 Stuarts is that they get ignored until I’m able to exploit some weak points along the enemy lines; get enough of ‘em along the flanks of some Panzer IVs and there’s gonna’ be a lot of dead Panzer IVs (hopefully).
 The standard 75mm Sherman Tanks, when they’re not casting smoke down-range, are more than sufficient in knocking out Panzer IVs but really need the flank shots to have a hope of pinging any Panthers or Tigers; they’ll be operating mostly in support of the 76mms unless I see an opening I can exploit.
I’ve never used 105mm Sherman Tanks before but I’m eager to get them in the field. The idea of knocking out German Tanks with a Sherman from artillery fire at 48-inches from the top makes me giddy. And their anti-tank for direct fire isn’t too bad either.
 Lastly, just in case someone brings some aircraft, I’ve got a small contingent of AAA to handle that eventuality.
In July we celebrated the launch of D-Day: American to much fanfare and celebration. You can check out all the great launch day content here:
Releases and Spotlights
Designing Airborne Figures
Fantastic Plastic Forces
D-Day: American Spotlight
Forces and Projects
Andrew’s Rangers Lead the Way
Brandon’s Armoured Rifles
Saving Private Ales
US Recon Cavalry Force
29th Infantry List Tech
Currahee!
Studio Projects I
Studio Projects II
Studio Projects III
Modelling and Painting
Victor’s Big Four Americans
Painting US Airborne- Evan’s Guide
Painting US Infantry- Evan’s Guide
Pete the Wargamer: How to Paint the M5 Stuart
Pete the Wargamer: How to Paint US Airborne
Video
How to: Airborne Assaults
How to: Beach Landing
D-Day: American Direct Order Rotations
D-Day: American Q + A
FUBAR Battle Report
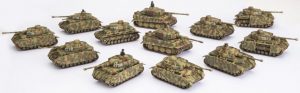
with Victor Pesch
It’s been a “Fury”ous month of painting for me, but there’s nothing like finishing a whole new army ready to hit the table…
Check out the fantastic pictures of Victor’s force over at Big Four…
with Andrew Haught
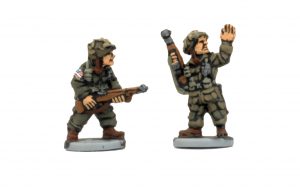
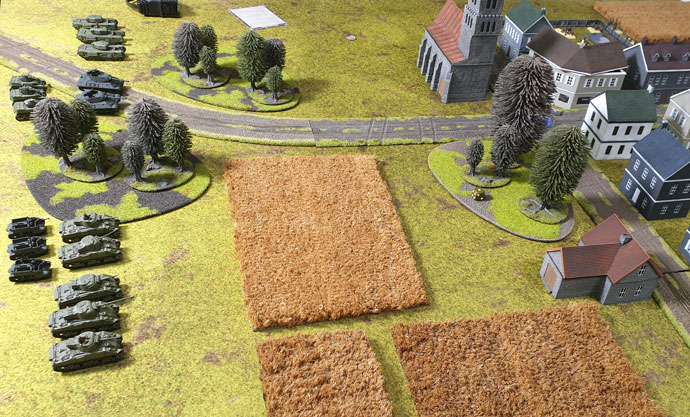
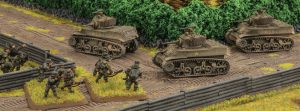
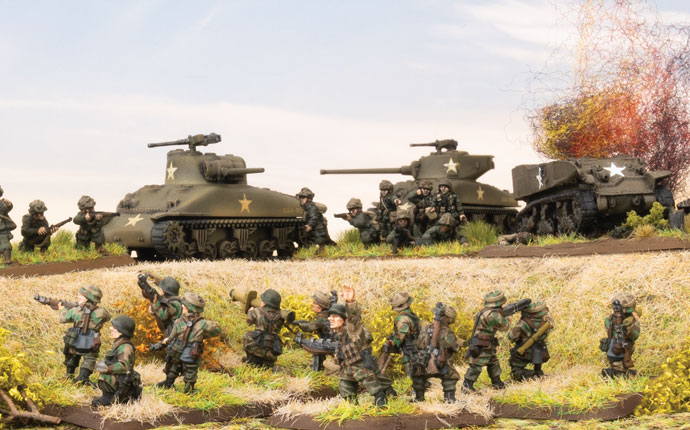
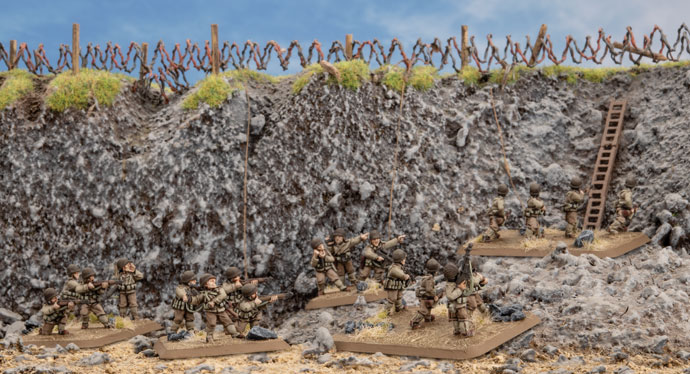
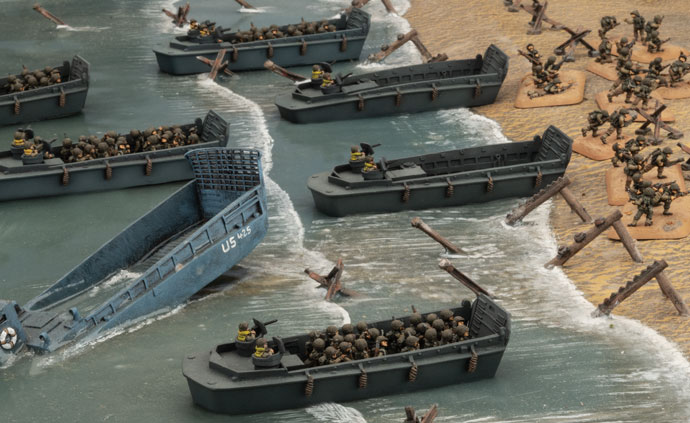
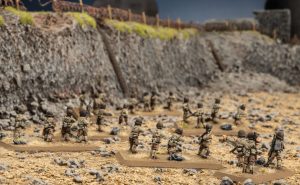
Wayne and I sat down to play a game of Flames Of War and we wanted to do a beach landing. Since I was still working my 29th Infantry Div beach landing Assault Company I decided to do something a little different than what I normally play for this Beach Landing game. I wanted to play Rangers. Rangers in V4 are incredibly cool. They are assault monsters and if they can get in close they will kill everything with their +2 to hit in Assaults.
Now, when brewing up a list for a Beach Landing mission, as an ally force you want to focus on the units that will cycle back onto the table: the infantry units, so I want at least 3 units, but the way the Rangers work I only get two per formation so I need to bring two formation. This is one of the strong aspects of the Rangers since their formations are small you can get multiple company commanders to help motivate your troops and keep your forces moving. With the core troops I wanted to add some artillery in the form of Mortars and Naval Gun Support. And since we are going D-Day let’s get some Duplex Drive tanks via the DD Sherman Command card.
Here is the list I ran against Wayne in our game:|
 Ranger Company 1
Ranger HQ 1 Point
Ranger Platoon 10 Points
Ranger Platoon 10 Points
Ranger Mortar platoon with 6 guns
Ranger Company 2
Ranger HQ 1 Point
Ranger Platoon 10 Points
Ranger Platoon 10 Points
Support
M4 Sherman Tank Platoon with 4 tanks 14 Points
Command Cards
Lucky 1 Pont
Naval Gun Support 12 Points
Sherman DD 0 Points
If you add it up you can see we were playing below the normal 100 point level, at 75 points. This was due to the fact we were playing in a recorded battle report and we wanted to keep it short. But 100 points is where the game truly shines and if you wanted to add 25 more points to this list I would add the following,
Ranger Company 3
Ranger HQ 1 Point
Ranger Platoon 10 Points
Ranger Platoon 10 Points
Add a fifth tank to the M4 Sherman Platoon +4 Points
That gets you to 100 point easy and you will have even more troops on the table to harass your opponents.
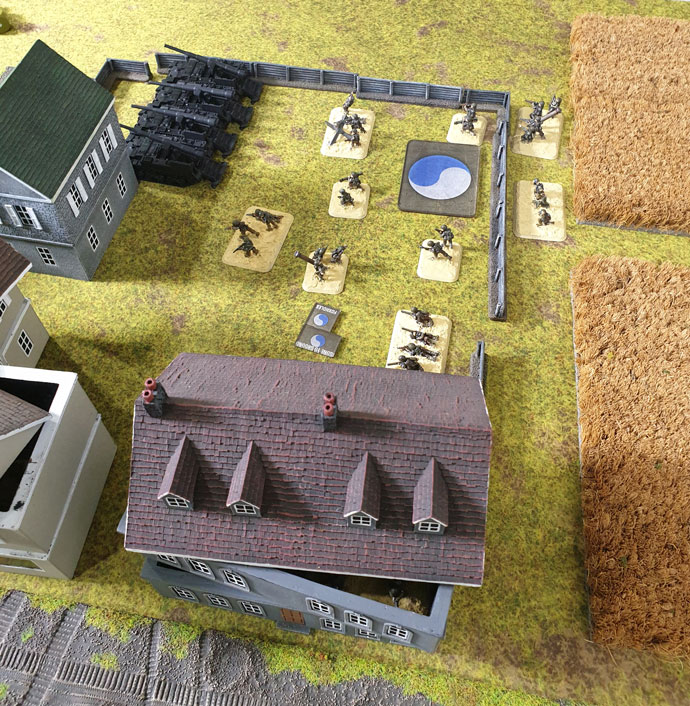
Wayne and I were playing the FUBAR mission found in the D-Day: American book, we wanted to show off the basic mission and give players a look into how the mission is played. We could have played the Pointe Du Hoc Variant rules that would have let us play the beach landing the Rangers ran into on D-Day. Both missions work as FUBAR is a great representation of the Omaha beach landings.
I won’t tell you how the game went as you can watch our battle report video to find that out but I will go into the basic tactics of this list.
This list is all about attacking, you move your infantry in and you overwhelm your target with sheer numbers. During the FUBAR beach landing mission you have to take both objectives but your opponent’s resources are quite limited so try and mass up on both objectives. Your Shermans are limited resources so be careful with them and get them up the beach quickly and have them focus on taking out bunkers, start with the AT bunkers and once they are dealt with move on to the MG nests.
 Something else to keep in mind when building non-Ranger Tank forces, Rangers formations are cheap point wise to add to your force. For 21 points you get two full units of Rangers and an HQ, so you get re-rolls and some of the best Assaulting units the Americans have to offer. Its easy to build a well forces list and slot the Ranger platoon in, for example,
M4 Sherman Company
M4 Sherman Company HQ with 2 Tanks 7 Points
M4 Sherman Tank Platoon with 5 tanks 18 points
M4 Sherman Tank Platoon with 5 tanks 18 points
M4 Sherman (76) Tank Platoon with 5 tanks 23 points
M4 81mm Armoured Mortar Platoon 2 Points
Ranger Company
Ranger HQ 1 Point
Ranger Platoon 10 Points
Ranger Platoon 10 Points
Support
Priest Artillery Battery with 3 Priests 8 Points
Sherman OP 3 Points
There is a hundred points and the Rangers are the perfect include, if you have to defend well you get two full strength Ranger platoons to dig in on the objectives, with their 3+ moral rating they will rally and stay in the fight longer than most other American infantry units. Add in their 2+ to hit in assaults and you have a defending unit your opponent does not want to assault into.
 Ranger weakness to keep in mind, they are easy to hit, so HMGs and other high rate of fire hostiles are a big threat, you want to use your tanks and artillery to deal with those threats before the Rangers move into the assault.
To see the video of our game click here…
Well that’s it for this Army Spotlight, hope to see you on the battlefield,
with Ales Potocnik
Hi! My name is Ales, and I am a designer behind some of the figure miniatures produced for Flames of War. For this article, I will guide you through the process of creation from beginning to final product. It is quite a specific line of work since the production of miniatures requires knowledge in different areas; such as 3D sculpting, casting processes, working with small scales, materials, and prototyping equipment. I also had a great opportunity to learn from Charles Woods, who was kind enough to provide me with some guidance. I couldn’t do what I do without a great team behind me, providing me with useful tips and ideas to even further push the miniatures look and improvements.
 There are a lot of things that are very specific when you are designing to such a small scale. Not only the size, there are certain technical requirements due to the way the final plastic miniatures are produced. Lines have to be extra crisp in order to get out as much detail as we possibly can, there is a necessary increase in the thickness of certain small bits, because in the end you are left with a choice. Either you can have a detail that is slightly off in size, or not have it all. The same issue would arise with long thin plastic objects which would be prone to breaking. My job is to think ahead for all the processes and final design and adjust the best I can for the best possible result.
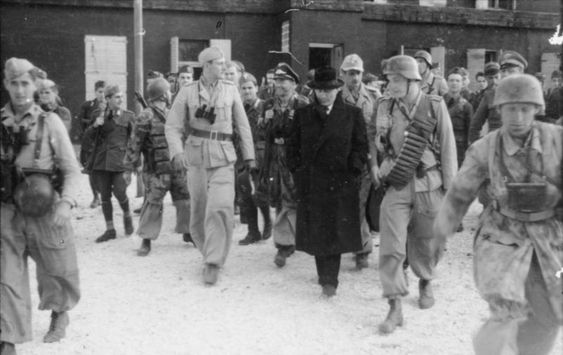
The designing process starts off with a brief that gets written up by Miniature Design Lead Evan. The brief then gets either approved or refined and after that, it ends up in my hands. Briefs will usually include details on uniform and equipment layout, height of the miniatures, and specifics that will need to be taken into account on what we want. I tend to gather up as much additional material, books and references as I can, since some of the details are very specific or certain parts can’t be distinguished easily in the historical photographs due to quality and size. After all I am looking at gear details on photos where it is not always the intention to capture that at all.
At this point I will start designing in 3d software, usually starting with a 10mm bottom round platform for size reference, moving on to uniforms and then moving on piece by piece. While I design the likes of shoes, pants, belts, entrenching tools, ammo pouches, gasmasks etc., I’m still not designing absolutely everything. Often I am provided with weapons that were designed by other freelance 3D artists working for Battlefront, shaving down the time I would spend on it as an individual, meaning, we are moving faster in the creation. This part usually takes quite some time, since all the parts are designed in a way for them to be as distinguishable as possible, and there is A LOT of gear that differs from soldier to soldier based on their tasks and ranks. While I am at this step, I often bug game designers with searching questions, or I ask for additional information from the Miniature Design lead.
Once we are happy with the miniature design look in digital form, I take over the process of prototyping on our high-accuracy 3D printer. Sometimes when we are in a pinch and we can’t decide for example, a helmet size, it really comes in handy to test them out in physical form. As I am satisfied with the model, it gets a final check up by Evan, and then gets prototyped so we can send it over for inspection.
We make absolutely sure we go through all the quality control steps. Previewed by Miniature Lead again in physical form, checked by our staff members and me, then checked and later on approved by the bosses. If the miniature is not up to standard, we repeat the whole cycle, but most of the time we only need to make minor corrections & adjustments. It is essential that we are communicating a lot at this stage through the way the miniature is designed. If we miss this window of opportunity and we want a change later on to a basic model, I have to make changes to all of the miniatures I’ve already made. For example: if we are not happy with the way shoes are made, I have to remove the old ones, add the new model of the shoes I have made, pose them, and add the details and folds for each individual miniature. Once you stack up 50 shoe changes it turns out to be a few work days of work, making it difficult to stick to deadlines.
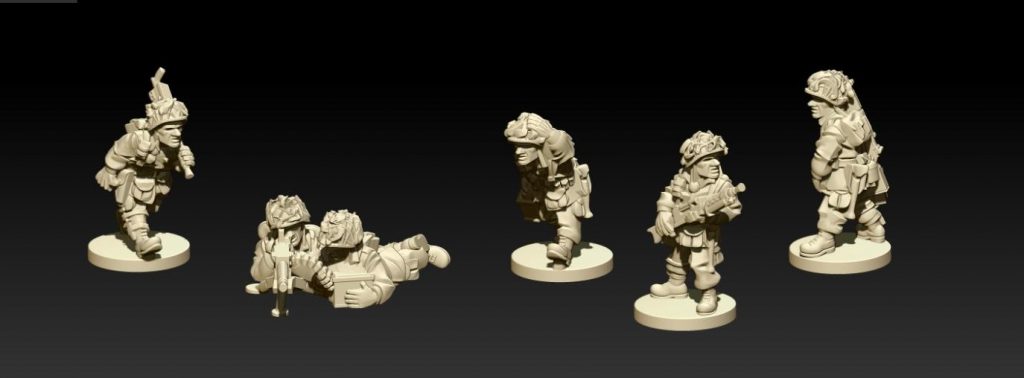
Finally, we move on to what I refer to as “making the range”.
This is the process of creating the miniatures and posing them. More direction at this part, since the figure range gets segmented. Riflemen, Mortars, Bazookas, Light machine gun crews and many more. Each usually have different and distinct equipment.
Always looking for cool poses, we base the soldiers on image references, our previous miniatures, and sometimes just trying out something that we think would look cool. At this stage I am looking for any possible undercuts (area that do not have straight lines and would cause the plastic to grab if cooled in the mould) and any other problematic areas which could cause trouble in production by orienting the miniature in an imaginary mould. The gear that I have previously designed now comes into play and gets added on each posed soldier, and adjusted based on the pose, gravity, and orientation. They are also given the right weapons if they carry them.
Each individual figure gets reviewed at this stage again and approved – one by one.
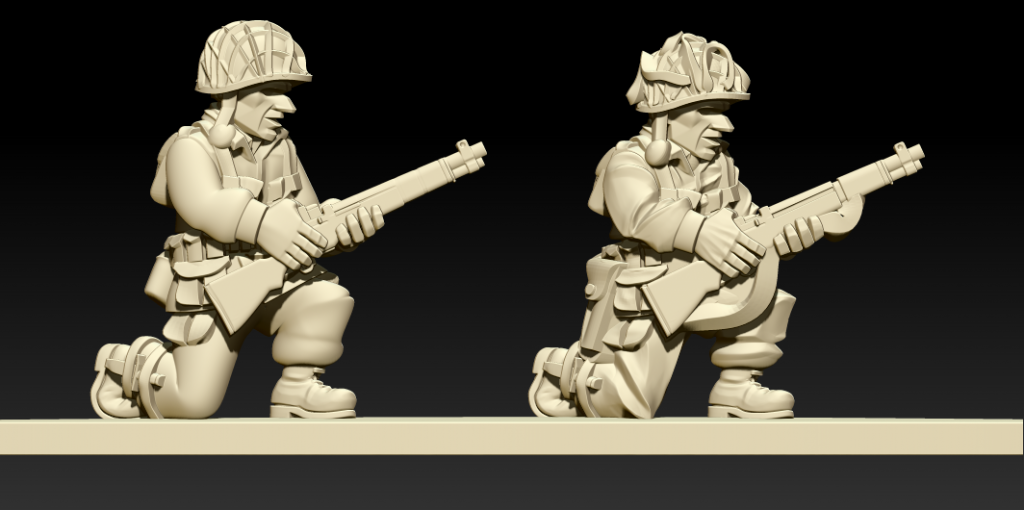 After we are happy with the pose, there comes detailing. Based on the pose, I am adding folds to the clothing, shape to backpacks and pockets based on how full they are, straps and different unique attributes to each single one of them. You must be careful not to overdo it with the gear stacking though! Soldiers can start looking like waddling penguins real fast with all the gear at such a small scale. This process is most difficult for a 3D artist to get used to, since small miniatures are treated completely differently than the large ones. Each crease and fold needs to be exaggerated and needs to be as sharp as you can get it.
As I add the details, myself and Design Lead go over all of them and review them one more time – digitally. After this it’s more prototypes being printed and again, we all review them since you can never get the exact same result you get on screen. Here we make any final adjustments to the entire range of figures. When the adjustments are done, we are left with final version, Version 2. The soldiers get grouped up, sprues are added in 3D software to specifications and requirements, and off they go to mass production!
with Evan Allen
All my figures are painted with the Vallejo range of paints. These are my personal suggestions only so please treat them as a guide and not “gospel”. I’ve also refrained from my usual technique of adding a little Deck Tan VP986 to the basic uniform colour and drybrushing highlights so you can see the actual colour more clearly.
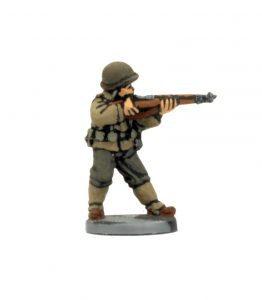
 The M1942 Uniform
The first combat uniform issued to US Airborne troopers, the M1942, was purpose designed for Airborne troops by Maj. William Yarborough (who was also the designer of the US Airborne parachute wings). The design included features such as pockets cut on the diagonal to allow easy access while wearing webbing equipment and large, expanding, bellows style leg pockets that became a trademark of the wartime US airborne trooper. The M1942 uniform was used only by Paratroopers and wasn’t issued to Glider troops. The Paratroopers taking part in combat jumps in North Africa, Sicily, Italy and Normandy wore this uniform and even one battalion that jumped during “Market Garden” in Holland was still wearing this uniform.
This uniform was made from light  cotton that was a pale greenish-tan colour and I must admit to spending an awful lot of time experimenting to achieve, what I hope to be, the closest match possible. I try to avoid mixing different colours to achieve my basic uniforms but this uniform seems to bring on my OCD (Obsesive Colour Disorder) to get it closer than just plain Olive Drab (887 gets). The Olive Drab (887) is close but a bit too dark for my taste so, eventually, I settled on a 50/50 mix of Khaki (988) and the Olive Drab (887)
The other colours I chose are:
| Uniform Piece | Vallejo Colour |
| Webbing & Equip. | Green Grey (886) |
| Helmet | US Olive Drab (887) |
| Helmet scrim | Khaki (988) |
| Weapon Furn. (wood) | Beige Brown (875) |
| Jump Boots E-tool handle Pistol holsters |
Flat Brown (984) |
The M1942 uniform was practical to wear in combat when it was warm but it offered no protection from the elements when the weather turned nasty. Also, being made from lightweight cotton, the knees and elbows tended to wear out quickly so many an airborne trooper bribed his unit parachute rigger to sew patches over the elbows and knees. The material commonly used for this was cotton duck from old parachute packs and was green in colour. I’ve painted patches on the elbows and knees of this figure over an otherwise standard M1942 uniform with US Dark green (893). You could even mix these with “unpatched” troopers for a bit of variety.
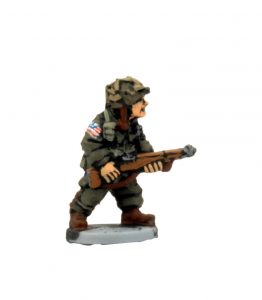
 The Glidermen
The Glider borne troops were basically standard infantrymen who woke up one day to find themselves called Glidermen, there were no calls for volunteers here! With a job equally as dangerous as their Paratrooper brothers they were denied the extra “jump pay” until just prior to the “Market Garden” landings when, finally, they achieved official recognition of the hazardous nature of their job. The uniform worn by these intrepid airborne soldiers was almost exactly the same as the “leg infantryman”. The only allowance for airborne duties was the issue of jump boots to a few fortunate troopers and, other than those few, they are the same as an ordinary infantryman in the M1941 uniform.
The colours I chose are:
| Uniform Item | Vallejo Colour |
| Jacket/leggings | Khaki (988) |
| Trousers | USA Field Drab (873) |
| Webbing | Green Grey (886) |
| Helmet | US Olive Drab (887) |
| Boots E-tool handle |
Flat Brown (984) |
The M1943 Uniform
After the US Airborne forces were withdrawn from Normandy they were refitted and brought back up to strength ready for the next mission. This included the widespread issue of the brand new M1943 olive drab uniform to the veterans of the 82nd and 101st divisions. This wasn’t just a paratroop uniform but the beginning of the US Army’s push to standardize the combat uniform. All airborne units received the M1943 uniform, even the Glider troops, but the paratroopers were quick to modify theirs by adding bigger
leg pockets.
The new airborne divisions arriving fresh from the States already wore this new uniform and it was the
uniform seen dropping from the sky, or climbing out of a glider, during “Market Garden” in Holland and
“Varsity” over the Rhine and into Germany proper.
This figure is painted as wearing the new M1943 olive drab uniform. The uniform colour I used is US Dark Green (893). The rest is the same as for the earlier paratroop uniform colours details. For all the airborne equipment, like mortars and bazookas etc. US Olive Drab (887)
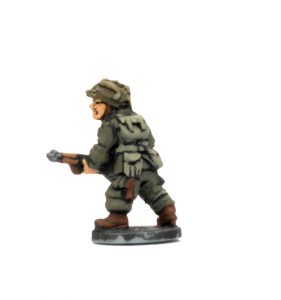
as the US Army used pretty much the same colour of Olive drab on everything.
I hope I’ve given you enough to help get you started on painting your airborne force and also a feel for the kind of troops that you’ll be leading, I’m sure, to tabletop success whether from the sky or as elite “leg infantry” with a bit of Armour in support.