Andrew is making good on his promise to freshen up his Red Banner Speedy Assaulters.
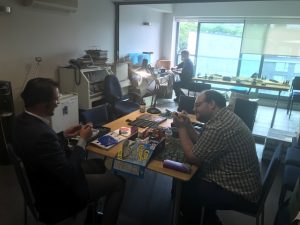
Wayne continues to spray up his StuGs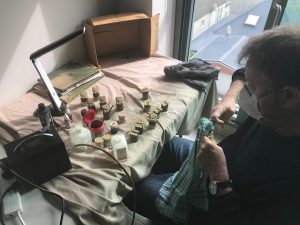
I’m working on my American Rifles.
Join the Battlefront team as we launch Bagration: Soviet

Andrew is making good on his promise to freshen up his Red Banner Speedy Assaulters.
Wayne continues to spray up his StuGs
I’m working on my American Rifles.
![]() Our two new Kursk Books are out on Forces, so you can get to work setting up your armies for the Eastern Front!
Our two new Kursk Books are out on Forces, so you can get to work setting up your armies for the Eastern Front!
Whether you want to run a battle-hardened horde of Panzer IIIs or a crack team of T-34 Heroes, you can start putting them together over the weekend at Forces of War…
with Chris Townley
Over the past few weeks I’ve been thinking a lot about my terrain and what is useful for playing a Kursk (or even Eastern Front) themed game. Looking through what we have in the office as well as my collection at home I found that I had quite a few great options for creating themed tables.
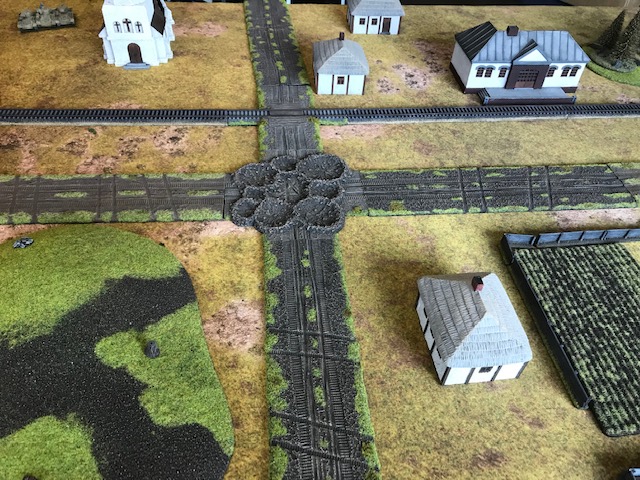 Prokhorovka – have a look at Alex’s table building article for more, but here you can use a nice mix of hills, forests and even a rail line.
Voronezh Front – Here the Soviets built extensive defences in layers. Time to dig out my Great War Trenchlines and Shattered Battlefields.
The Donets River – Rivers provide a natural defensive barrier and are a pain to deal with, making them great for a thematic game.
I put together a list of the terrain I thought might be useful. One of the graphic designers thought a spreadsheet looked a little dull so whipped up this PDF.
Check out the full range of Eastern Front terrain I’d find a place for on one of my tables here…
with Andrew Haught
This week just for fun we thought we come up with a arcade style mission using Borgwards in a new way. The main idea is you grab a friend or two and some tanks and you defend the supply route from an onslaught of German demolition carriers in a Space Invaders style game. This was put together especially for the launch and we thought we would release it as a Beta test for everyone to play around with.
For the mission click here…
For printable Borgwards and StuG Gs ckick here…
with Phil Yates
When Enemy at the Gates came out, I backdated my Kursk T-34 company to the earlier model and added some KV-1 tanks to create a Mixed Tank Battalion [Article Reference Here]. Now that Red Banner is out, I’m in the process of updating it to the latest and greatest for Kursk.
T-34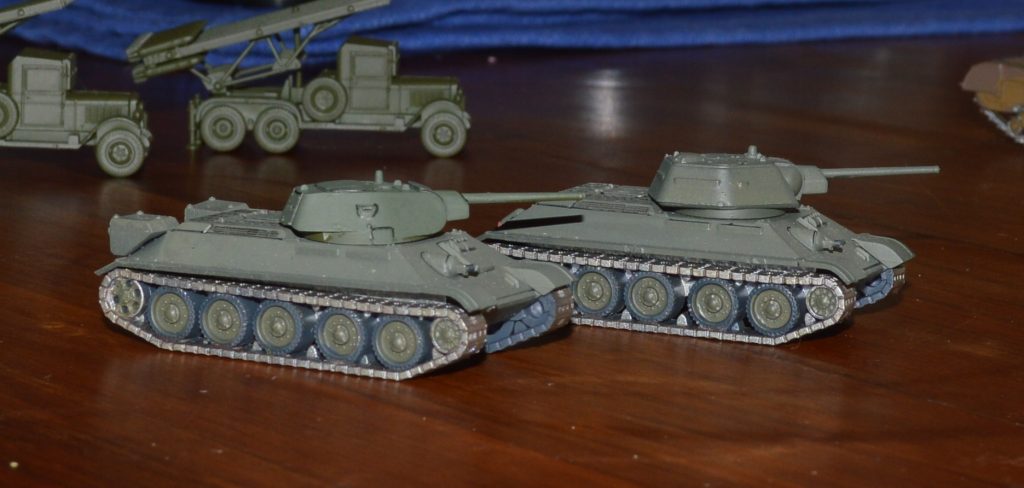
The first step is simple, I just replace the T-34 (early) turrets with the later ‘Mickey Mouse Ear’ turrets (so called because when the two circular hatches are open, they look like Mickey mouse’s ears!) that I originally painted.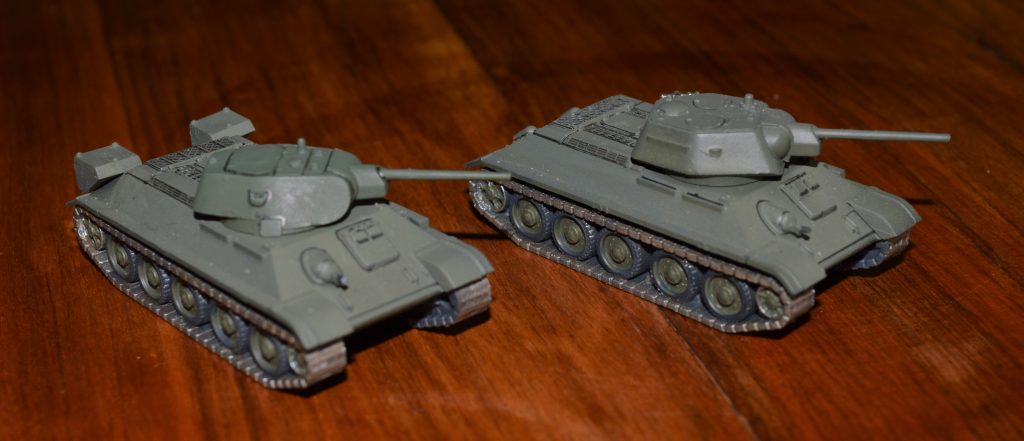
While the differences between the early and late T-34 are subtle, they are much appreciated by a speed freak like me. The later model is 2”/5cm faster through terrain and 4”/10cm faster across country, and has a Cross rating of 2+. This makes my preferred tactic of racing a mass of T-34s into the middle of an enemy tank group and engaging in a short-range firefight even more effective. At that range, and shooting into the flank of the enemy, the 76mm gun is very effective, while even the side armour is still good enough to bounce plenty of shots! It takes a Panzer IV (long) to match me in that firefight – anything less and I’ve got the advantage tank-on-tank.
Valentine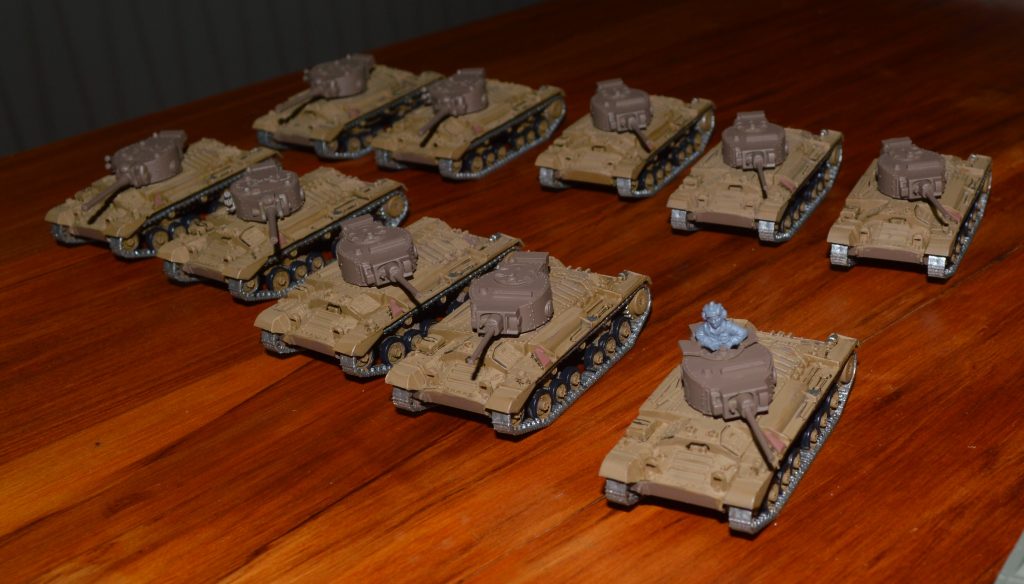
The next step is sort of the reverse – painting the late-model turrets for my Valentines. Fortunately, the kit has the parts for both early and late turrets, so I just grabbed the leftover bits and made three late 2 pdr turrets and four 6 pdr turrets. The late 2 pdr turrets with their space for an extra crewman get rid of the Overworked penalty (+1 to hit when I move), while the 6 pdr guns give me Anti-tank 10 (rather than 7) instead – but at the cost of no MG. This makes my Valentines quite a bit more shooty, although less effective against infantry and guns.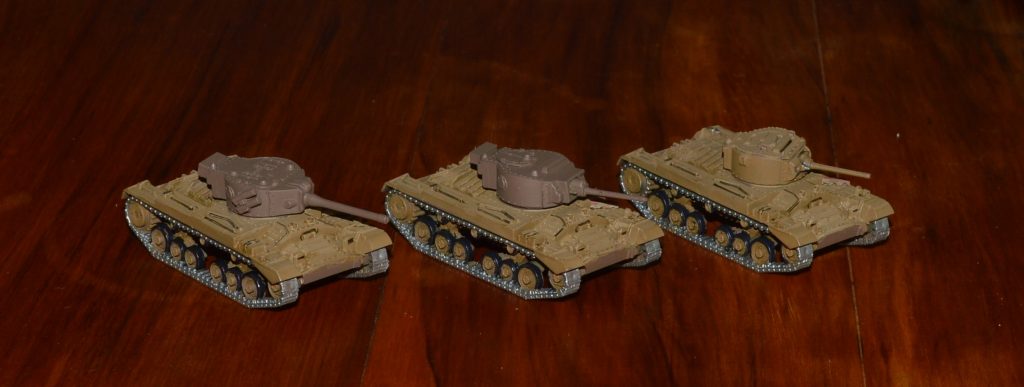
T-70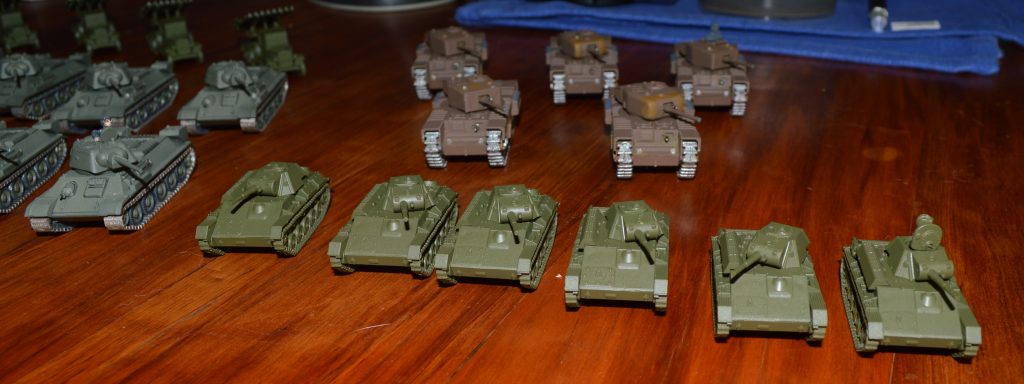
While I love the Valentine (it’s sooo ugly!), its slow speed makes it difficult to use with the T-34, so I’d rather something faster, so I’m painting a company of T-70 light tanks as well. These are like a T-60 on steroids. They mount a 45mm gun (even if it only has one shot!) and have decent armour and speed, but are still dirt cheap. While they are way faster than the Valentines (and at least as fast as any opposing tank), they still feel slow compared with my T-34s, but with ten for less than the price of three T-34s, they make a nice cheap flanking or distraction force.
Churchill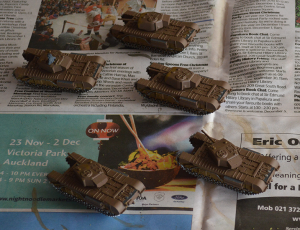
Finally on the tank side, I’m adding a company of Churchill tanks. Like the Valentine, they are so ugly that they are beautiful, and I just had to make some of the new plastic kit. Fortunately for my not-so-inner geek, the heavy tanks supporting the tank corps at Kursk were Churchills, so they go well with my T-34s. The Churchill is like a slightly faster and less armoured KV-1 (a bit more armour than the way faster KV-1s). Its gun has similar performance against tanks (slightly higher Anti-Tank, but worse Firepower mean more Bailed Out, but roughly the same number of destroyed enemy tanks), but with No HE, it’s way worse against enemy guns. The price is cheaper, but they’ll need some support to come out on top.
Between the two forces, I now have most of the Soviet and British Lend-Lease tanks to choose from, so that’s a plus when I want a bit of variety.
Katyusha
The new plastic Katyusha rocket launcher is too cool to leave out, so I’ve grabbed four of them as well. Now I’m not convinced of the need for artillery in a hard-hitting tank force, so it’ll be a bit different for me. On the other hand, having a big Salvo template means that their ability to pin down targets quickly and reduce their threat to my tanks is going to come in handy. Having built one in the Enemy at the Gates launch event, I wasn’t surprised by how easily they go together for such a complicated looking model, but it was nice when it came time to make four of them.
SMG Company
I haven’t picked it up yet, but I’d also like to paint up an SMG company to go with my tanks. I love the image of tanks covered in infantry racing forward, with the infantry dismounting and unleashing a hail of fire as they roll over the enemy in a combined-arms assault! Once the tanks are done, they’ll be next on the painting table.
The Force
So, with all of these toys, what will I field? Without the Valentines, its 143 points, so great for a bigger game! For a 100-point force though, I’ll have to trim something back. If I leave out the Churchills, I have a nice T-34 Tank Battalion:
For the remaining two points I could have Partisans to slow down enemy Reserves, Reconnaissance by Combat to start the game with my Katyushas Ranged In where I need them, ot Guards and Lucky together to make my tanks Remount better and counter a bad die roll. At present I’m liking Partisans to give my tanks an edge in numbers.
Alternatively, I could add in three Churchill tanks to support the infantry and drop the T-34 and T-70 companies to six tanks each. It would be a very different force with a much slower strategy. The infantry and Churchills would be the lead elements, with the tanks tanking the role of Reserves or a flanking force stalking the enemy rather than the spearpoint of a headlong rush.
The Proof of the Pudding
The only way to prove whether this particular pudding is worth eating will be to try it out in battle. It’ll be interesting to see which version has the most success.
with Andrew Haught
The battle lines have been drawn, the tanks have been fully serviced. It’s time for Firestorm: Kursk.
Firestorm Kursk
Firestorm is back and this time we are fighting around Kursk. Firestorm: Kursk recreates the two-pronged German attack around the town of Kursk in an effort to cut off the Soviet forces in the area. Of all the battles that occurred around Kursk, none quite compare to the battle of Prokhorovka, which ended up being one of the largest tank battles in military history.
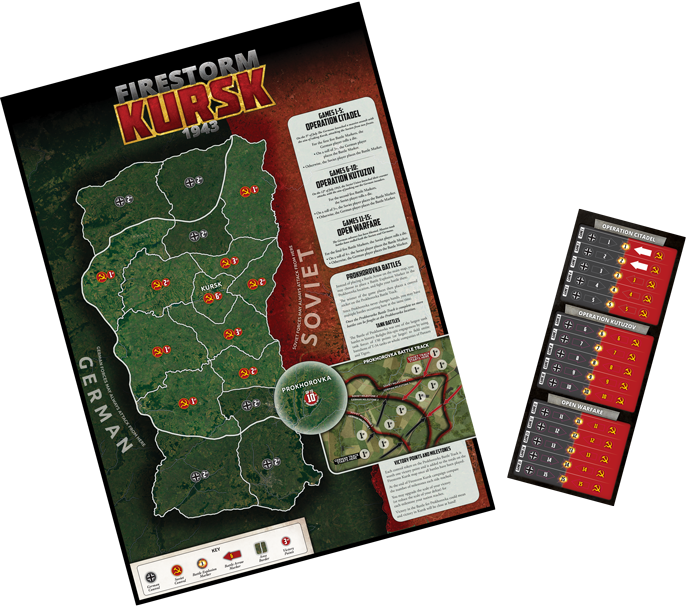
The Campaign
This kit has everything you need to play a full Firestorm: Kursk campaign at your store or club. The campaign will consist of a series of Flames Of War games in which players attempt to capture areas from the enemy or recover those lost in earlier games. Each time a player attacks they place a marker on the map, once all the markers have been used the campaign is over and the side with the most victory points wins.
Battle of Prokhorovka
The 5th Guards Tank Army was one of the most powerful armoured forces fighting in the Battle of Kursk. It was formed in March 1943 from the brand-new 29th Tank Corps and the experienced 5th Guards Mechanised Corps, and gained the 18th Tank Corps as it moved to counterattack positions as the Germans attacked at Kursk. Once in position near Prokhorovka, it added the 2nd Tank Corps, 2nd Guards Tank Corps, and the 9th Airborne Division from the forces that had been delaying the German advance.
On 12 July 1943, this force of over 800 tanks attacked, including more than 500 T-34 tanks, throwing the Germans back in hectic, close-range battles. Phalanxes of tanks charged across the dry steppes, dodging the gullies that slashed the battlefield, crossing through the enemy formations to shoot at point-blank range into the flanks of their tanks. The hills and state farms that the Germans had captured the previous day were littered with burning tanks by nightfall.
Massive Tank Battles
Battle of Prokhorovka being one of the largest tank battles in Military history, makes it the perfect place to play large tank battles. We suggest you play at least 150 point forces with an emphasis on tanks formations. This is the perfect time to pull out every T-34 you have or that large Panther army you been trying to play but was too many points for a standard 100 point game. The 150 points is only a suggestion—got a large Tiger tank company and you want to fight at 200 points? Go for it! The more tanks, the better.

Unlike normal areas on the map, Prokhorovka is fought over a series of battles. So you can stage loads of large tank battles during your campaign. Each victory at Prokhorovka will earn the winning side a control token that is placed on the Prokhorovka Battle Track. Each control token on the Prokhorovka Battle Track is worth one victory point and is added to the totals on the Firestorm Kursk map once all battles have been played, so winning in Prokhorovka can decisive when calculating victory points at the end of the campaign.
You can also check out Firestorm: Stalingrad here…
with J.C Von Winterbach

These two articles are taken from the Flames of War website and combined for this launch event. There is a link at the bottom of the page to the original articles with plenty more pictures.
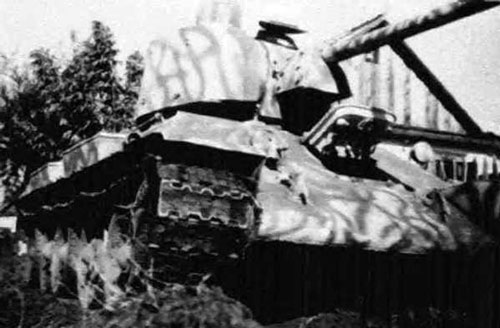
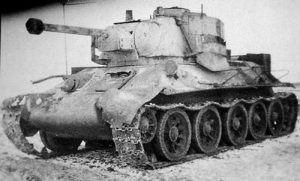 There are many ways these Beutepanzers were modified which I will be listing in this article. Some of the modifications ranged from Panzer III/IV cupolas, notek lights, stowage bins (fitted to the rear of the turret or the sides of the hull), antennas, and schürzen. These modifications can add a very unique and historic feel to your Beutepanzers, making them stand out even more on the table.
Notek Lights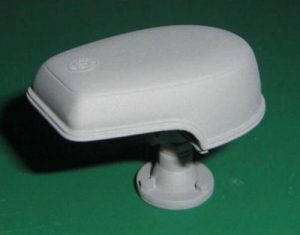
All of the Notek lights were designed to be used under blackout restrictions so the indirect lighting/hooded light concept was essential for the front light when the standard/main lights couldn’t be used so to avoid being spotted from ground or aerial observers.
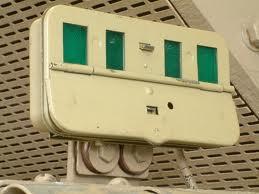 The rear Notek light had a lot more functionality, it could used as a normal rear brake light or used to maintain proper vehicle spacing at night under black-out conditions. It worked on the concept of optical convergence at different distances, which is why the rectangular shaped light had two sets of two different sized lights. The distance between vehicles dictated what patterns of the four lights were visible and provided a constant frame of reference to avoid vehicles ramming into each other in the dark.
An ideal distance between vehicles meant two lights were visible. If only one was visible, the distance between two vehicles was too great while four visible looks meant the distance was too close.
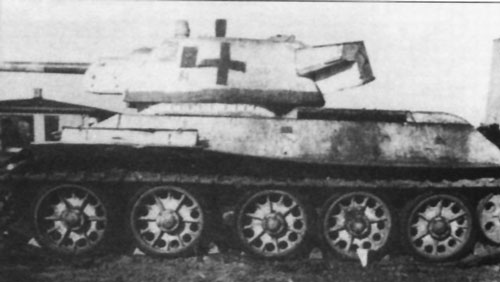
Tactical Markings
The numbering system used on the Beutepanzers were the same as those of the normal German tanks being the three-digit or four-digit standard (1024, 895, 354, 48, 9, etc.)
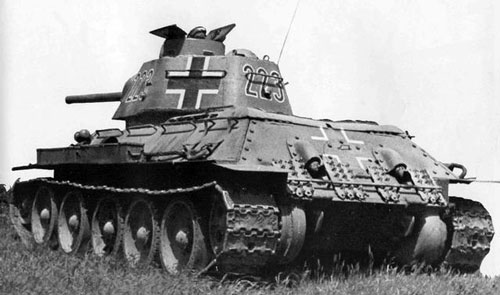
But some of these Beutepanzers received a different numbering system called the E-Mark. This numbering system includes the letter “E”, followed by a roman numeral and a further two-digit or a three-digit number. On most assumptions the letter “E” indicates Erbeutet (Captured).
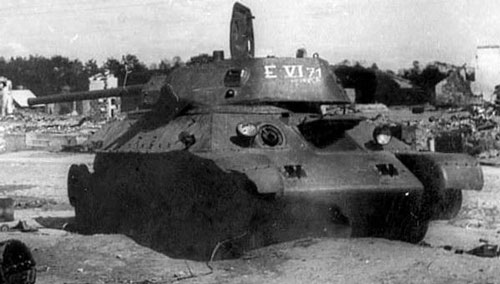
Position of Markings
The areas where these identification marks were located where mainly on the frontal, sides and rear panels of the turret and hull. The turret hatches and the barrel of the main gun, as well as under the barrel of the main gun, and track guards were also used as locations for identification marks. These signs were usually painted considerably large.
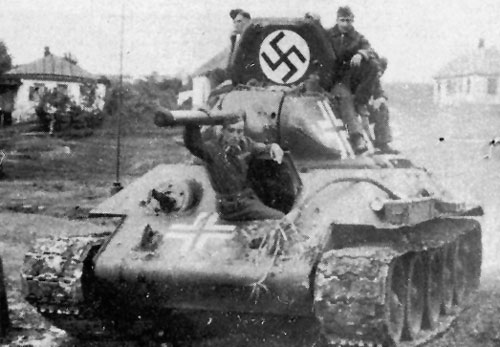
Other Markings
Some of the markings found to be painted on the Beutepanzers ranged from the Balkenkreuz, Swastikas, Divisional or Sub-Divisional Insignias, individual inscriptions or simply a German flag.
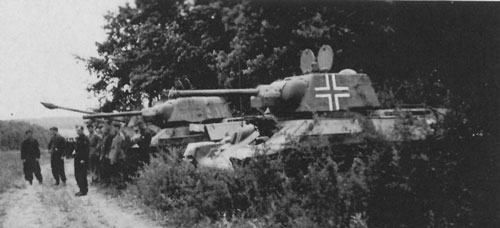
Among the individual inscriptions found on the Beutepanzer were the names of Soldiers (Emil, Karl, Radetzski, Jaeger, etc.), the names of wild animals (Tiger, Leopard, etc.), the names of municipals or provinces (Dantzig, Saar, etc.).
Kill Rings (Victory Rings) where also paint onto the barrel of the main gun to show how many victories the Beutepanzer & its crew had accomplished.
Tank Colors
Beutepanzers saw just as much change to their paint schemes as the rest of the German Armored Core due to the different periods, areas of operation, seasons and special needs. For starters, a lot of the Beutepanzers were repainted in the German Panzer Grey color, but as times went forward, these tanks also changed as the German tanks changed. From the beginning of 1943 they began to use camouflage patterns (Please refer to Art of War II for a complete list of German Camouflage painting schemes throughout the periods) on the Beutepanzer. These tanks also followed the winter camouflage paint scheme. But records & photos also show that a of of these tanks were left with their original colour scheme and went unchanged, except for their identification markings.
You can read J.C’s Modifications article and see more pictures here…
And more markings pictures here…
A common question we get is how long a turn of Flames of War takes. It can’t be instant, because setting up mortars takes longer than a second, but it also can’t be a whole day as an assault doesn’t have to take that long.
See Phil’s answer here to clear everything up:
with Andrew Haught 
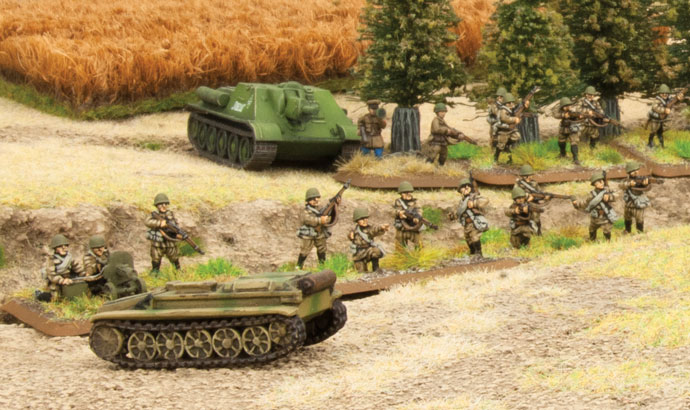
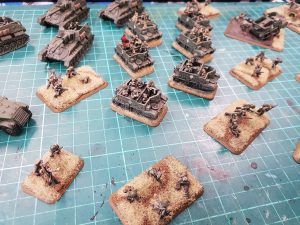
With another launch event I once again get a chance to dust off one of my old favourite armies and give it a bit of TLC and V4 update. This time I am going to dive into my old Rota Razvedki reconnaissance company. I originally built the list for V3 Late War using the Red Bear book. With their inclusion in the Red Banner book, I feel that I need to re-tweak the army so that I could run it in both Late and Mid War.
The Images in this article are in progress shots of my old list, I did the math and I think I painted this army originally seven years ago. I am planning to do some plastic updates to my army, over the release I will work on the ZIS-3 guns. After the release, I have further plans. First I am going to update the SU-85s to plastic and then I am going to rebase the infantry as some of the old basing has started to separate from the base.
Full warning: I love Universal Carriers, and will use any excuse to put them on the table. There is just something about their design that clicks with me. Thanks to the Red Banner Command Cards I get to use Carriers in my army, and I am going to get as many as I can.
 It’s All About That Speed
When I am running an aggressive list the first thing I think about how long it’s going to take to get my troops to the objective, and how many turns will my opponent get to shot my troops along the way. One of the features of the Reconnaissance Company is that their combat platoons all have Spearhead. This rule is massive, getting a free move before the game means that I can get a full turns worth of movement without risking any enemy fire.
Deadly Assaulters
Now speed is worth nothing unless you have some sort of payoff. The Infantry units in the Reconnaissance platoons have a massive 2+ to hit in assaults, meaning that if they can get into an assault they will kill almost anything in their way. The formation does have a weakness you need to be prepared for—they are really small—so you do not have the ability to take on heavy losses. So getting the extra movement form Spearhead is critical to your aggressive strategy.
To make my troops more of a threat I added two Command Cards to my Company Commander, the first one, Tenacity gives my HQ and any platoon he is attached to counterassault 2+. The second card I added was Ferocious Valour, this card allows my Company Command team to roll two dice in assaults. These two cards make it worth it to risk my Company Commander in assaults, and on top of that the HQ will add two more deadly assaulters to my assaults.
Universal Carriers Are Just Too Cool Looking
Like I stated above I love Universal Carriers, but apart from looks there is a good reason to run these awesome transports in your list. When using the US or German halftracks you have two stands of infantry in each transports, so each time one is destroyed you may lose 1/3 of your platoon. If you take the extra Carriers when you lose one transport you are only risking one stand of infantry, only 1/6 of you platoon. Also they just look cooler, so yeah why wouldn’t you use them?
 Support
My troops are good at one thing: assaulting and shooting infantry. This leaves a big gap in the form of Anti-Tank (AT), so I really need to add some AT assets. I could also use an artillery battery to help get my assaults to go in. Luckily, the Soviets have a unit that can multitask as artillery and anti-tank: the 76mm Artillery Battery. The flexibility of the 76mm Artillery Battery makes it ideal for my list. But I don’t think that will be enough AT, I think I want to add some mobile AT. First off I want to add the cheap and efficient SU-76s to my list, they have a great gun and are cheap enough to allow me to take the more expensive SU-85 option as well. SU-85s are a bit pricey but worth their points, they have a higher to hit stat as well as a massive Anti-Tank 12 gun, giving me the ability to threaten both Tigers and Panthers.
Andrew’s Speedy Assaulters
3 pts Reconnaissance Company HQ
1pt Tenacity Command Card
-Ferocious Valour (3 Point)
Armoured Reconnaissance Platoon(9 points)
– Universal Carriers 6x Universal Carriers (3 points)
Armoured Reconnaissance Platoon (9 points)
– Universal Carriers 6x Universal Carriers (3 points)
Armoured Reconnaissance Platoon (9 points)
– Universal Carriers 6x Universal Carriers (3 points)
Support
76mm Artillery Battery (8 points)
-4x 76mm guns
SU-76 Light SP Battery (13 points)
-4x SU-76
SU-85 Tank-Killer Battery (36 points)
-3x SU-85
Tactics 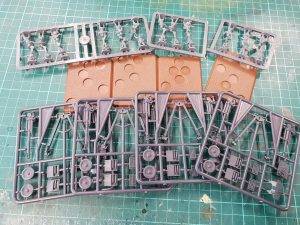
This is not an army that wants to sit back and defend objectives, it’s all about forward movement, a win fast or die fast kinda army. I plan on always choosing Maneuver or Attack when using More Missions to make sure I am never fully on the defence.
In games I plan to blitz my infantry towards the objectives, while having my SU tanks provide covering fire. The 76mm Artillery Battery role will be determined by my opponents forces, if they have a lot of infantry and gun teams I will be bombarding them as much as possible, if they have a massive tank army then I will use my spearhead to get them into a good position and use them to help thin out the opposing tanks.
Final Thoughts
I love the new life that V4 is giving my old armies, with the V4 formations I feel like I have more freedom to create the exact army I want. I am a really big fan of Build Command Cards, they let me as a designer add more interesting options that did not fit in the book while at the same time I get all the weird and wonderful things that I want. It’s a simple card pack but it adds so much to the game.
What eastern front armies interest you? How would you build a Soviet Reconnaissance Company? Why not tell us and join in the global discussions on our Facebook Flames of War group.
~Andrew
with Chris Potter
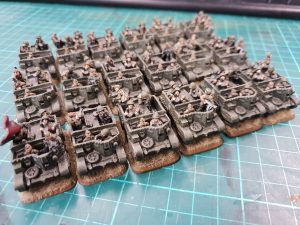
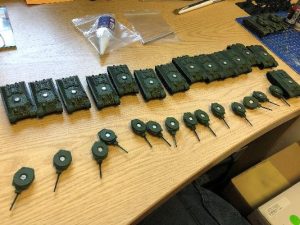
I am the first to admit that my painting skills rank as mediocre at best. However, the 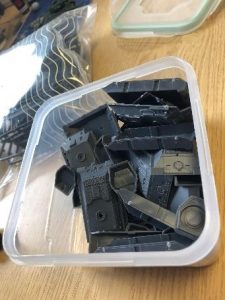 results which I manage to achieve against the battles of children, work and The Wife are more than acceptable for tabletop games. I’m happy with the results and what it looks like, and whilst not ever going to win me any awards, the schemes and methods I use allow me to have a completely painted army to game with, in not a lot of time. Which is key when having so many models to paint with an army such as Soviets!
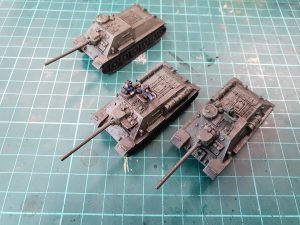
I might be starting to regret taking so many tanks in my list… There was so much clipping and gluing.
 Tanks:
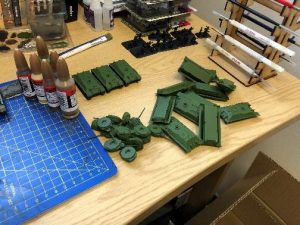
Step 1 after assembling the models and spraying them with a primer, I spray the models again with Tankovy Green for the hulls and turrets. I highly recommend leaving the tracks separate to the hull, as it’s easier to paint the tracks black now and then attach them later rather than risk getting excess paint onto my nicely sprayed, even-tone hulls, when I’m painting all the nooks and crevices.

Step 2 I wash the whole tank and road wheels on the tracks with Zhukov Shade, ensuring that none of the wash pools on the tank, but gets into all the details.
Step 3 Using Tankovy Green from the bottle, I use a mixture of drybrushing and layering to not only reduce the darkness of the wash but it serves to highlight the edges of the tank, and any straight lines to make them ‘POP’ Then, using Tankovy Green from the bottle, I paint the road wheels, ensuring that I don’t get any green on the tracks.
Step 4 is to apply decals anywhere you want them on the tank. Here I have applied them to the turrets. Whilst these are drying I used Boot Brown on the tracks to give them the illusion of being worn and used, over the black base coat.
Step 5 over the Green highlight, as well as the decals to help them blend onto the paintwork, I use Dry Dust as an extreme highlight on the top of the hull and the turret to create an instant bling to the tank.
Step 6 is to paint the exhausts and machine guns Dark Gunmetal. I then drybrush Dark Gunmetal over the tracks, leaving just a little Boot Brown showing through. After the exhausts and MG have dried, I apply a dilute wash of Ordnance shade over them to dull the shine down and create shading on the metal areas.
Step 7 after attaching the tracks to the hull and letting them dry, I complete a final drybrush/a light specking of Battlefield Brown in a random and haphazard pattern around the tracks, road wheels, front and rear of the hull, to simulate road dust and dirt splashes.
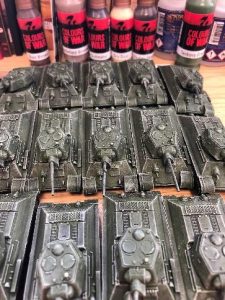
Step 8 finally, I use a small amount of delicate drybrushing to simulate cordite stains and exhaust stains on the front of the barrel and below the exhausts, with Black from the Quartermaster’s set. This is just an approximation, not exact, but rather to give the impression of.
~Chris