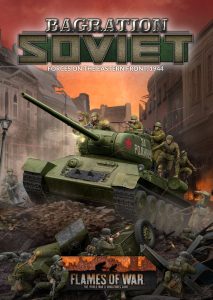
Bagration: Soviet Spotlight

with Wayne Turner

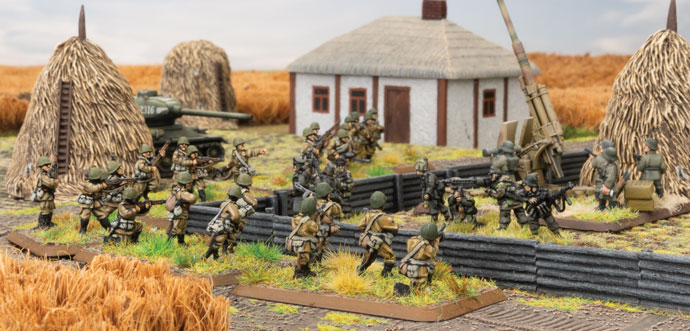
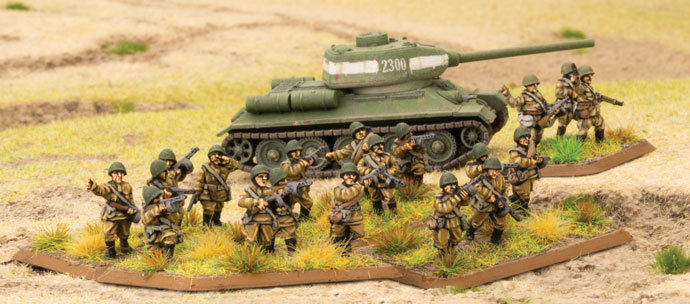
With the D-Day series of books coming to a close it is time to shine the spotlight on the Eastern Front. The first in our series of three Bagration books is Bagration: Soviet covering the Soviet forces on the Eastern Front in 1944.This book is jam packed full of interesting Soviet Formations and Units, as well as plenty of background, and three new river crossing themed missions.

The Bagration: Soviet book starts with background covering the pivotal events of Operation Bagration, the Soviet Army’s massive offensive against the Germans centred on Byelorussia that began on 22 June 1944.

Check out Bagration: Soviet in the online store here…

The front end of the book also features a comprehensive special rules section, Know your Tanks and Know your Infantry section to familiarise you with what you will find in the following pages.

The Force diagram is packed full of choices with nine Tank, five Infantry, and one Recon formation to choose from, as well as expansive support choices.

You will also find scattered throughout the book plenty more background covering the units and battles of Operation Bagration.

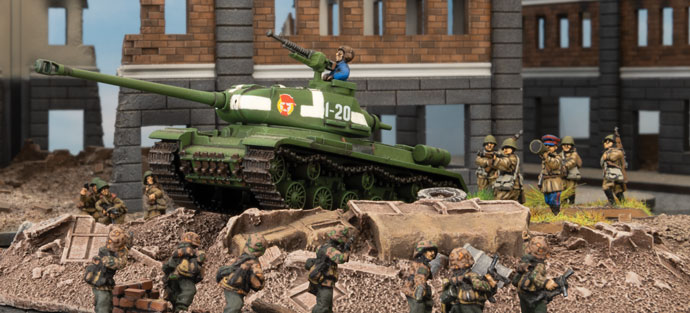
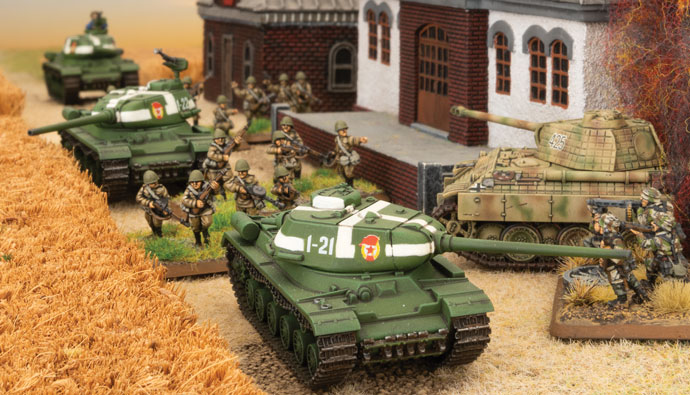
IS-2 Guards Heavy Tank Regiment

The first Formation is IS-2 Guards Heavy Tank Regiment. This hard hitting formation is equipped with IS-2 heavy tanks organised into a HQ of one IS-2, two to four IS-2 Guards Heavy Tank Companies of 3-5 IS-2 tanks. One of these can be armed with the IS-85 instead, for less hitting power, but a higher ROF. These Guards tanks are rated Confident 4+, with a Counterattack 3+ and Last Stand 3+. They are Veteran Skill 3+, but are Hit On Aggressive 3+.

The fifth Unit can be an infantry choice of a SMG Company, Hero SMG Company or Engineer-Sapper Company.

IS-2 is a formidable beast with armour front 10, side 8, and top 2. It is armed with a 122mm gun with a range 28”/70cm, ROF 1/1, anti-tank 14, with Brutal and Slow Firing. Additional armament includes a 12.7mm AA MG, and a MG.

IS-85 Guards Heavy Tank Regiment

Our second Formation is the IS-85 Guards Heavy Tank Regiment. This is organised in a similar manner to the IS-2 formation, but equipped with the IS-85 tank. The IS-85 was created from an early batch of IS tanks when the 122mm guns were not ready for production. Three Guards Heavy Tank Regiments were equipped with them in early 1944.

IS-85 has the same thick armour as the IS-2, with armour front 10, side 8, and top 2. However, it is armed with a 85mm gun with a range 28”/70cm, ROF 2/1, anti-tank 12. Additional armament includes a MG (the 12.7mm AA MGs were not fitted until IS-2 production was in full swing).

This will also see the release of the plastic SBX62 IS-2 Guards Heavy Tank Company, which can do both the IS-2 and IS-85 tank. Keep an eye out for the Spotlight on this great kit.

Heavy SP Artillery Regiment

The third Formation in Bagration: Soviet is the Heavy SP Artillery Regiment armed with the ISU-122 or ISU-152 heavy assault guns. These powerful weapons are almost as heavily armoured as the IS tanks with armour front 9, side 8, and top 2. The ISU-122 is armed with a 122mm gun and can fire both direct or as artillery. Artillery range is 72”/180cm, with AT 3 and FP 3+. Direct fire range is 28”/70cm, ROF 1/1, AT 14 and FP 2+ with Brutal, Forward Firing, and Slow Firing. They also have an option to be fitted with a 12.7mm AA MG.

The ISU-152 is similar, but armed with a 152mm gun. Artillery range is 64”/160cm, with AT 3 and FP 2+. Direct fire range is 20”/50cm, ROF 1/1, AT 13 and FP AUTO with Brutal, Forward Firing, and Slow Firing.

These ISU assault guns are rated Confident 4+, with a Counterattack 5+ and Last Stand 3+. They are Trained Skill 4+, Assault 5+, and are Hit On Aggressive 3+.

Formation allows you to field a mix of ISU-122 and ISU-152 in Heavy SP Batteries of two to five ISUs, commanded by an HQ of one IS-2 tank. The fifth unit of the formation is an infantry unit of a SMG Company, a Hero SMG Company or an Engineer-Sapper Company.

Both the ISU-122 and ISU-152 can be made from the ISU plastic kit, an excellent kit that will be released with Bagration: Soviet. Check out the Spotlight featuring this fantastic plastic model SBX63 ISU Heavy SP Battery.

Medium SP Artillery Regiment

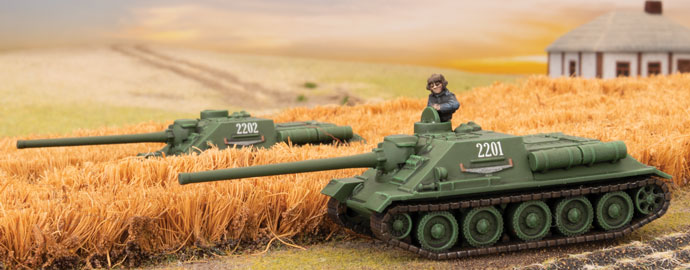
The fourth Formation is the Medium SP Artillery Regiment. This Formation is commanded by an Headquaders of one T-34 (85mm) and made up of two to four Tank-killer Batteries armed with SU-85, SU-85M or SU-100. A fifth unit can be either a SMG Company or a Hero SMG Company. As specialist tank-killer formations they are rated Fearless 3+ with Counterattack 4+, Skill is Veteran 3+ with Assault 5+, and they are Hit On Careful 4+.

SU-85 will be familiar to those who have built Soviet forces for Mid-war. It was armed with an 85mm gun with range 28”/70cm, ROF 2/1, anti-tank 12 with Forward Firing. It armour is front 5, side 5, top 1.

During the first production run of what would become the SU-100, the 100mm gun was not initially ready, so a batch was made with the new hull mounting the 85mm gun. These became known as the SU-85M. These have the same gun as the SU-85, but their armour is front 7, side 5, top 1.

The third unit option is the SU-100 which mounts the 100mm gun on the above hull, giving it a range 32”/80cm, ROF 1/1, AT 15, FP 2+ with Forward Firing and Slow Firing.

All three models are available as plastic kits in SBX64 SU Tank-killer Battery.

Light SP Artillery Regiment

This section ends with the Light SP Artillery Regiment, a simple formation with an HQ of T-70 light tank and two to four SU-76 Light SP Batteries, and either a SMG Company or a Hero SMG Company. The Light SP Artillery are rated Confident 4+, with Counterattack 6 and Last Stand 3+, Skill Trained 4+, with Assault 6, and Hit On Aggressive 3+.

The SU-76 assault gun can either fire as artillery or in direct fire. Artillery range 72”/180cm, AT 2, FP 4+. In direct fire it has range 24”/60cm, ROF 2/1, AT 9, FP 3+ with Forward Firing. It is also lightly armoured with front 4, side 1, top 0.

A new plastic SU-76 kit makes this formation a really interesting option. See the SBX65 SU-76 Light SP Battery spotlight.

Engineer-Sapper Battalion

The first of the Bagration: Soviet infantry formations is the Engineer-sapper Battalion. This offers the unique Soviet assault engineers with their camouflage suits and body armour. The formation is organised as an HQ of two PPSh SMG teams, and two to three Engineer-Sapper Companies. They can also take an attached tank unit of IS-2 Guards Heavy Tank Company, ISU-122 Heavy SP Battery, ISU-152 Heavy SP Battery, or OT-34 Flame-tank Company.

The Engineer-Sappers have some diverse options with which to tailor your unit. The basic build is made up of 8-20 PPSh SMG teams with one or two DP MG teams for extra long range firepower. However, they are also armed with Smoke Pots which can be used once per game to drop a two-gun Smoke Bombardment before they assault. They are also Pioneers who are expert at clearing mines. Their body armour gives them a save on a 6 in Assaults.

The tailoring comes in the unit options with Panzerfausts, anti-tank rifles, Maksim HMGs, Flame-throwers, and 82mm mortars all available to enhance their fighting abilities.

Check their excellent models in the SBX67 Engineer-Sapper Company spotlight.

Hero Shock Rifle Battalion

In the opening battles of Operation Bagration it was the men of the Hero Shock RIfle Battalions that initially assaulted the German front lines supported by the Guards heavy tanks or heavy SP artillery.

This formation can be made up of Hero Shock Rifle Companies, Storm Groups, or Hero SMG SMG Companies. The formation also has machine-gun, 82mm and 120mm mortars, scouts, and 45mm anti-tank companies.

The Hero Shock Rifle Companies are a little larger than the Hero RIfle Company found in Fortress Europe, having benefited from reinforcements in preparation for Operation Bagration. These troops are excellently rated being Fearless 3+, Veteran 3+ and Hit On Aggressive 3+. They can have 9 to 13 DP MG & M1891 rifle teams and Komissar giving them Motivation 2+ while the Komissar is still with the unit. They can also add anti-tank rifles, HMGs, and Flame-throwers for additional firepower.

These troops can be represented using the excellent plastic troops of SBX79 RIfle Company.

Instead of one of your Hero Shock Rifle Companies and your Hero SMG Company, you can choose to take up to two Storm Groups. These troops are armed with 6-7 PPSh SMG teams, a PTRD anti-tank rifle, a Maksim HMG, and a 82mm mortar, and can add an additional Maksim HMG and a Flame-thrower. There are very experienced troops rated Fearless 3+, Veteran 3+ with Assault 2+ and are Hit On Careful 4+.

These troops have their own box, SBX81 Storm Group.

Rifle Battalion

Not all the troops assaulting the Germans on 22 June 1944 were veteran shock troops, some from the Rifle Battalions that made up the bulk of the Red Army. These troops can be just as determined.

A RIfle Battalion is made up of an HQ, two to three Rifle Companies, one of which can be a Penal Company, and a SMG Company. The formation also has its own machine-guns, mortars, anti-tanks and scouts.

The riflemen have motivation of Confident 4+, but the presents of their Komissar gives them 3+. Their skill is Green 5+, but they Assault on 4+. Their Hit On is Aggressive 3+. These can be big units with 15 to 22 DP MG & M1891 rifle teams and a Komissar. To this they can add HMGs, anti-tank rifles and flame-throwers.

The Penal Company offers you some assault troops with which to soften up the enemy. These troops have nothing to lose, so have motivation Fearless 3+ with a Komissar bringing that to 2+. They are skill Green 5+, but Assault on 3+. However they only pass Tactics on 6. Their Hit On is Aggressive 3+ and Save on 4+.

The Scout Platoon, which can be taken with the Hero Shock Rifle Battalion and Rifle Battalion, provides the formation with some Spearhead troops to infiltrate the enemy’s positions.

These troops can also be represented using the excellent plastic troops of SBX79 Rifle Company and SBX80 SMG Company.

The third section of Bagration: Soviet covers troops given the job of rushing through the broken German lines to cause havoc among the retreating troops. These are the troops of the Motor Rifle Divisions.

Hero T-34 (85mm) Tank Battalion

Hero Troops are the troops that have been in battle for a while and have been reduced down to a core of competent soldiers.

The Hero T-34 (85mm) Tank Battalion is the first of out all T-34/85 formations. With an HQ of a T-34 (85mm) and two to three Hero T-34 (85mm) Tank Companies this formation has plenty of punch. It is further backed up by its own anti-aircraft platoon, a Hero SMG Company, a 82mm Mortar Company, and choice of 45mm, 57mm or 76mm Anti-tank Companies.

These Hero troops are rated Confident 4+, Trained 4+ with Tactics 3+, and are Hit On Aggressive 3+.

Hero T-34 (85mm) Tank Companies are compact Units of three or four T-34 (85mm) tanks. These tanks have good protection with armour front 6, side 5, and top 1. They are armed with the 85mm gun with range 28”/70cm, ROF 2/1, AT 12, FP 3+, and MGs.

These are available in plastic where you can either get a box of five with SBX66 T-34 Tank Company or jump in with both feet and grab 21 T-34 tanks in the SUAB12 T-34 Tank Battalion.

This formation also sees a new anti-aircraft option with the ZSU M19 Anti-aircraft Platoon. This unit is armed with the Lend-lease American M17 AA half-track. Its Quad .50 cal AA MGs give it range 20”/50cm with ROF 5/3, AT 4 and FP 5+ with Dedicated AA. The half-track is lightly armoured to protect it from small arms fire with front 1, side 0 and top 0.

This will be an all plastic kit available with SBX78 ZSU M17 Anti-aircraft Platoon.

Hero T-34 Tank Battalion

The Hero T-34 Tank Battalion allows you to take a mix of T-34 (76mm) and T-34 (85mm) tank in your Hero T-34 Tank Companies. The formation also contains options for a Hero T-70 Tank Company or a Hero Valentine Tank Company. This formation offers a real variety of different tanks. It also has its own anti-aircraft, Hero SMG Company, 82mm mortars, and anti-tank guns.

The T-34 (76mm) is armed with a 76mm gun with range 24”/60cm, ROF 2/1, AT 9, FP 3+ with Overworked (+1 To Hit for Moving)

The T-70 is a light tank armed with a 45mm gun. It is quite well-armoured for a light tank with front 4, side 2, top 1. The 45mm gun has a range 20”/50cm, ROF 1/1, AT 7, FP 4+ with Overworked.

The British Valentine was supplied to the Soviets as part of the Lend-lease program. Though the British thought of it as an infantry tank, the Soviets designated it a light tank and gave it to light tank companies. The Valentine is therefore quite well-armoured with front 6, side 5, top 1. The Soviets got a mix of types, some with 2 pdr guns others with 6 pdr guns. The 2 pdr gun has a range 24”/60cm, ROF 2/1, AT 7, FP 4+ with No HE. The 6 pdr gun has a range 28”/70cm, ROF 2/1, AT 10, FP 4+ with No HE, No MG and Overworked. The Valentine (2 pdr) also has a MG.

To field these troops have a look at these for the T-34s SBX66 T-34 Tank Company or SUAB12 T-34 Tank Battalion. For the T-70s check out SBX68. For the Valentines see SBX69.

Hero Motor Rifle Battalion

The Hero Motor Rifle Battalion is a well-equipped formation with its core of infantry, its own selection of support weapons like machine-guns, mortars, and anti-tank guns, and it also has its own tanks and reconnaissance troops.

The Hero Motor Rifle Company that make up two to three of your formation units are well-rated with Confident 4+ motivation backed up by a Komissar (3+ motivation). Their skill is Veteran 3+, with 2+ in Assaults. Their Hit On rating is Aggressive 3+. They have 7-10 DP MG teams (Range 16”/40cm, ROF 2/2, AT 2, FP 6) and a Komissar. They can add PTRD anti-tank rifle teams and Maksim HMG teams for more firepower.

These troops can also be represented using the excellent plastic troops of SBX79 RIfle Company and SBX80 SMG Company.

Their fourth infantry unit is the Hero SMG Company (which is included in many formations throughout the book as you may have noted). This simple, but effective unit is armed with 5-7 PPSh SMG teams (Range 4”/10cm, ROF 3/3, AT 1, FP 6 with Pinned ROF 1) and a Komissar team. They have the same ratings as the Hero Motor RIfle Company.

Use SBX80 SMG Company to field these excellent troops.

T-34 Tank Battalion

The T-34 Battalion is a mixed unit with both T-34 (76mm) and T-34 (85mm) tanks. They can also have a light tank company with either T-70 or Valentine light tanks. Their formation also contains anti-aircraft, mortars, anti-tank and SMG troops.

To field these troops have a look at these for the T-34s SBX66 T-34 Tank Company or SUAB12 T-34 Tank Battalion. For the T-70s check out SBX68. For the Valentines see SBX69.

Motor Rifle Battalion

Like the Hero version of these troops, the Motor Rifle Battalion formation is almost fully contained combined arms force, with its own machine-guns, mortars, anti-tank, anti-aircraft, reconnaissance and tanks. These troops have a motivation of Confident 4+ with a Komissar making it 3+, skill is Trained 4+, but with 3+ in Assaults. They are Hit On 3+, and Save on 4+.

The Motor Rifle Companies are quite large with between 10 and 28 DP MG teams and a Komissar. They can also add anti-tank rifles and HMGs to this total.

They can also take the SMG Company with the same ratings, but armed with 15-22 PPSh SMG teams and a Komissar. They can also take a couple of additional Flame-throwers (Range 4”/10cm, ROF 4/4, AT 2, FP AUTO, with Flame-thrower, Heavy Weapon, and Pinned ROF 2).

These troops can also be represented using the excellent plastic troops of SBX79 RIfle Company and SBX80 SMG Company.

Reconnaissance Company

The final formation in Bagration: Soviet is the Reconnaissance Company. This formation has a good mix of troops and units. It is built around a core of submachine-gun infantry which can fight on foot or be transported in Lend-lease M3 scout cars or captured German Sd Kfz 251 half-tracks. Both transport options give some protection from rifle and machine-gun fire. The formation is rated motivation Confident 4+ with Last Stand 3+, skill Veteran with Assault 2+, and Hit On Aggressive.

The Armoured Reconnaissance Platoon can have 4-6 PPSh SMG teams mounted in either of the above transport options. This unit used the Spearhead rule.

If you take the foot option are four Recce DP MG teams with an option to add a Flame-thrower. They also use the Scout rule in addition to Spearhead.

To field the infantry from an Armoured Reconnaissance Platoon or a Reconnaissance Platoon use SBX80 SMG Company.

For the M3 Scout Transports use SU206 M3 Scout Transport. For the Sd Kfz 251 use GBX152 Sd Kfz 251 Transports.

The Formation can also have its own 82mm mortar Company, 76mm anti-tank Company, and tank company.

Last, but not least they come with their own little armoured cars, the BA-64. This gives you another Spearhead unit. The BA-64 Armoured Car Platoon has 3-7 BA-64s, these can be armed with MGs or PTRD anti-tank rifles. They armoured to protect them from small arms fire with front 1, side 1, top 0.

The new plastic BA-64 comes in the SBX76 Armoured Car Platoon box.

Support

The support is full of great stuff to support your Soviet force in the field. There are OY-34 and KV-8 Flame-tank Companies for burning your way through the defences of the enemy. A good selection of Tank-killer Companies, armed with 45mm guns, 57mm guns, 76mm guns, and 100mm guns. The 100mm gun packs a mighty punch with range 32”/80cm, ROF 1/1, AT 15, FP 2+, with Slow Firing and Forward Firing.

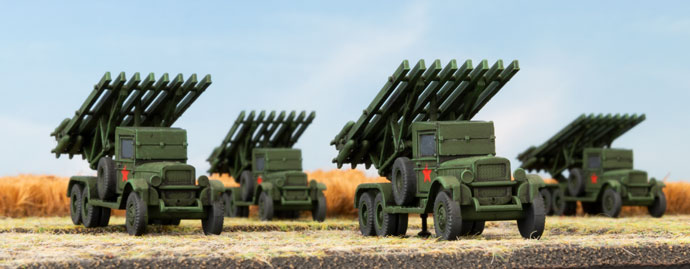
For artillery support you can have the infamous Katyusha rocket launcher, 76mm, 122mm, or 152mm artillery batteries. You can also now take the new BA-64 armoured car to mount our artillery observer.

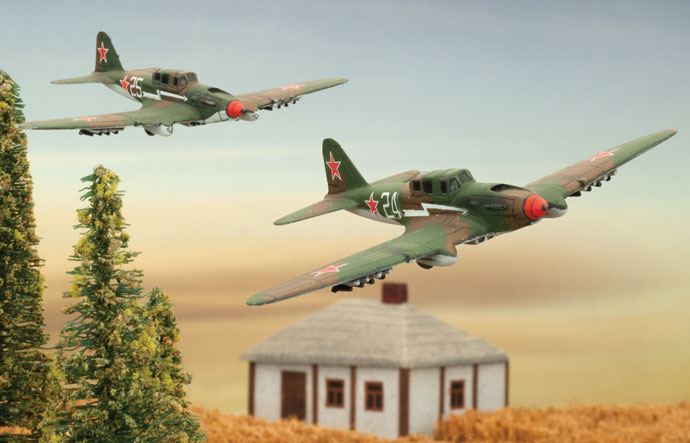
For air support you can choose from two variants of the IL-2 Shturmovik, one with 23mm guns (Range 6”/15cm, ROF -/2, AT 6, FP 5+), bombs and rockets, or one with a 37mm gun (Range 8”/20cm, ROF -/2, AT 8, FP 4+), as well as bombs and rockets.

After the support you will find a sample army based on the new Soviet Start Force Heavy Assault Group, a painting guide, a basing guide, a Eastern Front Terrain guide, and section on City Fighting.

Bagration Battles

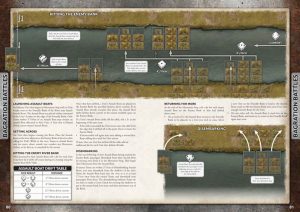
The final section in the book introduces River Crossing rules. River crossing were a common feature of the battles on the Eastern Front, and during Operation Bagration in particular. We have included rules so you can recreate these set piece battles in Flames of War.

You will find River Assault rules, three River Crossing missions, a Linked Campaign incorporating the new missions along with missions from the rulebook. The book ends with a comprehensive catalogue on Bagration: Soviet models, your easy guide to collecting your Soviet Force.

The book is packed full of content, and there is probably a formation or two to tempt anybody looking and getting into Flames Of War on the Eastern Front. Enjoy!

~Wayne

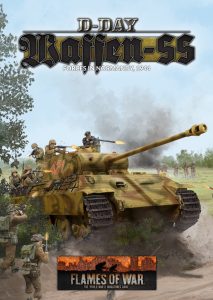
D-Day: Waffen-SS Spotlight

With Phil Yates

Between mid 1943 and mid 1944, the German focus was on the Eastern Front. After the failure of the German Kursk Offensive, the Red Army went on the offensive, throwing hammer blow after hammer blow to drive the Germans back to the Russian border. The elite 1st and 2nd SS Panzer Divisions were rushed to wherever the Soviets broke through, counterattacking to seal the breach. By Christmas, the divisions were worn out, barely a regimental sized battlegroup remained. They desperately needed to be withdrawn to France to rebuild back to full strength.

Check out D-Day Waffen-SS in the online store here…

Then, as 1944 began, the Red Army attacked again. The two new divisions being formed in France, the 9th and 10th SS Panzer Divisions were rushed to the Eastern Front and the plans to rebuild the existing divisions were shelved. Finally, in March, the Spring rains turned the roads to mud and the Soviet offensives ground to a halt. All four divisions were returned to France for rebuilding, joining the 12th SS Panzer Division which was part way through its training. Six weeks into their training, still trying to bring large numbers of conscripted replacements up to scratch, the Allies invaded France on D-Day. Ready or not, the SS panzer divisions were rushed to the invasion front, counterattacking to drive the Allies back into the sea.

With a solid core of veteran leaders under your command, can your willing, but inexperienced troops defeat the Allies despite their massive superiority in numbers? Can you win a never-ending battle of attrition, or do you attack into the teeth of massed artillery, naval bombardments and airpower? Can you defeat the invasion and save your homeland?

Here are the forces you have available to you:

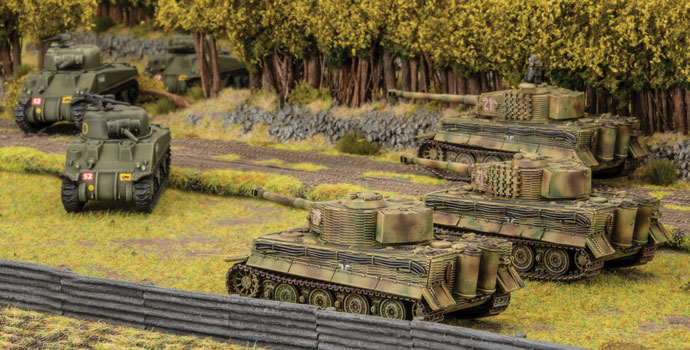
Tiger SS Tank Company

  • Fanatical veteran troops crewing the best heavy tanks available.
  • Thick armour and devastating 8.8cm gun, yet more mobile than most medium tanks.
  • Barge through terrain without a worry.
  • Almost immune to medium tanks, artillery, and infantry.
  • Integrated self-propelled anti-aircraft guns to protect from Allied aircraft.
  • Expensive, but the very best available.

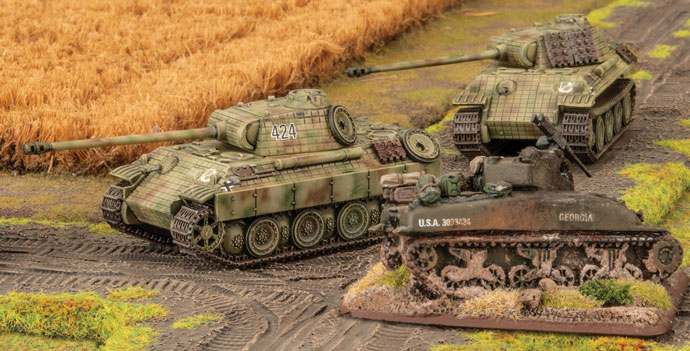
Panther SS Tank Company

  • Fanatical veteran commanders to teach the replacements clever tactics.
  • Determined to succeed despite their inexperience.
  • Medium tanks with enough armour to stop Allied anti-tank guns, and a gun that easily penetrates any Allied tank.
  • Fast for a medium tank, almost as fast as a light tank.
  • Integrated self-propelled anti-aircraft guns to protect from Allied aircraft.
  • Flexibility. Can swap out platoons of Panther tanks for a platoon of Tiger heavy tanks and a platoon of Panzer IV medium tanks or StuG assault guns.
  • Easily outclasses all opposition, just watch out for your flanks.

Panzer IV SS Tank Company

  • Fanatical veteran commanders to teach the replacements clever tactics.
  • Determined to succeed despite their inexperience.
  • Solid medium tanks. Good armour and better guns than Allied medium tanks.
  • Protected ammunition storage and bazooka skirts limit effectiveness of US Bazookas, British PIATs, and Soviet anti-tank rifles.
  • Integrated self-propelled anti-aircraft guns to protect from Allied aircraft.
  • Flexibility. Can swap out a platoon of Panzer IV tanks for a platoon of Tiger or Panther tanks and a second one for StuG assault guns.

StuG SS Tank Company

  • Fanatical veteran commanders to teach the replacements clever tactics.
  • StuG assault gun has better front armour and the same gun as a Panzer IV medium tank, but has no turret so can’t shoot targets to the flanks, and is less effective when assaulting infantry.
  • Determined to succeed despite their inexperience
  • Integrated self-propelled anti-aircraft guns to protect from Allied aircraft.
  • Flexibility. Can swap out a platoon of StuG assault guns for a platoon of Tiger or Panther tanks and a second one for Panzer IV tanks.

SS Panzergrenadier Company

  • Fanatical veteran commanders to teach the replacements clever tactics.
  • Determined to succeed despite their inexperience.
  • MG teams give plenty of firepower.
  • Can add Panzerfaust anti-tank weapons and 7.5cm anti-tank guns to keep tanks at bay.
  • Plenty of integrated weapons, including heavy machine-guns, 8cm and 12cm mortars, 2cm AA, and 7.5cm and 15cm guns.
  • More mortars and infantry guns than an Army division for artillery support.
  • Flexibility to take a platoon in half-tracks as a mobile strike force.
  • Highly motivated assault troops who won’t give ground in the defence.

SS Reconnaissance Company Company

  • Fanatical veteran commanders to teach the replacements clever tactics.
  • Determined to succeed despite their inexperience.
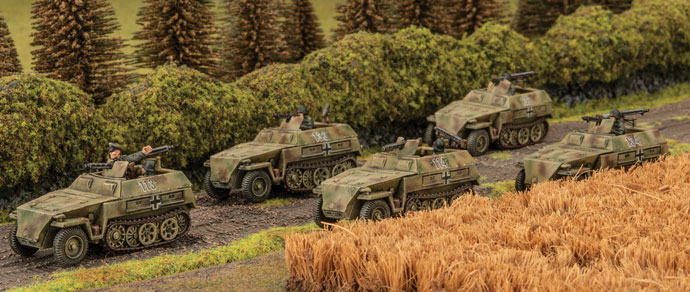
  • Armoured panzergrenadiers mounted in smaller, sneakier, faster Sd Kfz 250 half-tracks.
  • Up to 7 half-tracks per platoon for maximum mounted firepower.
  • Sneaky scout versions of 8cm mortar and 7.5cm gun half-tracks.
  • Mix of old and new armoured cars including Puma 5cm and old 2cm eight-wheelers, and light 2cm wheeled or half-tracked armoured cars.
  • Armoured cars are integrated into formation.
  • Flexibility to take armoured and dismounted panzergrenadier platoons.
  • Can be integrated into armoured and dismounted panzergrenadier companies.
  • Sneak into position, then hit hard and fast.

Support

  • New Jagdpanzer IV tank-hunter. Cheap, effective, mobile.
  • Super-deadly long 8.8cm anti-tank guns on cruciform turntable have all-round field of fire.
  • Plenty of AA options to counter Allied aircraft. Self-propelled single and quad 2cm, or ground mounted 2cm light or 8.8cm heavy AA guns.
  • Lots of artillery choice, with Hummel 15cm and Wespe 10.5cm self-propelled guns, 10.5cm howitzers, and 15cm Nebelwerfer rocket launchers.
  • Allied air superiority prevents any German air support in Normandy

How Do The Waffen-SS Play?

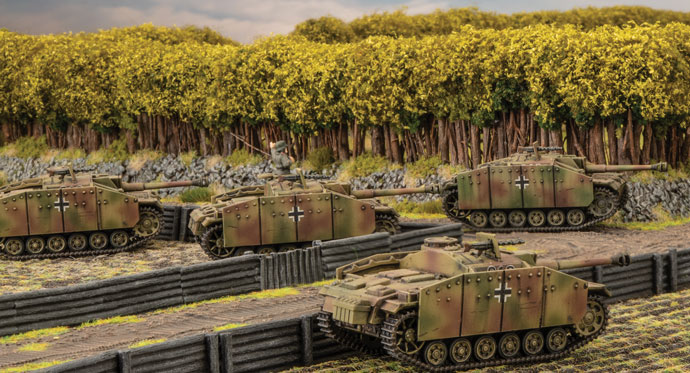
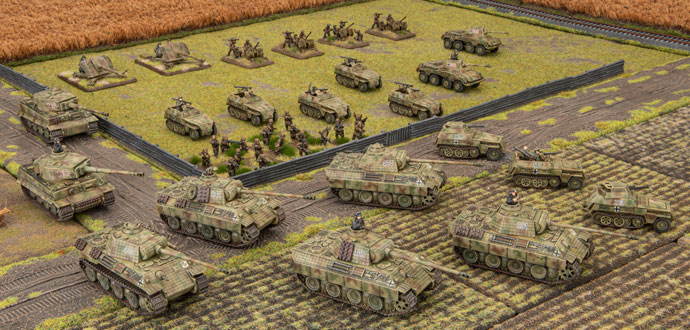
You can build your Waffen-SS force in a variety of different ways. You can build a force of elite heavy Tiger tanks. With their heavy armour protecting them, these veterans have suffered few casualties while they learned their trade. Now they are deadly. Whether you take them as the core of your force, or as a backup to lighter troops, they are always effective.

You can build a panzer force, either mixing types to take advantage of their different capabilities, or focusing on one type to maximise its strengths. Panthers are cheaper than Tigers, but offer much of the same benefits, so long as you can protect your flanks. The Panzer IV and SuG are cheaper, but still good enough to outclass Allied medium tanks. With their fanatical crews, the Allies will have to knock out every tank.

Like the rest of the Waffen-SS options (other than the elite Tiger tanks) your panzers are less skilled than their Army counterparts, their commanders are Old Hands, so units close to the company commander can use his skill when making tactics rolls to do clever things like Blitz Move or Shoot and Scoot. This can mitigate their inexperience and counteract their tendency to get hit more often than their Army equivalents. Their lack of skill makes the Waffen-SS cheaper than Army troops, Make use of the greater numbers you get to overwhelm the enemy, and if necessary their determination to keep fighting to outlast the enemy and achieve victory.

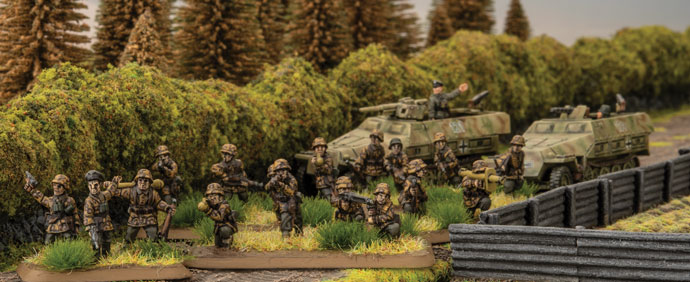
Your other option is to go for a panzergrenadier force. Infantry as fanatical as these can be hard to beat. When attacking, they rarely remain pinned down, especially when their company commander is nearby giving them re-rolls, and in an assault they will fight until they’ve taken the objective or died trying. In defence, they are equally tenacious. The enemy will have to kill them all to clear the objective, something that can be dreadfully expensive given the amount of firepower they possess.

The key to any Waffen-SS force is to keep the pressure on the enemy using your excellent and plentiful equipment and rely on your superb morale to outlast them.

Normandy Campaign Missions

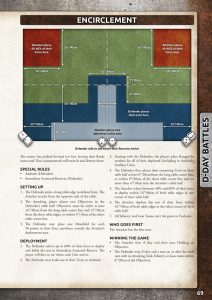
In common with the other D-Day books, D-Day: Waffen-SS has three new missions linked together with two of the standard missions into a campaign. The fighting is very fluid, from the counterattack on the Allied beachhead to a final dash to escape the Falaise Pocket. The first mission is Encirclement in which the Germans attack from the flanks trying to crush a salient formed by the Allied spearhead before more reinforcements can arrive from the beaches. The old standard No Retreat follows as the Germans attempt to keep the Allies penned in their beachhead.

The second new mission is Gauntlet, in which the Germans, cut off by the advance towards Caen, must dash down a narrow gap between two British forces to escape entrapment. With more units arriving from both sides as the game progresses, it’s an interesting challenge to hold the route open to extract your forces. Another standard mission, Bridgehead, follows as the Germans attempt to hold the Orne bridges open for the retreating forces to cross.

Finally, the third new mission is Into the Unknown, reflecting the loose fighting as the Waffen-SS attempted to delay the Allied forces pushing in the base of the Falaise Pocket in confused and open fighting. Like Dust Up, the fighting is across the diagonal of the table, but unlike that mission, neither side holds any objectives at the start of the battle. The combatants need to advance into No-Man’s Land to cover their own objectives and seize those of the enemy.

Who Are The Warriors

The D-Day: Waffen-SS command card pack includes six warriors: Ernst Barkmann, Emil Dürr, Adolf Peichl, Karl-Heinz Prinz, Rudolf Roy, and Michael Wittmann. All were awarded the Knight’s Cross. One of Germany’s highest awards.

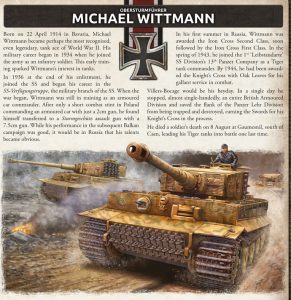
Three of these soldiers were tankers in Normandy. Michael Wittmann, famed as Germany’s top-scoring tank ace, commanded the Tiger tank company that dramatically halted the British advance at Villers Bocage soon after D-Day. His elite crew make his tank truely deadly with its high rate of fire and re-rolls if it misses. In addition, his command tanks can be placed in ambush in addition to any normal ambushes!

Karl-Heinz Prinz led a Panzer IV company, making rapid and bold counterattacks to regain lost positions and stop British attacks. His card allows you to re-roll failed reserves rolls to bring his units onto the table. Ernst Barkmann was a Panther tank commander who had some interesting adventures when cut off by the American advance, claiming a number of M4 Sherman tanks before limping back to the German lines with a badly damaged tank. He’s a good shot and has a chance of surviving a hit that would destroy the tank of a lesser tank commander, giving him a chance to return to battle and fight on.

Rudolf Roy also commanded an armoured vehicle, a Jagdpanzer IV tank-hunter, with which he claimed 26 British, Canadian, and Polish tanks in five days, helping keep the Falaise Pocket open long enough for much of the German panzer force to escape to fight another day. His gunner’s shooting is deadly accurate and his careful use of cover makes him hard to hit as he stalks the enemy. Emil Dürr was also a tank-hunter, part of a unit of 7.5cm towed anti-tank guns. When his guns were knocked out, he gathered up Panzerfaust anti-tank launchers and hunted tanks on his own.

The final warrior is Adolf Peichl, a veteran of fifty close combats including the destruction of at least eleven tanks. When he’s fighting in an assault, he and any unit he’s leading will pretty much fight to the death, with him as a lethal whirlwind in the centre of the fight.

Ready For Battle

The D-Day: Waffen-SS book will give you some great new ways to use your existing D-Day: German army, as well as opening up new options for painting and army building.

~Phil

D-Day: British Spotlight

with Andrew Haught

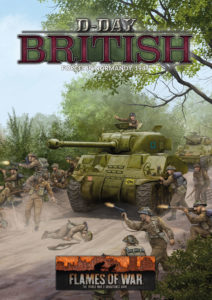
On June 6th, 1944 the Allied forces launched one of the largest amphibious assaults ever. This book follows the British and Commonwealth forces that overcame the German defences and claimed Sword, Gold, and Juno beaches as well as the breakout after. The forces in the book are broken down into three major groups: you have your regular war weary units that form the backbone of your forces, you have your Desert Rat veterans and lastly you have your elite troops like the Commandos and Airborne units. These options are perfect to build any list for D-Day and the breakout.
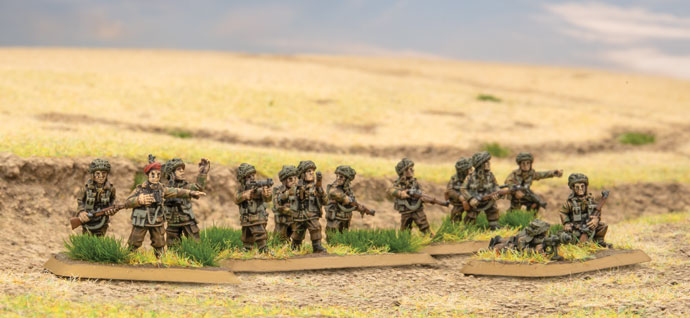
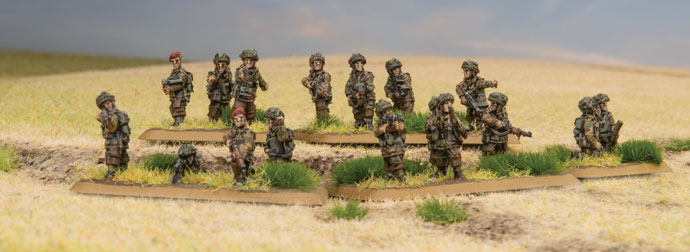
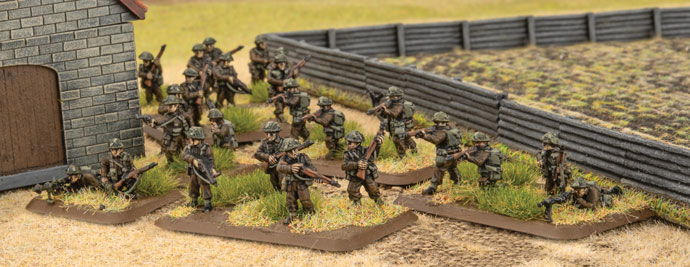
Check out D-Day British in the online store here…

What’s In The Book?

Parachute Company
Tough and deadly troops, able to hit hard in Assaults and hold their own when assaulted.  Extra anti-tank with up to two PIATs in each platoon.
Light unit with a good selection of integrated units, Anti-Tank, machine-guns and artillery, almost a whole army unto itself.  Can parachute into battle in airborne assault missions. With the extra PIATs and access to 6pdrs and 17pdrs in the formation, this formation is one that tanks will need to be wary of.

Airlanding Company
Elite deadly troops the Airlanding Company will be a hard unit to shift.
The Airlanding Company is well equipped with their own light mortar and up to two PIATs in each platoon.  Has the option to take a fourth Airlanding Platoon. Can land by glider in airborne assault missions. Has access to two 6pdr Anti-tank platoons and a 17pdr platoon to give you all the anti-tank assets an Airlanding Rifle Company could want.

Commando Troop
The Commando Troops are some of the most elite troops you can find. Being Fearless Vets is good, having Deadly on top of that makes them assault monsters hitting on a 2+, and that’s even better.  The Commandos have the standard platoon layout but with the Commando stats this unit is far from standard. Commando Troops are small with only machine-guns and mortar units integrated into the formation. This makes them ideal to match up with another formation that could use some of the best troops backing them up. Commandos are good at pretty much anything they do. If you need to assault an Objective, hold an Objective, or take out a stubborn enemy platoon, there is no other unit in the book better suited to the job.

Two Rifle Companies
The Desert Rats have less morale than the regulars, for this the Desert Rat troops are cheaper to field.  The Rifle Companies make up the backbone of the British forces, they are reliable and well trained.  Rifle Platoons are cost-effective platoons that are deadly in the assault. Rifle Platoons can choose to attack at night, giving your troops the cover of darkness while advancing. The Formation boasts loads of options, mortars, anti-tank guns, machine-guns, and Recon. The Universal Carrier Patrols of the Infantry Company gives your troops the edge by Spearheading your assaults. Wasps give your troops flamethrowers that can clear an Objective in a jiffy.
Easy to convert from Rifle Company in Fortress Europe. You can use the same models to play both the regular and the Desert Rat Rifle Companies.

Two Sherman Squadrons
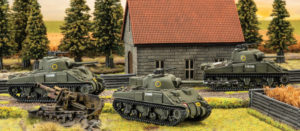
The Sherman Armoured Squadron is your normal Sherman Company that has integrated Fireflies in your Sherman Troops, giving you the higher anti-tank of the Firefly tanks in each platoon. The Sherman DD Squadron is a unique formation that has your Firefly Armoured Troops formed into a single unit giving you a more focussed anti-tank unit. This leaves their normal Shermans on their own, with platoons of 3. Cost-effective medium tanks, the Sherman gives you a cheap tank that can hold its own in most tank duels. The Stuart Recce Patrol gives your tanks spearhead, and an effective light tank that can both screen infantry and other light tanks.
The Crusader AA gives you some much needed AA that can keep up with the tanks. Easy to convert from the M4 Sherman Tank Company in Fortress Europe.

D-Day British SpotlightChurchill Armoured Squadron
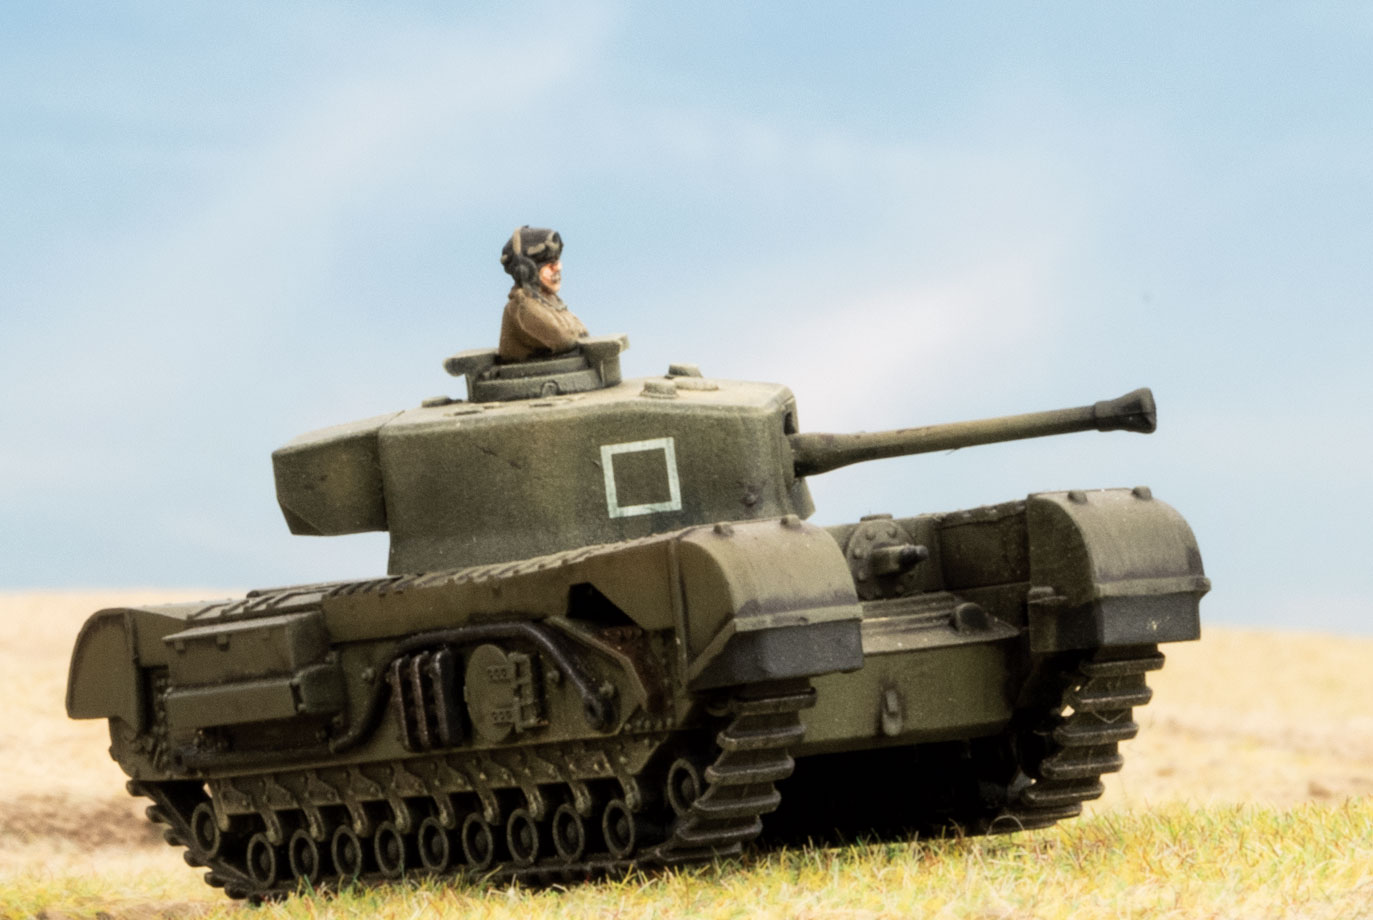
Heavy Tanks that can take on enemy tanks and infantry alike. Need more armour? You can upgrade one of your tanks in each troop to a Churchill (Late 75mm), this gives the Churchill a whooping front armour of 11!
Need more AT? You can take a 6pdr in each unit to up your Anti-Tank to 11.
If you have the points you can bring up to five platoons of Churchills, along with Stuart Recce and Crusader AA tanks, all this gives you a really tough force in just one Formation!

Cromwell Armoured Squadron
The Cromwell Armoured Recce Squadron gains the Scout rule in each of their platoons. They also don’t have a firefly in their platoons giving them a different feel altogether than the Desert Rats Cromwell Armoured Squadron.  Desert Rats Cromwell Armoured Squadron have reduced morale compared to the Recce Squadron. Each unit also has a Firefly tank integrated into their platoons giving them a heavy Anti-Tank tank within their Troops. The Cromwell is a fast tank that has great Terrain, Cross Country, and Road Dashes. Use these tanks to outflank an unwitting opponent or to speed to an Objective before their reinforcements have time to arrive.

Motor Companies
Like the Rifle Companies there are two kinds of Motor Company, the Desert Rat and the regular Company. The Desert Cat Company has a lower morale rating, making them cheaper than the regular troops. Motor Platoons are small and cheap, this is the perfect Unit to add to another much larger Formation that needs to use up those last points. Motor troops are equipped with Bren guns making them ideal defenders, and giving them a lot more firepower than their small size would denote.  Motor Companies are like miniature Rifle Companies, with lots of options to fill out your points and help round out your force.

Support
The Armoured Car Troop gives recon assets to any Formation that needs them. The M10 SP Anti-Tank troop gives you mobile heavy anti-tank. The 17pdr boasts a massive anti-tank of 14 that can penetrate most everything your opponents will throw at you. The 17pdr Anti-Tank Troop is great on the defense, just dig them in and watch your opponent worry about their tanks the whole game.

The Crocodile tank is the ideal infantry killer, with its rate of fire 5 flamethrower! Coming in at 21 points for three these tanks are well worth it. Along with their flamethrower they also have a gun and massive front armour of a Churchill (Late 75mm).

The AVRE is a deadly anti-infantry tank that can be devastating if your opponent lets it get close enough. The 25pdrs and the Priest Field Troop artillery give your forces some powerful artillery support on top of all your integrated artillery in your Formations. The Bofors Light AA Troop gives you AA in all of your formations, giving you protection from aircraft and a nice light anti-tank weapon in a pinch. The Typhoon Fighter-Bomber with its rockets can devastate even the heaviest of tanks.
How Do The British Play?
The British have loads of interesting options that run the gambit from from the cheaper Desert Rat Motor Company to the most elite Commando Troops. It all comes down to your play style.

When you want to play defensively you will want to build your force around one of the Rifle Companies. These companies give you the core of what you need to be defensive, add in some of the Churchills and M10s to give you the armour you need to keep your enemy tanks at bay. Once dug in, a British Rifle Company is hard to shift, and scary to assault.

When you want to be aggressive you have loads of choices. For a more tank-focussed army the Cromwell tanks are fast but expensive, so you want to pair them with Motor Troops or Rifle Companies. If you go with Shermans you can better afford the more elite infantry choices like Airborne or Commandos. If you want to focus on infantry then the Airborne Companies and Commando Company are some of your best fighters, bring them and a unit of Cromwells in support and you will have a strong striking force.
Normandy Campaign Missions
D-Day: British book includes four more missions, three breakthrough Bocage missions and another Airborne mission. The first mission is the Brew Up mission, the defender is surrounded by attacking players who deploy in a random way.

The second mission Bocage Country is your normal Bocage mission that has the Attacker fighting their way though Bocage while the defenders try to hold them off as they wait for reserves.

The Third Bocage mission is The Meatgrinder mission. In this mission player deploy on either side of the table and both have to fight their way to a central objective that goes live on the sixth turn.

The last mission is an Airborne mission, Seize and Hold. In this mission we mix things up, with the Defenders having to attack into the Attackers who just air landed and took the objectives. The Defender will have to move quickly to as the the Attacker will win if they keep the Defenders at bay for six turns.

Warriors Of D-Day British
The British D-Day Command cards include six Warriors: Richard Pine-Coffin, Peter Young, Stan Hollis, Joe Ekins, David V. Currie, Sydney Valpy Radley-Walters.
Richard. Pine-Coffin
Faced with defending Pegasus Bridge with only half of his battalion present, Lt-Colonel R. G. Pine-Coffin mounted a counterattack using available personnel to repel the German assault. Lt-Colonel R. G. Pine-Coffin is a Parachute Formation Commander that gives himself and any attached united better counter attack ratings. He also hits on a 2+ in Assaults.

Peter Young
To inspire his men’s confidence under fire, Lt-Colonel Peter Young told them that 15 feet of standing crops would stop a bullet. He may well have been right as none were hit. Either way, his men learned to make excellent use of any cover they could find. This Commando Formation Commander gives his unit the ability to go Go to Ground while on the move.

Stan Hollis
On D-Day, Company Sergeant Major (CSM) Stan Hollis saved D Company by single- handedly taking out two key HMG Bunkers and capturing 25 German defenders. This Rifle Company Formation Commander gives himself and units from his formation that are close-by improved Rally ratings.

Joe Ekins
Trooper Joe Ekins was a Firefly gunner who destroyed four tanks in a single day, including three Tiger tanks. One of the Tiger tanks he faced that day was commanded by Michael Wittmann, and some speculation would have it that Joe Ekins fired the shot that killed Wittmann, but that is still disputed to this day. This tank Warrior takes over a Firefly in one of your Sherman platoons. Ekins’ Firefly gains re-rolls To Hit, and he ignores the armour bonus on tanks he fires at that are over 16”/40cm away.

David V. Currie
Major David V Currie made a point of regularly checking on his men—whether they were his own tank company or another company that his tanks were working with. On several occasions he dismounted from his tank to lead his men under fire. This Sherman Tank Company Formation Commander gives himself boosted command range, and he may roll an additional dice when in assaults.

Sydney Valpy Radley-Walters
Major Sydney Valpy Radley-Walters has the distinction of being the western Allies’ top ace during the war. His tank squadron is one of many that claims to have taken out the German tank ace, Michael Wittmann. This Sherman Tank Company Formation Commander gives himself a better Blitz Move Order on a 3+ and forces any enemy tanks hit by him to re-roll successful armour saves.
Command Cards
This set of command cards introduces a new type of Command Card to British forces, Title Cards. These cards have the title of a division and a special rule giving the division’s flavour. The key is that you can only have one title in your force.

Title Cards for the British give you access to more unique and flavourful formations. These cards allow you to use existing formations from the book to create new lists that focus on particular units or formations. These cards also add in Canadian Divisions, Guard Divisions, Scottish Divisions, Polish Tanks, Welsh Divisions and more. With a simple card you can transform a unit like your British Rifle Company to a Welsh Division that has a different Last Stand and Dig In ratings while you are near an Objective. That’s the real cool thing about Title Cards, they let you take existing armies you may have, and by adding one card you have another army that works a bit differently than it did before.

Along with the new Titles you have everything you have come to expect in a Command Card set, new Formations and interesting upgrades to old ones.

As a special side bonus the pack also comes with one American Command Card for the 29th. Those who know me know that the 29th is one of my favorite companies in Flames Of War, and I really wanted to add the 29th Infantry Card to the American Command Card box but the timing was off. This card lets you bring in Crocodiles from the British book- Crocodiles that were not coming out till the British book, so I had to wait, and was able to sneak it into this set.

D-Day: American Spotlight

with Phil Yates
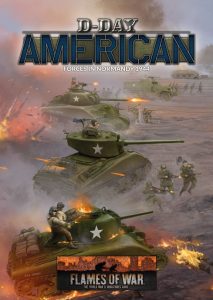
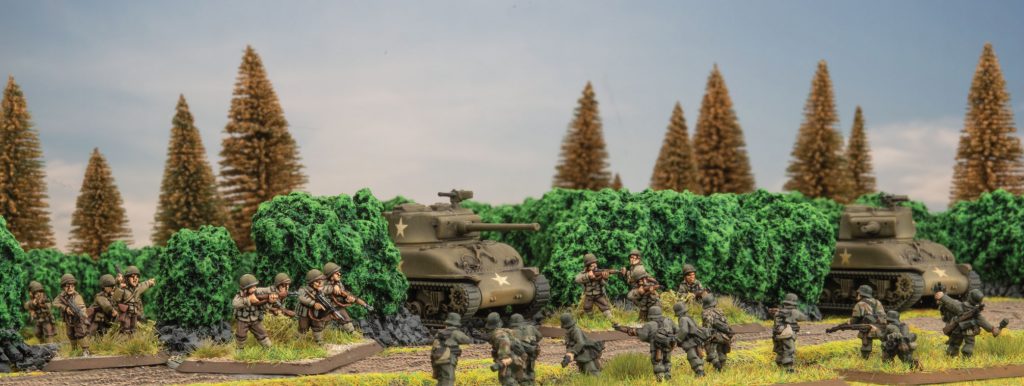
The D-Day landings were the biggest undertaking of the US Army to that point in the war. The US Army was huge, but most of its divisions were totally inexperienced. Only a handful of divisions had taken part in the fighting in North Africa, and most of those were still engaged in Italy. To offset this inexperience, they had raised elite assault troops, such as paratroopers and rangers, reorganised their regular troops for assault landings, and brought experienced veteran divisions back from the Mediterranean.
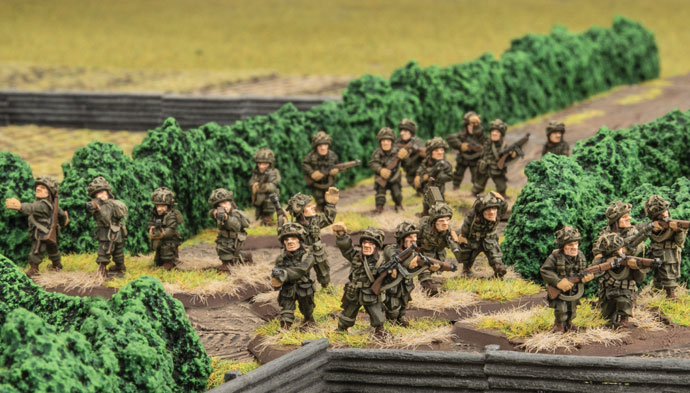
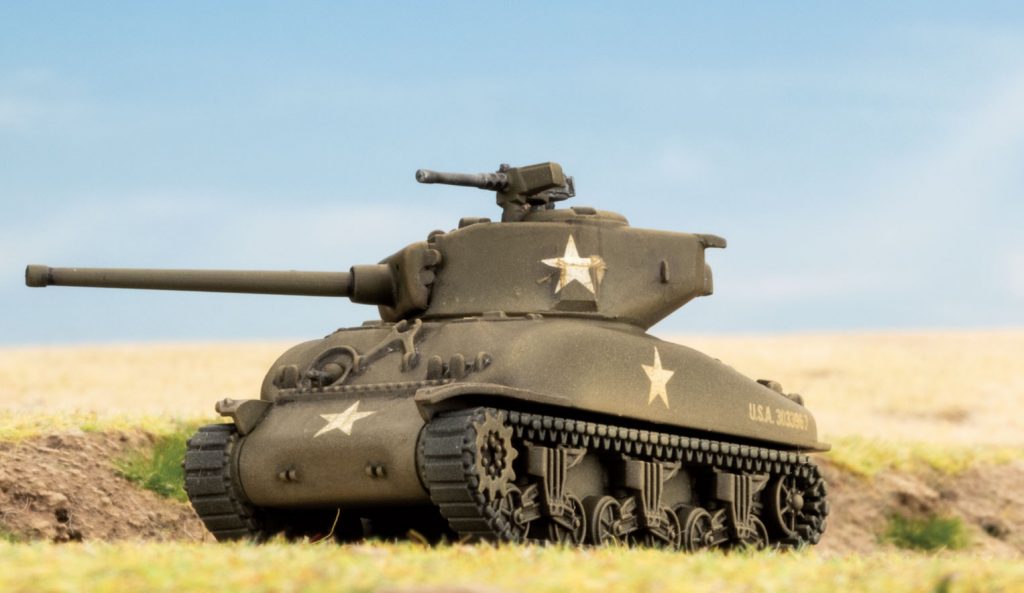
This gives an American commander a wide choice of forces, even though their equipment was standardised to maximise the benefits of Americsn-style mass production. Do you want to field fresh, eager troops, available in significant numbers, or do you want to field the less common desert veterans. Are you content with regular army troops, or do you want a small, elite strike force?

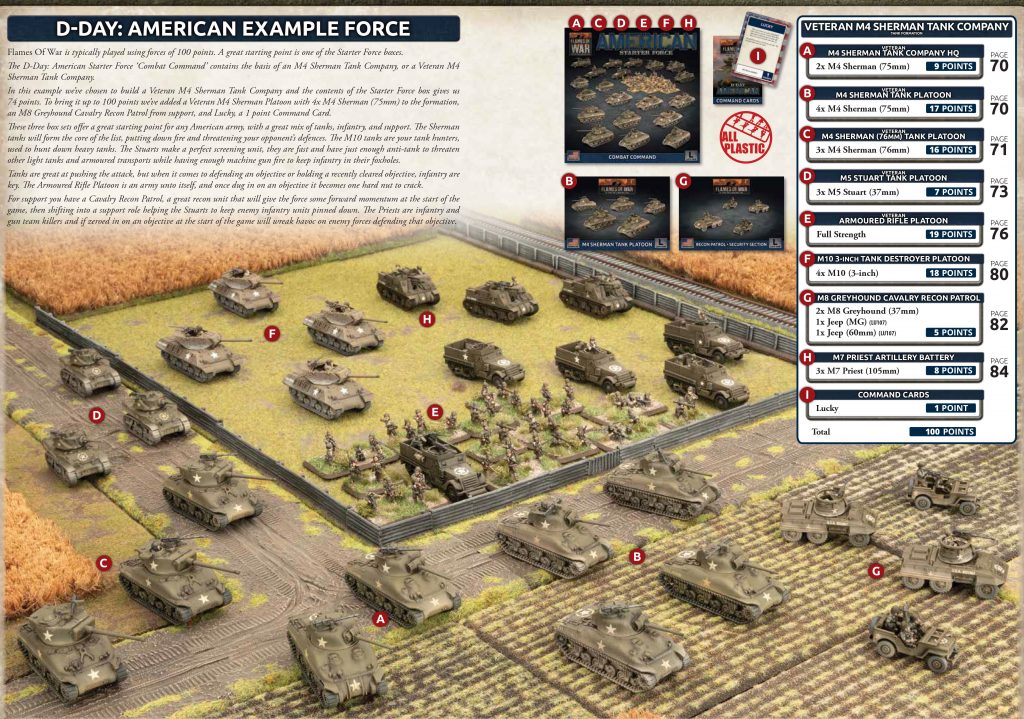
What’s In The Book?
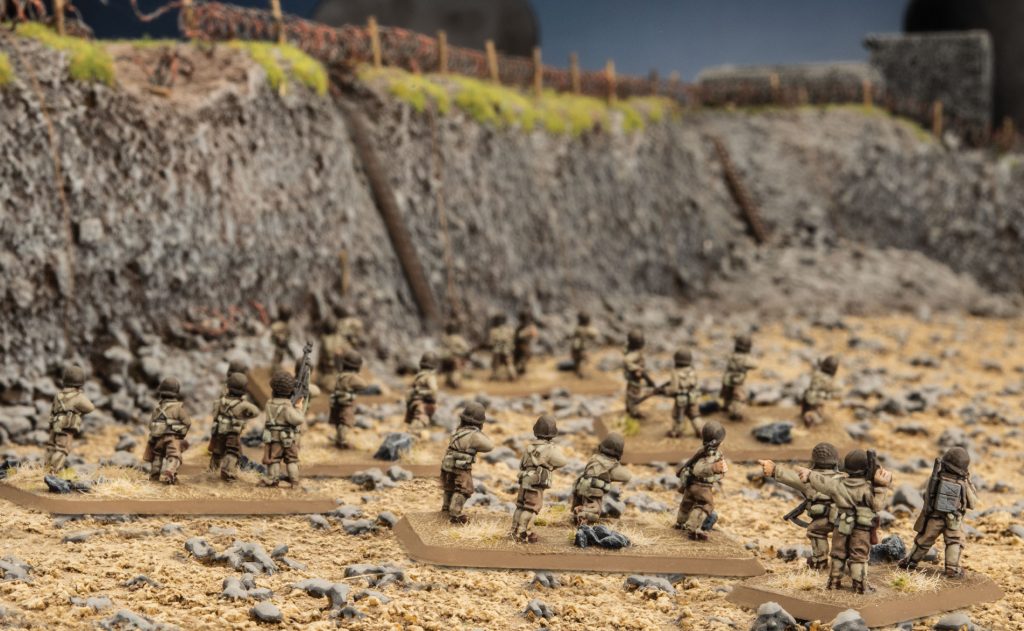
Parachute Rifle Company

  • Hard-as-nails volunteers. Fearless and trained exceptionally hard, so ready for anything.
  • Ready for anything. Platoons include riflemen, light machine-guns, mortars, and bazookas.
  • Platoons can be further reinforced with extra bazookas and light machine-guns.
  • Light infantry, so few integrated weapons. Just mortars, pack howitzers, anti-tank guns, and recon jeeps.
  • Can parachute into battle in airborne assault missions.
  • Regular army troops can provide tanks and heavier fire support.
  • Tanks, who needs tanks? I’ll just rip it apart with my bare hands!
    Glider Rifle Company
  • Large rifle platoons reinforced with light machine-guns, mortars, and bazookas.
  • Platoons can be further reinforced with extra bazookas and mortars for more firepower.
  • Small, hard-hitting formation with just two rifle platoons, heavy machine-guns, mortars, anti-tank guns, and pack howitzers.
  • Can land by glider in airborne assault missions.
  • Take the objective, then hold it with massed firepower.
  • Easy to convert from Rifle Company in Fortress Europe.

Ranger Company

  • Deadly assault troops who rally and hit in assaults on 2+!
  • Small, elite platoons with flexible organisation including mortars and bazookas if needed.
  • Compact company of two range platoons makes it easy to scale. Take as many or few companies as you need.
  • Scale impassable cliffs with ease.
  • Lead the way in assaults.
  • Easy to convert from Rifle Company in Fortress Europe.
    Assault Company & Veteran Assault Company
  • Rifle company reorganised to spread the risk for assault landings.
  • Up to six small platoons with plenty of weaponry: rifles, bazookas, mortars, and flame-throwers.
  • Either normal support platoons or integrated platoons with both a heavy machine-gun and a mortar, escorted by riflemen.
  • Swarm the enemy, pushing through any weak spots found.
  • Field as desert veterans – better tactics, less gung ho.
  • Easy to convert from Rifle Company in Fortress Europe.
    Rifle Company & Veteran Rifle Company
  • Cost-effective infantry with large, cheap platoons that can withstand a lot of enemy fire.
  • Platoons can be further reinforced with extra bazookas and light and heavy machine-guns for more firepower.
  • Formation has integrated heavy machine-guns, mortars, anti-tank guns, and artillery.
  • New 57mm anti-tank guns and 105mm light howitzers.
  • American riflemen manoeuvre quickly at dash speed.
  • Field as desert veterans – better tactics, less gung ho.
  • Fire and manoeuvre. Lots of artillery and firepower to support rapid assaults.
  • Easy to convert from Rifle Company in Fortress Europe.

M4 Sherman Tank Company & Veteran M4 Sherman Tank Company

  • Cost-effective medium tanks with integrated support.
  • Stabilisers for greater volume of fire on the move.
  • Up-gun an M4 Sherman platoon to 76mm guns for more anti-tank punch.
  • Heavy fire support from M4 Shermans armed with 105mm howitzers and half-track mounted 81mm mortars.
  • Flexibility. Can swap out a platoon of M4 Shermans medium tanks for a platoon of M5 Stuart light tanks.
  • Field as desert veterans – better tactics, less gung ho.
  • Grab their nose, manoeuvre to the flank, kick them in the butt.
  • Easy to convert from M4 Sherman Tank Company in Fortress Europe.
    M5 Stuart Tank Company & Veteran M5 Stuart Tank Company
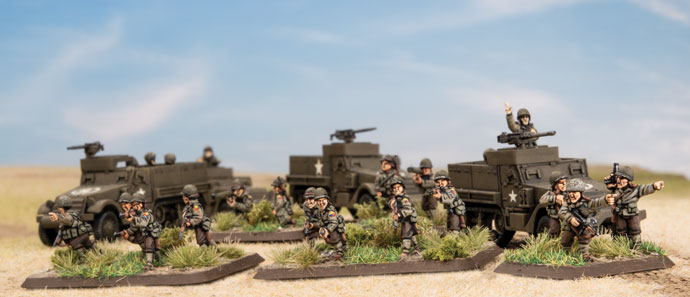
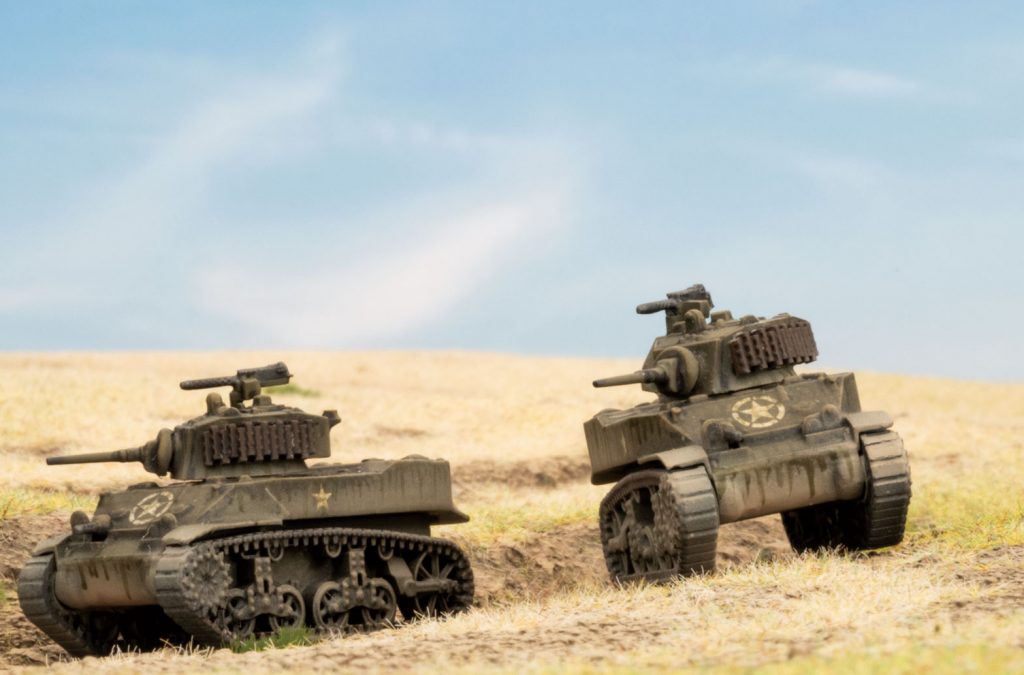
  • New upgraded M5 Stuart light tank.
  • Exceptionally fast, ideal for flanking manoeuvres.
  • Cheap light tanks with light and fast M8 Scott or heavy M4 Sherman assault guns as artillery support.
  • Flexibility. Can swap out a platoon of M5 Stuart light tanks for a platoon of M4 Shermans medium tanks.
  • Field as desert veterans – better tactics, less gung ho.
  • Speed around the enemy flank to seize the objective before they can react..
  • Easy to convert from M5 Stuart Tank Company in Fortress Europe.

Armoured Rifle Company & Veteran Armoured Rifle Company

  • Armoured M3 half-tracks for battlefield mobility, even under fire.
  • A weapon for every occasion. 
    • Platoons have riflemen, light machine-guns, mortars, bazookas, and half-track-mounted machine-guns.
    • Formation has integrated heavy machine-guns, mortars, anti-tank guns, and self-propelled artillery.
  • New 57mm anti-tank guns and M8 Scott light assault guns.
  • Massed firepower overwhelms the enemy when attacking and shoots down any attack.
  • Field as desert veterans – better tactics, less gung ho.
  • Large, resilient platoons withstand a lot of enemy fire.
  • Easy to convert from Rifle Company in Fortress Europe.
    M10 Tank Destroyer Company
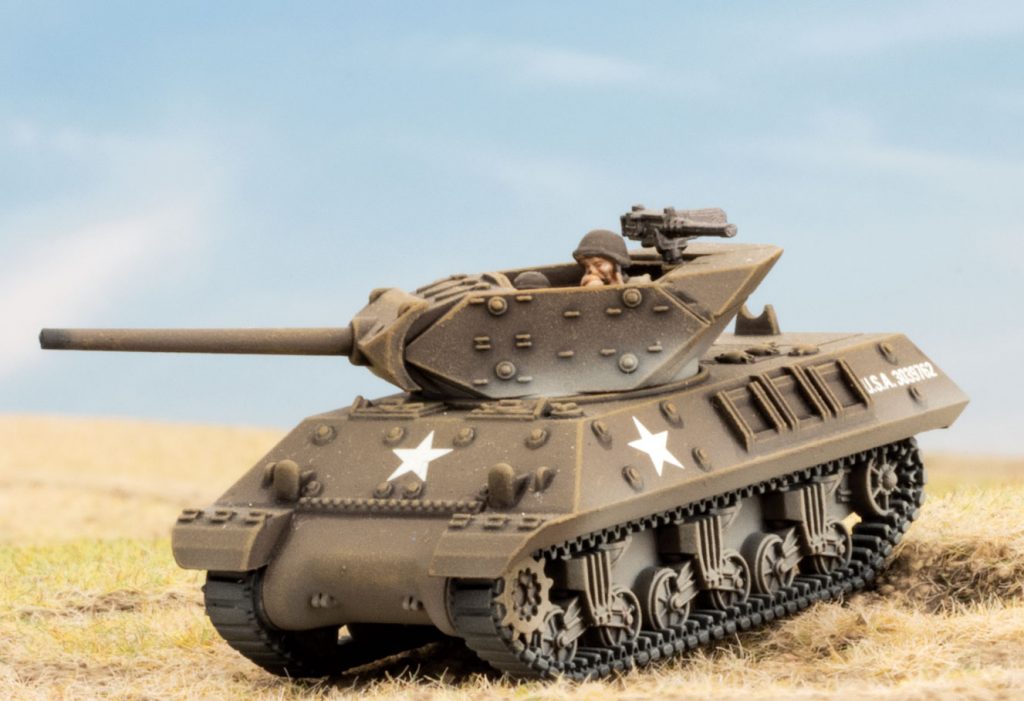
  • Massed self-propelled anti-tank guns, with up to 12 in a company.
  • Up to three security sections for perfect initial deployment, spearheading into No Man’s Land to flank enemy tank attacks.
  • New M20 scout car in HQ and security sections. Fast and well-armoured.
  • Use Seek, Strike, and Destroy doctrine to blitz into position and then scoot back out of sight after shooting up the enemy.
  • As mobile as a medium tank, and almost as well armoured, but fewer machine-guns and no top armour, so stay away from enemy infantry.
  • Easy to convert from M10 Tank Destroyer Company in Fortress Europe.
    Support
  • New M8 Greyhound armoured car mounting 37mm gun operates with machine-gun and mortar armed jeeps as well-armed cavalry recon.
  • New 3-inch towed tank destroyer for solid anti-tank firepower.
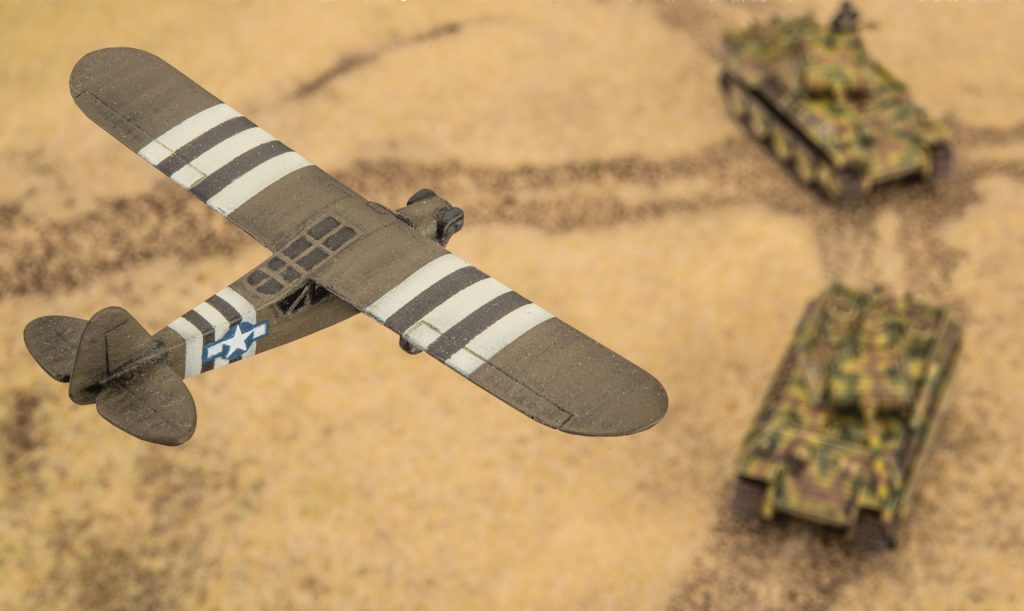
  • New L4 Grasshopper air observation post makes sure that your artillery are always on target.
  • New M12 155mm self-propelled gun for heavy artillery support and bunker busting.
  • Three batteries of towed 105mm or self-propelled M7 Priest or M12 155mm artillery give American forces powerful artillery support on top of the integrated artillery in formations.
  • Time on Target rule allows supporting artillery to make enemy infantry and guns re-roll successful saves for extra deadliness.
  • New P47 Thunderbolt fighters armed with eight machine-guns, bombs, and HVAR rockets have the right weapon for any target.
  • New M15 and M16 self-propelled AA guns. Mix of 37mm guns for punch and quad .50 cals for volume of fire.

How Do the Americans Play?

The Americans have three basic varieties of troops in D-Day: American. You can field elite paratroopers and rangers, regular troops fresh into battle, or experienced veterans. Each of these has a different play style.

The elite paratroopers of the parachute rifle company are a new experience for American players. They are some of the best infantry in the game, being rated as Fearless, Veteran, and Careful. On their own, they need to be aggressive as they don’t have the long-range firepower to stop the enemy from sitting back and picking them off, but used this way they can be hard to stop. Given tank-destroyer and artillery backup, they also make excellent defensive troops, so you can swing either way.

The other elite option, the rangers, are more assault oriented, being Aggressive, so easier to hit, and rallying and hitting in assaults on 2+. If you sit around, you’ll get shot to pieces, but if you go for it, the rangers are hard to stop without killing every last one of them!
The regular troops are well trained and eager for battle, although still lacking in actual combat experience to polish off the rough edges and teach them the difference between training and life-or-death battle. Most are rated as Confident, Trained, and Aggressive. Their eagerness shows in their ‘Blood and Guts’ approach to warfare which gives their tanks a better Last Stand rating and their infantry a better Rally rating. Once again, they usually need to take a fairly aggressive stance to prevent more skilful enemies massing firepower against them, although rifle companies can often mass enough firepower of their own to turn the tables.

The veteran formations have learned what works and what doesn’t, so are rated as Careful, making them harder to hit, and have ‘Yankee Ingenuity’ pushing their tactics up to 3+. Of course, they’re no longer so ‘Blood and Gusts’ as the green guys.  Their skill allows them to match the best, but they are more expensive in points, so your force is smaller, so tactics need to be more cautious.

The American strategy can be summarized in the phrase mobile tactics. They win by using their mobility, their ability to fire on the move, and their numbers to outflank their opponents and keep them off balance, while applying massed firepower to overwhelm any opposition.
Normandy Campaign Missions

D-Day: American includes three new missions and a linked campaign. The first mission is Shot in the Dark, an airborne assault gone wrong with the attackers scattered across the board (and possibly off it) while the defenders attempt to organise a defence in the dark before the attackers reform and overwhelm them. It uses simple rules to reflect the chaos and uncertainty of airborne assaults.

The second mission is Help Is On Its Way, a refight of the Rangers’ battle at Pointe du Hoc. This mission uses the amphibious assault rules to bring the attacking forces ashore. A shortage of landing craft forces the attackers to land in multiple waves, which tanks to the attacker’s Overwhelming Force rule may include units from previous waves that have already been destroyed. The defenders have bunkers, nests, minefields, and barbed wire to delay the attack, while both sides hope desperately for assistance from a rescue force coming from inland.

The third mission is FUBAR (an acronym for Fouled Up Beyond All Recognition) which allows you to refight the bloody battles on Omaha Beach. This uses the same amphibious assault rules, but is a much more straightforward frontal assault into heavy defences with victory being determined by how fast, or even if, the American player can capture their objectives.

These three missions are linked together with two standard missions from the rulebook in a simple campaign where the outcome of one battle has an effect on the next. If the American player can make their final breakthrough in the fifth mission, they win the campaign.
Who are the Warriors

The D-Day: American book has four warriors: Norman ‘Dutch’ Cota, Lafayette Poole, James Earl Rudder, Turner Turnbull.

Norman ‘Dutch’ Cota, famous for leading his troops off Omaha Beach, showing them how an assault should be done, allows infantry under his command to attempt to charge again if they are driven back by defensive fire.

Lafayette Poole, America’s most successful tank ace, is ideal for leading your tanks’ advance. His men will follow him as he dashes forward, then when he gets close, his accuracy while firing on the move us unparalleled.

Turner Turnbull’s paratroopers refused to give up ground, no matter how many times the Germans attacked. His platoon’s defensive fire is virtually impenetrable.

James Earl Rudder led the rangers at Pointe du Hoc, steadfastly counterattacking any German penetrations into the rangers’ defensive positions.

Command Cards

The command cards introduce a new concept, title cards. These cards have the title of a division and a special rule giving the division’s flavour. The key is that you can only have one title in your force. 

Title command cards for D-Day: American give you the option to field twelve new infantry divisions in addition to the two in the book. These allow you to customise your rifle company force to fight in many different ways. Some divisions give you new equipment, such as SMG-armed assault groups or M7 Priest assault guns as far of the formation. Others give your troops new abilities like attacking at night, riding tanks, navigating reserves to where they are needed, and improved artillery support. Most of the title cards give your division a different focus, trading out the ‘Blood and Guts’ rally bonus of the ‘yankee Ingenuity’ tactics bonus for other advantages.

Your tankers and armoured infantry aren’t left out, gaining the option to be the Free French ‘Division leClerc’, determined to liberate France or die trying. If they want to stay good ol’ boys from the US of A, they get lots of interesting equipment for their Sherman tanks: DD amphibious gear, Cullins hedgerow cutters, tank telephones, and sandbag armour.

The Americans are known for their love of fire support, and the command cards don’t disappoint, giving naval gunfire support, heavy mortars, air superiority, and new weapons loads for your P47 Thunderbolts including napalm and really big bombs!  

If all this firepower seems to blunt to you, you can get all sneaky with the French resistance. They can mess with your enemy’s reserves or fight alongside you on the battlefield! And, when everything else fails, there’s always luck, with the Lucky card giving you a re-roll at the critical moment.

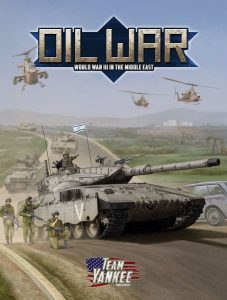
Oil War Notes

with Wayne Turner

Oil War marks a departure from our usual format for Team Yankee books in a couple of ways. It sees the Team Yankee story move to a new theatre, with the Soviet Union and NATO inserting themselves into the ongoing Iran-Iraq conflict. It also sees a mix of forces, not all from the same alliance, in the one book. So what’s inside?
Background
Oil War details the spread of World War III to the middle-east as the combatant nations scramble to secure precious oil supplies. Inside you will find background for the Israelis, Iraqis and Iranians in the lead up to World War III, as well as details of their conflicts immediately beforehand.

Forces
Oil War contains Forces, Formations and Units for fielding Israeli, Iraqi, and Iranian forces. In addition there is also a section on how to field Syrians using the Iraqis and an additional formation and unit for the Soviets.

Israel
The first Force you will find in Oil War are the Israelis. The Israel Defence Force (IDF) had learnt a lot from the Arab-Israeli conflicts of 1967 and 1973 and had undertaken a number of reforms and equipment upgrades to be ready for any future conflict. In 1982 they had also invaded Lebanon in an attempt to clear hostile Palestinian forces from their northern border and a number of lessons were learned from the experience. 1982 also saw the first combat of the Israel’s new main battle tank, the Merkava. A direct result of this was the improved Merkava 2.

You can field four different formations in an Israeli force: Merkava 1 Tank Company, Merkava 2 Tank Company, Magach 6 Tank Company, and M113   Mech Infantry Company.

Israelis are well trained and motivated with Courage 3+, Morale 3+, Skill 3+, Assault 4+, Counterattack 3+.

An Israeli Tank Company has 2-3 Tank Platoons, a M113 Mech Infantry Platoon, and either a Jeep Recce Platoon or a M113 Recce Platoon. These can either have Merkava 1, Merkava 2, or Magach 6.

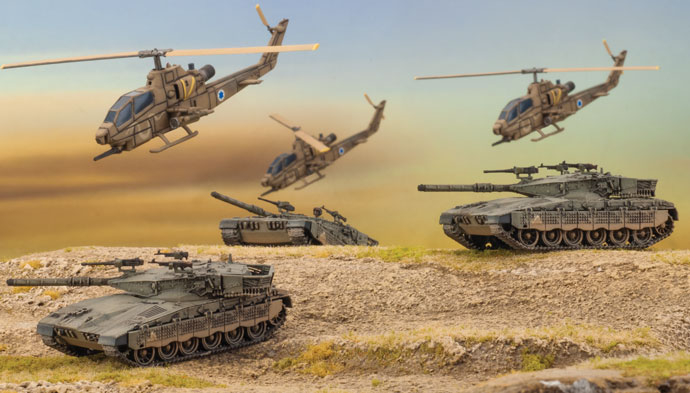
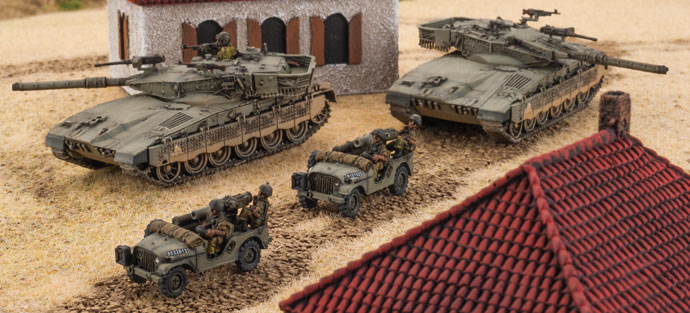
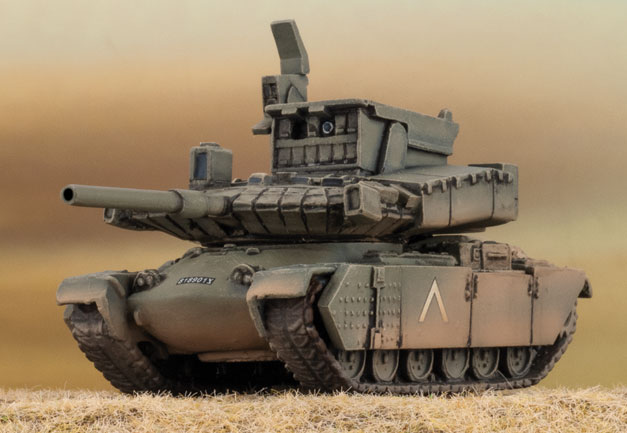
The Merkava 1 and Merkava 2 come in a new plastic kit that will let you build either model. The Merkava 1 is a formidable tank armed with the same M68 (British L7) 105mm gun as many NATO tanks. This gives it a Range 40”/100cm, ROF 2/2, AT 19 and FP 2+. Due to a good supply of HE it has the Brutal rule (re-roll infantry and unarmoured saves). The gun is also fitted with a Stabliser (can move Tactical 14”/35cm, but +1 To Hit), a Laser Rangefinder (no To Hit penalty for over 16”/40cm), and Smoke. It has Front Armour 18, Side 6, and Top 2. The Merkava 2 is upgraded with additional armour giving it Front Armour 19, Side 7, and Top 2. Well-protected ammunition stowage gives the Merkava 1 and 2 a Remount 2+

Due to their experiences in the previous three wars the Israelis ensured their tanks were well equipped with machine-guns. Each Merkava 1 or 2 has a co-axial 7.62mm MG, commander’s and loader’s 7.62mm AA MGs, and a remote-controlled .50 cal MG mounted over the main gun.

The Magach 6 is the Israeli variant of the US M60A1. It’s a tough tank with Front Armour 15, Side 8 and Top 2. It also mounts the M68 105mm gun and has the same machine-gun arrangement as the Merkavas, giving it plenty of firepower.

The company Recce Platoons can either be lightly equipped with Jeeps, or with M113 APCs.
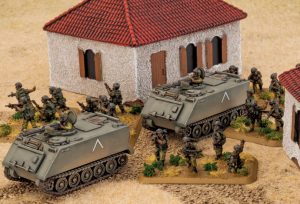
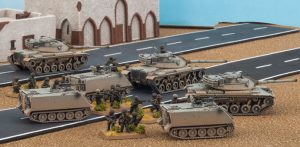
Israel’s various infantry formations, from the named brigades to the paratroopers, were all trained to fight from the American M113 APC. An M113 Mech Infantry Company comes with 2 or 3 M113 Mech Infantry Platoons, a Tank Platoon (of any type), an M125 81mm Mortar Platoon and an M150 Anti-tank Section.

Israeli M113 Mech Platoons are well-equipped and capable units. A full-strength platoon comes with 4x Galil assault rifle teams, 3x FN MAG teams, each of these is also armed with M72 LAW for anti-tank self-defence. In addition they have 3x RPG-7 anti-tank teams, a M47 Dragon guided anti-tank missile team and a 52mm mortar team. These are transported in 4x M113 APCs.

Company weapons include a M125 81mm Mortar Platoon with 2 or 3 M125s, and a M150 anti-tank Platoon with 2 M150 TOW armed APCs.

The Israelis also have a good selection of support with M106 120mm SP mortars, M109 SP Artillery, Jeeps mounting TOW anti-tank missiles, and the super-secret Pereh SP anti-tank missile launcher. They are well-covered by anti-aircraft with M163 VADS, ZSU-23-4 Shilka, Redeye SAM, and M48 Chaparral SAM missiles. Their aircraft includes Skyhawk Fighter Flights and AH-1 Viper (Cobra) attack helicopters.

In 1985 the Pereh was an ultra-secret weapon, it has only been revealed to the wider world recently. The Pereh is a M48 (Magach 5) tank mounting a turret with twelve Tamuz NLOS (Non-line of sight) guided anti-tank missiles. The Pereh had a dummy gun so it would look like a tank from a distance. Its NLOS missile could be guided by the gunner through a camera mounted in the missile, allowing it to be fired from an out of sight position.

Another major change to the IDF after the 1973 war was the introduction of the attack helicopter. The Israelis got their first American Cobra attack helicopters in 1975 and were used extensively in Lebanon. The Israelis named them ‘Tzefa’, Viper in English. Like the US versions, the Vipers are armed with Improved TOW missiles, M197 Gatling guns and M159 rocket launchers.

Iraq
Today we think of Saddam Hussein as the bad guy, but in 1985 things were not so clear cut. In the west, especially in America, Iran was seen as the greater of two evils. France had entered into several arms deals to supply the Iraqis, and Iraq’s oil was still desired globally. The Iraqi army had been fighting Iran since 22 September 1980 and by 1985 fielded a mix of Soviet, Chinese, French, and Brazilian equipment and vehicles organised loosely along Soviet lines.

An Iraqi Force can field five different formations, three tank and two mechanised infantry. The Iraqis have Courage 4+, Morale 4+, Skill 5+, Assault 5+ and Counterattack 4+.

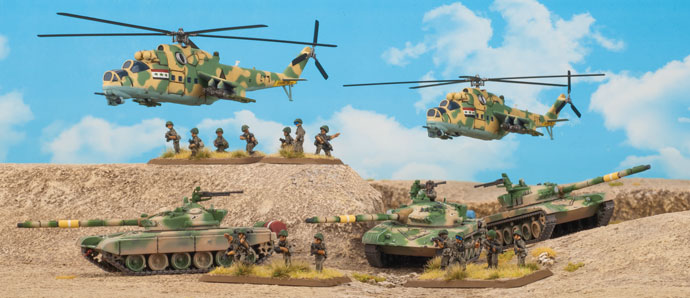
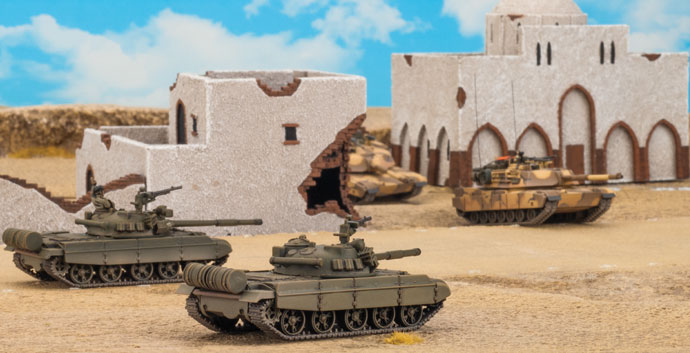
The Iraqis used the Soviet T-72M tanks in the 10th Armoured Brigade. The Iraqis used the export version of the T-72, the T-72M, which had Front Armour 15, Side 8 and Top 2. Its powerful gun has a Range 32”/80cm, ROF 1/1, AT 21 and FP 2+. This is further enhanced by being Brutal, having a Laser Rangefinder, and a Stabliser.

The Iraqis also field are large number of the Soviet T-62 tanks, all purchased from the Soviet Union before relations soured in 1978. The T-62 is an excellent tank for its age with Front Armour 13, Side 9, and Top 2. It is armed with the 115mm 2A20 smoothbore gun with Range 32”/80cm, ROF 1/1, AT 19, and FP 2+. It is Brutal, but is Slow Firing (+1 To Hit for Moving ROF).
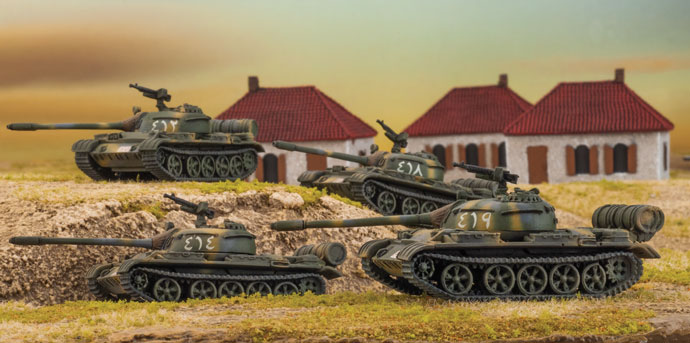
The Iraqis also used Soviet T-55, Chinese Type 59 and Type 69 tanks. The Type 59 and 69 were Chinese developments of the Soviet T-54 and were similar in capabilities to the T-55. The T-55 is a dependable and reliable tank, and against the Iranians it proved more than adequate, especially supporting their infantry. It has the same armour as the T-62, but is armed with the 100mm D-10T gun (Range 32”/80cm, ROF 1/1, AT 16, FP 2+, Slow Firing).

The T-72M, T-62 and T-55 all have a co-axial MG and a 12.7mm AA MG.

An Iraqi Tank Battalion has 2 or 3 Tank Companies, either a BMP-1 or BTR Mech Company, and a ZSU-23-4 Shilka or ZSU-57-2 AA Company.

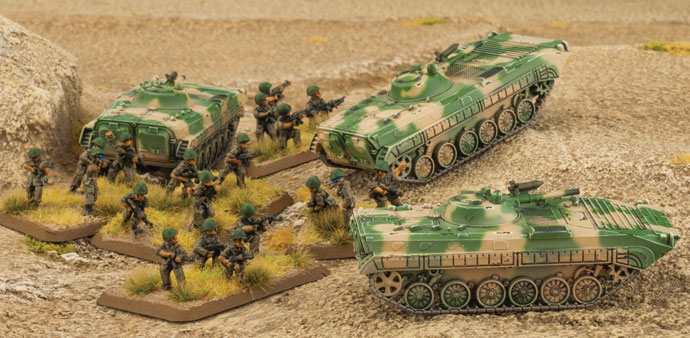
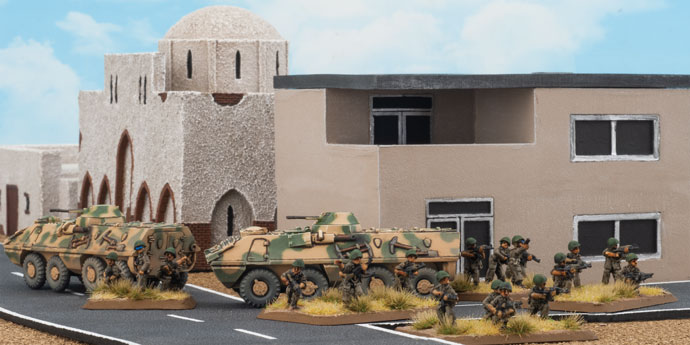
The Iraqis also acquired a large number of BMP-1 infantry fighting vehicles from the Soviet Union and many of the better equipped mechanised infantry battalions were mounted in these. An Iraqi BMP-1 Mech Battalion is built around 2 or 3 BMP-1 Mech Companies, a T-62, T-72, or T-55 Tank Company, a ZSU-23-4 or ZSU-57-2 AA Company and a 2S1 Carnation SP Howitzer Battery. The Iraqis received extensive training from the Soviets in the 1970s and still use Soviet style combined armed doctrine in 1985, so each Mech Battalion formation is a combined arms unit with infantry, tanks, anti-aircraft and artillery.

The infantry are armed with Soviet or Chinese AK-47 assault rifles, RPG-7 anti-tank rockets, and PKM machine-guns. Companies can be reinforced with SA-7 Grail man-portable surface to air missiles for air defence. A BMP-Mech Company can vary in size from a large unit of ten AK-47 assault rifle, nine RPG-7 anti-tank, and two PKM LMG teams mounted in 12 BMP-1s to a small company of four AK-47 assault rifle and three RPG-7 anti-tank teams mounted in four BMP-1s.

The rest of the mechanised infantry are mounted in a variety of wheeled armoured personnel carriers such as the Soviet supplied BTR-60 or the Czech OT-64. Some units were even mounted in the French AMP-10P tracked infantry fighting vehicle.

Much of the battalion’s equipment are the familiar Soviet types, such as the ZSU-23-4 Shilka anti-aircraft vehicle and 2S1 Carnation SP howitzer. The BTR Mech Battalions, because they didn’t have the anti-tank missile of the BMP-1, were also issued with the Spandrel anti-tank vehicle armed with the powerful AT-5 Spandrel guided missile (Range 8”/20cm – 48”/120cm, ROF 1/-, AT 21, FP 3+).

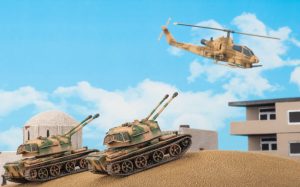
Another common vehicle in the Iraqi arsenal is the ZSU-57-2. It is an anti-aircraft vehicle based on the T-55 mounting a twin 57mm gun. It was an excellent ground support and anti-helicopter weapon, but because it lacked radar it was of only limited use against fast flying jets.
The Iraqis made arms deals with a variety of nations giving them an unusual mix of supporting weapons. They used Soviet BRDM-2 scout cars for reconnaissance duties, though a number of similar designs from France, Brazil, and Hungary were also used.

Unique to the Iraqis was the VCR/TH HOT anti-tank missile vehicle. This was a French light wheeled APC mounting a pair of guided anti-tank missile launchers. It fired the devastating HOT missile (Range 8”/20cm – 48”/120cm, ROF 1/-, AT 23, FP 3+).

Artillery came from the Soviets and French. The Iraqis used both the 2S1 Carnation 122mm self-propelled howitzer and the 2S3 Acacia 152mm self-propelled howitzer. Alongside these fought the French AMX AUF1 self-propelled howitzer with its automatically loading 155mm weapon (reduces the score required to hit by 1 during bombardments). The Iraqis also used a lot of rockets, the most common being the Soviet BM-21 Hail or similar Chinese copies.

Iraqi Self-propelled anti-aircraft missile assets came from both the Soviets and French with the SA-9 Gaskin, SA-13 Gopher, SA-8 Gecko, and AMX Roland SAM systems all seeing service in the war against Iran.

Iraqi helicopters played a major role in their conflict with Iran, with Soviet built Hinds and French supplied Gazelles working in close coordination. The Hinds would supress a targeted area, making sure anti-aircraft units had been forced to ground with rocket and Gatling gun fire, before the Gazelles would rise up from concealed positions to take out enemy tanks with their HOT ATGMs.

Syrians
In Oil War you can also field Syrians. We haven’t made a specific force for them, but much of their organisation, doctrine and weapons systems are similar to the Iraqis. For this we have added a section to Oil War with a guide to how to field Syrians using the Iraqi forces. Like the Iraqis the Syrians are heavily influenced by the Soviets, but unlike the Iraqis, buy 1985 they are still on good terms with them. They also have a good relationship with the Iranians. This means they are on the opposite side to the Iraqis. Pitting these two evenly matched forces against each other will make for some interesting games.

Iranians
The Iranian military was a very western influenced institution before the 1979 Islamic Revolution, and much of this in the form of organisation, doctrine, and equipment has remained in place under the rule of the Islamic Republic, though the most western leaning and thinking officers were purged from it ranks. The regular Islamic Republic of Iran Army (IRIA) used a mix of American and British tanks and vehicles, while the small arms were West German G3 battle rifles and MG3 machine-guns. Iran’s other fighting force was the Islamic Revolutionary Guards Corps (IRGC) and, as a newly raised organisation, used a mix of former army equipment, captured Iraqi arms, and newly purchased weapons from China, Soviet Union, North Korea, Libya and Syria.

Iranians are rated Courage 3+, Morale 3+, Rally 3+, Skill 5+, Assault 5+ and Counterattack 3+.

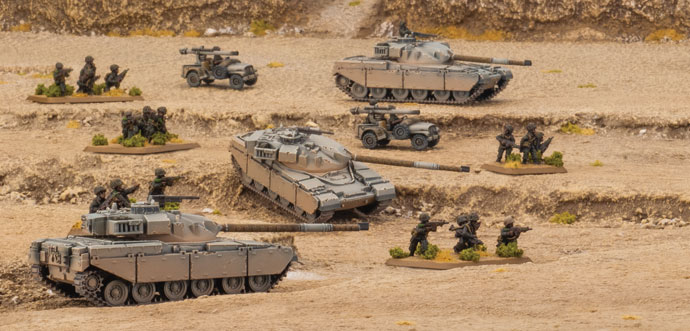
The tank formations of the IRIA used the British Chieftain and the US M60. Both the Chieftain Tank Company and the M60 Patton Tank Company are quite simple formations with two or three Tank Groups (each with three tanks) and a Mechanised Group (infantry mounted in M113). The IRGC also field tank formation using captured and purchased Iraqi/Soviet T-62 and T-55 tanks. These contained two T-62 Tank Groups, an optional T-62 or T-55 Tank Group and an optional Mechanised Group or Basij Infantry Company (volunteer militia).

The Mechanised Company, which can represent the IRIA or IRGC, is based on a core of two or three Mechanised Groups, a M113 106mm Anti-tank Group or M150 (TOW) Anti-tank Group, a M125 Mortar Group, and a Tank Group (Chieftain, M60, T-62 or T-55).

The Mechanised Groups are made up of four MG-3 teams (Range 16”/40cm, ROF 3/2, AT 2, FP 6), three RPG-7 anti-tank teams (Range 12”30cm, ROF 1/1, AT 17, FP 4+, Slow Firing), mounted in four M113 APC if it is from the IRIA. Optional teams include a M47 Dragon ATMG and a SA-7 Grail SAM. To represent the IRGC mechanised infantry you can replace the units M113s with BTR-60 APCs or BMP-1 IFVs.
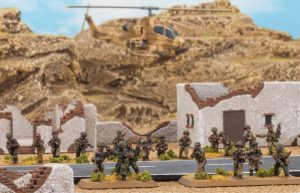
The second infantry formation available to the Iranians is the Basij Infantry Battalion. The Basij (Persian for ‘The Mobilization’) are a paramilitary volunteer militia of civilians between the ages of 18 and 45, though often volunteers much younger or older can be found in its ranks. The IRGC uses the Basij as a pool to draw reinforcements for their units, or to field Basij fighting units under IRGC command. The Basij were often used as the first wave of an offensive and as a consequence suffered disproportionately high casualties, often having these attacks described by the Iraqis are ‘human waves’.

The Basij, like much of the IRGC, were armed with Soviet style small arms as well as old obsolete weapons like bolt action rifles supplied from the army’s reserve stocks. The Soviet weapons were either captured from the Iraqis or supplied by the Syrians, Libyans, Chinese or North Koreans. A Basij Infantry Battalion has two to four Basij Infantry Companies, an Anti-tank Jeep Group, and a T-62 or T-55 Tank Group.
A Basij Infantry Company, at full strength, has 25 AKM assault rifle teams (Range 8”/20cm, ROF 3/3. AT 1, FP 6, and a Pinned ROF 1) and 12 RPG-7 anti-tank teams.

The Anti-tank Jeep Group contains two to six Anti-tank Jeeps, each armed with a 106mm recoilless rifle (Range 24”/60cm, ROF 1/1, AT 17, FP 2+). They use the Scout rule to sneak around, and the 106mm recoilless has Accurate (no +1 long range hit penalty if not moving), Brutal (enemy rerolls Infantry and Unarmoured saves), HEAT (no +1 Armour bonus at long range), Recoilless (cannot be concealed if shot) and Slow Firing (+1 to Hit for Moving ROF) rules.

The Iranian support weapons also reflect the mixed sources of their weapons systems. Reconnaissance units are equipped with British supplied Scorpion light tanks, while Iranian artillery is equipped with US M109 self-propelled howitzers. Rocket artillery, like the Iraqis is made up of BM-21 Hail truck mounted rocket systems, either the original weapons purchased in 1967 or additional Chinese and North Korean copies supplied later. Like the Iraqis, the Iranians used the Soviet ZSU-57-2 and ZSU-23-4 Shilka anti-aircraft SP gun systems.

The Iranian army’s aviation corps was well equipped with US AH-1 Cobra attack helicopters, equipped to the same standard as the American versions.

Iran-Iraq War
Oil War also contains a section on the Iran-Iraq War, giving a history and how to field the forces involved in the war from Oil War.

Soviets
While the tanks facing the western forces in Europe consisted of T-64 and T-72 tanks, the bulk of Soviet armoured forces available for immediate action on the Iranian frontier were equipped with T-62M tanks. The T-62M fitted the T-62 with an improved applique armour package (Front 14, Side 9, Top 2, Bazooka Skirts), a Laser Rangefinder (no To Hit penalty for range over 16”/40cm) and the ability to fire the AT-10 Stabber anti-tank missile (Range 16”/40cm-48”/120cm, ROF 1/-, AT 21, AT 3+, Guided and HEAT).

Oil War allows you to field a T-62M Tank Battalion formations and T-62M Tank Companies in your Soviet force from Red Thunder.

Intervention Forces
Oil War also provides a guide to the forces from other Team Yankee books that could also be used for the battles of World War III in the Middle East.

Scenarios
Finally we have two scenarios themed on the forces inside Oil War. The first one, West of Khorranshahr, pits Iranian attackers against Iraqi defensive forces in a battle across the frontier of the two countries, typical of the encounters of the Iran-Iraq War. The second scenario sees the Syrians attacking the Israelis in the Golan Height at the start of the Syrian offensive against Israel. This pits a strong Syrian Tank forces against a small, but elite, Israeli defensive force.

Packed with Colour
As is usual for a Team Yankee book, it is full of colour photographs of Israeli, Iraqi, and Iranian models, painting guides, and a comprehensive catalogue section to help your work out what packs to get for your Oil War force.

So pack up your desert camo gear, we’re off to the Middle East!

– Wayne