The release of the D-Day: Waffen-SS comes with a small pile of new products that are filled with new models specific to the Waffen-SS. At the same time we have a massive range of Late War codes for the Germans that are perfectly suitable for you to use to build your new army.
To make it as easy as possible we have done two things.
The fantastic catalogue at the back of the book contains all the models and their product code and descriptions. You can use this to help you find the products in our online store, or just tell your local retailer the codes and they can order what you need.
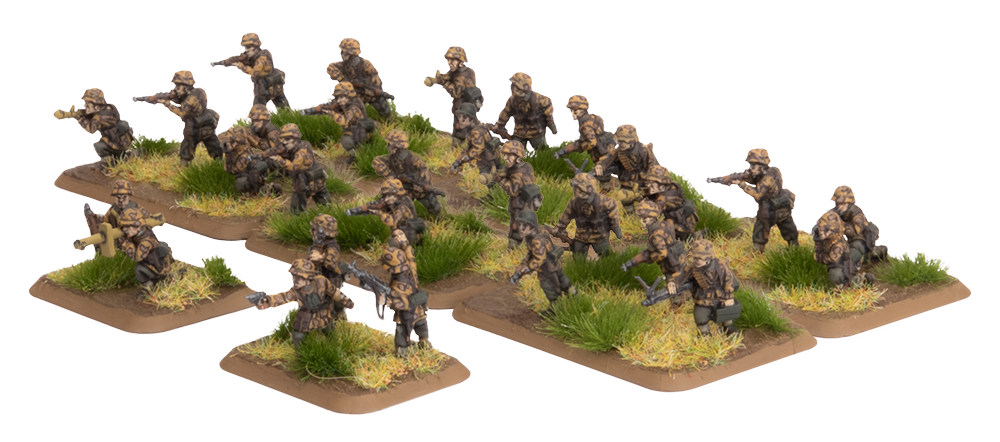
Waffen-SS Inside Stickers. We recently started adding the new Waffen-SS Unit Cards and figures (where appropriate) to our older German products so they can be used by either Heer or Waffen-SS armies. You just need to select the right figures and paint them up.
Huh? I heard you say…
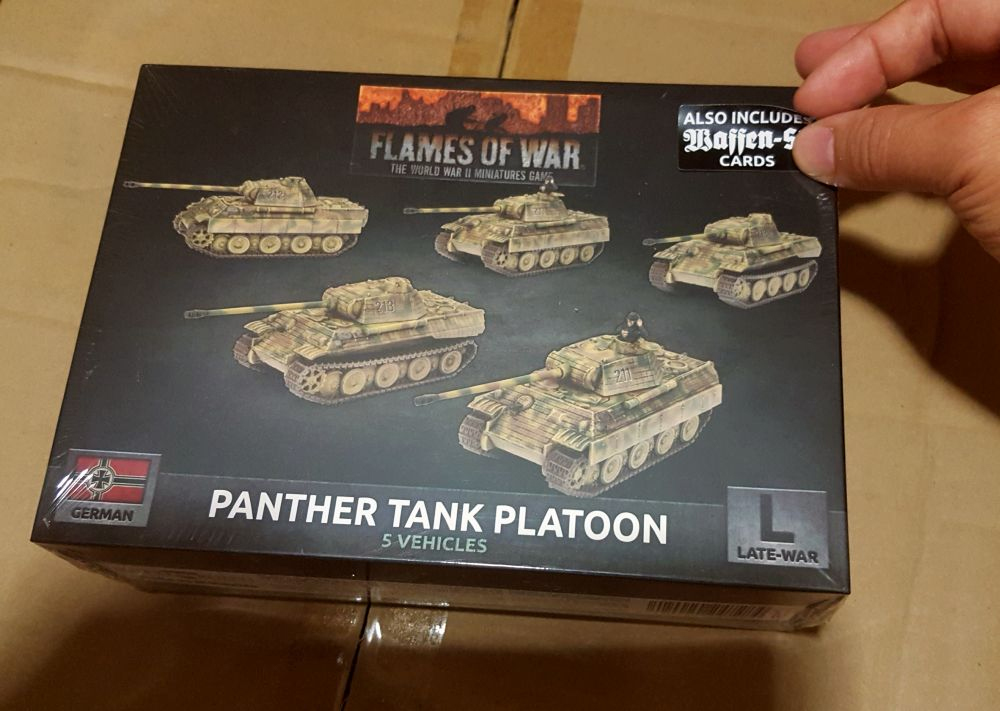
That’s right, products marked with this sticker will have the older D-Day: German Unit Cards inside AND the new D-Day: Waffen-SS Unit Cards! How good is that!
Whilst products marked with this sticker will have both sets of Unit Cards AND two sets of gun crews – one set of Heer (normal German army) crews, and another complete set of Waffen-SS crews made out of our new thermoplastic.
Between mid 1943 and mid 1944, the German focus was on the Eastern Front. After the failure of the German Kursk Offensive, the Red Army went on the offensive, throwing hammer blow after hammer blow to drive the Germans back to the Russian border. The elite 1st and 2nd SS Panzer Divisions were rushed to wherever the Soviets broke through, counterattacking to seal the breach. By Christmas, the divisions were worn out, barely a regimental sized battlegroup remained. They desperately needed to be withdrawn to France to rebuild back to full strength.
Then, as 1944 began, the Red Army attacked again. The two new divisions being formed in France, the 9th and 10th SS Panzer Divisions were rushed to the Eastern Front and the plans to rebuild the existing divisions were shelved. Finally, in March, the Spring rains turned the roads to mud and the Soviet offensives ground to a halt. All four divisions were returned to France for rebuilding, joining the 12th SS Panzer Division which was part way through its training. Six weeks into their training, still trying to bring large numbers of conscripted replacements up to scratch, the Allies invaded France on D-Day. Ready or not, the SS panzer divisions were rushed to the invasion front, counterattacking to drive the Allies back into the sea.
With a solid core of veteran leaders under your command, can your willing, but inexperienced troops defeat the Allies despite their massive superiority in numbers? Can you win a never-ending battle of attrition, or do you attack into the teeth of massed artillery, naval bombardments and airpower? Can you defeat the invasion and save your homeland?
Here are the forces you have available to you:
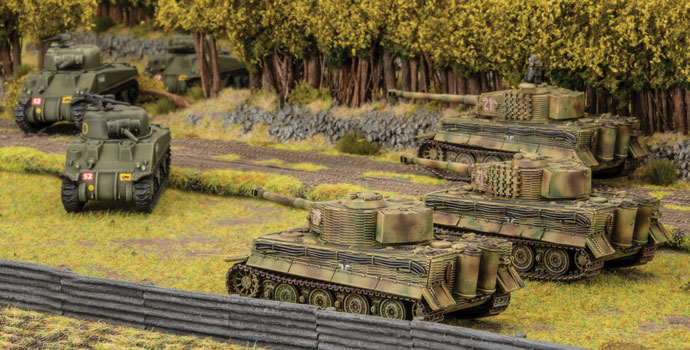
Tiger SS Tank Company
Fanatical veteran troops crewing the best heavy tanks available.
Thick armour and devastating 8.8cm gun, yet more mobile than most medium tanks.
Barge through terrain without a worry.
Almost immune to medium tanks, artillery, and infantry.
Integrated self-propelled anti-aircraft guns to protect from Allied aircraft.
Expensive, but the very best available.
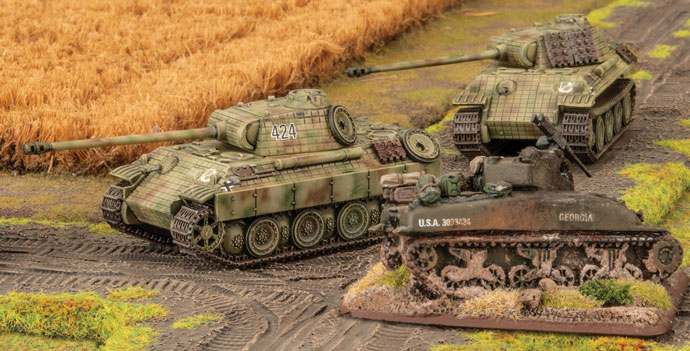
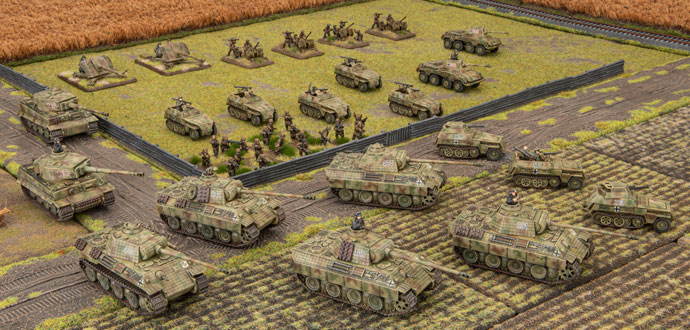
Panther SS Tank Company
Fanatical veteran commanders to teach the replacements clever tactics.
Determined to succeed despite their inexperience.
Medium tanks with enough armour to stop Allied anti-tank guns, and a gun that easily penetrates any Allied tank.
Fast for a medium tank, almost as fast as a light tank.
Integrated self-propelled anti-aircraft guns to protect from Allied aircraft.
Flexibility. Can swap out platoons of Panther tanks for a platoon of Tiger heavy tanks and a platoon of Panzer IV medium tanks or StuG assault guns.
Easily outclasses all opposition, just watch out for your flanks.
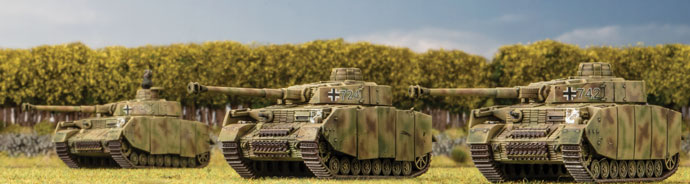
Panzer IV SS Tank Company
Fanatical veteran commanders to teach the replacements clever tactics.
Determined to succeed despite their inexperience.
Solid medium tanks. Good armour and better guns than Allied medium tanks.
Protected ammunition storage and bazooka skirts limit effectiveness of US Bazookas, British PIATs, and Soviet anti-tank rifles.
Integrated self-propelled anti-aircraft guns to protect from Allied aircraft.
Flexibility. Can swap out a platoon of Panzer IV tanks for a platoon of Tiger or Panther tanks and a second one for StuG assault guns.
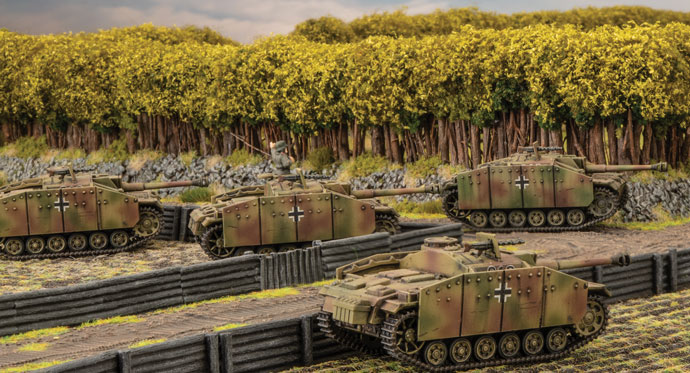
StuG SS Tank Company
Fanatical veteran commanders to teach the replacements clever tactics.
StuG assault gun has better front armour and the same gun as a Panzer IV medium tank, but has no turret so can’t shoot targets to the flanks, and is less effective when assaulting infantry.
Determined to succeed despite their inexperience
Integrated self-propelled anti-aircraft guns to protect from Allied aircraft.
Flexibility. Can swap out a platoon of StuG assault guns for a platoon of Tiger or Panther tanks and a second one for Panzer IV tanks.
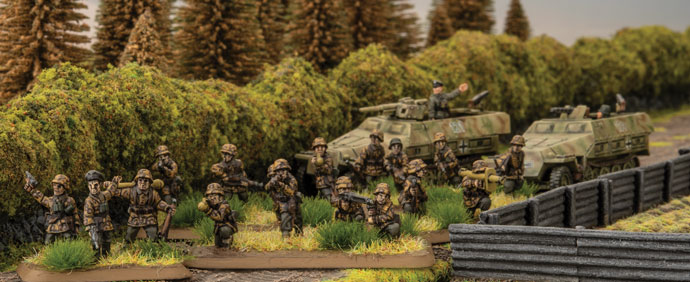
SS Panzergrenadier Company
Fanatical veteran commanders to teach the replacements clever tactics.
Determined to succeed despite their inexperience.
MG teams give plenty of firepower.
Can add Panzerfaust anti-tank weapons and 7.5cm anti-tank guns to keep tanks at bay.
Plenty of integrated weapons, including heavy machine-guns, 8cm and 12cm mortars, 2cm AA, and 7.5cm and 15cm guns.
More mortars and infantry guns than an Army division for artillery support.
Flexibility to take a platoon in half-tracks as a mobile strike force.
Highly motivated assault troops who won’t give ground in the defence.
SS Reconnaissance Company Company
Fanatical veteran commanders to teach the replacements clever tactics.
Up to 7 half-tracks per platoon for maximum mounted firepower.
Sneaky scout versions of 8cm mortar and 7.5cm gun half-tracks.
Mix of old and new armoured cars including Puma 5cm and old 2cm eight-wheelers, and light 2cm wheeled or half-tracked armoured cars.
Armoured cars are integrated into formation.
Flexibility to take armoured and dismounted panzergrenadier platoons.
Can be integrated into armoured and dismounted panzergrenadier companies.
Sneak into position, then hit hard and fast.
Support
New Jagdpanzer IV tank-hunter. Cheap, effective, mobile.
Super-deadly long 8.8cm anti-tank guns on cruciform turntable have all-round field of fire.
Plenty of AA options to counter Allied aircraft. Self-propelled single and quad 2cm, or ground mounted 2cm light or 8.8cm heavy AA guns.
Lots of artillery choice, with Hummel 15cm and Wespe 10.5cm self-propelled guns, 10.5cm howitzers, and 15cm Nebelwerfer rocket launchers.
Allied air superiority prevents any German air support in Normandy
How Do The Waffen-SS Play?
You can build your Waffen-SS force in a variety of different ways. You can build a force of elite heavy Tiger tanks. With their heavy armour protecting them, these veterans have suffered few casualties while they learned their trade. Now they are deadly. Whether you take them as the core of your force, or as a backup to lighter troops, they are always effective.
You can build a panzer force, either mixing types to take advantage of their different capabilities, or focusing on one type to maximise its strengths. Panthers are cheaper than Tigers, but offer much of the same benefits, so long as you can protect your flanks. The Panzer IV and SuG are cheaper, but still good enough to outclass Allied medium tanks. With their fanatical crews, the Allies will have to knock out every tank.
Like the rest of the Waffen-SS options (other than the elite Tiger tanks) your panzers are less skilled than their Army counterparts, their commanders are Old Hands, so units close to the company commander can use his skill when making tactics rolls to do clever things like Blitz Move or Shoot and Scoot. This can mitigate their inexperience and counteract their tendency to get hit more often than their Army equivalents. Their lack of skill makes the Waffen-SS cheaper than Army troops, Make use of the greater numbers you get to overwhelm the enemy, and if necessary their determination to keep fighting to outlast the enemy and achieve victory.
Your other option is to go for a panzergrenadier force. Infantry as fanatical as these can be hard to beat. When attacking, they rarely remain pinned down, especially when their company commander is nearby giving them re-rolls, and in an assault they will fight until they’ve taken the objective or died trying. In defence, they are equally tenacious. The enemy will have to kill them all to clear the objective, something that can be dreadfully expensive given the amount of firepower they possess.
The key to any Waffen-SS force is to keep the pressure on the enemy using your excellent and plentiful equipment and rely on your superb morale to outlast them.
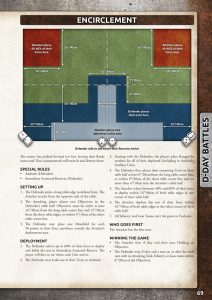
Normandy Campaign Missions
In common with the other D-Day books, D-Day: Waffen-SS has three new missions linked together with two of the standard missions into a campaign. The fighting is very fluid, from the counterattack on the Allied beachhead to a final dash to escape the Falaise Pocket. The first mission is Encirclement in which the Germans attack from the flanks trying to crush a salient formed by the Allied spearhead before more reinforcements can arrive from the beaches. The old standard No Retreat follows as the Germans attempt to keep the Allies penned in their beachhead.
The second new mission is Gauntlet, in which the Germans, cut off by the advance towards Caen, must dash down a narrow gap between two British forces to escape entrapment. With more units arriving from both sides as the game progresses, it’s an interesting challenge to hold the route open to extract your forces. Another standard mission, Bridgehead, follows as the Germans attempt to hold the Orne bridges open for the retreating forces to cross.
Finally, the third new mission is Into the Unknown, reflecting the loose fighting as the Waffen-SS attempted to delay the Allied forces pushing in the base of the Falaise Pocket in confused and open fighting. Like Dust Up, the fighting is across the diagonal of the table, but unlike that mission, neither side holds any objectives at the start of the battle. The combatants need to advance into No-Man’s Land to cover their own objectives and seize those of the enemy.
Who Are The Warriors
The D-Day: Waffen-SS command card pack includes six warriors: Ernst Barkmann, Emil Dürr, Adolf Peichl, Karl-Heinz Prinz, Rudolf Roy, and Michael Wittmann. All were awarded the Knight’s Cross. One of Germany’s highest awards.
Three of these soldiers were tankers in Normandy. Michael Wittmann, famed as Germany’s top-scoring tank ace, commanded the Tiger tank company that dramatically halted the British advance at Villers Bocage soon after D-Day. His elite crew make his tank truely deadly with its high rate of fire and re-rolls if it misses. In addition, his command tanks can be placed in ambush in addition to any normal ambushes!
Karl-Heinz Prinz led a Panzer IV company, making rapid and bold counterattacks to regain lost positions and stop British attacks. His card allows you to re-roll failed reserves rolls to bring his units onto the table. Ernst Barkmann was a Panther tank commander who had some interesting adventures when cut off by the American advance, claiming a number of M4 Sherman tanks before limping back to the German lines with a badly damaged tank. He’s a good shot and has a chance of surviving a hit that would destroy the tank of a lesser tank commander, giving him a chance to return to battle and fight on.
Rudolf Roy also commanded an armoured vehicle, a Jagdpanzer IV tank-hunter, with which he claimed 26 British, Canadian, and Polish tanks in five days, helping keep the Falaise Pocket open long enough for much of the German panzer force to escape to fight another day. His gunner’s shooting is deadly accurate and his careful use of cover makes him hard to hit as he stalks the enemy. Emil Dürr was also a tank-hunter, part of a unit of 7.5cm towed anti-tank guns. When his guns were knocked out, he gathered up Panzerfaust anti-tank launchers and hunted tanks on his own.
The final warrior is Adolf Peichl, a veteran of fifty close combats including the destruction of at least eleven tanks. When he’s fighting in an assault, he and any unit he’s leading will pretty much fight to the death, with him as a lethal whirlwind in the centre of the fight.
Ready For Battle
The D-Day: Waffen-SS book will give you some great new ways to use your existing D-Day: German army, as well as opening up new options for painting and army building.
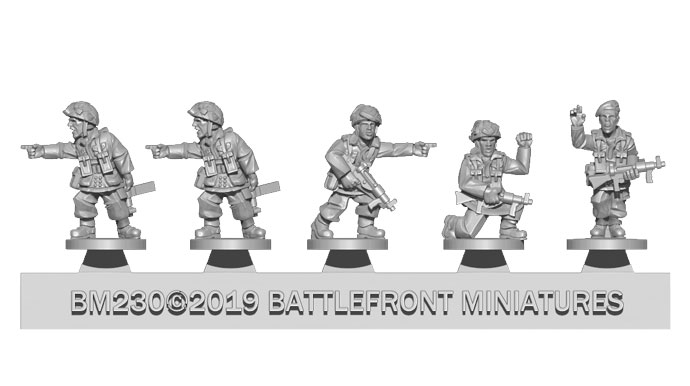
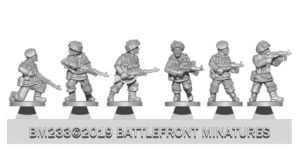
With the release of D-Day: British comes the first of our Thermoplastic figures, the British Airborne.
Since Thermoplastic is a relatively new technology, and as working with it is slightly different to any of our other plastic figures, it’s worth taking you through a few primers on how Thermoplastic behaves and how you can get the most out of our new figures.
The process through which the new figures are cast is similar to other casting methods for the plastics we offer- injection moulding of heated plastic. The point of difference with the new Thermoplastic technology is that the figures are cast in flexible moulds. The flexible moulds allow for undercuts, which means more detail on the figures can be cast, and that detail is much truer to the original design. Flexible moulds also allow us to broaden the number of poses we can deliver with the range of figures, meaning our infantry forces are about to get more dynamic than ever before.
None of these technical details are truly that relevant to us as modellers, but it is important to know that this casting method holds the fine detail we’ve all come to expect from Battlefront figures
Thermoplastic is a lightweight plastic with a medium amount of flex. Thermoplastic figures come on a sprue similar to the flexible plastic infantry, with eight or so figures on a single strip of Thermoplastic. Before you get started on your infantry, there are a few key differences between Thermoplastic figures and other infantry materials
Prep
As is the case with all miniature casting processes, Thermoplastic casting can occasionally leave a little flash or sometimes lines where the two halves of the mould join together. To clean these up you need to run a sharp hobby blade along the mould lines to slice them off flush with the actual figure. Filing or scraping the figure isn’t recommended and will leave a feathery residue behind. The Thermoplastic material can be cut or drilled out the same as any other infantry figure, so if you want to do head swaps or any other conversions, you will be able to as usual.
Gluing
Thermoplastic isn’t quite the same plastic as the stuff our hard plastic figures or vehicle kits are made of, and as such won’t weld with plastic cement. We recommend you use superglue to fix figures to their bases. You will also need to use super glue if you are doing any sorts of conversions on the figures themselves.
Painting
As always, it’s recommended to prime your figures before you paint them. Just like the flexible plastic figures, no paint will flake off the miniature with regular day-to-day flexing, however that doesn’t mean you shouldn’t prime the figures anyway to ensure paint adhesion. In any case, painting the new Thermoplastic figures offers no new difficulties or differences from your regular painting routine.
We are excited to get the first of our new figures out and in your hands for D-Day: British, and we are really looking forward to getting the most out of this new material as we refine and improve the process.
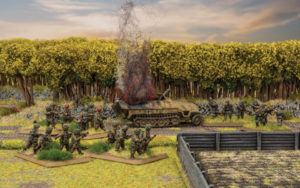
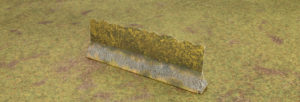
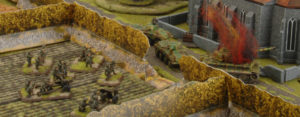
One of the key features of the Normandy Campaign was the bocage. A feature unique to that French countryside, bocage defined the combat of the Normandy breakout as Allied forces slogged their way through the thick vegetation, and German defenders sprung ambushes from every thicket and hedgerow.
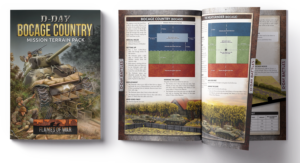
To make the bocage battles of Normandy accessible to Flames Of War players everywhere, and following the wild success of our D-Day: Beach Assault Mission Terrain Pack, we’ve put together the D-Day: Bocage Mission Pack- over 8 metres of cardboard bocage to match the bocage missions found in D-Day: British.
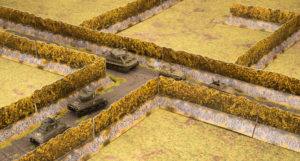
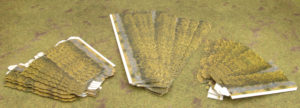
Bocage Country Mission Terrain Pack offers enough bocage (40 pieces, to be exact) to fill a full 4′ x 4′ (120cm x 120cm) bocage table, with corners, straights, and bocage of varying length.
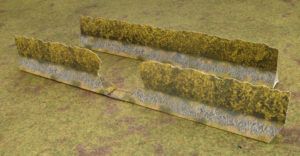
The bocage pieces are simple to assemble- so simple we already did it. All it takes to get started is to fold the bocage pieces into shape. Tabs and pre-run foldlines make setting up easy, and in ten minutes you have an entire table’s worth of bocage ready to set up in a variety of layouts.
Everything comes flat packed, and even when you’ve folded it all out for gaming, it fits away snugly in a file box for storage. The pack also contains an 8-page bocage scenario booklet, giving you everything you need to get started playing right from the word go.
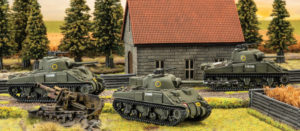
On June 6th, 1944 the Allied forces launched one of the largest amphibious assaults ever. This book follows the British and Commonwealth forces that overcame the German defences and claimed Sword, Gold, and Juno beaches as well as the breakout after. The forces in the book are broken down into three major groups: you have your regular war weary units that form the backbone of your forces, you have your Desert Rat veterans and lastly you have your elite troops like the Commandos and Airborne units. These options are perfect to build any list for D-Day and the breakout.
Parachute Company
Tough and deadly troops, able to hit hard in Assaults and hold their own when assaulted. Extra anti-tank with up to two PIATs in each platoon.
Light unit with a good selection of integrated units, Anti-Tank, machine-guns and artillery, almost a whole army unto itself. Can parachute into battle in airborne assault missions. With the extra PIATs and access to 6pdrs and 17pdrs in the formation, this formation is one that tanks will need to be wary of.
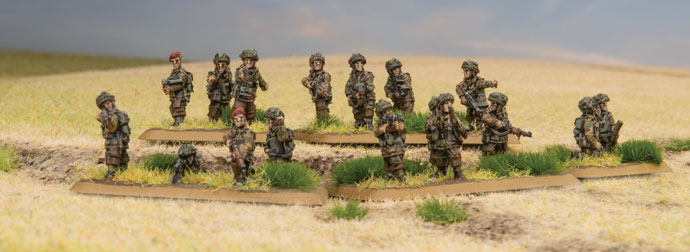
Airlanding Company
Elite deadly troops the Airlanding Company will be a hard unit to shift.
The Airlanding Company is well equipped with their own light mortar and up to two PIATs in each platoon. Has the option to take a fourth Airlanding Platoon. Can land by glider in airborne assault missions. Has access to two 6pdr Anti-tank platoons and a 17pdr platoon to give you all the anti-tank assets an Airlanding Rifle Company could want.
Commando Troop
The Commando Troops are some of the most elite troops you can find. Being Fearless Vets is good, having Deadly on top of that makes them assault monsters hitting on a 2+, and that’s even better. The Commandos have the standard platoon layout but with the Commando stats this unit is far from standard. Commando Troops are small with only machine-guns and mortar units integrated into the formation. This makes them ideal to match up with another formation that could use some of the best troops backing them up. Commandos are good at pretty much anything they do. If you need to assault an Objective, hold an Objective, or take out a stubborn enemy platoon, there is no other unit in the book better suited to the job.
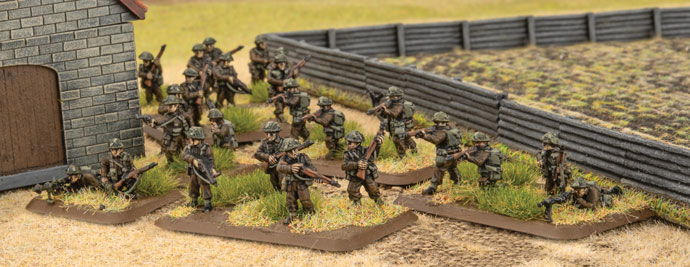
Two Rifle Companies The Desert Rats have less morale than the regulars, for this the Desert Rat troops are cheaper to field. The Rifle Companies make up the backbone of the British forces, they are reliable and well trained. Rifle Platoons are cost-effective platoons that are deadly in the assault. Rifle Platoons can choose to attack at night, giving your troops the cover of darkness while advancing. The Formation boasts loads of options, mortars, anti-tank guns, machine-guns, and Recon. The Universal Carrier Patrols of the Infantry Company gives your troops the edge by Spearheading your assaults. Wasps give your troops flamethrowers that can clear an Objective in a jiffy.
Easy to convert from Rifle Company in Fortress Europe. You can use the same models to play both the regular and the Desert Rat Rifle Companies.
Two Sherman Squadrons
The Sherman Armoured Squadron is your normal Sherman Company that has integrated Fireflies in your Sherman Troops, giving you the higher anti-tank of the Firefly tanks in each platoon. The Sherman DD Squadron is a unique formation that has your Firefly Armoured Troops formed into a single unit giving you a more focussed anti-tank unit. This leaves their normal Shermans on their own, with platoons of 3. Cost-effective medium tanks, the Sherman gives you a cheap tank that can hold its own in most tank duels. The Stuart Recce Patrol gives your tanks spearhead, and an effective light tank that can both screen infantry and other light tanks.
The Crusader AA gives you some much needed AA that can keep up with the tanks. Easy to convert from the M4 Sherman Tank Company in Fortress Europe.
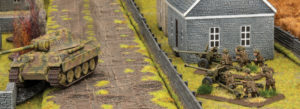
Churchill Armoured Squadron
Heavy Tanks that can take on enemy tanks and infantry alike. Need more armour? You can upgrade one of your tanks in each troop to a Churchill (Late 75mm), this gives the Churchill a whooping front armour of 11!
Need more AT? You can take a 6pdr in each unit to up your Anti-Tank to 11.
If you have the points you can bring up to five platoons of Churchills, along with Stuart Recce and Crusader AA tanks, all this gives you a really tough force in just one Formation!
Cromwell Armoured Squadron The Cromwell Armoured Recce Squadron gains the Scout rule in each of their platoons. They also don’t have a firefly in their platoons giving them a different feel altogether than the Desert Rats Cromwell Armoured Squadron. Desert Rats Cromwell Armoured Squadron have reduced morale compared to the Recce Squadron. Each unit also has a Firefly tank integrated into their platoons giving them a heavy Anti-Tank tank within their Troops. The Cromwell is a fast tank that has great Terrain, Cross Country, and Road Dashes. Use these tanks to outflank an unwitting opponent or to speed to an Objective before their reinforcements have time to arrive.
Motor Companies Like the Rifle Companies there are two kinds of Motor Company, the Desert Rat and the regular Company. The Desert Cat Company has a lower morale rating, making them cheaper than the regular troops. Motor Platoons are small and cheap, this is the perfect Unit to add to another much larger Formation that needs to use up those last points. Motor troops are equipped with Bren guns making them ideal defenders, and giving them a lot more firepower than their small size would denote. Motor Companies are like miniature Rifle Companies, with lots of options to fill out your points and help round out your force.
Support The Armoured Car Troop gives recon assets to any Formation that needs them. The M10 SP Anti-Tank troop gives you mobile heavy anti-tank. The 17pdr boasts a massive anti-tank of 14 that can penetrate most everything your opponents will throw at you. The 17pdr Anti-Tank Troop is great on the defense, just dig them in and watch your opponent worry about their tanks the whole game.
The Crocodile tank is the ideal infantry killer, with its rate of fire 5 flamethrower! Coming in at 21 points for three these tanks are well worth it. Along with their flamethrower they also have a gun and massive front armour of a Churchill (Late 75mm).
The AVRE is a deadly anti-infantry tank that can be devastating if your opponent lets it get close enough. The 25pdrs and the Priest Field Troop artillery give your forces some powerful artillery support on top of all your integrated artillery in your Formations. The Bofors Light AA Troop gives you AA in all of your formations, giving you protection from aircraft and a nice light anti-tank weapon in a pinch. The Typhoon Fighter-Bomber with its rockets can devastate even the heaviest of tanks. How Do The British Play?
The British have loads of interesting options that run the gambit from from the cheaper Desert Rat Motor Company to the most elite Commando Troops. It all comes down to your play style.
When you want to play defensively you will want to build your force around one of the Rifle Companies. These companies give you the core of what you need to be defensive, add in some of the Churchills and M10s to give you the armour you need to keep your enemy tanks at bay. Once dug in, a British Rifle Company is hard to shift, and scary to assault.
When you want to be aggressive you have loads of choices. For a more tank-focussed army the Cromwell tanks are fast but expensive, so you want to pair them with Motor Troops or Rifle Companies. If you go with Shermans you can better afford the more elite infantry choices like Airborne or Commandos. If you want to focus on infantry then the Airborne Companies and Commando Company are some of your best fighters, bring them and a unit of Cromwells in support and you will have a strong striking force. Normandy Campaign Missions D-Day: British book includes four more missions, three breakthrough Bocage missions and another Airborne mission. The first mission is the Brew Up mission, the defender is surrounded by attacking players who deploy in a random way.
The second mission Bocage Country is your normal Bocage mission that has the Attacker fighting their way though Bocage while the defenders try to hold them off as they wait for reserves.
The Third Bocage mission is The Meatgrinder mission. In this mission player deploy on either side of the table and both have to fight their way to a central objective that goes live on the sixth turn.
The last mission is an Airborne mission, Seize and Hold. In this mission we mix things up, with the Defenders having to attack into the Attackers who just air landed and took the objectives. The Defender will have to move quickly to as the the Attacker will win if they keep the Defenders at bay for six turns.
Warriors Of D-Day British
The British D-Day Command cards include six Warriors: Richard Pine-Coffin, Peter Young, Stan Hollis, Joe Ekins, David V. Currie, Sydney Valpy Radley-Walters. Richard. Pine-Coffin
Faced with defending Pegasus Bridge with only half of his battalion present, Lt-Colonel R. G. Pine-Coffin mounted a counterattack using available personnel to repel the German assault. Lt-Colonel R. G. Pine-Coffin is a Parachute Formation Commander that gives himself and any attached united better counter attack ratings. He also hits on a 2+ in Assaults.
Peter Young
To inspire his men’s confidence under fire, Lt-Colonel Peter Young told them that 15 feet of standing crops would stop a bullet. He may well have been right as none were hit. Either way, his men learned to make excellent use of any cover they could find. This Commando Formation Commander gives his unit the ability to go Go to Ground while on the move.
Stan Hollis
On D-Day, Company Sergeant Major (CSM) Stan Hollis saved D Company by single- handedly taking out two key HMG Bunkers and capturing 25 German defenders. This Rifle Company Formation Commander gives himself and units from his formation that are close-by improved Rally ratings.
Joe Ekins
Trooper Joe Ekins was a Firefly gunner who destroyed four tanks in a single day, including three Tiger tanks. One of the Tiger tanks he faced that day was commanded by Michael Wittmann, and some speculation would have it that Joe Ekins fired the shot that killed Wittmann, but that is still disputed to this day. This tank Warrior takes over a Firefly in one of your Sherman platoons. Ekins’ Firefly gains re-rolls To Hit, and he ignores the armour bonus on tanks he fires at that are over 16”/40cm away.
David V. Currie
Major David V Currie made a point of regularly checking on his men—whether they were his own tank company or another company that his tanks were working with. On several occasions he dismounted from his tank to lead his men under fire. This Sherman Tank Company Formation Commander gives himself boosted command range, and he may roll an additional dice when in assaults.
Sydney Valpy Radley-Walters
Major Sydney Valpy Radley-Walters has the distinction of being the western Allies’ top ace during the war. His tank squadron is one of many that claims to have taken out the German tank ace, Michael Wittmann. This Sherman Tank Company Formation Commander gives himself a better Blitz Move Order on a 3+ and forces any enemy tanks hit by him to re-roll successful armour saves. Command Cards
This set of command cards introduces a new type of Command Card to British forces, Title Cards. These cards have the title of a division and a special rule giving the division’s flavour. The key is that you can only have one title in your force.
Title Cards for the British give you access to more unique and flavourful formations. These cards allow you to use existing formations from the book to create new lists that focus on particular units or formations. These cards also add in Canadian Divisions, Guard Divisions, Scottish Divisions, Polish Tanks, Welsh Divisions and more. With a simple card you can transform a unit like your British Rifle Company to a Welsh Division that has a different Last Stand and Dig In ratings while you are near an Objective. That’s the real cool thing about Title Cards, they let you take existing armies you may have, and by adding one card you have another army that works a bit differently than it did before.
Along with the new Titles you have everything you have come to expect in a Command Card set, new Formations and interesting upgrades to old ones.
As a special side bonus the pack also comes with one American Command Card for the 29th. Those who know me know that the 29th is one of my favorite companies in Flames Of War, and I really wanted to add the 29th Infantry Card to the American Command Card box but the timing was off. This card lets you bring in Crocodiles from the British book- Crocodiles that were not coming out till the British book, so I had to wait, and was able to sneak it into this set.
One of the newest, most exciting weapons featured in the British Army book is the Marksman Self Propelled Anti Aircraft Gun (SPAAG). Following the Falklands War, Prime Minister Margaret Thatcher was livid at the losses sustained by the Royal Navy and the British Army, in part due to issues with the Rapier towed antiaircraft missile systems. Problems were experienced due to the need to “zero” the system and calibrate after each road move or unloading from a Naval landing craft. This meant valuable time of 15 minutes was wasted while cables were laid, stabilising of the sights and the calibration of the Blindfire radars was done.
It was acknowledged that the British Army’s reliance on missile systems was overoptimistic and a few within the Ministry of Defence noted that the Argentines had been pleased to have available Swiss Oerlikon twin 35mm Antiaircraft weapons on ground mounts for the Falkland Island defences.
Some of these weapons had even been captured and pressed into use with the RAF Regiment, who were delighted to have a solid backup to the longer ranged but troubled Rapier system.
Thatcher met with Minister of Defence Michael Heseltine in 1985 to discuss options as tensions had historygrown extremely hot with the Soviets. When the Iron Lady asked about options, Heseltine’s private secretary had a brainstorm. He pointed out that the Finns had expressed interest in a Marconi systems private development, the Marksman. This was a modular turret that could be mated to almost any Main Battle Tank. The Finns had in fact ordered a prototype system to be tested and put onto a modified Polish made T55. Although the testing was in the preliminary stages, the weapon
had shown promise.
The Prime Minister jumped at the idea, especially when advised that 15 fire units of twin 35mm Oerlikon KDA guns that had been captured in perfect order from the Argentine Army and were still currently in use with RAF Regiment reservists of 1339 Royal Air Force Auxiliary Wing. These weapons were confiscated by Royal Ordinance Factory in short order and integrated with seven other sets of 35mm that were in testing along with the sole prototype unit. This gave the factory enough for seven batteries of three Marksman SPAAG’s as an initial production run. More guns would be forthcoming from Krauss Maffei who provided spares from their busy Gepard production lines.
With the Challenger tank coming on line and taking over from existing MBT regiments, two squadrons of recently replaced Chieftains were stripped of their turrets and assigned to the fledgling project. For the first time since the Crusader SPAAG of World War II, the British Army had access to a world
class self propelled anti aircraft gun. Done in complete secrecy, this weapon would even surprise the average “squaddie” who expressed their shock and admiration at the exciting new designs when displayed for the first time on Salisbury Plain.
The Marksman provide an outstanding gun platform and was noted to be even more stable than the T55 the Finns had provided for testing, as the Chieftain was larger and more robust for the heavy recoil of the twin cannons. Some wag tried to describe it as a Brit Gepard, which was shouted down by indignant Royal Ordinance Factory staff. One superintendent pointed out that not only was it better armoured than the Gepard, it also had a laser rangefinder for engaging ground targets out to 8 kilometres, Marconi radar enabling air targets to be engaged out to 12 kilometres and fully stabilised gun sights for the commander and gunner. British technology had actually improved on the work of the Bundeswehr’s prized SPAAG.
More than a few officers bemoaned the fact that it had taken the Cold War turning hot to get the stingy taps of the Treasury to open a little more to provide funds for this superb weapon. Having access to ammunition kindly provided by the Argentine Army had proved helpful in getting reluctant bean counters to sign off on the process.
Initially, as the British Army was already heavily committed with the British Army of the Rhine, operators from the Royal Air Force Auxilary Regiment were integrated with British Army Chieftain crews to provide composite teams to operate the new equipment. This ensured a clever mix of
experienced gunners to operate the expensive new electronics and qualified drivers to maintain the frustrating Leyland engines of the Chieftain tanks. As Corps assets within British Army of the Rhine, the new vehicles were extremely popular and the seven batteries tended to see lots of action in the
Third World War. It was a particularly innovative weapon that took the battlefields in World War III as the Marksman. British troops soon found that the Marksman worked very well as a “backstop” support to the highly
successful Tracked Rapier. Occasionally ground commanders got overconfident and put the Marksman in the front line as a fire support weapon. Even with the thick hull armour of the Chieftain chassis, the vehicles didn’t stand up long against infantry RPG fire and cases are known of local commanders being castigated for such waste of scarce resources for inappropriate missions.
In game terms, you will find the system works very well as a complement to the existing missile systems as a mobile and well armoured platform capable of medium range effective AA support. As summarised to the troops on issue originally :
DO :
Keep the Marksman at range, behind the front line armoured forces it’s designed to protect.
Prioritise against air targets which are the bread and butter of the Marksman system.
Protect the Marksman with combined dismounted and armoured forces, ensuring it’s not swamped by enemy infantry.
Team up the Marksman with Tracked Rapier and if possible Blowpipe to ensure the full range of Air Defence assets are used appropriately. The key is to have Rapiers at the back, Blowpipe in concealing terrain scanning the skies while the Marksman keeps up with the armoured thrust forward.
Plan the use of the Marksman carefully, using it’s excellent rate of fire and mobility to provide an umbrella of firepower over your vulnerable armoured spearhead.
DON’T :
Risk the Marksman unit as a solo asset, remember you’re part of a larger team.
Assume that the Marksman is a dedicated armour killer. You only carry 20 rounds per gun of APFSDS ammunition. Make them count. Your primary mission must be air defence, the anti vehicle ammunition is not there for use as a primary choice.
Overestimate the range of the guns. Unlike the missile systems of the Rapier and Blowpipe that you’ve become used to, the Marksman is lethal – except at shorter ranges. Use the mobility of the vehicle to make the enemy pay. You have exceptional firepower and mobility and this should be used carefully.
Run the depleted formation, Marksman provide best support as a full unit.
Expose the Marksman to enemy fire until you’ve cleared the way. This secret weapon is priceless and not to be squandered in small scale efforts.
In conclusion, the combination of the two forces used here – Royal Tank Regiment and Royal Artillery – bring to mind the two mottos, which are respectively “Fear Naught” and “Ubique” (which translates as “Everywhere”) The Marksman truly allows your armoured crews to Fear Naught, Everywhere.
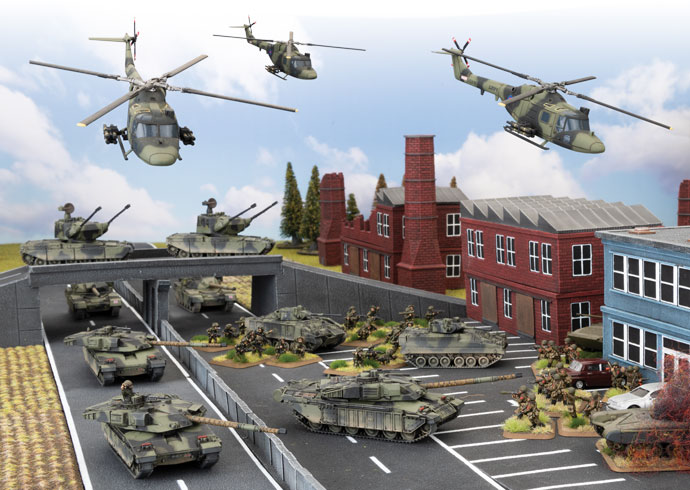
One of the things we’ve been most looking forward to with the release of WWIII: Team Yankee is the release of a selection of plastic aircraft to make bringing World War Three to the skies even easier!
After considering the customer feedback on the various aircraft in the WWIII: Team Yankee range, we explored the options available for getting plastic aircraft onto the table. As it turns out, there were a few ways we could get some of the aeroplanes of WWIII onto the table in plastic, and they included a variety of 1:144 scale model kits. To ensure that we weren’t adding a massive skill jump between Battlefront kits and these third party aircraft kits, it was up to Evan to run through each and every manufacturers kit and test out their ease of assembly, suitability to the theme, final look, and finally we settled on three kits to start with.
All three of these kits are manufactured by Academy, with a few additional resin cast pieces from us to make them suitable for combat in the skies above your WWIII: Team Yankee tabletop.
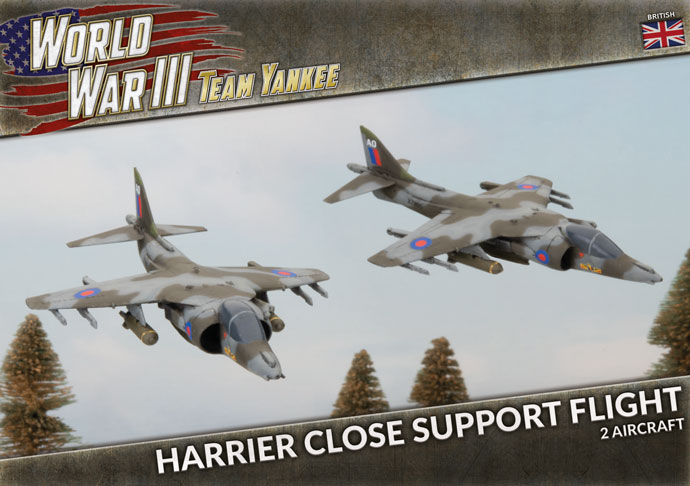
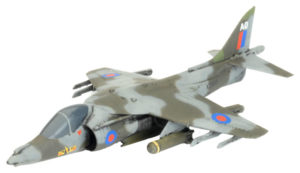
Being the first of the new WWIII: Team Yankee releases, the British are the first force to get their very own plastic aircraft, the Iron Division Harrier Close Air Support Flight. The famous ‘Jump Jet’ used by the British in World War III could swivel its exhaust nozzles down to allow it to take off vertically. As such, it was based out of supermarket car-parks, football fields, or other concealed locations close to the front line to reduce interference from Soviet intercepting aircraft, and to keep the rate of sorties higher than conventional aircraft.
The Harrier Close Air Support Flight is an effective attack aircraft, boasting both the 30mm Aden gun and the BL-755 cluster bombs. The Harrier’s role in destroying lighter vehicles, helicopters, and dropping cluster bombs on infantry is a key support role, made all the more easy to model, paint, and field, with the new plastic kit.
The SU-25 Frogfoot The Sukhoi Su-25 Frogfoot, known to its crew as the Grach (‘Rook’), is the modern-day equivalent of the legendary WWII Il-2 Shturmovik. It’s tough and sturdy, able to sustain multiple hits and still bring its pilot home. Flying low and slow, it can safely attack enemy troops in close proximity to its own. The SU-25 carries an impressive array of weaponry, including air-to-surface missiles and unguided rockets, on its ten under-wing hardpoints, as well as having a twin-barrelled GSh‑30-2 30mm cannon in the nose. The KH-25 Missiles come as a resin cast set of add-on pieces to make modelling your full kitted out Frogfoot easy.
The Tornado is the third plastic kit being made available right off the bat for WWIII: Team Yankee. The Tornado is a two spruce plastic kit, with a plastic cockipit, and a resin MW-1 Submunition Dispenser cast by us to add to the kit. The main role of the Tornado is as an Interdictor Strike (IDS) aircraft. The Tornado is armed with two internally mounted 27mm Mauser BK-27 auto-cannons and two AIM-9 Sidewinder missiles for self-defence. It can carry a variety of conventional bombs, as well as the MW-1 submunition dispenser that drops a variety of munitions, including the KB44 anti tank bomblet.
We are really excited to get plastic aeroplanes into WWIII: Team Yankee and we know you’ll all enjoy updating your airforce from hefty metal to sleek, lightweight plastic.
As many of you will know, the new British book for World War III : Team Yankee brings many fascinating and exciting new units.
Today I’d like to discuss one of the most radical changes of all – the Fox.
Firstly, there is a very exciting turning point happening in the game. One thing not many people have picked up on is the Fox. Yes, it’s a new reconnaissance vehicle for the British Army. But what people haven’t noticed is that this is NOT a regular British Army vehicle. The vehicle was run entirely in combat roles by Territorial Army units. This is reflected in the Fox’s statistics with Skill 4+ and Morale 5+ reflecting “Part Time” Army personnel. For the first time, you can see the difference between NATO full time professional troops and their reservist counterparts. Personally I can’t wait to see how National Guard and Army Reserve can be covered for US Army and USMC…
Of course, you get all of the advantages of a Scimitar with the same good armour front and side, same gun and night fighting gear but with road mobility and one point cheaper for four vehicles.
As a cost effective scout vehicle, the Fox hits hard.
With AT10 and coaxial machine gun like the Scimitar, you enjoy the same hard hitting ability on the same front armour 2, side armour 1 but with top armour 0 reflecting the increased vulnerability of the four wheel chassis over the tracked Scimitar.
Where the stats really change is mobility. Like the real vehicle, the Fox has same tactical move of 6”/15cm (or 10”/25cm with Sneak and Peek, due to the commander also being loader and radio operator) while the cross country dash drops to 12”/30cm and terrain dash drops to 20”/50cm and (compared to Scimitar on 20”/50cm and 28”/70cm).
Where the Fox really shines is Road Dash of 48”/120cm compared to Scimitar 36”/90cm. With huge road networks in western Europe, this road dash is a fantastic improvement and really helps with the improved points level. There is no reason you should be going offroad as the road mobility
makes this vehicle so invaluable.
The Fox is designed first and foremost as a reconnaissance asset and should be used as such. As I’ve heard from many current and former armoured reconnaissance crews, if you have to fight enemy for information with your (lightly armed and armoured) vehicle, then you’ve already lost.
One fun fact about the Fox is that small numbers were used for airmobile support of British airborne forces. You can do this by choosing the support box option as noted above and use in support of an Airmobile Formation. Historically the Fox could even be parachuted into an operational area, giving the British Army a lightweight and fast support vehicle for their light airmobile forces.
The Fox fulfils its role nicely and provides an excellent new tool for the discerning British Commander. Consider using a troop as a support option for your new Challenger or Warrior formations, leading the way and finding the best road routes for the heavier and slower tracked assets of the BAOR.
As the eyes and ears of the Regular Army, let your TA legends show how it’s really done. And best of all, do it in style in a fantastic new vehicle.


 That’s right, products marked with this sticker will have the older D-Day: German Unit Cards inside AND the new D-Day: Waffen-SS Unit Cards! How good is that!
 Whilst products marked with this sticker will have both sets of Unit Cards AND two sets of gun crews – one set of Heer (normal German army) crews, and another complete set of Waffen-SS crews made out of our new thermoplastic.
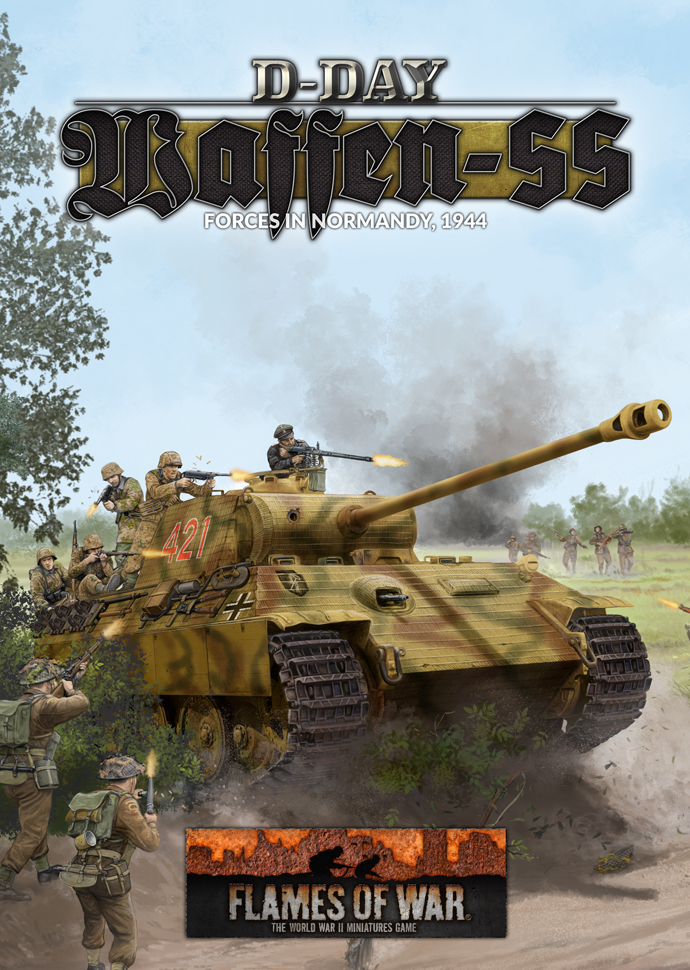


 Normandy Campaign Missions
 Who Are The Warriors
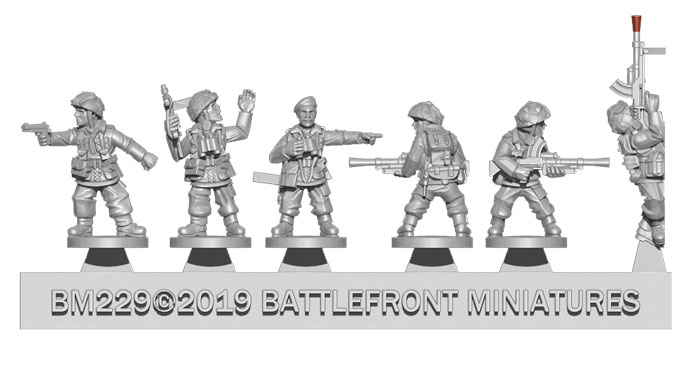
 The pack also contains an 8-page bocage scenario booklet, giving you everything you need to get started playing right from the word go.
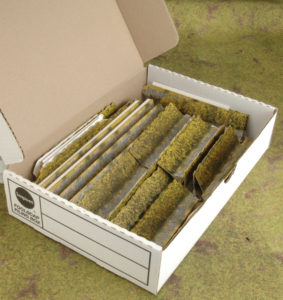
 On June 6th, 1944 the Allied forces launched one of the largest amphibious assaults ever. This book follows the British and Commonwealth forces that overcame the German defences and claimed Sword, Gold, and Juno beaches as well as the breakout after. The forces in the book are broken down into three major groups: you have your regular war weary units that form the backbone of your forces, you have your Desert Rat veterans and lastly you have your elite troops like the Commandos and Airborne units. These options are perfect to build any list for D-Day and the breakout.
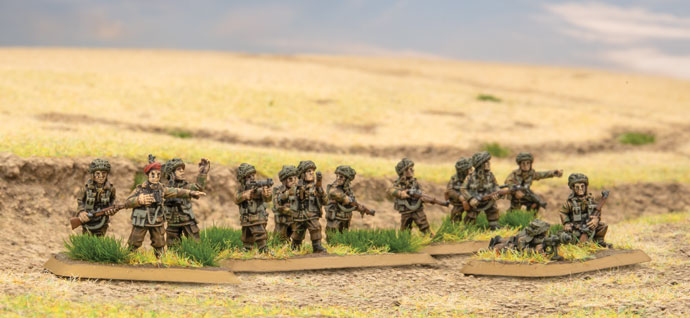
 Churchill Armoured Squadron
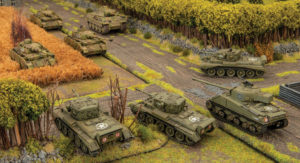
 How Do The British Play?
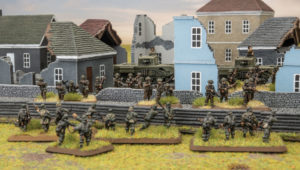 Normandy Campaign Missions
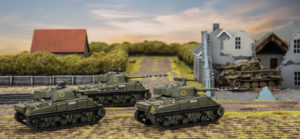 Richard. Pine-Coffin
 Command Cards
 One of the newest, most exciting weapons featured in the British Army book is the Marksman Self Propelled Anti Aircraft Gun (SPAAG). Following the Falklands War, Prime Minister Margaret Thatcher was livid at the losses sustained by the Royal Navy and the British Army, in part due to issues with the Rapier towed antiaircraft missile systems. Problems were experienced due to the need to “zero” the system and calibrate after each road move or unloading from a Naval landing craft. This meant valuable time of 15 minutes was wasted while cables were laid, stabilising of the sights and the calibration of the Blindfire radars was done.
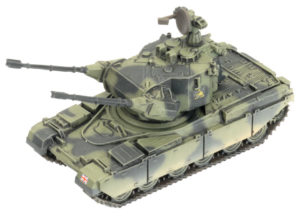 The Prime Minister jumped at the idea, especially when advised that 15 fire units of twin 35mm Oerlikon KDA guns that had been captured in perfect order from the Argentine Army and were still currently in use with RAF Regiment reservists of 1339 Royal Air Force Auxiliary Wing. These weapons were confiscated by Royal Ordinance Factory in short order and integrated with seven other sets of 35mm that were in testing along with the sole prototype unit. This gave the factory enough for seven batteries of three Marksman SPAAG’s as an initial production run. More guns would be forthcoming from Krauss Maffei who provided spares from their busy Gepard production lines.
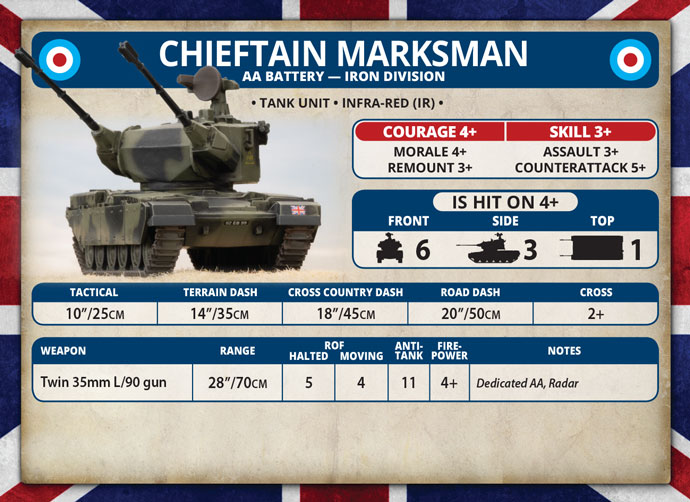
 Being the first of the new WWIII: Team Yankee releases, the British are the first force to get their very own plastic aircraft, the Iron Division Harrier Close Air Support Flight. The famous ‘Jump Jet’ used by the British in World War III could swivel its exhaust nozzles down to allow it to take off vertically. As such, it was based out of supermarket car-parks, football fields, or other concealed locations close to the front line to reduce interference from Soviet intercepting aircraft, and to keep the rate of sorties higher than conventional aircraft.
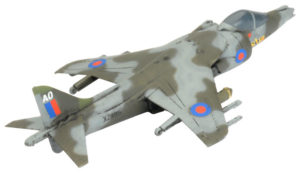 The Harrier Close Air Support Flight is an effective attack aircraft, boasting both the 30mm Aden gun and the BL-755 cluster bombs. The Harrier’s role in destroying lighter vehicles, helicopters, and dropping cluster bombs on infantry is a key support role, made all the more easy to model, paint, and field, with the new plastic kit.
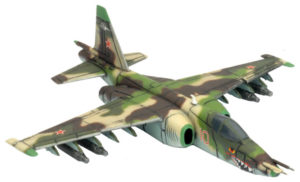 The SU-25 Frogfoot The Sukhoi Su-25 Frogfoot, known to its crew as the Grach (‘Rook’), is the modern-day equivalent of the legendary WWII Il-2 Shturmovik. It’s tough and sturdy, able to sustain multiple hits and still bring its pilot home. Flying low and slow, it can safely attack enemy troops in close proximity to its own. The SU-25 carries an impressive array of weaponry, including air-to-surface missiles and unguided rockets, on its ten under-wing hardpoints, as well as having a twin-barrelled GSh‑30-2 30mm cannon in the nose. The KH-25 Missiles come as a resin cast set of add-on pieces to make modelling your full kitted out Frogfoot easy.
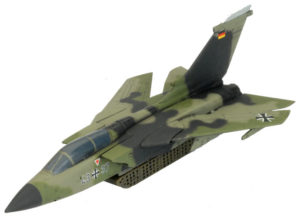 The Tornado is the third plastic kit being made available right off the bat for WWIII: Team Yankee. The Tornado is a two spruce plastic kit, with a plastic cockipit, and a resin MW-1 Submunition Dispenser cast by us to add to the kit. The main role of the Tornado is as an Interdictor Strike (IDS) aircraft. The Tornado is armed with two internally mounted 27mm Mauser BK-27 auto-cannons and two AIM-9 Sidewinder missiles for self-defence. It can carry a variety of conventional bombs, as well as the MW-1 submunition dispenser that drops a variety of munitions, including the KB44 anti tank bomblet.
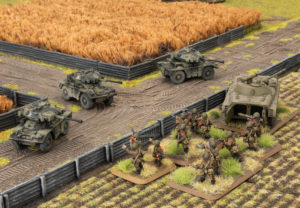 Today I’d like to discuss one of the most radical changes of all – the Fox.
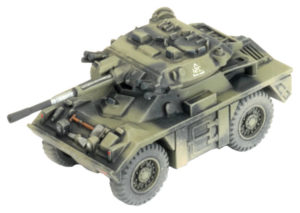 As a cost effective scout vehicle, the Fox hits hard.
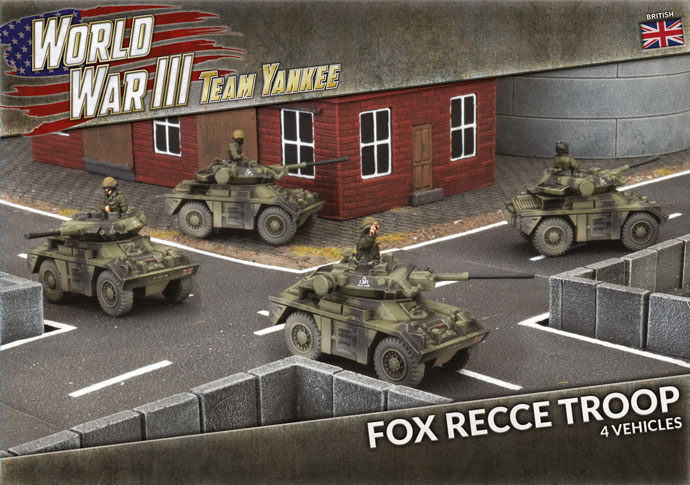 Where the Fox really shines is Road Dash of 48”/120cm compared to Scimitar 36”/90cm. With huge road networks in western Europe, this road dash is a fantastic improvement and really helps with the improved points level. There is no reason you should be going offroad as the road mobility
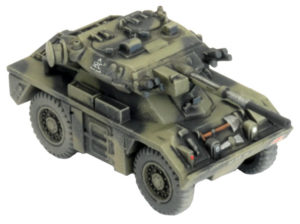 One fun fact about the Fox is that small numbers were used for airmobile support of British airborne forces. You can do this by choosing the support box option as noted above and use in support of an Airmobile Formation. Historically the Fox could even be parachuted into an operational area, giving the British Army a lightweight and fast support vehicle for their light airmobile forces.