Boy, we sure had a great weekend didn’t we? Thanks for joining us for the launch of D-Day: German. That’s all we’ve got this time round, but be sure to check back here for the next launch.
with Victor Pesch and Wayne Turner (Battlefront NZ)
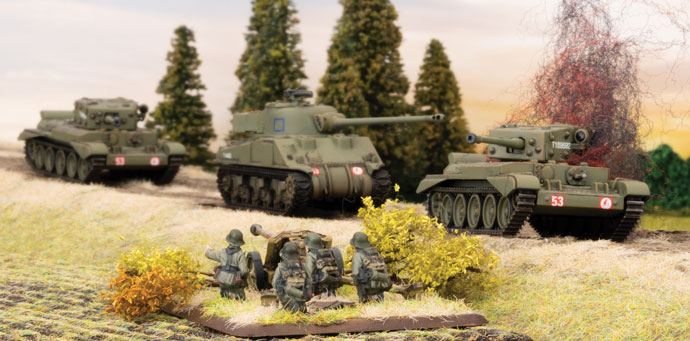
To round out our D-Day: German coverage, Wayne and Victor threw down their expertly-painted forces on a stunner of a table and duked it out. There can be only one winner- check it out here…
Check out my suggestions for setting up a table so you can have dynamic and exciting battles whenever you play Flames Of War. If you like the terrain I used here you can pick your own sets, and more, up right here…
Bloody Omaha Mini Campaign,
Game 1 Andrew Vs Ashleigh
Battle Report by Andrew
Today we decided to play a quick day long Bloody Omaha Ace Campaign! The plan was to use the Bloody Omaha deck to play three games, using our hobby league 50 point armies, playing among the NZ league members that I could. We decided to roll off the first mission in the campaign as we only had time to play three games. The Germans won the roll so I started my first game against Ashleigh (she was playing for the Germans). Her British army consisted of nothing but armor, a nasty match up for my 50 point 29th infantry division Assault Company. We were both running our 50 point hobby league armies.
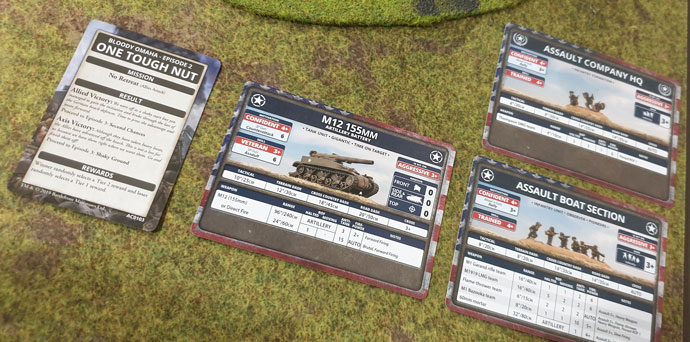
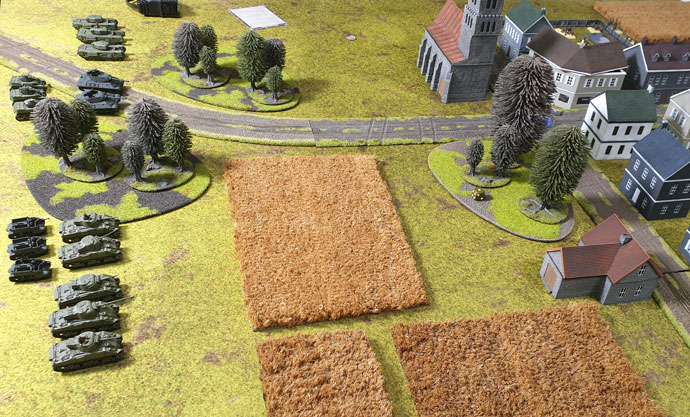
Setting up the game we were playing the Episode 2 card, One Tough Nut. This mission is No Retreat! Since both Ashleigh and I are playing Allied forces we rolled off to see who was defending, luckily I am defending. I quickly choose to defend the city thinking that was my best bet. The game started off as you would think, the tanks moved forward and took pot shots at range against my infantry. On my first turn I ambushed my 155 artillery to hit Ashleigh’s Churchill tanks, I managed to knock out one. Luckily Ash had one Churchill that stayed bailed and I was able to weather the return fire only suffering a few bailed out artillery tanks.| The game went on trading shoots with not much changing; I started moving my infantry through the buildings from reserves. This lasted until one turn when Ashleigh killed 5 infantry teams in one platoon with one round of shooting form her Carriers! I knew I would have to move! My next turn saw my artillery take out Ashleigh’s Churchill tanks and my bazookas getting lucky killing two Stuarts with moving shoots! Both the Churchill and Stuart tanks ran away! In reaction Ashleigh moved back and started shelling me from range, I responded by taking pot shots with artillery bombardments among her tanks, the third turn of bombardments I hit four of her tanks, all but one of them rolled a 1! With firepower 2+ my artillery took out the core of Ashleigh list, and it was just a matter of a few more morale rolls before her tanks retreated off the table. A victory for my 29th infantry Division. I would move on to my next game with Luke, due to having just played Hasty attack in our last game we played, Luke and I decided to play Dust Up instead.
Bloody Omaha Mini Campaign,
Game 2 Andrew Vs Luke
Battle Report by Andrew I also got to play in game two, this time I am playing against Luke. He brought his panzer IVs and again I was facing an all tank list.
I decided to do my normal reserves at 50 points for this match up even though I didn’t get to put my 155s in ambush. I stuck my two infantry units around the objectives and my 155 in the back comer prepping for an artillery strike.
Luke places a single Panzer IV unit in his deployment area and I was suddenly filled with hope, I only had to knock out one tank unit, then I could get to his objectives with my reserves! Turn one went to Luke and he rushed me, I was not expecting that, but I prepared myself for conflict sooner than I thought.
Turn one nothing really happened on turn two I saw that Luke was rushing for my 155s. He moved behind the church making hard for me to direct fire at him. I instead fired on him with infantry I had in the town, they moved forward through the buildings and opened up on his tanks, doing nothing. “Well”, I thought “That’s my artillery dead next turn”. Luke next turn had him wanting to Blitz around the building, 4 Panzer IVs would make quick work of my FA0 artillery tanks. But he failed the roll and then failed to hit me at all! Luck was on my side and I decided to open up on his tanks with my 155s! I knocked out two tanks! I really could not have asked for more.
Next turn I only lost two of my 155s, a bargain my 2 artillery for two Panzer IV tanks. On my turn I was able to bring in an infantry platoon from reserve, and they killed the last two tanks! Hurrah, now to deal with the rest of Luke’s tanks coming in from the other side of the table! Luke’s next turn he move his HQ and his other panzer 4 platoon up and destroyed the last of my 155s. ouch well it isup to my bazookas to hold him off.
On my turn I moved one of my infantry platoons to reinforce the forward objective and got one more reserved that made a beeline to Luke’s table edge getting 2 turns away from capturing the objective!
Feeling the pressure Luke assaults my infantry and two of me bazookas bail two of his tanks on their way in. He misses, my bazookas miss on their assault. Luke fails his counter assault and I take his two bailed tanks! His company command moves in to assault and my bazookas straight up killed both of Luke’s HQ tanks, winning me the game, and earning themselves a nice medal to boot! Another Victory for the 29th Infantry Division! We moved on from the Second Chances card to Rat Catchers, for this game Phil and Cameron are facing each other, Phil playing for the Allies and Cameron for the Axis. I’ll leave it to Phil to write up that final battle report.
“ Fast as a greyhound, Tough as leather, Hard as Kruppsteel, Greyhound forward!”
– 116 th Panzer (Windhund) Division – Motto
After the successful Normandy D-Day landings, and the hard fighting at
Caen and lower Normandy to hold tha Allies in check, the Germans were taking massive losses. Just from the D-Day landings on the 6th June until the 18th June – the German 7 th Army had lost 97,000 men, including 5 Generals. On the 28th of June the 7 th Army Commander General Dollmann died of a heart attack. The pressure on the German forces was enormous, and they were slowly being forced back through the Normandy bocage, until they finally broke with the Allied Breakout in Operation Cobra in late July. Finally with the German forces retreating towards the Falaise Gap (from Sept to Aug) to try to withdraw safely into Germany, both the 9th Panzer Divison and the 116th Panzer Division played roles in trying to slow down the Allies and allow the other German forces to retreat.
9. Panzer
The 9th Panzer Division had been fighting the Russians on the Eastern Front up until April 1944, and had been sent to France to rebuild in May 44, like many other Divisions that had been mauled on the Eastern Front were doing. It took replacements of 31 Panzer IIIs, 74 Panzer IVs, 20 Assault guns and 15 Panthers and 200 other vehicles.By the time the Allies invaded in D-Day with had a strength of around 150 tanks and 12,800 men, but they had not had time enough to sufficiently train up to their previous standard, but still in better conditon than other Divisions. They were not really deployed in strength until after the breakout of Cobra, to try to halt the Allied advance, and as it was committed in only bits and peices as units arrived at their start points, they never really gathered enough strength to stop the Allies. Instead they should have been committed in one cohesive counter attack.They did escape the rout of Falaise, but had lost most of its vehicles.
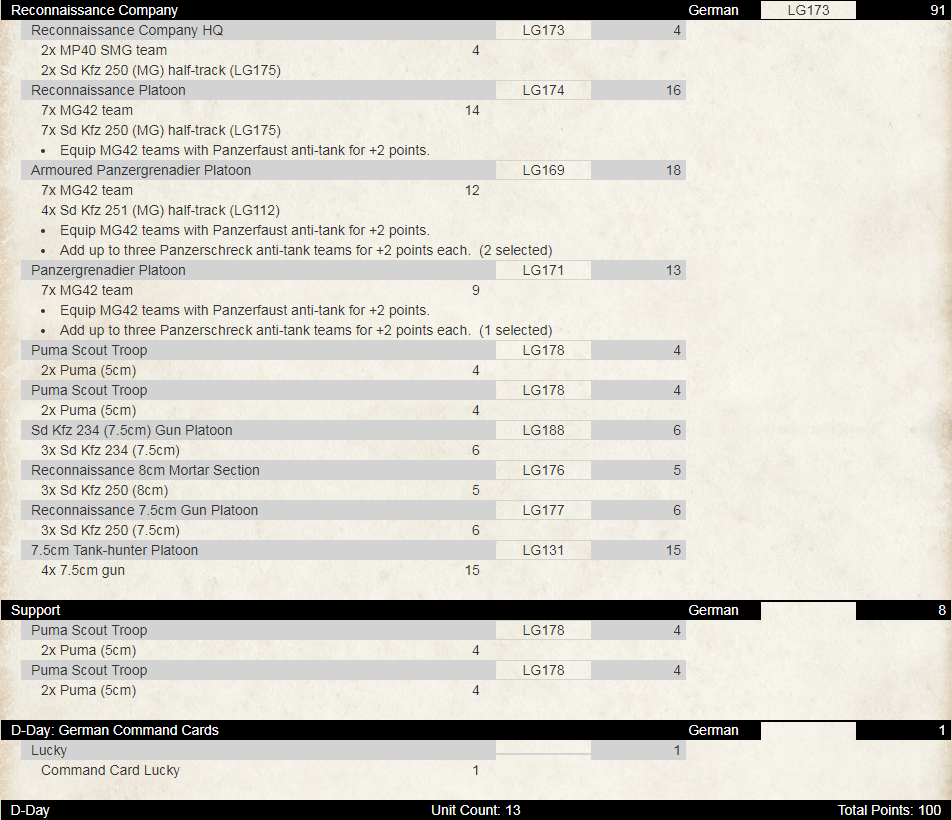
In the D-Day German Command Card pack, you can take a Formation that represents this division. To represent their lack of time to rebuild and give the new recruits sufficient training, they have the Rebuilding rule, which gives them a reduced Skill value of 4+ on any Tactics roll. So all units in your Tank or Panzergrenadier Company Formation must take this, for -1 point per unit.
While this may seem like a bad thing, depending on what you take, this
may not be so detrimental and the extra points you get can get you some extra units. I have made up a Panzergrenadier Company below to show how this can be used. So using the 9th Panzer Division Command Card, I have managed to get
an extra 8 points, which I used to get two extra scout troops, or give both of
my Panzergrenadier Platoons Panzerfausts and Panzershrecks, depending how you look at it. Also in a lot of the cases the units I gained the points from, don’t use a tactics movement order very often(eg. Gun teams would only use it for digging in) so there is really no huge penalty for them having the Rebuilding rule. Also I have managed to use units that would represent fairly well a historical force of the 9th Panzer Division, as it would have fought at the time.
116. Panzer
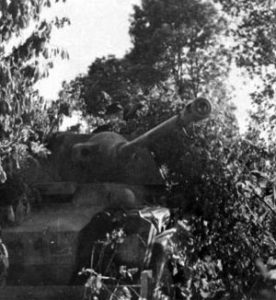
The 116th Panzer Division, also known as the Windhund or ‘Greyhound’
Division was made from the remnants of two different divisons in March 44 in Western Germany. The 16 th Panzergrenadier Division ( that had been mauled on the Eastern Front near Stalingrad) and the 179th Reserve Panzer Division, a second line formation that had been on occupation duty in France since 1943, were combined to form the ‘Greyhound’ Division. They were still training in northern France after the D-Day landing, and were not committed to fighting until the 28th July, and saw heavy fighting against the US 2 nd Armoured Division around the 29th and 30th July. They were then used in a defensive role from then on, in trying to slow the Allied advance and allow the retreat through Falaise. It was given the task with the 2nd SS Panzer Division of holding the Pocket open to allow the other forces to withdraw. Finally they did manage to retreat through the Gap, but had only 600 infantry and 12 tanks left.
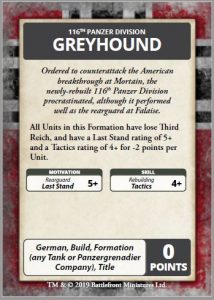
The D-Day: German Command Card that represents the 116th Windhund
Division, has not only the Rebuilding rule, but also Rearguard. Rearguard
means they lose the Third Reich rule that German forces usually have, and
instead have a Last Stand of 5+. To make up for this you -2 points from every unit in the Formation. This will make your units very brittle as they start to take casualties, so it would be a good idea to take larger units to make up for this, if you can. I feel to get the best out of this card, it should be taken with a Panzergrenadier Company, which can afford to take losses. Taking it with a Tank Company does not provide much benefit, and it takes away the traits German armour usually needs to succeed. So by using the 116th Command Card I saved 18 points, and I have tried
to maximise every unit in the formation. This force can pump out a huge
amount of firepower vs infantry, and has Pak 40s and Jagdpanzers for taking out Allied armour. The light AA platoon can also be useful for denying a flank against light armour and infantry, as well as giving the Jabos second thoughts.I think this would be a fun list to play, just make sure you move your HQ
around to where he may be needed for last stand rolls.
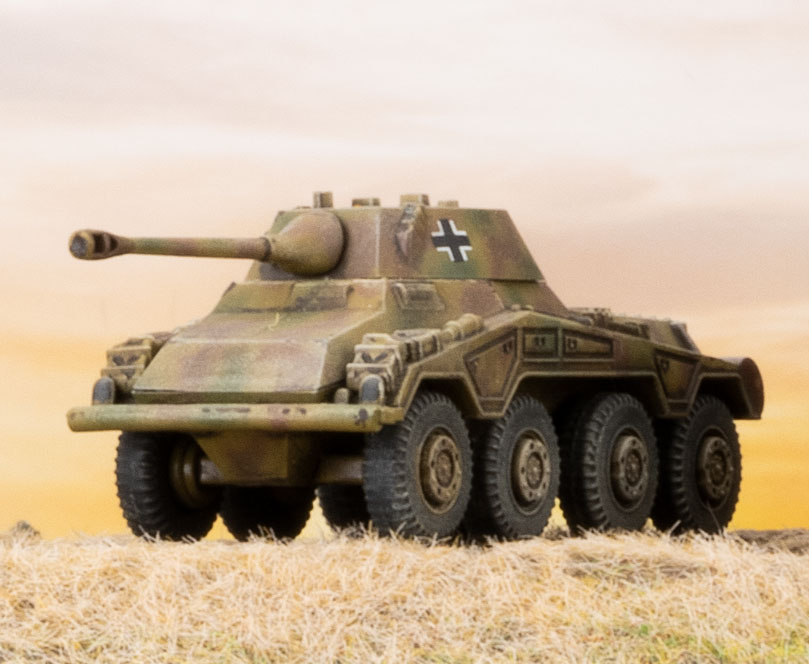
One of the many neat bits of kit you can find in D-Day: German is the Puma and its variants. To give you a bit of background on this unique beast before you bring it to the table we’ve unleashed another great historical article form the Flames Of War archive.
“The best patrols I had were those with clean guns. Even worthwhile targets were only reported and not engaged; that is the business of others. A troop leader with a tendency to bang away is useless for reconnaissance purposes since he is soon located by the enemy and chased like a rabbit. A report giving the location of an enemy tank leaguer is of infinitely more value than five shot-up lorries.”
– Oberst a.D. Fabian von Bonin von Ostau on German armoured reconnaissance tactics
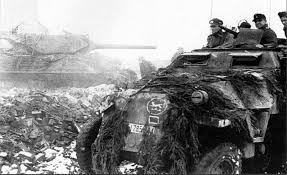
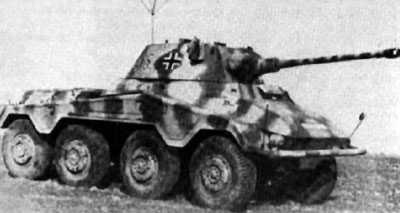
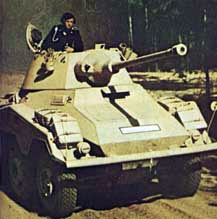
The 234 series of armoured cars was one of the most advanced concepts in wheeled fighting vehicle designs to appear during the war. It had improvements in armour, speed and range. In its original 1940 concept the 234 series was to operate in hot climates. The Czech firm Tatra produced its air-cooled V-12 diesel engine that had an out put of 220hp. The Bussing organization made the hull, which was made of monocoque construction. Daimler-Benz and Schichau were jointly responsible for the turret.
The Puma also addressed the most common complaint among armoured car crewmen; the lack of firepower when forced to engage the enemy. It included the same 50mm KwK L/60 gun carried in the Panzer III Ausf J and L tanks in a cramped enclosed turret with all around traverse. The gun did feature a muzzle break and the vehicle carried 55 rounds for the main gun. The weight of the 50mm gun and turret did result in the loss of some speed for the Puma, but this proved to be insignificant in the vehicles combat performance.
By the time of the Normandy campaign the basic organization of the armoured recon battalion had changed from its original 1939 organization.
Battalion Headquarters
Staff Company (Stabskompanie)
No. 1 Armoured Recon Company (Panzerspahkompanie)
No. 2 Recon Company (Aufklarungskompanie)
No. 3 Recon Company
No. 4 Heavy Company
Supply Company (Versorgungskompanie)
In practice this organization was only theoretical. The Pumas were to make up the Panzerspähkompanie of all Panzer divisions, but by the summer of 1944 there were not enough Pumas to fill the organisational needs of Germany’s Panzer divisions.
The Sd Kfz 234/2 would see action in Normandy in three Panzer divisions. 2. Panzerdivision and Panzer Lehr Panzerdivision were both fully equipped with the “Puma” having a compliment of 26 vehicles. The 2. Panzerdivision’s along with the Panzer Lehr division’s Pumas can be represented with the D-Day: German. First SS Panzer “Liebstandarte Adolf Hitler” also had a number of Puma armoured cars but did not posses a full compliment of them.
The combat techniques of the Puma were to see but not be seen and engage the enemy only when necessary. The radio was its most important weapon for its primary mission. Most of the time the Pumas were organized into three car groups for intelligence gathering missions on enemy movements and locations. Of all the missions the Puma crew were assigned infiltration was the most difficult. Oberst a.D. Fabian von Bonin von Ostau explains: “The initial penetration into unknown enemy territory was difficult. For this purpose our own local attacks were taken advantage of before the enemy could recover his balance. When one had achieved some penetration, the advance became easier.”
German crews learned important techniques to improve stealth such as easing the vehicles in to gear and running in low gear so they made very little noise. This was opposed to American crewmen who were known for ‘gunning’ their engines and thus giving away their positions to a skilled observer. The Puma were used to find the enemy, screen the flanks, and the companies were only used together in certain situations such as to screen the division during a withdrawal. According to Heinz Guderian they conducted “the ground reconnaissance for the panzer divisions they were assigned to. Only in open terrain, when being followed or to protect a withdrawal is the company used together.” The Puma performed well in its traditional roll and even showed strength on the attack.
The Pumas first saw combat in Normandy with the Panzer Lehr division’s drive into the invasion zone on 8 June. A few days later on the night of 13 June Pumas of 2nd Panzer Division engaged elements of the US 26th infantry near Caumont which had inconclusive results.
The Panzer division’s greatest enemy in Normandy proved to be the Allied fighter-bombers and the Pumas struggled with the foe as well. The stealth and infiltration techniques practiced by the Aufklärungs companies whose emphasis was on seeking cover during the day did help a high percentage of Pumas to survive the heavy damage the Panzer division took during Normandy. Of the original 26 Pumas from the Panzer Lehr division that started the campaign 8 survived Falaise Gap. In that same time only 20 tanks survived out of the starting strength of 109.
As the Panzer divisions involved in the Normandy campaign were rebuilt in the fall of 1944 the Sd Kfz 234/2 was no longer available in any numbers and was replaced with the more readily available Sd Kfz 234/1 and Sd Kfz 234/3 at that time. With the end of the campaign in Normandy, so too ended the reign of the Puma as the Panzer division’s premiere armoured car.
Sources Milsom, John and Peter Chamberlain, German Armoured Cars of World War II, Charles Scribner’s Sons, New York: 1974.
Perrett, Bryan, German Armoured Cars and Reconnaissance Half-Tracks 1939 – 1945, Ospresy Publishing, New York: 1999.
Having completed my first Hobby League army and played a couple of games, found I was missing building and painting an army. So back to D-Day: German it was last gaming night. With others in the club discussing Panthers and Tiger lists and their merits, I found the Stug Assault Gun Company calling out to me. So working on a 100 point limit I drafted up my first list. I have gone all out complete sections of StuGs and StuHs. I am planning on
using the StuHs as an anvil in the centre of my army and using the StuG
platoons as the hammers on the flanks. The StuHs also have some other great benefits on the table: Artillery for when they have no direct fire options and with Anti-Tank 3 they have a good chance of taking out enemy tanks or at least a bail. Adding in Brutal, HEAT and Smoke these are going to form the solid core of my force.
In my recent games I have found my infantry to be invaluable, I was tempted by a platoon of Fallschirmjaeger but points wise just could not fit them in, so I took Beach Defence Grenadier Platoon. I am not expecting great things from these troops. But They are going to sit on any objectives I have and dig themselves in and hopefully be a tiny thorn against my opponent. To round out the list I dropped in 6 Nebelwerfers as I want to try out the salvo template and have another smoke option on the table. So to ensure that both the StuHs and Nebs can fire have added in a Panzer III OP.
I’m really looking forward to playing with this list and seeing how it fairs on the table.
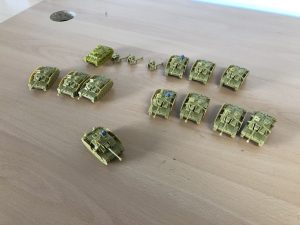
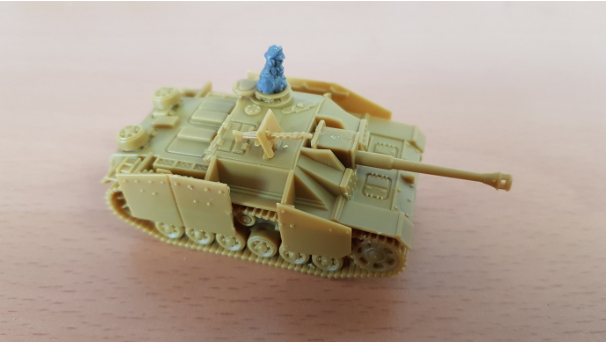
So with the list completed I got on to building some models. Over the last
couple of lunch breaks I have managed to assembly the following models:
With most of the army complete I need to build one more StuH and then the 2 HQ StuGs and 3 more Nebs, the infantry are already primed so I will start work on those over the course of this week.
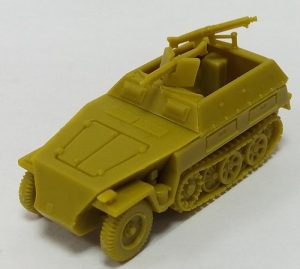
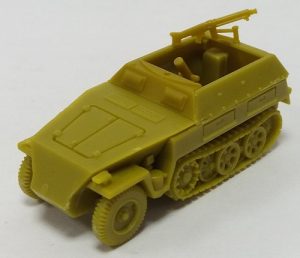
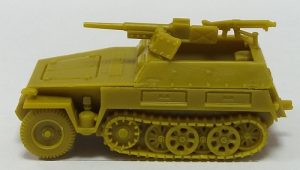
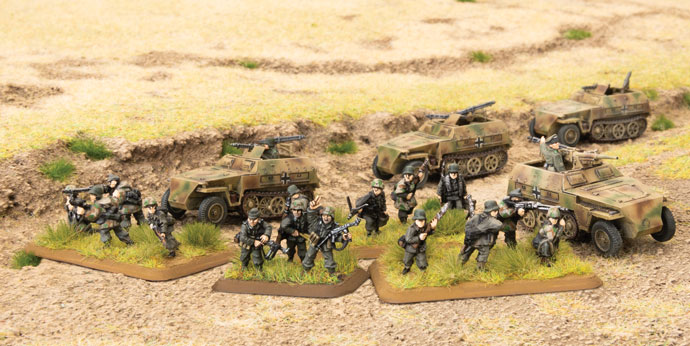
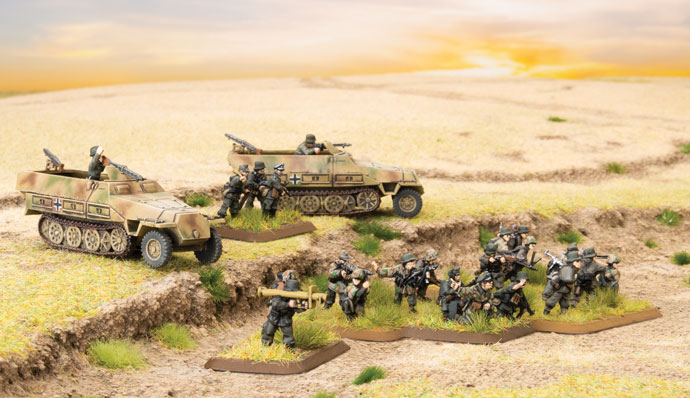
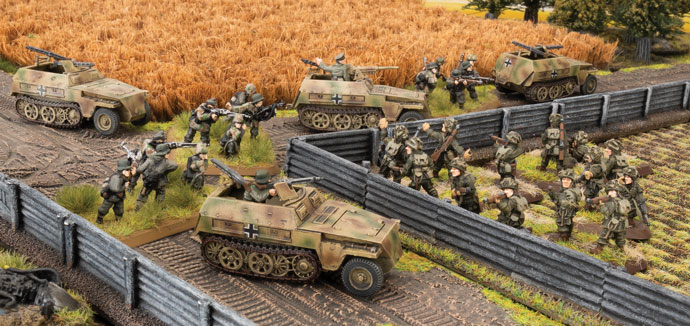
The Sd Kfz 250 was the light armoured personnel carrier of the Wehrmacht, providing a smaller but faster counterpart to the Sd Kfz 251. The shorter wheelbase made it less capable in crossing obstacles, but its greater speed was an asset for armoured reconnaissance battalions. Each transport
could hold 4 or 5 men, also known as a Halbgruppe (half-group).
The chassis was also ideal for carrying support weapons that could keep up with the motorised infantry, including 8cm mortars, as well as 3.7cm and 7.5cm guns. A total of 7,500 units were built by the end of the war in a wide range of variants, including Erwin Rommel’s famed command vehicle,
the ‘Greif.’
View from the Factory
After this kit was developed, the factory team had a field day, test assembling the full range of variants and checking parts for quality and compatibility. MG details had to be just right, and the 2cm turret had to fit together correctly. I think we did a pretty good job, if I do say so myself.
The Sd Kfz 250 sprue has a tremendous amount of flexibility, and we’re quite proud of how many different versions you can build from one kit. You can add Sd Kfz 250/9 armoured cars in a Scout Troop to provide your force with Spearhead capability, or support your Reconnaissance Company
with 8cm mortar carriers, while the 7.5cm gun half-track version can help you reduce machine-gun nests and gun positions.
You can also build a 3.7cm gun version to add a bit of punch to Reconnaissance Platoons.
My favorite list from V3 was the Panzerspahkompany from Grey Wolf, so when D-Day: Germans hit my desk and I saw the Reconnaissance Company in the Forces list I rushed to page 59 and looked at what I knew I would be building. Being a Recon force for the Panzer divisions, mobility is a key element to this force, so I started with 2 platoons of Pumas with the 5cm and added a SD Kfz 234/3 (7.5 cm) Gun platoon for better Firepower, and HEAT bonus. Here is where the TANKS line of products also benefit a Flames Player as you can flesh out the extra vehicles needed with TANKS Pumas (TANKS27)…
Filling the Core requirements, I choose one Reconnaissance Platoon, and a full Armored PanzerGrenadier Platoon to get a couple of Panzerschreks in for assaulting tanks off objectives, or holding off an assaulting tank force.
Then I filled out more core slots because this force is fragile, and can’t hold up to large losses. So, a Recon 8cm Mortar, and Armored 7.5 Gun Platoon were added in. Having a template weapon to help pin and a smoke bombardment for screening, yes please. Lastly the 7.5cm Pak 40 Tank Hunters help with board denial, and having higher than AT 9. These will probably hold an objective with the 3rd infantry platoon of Panzergrenadiers on foot.
I was really debating adding in an artillery, as Wespes, or the Command Card that allows swapping my Jagdpanzer IV with a Brummbar. While that is a more balanced option it didn’t feel like a fit with this mostly mobile force. Thus, I beefed up the infantry with Panzerfausts, and additional Panzerschrecks, and added 2 additional 5cm Puma platoons. Most of the force has scout/spearhead which means you can really open up deployment options to put things where you want.
This gives me a mobile force with plenty of AT when flanking shots can be had. The multiple pairs Vet Pumas serves as a shiny distraction (because they won’t survive long) but they tie up enemy fire long enough for the infantry to move up, punch a hole, and hold on long enough to secure the victory.
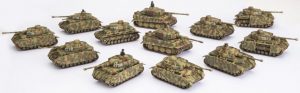
Not being your typical German force also allows you to paint something different. As such this force will get the less often seen ‘Octopus’ pattern rather than the typical 3 color ‘Ambush’ seen.
I chose 2nd Panzer partially for the Token set, partially because before I cracked the book my thoughts were Panthers, and partially because the Sd Kfz 250s won’t release til early October, I can simulate being refit in France, and not making the front lines until Operation Luttich. Now to get this force assembled, painted and head West to Normandy.

 Thanks for joining us for the D-Day: German Live Launch. You can find all the content from the weekend here:
 Boy, we sure had a great weekend didn’t we? Thanks for joining us for the launch of D-Day: German. That’s all we’ve got this time round, but be sure to check back here for the next launch.
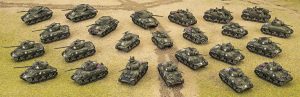
 The game started off as you would think, the tanks moved forward and took pot shots at range against my infantry. On my first turn I ambushed my 155 artillery to hit Ashleigh’s Churchill tanks, I managed to knock out one. Luckily Ash had one Churchill that stayed bailed and I was able to weather the return fire only suffering a few bailed out artillery tanks.|
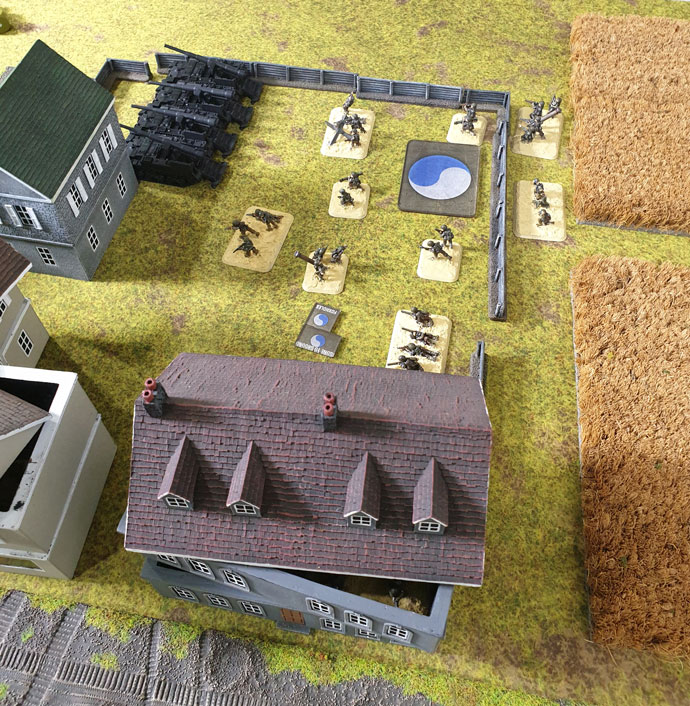 The game went on trading shoots with not much changing; I started moving my infantry through the buildings from reserves. This lasted until one turn when Ashleigh killed 5 infantry teams in one platoon with one round of shooting form her Carriers! I knew I would have to move!
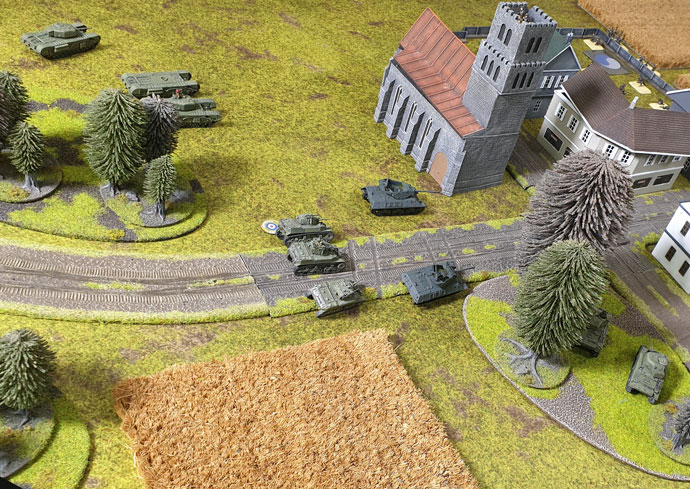 My next turn saw my artillery take out Ashleigh’s Churchill tanks and my bazookas getting lucky killing two Stuarts with moving shoots! Both the Churchill and Stuart tanks ran away! In reaction Ashleigh moved back and started shelling me from range, I responded by taking pot shots with artillery bombardments among her tanks, the third turn of bombardments I hit four of her tanks, all but one of them rolled a 1! With firepower 2+ my artillery took out the core of Ashleigh list, and it was just a matter of a few more morale rolls before her tanks retreated off the table.
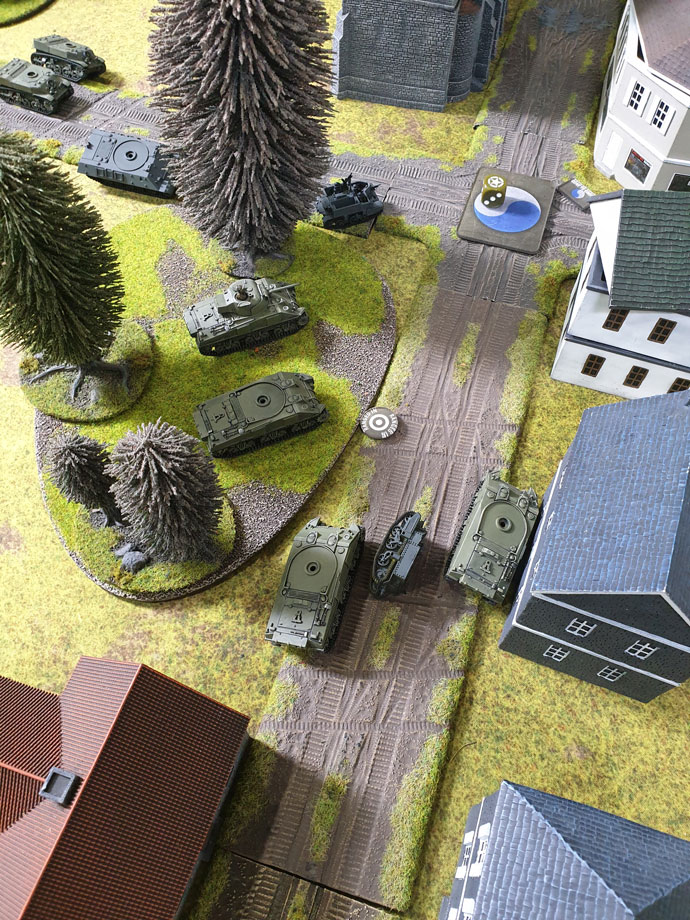 A victory for my 29th infantry Division. I would move on to my next game with Luke, due to having just played Hasty attack in our last game we played, Luke and I decided to play Dust Up instead.
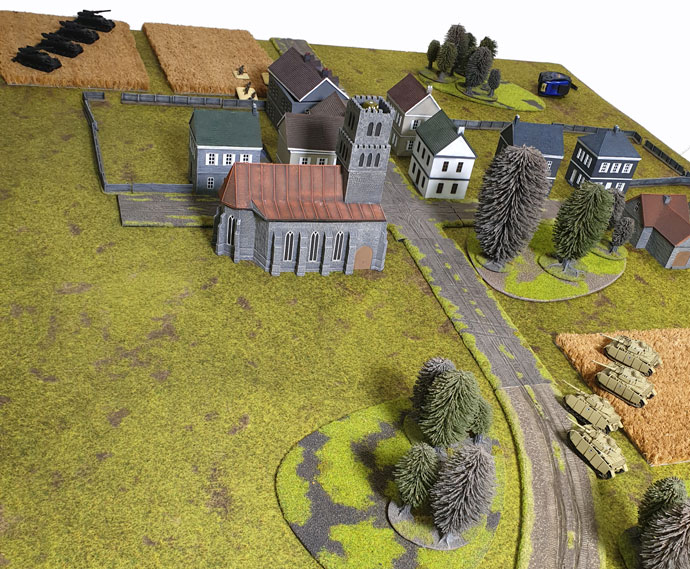 Turn one went to Luke and he rushed me, I was not expecting that, but I prepared myself for conflict sooner than I thought.
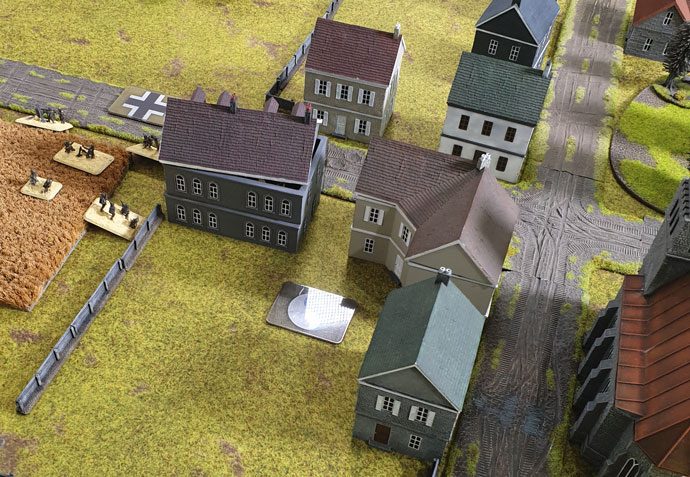 Luke next turn had him wanting to Blitz around the building, 4 Panzer IVs would make quick work of my FA0 artillery tanks. But he failed the roll and then failed to hit me at all! Luck was on my side and I decided to open up on his tanks with my 155s! I knocked out two tanks! I really could not have asked for more.
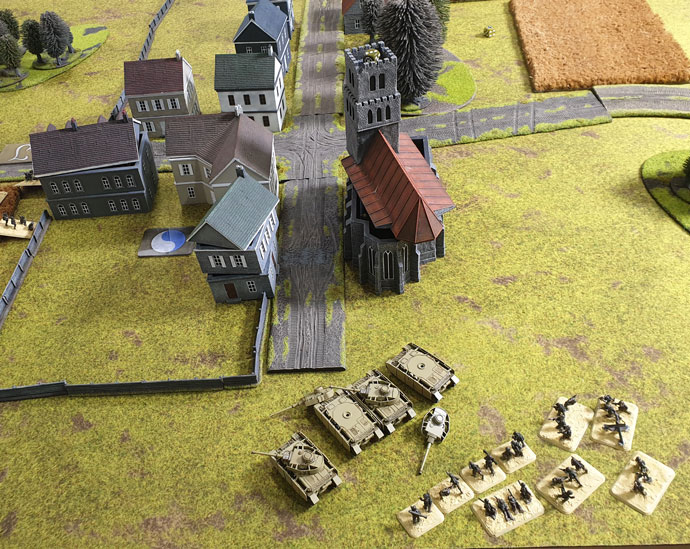 Luke’s next turn he move his HQ and his other panzer 4 platoon up and destroyed the last of my 155s. ouch well it isup to my bazookas to hold him off.
 Another Victory for the 29th Infantry Division! We moved on from the Second Chances card to Rat Catchers, for this game Phil and Cameron are facing each other, Phil playing for the Allies and Cameron for the Axis. I’ll leave it to Phil to write up that final battle report.
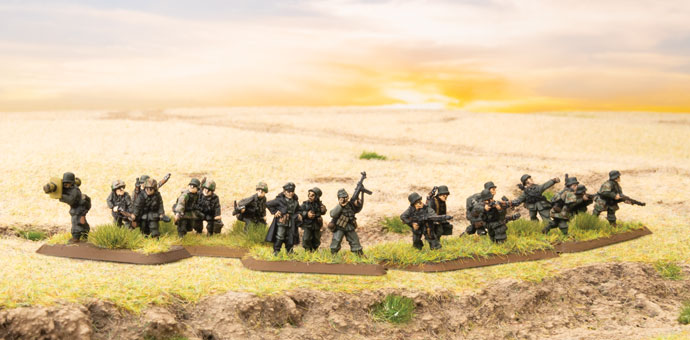 The pressure on the German forces was enormous, and they were slowly being forced back through the Normandy bocage, until they finally broke with the Allied Breakout in Operation Cobra in late July. Finally with the German forces retreating towards the Falaise Gap (from Sept to Aug) to try to withdraw safely into Germany, both the 9th Panzer Divison and the 116th Panzer Division played roles in trying to slow down the Allies and allow the other German forces to retreat.
 9. Panzer
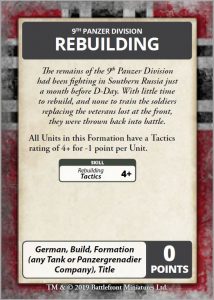 In the D-Day German Command Card pack, you can take a Formation that represents this division. To represent their lack of time to rebuild and give the new recruits sufficient training, they have the Rebuilding rule, which gives them a reduced Skill value of 4+ on any Tactics roll. So all units in your Tank or Panzergrenadier Company Formation must take this, for -1 point per unit.
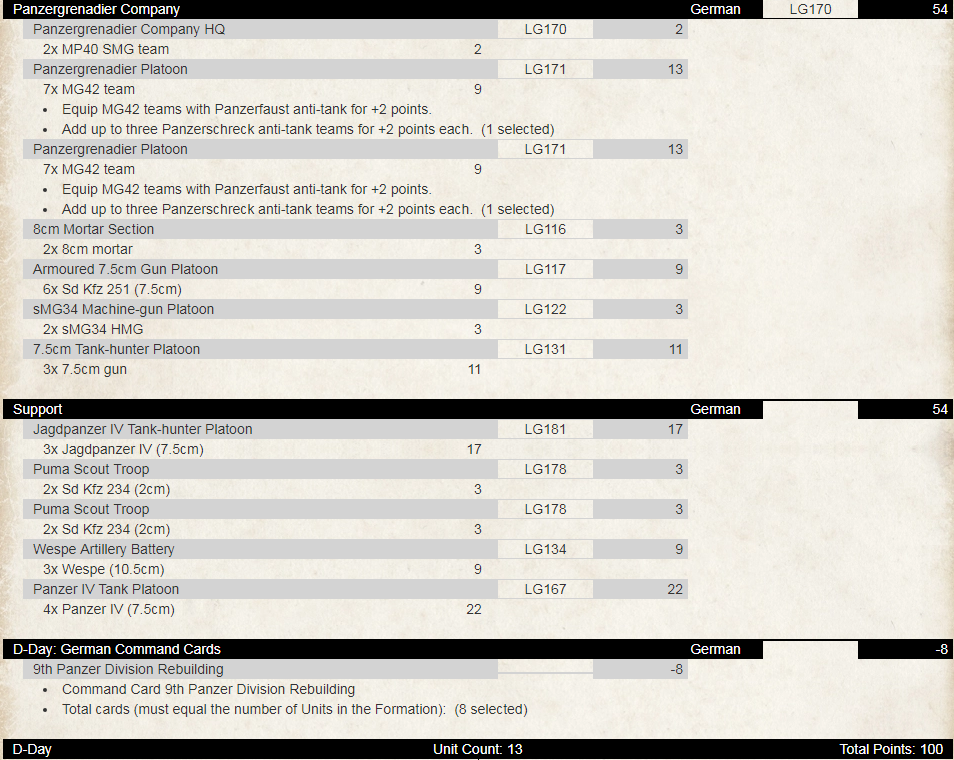
 The D-Day: German Command Card that represents the 116th Windhund
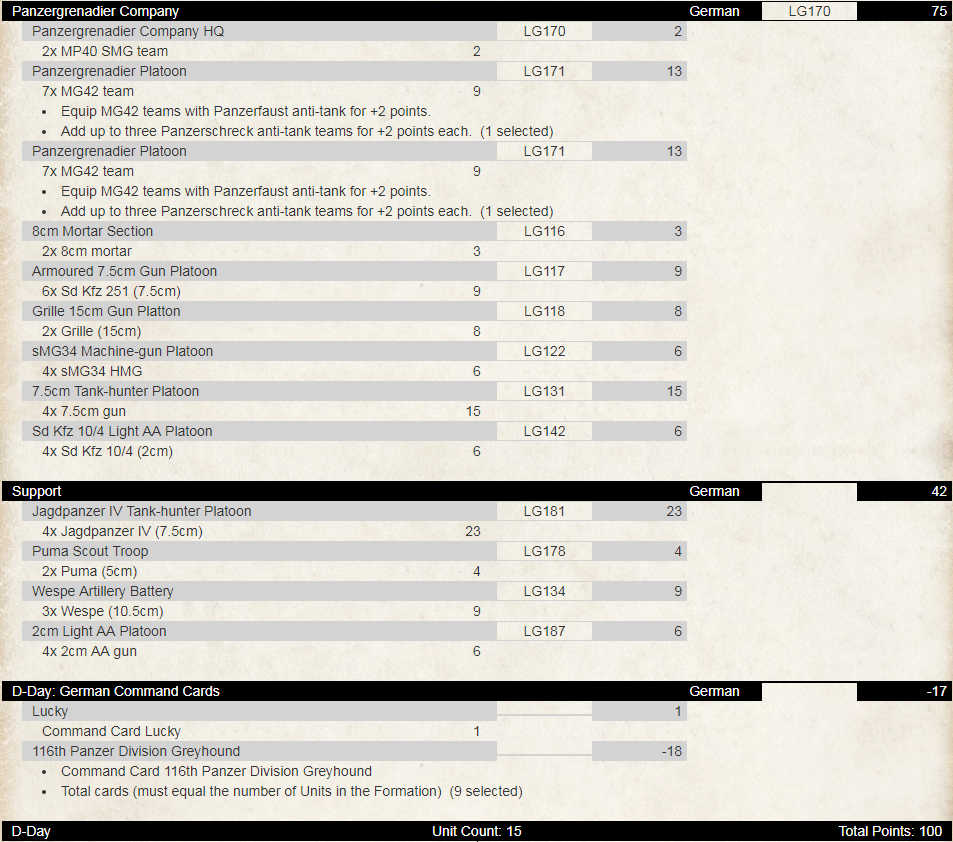
 I think this would be a fun list to play, just make sure you move your HQ
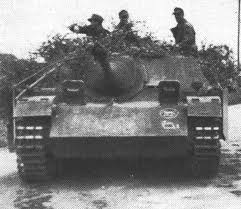
 One of the many neat bits of kit you can find in D-Day: German is the Puma and its variants. To give you a bit of background on this unique beast before you bring it to the table we’ve unleashed another great historical article form the Flames Of War archive.
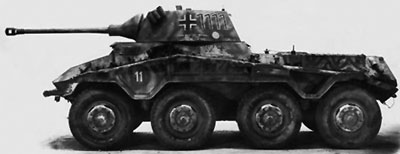

 Of all the missions the Puma crew were assigned infiltration was the most difficult. Oberst a.D. Fabian von Bonin von Ostau explains: “The initial penetration into unknown enemy territory was difficult. For this purpose our own local attacks were taken advantage of before the enemy could recover his balance. When one had achieved some penetration, the advance became easier.”
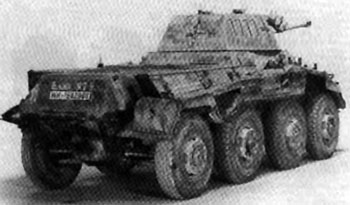 The Puma were used to find the enemy, screen the flanks, and the companies were only used together in certain situations such as to screen the division during a withdrawal. According to Heinz Guderian they conducted “the ground reconnaissance for the panzer divisions they were assigned to. Only in open terrain, when being followed or to protect a withdrawal is the company used together.” The Puma performed well in its traditional roll and even showed strength on the attack.
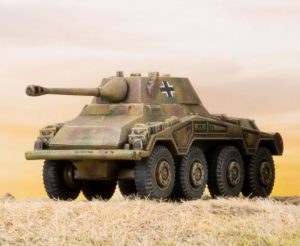 The Panzer division’s greatest enemy in Normandy proved to be the Allied fighter-bombers and the Pumas struggled with the foe as well. The stealth and infiltration techniques practiced by the Aufklärungs companies whose emphasis was on seeking cover during the day did help a high percentage of Pumas to survive the heavy damage the Panzer division took during Normandy. Of the original 26 Pumas from the Panzer Lehr division that started the campaign 8 survived Falaise Gap. In that same time only 20 tanks survived out of the starting strength of 109.
 With others in the club discussing Panthers and Tiger lists and their merits, I found the Stug Assault Gun Company calling out to me. So working on a 100 point limit I drafted up my first list.
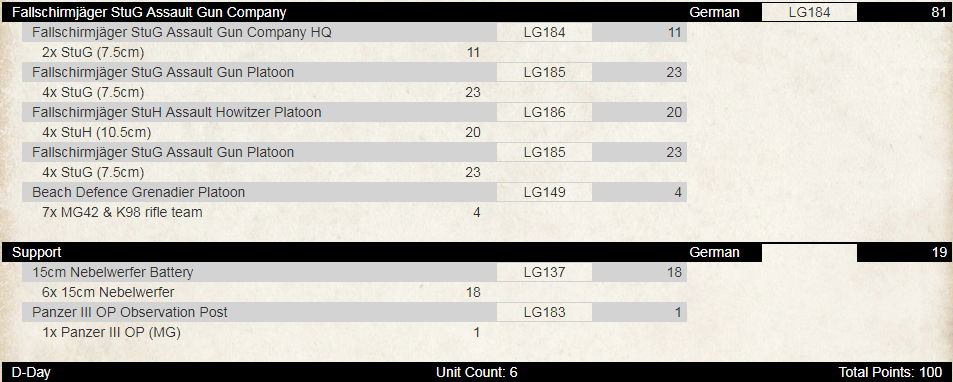
 The StuHs also have some other great benefits on the table: Artillery for when they have no direct fire options and with Anti-Tank 3 they have a good chance of taking out enemy tanks or at least a bail. Adding in Brutal, HEAT and Smoke these are going to form the solid core of my force.
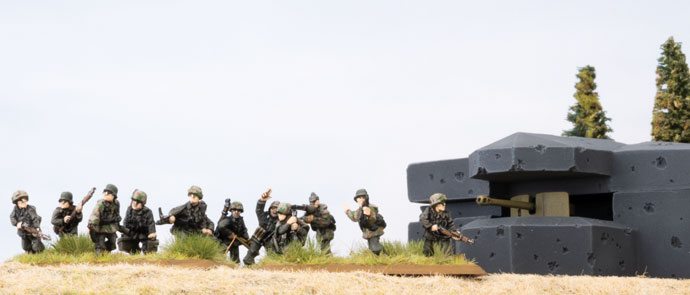 To round out the list I dropped in 6 Nebelwerfers as I want to try out the salvo template and have another smoke option on the table. So to ensure that both the StuHs and Nebs can fire have added in a Panzer III OP.