If you want to cut to the chase and get to gaming D-Day, you can check out the Mission Terrain Pack in the Online Store…
Focussing on D-Day with the first wave of Late War releases has given us all a chance to get excited about the monumental D-Day landings and airborne assaults vividly brought to life by media like Saving Private Ryan and Band of Brothers. However, one of the difficulties with D-Day games is the requirement for specific terrain, and while you can direct order that terrain (and landing craft) right here…, for many of us, D-Day games come round but once a year.
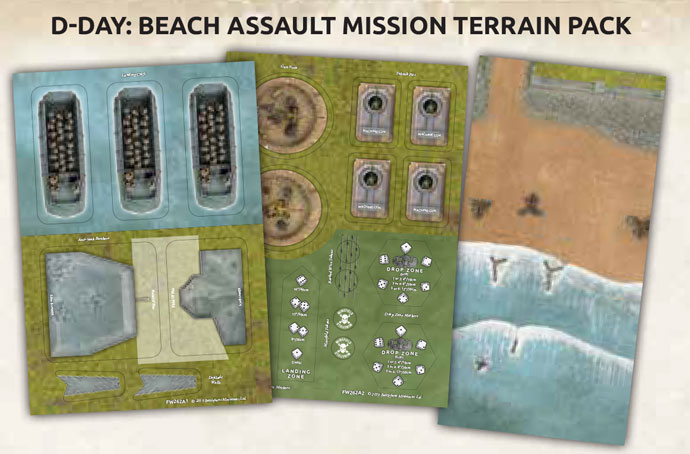
Our new Cardboard D-Day terrain set contains everything you would ever need for any number of Beach landing missions from the D-Day: American book- including landing craft, minefields, gun bunkers, and mortar pits. Your new D-Day: German Beach Defence force has everything they need to fight off the attacking Allies. To it all together, all the German defensive unit stats in the back of D-Day: American are provided as unit cards to match the pop-out and play cardboard defensive units.
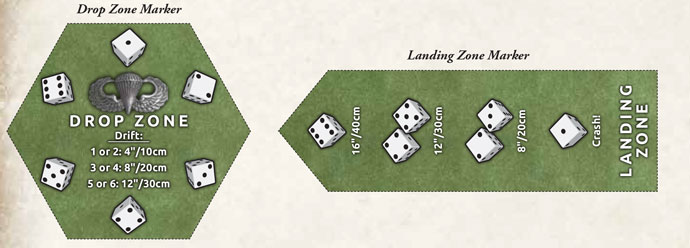
On top of landing craft for beach missions like FUBAR, the Cardboard Terrain mission pack also gives you handy cardboard tokens and pieces for airborne missions. The Drop Zone Marker is used to determine the drift of parachute landing forces, while the Landing Zone Marker is used for troops landing in Gliders.You can check out our handy How-To videos on Airborne and Beach Landings below- everything you need to know to use the new Cardboard Terrain pack!
The coolest thing about the new Reconnaissance Company in D-Day: German is its flexibility. It’s similar to an Armoured Panzergrenadier Company in many ways, but lighter, faster, and more flexible. With the war turning against them, German panzer divisions found themselves fighting on the defensive more often than making grand offensives. As a result, the reconnaissance battalions were used as the divisional reserve, to fill gaps in the line, or to cover retreats more than as a true reconnaissance force. The reconnaissance company fills these roles well, and can be built in three different ways to reflect this.
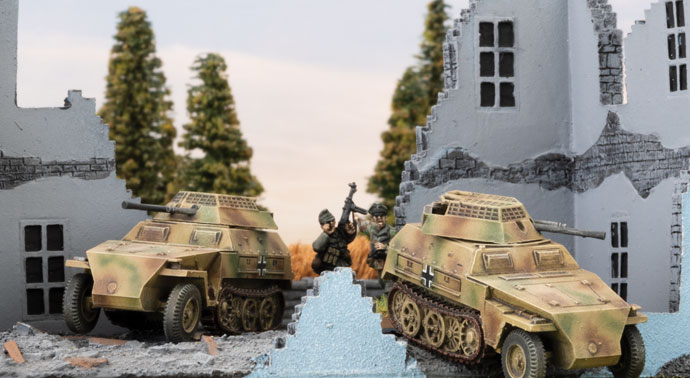
If I’m building a divisional reserve type force, I want to create a battlegroup mixing tanks and armoured infantry for a flexible approach to battle. The core of the force would be a Reconnaissance Company HQ and a pair of Reconnaissance Platoons, all in light Sd Kfz 250 half-tracks, as an assault force. I could swap one of these out for a normal Armoured Panzergrenadier Platoon to save a few points, but I like the increased firepower of the extra half-tracks and the Scout ability to keep my infantry alive as they work their way forward.
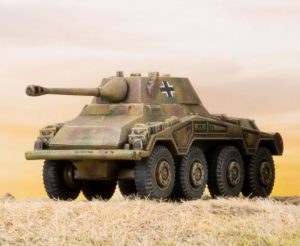
I’d back them up with a Scout Troop of Sd Kfz 250 (2cm) armoured cars to give me some spearhead capability and a useful economy-of-force unit to tie down enemy troops where my main force isn’t. The 8cm Mortar Section and 7.5cm Gun Platoon, give me more Sd Kfz 250 half-track goodness, and relieve my tanks of infantry support duties, making the infantry more self-sufficient. That useful little company comes in at around 44 points if I keep one of the 7.5cm Gun Platoon at two rather than three vehicles. Since I’ve plenty of other guns in my tanks, I don’t think I’ll miss the extra vehicle.
That leaves me a solid 56 points for the tank component. I could go with five Panther tanks for some heavy fire support, but as I envision this as a free-wheeling attack force, I think a company of ten Panzer IV tanks works better. As a separate formation, it’s strong enough to fight its own battle in support of the reconnaissance, and gives me two formations to keep me in the fight. The last point would probably go on the Lucky command card for that extra bit of luck when I really need it.
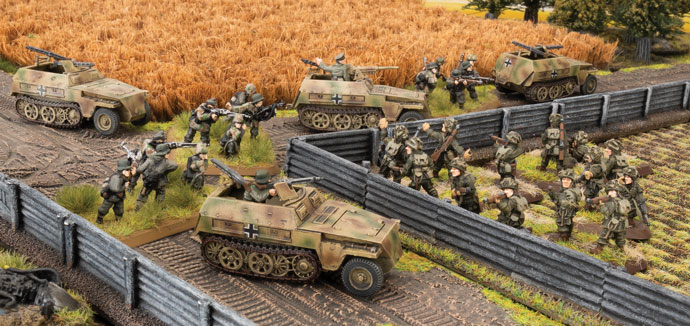
A defensive force to fill a gap in the line would be a bit different. Here, I’d probably look at adding four Panthers as a powerful reserve striking force (rather than the Panzer IVs), while boosting the core company with a 7.5cm Tank Hunter Platoon to give me more resilience against tanks. Since I don’t need as much mobility, I think I’d also trade in the half-tracks from one platoon to give all of my infantry Panzerfausts. The plan here would be to dig in the platoon without half-tracks with the anti-tank guns on the most vulnerable objective, while a mobile group of all of my half-tracks manoeuvres to keep the enemy at bay until my Panthers arrive, then counterattacks to secure victory. To build a true reconnaissance force for mobile operations, I might look at the Puma Scout Company command card for my second formation in place of tanks. A company of nine Puma eight-wheelers with three 7.5cm armoured card for fire support would set me back 24 points. Adding a second Sd Kfz 250 (2cm) and the 7.5cm Tank-hunter Platoon to my Reconnaissance Company burns up another 14 points. Throw in a platoon of overlong 8.8cm tank-hunters for heavy tank killing, and I’ve got a force that is mostly light, fast and mobile, but still packing a heavy punch.
No matter how you organise it, the Reconnaissance Company has plenty of flexibility and potential (as well as lots of really cute Sd Kfz 250 half-tracks!).
I’ve decided to put together a StuG Assault Gun Company for the Kursk period from Ghost Panzers. By June 1943 many Assault Gun Battalions (Sturmgeschütz Abteilungen) had started to be equipped with the latest version of the StuG assault gun, the StuG III G armed with the long 7.5cm StuK40 gun. The 301. Panzer Battalion chosen as the theme unit in Ghost Panzers is a radio control unit that also contains Borgward demolition carriers, but by not taking the Borgward options it can also be used to represent any of the Assault Gun Companies or Batteries that served on the eastern front.
At Kursk in particular there are a number of Assault Gun Battalion or Brigades involved in the operations. Sturmgeschütz Abteilungen 904 (31 x StuG III) and 245 (22 x StuG III and 9 x StuH 42) served with XXXXVII Panzer Korps on the north side of the salient. Sturmgeschütz Abteilungen 177 (22 x StuG III and 9 x StuH 42) and 244 (22 x StuG III and 9 x StuH 42) served under command of XXXXI. Panzerkorps.
In addition a number of divisions had their own assault gun units. 78. Sturm Division had Sturmgeschütz Abteilung 189, Panzergrenadierdivision ‘Grossdeutchland’ had Sturmgeschütz Abteilung ‘Grossdeutchland’, 7. Infanteriedivision’s Panzerjäger Abteilung 7 contained one company equipped with StuG III, and 6. Infanteriedivision’s Panzerjäger Abteilung 6 contained one company equipped with StuG III.
To be a bit different I’m going to base my StuG force on 6. Infanteriedivision, representing the Sturmgeschütz Kompanie (Assault Gun Company) of Panzerjäger Abteilung 6 (6th Tank-hunter Detachment/Battalion). 6. Infanteriedivision fought in the middle of the 9thArmy’s attack on the north of the Kursk Salient and pushed as far as Olkhovatka during the battle along with the Panzertruppen. During the fighting the divisions also has the 1st and 2nd Companies of Heavy Panzer Battalion 505 (Tiger IE heavy tanks) and Panzerkompanie (Fkl) 312 attached.
These two articles are taken from the Flames of War website and combined for this launch event. There is a link at the bottom of the page to the original articles with plenty more pictures.
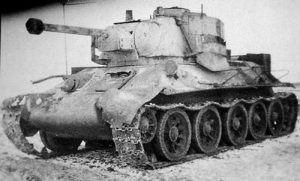
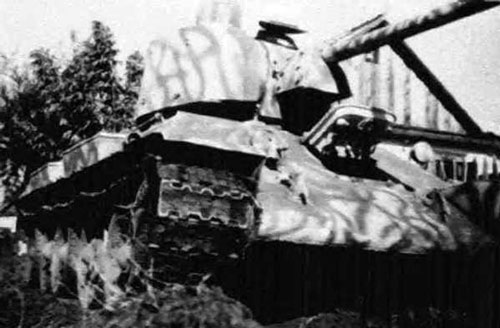
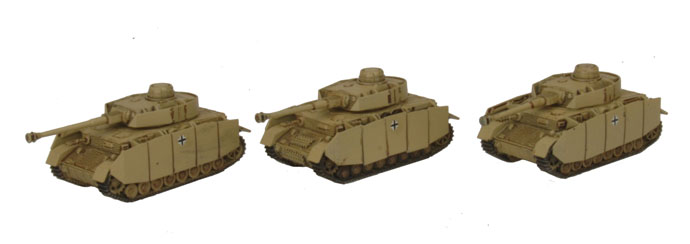
There are many ways these Beutepanzers were modified which I will be listing in this article. Some of the modifications ranged from Panzer III/IV cupolas, notek lights, stowage bins (fitted to the rear of the turret or the sides of the hull), antennas, and schürzen. These modifications can add a very unique and historic feel to your Beutepanzers, making them stand out even more on the table.
Notek Lights All of the Notek lights were designed to be used under blackout restrictions so the indirect lighting/hooded light concept was essential for the front light when the standard/main lights couldn’t be used so to avoid being spotted from ground or aerial observers.
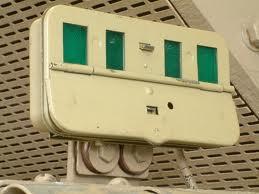
The rear Notek light had a lot more functionality, it could used as a normal rear brake light or used to maintain proper vehicle spacing at night under black-out conditions. It worked on the concept of optical convergence at different distances, which is why the rectangular shaped light had two sets of two different sized lights. The distance between vehicles dictated what patterns of the four lights were visible and provided a constant frame of reference to avoid vehicles ramming into each other in the dark.
An ideal distance between vehicles meant two lights were visible. If only one was visible, the distance between two vehicles was too great while four visible looks meant the distance was too close.
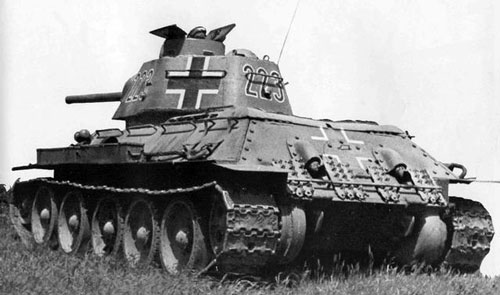
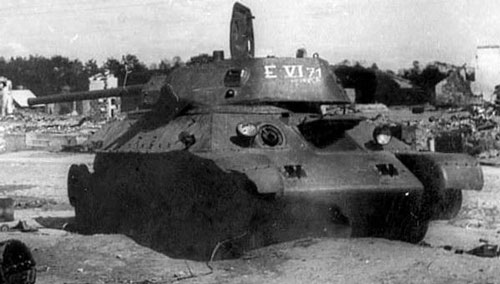
Tactical Markings The numbering system used on the Beutepanzers were the same as those of the normal German tanks being the three-digit or four-digit standard (1024, 895, 354, 48, 9, etc.)
But some of these Beutepanzers received a different numbering system called the E-Mark. This numbering system includes the letter “E”, followed by a roman numeral and a further two-digit or a three-digit number. On most assumptions the letter “E” indicates Erbeutet (Captured).
Position of Markings The areas where these identification marks were located where mainly on the frontal, sides and rear panels of the turret and hull. The turret hatches and the barrel of the main gun, as well as under the barrel of the main gun, and track guards were also used as locations for identification marks. These signs were usually painted considerably large.
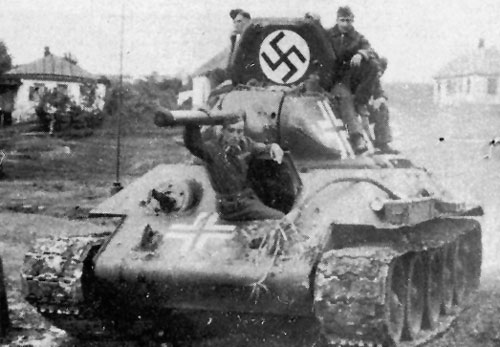
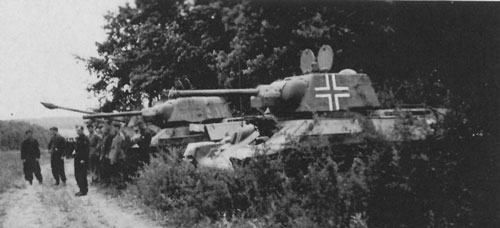
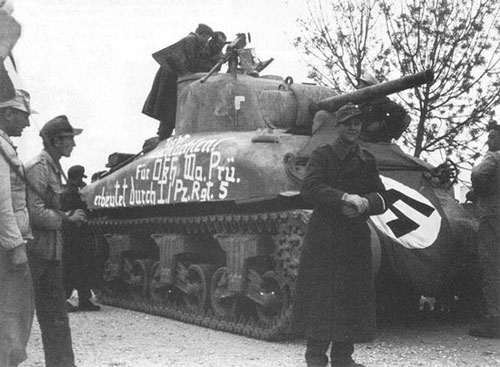
Other Markings Some of the markings found to be painted on the Beutepanzers ranged from the Balkenkreuz, Swastikas, Divisional or Sub-Divisional Insignias, individual inscriptions or simply a German flag.
Among the individual inscriptions found on the Beutepanzer were the names of Soldiers (Emil, Karl, Radetzski, Jaeger, etc.), the names of wild animals (Tiger, Leopard, etc.), the names of municipals or provinces (Dantzig, Saar, etc.).
Kill Rings (Victory Rings) where also paint onto the barrel of the main gun to show how many victories the Beutepanzer & its crew had accomplished.
Tank Colors Beutepanzers saw just as much change to their paint schemes as the rest of the German Armored Core due to the different periods, areas of operation, seasons and special needs. For starters, a lot of the Beutepanzers were repainted in the German Panzer Grey color, but as times went forward, these tanks also changed as the German tanks changed. From the beginning of 1943 they began to use camouflage patterns (Please refer to Art of War II for a complete list of German Camouflage painting schemes throughout the periods) on the Beutepanzer. These tanks also followed the winter camouflage paint scheme. But records & photos also show that a of of these tanks were left with their original colour scheme and went unchanged, except for their identification markings.
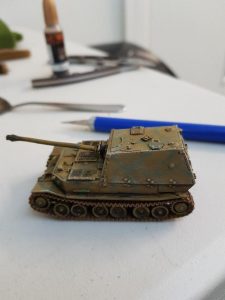
Up next was the camo scheme, taking from the painting guide at the back of Ghost Panzer book applied Army Green and applied the camo pattern, this is still a weak point of my painting and something that hopefully will improve as I paint more tanks. In the cervices I worked in Panzer Grey mixed with black to add working dirt, this was also drybrushed onto the barrel and the wheels to add more dirt and weathering to the model.
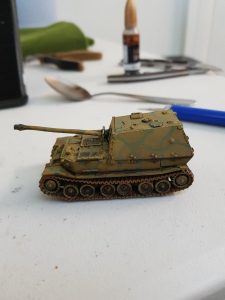
Before applying decals which I will do as batch run for the entire army I added on a drybrush of Dry Dust to the edges of the Ferdinand to add a bit of pop colour to help it lift from the table.
The Ferdinand, table-ready (barring decals and battle damage) is ready for its first game. I will be starting on the Panthers this week and then onto the Panzers, aiming to have them completed and ready for decals and weathering and then onto to some games the following week.
With the release of the upcoming books Ghost Panzers and Red Banner myself and Chris sat down and planned our next armies. Chris being the resident Soviet player grabbed the Red Banner book, meaning that I would be taking a German list: the first in a long time.
Taking the book over the weekend and having a read through (and also watching the great series on tanks on Netflix) my choices were narrowed down to a couple of the lists. As much as I loved the idea of a small but hard hitting Tiger or Panther force, I wanted a few more models on the table. So I jumped at the Mixed Panzer Company.
Using the upcoming Bӓke’s Fire Brigade as the core of my force my list was starting to take shape. I knew I wanted a couple of the big tanks—Panthers and one of my favourite tanks of the war, the mighty Ferdinand. So with a mix of Panzer III’s and IVs I feel that I have a good basic core to my force. Looking to the future I am planning on Armoured Panzergrenadier Company.
Mixed Panzer Company HQ 21 pts 1x Panzer IV, 1x Panzer III
Troops 27pts Panzer IV Platoon, 2 x Panzer IV 25pts Panzer III Platoon, 3 x Panzer III 36 pts Panther Tank Platoon, 2x Panther
Support 17pts Ferdinand Tank-Hunter Platoon, 1x Ferdinand
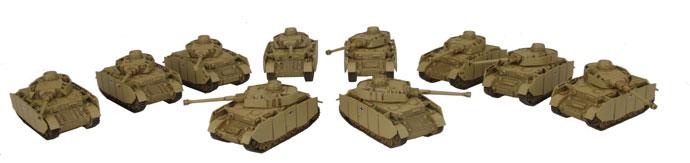
I started my Flames Of War journey earlier this year when I was invited an joined in the annual Battlefront Staff trip down to Panzerschreck. The aftermath of the weekend of fun was I now had ten Panzer IVs all painted and ready to go. Ghost Panzers has introduced the German Panzer IV to Mid War so this seemed like a great chance to take parts of it into a Mixed Panzer Company, expand my Flames Of War collection and get a Mid War army all set.
I partnered up with Andrew for Panzerschreck and we sat down to plan out what sort of forces we’d be taking for the Late War doubles. Early on I decided I quite liked tanks and eventually I settled on Panzer IV Company. This paired up well with Andrew’s Finns who would bring mortars, guns and an infantry company to round out our force and cover all the bases. Our plan was to go all out offense and take our chances and win big or lose big. The aftermath of the weekend of fun was I now had ten Panzer IVs all painted and ready to go.
My games at Panzerschreck taught me some much needed respect for the T-34 (Andrew and I lost to a pair running absolutely massive T-34 companies) but also a great deal of pride in the effectiveness Panzer IVs that they easily became my favourite German tank. With that in mind I will be making a 120 point force using the Mixed Panzer Company. I like slightly larger games and means I’ll get a few more goodies on the table (as will my opponents).
First step will be deciding just how many Panzer IV Lates I’m bringing. First step will be filling out my mandatory picks. My Commander will be riding along in his Panzer IV (this guy passed an unbelievable amount of saves) and I’ll be taking a platoon of four. With AT 11 and front armour 6 they’ll be able to take nearly all comers with very few questions outside of a KV or Churchill. To help out with those I’ll be bringing along two Panther tanks. Their tough armour is sure to attract some firepower but it will keep their eyes off the Panzer IVs with their aggressive +3 to be hit on working to my favour hopefully making the Panther a more tempting target to less powerful guns. Of course the downside is that those weapons that can penetrate the Panther reliably will be hitting more often so it’s a trade-off, but one I’m willing to try out since Panther tanks just look awesome.
With armour largely filling out the list (102 points to be exact) it’s time to look towards what else I need. Since I imagine the tanks will be the ones looking to take objectives I will need something that can hold the fort and take on infantry. For this I’ll be taking a full strength Grenadier Platoon in support and two sMG HMG teams. This will give me nice solid base of infantry with plenty of bodies and (hopefully) enough machine guns to deal with Soviet infantry based armies.
The overall battle plan for this list is fairly straightforward. The tanks themselves will be looking to take out the sorts of things that can destroy them ASAP. The Grenadiers will likely be expected to hold an objective, whether it’s in my own or if I have to take it from the enemy. I can’t rely on the Panthers for any tricks but hopefully they won’t need them
I expect this will be a fun army to paint up and model that adds on very well to my existing models. The new variety of tanks and infantry make this a hobby project I look forward to. I’m especially looking forward to seeing how the Panthers do on the table and start painting up the two I need. With some great results it could well suit me moving towards a Panther company but for now one project at a time!
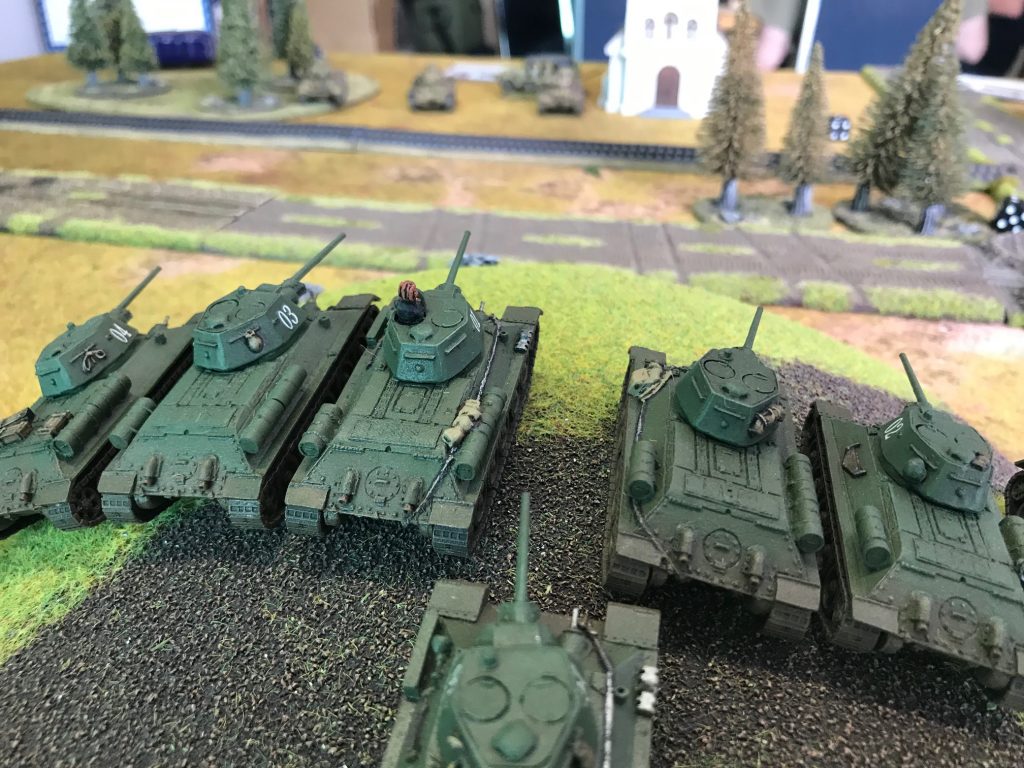
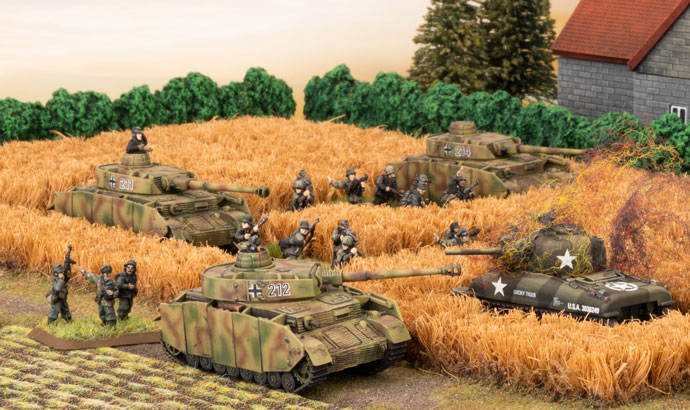
Facing off with Casey is always a fun game and this was going to be no exception. Usually, we find ourselves on the same side but this time things were different. Facing off a large number of Soviet T-34s against a smaller number of German versions would be a real test to see who could handle them the best – the Soviets that built them, or the Germans that captured them.
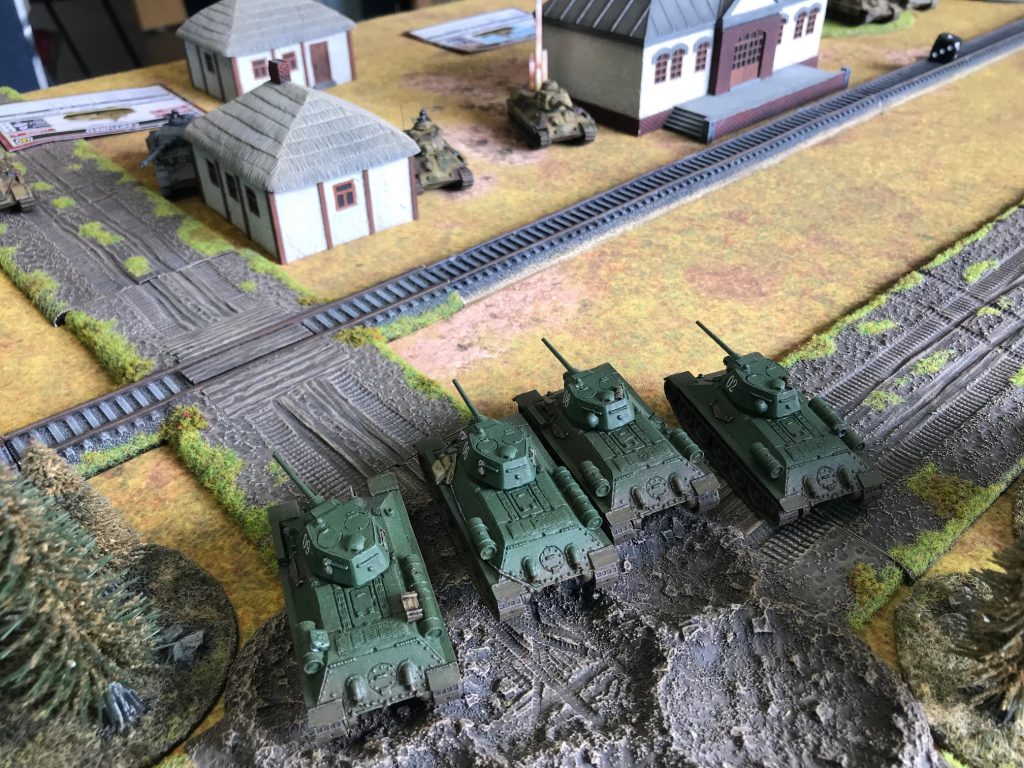
I deployed a line of tanks stretching across the table, confident I could manoeuvre as needed. Casey stuck to cover behind buildings and in forests. He knew I would be coming for him.
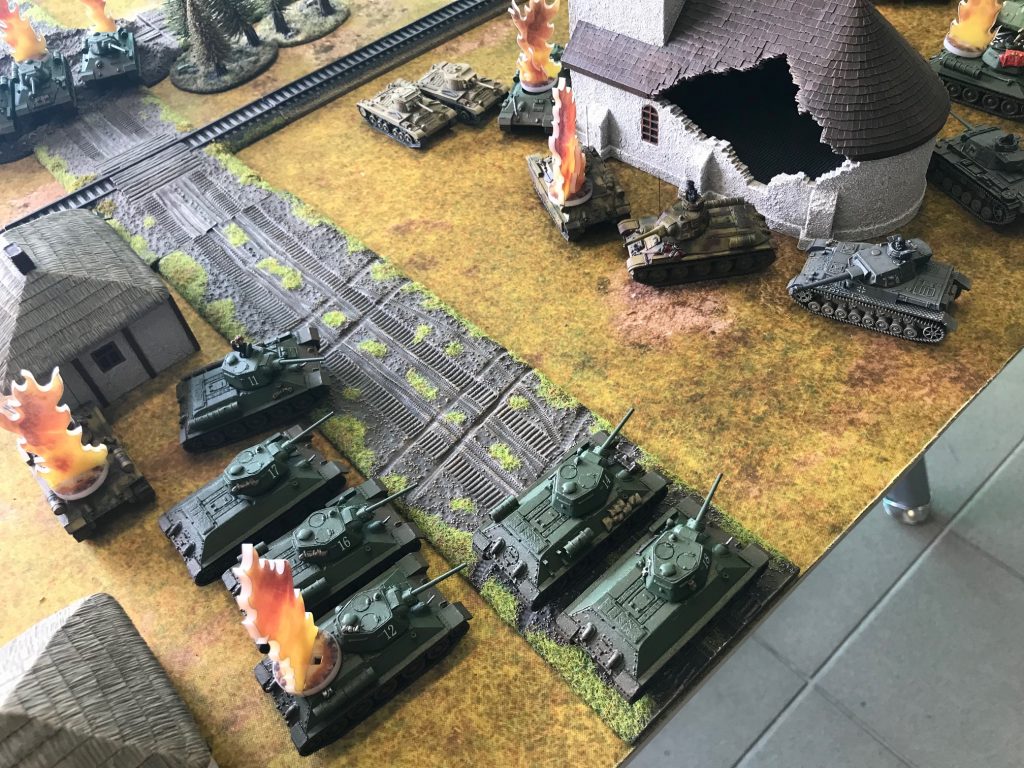
Rolling well (story of the first half of the game) I seized the initiative and surged forward. Over the next couple of turns I closed fast and hard, shooting where possible but focussing on position. Casey’s fire was inaccurate or just unlucky whilst mine accounted for some of his tanks with a string of lucky hits (or poor saves). This was especially lucky in the long term as it cut down the amount of incoming fire I would have to suffer.
Things started to change once we hit close range as Casey’s dice started to work their magic and his T-34s started hitting and killing their targets. The Tiger kept up a steady pace of fire knocking out 1 to 2 tanks a turn whilst his Company HQ Panzer IV proved to be deadly, constantly knocking targets off as they came into his sights.
Shockingly, my ram attack against a Tiger failed at the first roll.
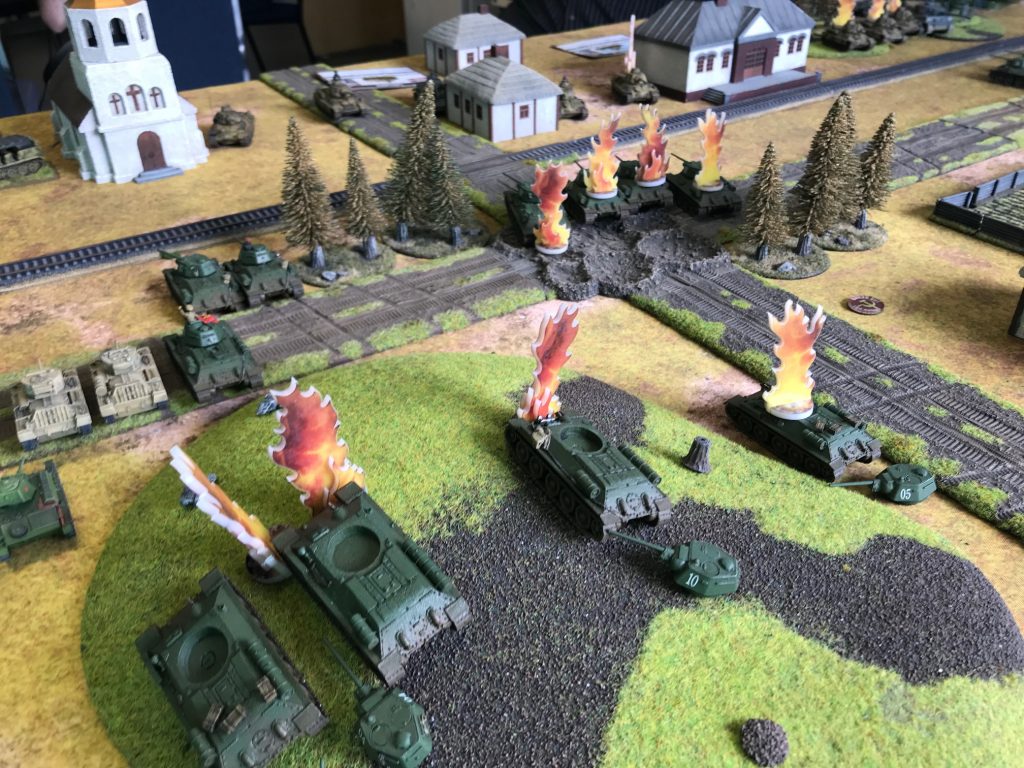
However, my 3-1 tank advantage and outstanding luck with Valentine saves proved to be the difference. The almost untouched Valentine company overran the left-hand objective, whilst the right-hand T-34 company flanked Casey’s remaining tanks (ignoring the Tiger after their ramming effort failed on the first dice throw).
With the objective secured and Casey’s last T-34 running away the battlefield was mine.

 Focussing on D-Day with the first wave of Late War releases has given us all a chance to get excited about the monumental D-Day landings and airborne assaults vividly brought to life by media like Saving Private Ryan and Band of Brothers.
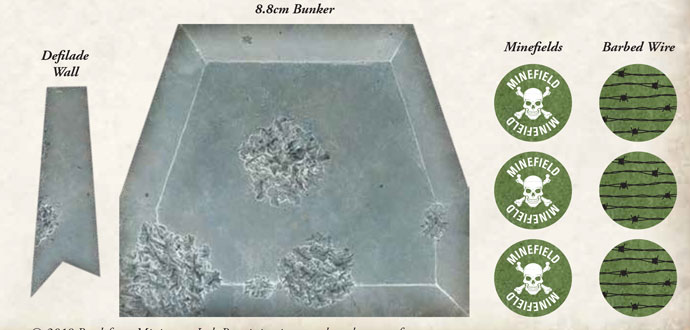 However, one of the difficulties with D-Day games is the requirement for specific terrain, and while you can direct order that terrain (and landing craft) right here…, for many of us, D-Day games come round but once a year.
 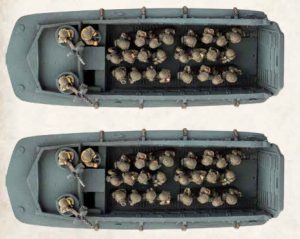 Our new Cardboard D-Day terrain set contains everything you would ever need for any number of Beach landing missions from the D-Day: American book- including landing craft, minefields, gun bunkers, and mortar pits. Your new D-Day: German Beach Defence force has everything they need to fight off the attacking Allies. To it all together, all the German defensive unit stats in the back of D-Day: American are provided as unit cards to match the pop-out and play cardboard defensive units.
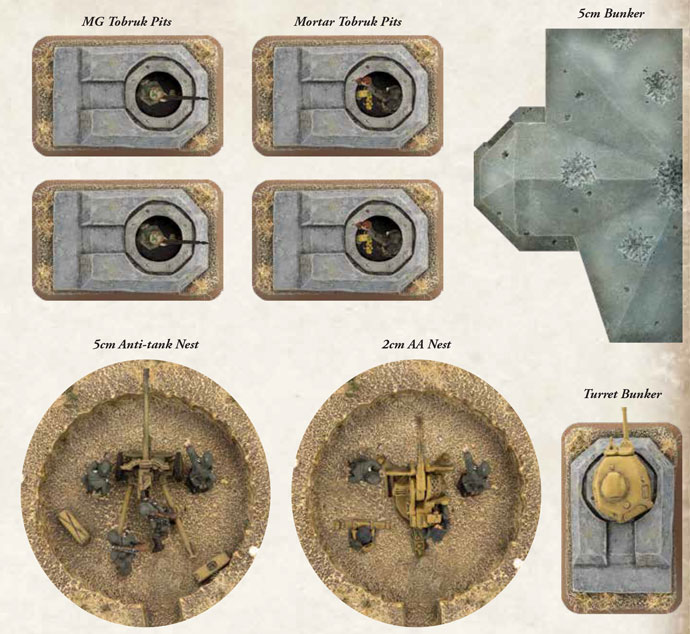
 You can check out our handy How-To videos on Airborne and Beach Landings below- everything you need to know to use the new Cardboard Terrain pack!
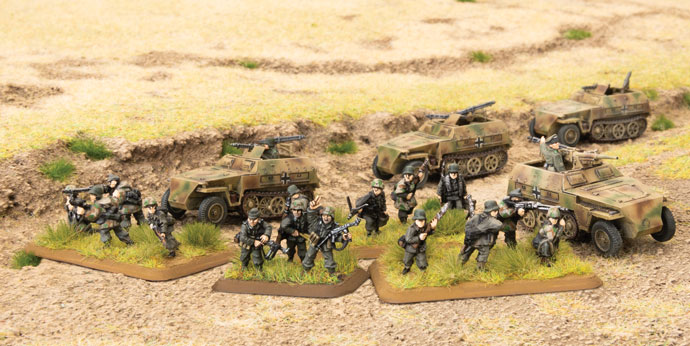


 There are many ways these Beutepanzers were modified which I will be listing in this article. Some of the modifications ranged from Panzer III/IV cupolas, notek lights, stowage bins (fitted to the rear of the turret or the sides of the hull), antennas, and schürzen. These modifications can add a very unique and historic feel to your Beutepanzers, making them stand out even more on the table.
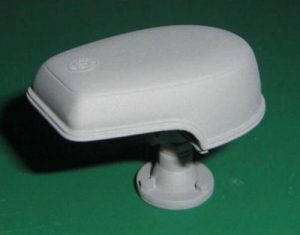
 The rear Notek light had a lot more functionality, it could used as a normal rear brake light or used to maintain proper vehicle spacing at night under black-out conditions. It worked on the concept of optical convergence at different distances, which is why the rectangular shaped light had two sets of two different sized lights.
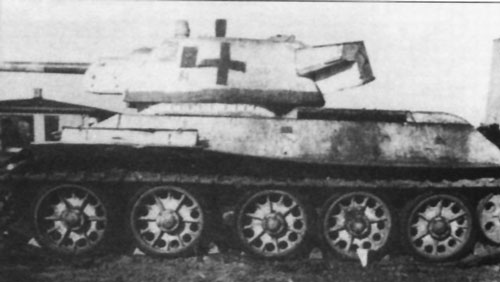


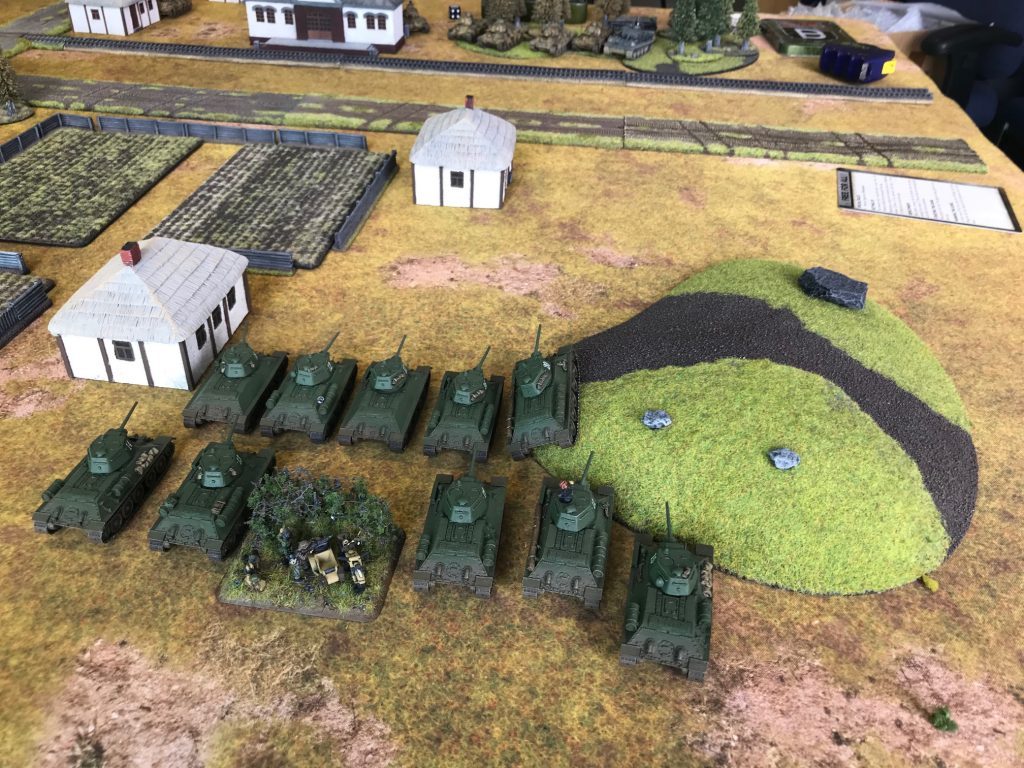 I deployed a line of tanks stretching across the table, confident I could manoeuvre as needed. Casey stuck to cover behind buildings and in forests. He knew I would be coming for him.