
Pete the Wargamer shares a simple but really effective way of painting the new M2 Bradley (or any American vehicle) in a Forest Green European colour scheme.
Tag: WWIII: American
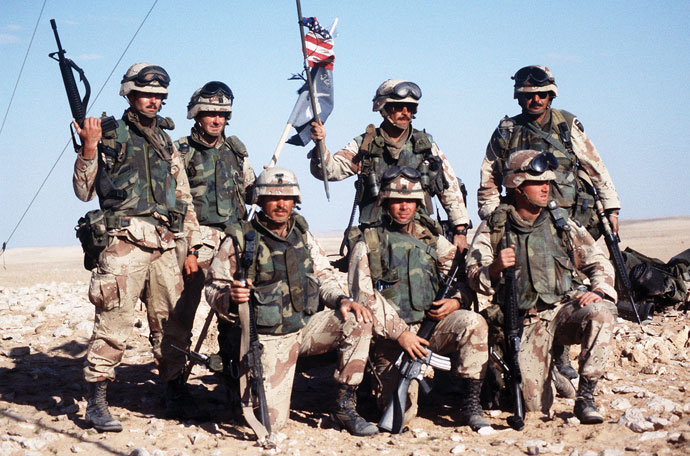
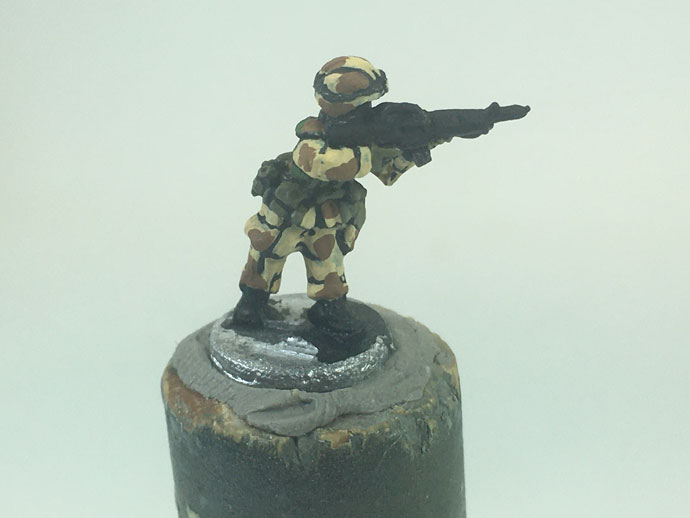
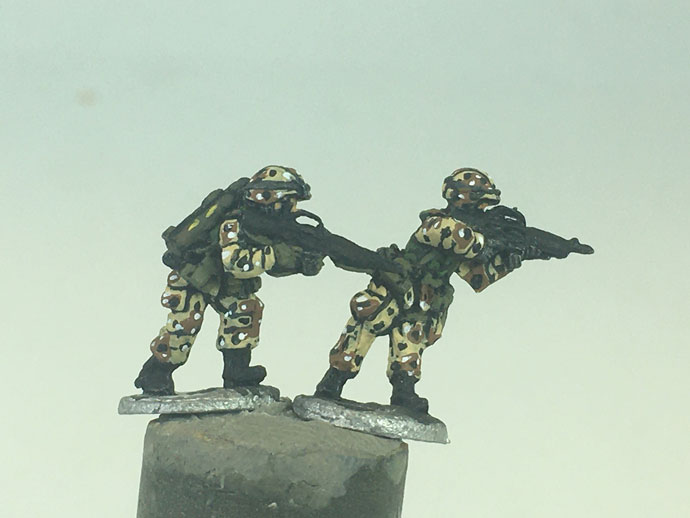
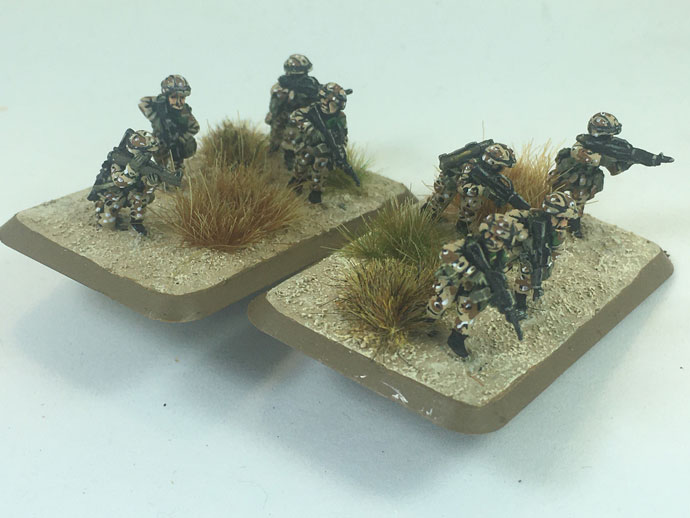
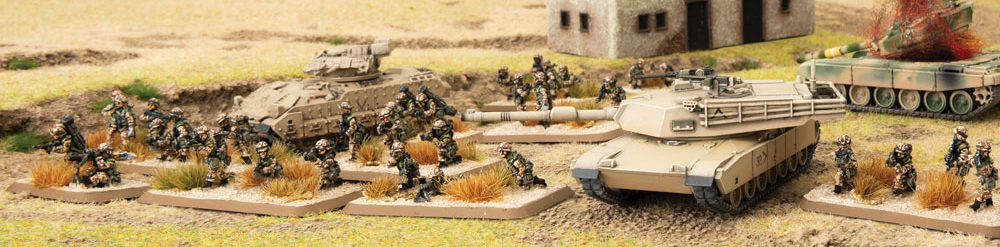
Chocolate Chip US Infantry
With Evan Allen
With the timeline for World War III: Team Yankee expanding out somewhat I decided to paint my US forces in a Desert Storm type paint scheme instead of adding to my existing Euro force. After some research that meant the infantry would have to be in Desert “Chocolate Chip” uniforms but with Woodland pattern body armour. All the paint I used is from the Vallejo model colours range.
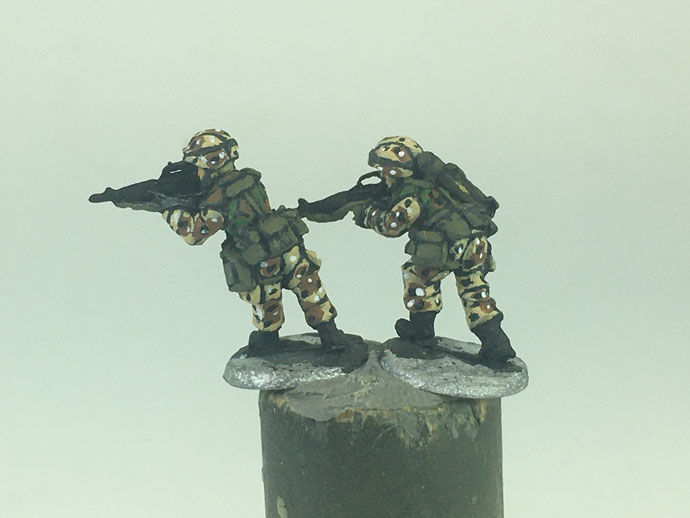
European Uniforms
I’d already painted two platoons of US infantry in Woodland pattern for my Euro US force so I just copied that again for their body armour jackets. I also copied the same colours for all the web gear and weapons, Russian Uniform (924) on the web gear and pouches, black for the M16s and Olive Drab (887) for the LAWs etc.
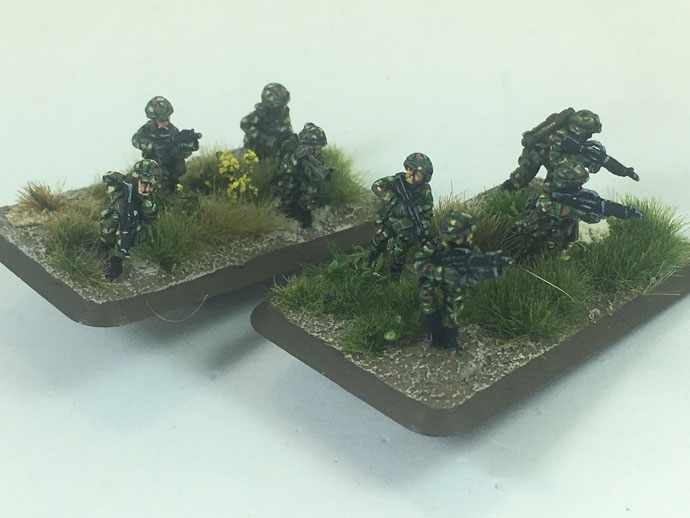
The base colour I used was a quite bright USA Uniform (922), the effect darkens up when the rest of the camouflage scheme is done so the extra brightness to start off with works well here I think. Next I added large blotches of Beige Brown (875). Finally, I painted thin strips of Black and Dark Sand (847), I try to do these in “Y” or “V” type shapes. One thing I also do is think about where the clothing seams are and stop blotches of the brown at those lines. Also resist the temptation to add too much at the beginning, less is definitely more here!
Chocolate Chip
After a black undercoat I start off with base colours for the uniform (Dark Sand 847), body armour (USA Uniform 922) and the webbing and pouches (Russian Uniform 924). I block paint in the three colours leaving thin black lines around the clothing and equipment, sometimes I rush this and have to go back later and re-do some of the black lining if I’ve covered too much or want to tidy up. I also use the Russian Uniform on the hands to represent the gloves commonly worn as well.
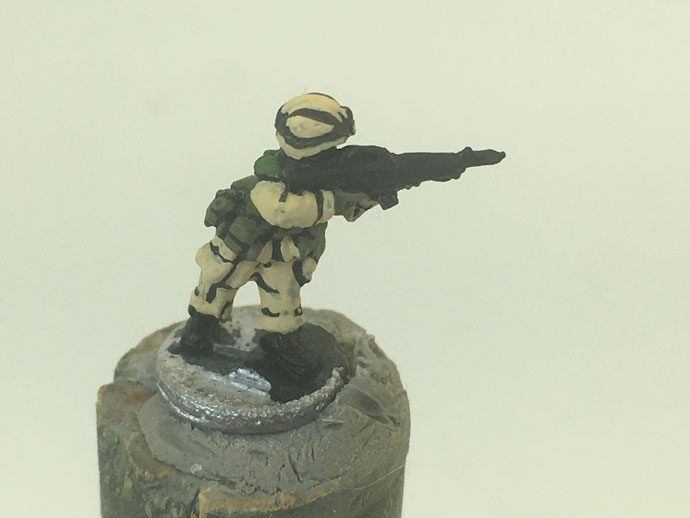


The next step is to add cloud like blotches of Beige Brown (875) on both the uniform and the body armour. Don’t go too far, try and leave plenty of the original colours and remember those seams and joints.
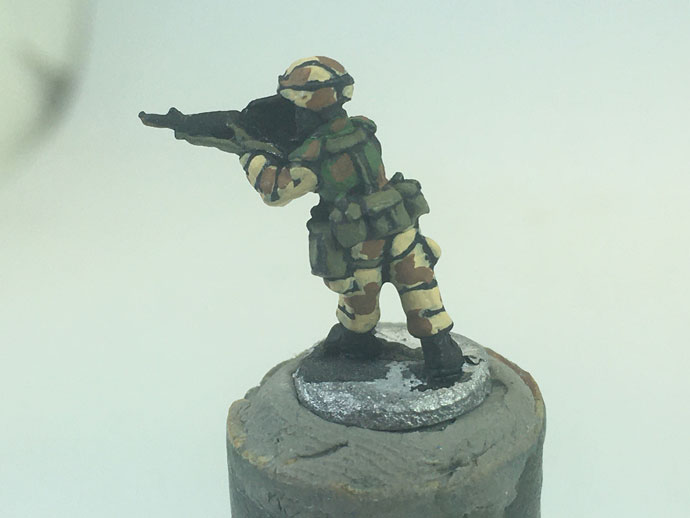
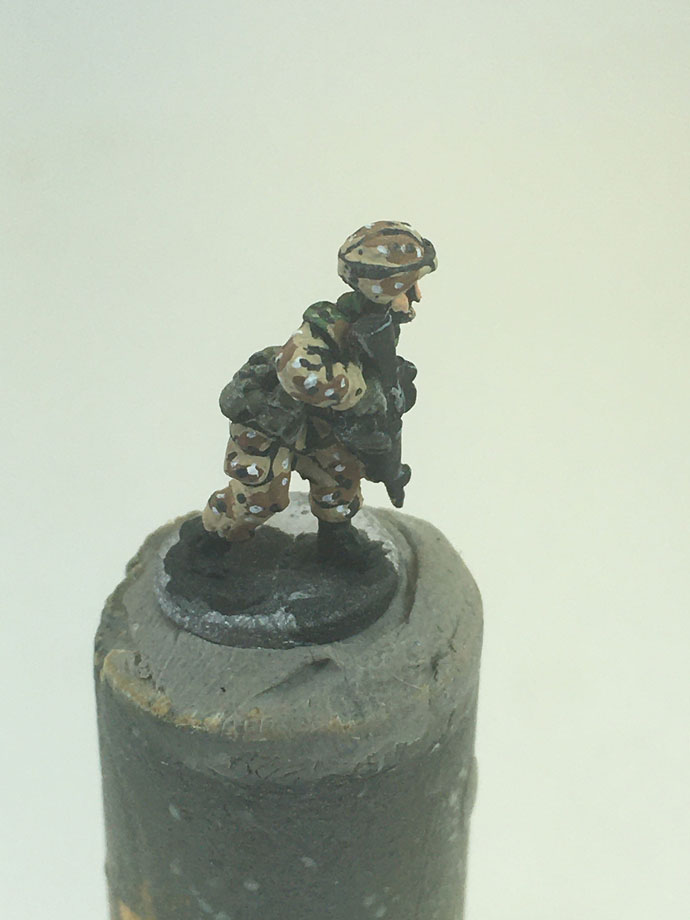
Now we get down to the trickiest part, the dots and stripes! Using a #00 sized brush I add dots to the uniform equally on the sand and brown portions, again don’t add too many as it’s all too easy to fill up the space and loose the overall effect – plus it takes longer the more dots you do!
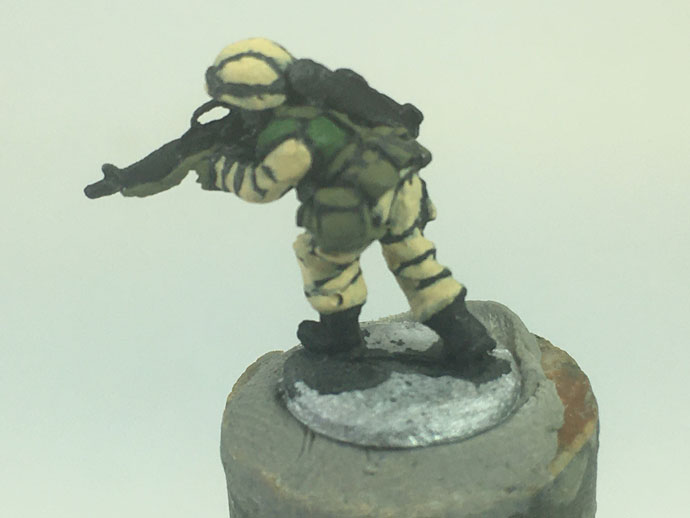
Once you’re happy with the dots add the stripes on the body armour portion of the figure. I try and use “Y” or “V” shaped strips running on the edge of the brown to green edges. This can also be a good time to do any edge or joint tidying up with the black paint out and a fine brush in hand.
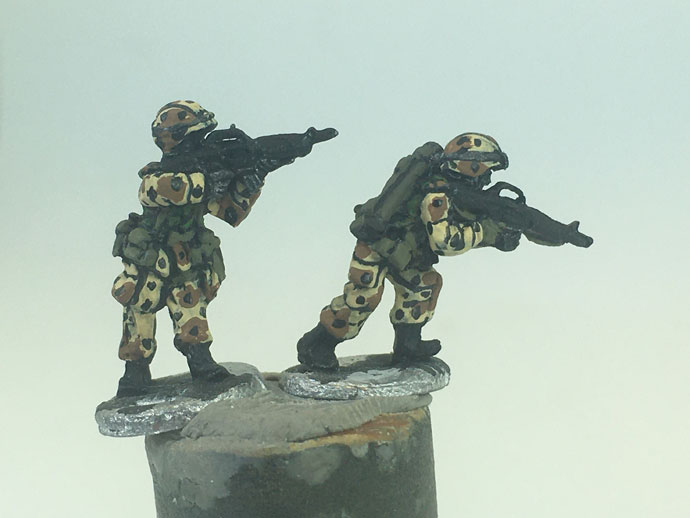
Continuing with the dot theme I go to the white dots next. They show up best against the beige brown blotches but I still put a few on the sand areas as well. I try to sometimes superimpose the white against some of the black dots for some extra colour pop.
Finally, for the body armour I go back to the Dark Sand colour and add the same type of stripes I did previously with the black. This time I try and cross over the black stripes where possible to get more of a colour pop again.

Once I’m happy with that I finish off by adding the face flesh colour, paint any equipment like LAW or Dragons etc in Olive Drab (887) with some fine yellow lines added for the instructions text and finish off by adding a dry brush over just the weapons, gloves and web gear/pouches with Deck Tan (986) to bring out the detail again separate from the uniform and body armour.
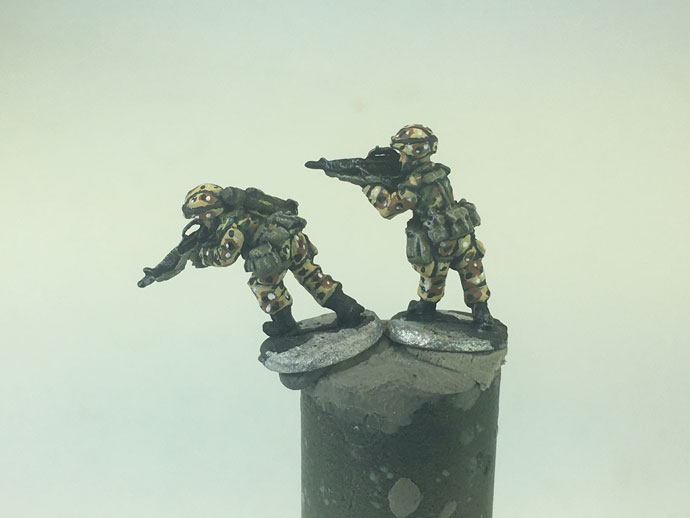

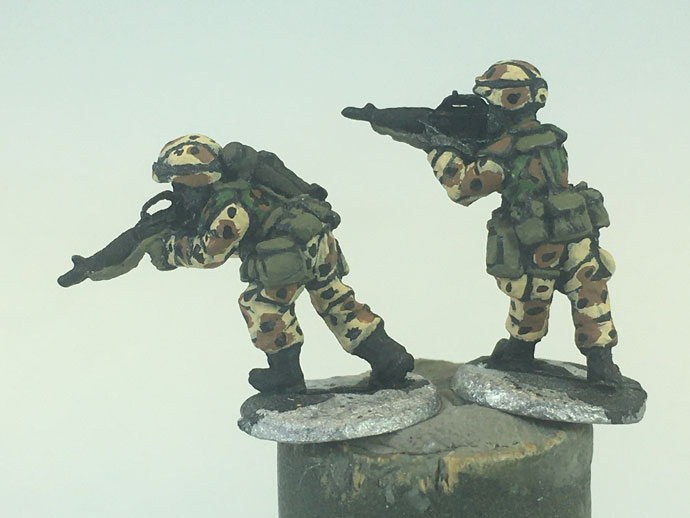
Then before they’re game ready with the desert basing of your choice. I use Acrylic house paint test pot brown mixed with Vallejo pumice gel followed by highlight drybrush with Vallejo Dark Sand.
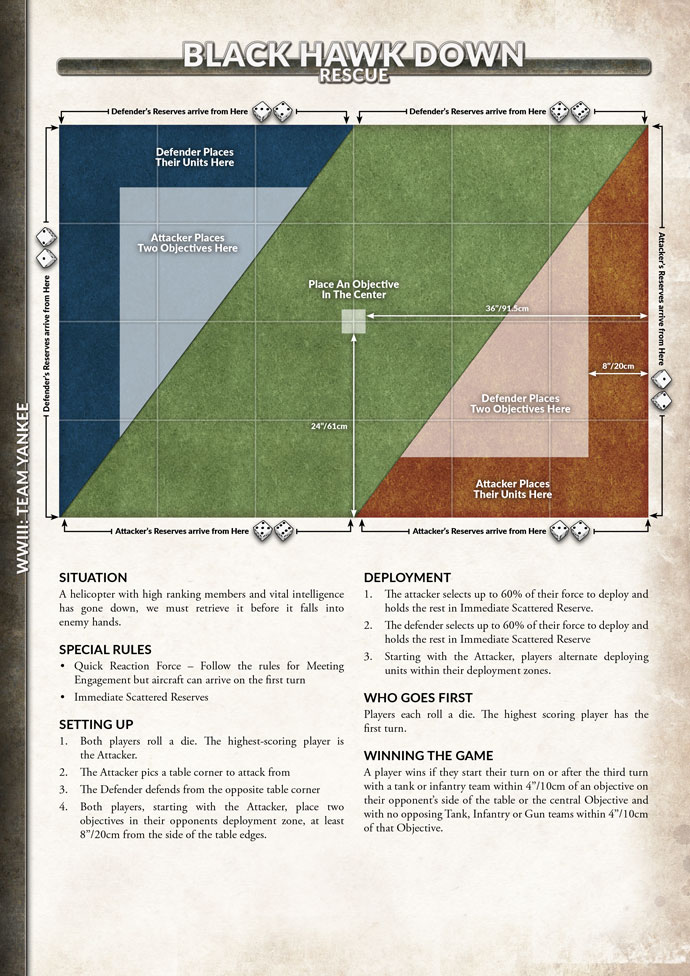
Black Hawk Down – A Rescue Mission
The story of “Black Hawk Down” has become ingrained in popular culture thanks in part to the book by Mark Bowden, and certainly thanks to the movie by Ridley Scott. If you haven’t heard the story you can get the short version on Wikipedia. The turning point is when one of the supporting helicopters is shot down and suddenly the US forces loose the initiative and the ability to pick their fights. Chris Allen has taken the situation and turned it in to a mission that you can try out at home.
Click here to download the Black Hawk Down- Rescue Mission PDF here (Right Click, Save As)…
How To Build: M109
Probably one of the most widely used models in World War III: Team Yankee (after the M113), this is another of the models that was released with the WWIII: British book, and it is now time for Aaron to show us how simple it is to build.
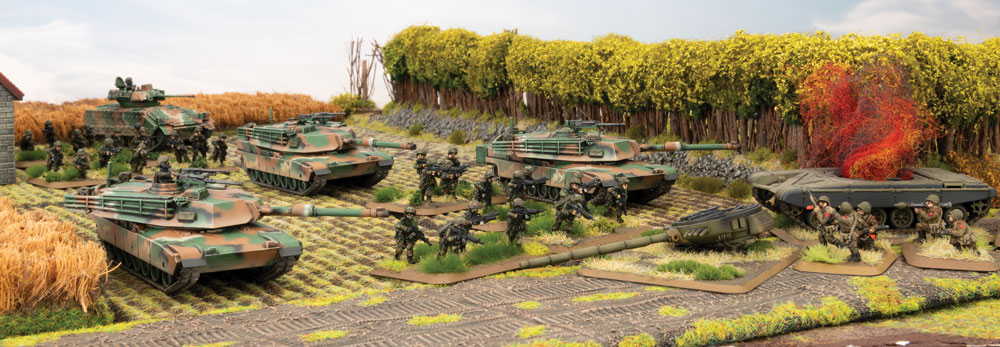
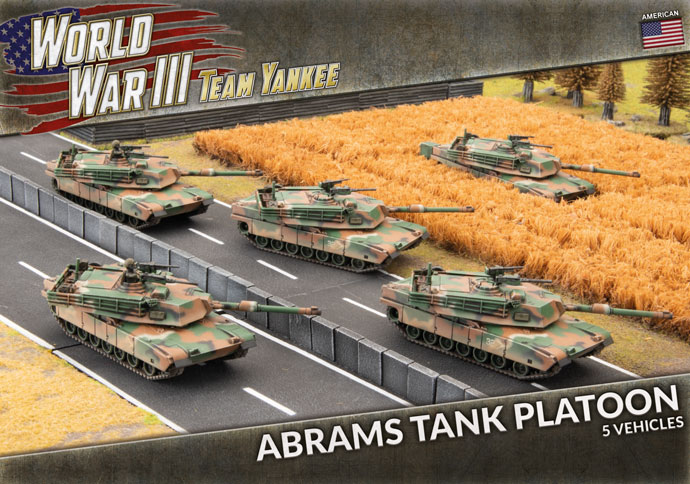
Every Anvil needs a Hammer: The M1A1HC
With Chris Allen
One of my absolute favorite things about WWIII: Team Yankee and Flames Of War is that with more missions not only can you play the force you want, but you can play the force you want how you want, most of the time. Bidding for mission types is an amazing dynamic to the game that lets you push tank armies aggressively, defend with hardened infantry, maneuver with mobile forces or try and catch people with their decisions.
All of the missions bring a lot of variety and complexity to the game, but the one thing almost all of them have in common is reserves. In some form, somebody, if not both players are starting with things off the table. Having a plan for these forces is key.
If you haven’t read The Art of Reserves by Jed Byrtus you probably should give it a review. Reserves are an integral and important part of the game and far too many people see it as a problem, a deficiency, rather than looking at the many advantages it offers. Jed walks players through the basics of reserves, and the advantages they bring to players as they come on to the table. It’s a great read and I really suggest it.
When I look at reserves I see two general styles of reserve forces
- “Racing To The Rescue”
- Counter Moves.
So what differentiates the two? Technically a reserve has no task, where a counter moves is a known tasked entity, but in game terms I would argue planning and number of units. Commonly with racing to the rescue, you’ll see reserves for a list that are a collection of smaller units adding up to 40% of the overall list. These are often but not always chosen immediately before the game and have minimal planning in terms of their employment or order to arrive. We’ve all done this, the excruciating finger math of what 40% is, and ‘I’ll figure it out later, I have to deal with my 60% now!” plan. Usually when you see units like anti-tank missile units, artillery or reconnaissance in reserve, you know they’re racing to the rescue. This type of reserve faces two major problems, first it comes on over a large period of time, with many units in reserve it just takes a long time to get that many 5s! The second issue is many haphazardly chosen units have difficulty contributing on the turn they arrive. Artillery and AT missiles can’t move and shoot (bombardments at least) and so will have to wait another turn to effectively contribute.
Counter moves on the other hand are commonly very few, sometimes only one unit, that is a known entity that has a plan (that may change as the enemy gets a vote). Counter moves forces are commonly a large consideration of a players list building process, picking the perfect tool to add the effect you want when your reserves arrive. Players commonly use these with defensive forces like infantry to bring tanks on to blunt enemy attacks or launch counter attacks of their own.
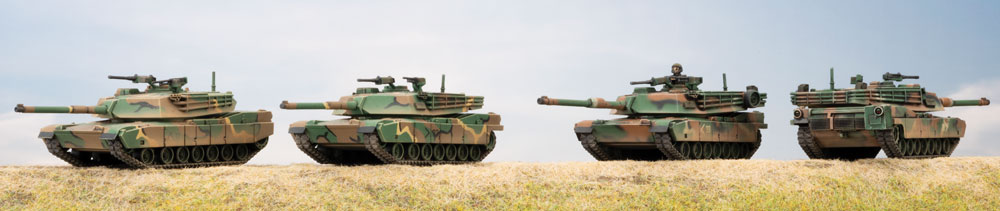
 The World War III: American book brings us two new variants of the iconic Abrams tank, and I’m here to tell you it’s the apex predator of counter moves units. The finest reserve you can have, and a game winning unit. WWIII: Team Yankee has seen the game progress in terms of story and equipment. With the next generation of tanks joining the war we’ve seen a big progression in the protection and lethality that they can bring.
Strengths and Weaknesses: Few but perfectly formed.
At first glance many people are turned off by the cost of these vehicles, with the Challenger coming in at 11 points or 13 points for the ROMOR armour package, and the M1A1 at 14 points, 18 points for the M1A1HC. In a 100 point game 2 M1A1HC come in at 36 points, or the vast majority of your reserve. You have 4 points left over to take an extra unit, which if you’ve read The Art of the Reserve you know gives you a great opportunity to take a unit to control when your tanks come in and potentially provide them more protection, like taking a unit of VADS. This allows you as the player to come onto the table with purpose and more importantly you can set them up for success.
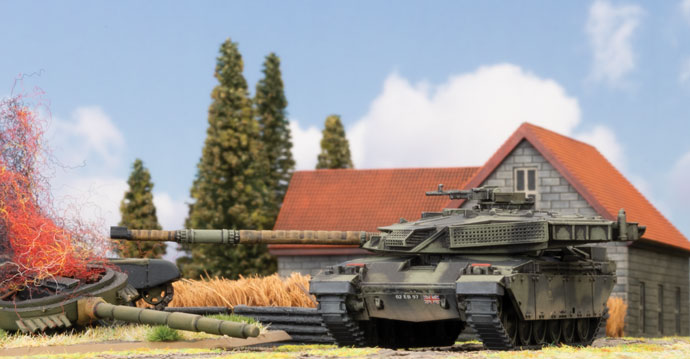
What you get in the next generation of Abrams that sets it apart from the Challenger is simple, speed and violence. The Challenger has a reduced rate of fire on the move, less AT but is better skilled for a Blitz or Assault. The Abrams on the other hand is fast and mean. With a tactical move of 14”, ROF 2 and AT 23, it epitomizes violence of action. With the HC package, the tank jumps to a Front Armour of AT 21 and so ignores most weapons on the battlefield, which combined with Chobham armour makes the tank is nearly impervious to damage in assaults. It’s the toughest nut to crack in the game and will be the central focus of your opponent in any game it takes to the field.
Threats: Not quite invincible
So what scares an armoured commander? Infantrymen would immediately answer dismounting, tankers might jest running out of gravy. But in reality it comes down to 3 things, shooting second, exposing Side Armour and missiles.
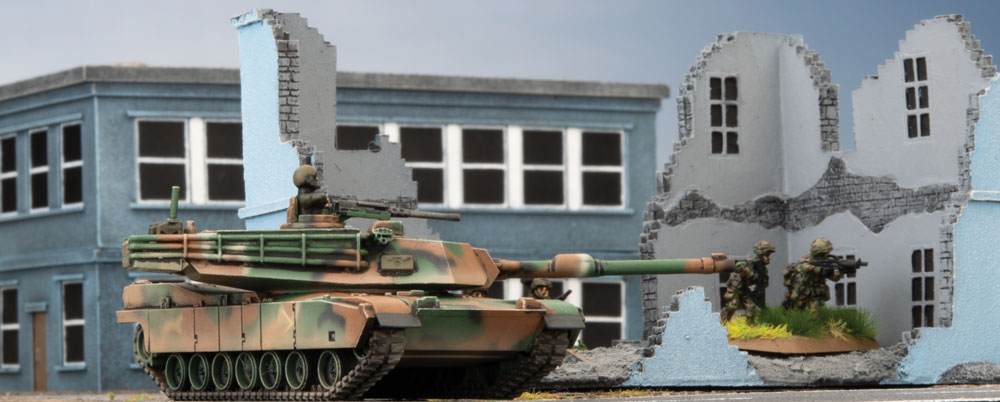
You never want to shoot second, you want to be first, first to shoot, first to hit, first to kill. Shooting second for a tanker means you did something wrong. Tanks lurk in the shadows, and appear like the specter of death and lay waste to what lies in front of them before disappearing again to rearm, and refuel to do it all again. This is exactly what putting your tanks in reserve grants you, the chance to shoot first. To say there will be no threats to my tanks until they’ve at least done something. You can start behind terrain, but air, artillery or just aggressive play can see your tanks get caught up in things. In reserve they lay in wait to bring the pain.
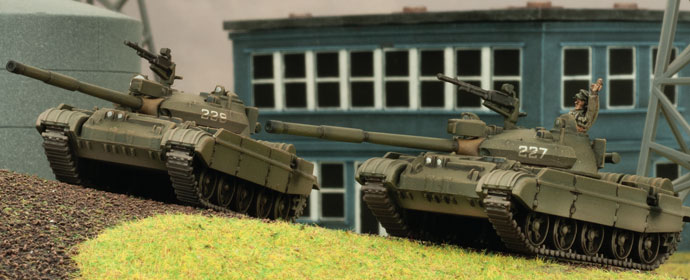
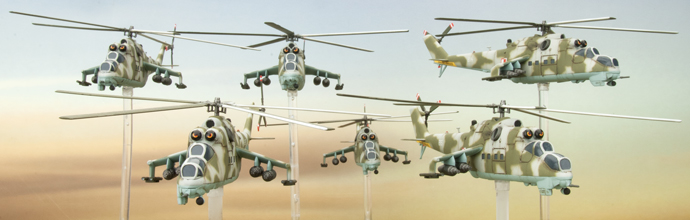
Everything can’t be Front Armour. And anything that isn’t Front Armour you don’t want being shot at. Luckily for the Abrams there is Chobham armour that provides really improved protection vs HEAT rounds used by infantry and missiles, but there is little protection from even older anti-tank guns along the side of a modern battle tank. There are few things as morale crushing as having a super tank flanked and destroyed by a tank 20 years or more its senior. Leopard 1s and T-62Ms can flood the battle space and push for side armour and that can be scary. Numerous tanks with high rates of fire can push to flank and engage these big cats and so are a key target for reduction prior to the arrival of your big tanks. But tanks and infantry have to move, navigate terrain and the enemy, and this takes time. Aircraft can do this much faster, from the moment they arrive attack aircraft and some helicopters like the Hind can push straight to attack your side armour, and they will because attacking your frontal armour is a much less viable course of action. This means two things for an American list, first that the destruction of aircraft should be your focus, destroy the best flankers. Second it means that because they’ll go for side armour, how you provide your anti-air defence can be different. Instead of creating a forward zone of protection you can shape lobes around the side of the tanks. This forces players into going for it or taking the tank from the front.
Missiles are really scary. Being shot at by something you can’t see, from a range you can’t respond at by something that can destroy you with ease is in a word unsettling. Missiles come from the sky on strike aircraft and helicopters, from specialized tank hunters, even infantry are covered in missiles. I say again, missiles are scary. While most missiles can’t move and shoot from ground platforms (with some exceptions) they are commonly cheap and can provide blanket coverage across huge sections of the table as many have great ranges. Against most modern main battle tanks like the Abrams or the Leopard 2, AT 21 and the occasional 23 are pretty scary with ~10-20% kill rates per shot on tanks in the open. With how numerous these can be for their cost it can be a hard time to be a tanker.
Armour 21 is a game changer. With FA 21, Milans, Spandrels or TOW can’t touch you frontally, and the Spiral, HOT and TOW-2 have a lot of work to do with less than a 6% kill rate per shot. For those playing along at home that’s roughly a 1 in 18 chance of killing one of these tanks frontally with AT 23. As yourself what army has 18 AT 23 missiles sitting around? The hunter quickly becomes the hunted when a tank like the M1A1HC hits the table. And while the AT 21 systems had been exceptionally cheap, they are now totally ineffective and the more expensive AT 23 systems, are considerably more expensive but inadequate for the task at hand.
| Targets without Cover Against Anti-Tank | ||||||
| Front Armour | 20 | 21 | 22 | 23 | 24 | |
| 18 | vs FP3+ | 5.56% | 11.11% | 16.67% | 22.22% | 27.78% |
| vs FP2+ | 6.94% | 13.89% | 20.83% | 27.78% | 34.72% | |
| 19 | vs FP3+ | 0.00% | 5.56% | 11.11% | 16.67% | 22.22% |
| vs FP2+ | 0.00% | 6.94% | 13.89% | 20.83% | 27.78% | |
| 20 | vs FP3+ | NA | 0.00% | 5.56% | 11.11% | 16.67% |
The 0% chances were noted for the possibility of a bail (yes, a double bail destroys a tank but for ease of explanation I went with this)
So what does the survivability of the M1A1HC along with its lethality and mobility have to do with reserves? It’s changing the game. In the Art of the Reserve, Jed clearly pointed out that things in reserve can’t be killed until they arrive. They can’t be shot at, mined, assaulted. They are safe from the few systems that can threaten them, and in reserve they give you the opportunity to set conditions to do what tanks do best, exploit.
Setting the conditions is an absolute key to success with anything, but for huge investments like the M1A1HC it’s critical. Can these tanks do it without setup? Sure, sometimes, but you have the chance to really tip the odds in your favour and let these tanks do the work they were meant to do.
Reserves, like fortune favours the bold. The attacker usually picks their reserve units once they know what the defender has placed in reserve. This allows an attacker a lot of flexibility and options. While the major argument I’m making here is leaving your big tanks in reserve can pay big dividends, for the attacker you can flip the switch and go full tilt from turn one. If a defender chooses to place their big threats such as air or large units of high AT weapons in reserve, an attacker can change things up and give an objective the bums rush. As we’ve previously said, a lot of the time there is little that can stop an next gen Abrams once it starts rolling and should the scenario permit, taking an objective fast and dirty can really catch an opponent off guard with little to no rebuttal, exploiting their play for the late game.
If you are the defender or the defender puts considerable AT assets on the board, placing your Abrams in reserve is a great option and lets you spend vital turns degrading the units that can harm your tanks. Few players can resist leaving their heavy hitters like air support available or AT units like ADATs out of the game over the course of multiple turns. If a player has fast air they roll to see if they come in, this doesn’t force them to place it or attack but even the most steadfast player can be enticed to use their air if they see an opening, a chance to do something, people want to use what they have available. This is where you can begin to blunt the spear. A plane here, a helicopter there, a missile system or two in the wood line, it all adds up and quickly. As the number of key high AT units disappear, the lifespan of the Abrams skyrockets. Look at the numbers again, it takes a lot to kill a FA21 vehicle, every single HOT missile system, Storm or Hind that burns makes the Abrams that much bigger a threat.
Opportunities: What happens when an immovable objective meets an irresistible tank. Victory.
The M1A1HC as a counter moves force, a unit with a plan, isn’t showing up just to get drawn into a fight or to kill a unit here and there, it’s showing up to win the game. And WWIII: Team Yankee is all about objectives. Can you win by destroying the enemies army? Absolutely, but it takes a long time and the longer the game goes the more opportunities there are for something to go wrong. Taking objectives is fast and violent, like these tanks, it’s the better way to go. Once these tanks arrive on the table, the countdown to victory begins. It’s now just a matter of when, where and who. Infantry can’t destroy you and so can only resist you so long on the objective, especially after turns of bombardments prior (setting the conditions). Tanks can only hope to hide or flank you, and all the while, you’re hunting them, they’re for the most part, simply a delay. Air can’t hold objectives, they can only hope to get to you in time. There are only so many tools in the toolbox and this one unit seems to attract them all.
The Abrams family of tanks are fast. With a 14” tactical they can use terrain aggressively and push rapidly while putting down heavy fire, but the tank also has big numbers when it comes to dashing and this allows the Abrams to threaten objectives almost immediately after arriving. The Abrams does have to worry about being flanked by other tanks in reserve but this is where players have to make key decisions, how fast do you push based on the time line to their tanks arriving, or where their tanks arrive. In a game like Counter Attack the reserves will almost never be able to threaten your flanks for multiple turns unless they’re units like Hinds and can be ignored for a turn as even a Leopard 2 can’t bail you range, and missile systems like a Storm can’t fire the turn they arrive. All while you drive around with an AT 23 gun and 3 machine guns, like a boss.

Overall, the M1A1HC Abrams brings something new, and adding this to your lists is going to be way too much fun. It’s not just FA 21, the Challenger has FA 21. I’ll say it right here and right now, it’s not an Abrams, it can’t do what the Abrams can. It’s not as fast, has worse cross (at FA 21), has a worse gun both in ROF and AT. It just doesn’t add up. It’s made to sit an eat shots all day, but the Abrams is here to take objectives and to own the field. The Abrams in my opinion is made to show up fashionably late to the party. Launching when the commander has set conditions by degrading the threats to these beasts, the Abrams is a juggernaut. It is the apex predator of reserves, the perfect counter moves force.
~Chris
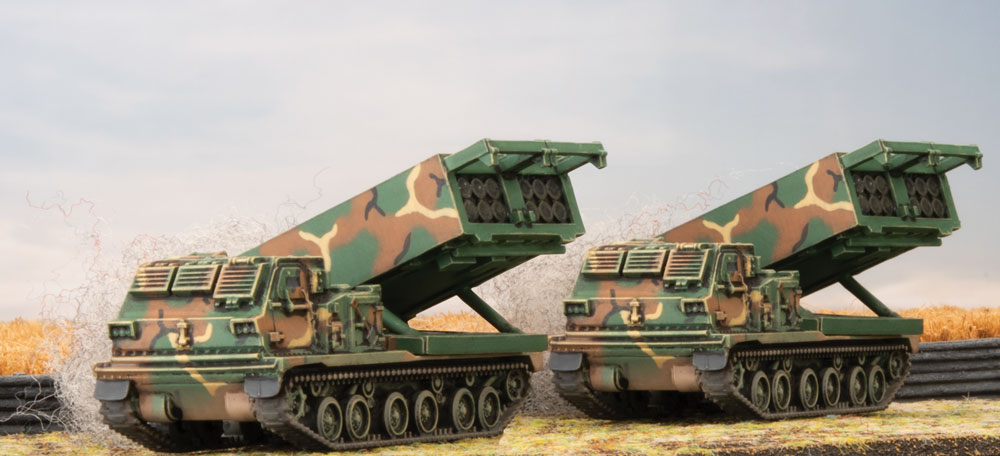
How To Build: MLRS
Released earlier this year, the MLRS is rapidly becoming a favourite round the office. Join Aaron as he puts this model through its paces on the modelling bench.
Make sure you check out Chris Allen’s article (coming later today) as to why you need both the M109 and the MLRS in your arsenal.
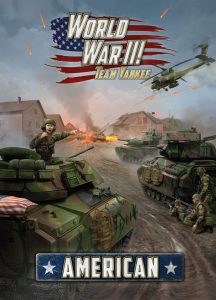
Whispering Death, the M1 Abrams
With Nick Azzaro
The M1 Abrams has become ubiquitous with the modern US military. Its mighty carapace has been a difference maker across a multitude of battlefields is the past several decades. Its legacy is that of an apex predator. Where the rumble of its treads is felt, victory is assured. This legacy has held true in the realm of World War III Team Yankee.
With its M68 105 mm gun as its sword and its top secret Chobham armor as its shield, the M1 Abrams can run roughshod over any armored competitor. In the game this has manifested itself as an Anti-tank stat of 20 on the gun with a 2+ firepower as well as its Front Armor 18 and a Side Armor of 8. This may seem like an unstoppable behemoth, but what if you want more?
Enter the M1A1. The new Abrams boxed set will be able to make this even more dominant variant of this already monstrous tank. This variant has gone and stolen the Leopard 2’s lunch as well as its deadly M256 120 mm gun. It’s now striking at an unbelievable Anti-tank of 23 while preserving its 2+ Firepower and standard 2 Rate of Fire along with its Advanced Stabilizers and Laser Rangefinders. In addition, it’s added depleted uranium to its Chobham armor taking the standard M1A1 to an ironclad Front Armor of 19 and Side Armor of 10 (unless you want to pay the points to upgrade it to the M1A1HC variant with a Front of 21 and Side of 11!).
The M1A1 is costly, but it is the foundation on which your list can be built. Its combination of offensive firepower, defensive armor, and speed make it well worth the points and sets the tone of your game. Your opponent will need to solve the puzzle you placed before them, meanwhile your Abrams will do what they do best: seek and destroy. You need only bring along a mix of support units to defend your Abrams and some infantry to lock down objectives.
The M1A1 is truly monstrous. The updated boxed set allows for the fielding of this beast to run rampant across the battlefields of World War III. It will leave your opponents trembling like the ground beneath your treads; and it will flatten them equally effectively.
~Nick
How To Build: M2 Bradley
Join Aaron as he shows you how to build the new Bradley Infantry Fighting Vehicle. Whether you are building it as the straight M2/M2 or the uparmoured A2 version, it is a great kit.
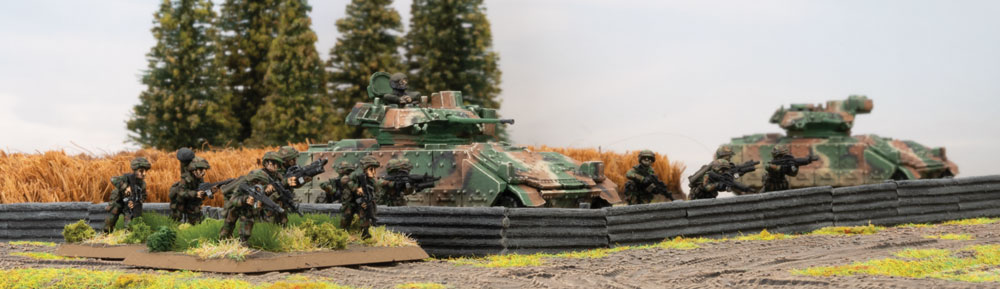
Bradleys. Lots of Bradleys
With Lonnie Mullins
From its first incarnation in the first Team Yankee book, to Stripes, and now to World War III: American, I’ve wanted to do an American army but we were missing one key component: Bradleys, which put me off even starting them. In the meantime, I’ve made do with my West Germans and a smattering of British but now, after seeing the new American army book…
I’ve cleaned my hobby files, replaced the hobby knife blade, checked the plastic clippers, bought new glue, and am getting ready to fire up the old airbrush in anticipation of the upcoming American release for World War III: Team Yankee. And I’m building my force around an M2A2 Bradley Mech Combat Team backed up by a small contingent of Marines in an LAV Company. My force will consist of:
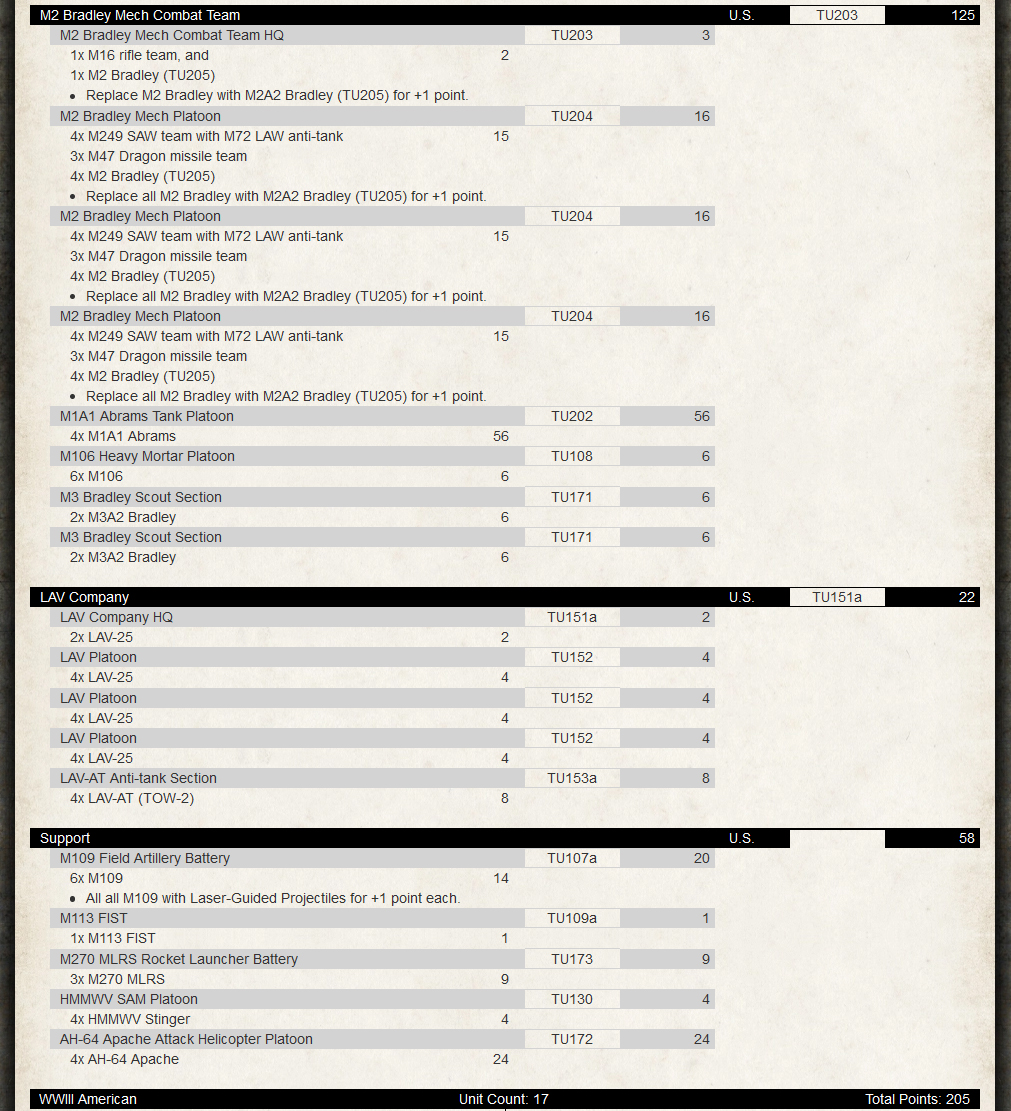
I know it’s a lot but it gives me the variety to play 25-point skirmishes to 200-point mega-battles. We’re waiting for most of the new product to get in but I’ve got my MLRS built and am working on my M109s, and can probably scrounge together some M106s and FIST to get me started before our shiny new Americans hit our dock.
I’ve gone artillery heavy in anticipation of loads of Soviet troops in their BMPs and the SPAM tactics that I’ve encountered, along with the ability to smoke up the battlefield for my own protection. Everything I have can put enough steel down-field to shred BMPs by the dozen and turn Soviet infantry into bloody wet smears and nearly all of my (army) vehicles have the ability to take out even the heaviest Soviet Armor and/or helicopters.
~Lonnie
How To Build: AH-64 Apache
It’s the one you have been waiting for… the new all plastic AH-64 Apache. Join Aaron as he assembles one.