The new releases for the Soviets in World War III: Team Yankee offer so many cool new options. When the new kits like the T-80, BMP-3, TOS-1, and Tunguska started appearing in the studio, I started noodling lists to try and include all of them.
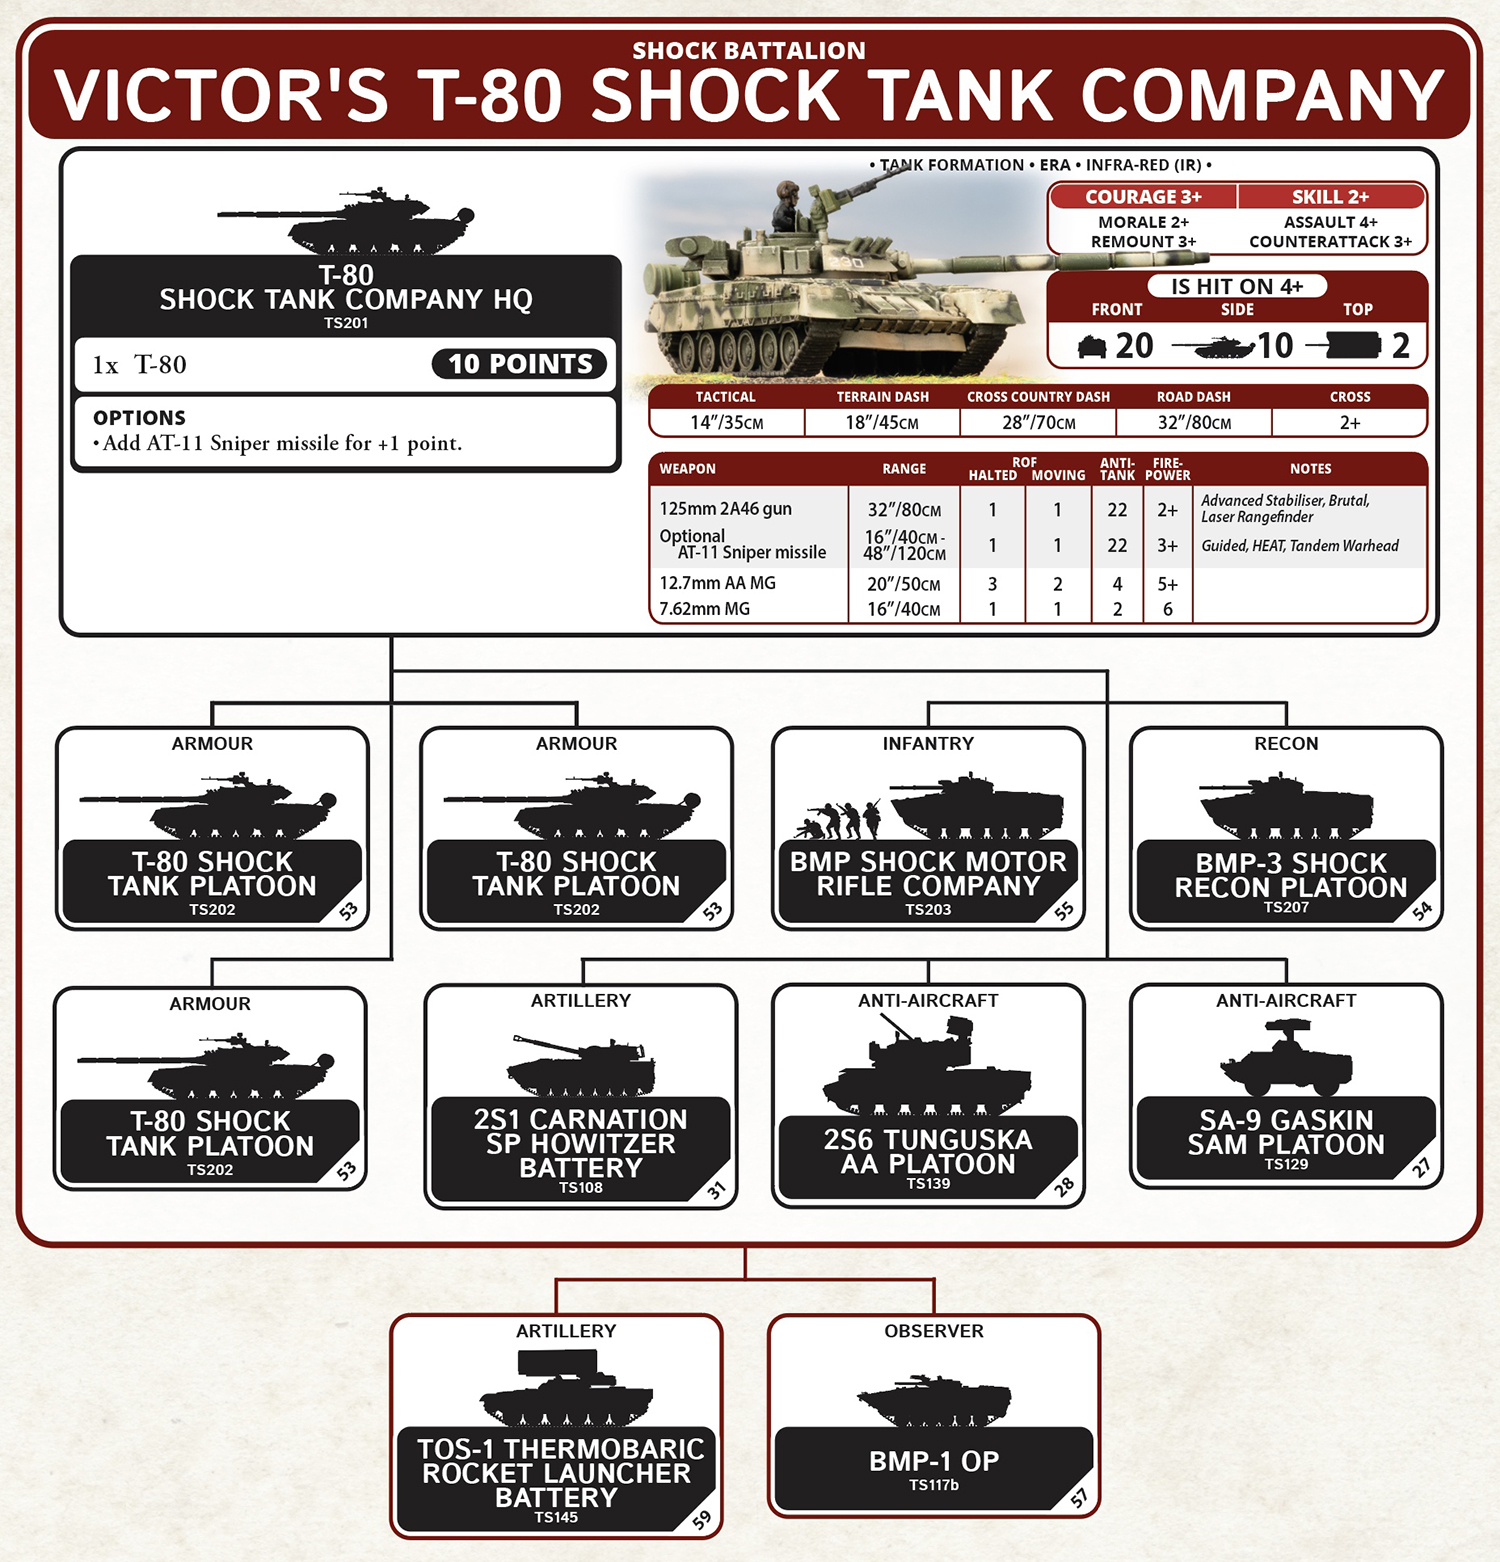
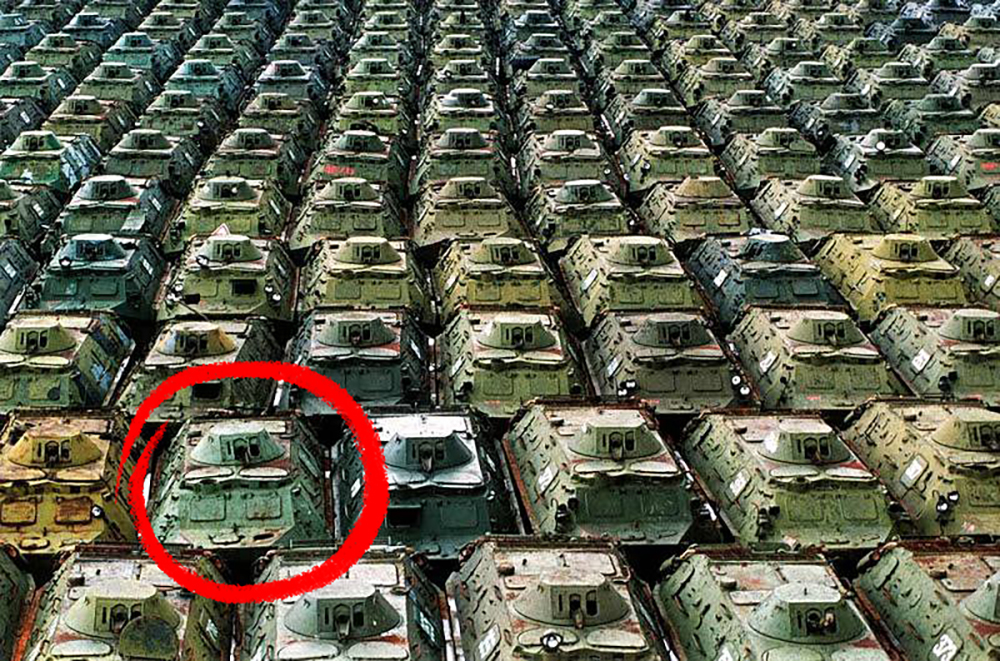
Soviet armies get stereotyped as large hordes of questionable quality units, relying on sheer numbers to overwhelm the enemy. This is often true, but with modern equipment, and the new T-80 Shock Tank Company, I saw an opportunity here to find a middle ground between quantity and quality.
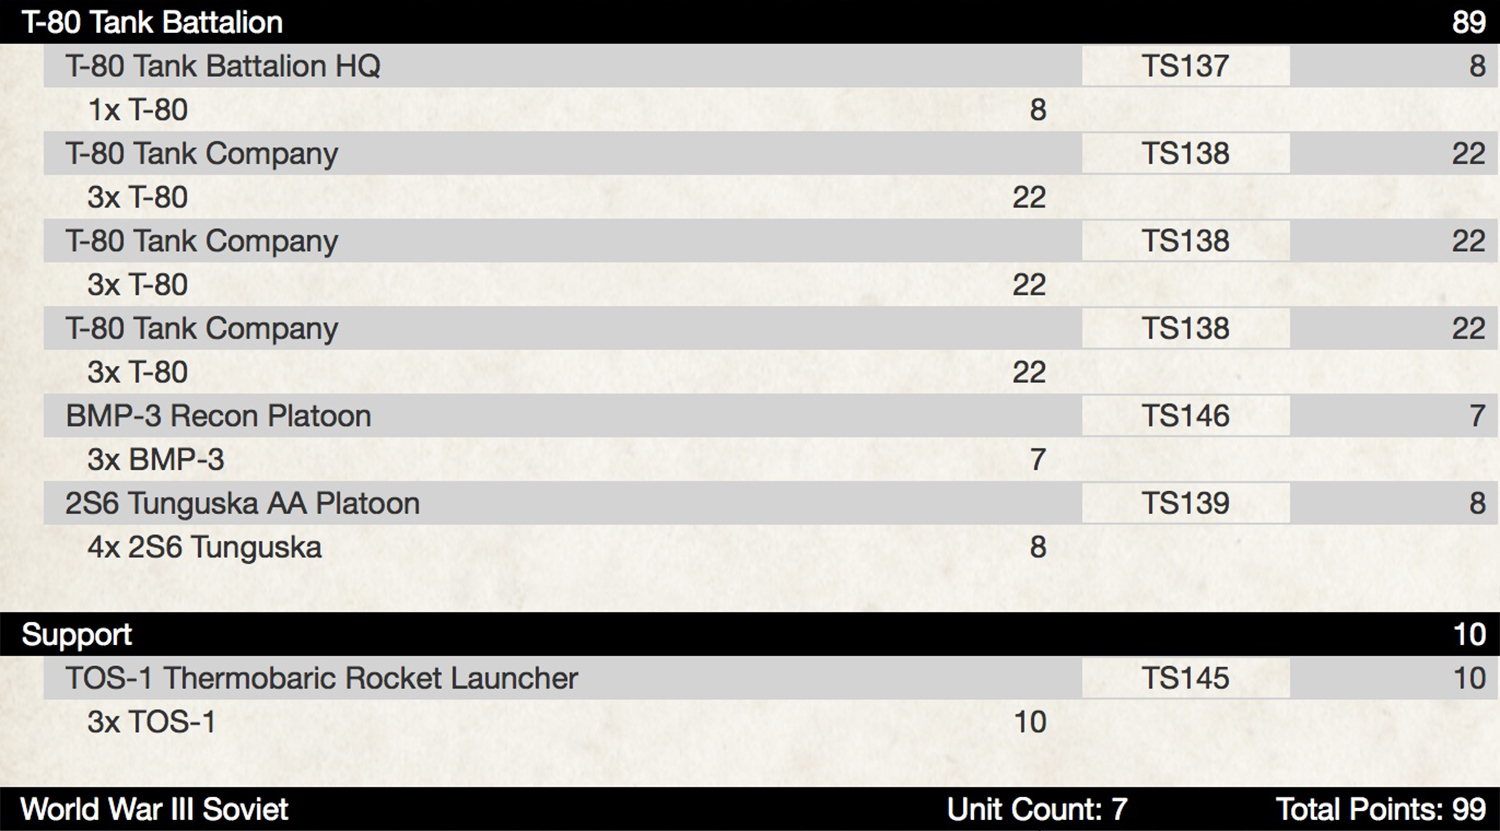
Here is the first list a came up with:
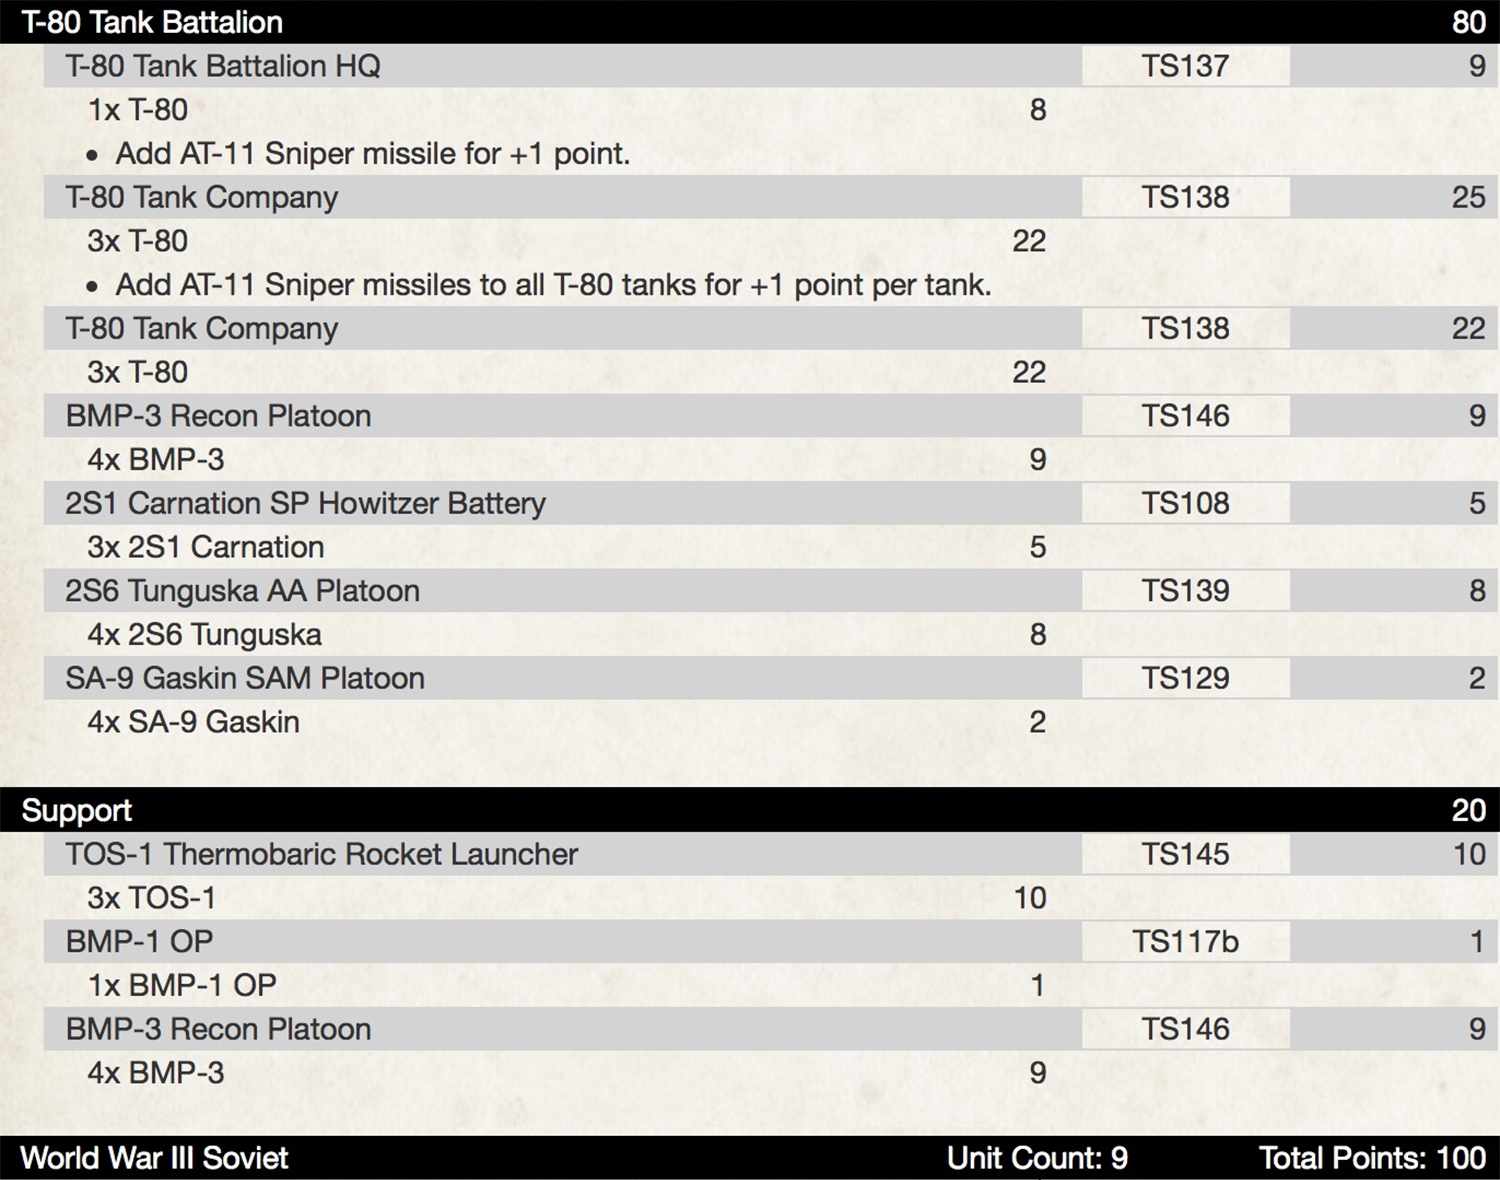
This is the type of list I normally gravitate to; max out on expensive tanks, and fill the rest with something cool. Unfortunately on the table it doesn’t have a combined arms approach and is easily countered, so I evolved it to this:
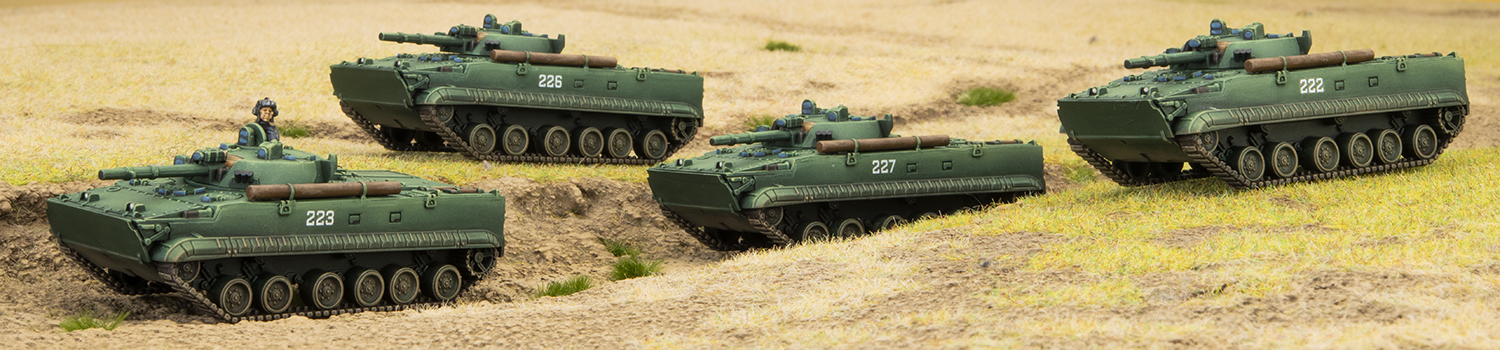
Now here I feel like I’ve got a little bit of everything, and most of it is in formation. I dropped a T-80 company which made room for Carnations and an OP, Gaskins, more recon, and some missiles. The two platoons of BMP-3’s are maybe a little redundant, but the end goal is to have 8 painted so I can run 3 as recon, and 5 to carry infantry as you’ll see below…
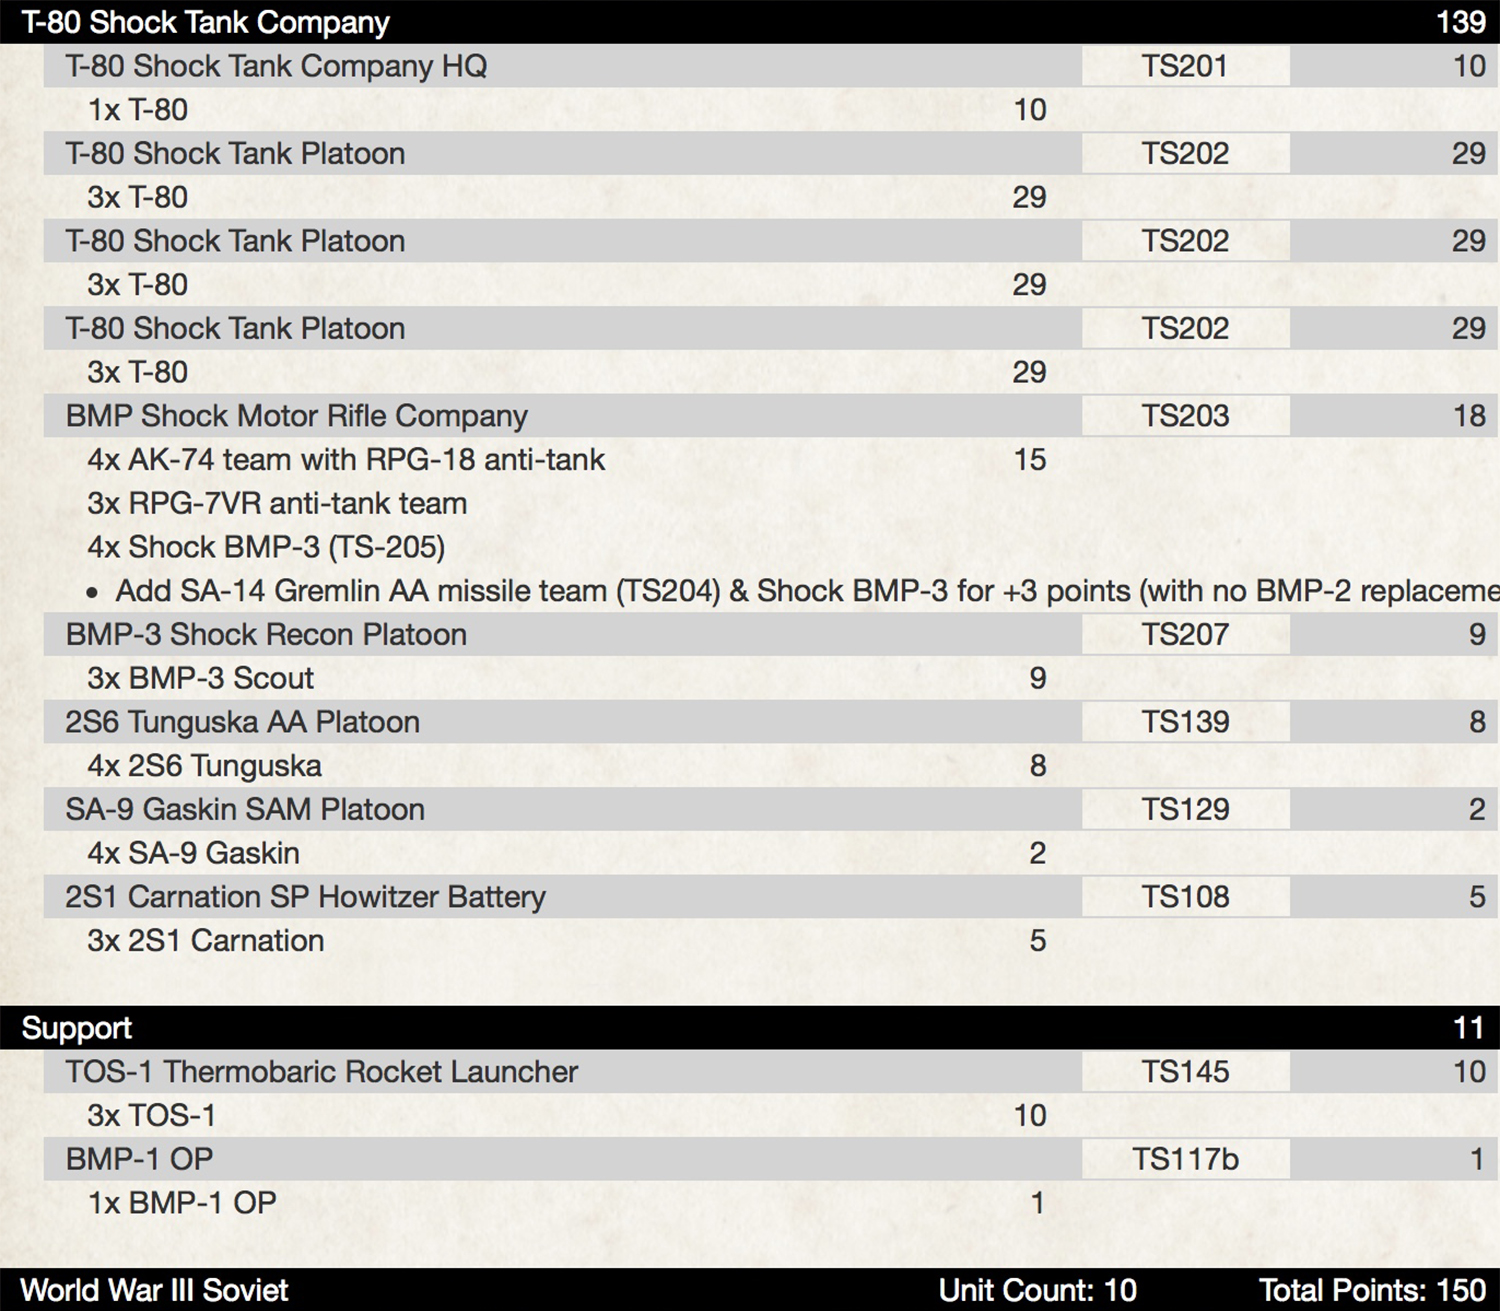
A few of us in the studio have been talking about playing some larger 150 point games, focusing on more modern equipment, so I wanted to see if I could easily make the army work at both 100 and 150 points with minimal extra painting. Here is how the above list grows:
I put the third company of T-80’s back in, and upgraded the formation to the Shock Company. The biggest addition is the Motor Rifle Company, but I think these improve the list greatly, and will be a fun painting project later down the line.
I’m excited to have two lists to throw down whether it’s at a 100 point tournament, or a friendly game with one of the Big Four at 150 points, without a huge change in model count. It’s mostly thanks to the new Shock Tank Company offering the option to have Soviets hit on 4+ for a bit more points, and I’m eager to try out both.
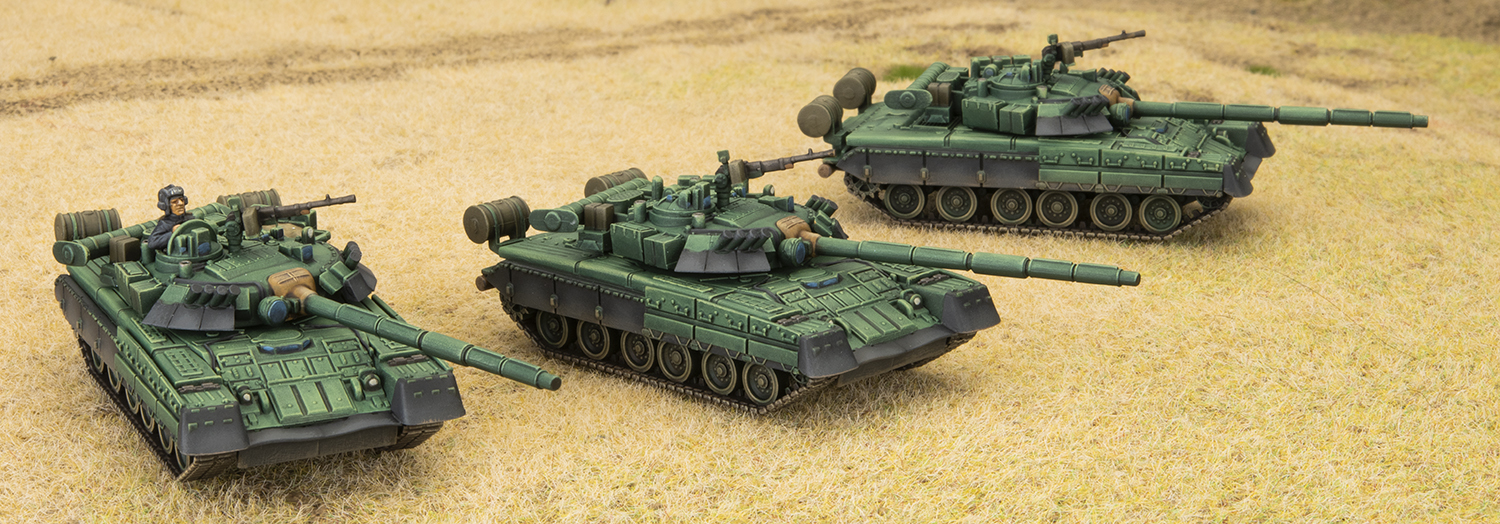
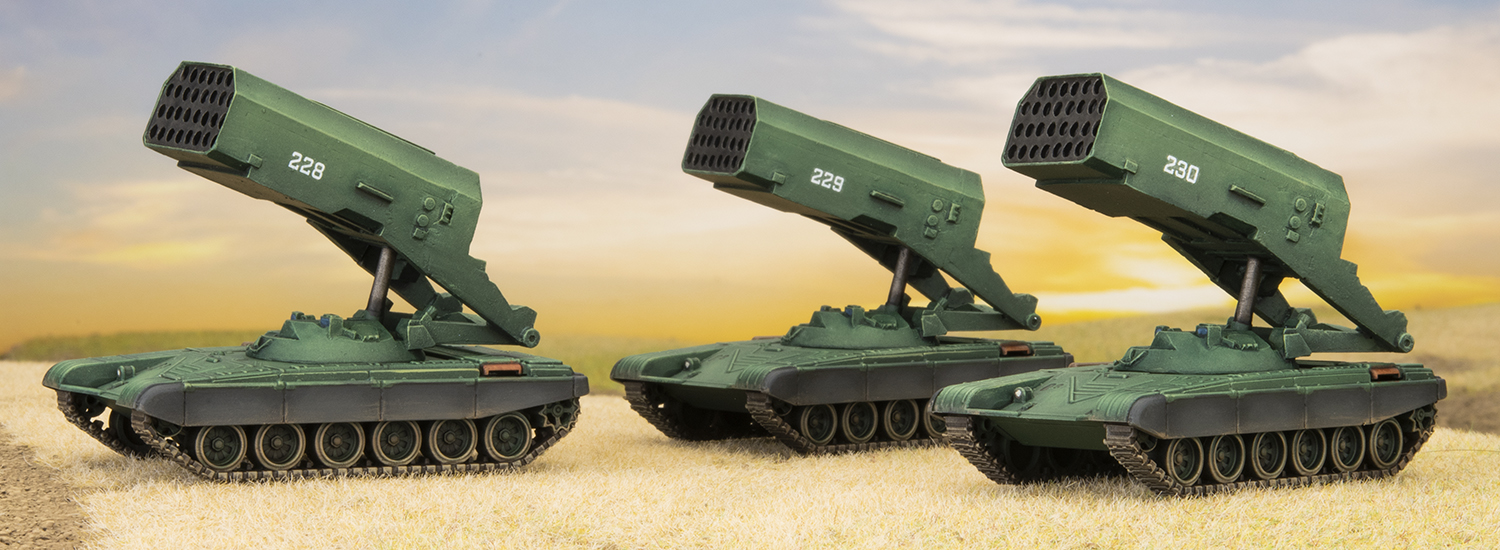
With this force I toiled for a while about whether or not to do camouflage or plain green. There are some really cool camo schemes out there for Soviet tanks, and it was very tempting. However when my army lists started to contain more and more vehicles (tune in for Victors WWIII Soviet list at 3pm) , I settled on plain green to ensure I’d get them all finished in the time frame. But what shade of green?
As you will have seen in Chris and Evan’s article (What is soviet green?) there no one green to rule them all. I’ve painted plenty of drab olive greens before, so I aimed for something more vibrant.
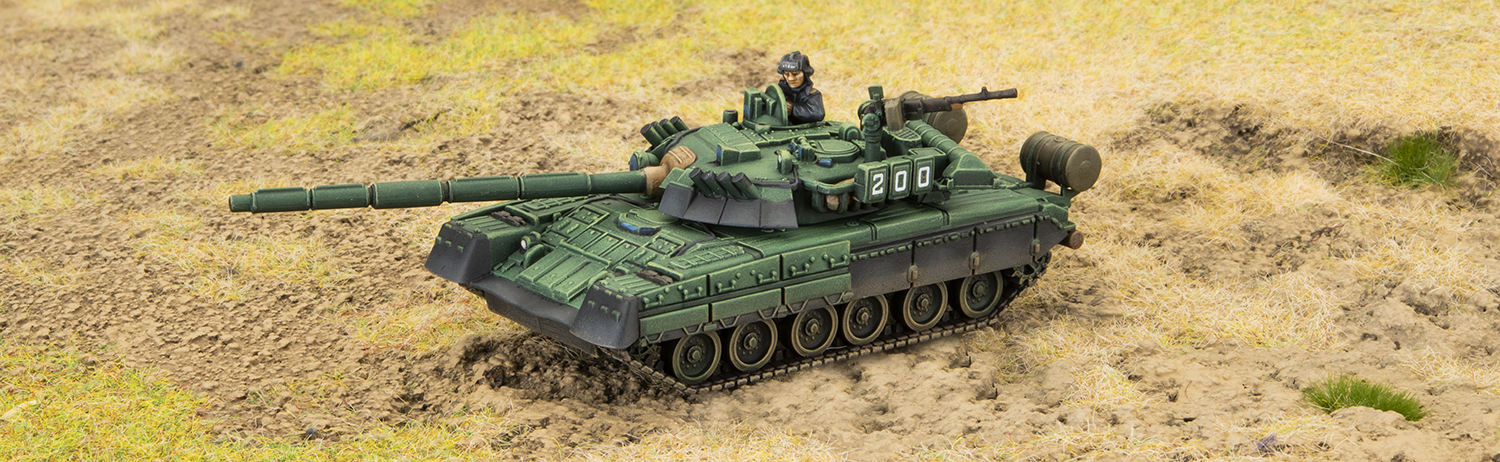
I started by airbrushing a dark green, and then panel fading with a pale green, intentionally going quite light. Next was a dry-brush and a wash to tone it all down, followed by a second dry-brush to bring back the edges. This is a really quick way to get a lot of tonal depth on your tanks quickly.
The result is quite an intense green, more towards blue than yellow. It won’t be for everyone tastes, but I’m quite happy with it and it pops on the table.
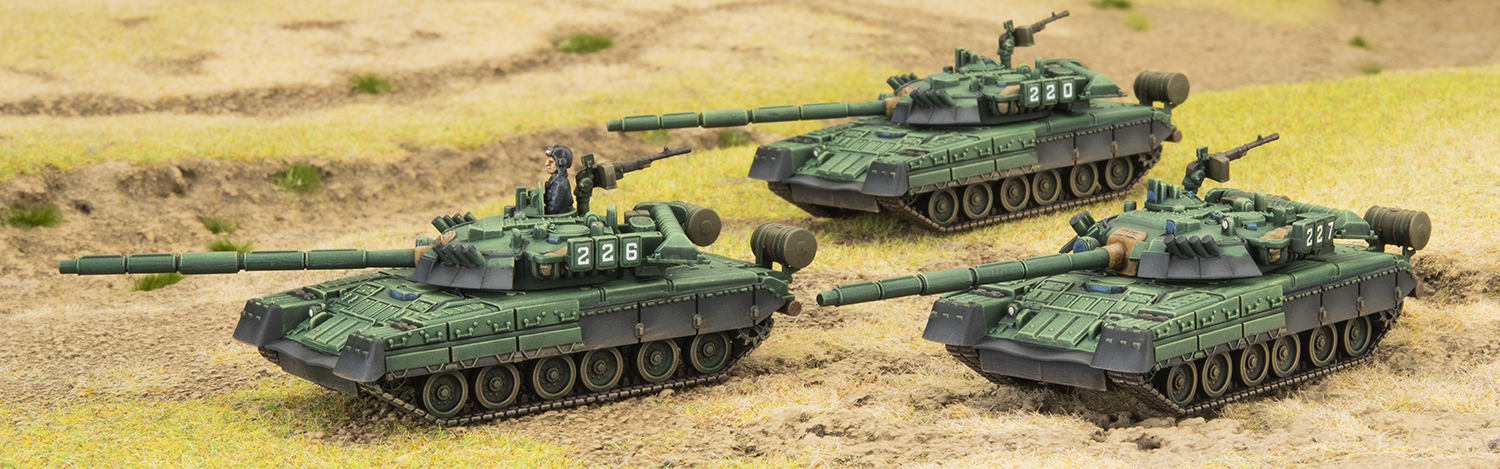
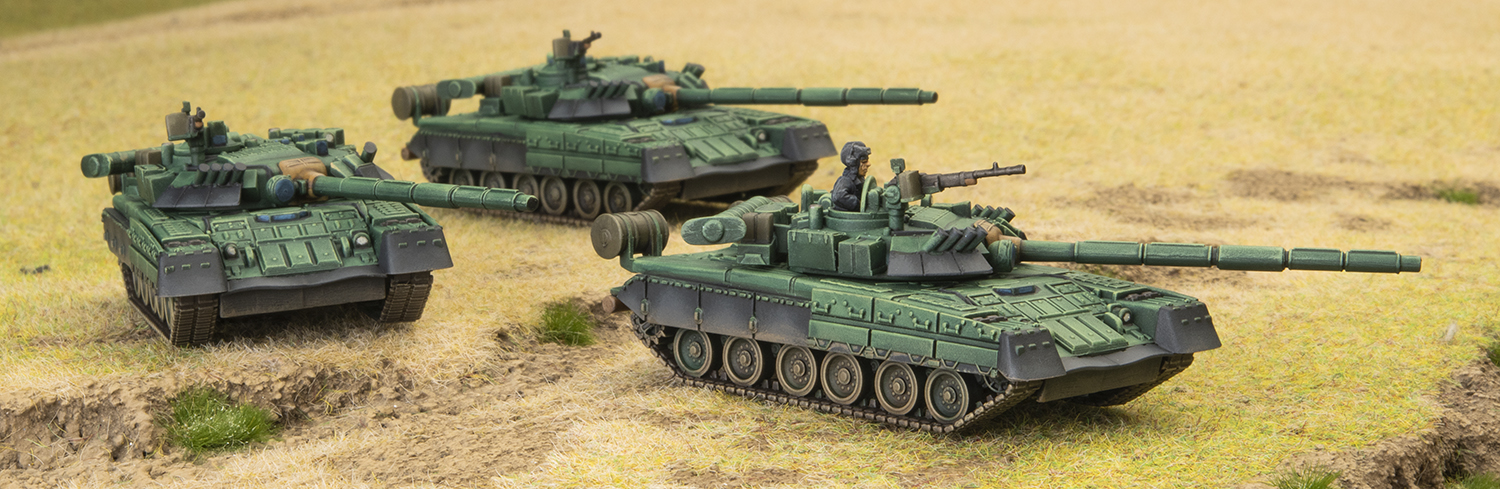
I chose to paint the rubber parts to add another colour to break up the green. In reality they would likely be painted the same time as the tank, but there are examples with bare rubber. Same goes for the wooden un-ditching logs, tools, and exhausts where paint might have come off and rusted over time.
Another additional colour I used was an olive drab, which I used for anything consumable (MG ammo tins, fuel drums, missile canisters, etc).
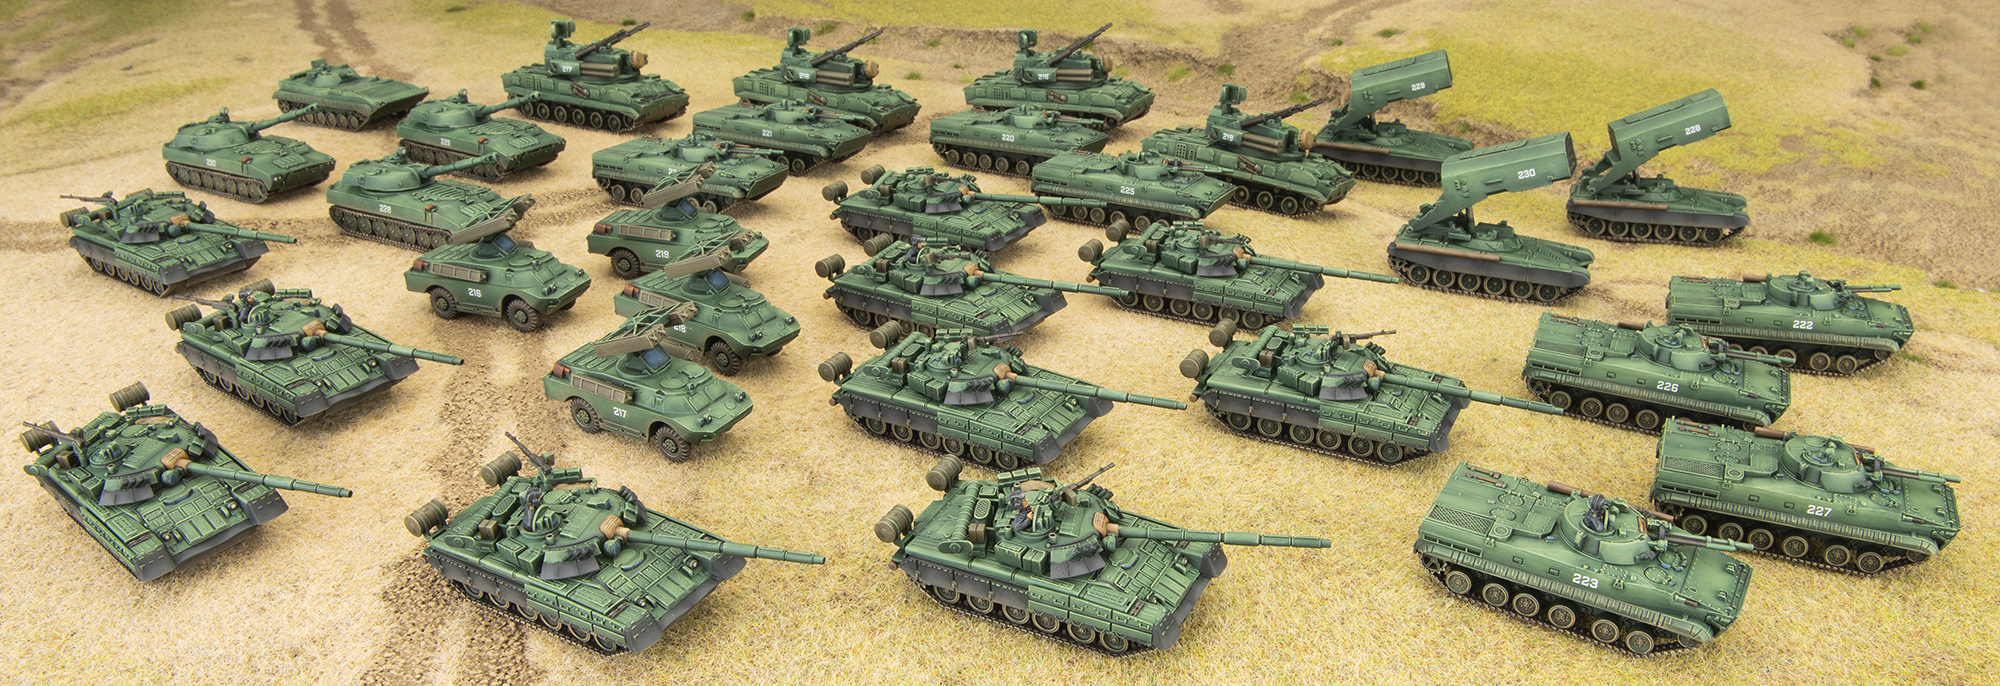
So even with a “green horde” I’ve managed to get some other colours in there which hopefully add some visual interest without looking too patch work.
That’s 34 vehicles completed in 18 evenings, the largest army I’ve ever painted, and the fastest. Time for a break before I work on the infantry to ride in the BMP-3’s. I’m looking forward to using these all in a game soon!
With all the new cool stuff coming out for this release, I thought it would be a good opportunity to also review the existing Main Battle Tanks. When Team Yankee was first launched there was only the T-72 that Soviet players could take. With the release of Red Thunder, the T-64 was introduced. Oil Wars brought us the T-62M. This release brings all these tanks together in one book alongside the new T-80 and T-55AM.
So many choices now for the Soviet player and with V2 of the rules, allows to take Black Box units as Formation Support giving us more options to field combinations of tanks depending on your play style. In this article, we look at the existing tanks (T-64, T-72, T-62M), their stats, cost and comparisons.
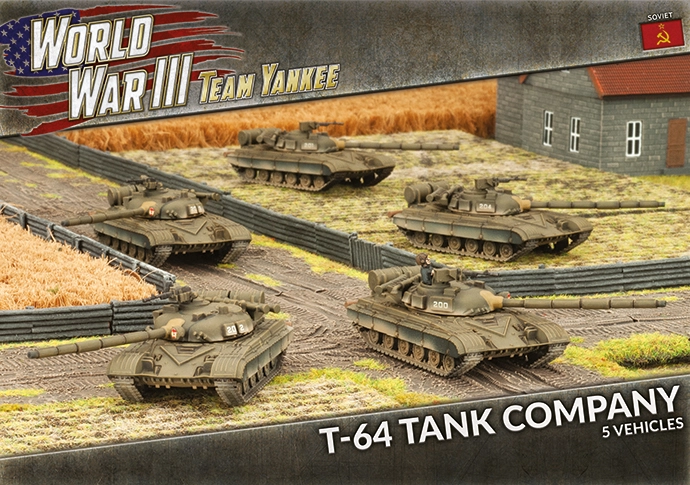
The T-64:
Starting off with the T-64, prior to this release was the premier go to Tank for the Soviet player. It has FA17 SA9 TA2, BDD armour (side 13 against HEAT), tactical 14” move, 32” range AT22 gun with advanced stabiliser, optional AT21 missile with range out to 48” that can be fired on the move!
The gun – AT22 with advanced stabiliser means moving up to 14” and able to fire its main gun on the move with no penalty. So effectively its range is up to 46” if you move and fire. Brutal – hit dug in infantry with it and that infantry team is re-rolling its saves! Laser rangefinder – No +1 to hit targets over 16”.
The missile – AT21 that can be fired on the move with 16” – 48” range increases with tactical move of 14” to 62” range! Guided – no +1 to hit over 16”. HEAT – no +1 to armour save for over 16” range. For those missions where you have scattered reserves and they turn up at the other end of the table – no problem anymore with coming on at tactical and firing your missile giving you 62” range.
The armour – FA17 SA9 TA2. SA9 with BDD (effective against some of the infantry HEAT weapons by increasing to SA13) – a better chance for assaulting.
The speed – 14” tactical speed means you will keep moving suffering no penalties for moving and firing. 3+ cross check which means you will pass them 67% of the time. 16” terrain dash and 24” cross country dash if you need it.
The stats – Skill 5+ so you will not be doing much blitzing or shooting and scooting. Remount is 3+ so easier to get back in. Morale 3+ to stay in the battle. Assaults are 5+ but counterattack on 4+ – so get those assaults in and look to force your opponent off the objective! HQ has better stats of course, so you want the HQ close by for the assaults.
The battalion HQ comprises one tank for 6pts and can add an optional missile for +1pt.
Tank Company has a minimum of three tanks for 13pts and a maximum of ten tanks for 55pts. Each tank beyond the minimum is an additional 6pts. If you want the optional missile its +2pts for the whole company – a bargain when running a medium to large company of them. Fit up to three tanks with a Mine Clearing Device for 1pt for the company. If you run the minimum sized company of three tanks you get a massive discount. You could run a battalion of HQ plus three companies of three for 45pts leaving plenty of options to support them including taking a company of either Shock T-80s or a large company of T-62Ms or T-55AMs. In the past I tend to run a battalion of HQ plus two companies of five tanks (I find the companies of the right size for survivability). One of those companies I arm with missiles. Then I support them with BTR infantry plus the usual support options of AA, recon, artillery (and helicopters if points allow).
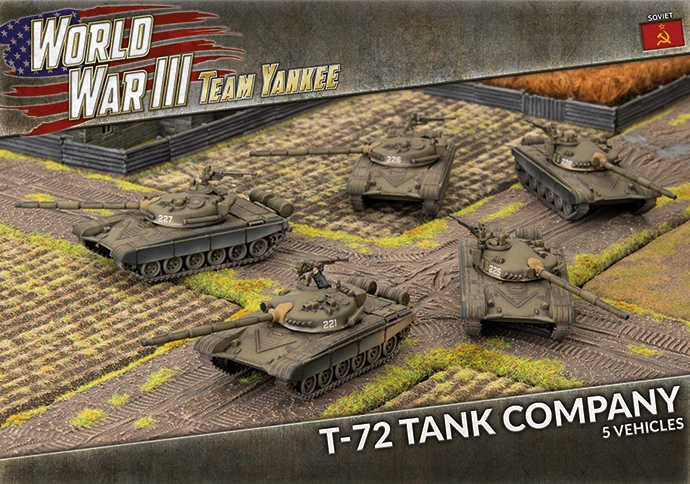
The T-72:
Next up is the T-72 tank. This iconic tank whilst replaced with the T-64 (and now T-80) is still a useful tank (especially as a Warsaw pact player). It still has a place in the soviet arsenal too. It has FA16 SA8 TA2, BDD armour (side 13 against HEAT), tactical 10” move, 32” range AT22 gun with stabiliser.
The gun – AT22 with stabiliser means moving up to 10” and able to fire its main gun on the move with no penalty. You can move up to 14” with a +1 penalty over 10”. So effectively its range is up to 46” if you move and fire. Brutal – hit dug in infantry with it and that infantry team is re-rolling its saves! Laser rangefinder – No +1 to hit targets over 16”.
The armour – FA16 SA8 TA2. SA8 with BDD (effective against some of the infantry HEAT weapons by increasing to SA13) – a better chance for assaulting.
The speed – 10” tactical speed means you will keep on the move, suffering no penalties for moving and firing. With stabiliser this means you can increase your tactical speed to 14” with a +1 to hit over 10”. 3+ cross check which means you will pass them 67% of the time. 16” terrain dash and 24” cross country dash if you need it.
The stats – Skill 5+ so you will not be doing much blitzing or shooting and scooting. Remount is 3+ so easier to get back in. Morale 3+ to stay in the battle. Assaults are 5+ but counterattack on 4+ – so get those assaults in and look to force your opponent off the objective! HQ has better stats of course, so you want the HQ close by for the assaults.
The battalion HQ comprises one tank for 5pts. Tank Company has a minimum of three tanks for 12pts and a maximum of ten tanks for 47pts. Each tank beyond the minimum is an additional 5pts. Fit up to three tanks with a Mine Clearing Device for 1pt for the company. If you run the minimum sized company of three tanks you get a massive discount. I tend to take T-72s as a support option for my BMP-2 Motor Rifle Battalion or Air Afgansty formation when I want more quality tanks but need to shave points where I cannot quite fit the number of T-64s in that I want.
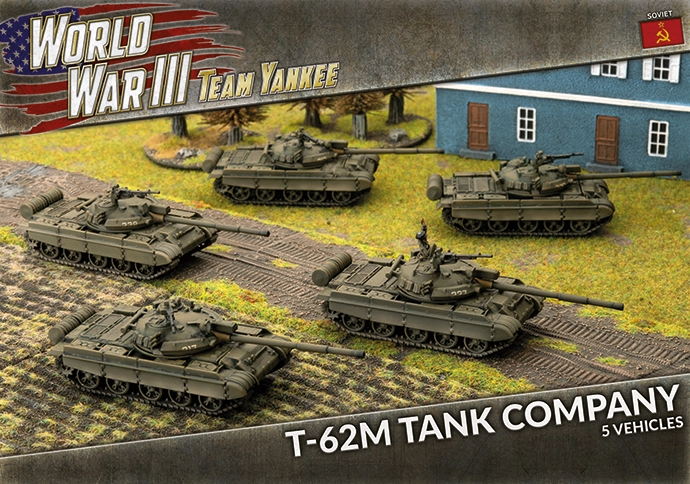
The T-62M:
Finally, the T-62M tank – released when Oil Wars came out gave the Soviet player their first cheap spam list tank, with a missile! It has FA14 SA9 TA2 with Bazooka Skirts, tactical 10” move, 32” range AT21 gun, optional AT21 missile with range out to 48”.
The gun – AT21 with NO slow firing rule means moving up to 10” and able to fire its main gun on the move with no penalty. So effectively its range is up to 42” if you move and fire. Brutal – hit dug in infantry with it and that infantry team is re-rolling its saves! Laser rangefinder – No +1 to hit targets over 16”.
The armour – FA14 SA9 TA2. Most modern tank guns and missiles will go right through the frontal armour but has enough to stave off attacks from other weapons. Side armour is relatively decent and has Bazooka Skirts which means it goes to 10 vs HEAT weapons. Against more modern infantry anti-tank armed units, it is still not going to stop it but against older weapons you have a chance.
The speed – 10” tactical speed means you will keep on the move, suffering no penalties for moving and firing. 4+ cross check which means you will pass them 50% of the time. 14” terrain dash and 20” cross country dash if you need it.
The stats – Skill 5+ so you will not be doing much blitzing or shooting and scooting. Remount is 3+ so easier to get back in. Morale 3+ to stay in the battle. Assaults are 5+ but counterattack on 4+ – so get those assaults in and look to force your opponent off the objective! HQ has better stats of course, so you want the HQ close by for the assaults.
The battalion HQ comprises one tank for 4pts and can add an optional missile for +1pt.
Tank Company has a minimum of three tanks for 5pts and a maximum of ten tanks for 29pts. Beyond the minimum three tanks it is an additional 2pts for the 4th tank, 3pts for the 5th and 6th tanks each, then an additional 4pts per tank thereafter. A massive discount if you are running three or four tank companies. You could easily run a dual formation of HQ plus three companies of four tanks for 32pts a formation and running two of them costs 64pts. That is 26 tanks running amuck with lots of points for support. I would run a single formation of HQ plus three companies of seven with one company armed with the AT-10 stabber missile for 60pts leaving me options to take an BTR infantry formation as well plus artillery, recon, and helicopters. Seven to eight tanks are large enough to have a chance of surviving and not as inflexible as trying to manoeuvre nine or ten.
Looking to compare the Tanks now directly, we can compare armour, weapons, and movement.
Armour stats:
Tank
Front
Side
Top
Notes
T-64
17
9
2
BDD
T-72
16
8
2
BDD
T-62M
14
9
2
Bazooka Skirts
Weapon stats:
Tank Weapon
Range
ROF
Halted
ROF
Moving
Anti-Tank
Fire
Power
Notes
T-64 125mm 2A46 gun
32”/80cm
1
1
22
2+
Advanced Stabiliser, Brutal, Laser Rangefinder
T-72 125mm 2A46 gun
32”/80cm
1
1
22
2+
Stabiliser, Brutal, Laser Rangefinder
T-62M 115mm 2A20 gun
32”/80cm
1
1
21
2+
Brutal, Laser Rangefinder
Missile stats:
Missle
Range
ROF
Halted
ROF
Moving
Anti-Tank
Fire
Power
Notes
AT-8 Songster (T-64)
16”/40cm – 48”/120cm
1
1
21
3+
Guided, HEAT
AT-10 Stabber (T-62M)
16”/40cm – 48”/120cm
1
–
21
3+
Guided, HEAT
Movement Stats:
Tank
Tactical
Terrain Dash
Cross Country Dash
Road Dash
Cross
T-64
14”/35cm
16”/40cm
24”/60cm
28”/70cm
3+
T-72
10”/25cm
16”/40cm
24”/60cm
28”/70cm
3+
T-62M
10”/25cm
14”/35cm
20”/50cm
24”/60cm
4+
The T-64 has the best overall stats in terms of protection, gun, missile able to fire on the move and the fastest tank, especially at tactical (where it counts the most). From a cost perspective, the T-62M is probably the best overall. Its gun is quite good with AT21 and an optional missile means you have options with your force build giving you flexibility to run a decent armed tank in either spam mode or paired with an infantry formation, giving more a balanced approached but lots of firepower. The downside is that it has a worse cross check. The T-72 is the poor man’s T-64 really. It is used where missiles on the tank are not required for your playstyle and for me its best used a formation support option for an infantry formation where you need a good tank but not quite enough points for T-64s or T-80s. The best use for T-72s is in the Warsaw pact formations. I run a Czech T-72M formation and it works well.
There you have it, there is still a place for the existing tanks in your arsenal, even with the new T-80 and T-55AM out. Happy list building!
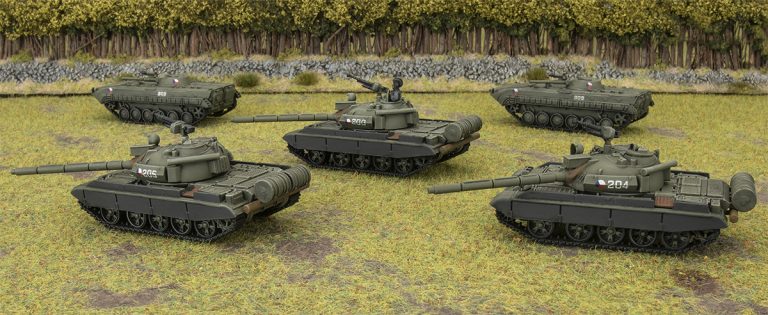
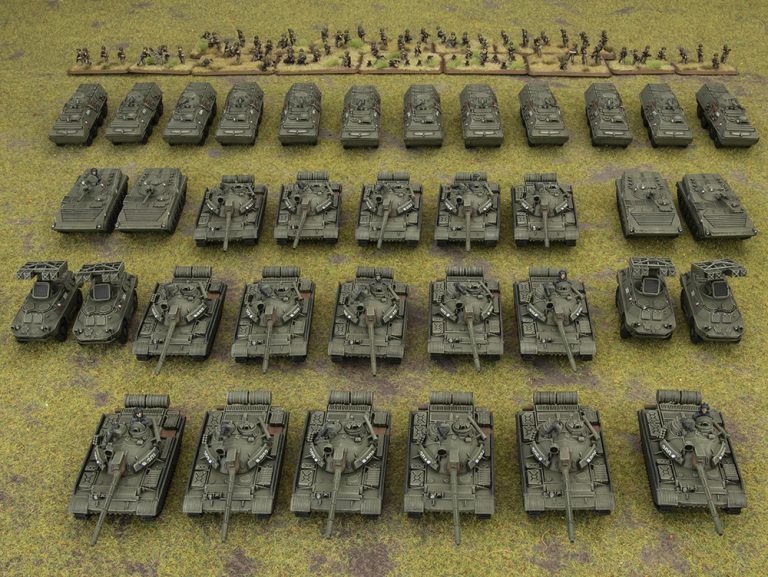
As you may, or may not know, I have built quite a large WWIII Czechoslovakian army dominated with T-55’s, T-72’s and infantry (in OT-64s). It is a heck of a lot of fun to play but, if I am being blunt, has a literal table full of models which can make for some hard work on the gaming front. You can find some pictures from the previous Panzerschreck and ValleyCon where I took this army along for a weekend of gaming over on the Big Four Of Late War site here…
With the release of the WWIII: Soviet book I thought it might be interesting to take (some) of the models that I have and put together a couple of lists that I can use when I am wanting a faster game. Clearly these are some more motivated, better trained, and in some cases better equipped Czechoslovakian forces – perhaps a demonstration battalion or Presidential Guard…
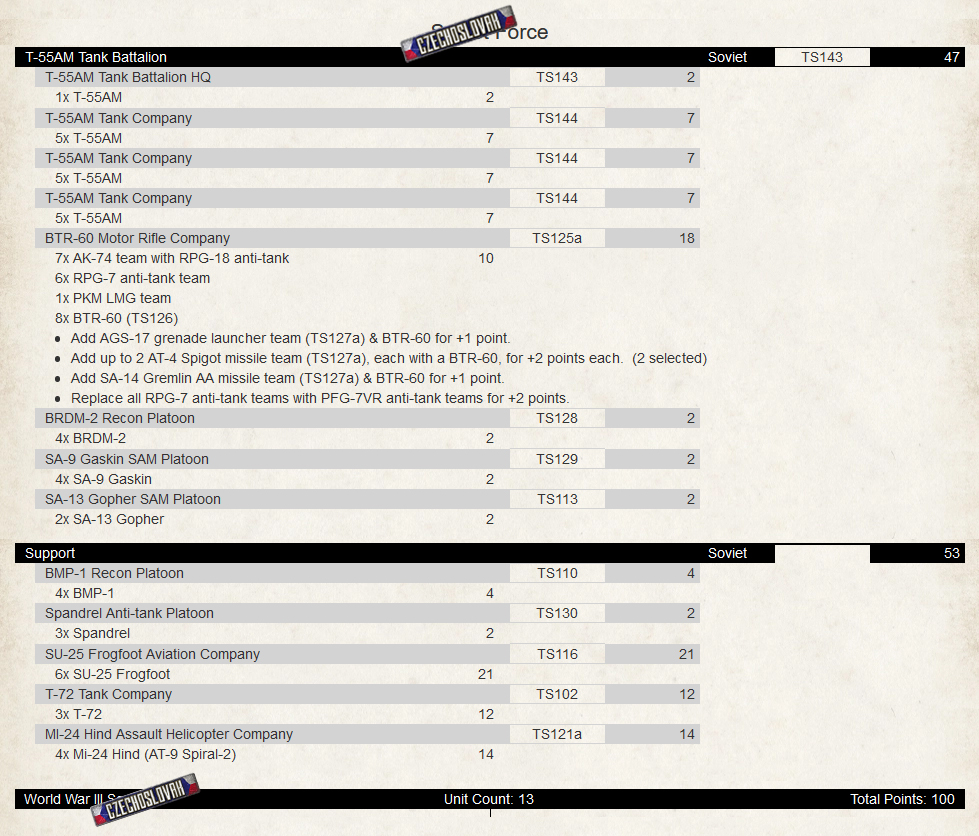
First up is my T-55 Battalion. This lets me keep running the horde of tanks (and with some slight upgrades from the T-55AM2 going to the T-55AM (check out John’s article about this great tank here… )
I am not sure that running this force will save me ‘much’ time when playing games but at least I can be less worried about taking those Morale and Rally checks when I come under fire. I wanted to play around with the idea of adding missiles to my T-55AM’s but I couldn’t bring myself to remove any of the units to find the points!
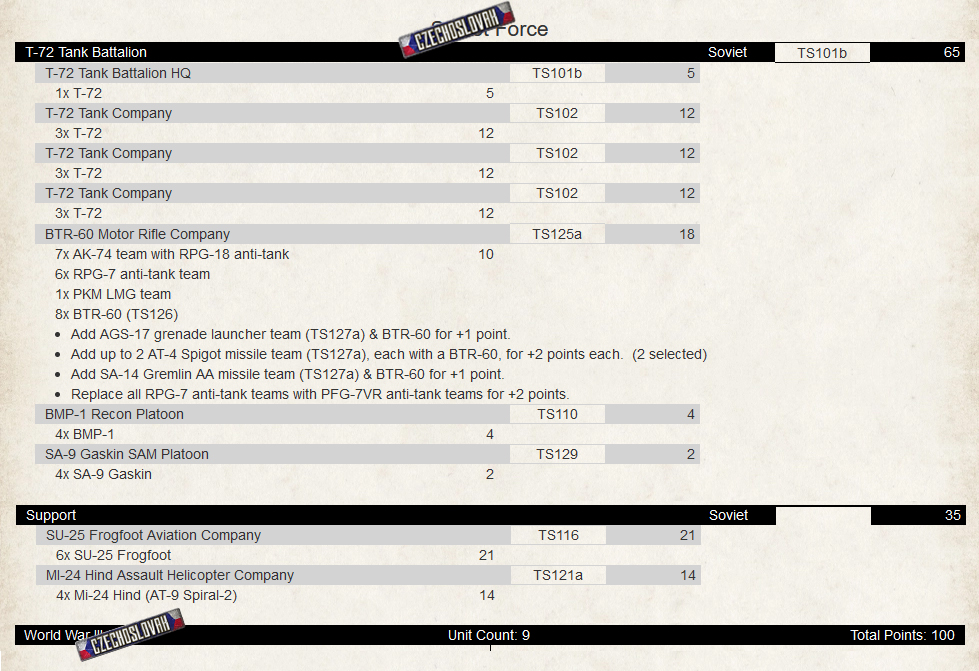
My second option is really just a variant on the theme with the T-72’s taking the lead. I’m not convinced that platoons of three is a good idea but right now I only have 10 painted and whilst I intend on adding another six (to increase the platoons up to five each) I am stuck with what I have. Additionally, I run in to the same issue with the T-55AM’s that I would need to find those points. First World problems eh….
Looking at the force though I have managed to pack in all my (okay, almost all of my) favourite toys with the Hinds and SU-25’s in there for some serious heavy lifting whilst the infantry (upgraded with next-gen RPGs) should be a headache for someone.
Both lists look a lot of fun to run and whilst I don’t have the new shiny T-80 or BMP-3 I still have a well-rounded force. This also gives me an excuse to build a specific ‘ultra-modern’ Soviet T-80 army at a later date that can be used to help stiffen up their Czechoslovakian allies!
Successful Soviet Combat Operations are predicated on the effective and consistent use of the algorithm. Soviet military scientists applied rigorous consideration, and research to provide commanders with decision action tools. If you go through Soviet Doctrine you’ll find no shortage of these. They were made to be simple and effective means to plan operations. My personal favorite is a chart where you plot the speed of yourself, the enemy and the range you’re at and it pops out the time you have before the engagement starts. They are really useful and we now see the West today coming out with similar things on digital platforms. But where a million-dollar space pen was designed, a pencil still worked just fine. The same can be said of the Soviet algorithm tables and charts.
So how do you use this ‘calculator’ or algorithm chart?
First off you need to make a prediction of the enemy air power threat. There are two aspects to this process, first you understand your vulnerability to air power. What air power often does is reduce your freedom of movement. It seems weird at first, but follow me here. By having a bogey man of suddenly appearing threats, air reduces your freedom to move out of cover or away from air defence. It’s meant to scare you into smaller less advantageous action and then punish you when you don’t. The amount to which this can affect you is based on your own composition.
If your army is composed of BTR-60s, how much of a threat does air pose to this force? I would argue against something like this the threat of certain air platforms such as Apaches or Cobras is low. What is a hellfire or a TOW missile going to do that say a M242 Bushmaster isn’t? Not much. Turn this around and consider a force comprised of T-80s, where these high value tanks are vulnerable to high AT weapons with LOS to the whole table and you find yourself considering air weapons platforms as a high threat. This doesn’t mean that a force based on BTRs is always low threat, or that one with T-80s is always high. You need to understand your force and how you see the path to victory. The same BTR-60 formation could have a platoon of Shock T-80Us and that unit is needed to take the objective. This might then be a high threat consideration. But that part is up to you.
Once you’ve considered your vulnerability to air, to your force and your plan, you need to consider the threat that you expect. This can be difficult as it’s a prediction of the future and you’re working with very limited info. In casual play with friends you know your buddies, you know units they always take and if this includes air, it’s a good indication. Newly painted Hind platoon? Bet it’s showing up. Tournaments and other events like game nights are more difficult, but I find that if I expect at least one unit of air, be it strike aircraft or helicopters, I’m rarely disappointed in choosing to always bring ground-based air defence units. If you’re in a place where air is less common you can also consider taking platforms that are dual purpose like the ZSU-23-4 Shilka or the 2S6 Tunguska that can provide both anti air fire and suppress ground targets with their high rate of fire.
Once you’ve considered your vulnerability and the expected air threat, you should have an idea of what you’re going to see show up and how big a worry it is to you. This is where you start to prepare your force and how you are going to kill them. Using the table you can essentially add up the kill rate you believe you need to deal with a given threat by using the right hand column.
The table below gives you the expected normal output of full batteries of air defence weapons systems in service for the Soviets against expected targets based off their to hit and save values. So if you’re expecting a group of A-10s, consult the 3+ save sections, Hinds or Apaches look up the 4+ save areas based on their respective hit value. This will give you all of your relevant destruction data for the battery vs the target. If you are planning on using half platoons just reduce the expected kills per turn by half.
Vs to hit 3+ 5+ save
% chance to kill
Shots to kill
Shots per pl
Kills per turn
Missile systems
Gaskin
14.81%
6.75
8
1.19
Gopher
22.22%
4.5
8
1.78
Gecko
29.63%
3.375
12
3.56
Tunguska
29.63%
3.375
8
2.37
Gun systems
Shilka
14.81%
6.75
24
3.56
Tunguska
14.81%
6.75
28
4.15
Vs to hit 3+ 4+ save
% chance to kill
Shots to kill
Shots per pl
Kills per turn
Missile systems
Gaskin
11.11%
9
8
0.89
Gopher
16.67%
6
8
1.33
Gecko
22.22%
4.5
12
2.67
Tunguska
22.22%
4.5
8
1.78
Gun systems
Shilka
11.11%
9
24
2.67
Tunguska
11.11%
9
28
3.11
Vs to hit 4+ 5+ save
% chance to kill
Shots to kill
Shots per pl
Kills per turn
Missile systems
Gaskin
11.11%
9
8
0.89
Gopher
16.67%
6
8
1.33
Gecko
22.22%
4.5
12
2.67
Tunguska
22.22%
4.5
8
1.78
Gun systems
Shilka
11.11%
9
24
2.67
Tunguska
11.11%
9
28
3.11
Vs to hit 4+ 4+ save
% chance to kill
Shots to kill
Shots per pl
Kills per turn
Missile systems
Gaskin
8.33%
12
8
0.67
Gopher
12.50%
8
8
1.00
Gecko
16.67%
6
12
2.00
Tunguska
16.67%
6
8
1.33
Gun systems
Shilka
8.33%
12
24
2.00
Tunguska
8.33%
12
28
2.33
Vs to hit 4+ 3+ save
% chance to kill
Shots to kill
Shots per pl
Kills per turn
Missile systems
Gaskin
5.56%
18
8
0.44
Gopher
8.33%
12
8
0.67
Gecko
11.11%
9
12
1.33
Tunguska
11.11%
9
8
0.89
Gun systems
Shilka
5.56%
18
24
1.33
Tunguska
5.56%
18
28
1.56
Vs to hit 5+ 5+ save
% chance to kill
Shots to kill
Shots per pl
Kills per turn
Missile systems
Gaskin
7.41%
13.5
8
0.59
Gopher
11.11%
9
8
0.89
Gecko
14.81%
6.75
12
1.78
Tunguska
14.81%
6.75
8
1.19
Gun systems
Shilka
7.41%
13.5
24
1.78
Tunguska
7.41%
13.5
28
2.07
Vs to hit 5+ 4+ save
% chance to kill
Shots to kill
Shots per pl
Kills per turn
Missile systems
Gaskin
5.56%
18
8
0.44
Gopher
8.33%
12
8
0.67
Gecko
11.11%
9
12
1.33
Tunguska
11.11%
9
8
0.89
Gun systems
Shilka
5.56%
18
24
1.33
Tunguska
5.56%
18
28
1.56
Vs to hit 5+ 3+ save
% chance to kill
Shots to kill
Shots per pl
Kills per turn
Missile systems
Gaskin
3.70%
27
8
0.30
Gopher
5.56%
18
8
0.44
Gecko
7.41%
13.5
12
0.89
Tunguska
7.41%
13.5
8
0.59
Gun systems
Shilka
3.70%
27
24
0.89
Tunguska
3.70%
27
28
1.04
Vs to hit 6+ 5+ save
% chance to kill
Shots to kill
Shots per pl
Kills per turn
Missile systems
Gaskin
3.70%
27
8
0.30
Gopher
5.56%
18
8
0.44
Gecko
7.41%
13.5
12
0.89
Tunguska
7.41%
13.5
8
0.59
Gun systems
Shilka
3.70%
27
24
0.89
Tunguska
3.70%
27
28
1.04
Vs to hit 6+ 4+ save
% chance to kill
Shots to kill
Shots per pl
Kills per turn
Missile systems
Gaskin
2.78%
36
8
0.22
Gopher
4.17%
24
8
0.33
Gecko
5.56%
18
12
0.67
Tunguska
5.56%
18
8
0.44
Gun systems
Shilka
2.78%
36
24
0.67
Tunguska
2.78%
36
28
0.78
For example, if you want to destroy a unit of 4 Harriers before they can engage you with cluster munitions, you can consult the 4+ to hit column, or the 5+ to hit column if you expect to keep your ground-based air defence teams concealed in woods or behind buildings. With these inputs, we can see that a battery of Tunguskas should kill 3 Harriers, 2 if concealed, while two platoons of Shilkas will probably down 5 or 3-4 if concealed. Because the harrier has to get close to do it’s work, these gun systems are probably the best bet.
How about a pair of Cobras? Well consider that they will almost always be either a 5+ or 6+ to hit, and sitting in their own backfield you probably want to use a missile system. Geckos look to be the thing you need, but you could also consider taking Gophers, or even Tunguskas backed by Gaskins. This should give you coverage and enough scare factor to either keep the helicopters off the table until your air defence has been knocked out, or possibly have your opponent not fire for risk of losing their birds.
Purpose built or multi-tool?
Gun systems bring a lot to the table, and this includes the ability to fire at ground targets which is fairly amazing as anyone who’s ever run Shilkas can attest to. But while the gun systems have higher expected output than missile teams due to rate of fire, you need to remember that they also have a dramatically reduced range. This means you’ll have to escort units across the table if you want to protect them, or project your AA against long range missile systems like Apaches. If you want to take down these long-range systems, you need to either go get them or invest in missiles. Gaskins, Gophers, Geckos, even the lowly Gremlin (not included in the table but you can get the percentages from the Gaskin) can dominate the entire table being able to provide anti-aircraft fire to anything that shows up.
What the Shilka has going for it is its high rate of fire, albeit at a short range. With the introduction of the Tunguska you get the best of both worlds, an all-in-one package. It has missiles with the same profile (but lower rate of fire) as the Gecko and an amazing gun with a higher rate of fire than the Shilka and higher AT for all those ground targets. It’s kind of perfect.
The Soviet army had the largest most integrated and varied ground based air defence in the world, and this is no different in WWIII:Team Yankee. You can own the sky from the ground and gain freedom of movement for your forces to spread the Soviet Union’s ideals across Europe and beyond. Add to that the fact that these are some of the coolest models in the range, covered in guns and missiles, and there’s pretty much no reason to leave home without them.
Pete the Wargamer takes us through painting the T-80 in meticulous detail, with paint colours and brushing techniques to pick out the most minute feature on your new model.