
World War III: Soviet Live Launch – Sunday 15th November-7.00am PST
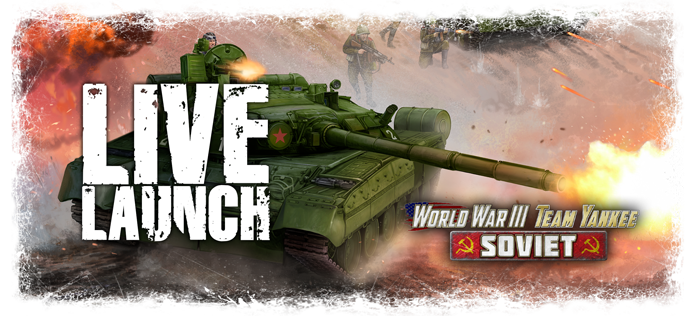
We are putting the LIVE back in live launch! Join the Big Four of Late War Sunday 15th November 7:00 AM PST as we launch our new WWIII Team Yankee Soviet range. We will be updating the Live Launch website and we will streaming from the Battlefront Studio in NZ on our Twitch channel! Be sure to join us there and to follow us so you’ll know the moment we go live!
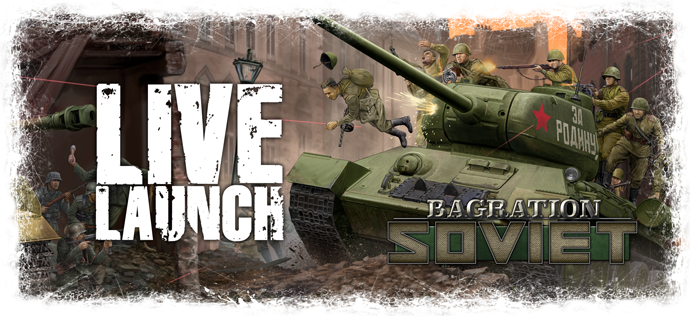
Bagration: Soviet Live Launch Round-Up
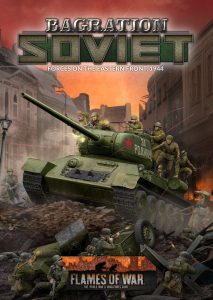
Bagration: Soviet is Live on Forces and Digital
Race To Minsk: Ace Campaign
Tactics and Gaming
Returning to the Rodina T-34 Battalion
Casey’s Soviet Reconnaissance
Building a Forward Detachment Formation
Wayne’s Hero Shock Rifle Battalion
Battle for the Concrete Jungle – City Fighting in Flames Of War
Object 249 and the “Killer of Beasts
IS-2s, The Anvil
Victor’s Heroes Ride Again
Multi-Mission Infantry – The Soviet Engineer-Sapper
Hunting the Big Cats – A Look at the IS Series in Flames Of War
Anything More Than A 76mm Is Overkill
Wittmann vs the IS-2?
The Red Tide: A look at Soviet Infantry in Bagration
Tiger Tiger, Burning Bright
Army Building With The Heavy Assault Group Starter
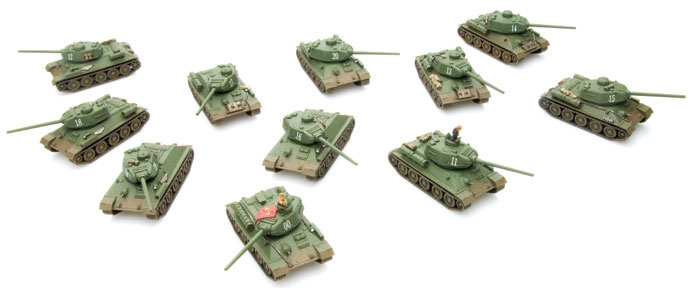
T-34s, The Hammer
Army Building With The T-34 Starter Box
Bagration: Soviet Community Previews
Videos
Blitz and Peaces: City Ruins
Painting Late War Soviet Armour
Opening Up The New Army Deals
Painting and Modelling
Adding Detail To Your Plastic T-34s
Thanks For Watching…
Thanks for watching, reading and of course interacting over on social media – don’t forget our competition to help us improve this in the future!
It has been great fun to share this new book with you and hopefully you have picked up some great ideas on how you can build a new Soviet army.
And stay tuned… next up, WWIII: Soviets! You think the IS-2 is cool (okay, it really is), well the T-80 is even better…
The Battlefront Team
Live Launch Competition!
 We’ve enjoyed putting together today’s Live Launch but we would really like to hear from you about what content you have enjoyed the most, and what you would like to see us do in the future!
Head over to our Instagram or Twitter (or both if you want to double your chances), follow and post your comment, and we will pick a random reply to win a copy of the Bagration: Soviet book and Army Deal! How easy is that?

Adding Detail To Your Plastic T-34s
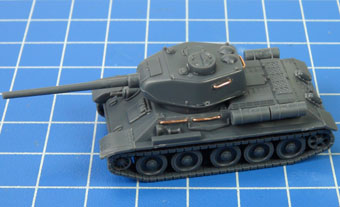 With James Brown
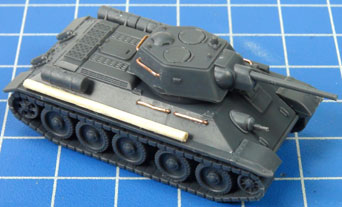
If you want to field large Tankovy units in a hurry, chances are you won’t be interested in giving yourself any extra work. But if you have some spare time and you want to show off your modelling skills, you can give your new tanks that little something extra to make them stand out from the crowd.
Adding Wire Grab Bars
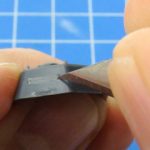
There’s nothing wrong with the moulded plastic grab rails – they paint up very nicely. But if you want to add a bit more realism, it’s actually a lot easier than it looks to replace them with wire.
You will need:
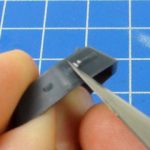
■ Hobby knife.
■ Wire.
■ A pin vice with a drill bit roughly the same diameter as the wire, but preferable slightly bigger.
■ Pliers – ideally two pairs: one with flat jaws and one with tapered, notched jaws.
■ Clippers/sprue cutters.
■ Superglue or green stuff epoxy putty.
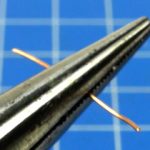
First things first: choosing the right wire. It needs to be flexible enough that you can bend it into a crisp 90-degree angle, but rigid enough for the finished model to survive reasonable handling. I used .5mm copper wire, but slightly finer or heavier gauges will do fine, as long as you have a drill bit to suit.
 Bending The Wire
 Bending The Wire
A pair of tapered, serrated pliers is very helpful for getting a consistant size. Measure along the grip of the pliers until you find a notch 1.5mm narrower than the length of the grab bar you want to make, to allow for the extra width added by the curve of the wire at the bends; I found 1.5mm was perfect for the gauge of wire I used, but your results may vary, so you should experiment a bit, bending a few practice grab bars and carefully measuring them until you have identified the correct notch. Or I should say notches, because you will need two different lengths of grab bar:
5.5mm – 4 per tank (for the T-34/85 turret sides and rear, and the T-34/76 turret sides)
7mm – 6 per tank (for the T-34/76 turret rear, and the hull sides)
Mark the notches clearly with paint or a pencil, and voila – your pliers are now a precision wire-bending tool, letting you churn out dozens of nifty grab bars super-fast. OK, to be honest, it’s going to take a while, but probably not as long as you think.
The method is simple. Grip a short piece of of wire between the pliers at the marked notch. Bend down the ends with your fingers. If you have another pair of pliers, use them to crimp the ends down tightly, to give as sharp a bend as possible. Or you can press the ends firmly against a hard surface.
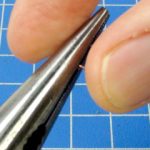
After removing the wire from the ridged pliers, you can further sharpen up the bend by squeezing tightly on either side of the bend, refining that 90-degree angle.
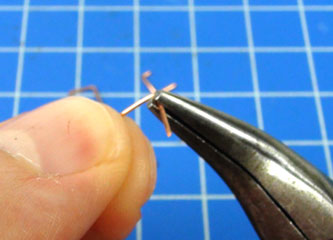
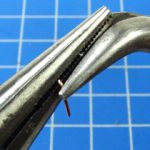
Clip off the excess wire with clippers or sprue cutters, leaving a few millimetres to stick into the tank.
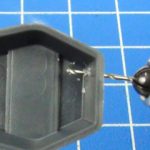
Drilling The Holes
Drill a hole at each end of the moulded plastic grab bars. I recommend using the tip of your hobby knife to bore a small hole first. This makes it a little easier to hit the exact point where you want each hole, and the drill bit will naturally centre itself there.
Be careful with the placement of your holes. Try to ensure they are at the same height, or your grab bars will end up on a crazy angle.
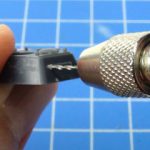
Drill all the way through the plastic to the other side.
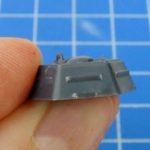
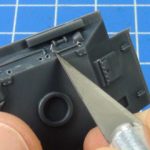
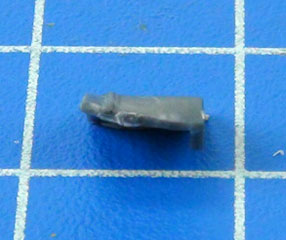
Once you have drilled the holes, carefully shave off the plastic grab bars with a sharp hobby knife. Take care not to cut any of the detail on the hull when removing those grab bars
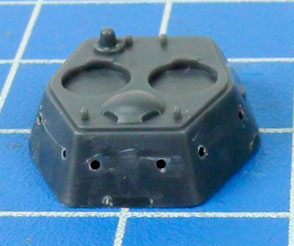
The 76mm turret with holes drilled, ready to insert the wire grab bars
Adding The Grab Bars
Insert your grab bars into the holes. How closely you want them to sit against the surface of the tank is a matter of taste. To strictly match correct scale, they should be pressed right up against the surface. But you’ll probably prefer to leave a small gap, just for the look of it.
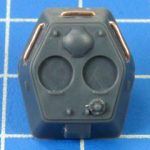
Once you have all of the grab bars positioned to your liking, you can fix them in place from the inside with either a drop of superglue or a small blob of epoxy modelling putty (ie green stuff or similar). Obviously this means you need to add them before attaching the bottom parts of the turrets and hull.

Bending Mudguards
Looking at historical photos of T-34s, you’ll quickly notice that the mudguards – made of relatively thin sheet metal – were prone to bending and crumpling. They could also be quite easily removed, so the easiest customisation option is to simply leave them off.
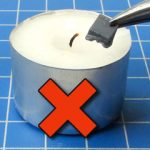
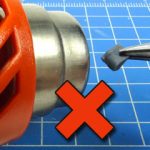
Heating up the plastic until it becomes soft and pliable seems like it would be a good idea. But there is a very specific temperature window where the plastic is soft enough to bend but not so hot that it melts completely. An open flame is not much use – hold the part even slightly too close and it will instantly melt into a vague blob. A heat gun (if you haven’t used one of these, it’s essentially a juiced-up hair dryer) gives you more control, but you can still easily ruin the plastic part if you’re not extremely careful.
 After quite a lot of experimentation with different heat sources, I have come to the conclusion that it’s not worth the effort. By all means give it a try if you’re feeling brave – you can get some very effective-looking results if everything goes right. But I think the best option is the simplest: just grip the mudguard firmly with your pliers and bend it by brute force.
 Unditching Logs
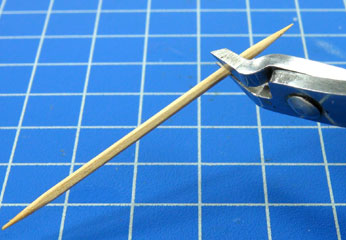 Unditching Logs
Also crude but effective – you can clip the ends off toothpicks to simulate the improvised unditching beams (ie. logs) which were often carried on Soviet tanks. Toothpicks already have a suitably woody texture, which you can enhance by scratching up the surface a little with your hobby knife. Either simply glue the ‘log’ in place, or else wind around a few coils of heavy sewing thread or fine fuse wire, to simulate rope securing the log in place.
I’m sure these detailing techniques won’t be for everyone, but for those creative types who feel like adding a little something extra to their tanks, good luck, and I look forward to seeing your work in person or on the Facebook Groups.
~ James
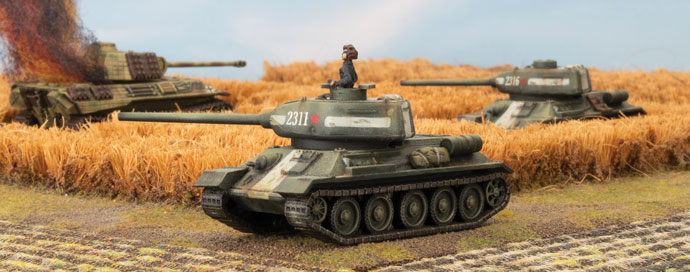
Returning To The Rodina – T-34 Battalion
With Chris
A long time ago, in a very different building, I remember being so excited about our latest army deal I grabbed one with the intention of painting 21 T-34s in 28 days. Spoiler alert, I got it done! Now this was long before we had the awesome full plastic T-34 that we have now, but it was still a fantastic project and I really enjoyed it. Best of all, by challenging myself with a strict timeline and series of web articles I got it done, and finished the basis for a great Soviet army.
Learn about Chris’ original tank project here…
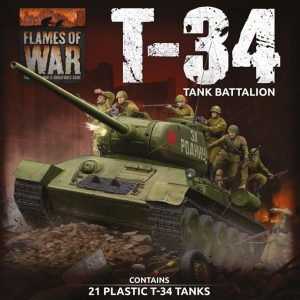
Fast forward a few years and we have a similar deal, just with all plastic and at a better price than last time! Thinking about it has made me dust off my box o’ T-34s and think about how I might deploy them under V4…
All The T-34s
Straight out of the gate we have the simple, straightforward and fairly brute force approach. Start with 21 T-34 (85mm) tanks and garnish with some simple additions. ZSU M17 AA because they are plastic, they are cheap, they are in Formation, they are cool, and packing all those .50cal machine-guns they will put some fear into infantry. The addition of the mortars is really about adding another unit to the Formation and whilst I was tempted to make it a unit of three (and using those points elsewhere) I thought six will mean that they might actually be useful and if they can pin or knockout a couple of AT guns then they will have easily paid for themselves by potentially saving the lives of a few tanks. Last, but certainly not least, are thee BA-64s. I love these little bad boys so much I have painted close to 20 of them as I paint a unit up for every Soviet army I build. Cheap, cheerful, with a machine-gun and Spearhead they can get your T-34s a little closer to the enemy – drive me closer so I can hit them with by 85mm gun!
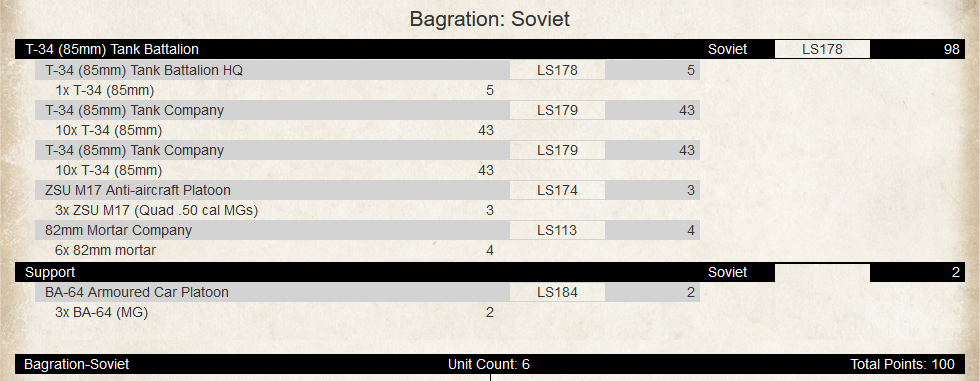
With so many fast AT12 guns in the force I managed to chew up my points pretty quickly. So lets try removing a few….
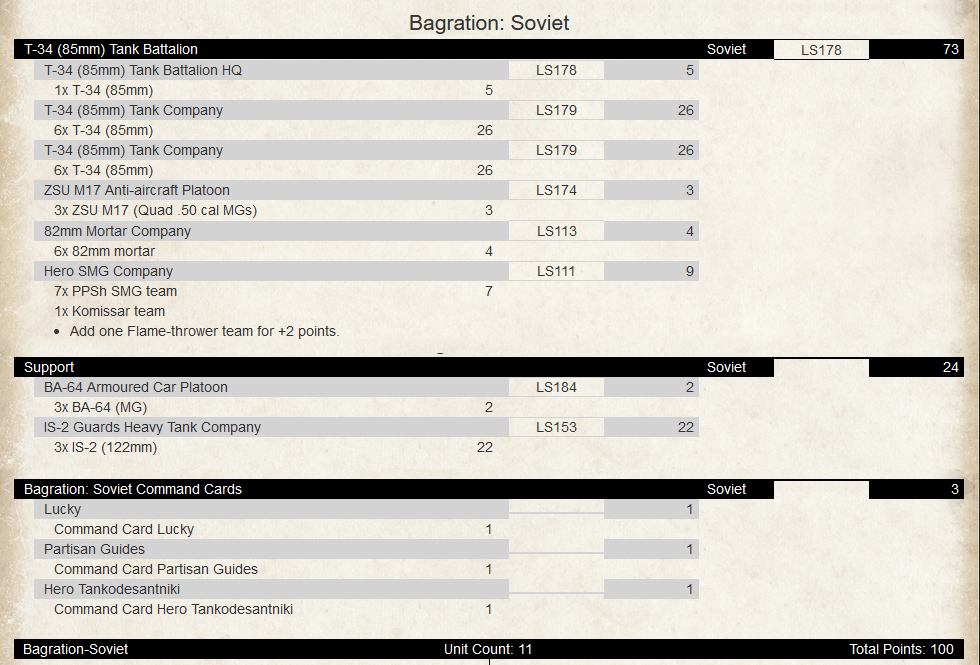
Dirty Dozen (Plus One)
For this version I have reduced the T-34 count down to 13 – hopefully it will be unlucky for my opponents! With the points saved I have added in a Hero SMG Company and the Hero Tankodesantniki Command Card so I can have an aggressive group packed with infantry and tanks to charge at the enemy.
In addition, I’ve added in three IS-2 tanks as some heavy armour and big guns! I thought about adding four but three meant that I could pair them up with a company of T-34 tanks and they could form a counterattack force in any mission where I had reserves. To increase my chances of getting any reserves early I have also added in Partisan Guides to give me an extra dice on a reserve roll.
Next up, despite what Tina Turner said there is always a place for a Hero Company…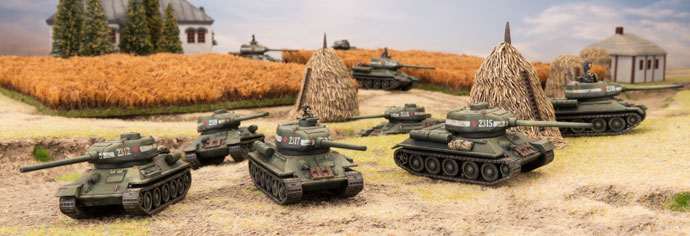
We Don’t Need Another Hero…
Changing out to a Hero T-34 (85mm) Company gives me another way to use the army and still have quite a different feel. Smaller units of tanks and a better Skill rating mean that I can be a little more cunning with the units the tabletop. Plus I still have all my favourite support options packed in to the list so I get good value out of the extra models.
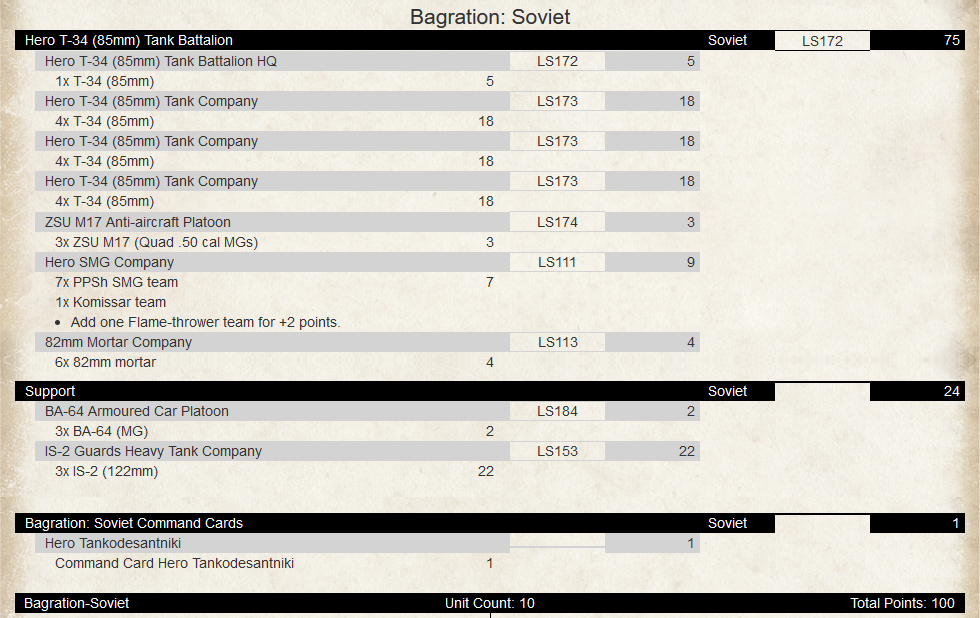
 There we have it, three different lists with quite different play styles, but with a similar mix of models and a strong core of T-34s. If you want to add some more variation you can start looking into mixed 76mm and 85mm T-34 Formations (remember the plastic comes with both turrets) as these come in both “normal” and Hero versions, giving you a way to keep your tank count up, but still saving a few points by keeping some cheaper tanks in the mix.
~Chris
Casey’s Soviet Reconnaissance
With Casey
A Soviet Reconnaissance company, or Rota Razvedki in the old days, is a list that I’ve always wanted to build but never got around to doing. Our Big Four Of Late War project and the release of Bagration: Soviet book is giving me the chance to finally start it.
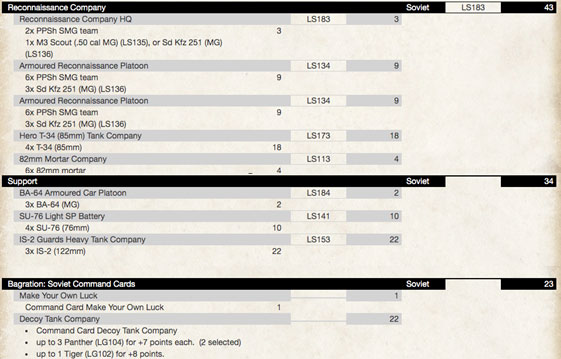
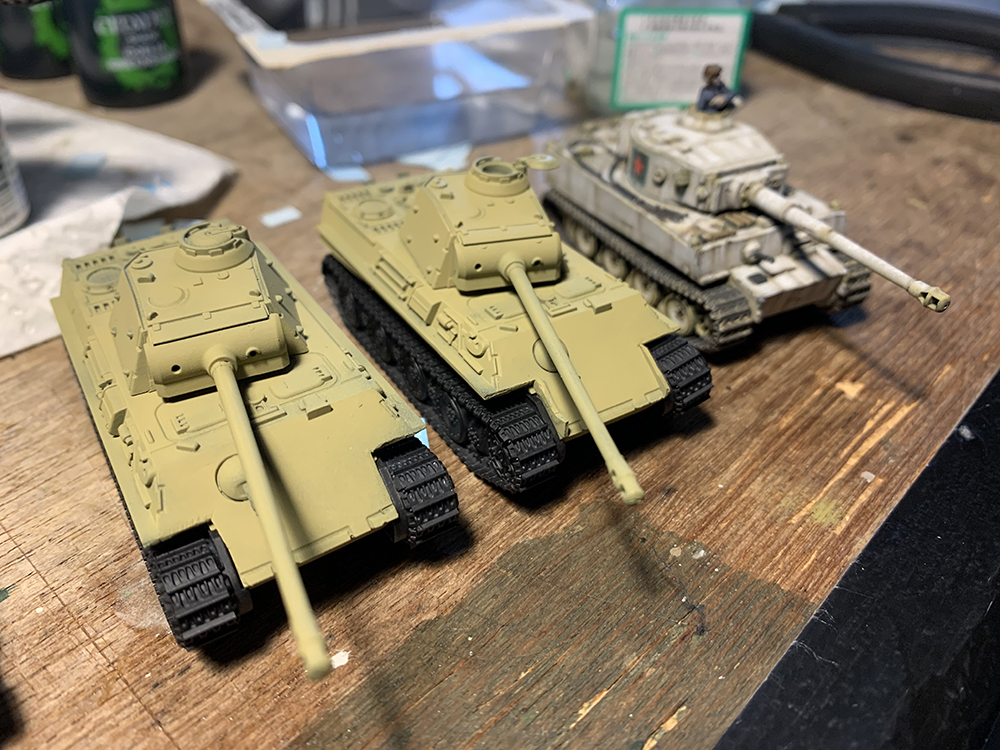
The core of my force is going to be built around an HQ and 2 Armoured Reconnaissance platoons in captured Sd Kfz 251 half-tracks. The M3 scout car is probably a more gamey choice because it has an .50 cal rather than a standard MG, but I’m a sucker for captured equipment. I’ve chosen to model the platoons with a mix of plastic Sd Kfz 251/1Cs and our new plastic Sd Kfz 250s. I’ve made a couple of modifications to make the look more ‘Soviet’ like replacing one of the mgs with a DSHK. The commanders half-track I’ve modelled as a 250/9 2cm, just to make it stand out on the table.
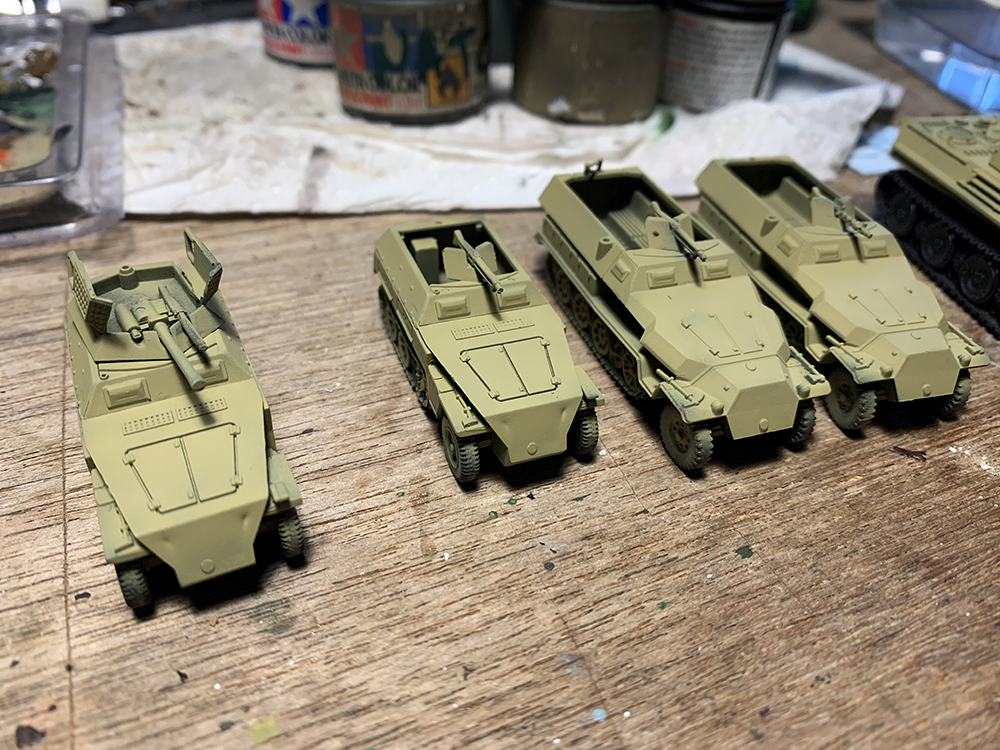
The next unit is where the list really shines. The Armoured Reconnaissance Company has a BA-64 platoon as part of its Formation, but I’m going to use the Decoy Tank Company Command Card to replace it with a platoon of two Panthers and a Tiger for 22 points. Note that these now count towards Morale now! See my previous article talking about captured tanks.
Next up I’m going to add a Hero T-34/85 platoon for 18 points. T-34s are useful in any army and are there to add to Formation morale and deal with enemy medium tanks.
Finally, inside the Formation I’m going to add a platoon of six mortars for 4 points for a bit of cheap artillery.
On to support.
The first platoon I’m going to add is an IS-2 Company. Their massive armour makes these tanks assault beasts. They are in the list to push the enemy off their objective, or at least soften the enemy position up enough that the infantry can get in there and finish the job. The fact that they have a brutal AT14 gun is a bonus, but their primary role is not to engage tanks.
To help soften up the objective, through both direct and indirect fire, is a platoon of 5 SU-76’s. I never rated the SU-76 under previous editions of the game as they were a single role vehicle that I though was a bit over pointed. Now that they are multi-role and relatively cheap I think they will find their way into a lot of my forces, however I’m not as crazy as Chris and probably won’t paint a full regiment of them. Click here to see Chris’s article…
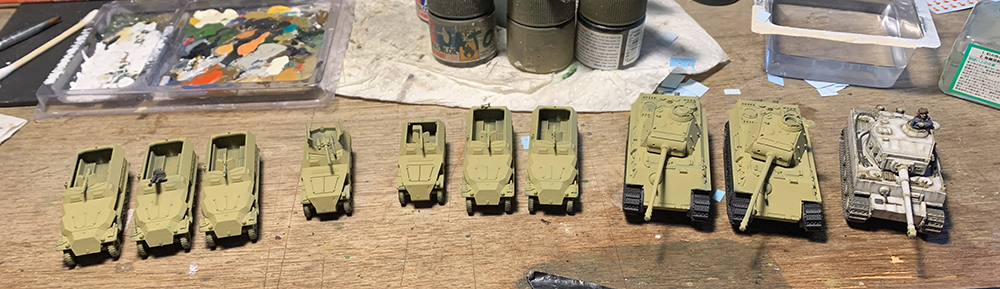
With 3 points left I’m going to add a support platoon of BA-64s. There are probably better options to spend the points on as I don’t really need any more Spearhead options in the army, since I already have three, but it is in theme to add more reconnaissance.
The last point will be spent on the Make Your Own Luck, which allows you to automatically roll a 4 on a dice roll. This I will hold onto till late game for either a critical firepower roll to destroy a tank or motivation roll during an assault to hopefully turn the tide of the game.
~Casey
Building a Forward Detachment Formation
With John Lee
With the release of Bagration: Soviet I was happy to see the Forward Detachment Formation appear in the Command Cards. This is one of my favourite formations as it embraces combined arms in the one formation. Its not all tanks, it is not all infantry – it has a bit of everything. This is how the formation looks:
- 1 Hero Motor Rifle Battalion HQ or Hero T-34 Tank Battalion HQ
- 1 Hero T-34 Tank Company or Hero T-34 (85mm) Tank Company
- 1 Hero Motor Rifle Company or Hero SMG Company
- 0-1 Hero T-34 Tank Company or Hero T-34 (85mm) Tank Company or Hero T-70 Tank Company or Hero Valentine Tank Company
- 0-1 82mm Mortar Company
- 0-1 SU-76 Light SP Battery
- 0-1 ZSU M17 Anti-Aircraft Platoon
You can have three to seven units in the formation so you can make it relative strong. It has tanks, infantry, artillery and AA organic to the formation allowing you to take some different options for support.
If we look to maximise the units in the formation and we can add some high-end AT options – either IS-2s or Decoy Company with captured German Panzers. Let us look at a 100pt list using IS-2s first and then the Decoy Tank Company option.
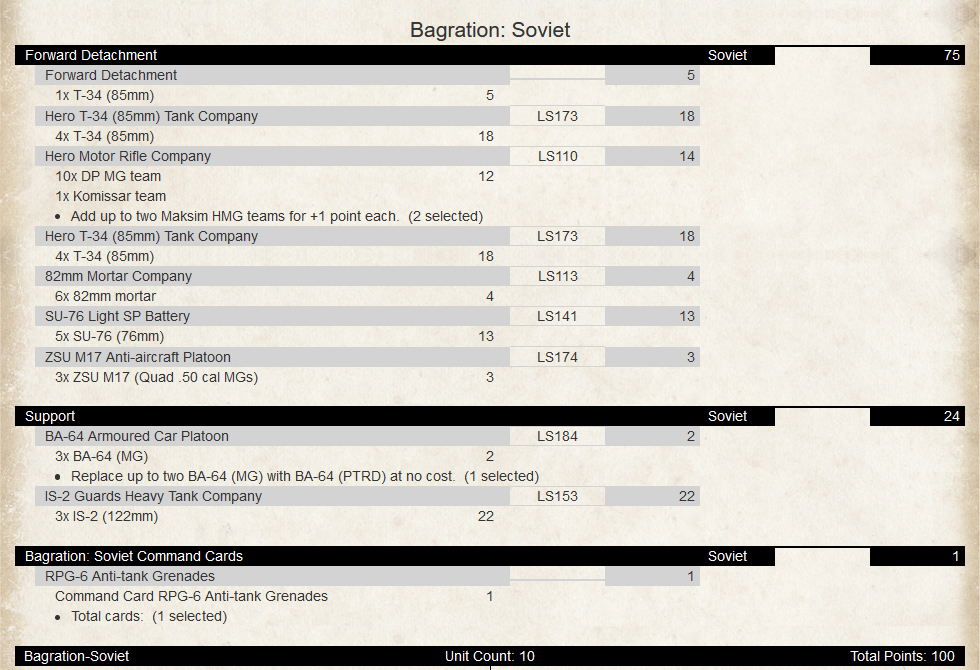 This list has nine tanks with AT12 and are Crafty which means they can do Blitz or Shoot and Scoot on 3+. Infantry can attack and defend, have their own intrinsic AT with the RPG-6 Anti-tank grenades. They can also assault on 2+! Two artillery units with the ability to reroll misses. AA support which can double as anti-infantry and anti-light vehicle platforms. High end AT provided by FA SA 8 TA 2 IS-2s with AT-14 and the BA-64 Armoured Car Platoon providing spearhead to get your force into a better attack position in those missions that allow it.
Let us modify this a bit to fit in the Decoy Tank Company and Shturmoviks instead of the IS-2s and BA-64 Armoured Cars.
The “Decoy Tank Company” command card provides us with the ability to have some captured German tanks with spearhead. This company replaces the BA-64 slot in support or in the Reconnaissance Company. A maximum of three tanks and you can select from a single Tiger and up to three of Panther, StuG and Panzer IV in whatever mix you like, and adds some flavour to your force and a change from Soviet green!
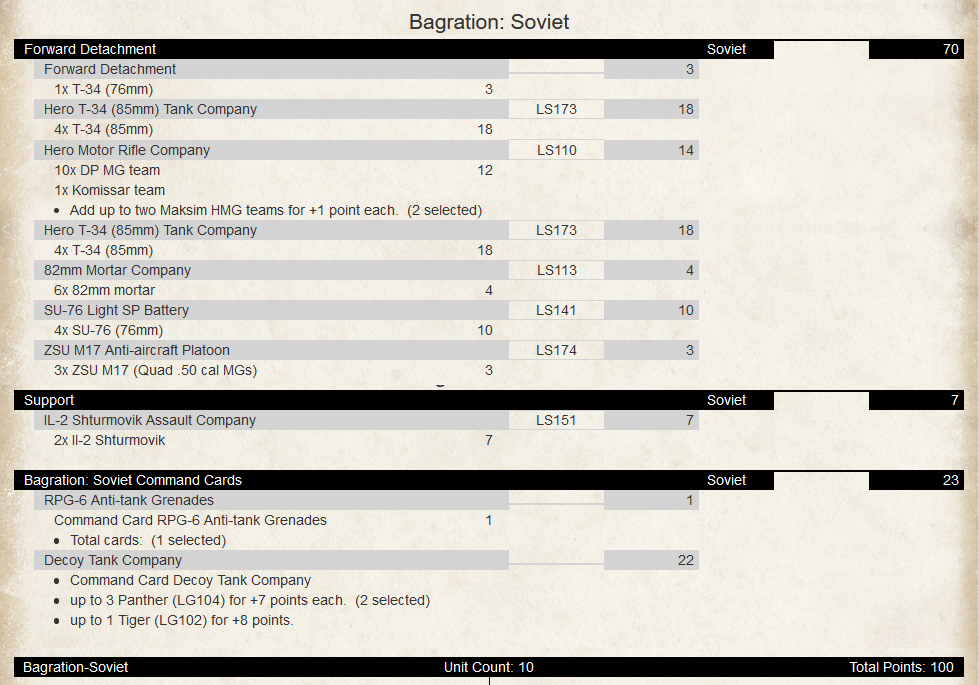 So, we still have our high-end AT with the Decoy Tank Company but now pulls double duty for spearhead where appropriate. Added the Shturmoviks for a third template and a secondary AT option with AT5 vs top armour.
A couple of combined arms lists that are like a swiss army knife to be able to take on most armies and is adaptable with lower points if required. Have fun list building and give this list a go!
~Joe
Blitz and Peaces: City Ruins
Two years ago our friends over at Blitz and Peaces were given some early resin test casts of our new plastic City Ruins back when we were hoping to have them out for the Mid War Stalingrad books. Check out their video how easy it is to build and paint a full table of terrain..
Please note, these were early RESIN casts, not the final plastic versions, but you should still see how great these are going to be!