Ambush Predator: The Hetzer in Flames of War

With Joe Saunders

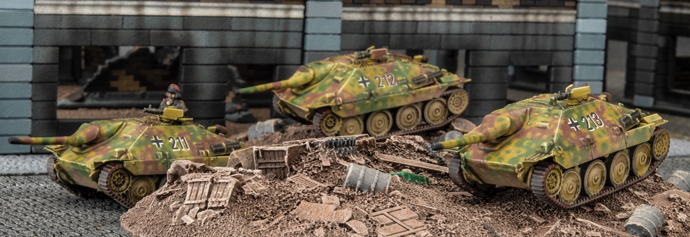
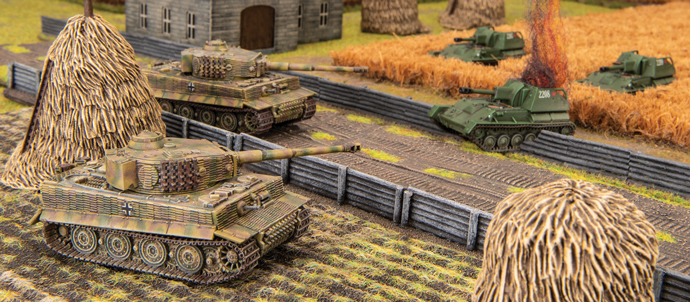
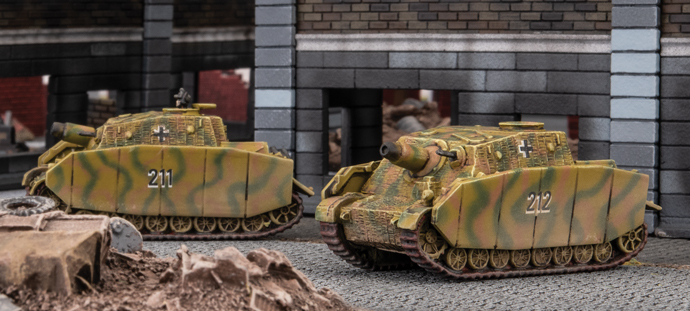
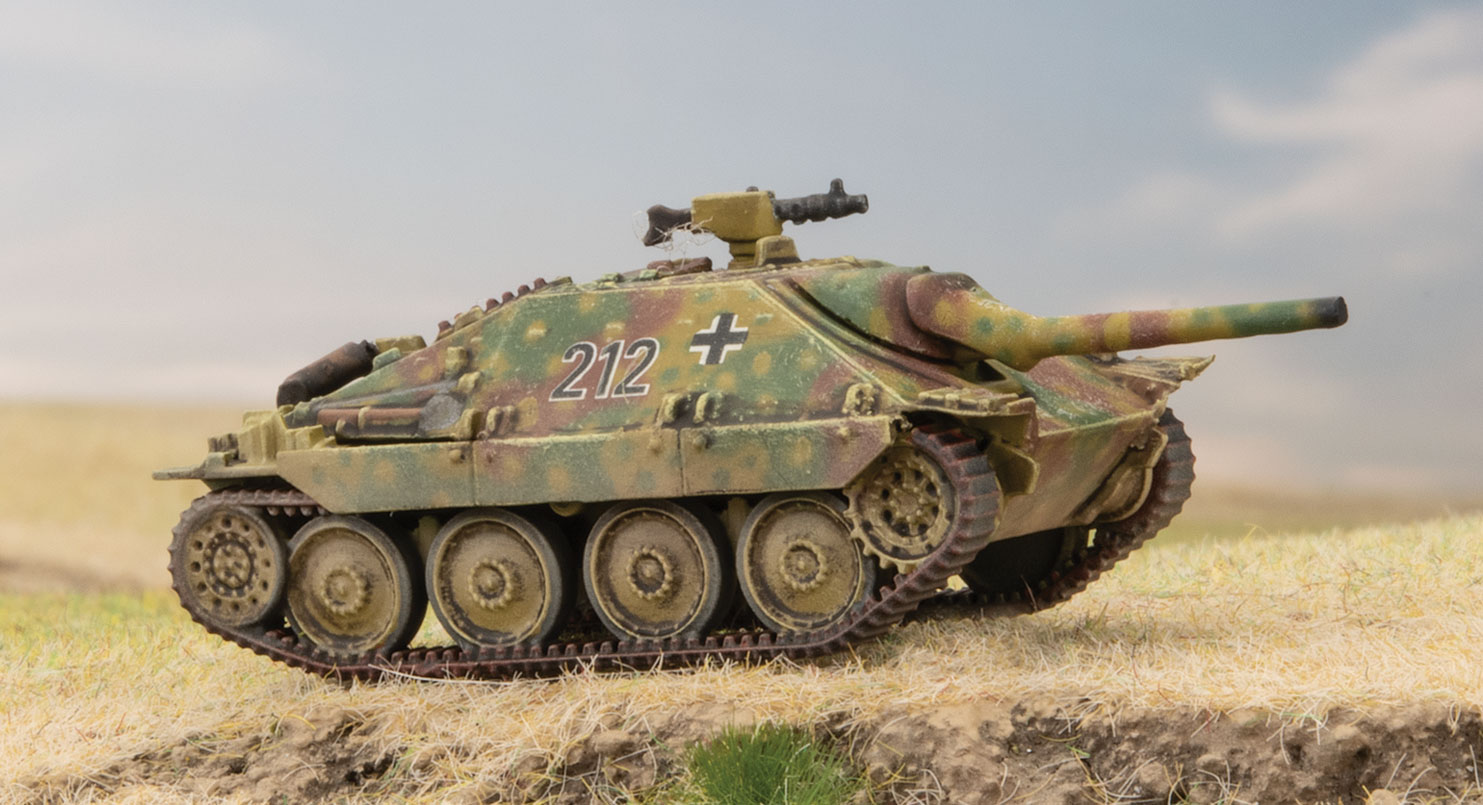
As world War II dragged on, the Axis found themselves in a dire situation.  As momentum on the Eastern Front ceased at Stalingrad and Kursk, it became apparent that they lacked the production capacity to hold the Red Army back (and eventually rebuff the Allied landings in Normandy in 1944). Worse still, military innovation was progressing at a massive pace, but the realities of shortages of raw materials and manpower meant that to keep up with the Allies, Germany had to do more with less.  And for a time, they achieved this, though in limited terms.  Advances in cheap portable shaped charge weapons enabled infantry to destroy heavy tanks and dedication to quality over quantity led to some truly impressive (If somewhat impractical) late war behemoths like the Tiger II.   But numbers have a role to play in warfare and the Axis knew they also needed a new tank destroyer in large numbers.  This weapon needed to be both easy to produce with minimal resources and armed with a weapon fearsome enough to deal with anything the Allies could field.  This tough task was achieved by putting a large, but commonly available, gun on the small frame of the numerous, yet obsolete, (modified) Panzer 38T.  The resulting vehicle became known as the Hetzer.

The Hetzer in Flames of War

For the German Flames of War player, the Hetzer, which is featured in the new army book Bagration: German represents an opportunity to bring a decent gun to the fight without breaking the bank on points.  Traditionally the Axis player has paid a premium for their tank destroyers, owed to the general German trend for having high-quality weapons, good armour, and excellent Skill and To Hit On ratings.  The Hetzer reverses this course by balancing armour and firepower with economy.  Despite this, the Hetzer has stats that appear on par with the StuG III, a much loved and flexible option for German players.  These two vehicles have the same Skill and Hit On ratings.  Also, the StuG and Hetzer are at parity with their close combat stats with a counter attack and assault of 5+ (which is fitting for a vehicle designed to stand off from the enemy).  The armour is the same.  They both feature Front Armour 7, which is excellent, and mediocre Side 3, Top 1 values.  Lastly the gun is the same, a forward firing 7.5cm with AT11, 2 shots when stationery, 1 on the move and 3+ Firepower (a canon that even in late war most Allied tankers wish they had). But this brings us to the one really important difference that makes the Hetzer worth 4 points compared to the StuG’s 5.6 points; The Hetzer is overworked.  If you are unfamiliar with this rule it means the Hetzer has an extra +1 to hit when it moves.

Tactics For The Hetzer

The Ambush:
Considering the overworked rule provides a 1.6-point discount for the Hetzer, (over the Stug) you come away with a pretty good trade-off in my opinion. However, this does require the German Player to rethink his play style.   With Front Armour 7 the Hetzer can take the odd hit, but if it is going to go toe to toe with the enemy’s heavy hitters and earn its points, it is going to need to use some tricks.  First and foremost, the Hetzer was designed to ambush its opponents, so in Flames of War, when you are playing a scenario where you can use Ambush rules, the Hetzer is your best option.  Once you spring your ambush each Hetzer in the platoon will have its 2 shots without the penalty from being Overworked (because they count as stationary when they spring the ambush).  If you have to place the ambush in a vulnerable spot you do not have to worry too much. At 4 points each, you can likely get a pretty good trade-off in point returns from destroyed enemy teams before your Hetzers are taken out by return fire.

Storm Troopers:
If you are an experienced German Flames of War player the Blitz/Shoot and Scoot combo is likely not new to you, and the Hetzer is practically made for this.  With this tactic, you use the Stormtroopers rule to Blitz your Hetzers from behind terrain that blocks line of sight (like a building or hill) so they count as stationery in the shooting phase thereby avoiding the overworked penalty. Then after they fire 2 shots each, you Shoot and Scoot them back into cover so in the following turn the enemy cannot shoot back.  Most German players will have used this tactic with other vehicles at some point.  The German’s excellent 3+ Skill makes this combo possible…usually.  As you have to be successful on both Skill roles to pull this off, most Axis players can probably think of a time when their precious and expensive panzers failed their subsequent roll leaving the entire unit exposed to a platoon of M10 Achilles or other scary anti-tank units.  (Then this platoon subsequently annihilates your exposed tanks in the next round.) The Hetzer however is the answer to this problem.  The Hetzer has the 3+ Skill to pull off the Blitz/Shoot and Scoot combo, but if it fails the Shoot and Scoot roll it’s no big deal. If they end your turn in plain sight of the enemy’s return fire, you don’t risk losing much.  3 Hetzers is 12 points, where a single Tiger is 12 points.  This means you should be able to absorb the return fire, and if you lose the whole platoon, it is not likely to be as disruptive to your battle plans as seeing your Panthers or Tigers burst into flames.

Hetzer Horde
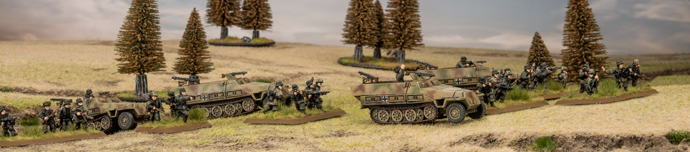
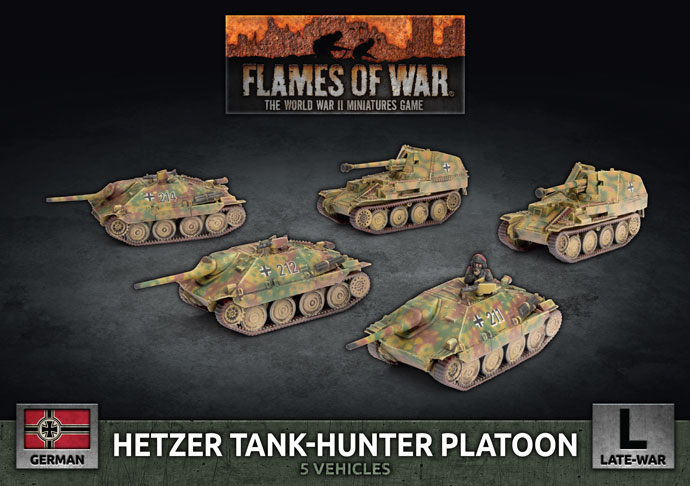
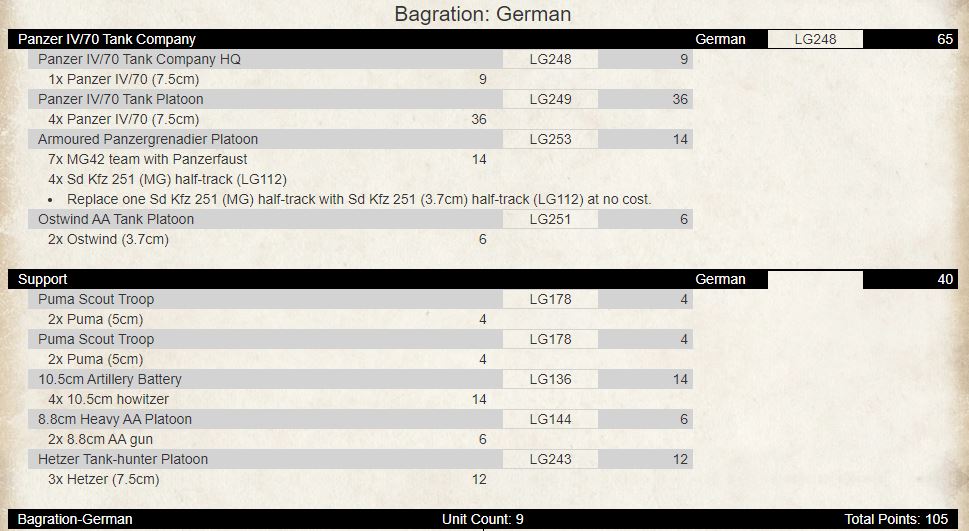
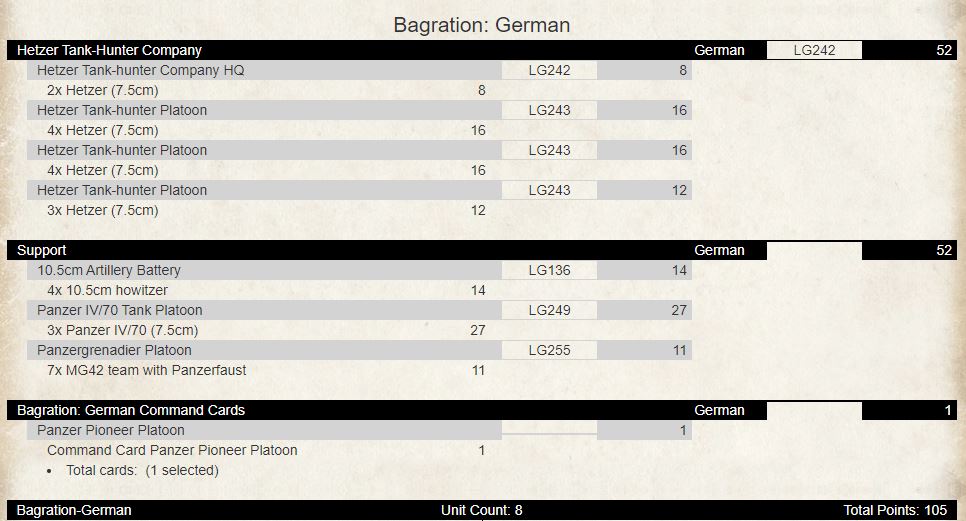
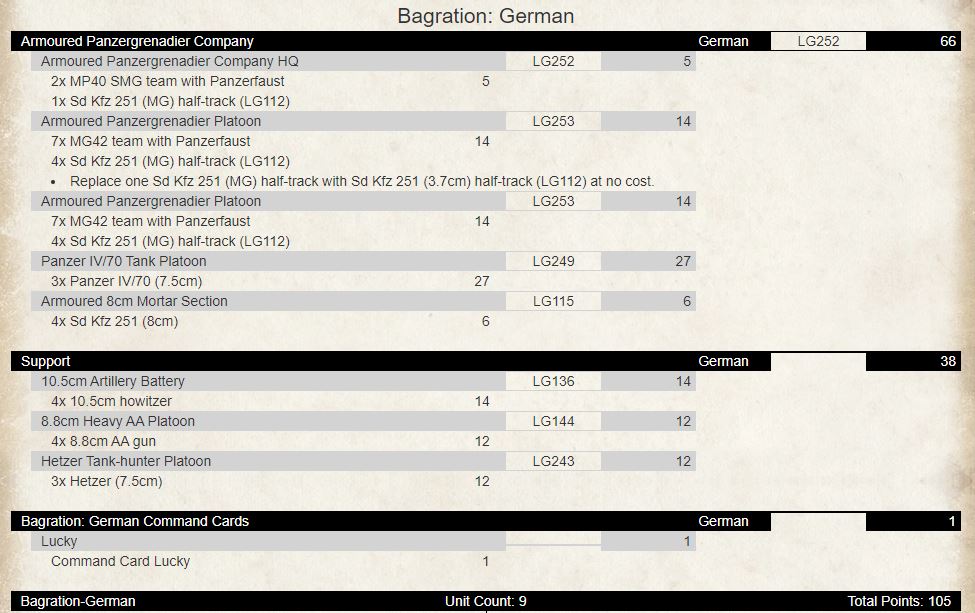
Where the above tactics are variations on exiting techniques in Flames of War, this one is new. Rather than using Hetzers as support to help your army, you can use the Hetzers as the army!  Just go ahead and max out every option to take this little tank hunter in your force. 14 Hetzers will run you only 56 points.  Here is an example of a Hetzer based force I have been thinking about:

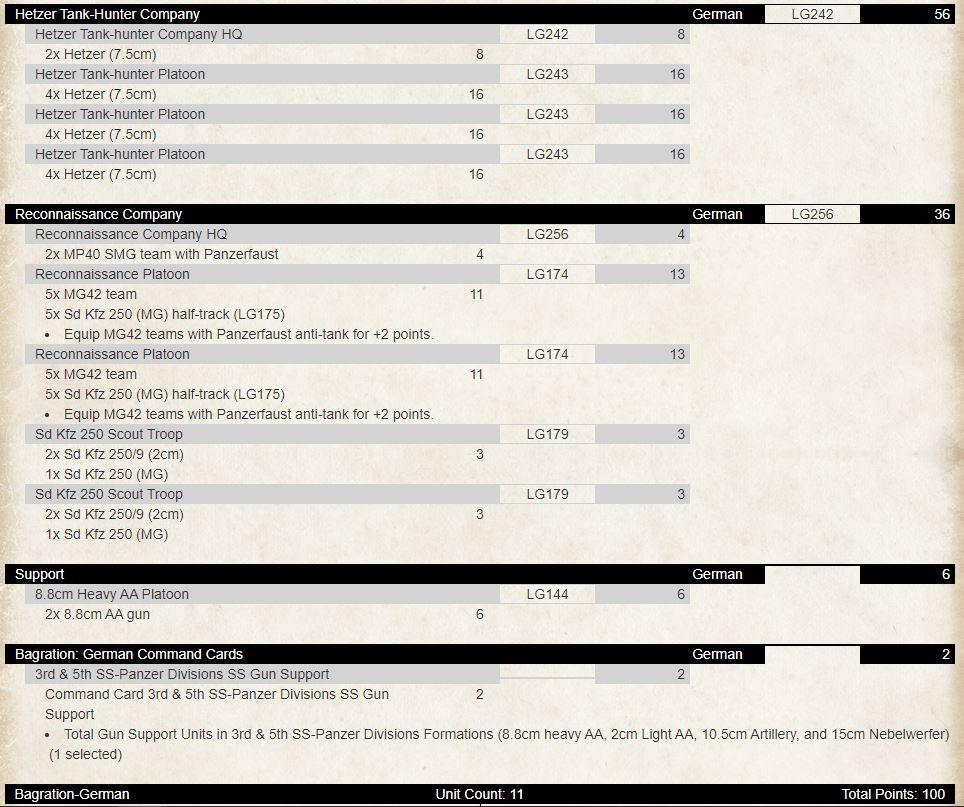
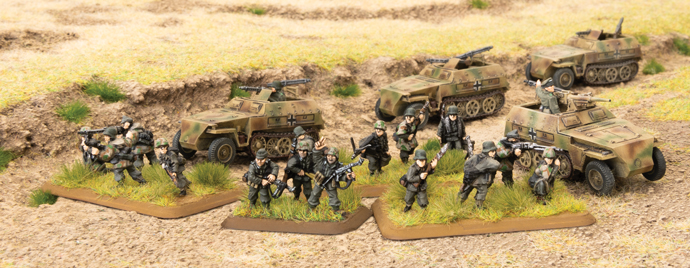
With this list, you can use the Scout half-tracks to spearhead your Hetzers deep onto the board (and hopefully on the flanks). The reconnaissance infantry/half-track troops can stay close to provide infantry support and the 88s can sit back to deal with more formidable armour and guard objectives.  I think this list would be quite fun to play as you come at your opponent from many different directions to overwhelm them with a bunch of small tanks.

Time to Set the Ambush

However, you choose to use the Hetzer I think Bagration German has brought us a cool new addition to the Axis arsenal in Flames of War.  Whether you keep them in Ambush, pull the Stormtrooper combo on your enemy, or flood the board with numerous tank destroyers, the Hetzer promises to become a regular feature in the game.  So, get out your paint and glue and get ready to add this new weapon of war to your force and show the Allies that when it comes to German tank destroyers it really is possible to effectively do more with less!

Building A Bagration German Forces with the Tank-hunter Kampgruppe Starter Box

With John Lee

With the launch of the Bagration: German release, I thought I would look at how a new player, or someone on a budget, get a force on the table that would be semi-competitive or at least hold its own with such iconic equipment as the Hetzer assault guns and Panzer IV/70s.  For the new player, it opens the door to playing Flames of War without needing to buy, assemble or paint too much and get into playing the game quicker.

So, if we look at what we get in the excellent value starter set (Tank-Hunter Kampfgruppe), that will help decide what formation to run.  The starter set contains the following:

  • Complete A5 Rulebook
  • German “Start Here” booklet
  • 5 x Panzer IV/70 Tanks or Jagdpanzer IVs
  • 3 x Hetzer Assault Guns or Marder 3s
  • 1 x Panzer Grenadier Platoon
  • 4 x Sd Kfz 251 Half-tracks
  • 2 x Wirbelwind or Ostwind AA Tanks
  • 4 x 10.5cm Howitzers
  • 2 x 8.8cm Heavy AA Guns
  • 2 x Decal Sheets
  • 10 x Unit Cards

The bonus here is that the rulebook is included in the box – so the new player makes a saving right away.  Now if we look at what formations are in the Bagration: German book, we can see what we can maximize from what we get in the starter box.  The most obvious formation is the Panzer IV/70 Tank Company.  There are now three German Late War Starter boxes in total so we will explore what options we can have with multiple starter boxes.  We will look at two points options – the 2021 points for LW (105pts) and the standard 100 pts.  Might not be much in it, but it can decide how to structure your force.

Starting with just the single starter box by itself, we will look at the Panzer IV/70 formation first followed by the Hetzer formation.  Let us look at what units comprise this formation:

  • 1 Panzer IV/70 Tank Company HQ
  • 1-2 Panzer IV/70 Tank Platoon
  • 0-1 Panzer IV/70 Tank Platoon or Panther Tank Platoon or Tiger Tank Platoon or Armoured Panzergrenadier Platoon
  • 0-1 Wirbelwind AA Tank Platoon or Ostwind AA Tank Platoon or Mobelwagon AA Tank Platoon or Sd Kfz 7/1 Quad AA Platoon

Looking at the formation and what we get in the starter box, we can maximise the Panzer IV/70s, Panzer grenadiers with their half-tracks and the AA tanks.  The Hetzers could be used as formation support with the 10.5cm Howitzers and 8.8cm AA guns in support.

This formation is a bit fragile but if handled well, should perform OK.  It only has four units for the formation break and four small platoons of 2 teams.  This is primarily a defensive force but can have a bit of fun with two platoons of Pumas causing havoc and you can put the four Panzer iv/70s in ambush.  Now for 5pts less, you could remove one of the Puma Scout Troops, downgrade the two Ostwinds to Wirbelwinds and pick up a Lucky Command Card.

To buy this army you need only to purchase the following for $170:

1 x GEAB20 German “Tank-Hunter Kampfgruppe” Army Deal $110
1 x GBX172 Puma Scout Troop (Plastic) $40
1 x FW267 Bagration: German: A4 Hardback $20
Total: $170

The second formation we can look at is the Hetzer formation.  Let us look at what units comprise the formation:

  • 1 Hetzer Tank-Hunter Company HQ
  • 2-3 Hetzer Tank-Hunter Tank Platoon

As we only get three Hetzers in the starter box we need to add a couple of boxes of Hetzers to make this formation complete, but we can use the rest of the starter box to flesh out a decent list.

You could also remove two Hetzers and the command card if you wanted a fourth Panzer IV/70.  To make this 100pts just drop one more Hetzer from one of the two full platoons and the command card for the Panzergrenadiers.

To buy this army you need only to purchase the following for $230:

1 x GEAB20 German “Tank-Hunter Kampfgruppe” Army Deal$1101 x GBX172 Puma Scout Troop (Plastic)$401 x FW267 Bagration: German: A4 Hardback$20Total:$170

1 x GEAB20 German “Tank-Hunter Kampfgruppe” Army Deal $110
2 x GBX167 Hetzer Tank-hunter Platoon (Plastic) $100
1 x FW267 Bagration: German: A4 Hardback $20
Total: $230

I think the best value for this starter box is when combined with one of the other two German starter boxes.  If we combined it with the German Panzer Kampgruppe Army Deal, we get the additional models:

  • 5 x Panzer IV Tanks
  • 2 x Tiger Tanks
  • 3 x Stug Assault Guns
  • 1 x Panzer Grenadier Platoon
  • 4 x Sd Kfz 251 Half-tracks
  • 3 x 15cm Nebelwerfer Rocket Launchers
  • 2 x 8.8cm Heavy AA Guns (doubling our 8.8cm Heavy AA Guns)

Now to my eyes, this gives a great start to run different formations by adding further boxes as required, but the best formation to start out with, combining both starter boxes is to run an Armoured Panzergrenadier Company.  This formation comprises the following units:

  • 1 Armoured Panzergrenadier Company HQ
  • 1 Armoured Panzergrenadier Platoon
  • 0-1 Armoured Panzergrenadier Platoon or Panzergrenadier Platoon or Reconnaissance Platoon
  • 0-1 Armoured Panzergrenadier Platoon or Panther Tank Platoon or Panzer IV Tank Platoon or Stug Tank Platoon or Panzer IV/70 Tank Platoon
  • 0-1 Armoured 8cm Mortar Section
  • 0-1 Armoured 7.5cm Gun Platoon
  • 0-1 Grille 15cm Gun Platoon or 15cm Gun Platoon
  • 0-1 Armoured sMG34 Machine-Gun Platoon
  • 0-1 7.5cm Tank-Hunter Platoon
  • 0-1 Sd Kfz 10/4 Light AA Platoon

That is right – we can have our Panzer IV/70s integral to the formation!  To maximise the two starter boxes for this formation we need to buy an Armoured HQ box and a box of Gun/Mortar half-tracks as well.  So how does this look for 105pts?

Pretty solid formation and has two artillery templates – one of which is integral to the formation.  If you prefer the 7.5cm Gun Half-Tracks you can swap them in for the 8cm Mortar Half Tracks for the same points cost.  You can swap out the Panzer IV/70s for the Tigers or Panzer IVs or Stugs – or add what you prefer as formation support.  To get to 100pts, swap out the 1.5cm Artillery Battery for 15cm Nebelwerfers for 5pts difference exactly.

To buy this army you need to purchase the following for $295:

1 x GEAB20 German “Tank-Hunter Kampfgruppe” Army Deal $110
1 x GEAB18 German Panzer Kampgruppe Army Deal $110
1 x GBX168 Armoured Panzergrenadier Company HQ (plastic) $15
1 x GBX177 Gun Platoon / Mortar Section (x4 Plastic) $40
1 x FW267 Bagration: German: A4 Hardback $20
Total: $295

The other formation you could run that is like the above is the Panzergrenadier Company.  It is basically the same except for the HQ, mandatory platoon of Panzergrenadiers instead of Armoured Panzergrenadiers, 8cm Mortars instead of Armoured 8cm Mortars and you can choose between Armoured 7.5cm Guns, 7.5cm Guns or 12cm Mortars.

There you have it – some options to ponder for getting started with different formations with the starter box(es).  Enjoy!

Bagration: German Spotlight

with Wayne Turner

Bagration: German is the third German-themed book in the Flames Of War Late-war series of army handbooks (after D-Day: German and D-Day: Waffen-SS). It is also the second of the Bagration series, bringing you German Eastern Front forces fighting against Soviet Operation Bagration as featured in Bagration: Soviet.

Bagration: German covers the German forces fighting all across the Eastern Front from Finland in the north to Romania and Hungary in the south from January 1944 to January 1945.

There is a great variety of formations and units available to field, from tanks and armoured infantry to grenadiers and tank-hunters.

Check out Bagration German in the online store here…

Grenadier Company

The first formation you will encounter is the Grenadier Company. These are hardened Eastern Front veterans with the full array of support weapons including machine-guns, 8cm and 12cm mortars, 5cm and 7.5cm anti-tank guns, 7.5cm and 15cm infantry guns, anti-aircraft guns, and scouts.

These confident troops also have Third Reich, giving them Last Stand 3+. They are Veterans so they pass Skill related Movement Orders on a 3+ and Hit On 3+ in Assaults. The teams of the Grenadier Platoons are armed with Panzerfausts (Limit 1), allowing them to use one team each Shooting and Assault step as a Panzerfaust anti-tank weapon.

Storm Grenadier Company

If you like the sound of the veteran Grenadiers, you can go one step further and take the Storm Grenadiers of the 78th Sturm Division. These troops have a support listed above, but with twice as many 7.5cm anti-tank guns and machine-gun platoons. The Storm Grenadier Platoons themselves are the same ratings as the Grenadiers, but have twice as many MG42 machine-guns in their platoons making them MG42 teams with Rate of Fire 3 stationary and 2 while moving. Like the Grenadiers the Storm Grenadiers are automatically equipped with Panzerfaust (Limit 1).

StuG Assault Gun Battery

The 78th Sturm Division had its own assault gun battery permanently attached to the divisions, the 89th Assault Gun Battalion. As well as being equipped with both StuG (7.5cm) and StuH (10.5cm) assault guns, the battalion also had its own tank escorts, or tank riders, to protect them from enemy infantry. These troops are armed with new StG44 assault rifles. Assault rifles have a longer range than SMGs, but similar firepower, so when combined with the assault guns own machine-guns, are able to keep any aggressive infantry at bay.

So keep an eye out for these new tank escort StG44 assault rifle-armed infantry, one of the many new releases coming out for Bagration: German:

Other assault gun battalions also fielded tanks escorts, as well as becoming semi-attached to particular divisions, so this formation is not exclusively representing the 78th Sturm Division.

Hetzer Tank-hunter Company

A very common tank-hunter to begin making its appearance on the Eastern Front during 1944 was the Hetzer. This tiny ball of power is armed with the same gun as the StuG but based on widened Czech Panzer 38(t) tank chassis. It has the same level of protection as the StuG. However, it is overworked due to the position of the gun and the general lack of space in the fighting compartment. As a tank-hunter its primary role is ambushing enemy tanks so does need to be rushing about the battlefield.

The Hetzer will come out as a new plastic kit which will make the Hetzer tank-hunter, as well as the Marder tank-hunter (the Marder III M, for us rivet counters).

Tiger Tank Company

To represent the Tigers fighting on the East, we have also included a Tiger Tank Company. You field up to three Tiger Tank Platoons and one of four different anti-aircraft options (more about those further down).

Panther Tank Company

With the Bagration Panther Tank Company, we have introduced a few additional options over the ones found in D-Day: German. Your second black box unit can be chosen from five different options; Panther Tank Platoon, Panzer IV Tank Platoon, Panzer IV/70 Tank Platoon, Tiger Tank Platoon, or an Armoured Panzergrenadier Platoon. This combined with the other one to two Panther Tank Platoons and the AA Tank Platoon options lets you create a battle group feel to your force

Panzer IV Tank Company

The Panzer IV formation lets you do something similar with the second black box letting you select from Panzer IV Tank Platoon, StuG Tank Platoon, Panther Tank Platoon, Tiger Tank Platoon, or an Armoured Panzergrenadier Platoon. While the Panzer IV formation lets you have one to three additional Panzer IV Tank Platoons.

Panzer IV/70 Tank Company

Late 1944 saw the widespread introduction of the Panzer IV/70 tank/tank-hunter. This low-slung assault gun is a development of the Jagdpanzer IV tank-hunter and was often issued straight to tank battalions. It has thick armour and the gun of the Panther tanks, making it rather nose heavy impeding its ability to deal with tough terrain.

This is another new plastic kit coming out with the release of Bagration: German. It will also allow you to make the Jagdpanzer IV tank-hunter.

AA Tanks

All of the above tank companies will also be able to field the new Wirbelwind and Ostwind AA tanks. Of course, you will still be able to field the already available Möbelwagen AA tank, as well as the Sd Kfz 7/1 Quad AA half-track.

The Wirbelwind and Ostwind AA tanks are also new plastic kits. You can build either of these kits as it comes with a turret frame letting you build both turrets. These fit on the plastic Panzer IV hull that also comes with the kit.

Armoured Panzergrenadier Company

Representing the infantry of the panzer divisions you will find several options in Bagration: German. The first of these is the Armoured Panzergrenadier Company representing the armoured half-track mounted infantry of the panzer grenadier regiment. Keeping with our battle group theme you can take a tank unit instead of a Panzergrenadier Platoon as your first grey box option being either: Panther Tank Platoon, Panzer IV Tank Platoon, StuG Tank Platoon, or Panzer IV/70 Tank Platoon. On top of the main infantry options, the formation can also take a variety of half-track mounted weapons including 8cm mortars, 7.5cm guns, and Flame-throwers, as well as towed or self-propelled 15cm infantry guns, 7.5cm anti-tank guns, and anti-aircraft.

Panzergrenadier Company

The bulk of the panzer grenadier infantry in a panzer division was mounted in motorised transports for travel but fighting on foot when the enemy was engaged. However, as the battles to hold back the Soviets intensified all along the front they were often grouped with tanks for fighting. With a Bagration Panzergrenadier Company, you can field tanks as part of your formation taking a Panther Tank Platoon, Panzer IV Tank Platoon, StuG Tank Platoon, or Panzer IV/70 Tank Platoon instead of your third Panzergrenadier Platoon. Though slightly less numerous than in the Armoured Panzergrenadier Company, the formation can take a number of armoured half-tracks mounted weapons as well as towed guns and weapons.

Reconnaissance Company

The bulk of the panzer grenadier infantry in a panzer division was mounted in motorised transports for travel but fighting on foot when the enemy was engaged. However, as the battles to hold back the Soviets intensified all along the front they were often grouped with tanks for fighting. With a Bagration Panzergrenadier Company you can field tanks as part of your formation taking a Panther Tank Platoon, Panzer IV Tank Platoon, StuG Tank Platoon, or Panzer IV/70 Tank Platoon instead of your third Panzergrenadier Platoon. Though slightly less numerous than in the Armoured Panzergrenadier Company, the formation can take a number of armoured half-track mounted weapons as well as towed guns and weapons.

Support
As mentioned above, support includes both the Marder Tank-hunter Platoon and the Jagdpanzer IV Tank-hunter Platoon, both now available as plastic kits.

For heavier self-propelled tank-hunting capabilities you can take either the Elephant Tank-hunter Platoon, of the Hornisse Tank-hunter Platoon. Both are armed with the powerful long 8.8cm anti-tank gun. The Hornisse is on a lighter chassis with just 2 front armour, while the Elephant is heavily armoured with front armour 16!
You can also field the 8.8cm Tank-hunter Platoon with the 8.8cm gun (Pak43). This has AT17, allowing it to knock out almost any tank.

If you are looking for a multipurpose gun that can know out tanks as well and aircraft you can always go for the 8.8cm Heavy AA Platoon with its AT14 and Self-defence AA abilities.Both of these guns are available as plastic kits.

There are plenty of choices for artillery, with the Wespe, Hummel, and 10.cm Artillery Batteries. If you like to make a bigger splash on the table you could also go for the Salvo template bombardments of the 15cm Nebelwerfer Battery or the Panzerwerfer 42 Battery. These rocket launchers saturate a large area with their rockets, hitting it with a 10”/25cm x 10”/25cm bombardment delivering Firepower 4+. The Panzerwerfer 42 provides mobility for relocating as well as providing armoured protection against light weapons. The Panzerwerfer 42 is a new model for Bagration: German.

Other support includes both Panzer III OP and Sd Kfz 250 OP Observation Posts, a Brummbär Assault Tank Platoon, anti-aircraft platoons, and Ju 87 Stuka Dive Bomber and Tank-hunter Flights.

Painting, Basing, and Terrain Guides

The book also contains colour guides for painting your models, guides for basing your infantry and guns, and a table guide to Eastern Front terrain.

Campaign and Missions

In the Bagration Fortified City Battles section, we introduced a Linked campaign using the Missions in the book as well as some form the Flames of War rulebook.

The Missions include a Fortified Defence Mission called Onslaught that uses Bunkers, Nests, Barbed Wire, and Minefields. The second Mission, Hammering the Line, has the defender less prepared with their flanks threatened. The final Mission sees the defend withdrawing ahead of the enemy attack, delaying them long enough to move back to their next defensive line.

All these Missions and the card fortifications needed to play Onslaught are all available in the River Assault Terrain Pack. Also available is The Race for Minsk Campaign, a narrative-driven system where players get to create their own heroes and fight on the marches of Eastern Europe and beyond.

The back of the book contains a comprehensive catalogue highlighting all the packs you need to field a force from Bagration: German.

Whether you are already playing a German Force, or just beginning, I’m sure there is something inside Bagration: German for you.

So pick one up at your friendly local gaming store.

Welcome to the Bagration: German Live Launch

It’s time for the Bagration: German Live Launch! Join us over the next 12 hours as we upload articles and videos all about the latest Flames Of War Late War book as we take a look at the German forces on the Eastern front of WWII.

Be sure to tune in for for Wayne’s Live Q&A on Twitch where he will be answering questions you’ve sent to us and those that you send in over the Twitch chat!

Click here to go to the Battlefront Twitch channel…

Bagration: Germany Live Launch

Join Battlefront on Sunday 21st March 08:00 AM PST03:00 PM GMT as we launch our new Bagration: German range. We will be updating the Live Launch website with articles and videos and we will streaming from the Battlefront Studio in NZ on our Twitch channel as Wayne doe a Live Q&A. Be sure to join us there!

Click here to go to the Live Launch Website…
Be sure to follow us on Twitch to get notified when we go live…

World War III: Soviet Live Launch Round-Up

World War III: Soviet Book Spotlight
WWIII: Soviet Live on Forces and Digital

Tactics and Gaming

Fire for Effect Artillery in World War III Soviet
March To The Sound Of The Guns: Crunching the Numbers
Victor’s WWIII Soviet Lists
The Boxer Vs The Bruiser Comparing the M1 Abrams with the T-80
The Legions of the Red Banner Infantry in World War III: Soviet
Soviet Armour: Comparing the T-72, T-64 and T-62M
Czechoslovakian’ing Out The Soviets
Casey’s T-64s Ride Again
Building a T-55AM Formation
Casey’s T-80 Tank Battalion
Shock Therapy: Hurting People With The Shock Tank Company
Wayne’s WWIII: Soviet Army List
Be Bad With Your GBAD: Soviet Ground Based Air Defence
BMP-3: “The Dzhek of all Trades”
Building a T-80 Shock Company List
Army Building with New Soviet Army Deal

Videos

BTR-60 Video Assembly Guide
Chris’s T-64 Video Assembly Guide
Wayne’s BMP-1 and BMP-2 Video Assembly Guide
Phil’s T-72 Video Assembly Guide
Casey’s MI-24 Hind Video Assembly Guide
WWIII Team Yankee Soviet Model Range Showcase
BRDM Assembly Guide
BMP-3 Assembly Guide
T-80 Video Assembly Guide
Chris and Wayne WWIII Team Yankee Soviet Battle Report Part 1

Painting and Modelling
Victor’s WWIII: Soviet Army Showcase
Painting the T-80 with Pete The Wargamer
What is Soviet Green?

Thanks For Watching

Thanks for watching, reading and of course interacting over on social media.  Wayne and Chris really enjoyed the battle report live feedback and hope that we can arrange another one of these for a future Live Launch event.

Hopefully you have picked up some great ideas on how you can build a new WWIII: Soviet army, or if nothing else have a few ideas on how to counter them on the tabletop.

This was our last Live Launch before Christmas so make sure you take care of yourselves, have a large pile of Flames Of War and WWIII Team Yankee models on your Christmas list and we will see you in the New Year for the Bagration: German Live Launch.

The Battlefront Team

Fire for Effect Artillery in World War III Team Yankee Soviet

I am new to WWIII: Team Yankee but have a few years of experience with Flames Of War.  During this time, I have really come to love how artillery works.  The idea that you can use it to exert your willpower across the table to make your opponent react to your plans is very cool and I think it adds a level of realism to the game.  The big guns can be a surgical instrument, a shield for your advancing units, or any other of a host of tactical options limited by your imagination, terrain and the opponent’s army composition.  So, when I was introduced to Team Yankee and saw the artillery weapons that are available in the system, I got pretty excited!  Now with the launch of World War III: Soviet we have a range of brand-new, excellent artillery options to consider.

In this article I would like to take a closer look at the mighty Soviet artillery Battlefront is about to unleash on the WWIII: Team Yankee battlefield.   The Soviets have a lot of units vying for the points allotment in a normal game and I am sure the lion’s share will be directed towards tanks.   Because of this, we should shed some light on these units so you can pick and choose which weapons are right for you and still come up with a flexible army list.

2S1 Carnation

The Carnation is a good general option for Soviet Artillery.  In terms of special rules, it is pretty typical with an artillery template, Antitank 4, 3+ Firepower and Smoke.  In direct fire it is range 24 and AT 21, Brutal, HEAT, Slow Firing.  These stats mean it is a decent option for bombardments and its direct fire (if you can get close enough) is good enough to do double duty shooting tanks if there are no other options.  Despite this, at first glance, you may want to consider other heavier hitting options like the Acacia or TOS-1, but this might be a mistake.  The carnation is cost effective with 3 vehicles being 5 points, but most importantly it is a formation choice for all of the formations in the book, except the for (unsurprisingly) the Air Assault Company.  This makes it really easy to slot into your force.  If you are afraid you have too low of a break point for your formation(s) in your army, the Carnation can boost your chances of staying on the field, while providing a decent, flexible weapon.

2S3 Acacia Heavy SP Howitzer

This is the heavy gun option for the Soviets.  The Acacia is similar to the smaller Carnation but you add a Firepower of 2+.  Direct fire against tanks with the Acacia is not much of an option with an AT of only 14, but its Firepower is Auto!  If you need to direct fire on dug in infantry or those sheltering in buildings though, this gun is very potent.  The really interesting option with this gun is the Kransopol projectile.  This is a laser guided howitzer shell with a minimum range of 16 and a maximum of 88 inches.  It does not suffer penalties for being used at long range and is guided by an observer.  Also, it hits tank top armour at AT 4. But what is truly scary is if the Kransopol is used against lighter targets.  This is because it has the Brutal rule so infantry hit by it re-roll successful saves (then the Firepower test succeeds automatically).  Additionally, the Kransopol projectile is not an artillery template, but an individual shot for each gun, so you can potentially get several shots on the target in the shooting step.  When you absolutely need to destroy your target, a battery of Acacias with the Krasnopol upgrade is the choice for you.  You get flexibility with regular artillery and direct fire and the terrifying surgical precision from the special ammunition all from 1 weapon!

BM-21 Hail Rocket Launcher

This is a tried and true option for Soviet artillery.  The BM-21 Hail is a comparatively light weapon at AT 3, Firepower 4+, but it uses the salvo template to cover a wide area.  It is also very cheap in terms of points, running at 4 points for 3 launchers.  Being a salvo rocket launcher, it does not have a direct fire option but can launch Smoke.  The BM-21 Hail is your choice if you are looking for a simple and cheap option to take on infantry or provide counter battery fire against other artillery.  It is not devastatingly powerful but will allow you to slide a salvo template into your army list without devouring too many points which you can save for tanks or aircraft!

BM-27 Hurricane Rocket Launcher

This is the BM-21 but on steroids!  The launcher is similar but gets a boost in range and has a better Firepower and Antitank rating.  The big difference here is these launchers also have the Minelets rule so they provide some are denial effects.  Overall the Hurricane is still more of an anti-troop option than anything else, but considering that it does have an AT of 4 and a 3+ Firepower, it can still destroy the odd tank with top armour hits making this option more flexible than the BM-21 Hail.

TOS-1 Thermobaric Rocket Launcher

When I saw this unit, I did a double take…basically it is a flame thrower that uses a salvo template!  Mercifully the AT value is only 2, so as an antitank weapon it does not have much going for it.  But that is where this weapon’s limitations stop.  With the large template, a Firepower of Auto and the Brutal rating this means that when you hit the opponent’s infantry they must re-roll successful saves.  Foxholes or buildings which provide bulletproof cover are of no value because of the Auto Firepower.  3 launchers are 10 points so these are expensive to take (justifiably so), but this weapon will simply erase opposing infantry off the board.  If your opponent uses a lot of troops on foot this is the option you have been waiting for…and what they have always dreaded.

BMP-1 Observer Post

Do you have an extra BMP-1?  If not go get one.  Though the BMP-1 Observer is not technically artillery, this unit goes hand in hand with the Soviet artillery assets.  The reason you need it is because the Soviet forces get a dismal skill of 5+.  On the WWIII: Team Yankee battlefield this is not that big a deal when missiles and 100+ mm guns are doing most of the work, but trying to roll a 5+ (or 6 if the template overlaps terrain) will burn up your Range In Rolls fast.  Since the BMP-1 Observer has the Observer special rule it can lower your range in attempts to 4+.  This is still not the best in the game, but for 1 point it is essential if you are spending any of your precious points on artillery.

Let the Fire Rain Down

If you were considering ignoring the artillery options when making army lists from WWIII: Soviet, I hope this article has helped change your mind.  The amazing array of tanks, IFVS and aircraft this book introduces to the game could understandably distract you from humble long-range fire support.  But as we have seen, the options for the big guns and rocket launchers have what it takes to not only obliterate your opponent’s forces but also dictate the course of the battle through laying Smoke and Minelets. If your opponent thinks their infantry is safe in a building, introduce them to the TOS-1 and burn them out!  If he or she hides their tanks out of sight, send in a laser guided Kransopol shell after them!  With some careful and imaginative use of the awesome new Soviet artillery there will be nowhere to hide as you project the wrath of the Red Banner across the battlefield.


March To The Sound Of The Guns: Crunching The Numbers

With Chris Allen

When most Western armies conduct warfare they support movement with fires, providing artillery support and other fires to assist manoeuvre. The Soviet Army has always seen things differently and supports fires with manoeuvre. Utilizing massed artillery and the devastating effects that they can deliver to an enemy force they reinforce artillery success with unit movement. Simply put, the Soviet army doesn’t go anywhere without artillery. Lots of artillery.  I’ve said it before and I’ll say it again, this is especially true in WWIII:Team Yankee.

When Red Thunder I was released I was excited to get to put down even more artillery for my Soviet force with the release of the 2S3 Acacia. Now with WWIII: Soviets dropping I’m even more excited by the addition of two new artillery units. I’m a huge fan of MLRS systems and have long advocated for the humble BM-21 as an amazing sleeper unit in Soviet forces. Many people write it and other MLRS off due to their low firepower. But with about 2.8 times the area coverage of an artillery template, they can cover a shocking number of stands. With the release of WWIII: Soviets players are offered the opportunity to include both the BM-27 Uragan and the TOS-1 Buratino MLRS systems, and the sky is about to fall.

All Soviet Formations with the exception of the Air Assault Battalion have the option to take a 2S1 battery. This gives players an amazing base artillery system that can also act as an assault gun with a direct fire AT 21 gun. The 2S1 is the artillery equivalent of a Swiss Army knife. It can do it all.

From here Soviet players have the most diverse and numerous artillery support options in the game. There are four boxes of artillery support available to Soviet commanders, an additional 2S1 battery, a 2S3 battery, an MLRS battery of either BM-21s or BM-27s and the option to take a TOS-1 battery in addition to the ubiquitous BMP-1 OP. A single formation has 5 artillery platoons available to it:  fires supported by manoeuvre.

So what do these two new systems bring us? As you can see from the support chart above, you get an extra salvo option, allowing players to drop two salvos a turn on the enemy with either a BM-21 or BM-27 salvo, and a TOS-1 salvo going down range at the enemy. The second thing it brings players is more firepower. The BM-27 is the BM-21s big brother and brings with it AT 4, enabling it to bail and damage vehicles regularly, and FP 3+ to dig out infantry teams more reliably. The BM-27 also has minelets which give Soviet players a fantastic board control option. The TOS-1 brings the heat. With its thermobaric warheads the TOS-1 has a FP of AUTO and with brutal forces all teams hit to reroll saves. It is an infantry deletion machine, and it’s armoured so ignores pinning and can consistently survive small arms fire.

So what is all of this artillery here to do? I would argue there are two basic tasks for artillery in a Soviet list: they dig out infantry, and they cover your force.

Digging out infantry is nothing new to players and is the common reason to take artillery. But while many other armies will take artillery to pin infantry so that they can be assaulted, this commonly isn’t the case for Soviet infantry or tanks. Facing facts, Soviet forces aren’t great at assaulting generally speaking. But they don’t need to be. Here Soviet doctrine calls for the use of “Posledovatel’ Noye Sosredotocheniy Ognya” or successive fire concentrations to neutralise, by artillery fire,the enemy in proximity to motor rifle and tank units.

Soviet doctrine is clear that the breakthrough is the least preferred situation, and that the meeting engagement or pursuit is dramatically more advantageous to Soviet forces. So what does this have to do with artillery? Manoeuvre supports fires. Soviet artillery is there to force people to move or die in place. With the quantity and quality of artillery and salvo fire you can put down on a position, there is no infantry force in the game that can simply sit and take it. This forces your opponent to move, changing the situation to a pursuit, something tanks and the Motor Rifle companies excel at exploiting.

So how good is Soviet artillery at digging out infantry? The simple answer is with the new MLRS systems, it just got better. Soviet players can trust that military scientists have applied great efforts to compile the following algorithm table.

The above table gives you % chance to kill a given dug in team under a template, along with the average number of teams required under a template to destroy a dug in team. The TOS-1 doesn’t have stats for normal or 6 gun bombardments because teams hit by it always reroll saves.

So how can you use a table like this? You can use it both in designing your list and during a game when faced with an enemy position. When you’re designing your list you can use.

these tables to help you prepare for situations you think are likely. Take every player’s nightmare, the British Infantry platoon. With 9 teams it’s hefty, it’s skilled and it’s covered in weapons. Even if you manage to assault them, they’ll more than likely assault back and kill more of you than you did of them. So instead of going in, burn them out. With a six gun battery of 2S3s and 3 TOS-1s hitting the position, how long does a platoon last? If you sited the TOS-1 on the objective to start and the Brits dug in there, you can expect to kill just under 1 out of 3 teams. The 2S3s wiill kill around 1 out of 5 teams as you range it in and then subsequent turns will kill 1 out of 3. This would average killing 4 teams on the first turn, and while the number drops each turn, so does the number of survivors. This essentially removes the platoon in 3 turns. So either they sit and take it or they move, at which point your vehicles move in and gun them down (the pursuit), or just take the objective.  Either way, artillery wins you the day.

The thing to note about artillery is that against any given target it provides diminishing results. Unlike a tank’s main gun or a machine gun, artillery has no rate of fire but instead has a template. This means that unless an opponent feeds your artillery more units to drop bombs on, a battery firing at any point should kill fewer and fewer each turn. Killing fewer of the enemy can seem like a bad thing, but when it’s because there are fewer alive to kill, it can be forgiven. Again, artillery makes someone die in place, or move to be gunned down on the run. Let them make that choice.

Covering a Soviet force in the advance is critical to success. NATO and other opposing forces need to attrite a Soviet force prior to it becoming decisively engaged. Soviet forces need the cover that only their artillery can provide in the advance, the defence and while on the objective. It is possible to cover a Soviet force in three ways, through concealment to fire, by fires and by providing counter mobility. You can fire smoke to cut off the enemy from shooting you; you can lay down fires where the enemy wants to go to force them to go somewhere else; or, you can drop mines on them and have them stay a while, and think about what they’ve gotten themselves into.

While terrain can assist in the concealment of a force, there is seldom a situation where it alone can provide the cover that is provided. Where the ground may fail you, artillery will not. A 3 or 6 gun battery can provide you with between 12 and 24 inches of smoke. A single battery can block off between half and a third of the table. Two batteries can basically block off the enemy’s line of sight. Smoke should reside in and be used by all Soviet forces. It helps a Soviet player shape the battlefield, and the enemy, pushing them with fear and metal from their defensive positions to new locations.

Smoke can be used to cut off fires, commonly by placing it close to your force in order to ensure that units don’t come within 6 inches to be able to fire on you. You can however use this to bait aggressive enemies into coming out of cover to shoot. By placing the smoke bombardment close to the enemy positions you can dare them to come out of cover to shoot at your forces. This can often allow you to shoot back at targets now in the open and closer to you. Smoke forces your opponent to choose between bad options and for this reason alone should be employed where possible.

While smoke cuts an enemy’s shooting off from affecting Soviet forces, there are other ways you can cover your advance. Soviet doctrine calls for the use of “nepodvizhnyy zagraditel’nyy ogon’”, or standing barrages to obstruct the movement of the enemy.  Salvo fires are amazing in that they take up a huge amount of space. 100 square inches of coverage allows a player to block off routes to objectives with salvo fire. Few infantry unitswant to risk running through the fire to help an objective in danger, and now with the BM-27 bringing AT 4, few vehicles will join in that risk. If your cutoff fires are ranged in before the enemy arrives, you’ll have the added benefit of using repeat bombardments and any infantry teams hit will be rerolling saves. Artillery and Salvo cutoffs are rarely thought about as we often try and range in on where something is and not where it will be or where it needs

to go. Using this cunningly will again shape the enemy and make their destruction that much easier.

The BM-27 Uragan now adds the options to drop mines on the enemies of Socialism, forcing enemy vehicles to either hold in place, risk moving or wait for infantry or specialist vehicles to extract them from the minefield. Few of these options end both well and quickly. Usually players have the choice between the two. In every situation Soviet artillery forces the enemies of Socialism to make choices that expose them and enable your manoeuvre forces to exploit.

Overall the new artillery available to Soviet players is exciting. First off it just looks cool. A T-72 driving around with a bank of 30 220mm rockets on top? Yes please. Secondly it just fits the army, its huge, numerous and brutal. And thirdly it’s fun to play. It all comes together in a scary amount of firepower that can now be wielded with careful planning and consideration to ensure Soviet objectives are reduced prior to arrival or protected from the scourge of capitalism.

See you on the firing line.

~Chris