
with Larry O’Connor
Some would say the British Small Box Girder (SBG) bridge is descended from the famous Bailey Bridge.
“I take it you mean that glorious, precision-made, British-built bridge which is the envy of the civilized world?”
That’s the one.
Hello chaps and ladies, let’s talk AVRE Small Box Girder (SBG Assault) bridges and how to make your own to help liberate Northern Europe from Jerry.
About a dozen years ago while visiting family, I found Flames Of War through a dear friend and shipmate who had an FLGS in Augusta, Georgia (Norman Schwartz at Arsenal Games – now closed.). But at the time the game really didn’t catch my fancy, I’m a Navy guy. About the same time, after a close call with cancer, my bride found an FLGS (Texas Toy Soldier (TTS) in Dallas) and she strongly encouraged me to pick up a hobby to rejoin the human race. A group of great guys at TTS play Flames Of War and I got hooked.
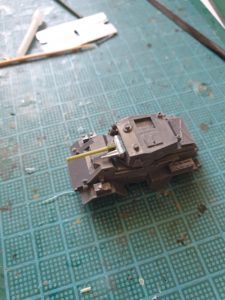
I chose the British Forces as virtually no one else here played them as a primary army. A few months later, the group at TTS were planning to do their annual D-Day game. I was intrigued, and being a student of WWII history for decades, I wanted to play using General Sir Hobart’s “Funnies”, particularly the AVRE and its assault bridge. I wonder often if General Sir Hobart’s funnies were used as he was General Bernard Montgomery’s brother in law. Hmm? Nevermind. Alas, I was told I would need an SBG mini. “No mini, no bridge on table”. At the time, no one here knew of a commercial source for a model so I decided to make my own. Heck, I served in two Seabee units for several years, how hard can it be? Two notes. There is a bit of fiddliness to this process and those with OCD (CDO) will either hate or love the process.
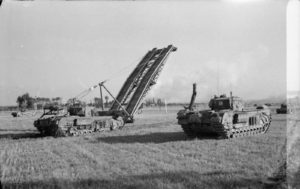
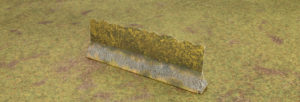
Right. So the Small Box Girder (SBG) assault bridge was a British project which in short order was copied with different tweaks by other nations. But in essence a SBG is mostly a metal bridge carried/mounted on an armored vehicle to cross obstacles – either man made or a feature of terrain, to be deployed under fire. SBGs can either be solid/fixed or fold in half. I chose to recreate the kind that fold, both for more drama (eye candy), utility (such as seawalls of different height) and it’s more dynamic.
Note, these bridges are not going to be something slapped together quickly. These are the items I use, but various substitutes should be generally available most places in hardware, hobby stores, and many are likely in your work area.
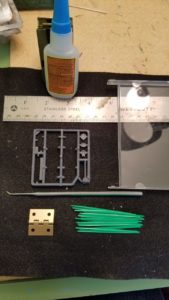
- Hobby Knife
- Safety Razor
- Some medium (hobby) sandpaper
- Tweezers
- 2-4 Clothespins (the wooden ones with springs)
- A metal ruler
- Something to cut plastic, with precision and control. I use a scribing tool but, there are other options including some power tools. A scribing tool is super sharp and when drawn with pressure against plastic it cuts a fine narrow groove by removing a thin line of plastic.
- Small metal hinges (1 per bridge) {1″ x 1″ / 2.5 x 2.5 cm}
- Plastic toothpicks (TPs)[18 per bridge]. Flat wooden ones can be substituted, but have drawbacks. My preferred are called pic-a-pic plastic toothpics. * One curious thing about these, is at certain angles they have a resemblance to girders/I-beams.
- Some small bits of plastic rod or sprue (4x 5mm long)
- polystyrene cement and/or a super glue.
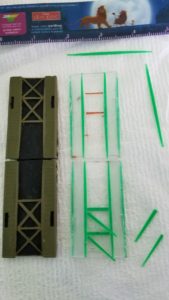
- and the secret critical component, surprisingly, is the top cover of a CD case: one per bridge. You need the relatively older thicker kinds where the top cover side have grooved sides.
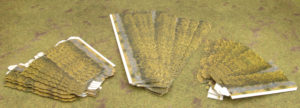
In many of the accompanying figures, I use a previously made SBG as a visual reference. Let us begin.
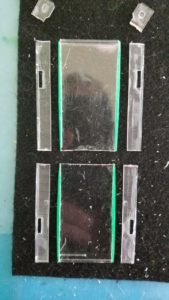
First cut the sides from the CD case cover. I cut from the inside, first removing the annoying small half-circle discs. You want to preserve the smooth outside edges of the case. These are what I will call side rails. Do not throw away the CD case yet.
Second, parallel to one side where the side was removed, cut of a full length piece of the case,1 and 5/16 inches wide (33mm). This will be the primary span. This measurement was calculated based on:
- scale to historical example
- the width of minis that would be using the bridge
- size of the hinges I chose.
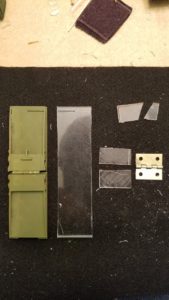
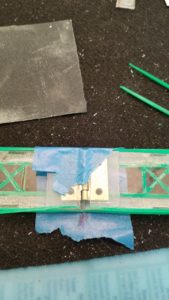
Next, on the other side of the CD case lid, cut out a small 1.5″ square. (The more proper square the better, but some slight variance can be accommodated during construction.) Then cut the square in half, but it must be (or close enough) 1 4/16″ wide (31mm) – just a wee less narrow than the main span (by the width of two toothpicks). This will become a shelf below the bridge on which the hinge will be super glued. Score (scratch up) one side of these shelf pieces with sandpaper.
Shelf Hinge sub-assembly. Now score (I use an old screw driver) the sides of the hinge that fold towards themselves. Centering them, glue the small shelf pieces with the wide parts butted against the hinge but avoid getting superglue in the hinge. After the hinge has dried, glue 5mm long bits of plastic rod/sprue (to be pylons between the hinge shelf and spans) on the opposite side of the hinge, in the holes which screws would be used in normal use. Then glue toothpicks parallel to the sides. One end flush with the shelf edge.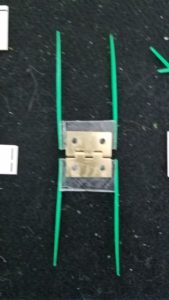
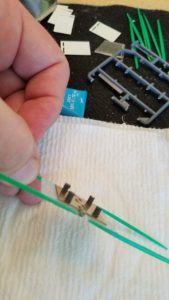
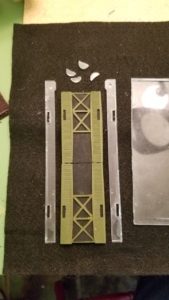
Next, let’s sort out the main spans. Mark off the ends (with the CD case hinges) with a marker- the same length as the main span. Cut off the ends of the sides of the CD case. On the bottom of the CD case/center span there may be an angled ridge which helped to keep the CD case close. I preserve that to help bridge placement during gameplay. That ridge will also help as a reference as it faces down. Measure the half way points of the side rails and main span. They should be the length of a toothpick (TP). Mark and cut them. Glue a toothpick to the outboard side on the underneath sides under the smooth edge.
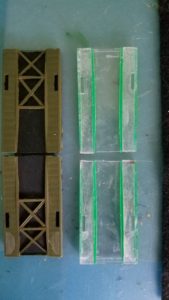 Score up the sides on the main spans, where the side rails will go, with sandpaper. Also score up the side rails on the smooth side. Then glue/cement the side rails (ridge sides up) on the sides of the main span, smooth sides outboard, flush with the toothpicks. You may want to gently apply clothespins/clips in lieu of squeezing with fingers until set. But too much pressure can damage your work. Now, glue a toothpick lengthwise on the inboard side of the side rails
 Next you are going to make two Xs on each span on the ends away from the hinge.
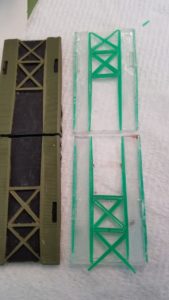 Start by cutting and taking the middle third of toothpicks and glue down ‘girders’ at the halfway and quarter points. You can use the other thirds to make the diagonal girders.
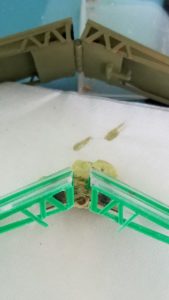
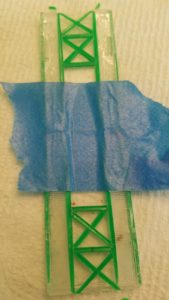 When all parts are set, temporarily tape the two main spans back together lengthwise with painters tape or similar easy removable tape. Mark the tape on the bottom side to show where the hinge barrel is
Now comes the trickiest bit of assembly.
You are going to glue/cement the 4 (styrene/sprue rods) pylons to the underneath of the main span(s). Score patches on the bottom side of the spans. Apply glue/cement to the rods, then carefully center the shelf sub-assembly so each pair of ‘pylons’ will be glued to the span pieces. I find p/s glue is more forgiving in this step while centering on the multiple X and Y axes. Hold in place with gentle pressure. After 30 seconds or so, you can gently wrap the painter’s tape around to the hinge area to hold pressure.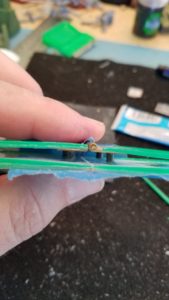
Set aside to get a good bond. (I usually let this set overnight.) When set, glue the trailing toothpicks down to the corners of the main span. Important – Rushing this step can unset the pylons.

Right. Last bit of assembly. One last toothpick per bridge side. Cut a toothpick in half. Start at one bridge half. Glue the thicker side of the toothpick to the bottom edge of the span near the hinge, gluing it down to the out side of the bottom toothpick on the hinge shelf. When dry, cut the toothpick off flush with bottom of shelf. Next take the same piece, dry fit, then snip off a tiny corner as necessary, and glue it from the top back to the shelf to make a W.
 Repeat. WW Now do the same for the other side. You may of course make more Ws, but the party is in 3 months and you want 2, maybe 4 of these beasties. Tidy up by trimming off excess bits.
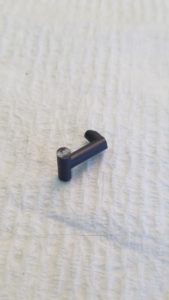 Ok. Done. Well, one last OPTIONAL step. Find a bit of sprue or similar to make a hook on your bridge.
 Glue it to one of the down facing sides of shelf hinge.
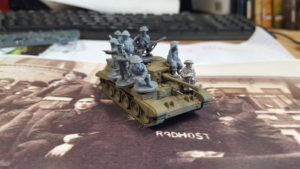
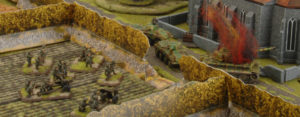
![]() You can field your AVsREs with their SBG’ tee-pee’d on their decks or you can do something a bit more dynamic. The idea is to use a loop of thread or dental floss around your tank hooked on the bridge. You’re an engineer now, you can sort that out. For your officers, tell them to make a loop of dental tape, thread, hobby ‘cable’, etc 9 and 1/2″ long. Loop your ‘cable’ around the hook, through the hinge/pylons, around your tank lengthwise, go under, over the bow and hook the cable back on the hook of the bridge.
You can field your AVsREs with their SBG’ tee-pee’d on their decks or you can do something a bit more dynamic. The idea is to use a loop of thread or dental floss around your tank hooked on the bridge. You’re an engineer now, you can sort that out. For your officers, tell them to make a loop of dental tape, thread, hobby ‘cable’, etc 9 and 1/2″ long. Loop your ‘cable’ around the hook, through the hinge/pylons, around your tank lengthwise, go under, over the bow and hook the cable back on the hook of the bridge.
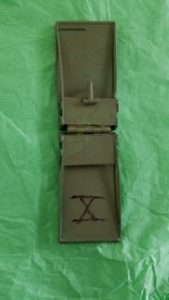
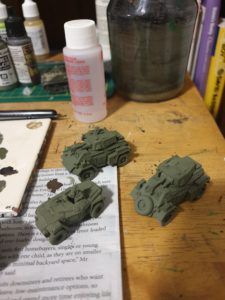
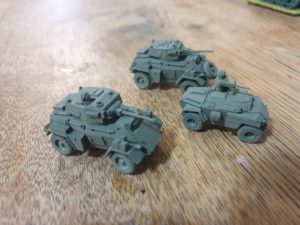
Now, it is just a matter of priming, painting and detailing your bridges. I use a rattlecan of green to prime, then base coat with whatever I use on my Brit armour – usually Russian uniform. Then I use flat black on the insert areas. A bit of a wash will enhance the ridge bits on the side rails. Now, for me, a big X to denote this is my 10th bridge I’ve made. I guarantee your mounted SBGs will be the belles of the beaches. Remember, the bridge is deployed during the shooting step after movement. Good Luck!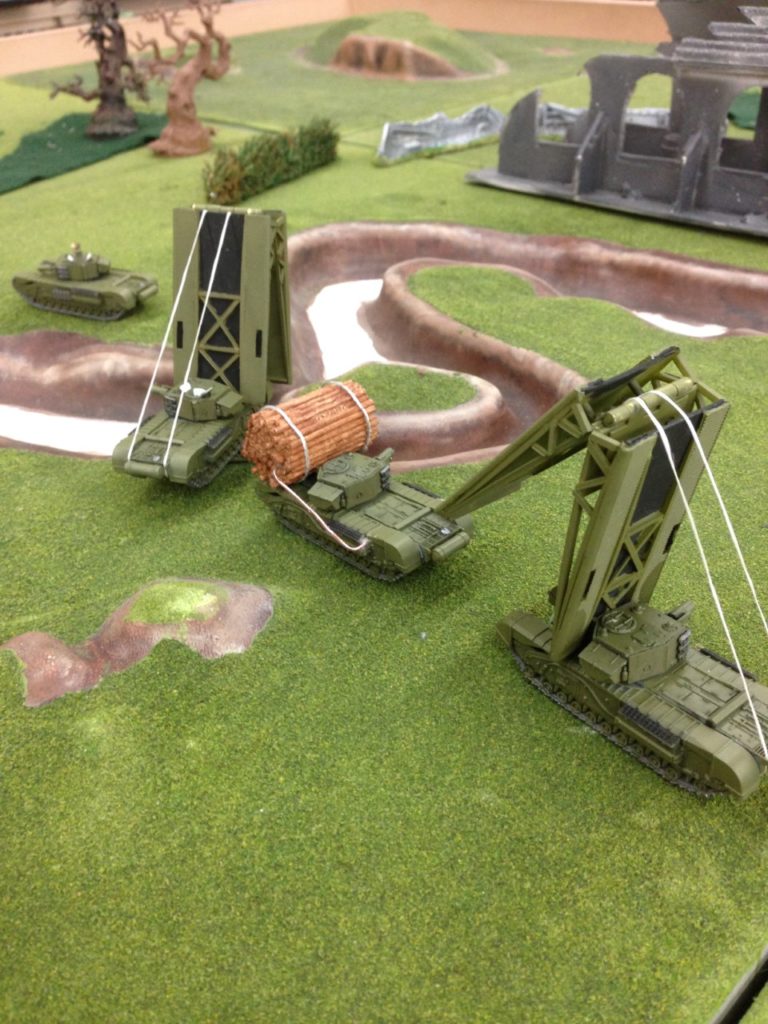 If you’re after more Funnies inspiration, you can of course check out Adcock’s Funnies…
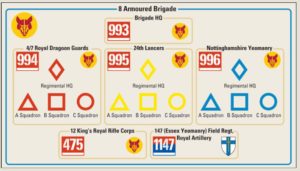
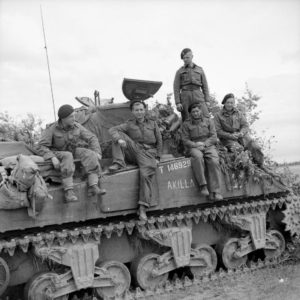
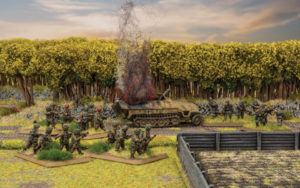
 The 8th Armoured Brigade were one of the most experienced British Armoured Brigades in WW2. They had initially been formed in July 1941, from parts of the 6th Cavalry Brigade in Iraq and Syria and began training with Honey tanks. In 1942 they were brought up to strength with more Honey Tanks and Grants, only to have then taken away just before the Battle of Mersa Matruh in June 1942, and given as replacements to more experienced units. They were joined by the 3 rd RTR Lt Col “Pip” Roberts, and then in August sent to join XXX Corps as part of the 10th Armoured Division.
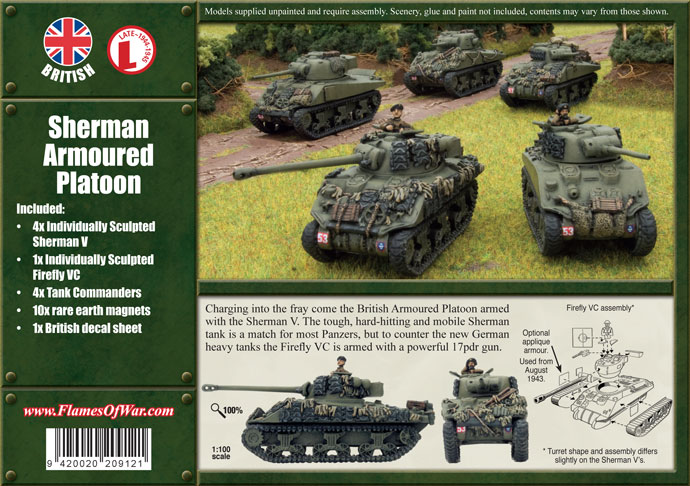
 Also another of my favourites is the Typhoons! I am also really looking forward to the new plastic kits that Battlefront will be bringing out for their planes.
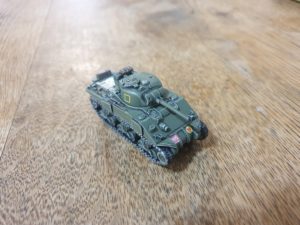 I have painted up a test Sherman, to see how the custom decals went, and also how I like the paint scheme I “borrowed” from Chris and his Big 4 of Late War British- Pretty happy with it …. now to paint the extra 20 or so models…
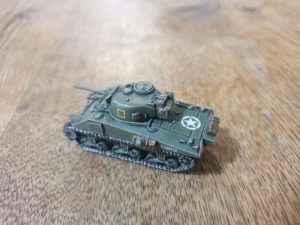
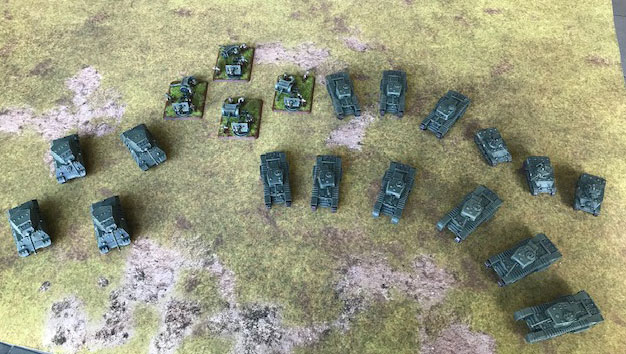

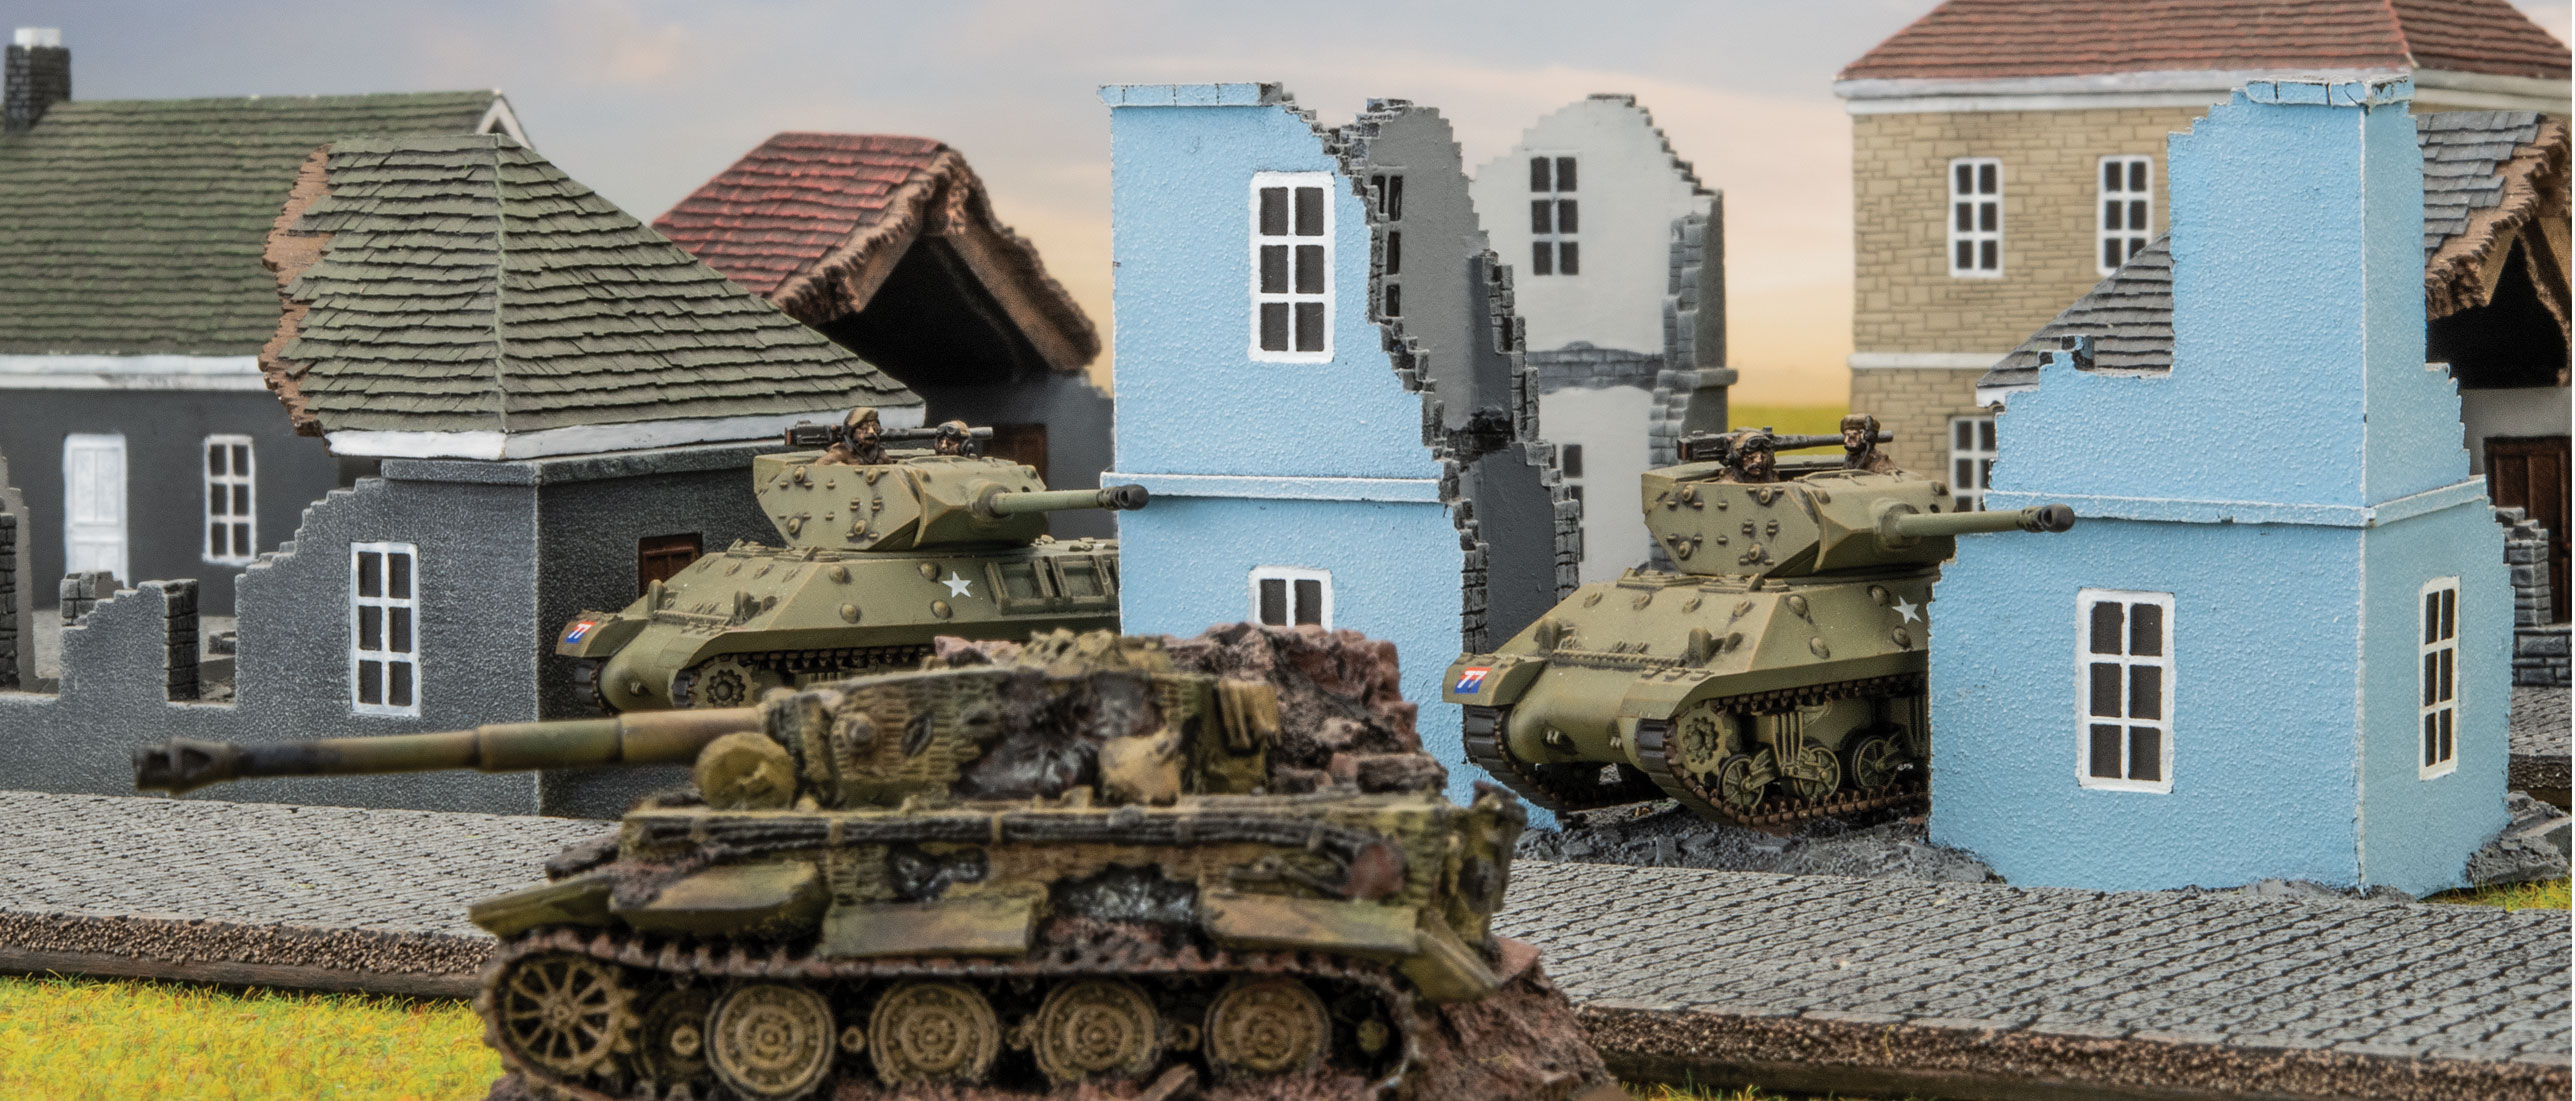
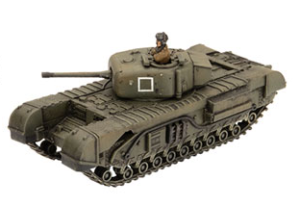
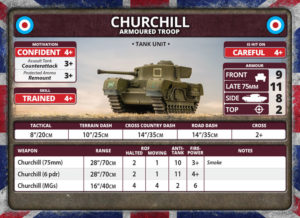 First up is the Churchills who have arguably the most to change. With the addition of the 75mm gun to their options, an additional point front and side armour and now with access to the Chuchill (late 75mm) with its whopping 11 front armour things are looking up! Stats increases of course come with points increases too but I’ll be trying to keep the core of my nine Churchills intact. My squadron HQ can now include the Churchill CS of which I’ll be taking two. This will keep the cost the same which is great for conveniences sake. My two Churchill Armoured Squadrons will be identical with both taking a Churchill (6 pdr), a Churchill (75mm) and a Churchill (Late 75mm) giving a great spread of guns and armour. Sure they’ll be slow but they’re tough and with the 2+ cross check very little is going to stop them. This brings the points total to 52 points spread over just 8 Churchills!
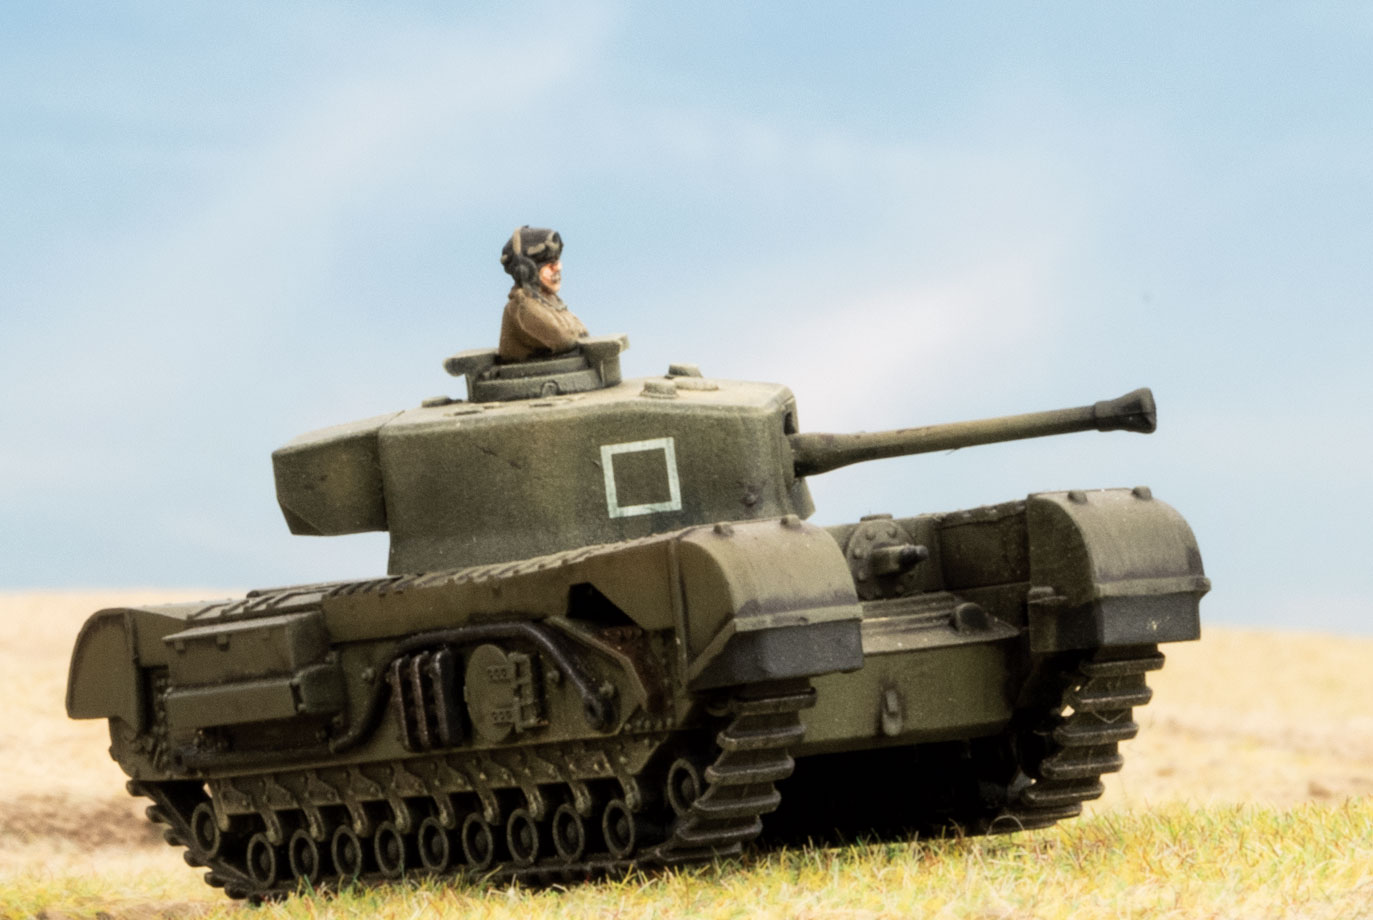

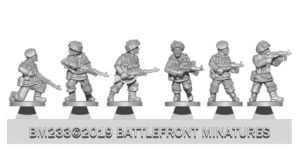
 My rifle company will be just the bare bones, an HQ and three weak rifle platoons (all that are left after several weeks of hard fighting). I can do this by adding three more rifle teams to my motor platoons. Sure, they’ll have an extra Bren gun, but I figure they kept it when they had to disband the third section, so that’s fine. Three platoons will give me plenty of flexibility as I can hold two objectives and still have a platoon free to manoeuvre.
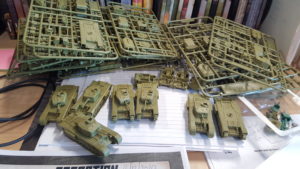
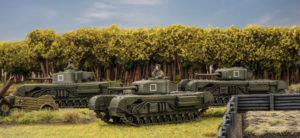
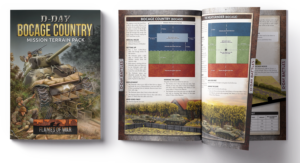
 The pack also contains an 8-page bocage scenario booklet, giving you everything you need to get started playing right from the word go.
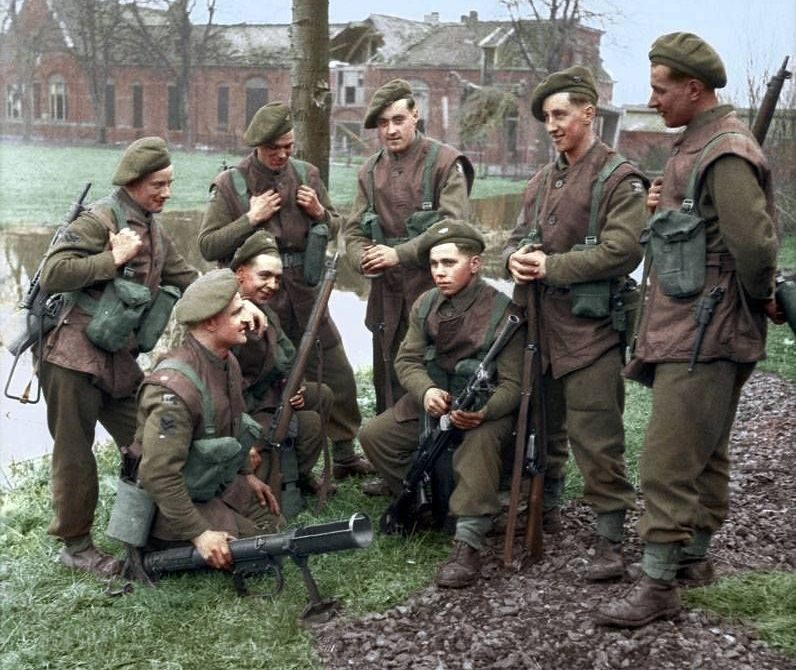
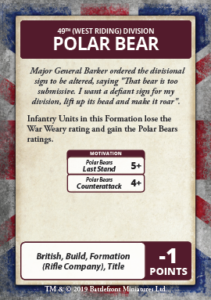 I was particularly taken with the 49th Division Card – POLAR BEAR, because as a young Private in the UK Territorial Army, my regiment came under the command of the WW2 Division’s successor: 49th (East) Brigade, based originally in Grantham, Lincs and now just half a mile from the BF UK HQ in Nottingham. This forces me (kicking and screaming I assure you) to create a rifle company as Polar Bears. Even more interesting is a conversation during the Hobby League forums with a resident of Iceland, and my discovery that there were elements of the 49th Polar Bears stationed in Iceland as a garrison force! My how we got around, especially as my old regiment is now based in the South of England on the coast as befits their role…
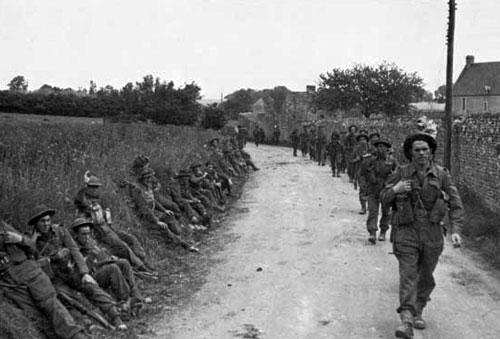
 1939-40
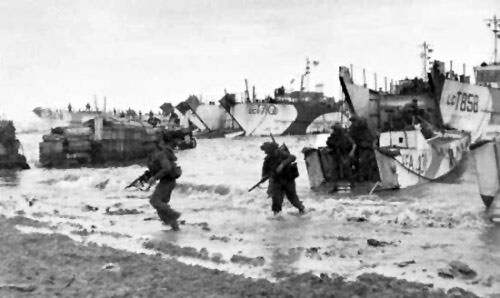 Northwest Europe
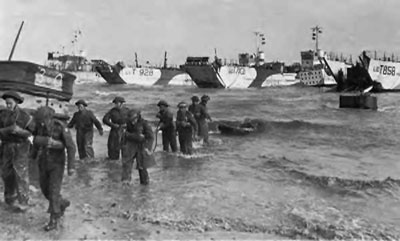
 On the “JIG” sector the 1st Battalion, Hampshire Regiment landed, but due to delays were without the support of tanks. Heavy machine-gun fire caused the death of the 1st Hampshire’s commanding officer and also their second in command (2iC) within minutes of landing.
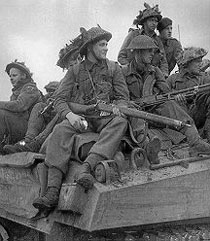
 Much like the 9th DLI the 6th DLI were fired on from the wood in the line of their advance. They too were supported by a squadron of the 4/7 Dragoon Guards. They took the village, but could not advance any further forward. During the night they withdrew from the village to the north.
 Operation Bluecoat
 The Brigade
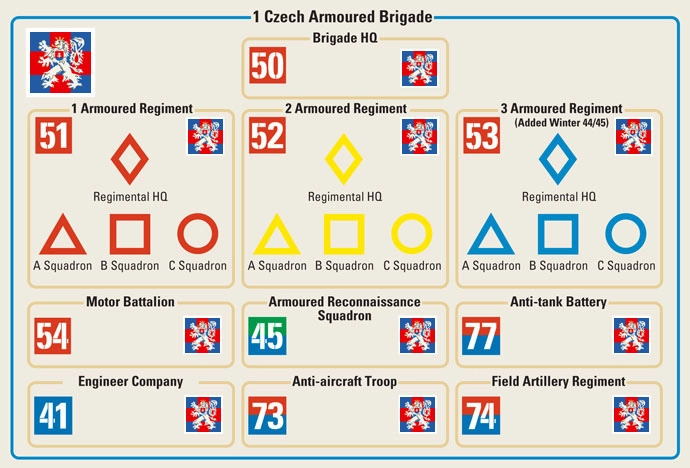
 These core units were supported by an AA Troop with towed 40mm Bofors guns and an overworked and slightly under strength Engineer Company which was again expanded during the 1944/45 winter.
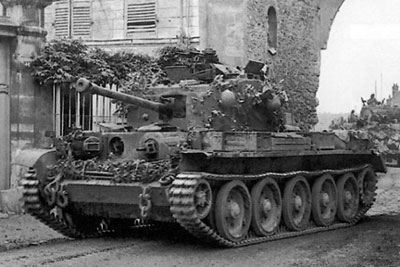 The siege role ill suited the Czechs, who had insufficient manpower for the task and lacked the specialist engineering vehicles necessary to reduce the inland defences.
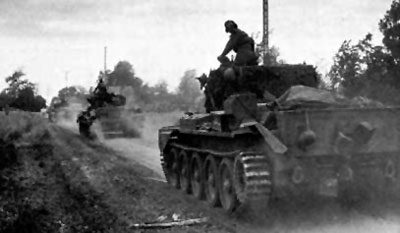
 The Siege
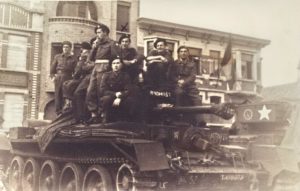
 Despite the relatively static nature of the operation, the men of the CIABG were occasionally able to demonstrate their prowess and mobility in mobile battle. On 28 October 1944, elements of the 2nd Armoured Regiment and the Motor Battalion conducted a feint which drew defenders out from their prepared positions.