
With so many great models in the new WWIII: American book it can be easy to loose track of which one is which, so check out this video to help identify what models you might need to buy.
Author: Chris Townley
WWIII: American Q&A With Wayne
We asked for you questions on World War III: Team Yankee and specifically the new American book. You managed to ask some fairly curly questions so Alex sat down with Wayne to answer them…
Intro to the WWIII: American Live Launch
Welcome back to World War III, the war continues…
![]() Over the next 12 hours we will be sharing a pile of content from the Battlefront Miniatures team, along with some great articles and videos from some of our regular contributors.
Over the next 12 hours we will be sharing a pile of content from the Battlefront Miniatures team, along with some great articles and videos from some of our regular contributors.
You can expect to see:
- Tactics and Army Building articles
- How To Build and Painting videos
- Battle Reports and Missions
- And plenty more
Now to get things started, you can head over to the Flames Of War Digital App, or the Forces website and start thinking about how you are going to update your existing army, or begin a new one whilst you check the rest of the content coming soon…
You can find out more about the Flames Of War Digital App here…
Begin army building here with WWIII: Team Yankee Forces…
WWIII: American Launch Coming Soon…
On July 17th, be sure to tune in to our World War III: American Live Launch. We’ll have a whole collection of articles relating to our latest World War III release.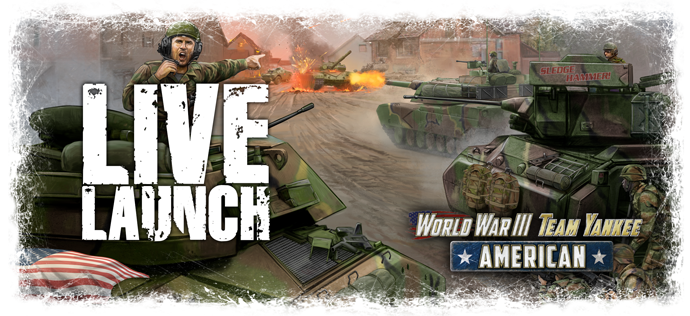
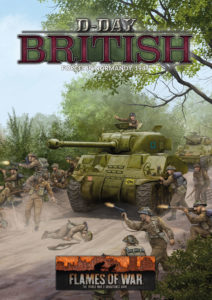
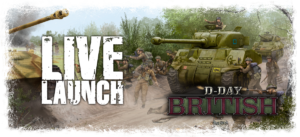
D-Day: British Live Launch Round-Up
Spotlights
Working With Thermoplastic
Bocage Country Mission Terrain Pack
D-Day: British Rotations
D-Day: British Spotlight
Forces and List Building
Back In Time for Tea and Medals
We’re Paratroopers- We’re Meant to Be Surrounded
The Fox’s Mask
Churchills On The Horizon
Slow and Steady – A New D-Day: British Force
Updating My Desert Rats in Normandy
Modelling and Painting
Pete the Wargamer Paints D-Day: British
Building an SBG Bridging Churchill
Radhošť
Thermoplastic 101
Thanks For Joining Us
That’s a wrap on the D-Day: British launch! Thanks for joining us, and we look forward to seeing all your D-Day: British projects!
Big Four Of Late War British Coverage
Chris has been going hell-for-leather with all his British projects and games for the release of D-Day: British.
You can keep up with the painting, modelling, and battling over on the Big Four blog…
Back In Time for Tea and Medals: Jumping Into Normandy with the British Airborne
with Chris Potter, Battlefront UK
Those who have followed previous Live Launches, will have probably seen my articles on list building, and army choices before. When the D-Day: American book came around, it was a super easy choice on what formation for my US army I would take – Paratroopers. Specifically, I built a full
formation choice in the book and platoons of Easy Company, 506th PIR, 101st Airborne as they were on the ORBAT going into Normandy on 6 th June 1944 – complete with Lt. Winters, Spiers, Nixon and the Toccoa Sergeants from real life and also immortalised in the HBO Series Band Of Brothers.
 This force was reliably backed up by my absolute favourite tank of the war – the M4 Sherman, in all its glorious forms. For the project I took loads of 75mm variants, a smattering of 76mm Shermans and also a platoon of 105mm too. In total I managed to paint almost 400points of US models for my army. Then, during the Hobby League Campaign, I managed a rather respectable 7 wins to just 2 losses and a draw. Not bad considering I’m known in the office for my poor dice rolling! Also during the Hobby League, I put together a D-Day: German Panzergrenadier Force, with Panzer IV and
Panthers which I really enjoyed using, but there is something about the Airborne formations that always draw me back. So at the same time I managed to put together an 80pt Fallschrimjager Force to swap out with the Panzergrenadiers as I desired.
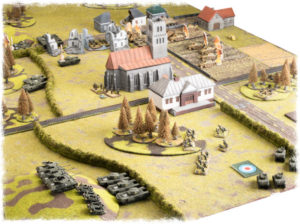
It was as soon as the D-Day: British book landed on my desk, that I knew in my heart of hearts which formation I was destined to put together. A D-Minus 1 British Parachute Company – with as much AT as I could muster onto the planes and within the list.
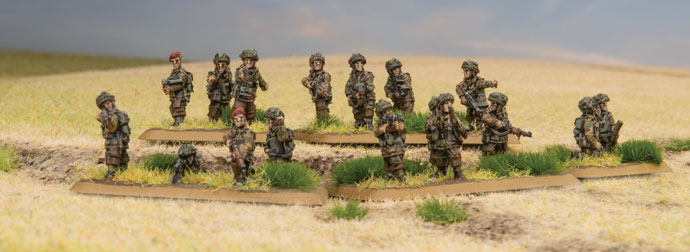
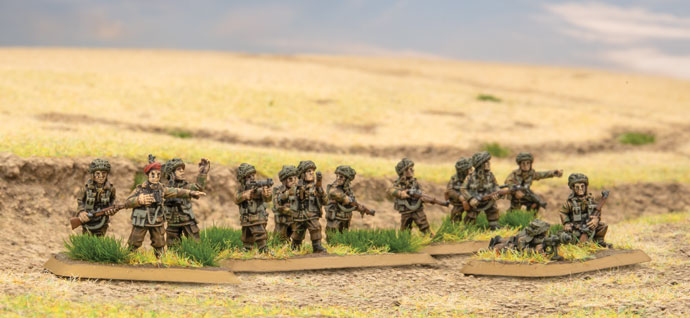
For a start, the new plastic sculpts for the British Paratroopers are probably my favourite plastics we have produced to date for infantry. I love the attention to detail on the helmets, smocks (including buttoned up ‘pull through’ at the back) the folds on the Denison smocks, as well as the variety of weapons each bloke is armed with – you have the ubiquitous SMLE rifle, Sten gun, Bren Gunner, as well as a plethora of officers and NCOS with Webley revolvers, moustaches and most importantly, berets.
I literally jumped at the chance to grab some of the plastics from our resident man of mystery sculptor Tim Adcock, and feverishly put them together. Soon I had enough troops for three full platoons, complete with PIATs and 2inch mortars, and I even managed to scrounge together some
6pdr AT guns as well as crew from my bits box that are perfect for making a mini diorama for the force.
 Combined with the options for taking a Desert Rats Cromwell Armoured Squadron in support complete with embedded Firefly and I’ve got myself a well rounded army that is vicious in assaults, able to hold its own against most tank armies I will encounter with the AT of the 6pdr and the PIAT,
as well as flexible enough to be able to fulfill a variety of roles that I might face in a game. Further, I can see the army being repurposed for further Late War projects that I have my eye on in creating scenarios for, that involve bridges, Armoured rushes up long highways, and rear-guard actions involving umbrellas and hunting horns.
 But most importantly, is the command cards for the British. I got a sneak peak at them, and suffice to say that I will be taking Mr Joe Ekins and a Lt. Col of the 6 th Airborne to tease victory for my games of Flames Of War.
Pete the Wargamer Paints D-Day: British
We’re Paratroopers- We’re Meant to Be Surrounded
with Tama Mascelle
The release of the D-Day: British list book is upon us, and for me personally I am excited to play with one formation in particular; Late War British paratoopers. Not only because this is the only formation I have fully based and painted, but also because of the versatility within the formation and the great history behind the men of the “Red Devils”.
The other big benefit is that for a newer player like myself, or at least a player that doesn’t get to game every weekend like he would like, the Airborne Formations provide a great deal of variety and have a huge range of tools, so they have a lot of options for different weapons and cope well with different play styles.
 On June 5th, 1944, the eve of the greatest and most ambitious amphibious assault in human history; thousands of men flew in the dead of night with the goal of dropping behind enemy lines and taking key objectives to halt the German response to the D-Day landings. The Red Devils, along with their American cousins, the 101st Screaming Eagles, were young pups in comparison to the veteran American para division the 82nd Airborne, which had already made one Combat drop into Sicily and taken part in extensive fighting both on the island and mainland Italy. Both divisions had a lot to prove in their maiden jump, and this can be seen in the Parachute
company’s stats. Their Fearless Motivation indicates that you can be sure that no matter the objective, the men of the 6th Airborne would stop at nothing to secure it. The Trained Skill rating of British is reflective of their relative inexperience, but brings with it the benefit of being able to fit more into your force.
This stat can be the make or break of any battle, as infantry caught out in the open and pinned down by artillery can quickly be torn to pieces by an infantry platoon or MG team, having the ability to quickly unpin your men and keep the momentum of an assault swinging in your favour can often be the key to victory in a battle. It’s also worth noting that this stat is spread across the board with all airborne troops and support weapons.
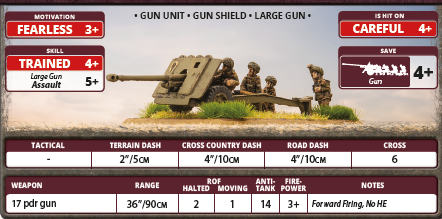
 In terms of support the Airborne boast a level of versatility that you’d realistically expect from a unit that has been dropped behind enemy lines and has to wait an unspecified length of time for relief. While 6 pdrs are cheaper and more numerous, if you’re wanting to put up any sort of resistance to the heavy German armor you’re likely to encounter, I recommend taking the more powerful and deadly 17pdr. For decent fire support at a relatively low cost you could do a whole lot worse than the Airlanding 75mm howitzers, with decent range they can be a real thorn in
Jerry’s side.

Finally for your direct infantry fire support we have the option to take up to four teams of the trusty Vickers HMG, alongside providing area denial to fragile areas along your battle line, the Vickers HMG also has the ability to fire an “artillery barrage” with a range of 120 centimeters, essentially having your HMG teams act as secondary (very light) arty for your formation.
Now even with all that variation, coming up against panzer formations can be extremely difficult and daunting. That’s why I like to pair my Parachute formations with a tried and tested Sherman Armoured Squadron from the 11th Armoured Division, made up of a Sherman HQ consisting of 2x Sherman 75mm, and two large Sherman Armoured troops, made up out of three Sherman 75mm and one Sherman Firefly each.
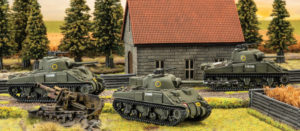 This added formation usually should give you both the mobility and firepower to deal with what can sometimes be overwhelming German Armour. Although you must be careful not to waste your Shermans as they have poor front armour (6) and dismal side armour (4) leaving them vulnerable to pretty much any large calibre gun the Germans are able to field.
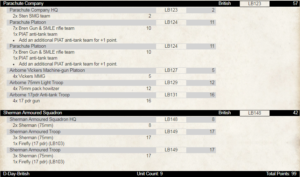
To recap, my go to Parachute/Sherman list is as follows:
This build is excellent for someone like myself, who has yet to master either Infantry or Armour tactics and prefers not place their eggs all in one basket. Having the Paras support your Shermans enables you to move freely without fear of being overwhelmed in an infantry assault and also gives you an added option of assault Anti tank positions with Infantry. Likewise having Shermans support your Paras gives added fire power to assaulting heavily fortified infantry positions and also against a determined German armoured counter attack.
The other bonus is that every feature of this force is part of a Formation, so my opponent has to break two Formations to rout me entirely, and while there are certainly other options I might take with a little more potency, the buffer of having two Formations is valuable for less experienced players (like me).