Updating My Desert Rats in Normandy

with Phil Yates, Battlefront NZ

As those who’ve been reading my articles over the years will know, I have had a fascination for the 7th Armoured Division, the ‘Desert Rats’ in Normandy since I was a kid. My Late War Desert Rats force is easily the biggest part of my collection, so the obvious question is: what difference does the latest version of the rules make? I’ll look at my two formations: a Cromwell Armoured Squadron and a Motor Company, separately.

My Desert Rats force back when we first switched to V4

Cromwell Armoured Squadron
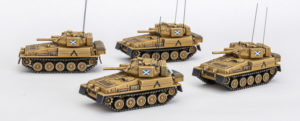
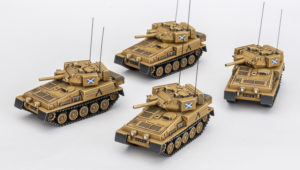
There are two ways to build a Cromwell Armoured Squadron in D-Day: British: the Desert Rats Cromwell Armoured Squadron and the Cromwell Armoured Recce Squadron. Since the 7th Armoured Division had both types, I could go either way, but my tanks are marked as 1st Royal Tank Regiment, I’ll go with the Desert Rats Cromwell Armoured Squadron. The main tanks in the formation are the Cromwell and the Firefly, so let’s see what’s changed.

Cromwell Tanks
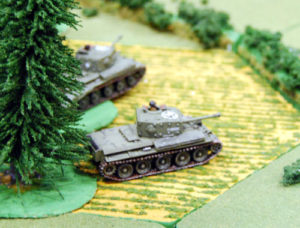
The Cromwell has the same speed and cross capability, and the same armour that it used to have, so it’s still blazingly fast and has about the same armour as a Sherman or T-34. The gun is the same as the Sherman’s 75mm, so no surprises there. The 95mm in the close-support tanks of the HQ gain a little with better Firepower and better Anti-tank and Brutal for direct-fire. The artillery Firepower improvement from 5+ to 3+ should make them a lot more lethal, especially when combined with the re-rolled saves for repeat bombardments. I’m looking forward to seeing them rip enemy anti-tank guns to pieces! Gamewise, I think the biggest difference is the ability to use their dash speed without the risk inherent in moving fast in the earlier versions of the game.

Firefly Tanks
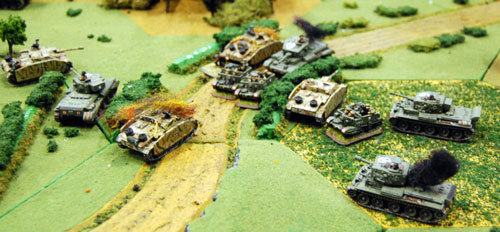
The Firefly’s speed and armour is also the same, as is the 17 pdr gun apart from gaining an extra 4”/10cm range, which may be useful when covering a fast dash onto the flank by the Cromwells. The ratings of both types of tank are much the same. They are still Reluctant, although the Remount is now a straight 3+ rather than having the old Cautious not Stupid rule. They are Careful, so are still hit on 4+. Their Skill rating is Trained, so like most they are OK at Movement Orders like Blitz Move and Shoot and Scoot, a welcome addition in the latest version that should give me more options to do clever things.

The old British tank rule of Semi-Indirect Fire (giving a re-roll for long-range shooting) is gone, so I’ll need to be a little more circumspect in my initial shooting before the charge to close range, but I doubt that it will make that much difference.

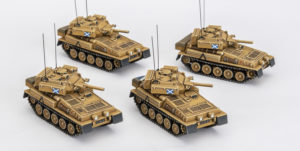
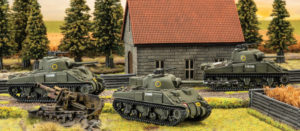
Stuarts and Crusader A/A Tanks
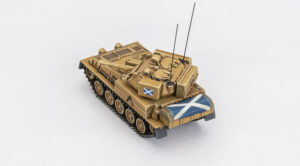
My force also has Stuart light tanks and Crusader A/A tanks. The Stuart is virtually unchanged, and is still a great little Spearhead unit to help with deployment, and a sneaky unit to keep the enemy on their toes later in the game — enemy armoured cars beware, my scouts bite! The Crusader A/A has improved considerably. It’s lost a point of ROF, now ‘only’ 4, but is faster and better armoured, and most importantly has 4”/10cm of extra range making it easier to keep my tanks under its umbrella. Most importantly, it’s halved in price relative to my Cromwells, so it is much easier to include in the force!

The Verdict
A full squadron with Stuarts and Crusader A/A is now 98 points compared with 1935 points under the old version. That’s a significant reduction allowing me to field the whole squadron in a normal game! I’ve lost the Semi-Indirect Fire, but I’ve gained a whole extra troop of tanks, so I think they will perform very well thank you! I’m a happy camper so far.
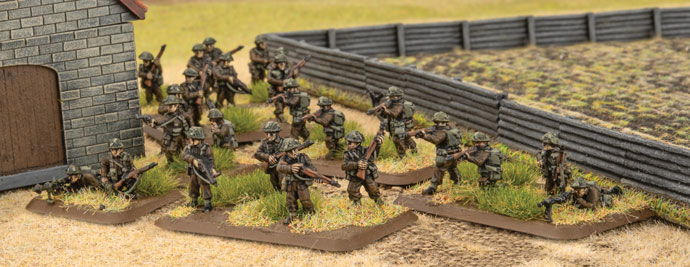
Motor Company
For those who are confused by British terminology, a Motor Company is a rifle company optimised for transport in light trucks or half-tracks. Other armies might have called it a motorised or armoured rifle company or something similar, but not the British!

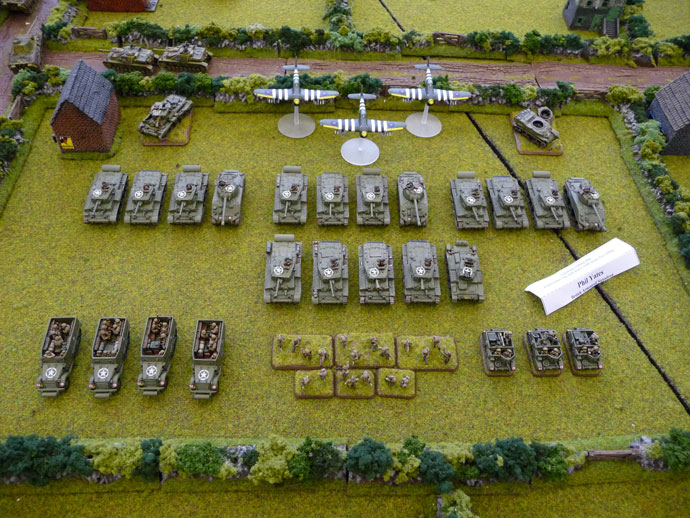
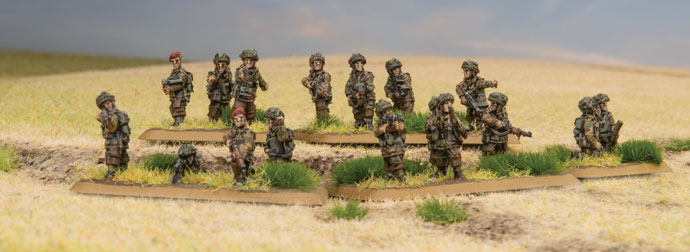
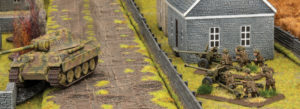
Like my armoured squadron, my Desert Rats Motor Company has the works as far as the formation is concerned. It’s got three small infantry platoons, three universal carrier scout patrols, two 6 pdr anti-tank platoons, a Vickers MMG platoon, and a pair of 3-inch mortars, backed up with two platoons of M10 (17 pdr) SP anti-tank guns. The most noticeable change up front is that the armoured transports aren’t in the D-Day: British book. Instead, they are available through command cards. While I appreciate the flexibility of not having to take the transports, I have found them so useful in the past that I probably will continue to take them.

What’s Changed
So what else has changed? Well the most noticeable change (and the fact that it’s so minor shows how little has changed) is an extra 4”/10cm range on my 6 pdr anti-tank guns. This could be useful on occasion, but as I use the M10 SPs for long range shooting and position the 6 pdr guns for survivability and to protect the infantry, I doubt it’ll make that much difference.

Another change is that the choice of how my Vickers MMGs deploy is now part of building my force. I have to choose whether they will be mounted on their carriers or on foot and that’s how they stay. I’m going to have to experiment to see which works better for me. At the moment, I’m tempted to keep them mounted.

My M10 (17 pdr) SP anti-tank guns have picked up an extra point of front armour and 4”/10cm more range, and like all SP guns, lost a bit in assault capability — something I won’t miss!

The pair of 3-inch mortars gain from the new artillery rules, particularly the re-rolled saves from repeat bombardments, so that makes me happy. Oh wow! I just realised that their Firepower went up from 6 to 4+, making them three times as deadly — watchout enemy anti-tank guns and machine-guns!

The last time I got to take this force out for a spin.

The Verdict
A company with the M10s and transports is now 88 points compared with 1850 points under the old version. Once again, that’s a significant reduction. Combined with a few performance boosts. I’m happy there as well.

Support
The only support I have so far are a flight of Typhoons and some unpainted Sexton SP artillery. The Typhoons haven’t changed much aside from a little extra range on their rocket bombardment (and fortunately I have a spare painted from earlier versions, so I’m set for the change from one to two aircraft models in the unit). That extra range might be useful at times for avoiding anti-aircraft fire. The Sextons are a command card that modifies the Priest Field Troop in the book, and like all artillery, they gain a bit of extra effectiveness. I think I might finally have to get them painted to support my motor company!

In Closing
I’ve placed or won in tournaments with both formations, and I look forward to a lot more gaming using them in the new version. I don’t think they’ll play particularly differently, but I look forward to finding out! Whatever the differences, it’ll be good to get them back on the table again.
With not much change needed to my existing force, I’m tempted to start a force of Churchill tanks and modify my motor company into a rifle company. Hmmm, the new Wasp flame-throwers look good. Hey, I could add Crocodile flame tanks as well… hey Chris, can I place an order!

D-Day: British Spotlight

with Andrew Haught

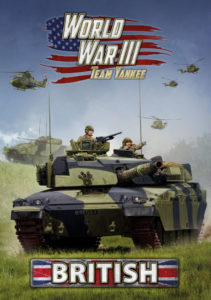
On June 6th, 1944 the Allied forces launched one of the largest amphibious assaults ever. This book follows the British and Commonwealth forces that overcame the German defences and claimed Sword, Gold, and Juno beaches as well as the breakout after. The forces in the book are broken down into three major groups: you have your regular war weary units that form the backbone of your forces, you have your Desert Rat veterans and lastly you have your elite troops like the Commandos and Airborne units. These options are perfect to build any list for D-Day and the breakout.

Check out D-Day British in the online store here…

What’s In The Book?

Parachute Company
Tough and deadly troops, able to hit hard in Assaults and hold their own when assaulted.  Extra anti-tank with up to two PIATs in each platoon.
Light unit with a good selection of integrated units, Anti-Tank, machine-guns and artillery, almost a whole army unto itself.  Can parachute into battle in airborne assault missions. With the extra PIATs and access to 6pdrs and 17pdrs in the formation, this formation is one that tanks will need to be wary of.

Airlanding Company
Elite deadly troops the Airlanding Company will be a hard unit to shift.
The Airlanding Company is well equipped with their own light mortar and up to two PIATs in each platoon.  Has the option to take a fourth Airlanding Platoon. Can land by glider in airborne assault missions. Has access to two 6pdr Anti-tank platoons and a 17pdr platoon to give you all the anti-tank assets an Airlanding Rifle Company could want.

Commando Troop
The Commando Troops are some of the most elite troops you can find. Being Fearless Vets is good, having Deadly on top of that makes them assault monsters hitting on a 2+, and that’s even better.  The Commandos have the standard platoon layout but with the Commando stats this unit is far from standard. Commando Troops are small with only machine-guns and mortar units integrated into the formation. This makes them ideal to match up with another formation that could use some of the best troops backing them up. Commandos are good at pretty much anything they do. If you need to assault an Objective, hold an Objective, or take out a stubborn enemy platoon, there is no other unit in the book better suited to the job.

Two Rifle Companies
The Desert Rats have less morale than the regulars, for this the Desert Rat troops are cheaper to field.  The Rifle Companies make up the backbone of the British forces, they are reliable and well trained.  Rifle Platoons are cost-effective platoons that are deadly in the assault. Rifle Platoons can choose to attack at night, giving your troops the cover of darkness while advancing. The Formation boasts loads of options, mortars, anti-tank guns, machine-guns, and Recon. The Universal Carrier Patrols of the Infantry Company gives your troops the edge by Spearheading your assaults. Wasps give your troops flamethrowers that can clear an Objective in a jiffy.
Easy to convert from Rifle Company in Fortress Europe. You can use the same models to play both the regular and the Desert Rat Rifle Companies.

Two Sherman Squadrons
The Sherman Armoured Squadron is your normal Sherman Company that has integrated Fireflies in your Sherman Troops, giving you the higher anti-tank of the Firefly tanks in each platoon. The Sherman DD Squadron is a unique formation that has your Firefly Armoured Troops formed into a single unit giving you a more focussed anti-tank unit. This leaves their normal Shermans on their own, with platoons of 3. Cost-effective medium tanks, the Sherman gives you a cheap tank that can hold its own in most tank duels. The Stuart Recce Patrol gives your tanks spearhead, and an effective light tank that can both screen infantry and other light tanks.
The Crusader AA gives you some much needed AA that can keep up with the tanks. Easy to convert from the M4 Sherman Tank Company in Fortress Europe.

D-Day British Spotlight
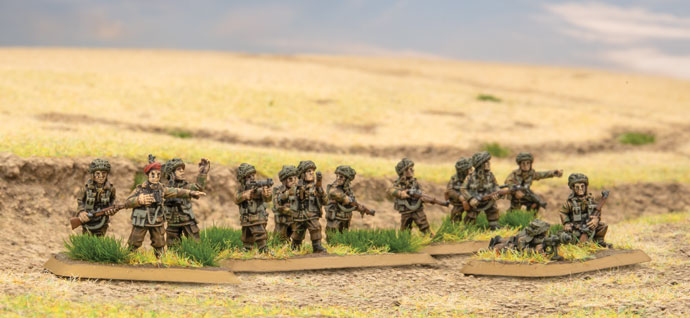
Churchill Armoured Squadron
Heavy Tanks that can take on enemy tanks and infantry alike. Need more armour? You can upgrade one of your tanks in each troop to a Churchill (Late 75mm), this gives the Churchill a whooping front armour of 11!
Need more AT? You can take a 6pdr in each unit to up your Anti-Tank to 11.
If you have the points you can bring up to five platoons of Churchills, along with Stuart Recce and Crusader AA tanks, all this gives you a really tough force in just one Formation!

Cromwell Armoured Squadron
The Cromwell Armoured Recce Squadron gains the Scout rule in each of their platoons. They also don’t have a firefly in their platoons giving them a different feel altogether than the Desert Rats Cromwell Armoured Squadron.  Desert Rats Cromwell Armoured Squadron have reduced morale compared to the Recce Squadron. Each unit also has a Firefly tank integrated into their platoons giving them a heavy Anti-Tank tank within their Troops. The Cromwell is a fast tank that has great Terrain, Cross Country, and Road Dashes. Use these tanks to outflank an unwitting opponent or to speed to an Objective before their reinforcements have time to arrive.

Motor Companies
Like the Rifle Companies there are two kinds of Motor Company, the Desert Rat and the regular Company. The Desert Cat Company has a lower morale rating, making them cheaper than the regular troops. Motor Platoons are small and cheap, this is the perfect Unit to add to another much larger Formation that needs to use up those last points. Motor troops are equipped with Bren guns making them ideal defenders, and giving them a lot more firepower than their small size would denote.  Motor Companies are like miniature Rifle Companies, with lots of options to fill out your points and help round out your force.

Support
The Armoured Car Troop gives recon assets to any Formation that needs them. The M10 SP Anti-Tank troop gives you mobile heavy anti-tank. The 17pdr boasts a massive anti-tank of 14 that can penetrate most everything your opponents will throw at you. The 17pdr Anti-Tank Troop is great on the defense, just dig them in and watch your opponent worry about their tanks the whole game.

The Crocodile tank is the ideal infantry killer, with its rate of fire 5 flamethrower! Coming in at 21 points for three these tanks are well worth it. Along with their flamethrower they also have a gun and massive front armour of a Churchill (Late 75mm).

The AVRE is a deadly anti-infantry tank that can be devastating if your opponent lets it get close enough. The 25pdrs and the Priest Field Troop artillery give your forces some powerful artillery support on top of all your integrated artillery in your Formations. The Bofors Light AA Troop gives you AA in all of your formations, giving you protection from aircraft and a nice light anti-tank weapon in a pinch. The Typhoon Fighter-Bomber with its rockets can devastate even the heaviest of tanks.
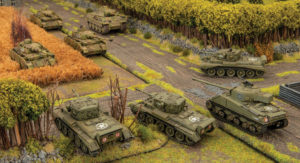
How Do The British Play?
The British have loads of interesting options that run the gambit from from the cheaper Desert Rat Motor Company to the most elite Commando Troops. It all comes down to your play style.

When you want to play defensively you will want to build your force around one of the Rifle Companies. These companies give you the core of what you need to be defensive, add in some of the Churchills and M10s to give you the armour you need to keep your enemy tanks at bay. Once dug in, a British Rifle Company is hard to shift, and scary to assault.

When you want to be aggressive you have loads of choices. For a more tank-focussed army the Cromwell tanks are fast but expensive, so you want to pair them with Motor Troops or Rifle Companies. If you go with Shermans you can better afford the more elite infantry choices like Airborne or Commandos. If you want to focus on infantry then the Airborne Companies and Commando Company are some of your best fighters, bring them and a unit of Cromwells in support and you will have a strong striking force.
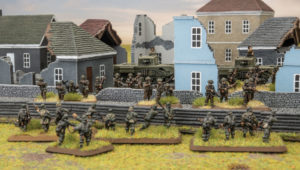
Normandy Campaign Missions
D-Day: British book includes four more missions, three breakthrough Bocage missions and another Airborne mission. The first mission is the Brew Up mission, the defender is surrounded by attacking players who deploy in a random way.

The second mission Bocage Country is your normal Bocage mission that has the Attacker fighting their way though Bocage while the defenders try to hold them off as they wait for reserves.

The Third Bocage mission is The Meatgrinder mission. In this mission player deploy on either side of the table and both have to fight their way to a central objective that goes live on the sixth turn.

The last mission is an Airborne mission, Seize and Hold. In this mission we mix things up, with the Defenders having to attack into the Attackers who just air landed and took the objectives. The Defender will have to move quickly to as the the Attacker will win if they keep the Defenders at bay for six turns.

Warriors Of D-Day British
The British D-Day Command cards include six Warriors: Richard Pine-Coffin, Peter Young, Stan Hollis, Joe Ekins, David V. Currie, Sydney Valpy Radley-Walters.
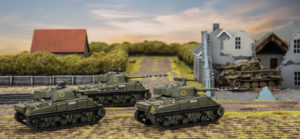
Richard. Pine-Coffin
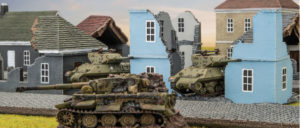
Faced with defending Pegasus Bridge with only half of his battalion present, Lt-Colonel R. G. Pine-Coffin mounted a counterattack using available personnel to repel the German assault. Lt-Colonel R. G. Pine-Coffin is a Parachute Formation Commander that gives himself and any attached united better counter attack ratings. He also hits on a 2+ in Assaults.

Peter Young
To inspire his men’s confidence under fire, Lt-Colonel Peter Young told them that 15 feet of standing crops would stop a bullet. He may well have been right as none were hit. Either way, his men learned to make excellent use of any cover they could find. This Commando Formation Commander gives his unit the ability to go Go to Ground while on the move.

Stan Hollis
On D-Day, Company Sergeant Major (CSM) Stan Hollis saved D Company by single- handedly taking out two key HMG Bunkers and capturing 25 German defenders. This Rifle Company Formation Commander gives himself and units from his formation that are close-by improved Rally ratings.

Joe Ekins
Trooper Joe Ekins was a Firefly gunner who destroyed four tanks in a single day, including three Tiger tanks. One of the Tiger tanks he faced that day was commanded by Michael Wittmann, and some speculation would have it that Joe Ekins fired the shot that killed Wittmann, but that is still disputed to this day. This tank Warrior takes over a Firefly in one of your Sherman platoons. Ekins’ Firefly gains re-rolls To Hit, and he ignores the armour bonus on tanks he fires at that are over 16”/40cm away.

David V. Currie
Major David V Currie made a point of regularly checking on his men—whether they were his own tank company or another company that his tanks were working with. On several occasions he dismounted from his tank to lead his men under fire. This Sherman Tank Company Formation Commander gives himself boosted command range, and he may roll an additional dice when in assaults.

Sydney Valpy Radley-Walters
Major Sydney Valpy Radley-Walters has the distinction of being the western Allies’ top ace during the war. His tank squadron is one of many that claims to have taken out the German tank ace, Michael Wittmann. This Sherman Tank Company Formation Commander gives himself a better Blitz Move Order on a 3+ and forces any enemy tanks hit by him to re-roll successful armour saves.
Command Cards
This set of command cards introduces a new type of Command Card to British forces, Title Cards. These cards have the title of a division and a special rule giving the division’s flavour. The key is that you can only have one title in your force.

Title Cards for the British give you access to more unique and flavourful formations. These cards allow you to use existing formations from the book to create new lists that focus on particular units or formations. These cards also add in Canadian Divisions, Guard Divisions, Scottish Divisions, Polish Tanks, Welsh Divisions and more. With a simple card you can transform a unit like your British Rifle Company to a Welsh Division that has a different Last Stand and Dig In ratings while you are near an Objective. That’s the real cool thing about Title Cards, they let you take existing armies you may have, and by adding one card you have another army that works a bit differently than it did before.

Along with the new Titles you have everything you have come to expect in a Command Card set, new Formations and interesting upgrades to old ones.

As a special side bonus the pack also comes with one American Command Card for the 29th. Those who know me know that the 29th is one of my favorite companies in Flames Of War, and I really wanted to add the 29th Infantry Card to the American Command Card box but the timing was off. This card lets you bring in Crocodiles from the British book- Crocodiles that were not coming out till the British book, so I had to wait, and was able to sneak it into this set.

WWIII: British Landing Page

Thanks for joining us for the WWIII: British Live Launch. You can find all the content from the weekend here:

New Units and Spotlights
WWIII: British Spotlight
Fox Armoured Car
Academy Aeroplanes
The Marksman


Forces and List-Building
Time to Get a Chally or Three
Battle Taxis and Battle Buses
Victor’s Scorpions
Know Your Foe

Modelling and Painting
Aaron’s Oil War British Part I
Aaron’s Oil War British Part II
Aaron’s Oil War British Part III
Pete the Wargamer Paints British Armour
Pete the Wargamer Paints British Desert Armour 
Aaron’s Dolled-Up Chieftain

Tactics and Gaming
The Defence of Shellerton
Artillery in V2
Chris Visits Goblin TV
Chris Visits OnTableTop

Aaron’s Dolled-Up Chieftain

with Aaron Te-Hira Mathie, Battlefront NZ

As the release of the new World War III British book approached Alex mentioned to me that while effective, the green and black scheme used by the British forces in Europe looked a little plain and is there a way to enhance the look … challenge accepted.

The new Challenger 1 MBT looks amazing, however I didn’t have access to one of the models at the time, so the next best thing to a Challenger is a Chieftain, so that was the model I chose to use for the purposes of this attempt to make this basic scheme look a little more of a visual feast.

The first step was to look at a few pictures of the vehicle in the field in order to get a sense of how it looks in service and anything that crews commonly did to aid in concealment while in combat (or on exercise in this case).
The first thing that is easily noted from photographic records is the preponderance of crews draping their vehicles with camouflage netting in order to break up the outline when in trying to remain undetected in prepared fighting positions peppered throughout the treelines of West Germany, so I began by adding ‘netting’ around the turret, hull front and gun tube. This was achieved by first making shapes out of Muliput modelling putty on the model, these would form the base of the ‘net’. To make this netting appear more realistic when applied you should do your best to avoid covering up optics and access points.

Once the Miliput was set, I then thinned down white glue with water and coated the putty with this mixture. I then liberally sprinkled Noch brand model railway scenery ground clutter material over the puttied areas, then tamped down the ‘net’ with further watered down white glue, then I waited for this to set. The following photo is what the end result looks like.

When the ‘net’ was dry, I gave the model an all over coat of Vallejo surface primer. This helps to fully secure the net to the model, homogenise the colour of the model before painting, as well as giving the following paint coat something to ‘bite’ into. With the undercoat dry I moved on to painting the green and black camouflage scheme on to model. I started with a basecoat of the old Team Yankee ‘Chieftain Green’ as this would allow the best comparison between this model and one that I had painted for ‘Iron Maiden’.

I then used my 0.15mm airbrush to spray on a random pattern of black shapes using Vallejo Model Air NATO Black, to form the camouflage pattern.
Then drybrushed the edges and raised details of the model with Vallejo Model Color Pale Sand, as a way of making these features more distinct.

Following the edge highlight I proceeded to paint the ‘net’ with the green side out. I started by painting it with Vallejo Model Color Camouflage Olive Green. Once this coat was dry I applied a black wash to the net in order to it some ‘depth’. When the wash dried I moved on to giving the net covered areas of the model a heavy drybrush with Camouflage Olive Green so that only the deepest recesses remained stained with the black wash. The net colour was finished off with a light drybrush of Vallejo Model Color Medium Olive on the highest parts of the net, to simulate light catching these parts of the net.

The net colour is now in pretty shape so I moved on to adding a few paint chips and scrapes over the camouflage paint. This helps to make the vehicle look a little less factory fresh. I started by identifying parts of the Tank were paint would be chipped or worn off, around track guards, hatches, corners and stowage baskets are excellent places for this treatment. I started off by painting small random shapes of Vallejo Model Color Green Grey (over green parts) and Vallejo Model Color Grey Green (over the black parts) to simulate the slightly lighter colour of the worn and chipped edges of the paint.

I then used small amounts of Vallejo Model Color German Camouflage Black Brown in the centre of the wear marks to simulate chips and scrapes that had gone all the way down to the primer paint. One of the keys to using this technique is to add the amount of paint wear that is appropriate to the subject, so in the case of this Chieftain it is supposed to be a vehicle in current service but as yet to be involved in battle, therefore some paint damage is realistic, but not too much.

Satisfied with the amount of paint wear I moved on to painting all the small details like optics, Machine Guns, fire extinguishes etc.

After painting the details I sprayed the model with an all over gloss varnish.
Once this was set and dry I used a black enamel wash, when mostly set I cleaned this up with white spirits, leaving only the most indented details black.
I then used my precision airbrush to spray on a coat of a dusty colour on the lower surfaces of the model to simulate a dust layer building up as the vehicle moves.

The final step for completing this model was to add some streaks of grime that has run down vertical and near vertical surface of the vehicle as moisture has picked up the grime. For this step I used Vallejo Environment Streaking grime.

Victor’s Gulf War Force

with Victor Pesch, Battlefront NZ

When work started on WWIII British and we were seeing early prototypes of the Challenger model, it didn’t take much convincing to decide to do a new British force.

The idea of doing a desert force appealed to me as I’ve already been painting a lot of green with black camo on my WW2 Americans, so I chose to theme the army for the Gulf War, or Operation Granby.

I came up with these forces trying to maximise Challengers, while also getting some cool new Warriors in there, and useful recon.

1x HQ Challenger ROMOR – 13 points
2x Challenger ROMOR – 26 points
2x Warrior (Milan) – 4 point
4x Scorpion – 4 points
Total – 99 points

A few of us in the office are planning to do some fun “big boy” games at 150 points, and that will allow me to field a more complete company of Challengers, while only having to paint three extra tanks and some aircraft.

1x Challenger ROMOR HQ – 13 points
3x Challenger ROMOR – 39 points
2x Warrior (Milan) – 4 point
4x Scorpion – 4 points
4x Harrier (Tornado) – 10 points
Total – 148 points

(The British were using Panavia Tornados in the Gulf, so I’ll use those models with Harrier stats)

I worked together with Casey on updating the British decals, and I was keen to get the markings for Gulf War forces in there. We’ve got the Chevrons and large numbers, as well as the little Desert Rat symbols. I also found a few pictures of tanks with Scottish flags, and that is what I’ve chosen to use on my force.

The Scorpions were the first platoon I decided to work on while we awaited the arrival of the new plastics. They’re a great little kit and are a good way to test a new scheme quickly since they’re so small.

Painting for these was pretty straight forward, and I’ve kept them clean. I can go back an add pigments/dusting later but I’ll wait and see how the Challengers turn out first.

The yellow base colour has possibly turned out a bit darker and more saturated than the real thing, but I think it’s in the ball park.

I put a large Scottish flag on the back of the platoon commander, which I will probably implement on the Challengers too.

I’m looking forward to getting the new toys as much as you all are I’m sure, and this army will be a joy to paint.