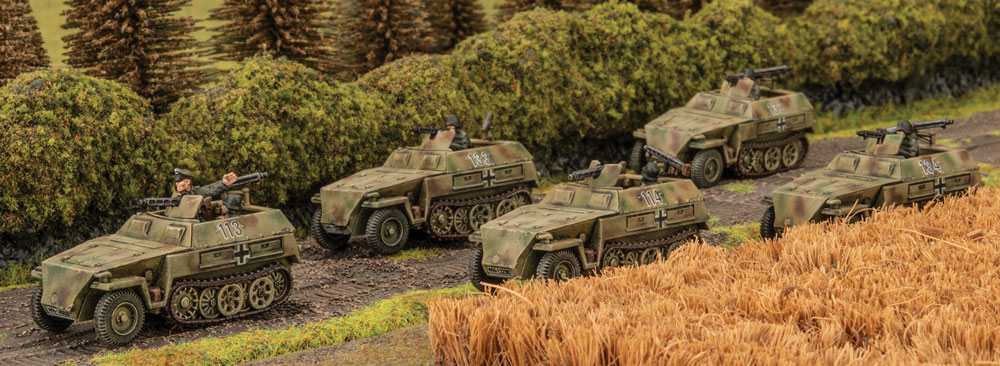
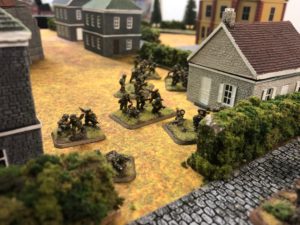
I love building recon formations and with the release of D-Day: Waffen-SS, I decided to explore all the recon formations available in the command card pack. The Half Track SS Scout Company looks interesting and similar to the Armored Car Company.
The formation comprises the following:
1 HQ Unit
2-8 Sd Kfz 250 SS Scout Troops
0-1 SS Reconnaissance Platoon
We end up with a relatively strong formation with a minimum of three units and a maximum of ten units! So, if we max out the scout troops and take the infantry platoon, we should end up with a unit count of eleven – difficult to break especially if we take some Command Card upgrades. The scout troops have three vehicles in each platoon so can hang around if you are not too reckless with them. For this article though, I am going to take six of the scout troops not eight.
Now bear in mind that everything in the formation will be Fearless, Trained, Aggressive. Fearless means they are more likely to stick around however they are easier to be hit on 3+ so you want to optimize the Scout attribute with the armored cars as much as you can so they are hit on 5s or 6s.
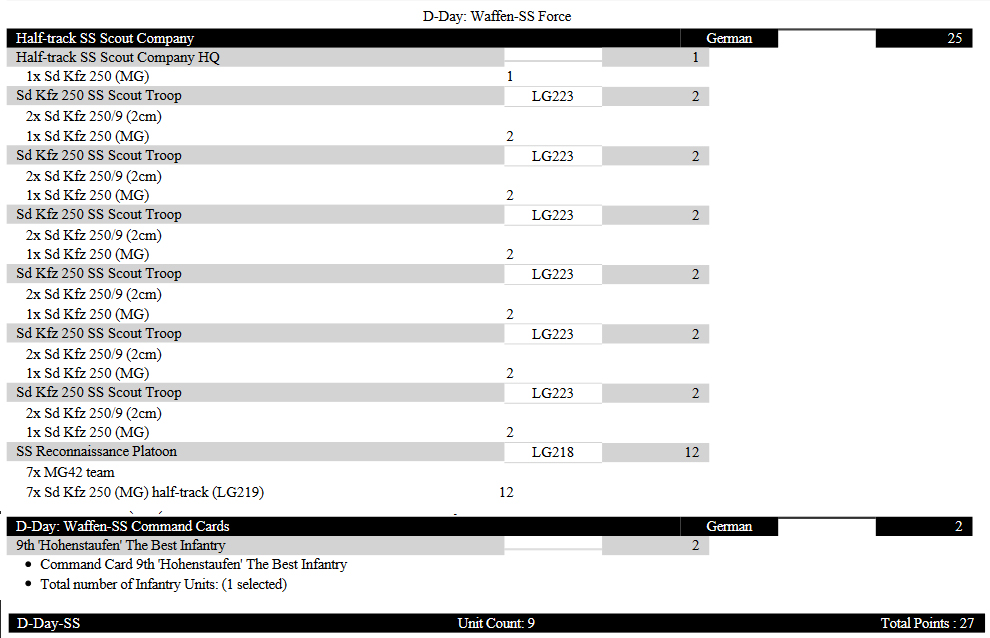
This is how I would look at building the base Formation (which you can tailor depending on points required):
This comes in at 27pts and has eight units in the Formation and six units capable of Spearhead. Giving the infantry the “Best Infantry” Command Card upgrade, they are now Fearless, Veteran, Careful. This unit is now harder to hit, can Blitz and Stormtrooper on 3+ and being Fearless make them dangerous.
With the core Formation done, we now need to look at what support options could be taken. With the ability to choose from either D-Day: Waffen-SS or D-Day: German black box units, you can mix and match what you want to suit your playstyle – especially when choosing between either Fearless and Confident and/or Aggressive and Careful. Support options need to be taken from the D-Day: Waffen-SS chart.
So, let us look at what we need to consider from a support perspective for this list. They should be supported by tanks, high end AT, artillery and what we need to cater for around reserves. Most games are 100pts, but several tournaments are smaller in points – some one-day games have even gone to 50-60pt games to get four or five quicker fast paced games. This is where recon unit lists shine – more flexibility with smaller points than other formations. Looking at a standard 100pt game we have 73 points left to play with.
We want to have some high-end AT support and artillery and there are some cool upgrade cards to make some interesting combinations.
First, we take a full unit of 8.8cm Tank-Hunters for 18pts and apply the command card “8.8cm Tank-Hunter” for an additional 1pt to make then dual purpose by giving them an ability to bombard like an artillery unit. Confident, Veteran, Careful 48” direct fire 48” range AT17 guns, with 88” artillery range for bombardment AT2 FP4+.
Second, we take the 8.8cm SS Heavy AA Platoon for 10pts and add the “PAK Front” Command Card for 6pts to give us the ability to spread them out across our deployment area and being nests means they need to re-roll Firepower tests to take them out. We can also add the Command Card Upgrade of “Best Guns” to make then Careful hit on 4+ for an additional 1pt per gun.
With both units you can control and deny whole areas of the table including digging out enemy infantry and gun teams as well as killing tanks at range. Having multiple Spearhead units in certain missions, you can expand your kill zones.
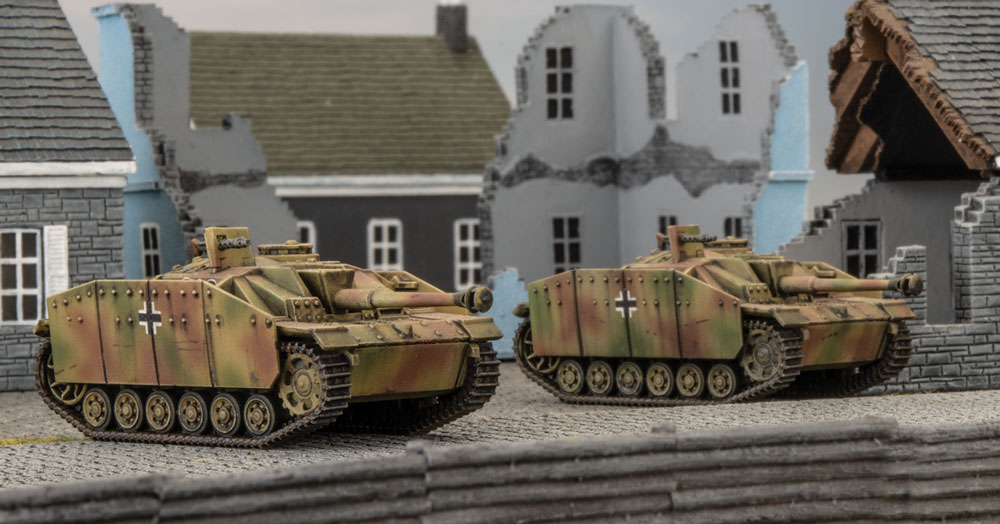
Now we really should take some sort of armor – I love the StuG, and as we have eight AT14 or higher gun platforms already, I feel Tigers and Panthers would be overkill. A maxed out StuG SS Tank Platoon of five costs 24pts and upgrade them using the Command Card –“The Best StuG” for an additional 2pts per tank for 34pts. They become Fearless, Veteran, Careful and they can Assault on 4+ instead of 5+. At 34pts, they become your main reserve unit and you can put three of the Scout Troops in reserve with them to get to the 40pt threshold for reserves.
That makes 100pts – Here is the full list:
For a smaller sided game or tournament, you can change out some of the formation units, remove some of the Command Card upgrades, change the Stugs for Tigers, Panthers or Panzer IVs.
Here is an example list for a 50pt game:
This command card formation can provide some interesting options and can take on the British and American recon formations with similar numbers. I hope this has given you some food for thought. Happy list building!
With the launch of the D-Day: Waffen-SS release, I thought I would take a look at how could a new player or someone on a budget, get a force on the table that would be semi-competitive or at least hold its own with such iconic equipment as the Tiger and Panther tanks, and the Puma armored car. For the new player, it opens the door to playing Flames Of War without needing to buy, assemble or paint too much and get into playing the game quicker.
So, if we look at what we get in the excellent value starter set (Waffen-SS Panther Kampfgruppe), that will help decide what formation to run. The starter set contains the following:
Complete A5 Rulebook
American “Start Here” booklet
5 x Panther Tanks
2 x Tiger Tanks
1 x SS Panzergrenadier Platoon
2 x Puma Armored Cars
8 x Sd Kfz 250 Half Tracks
2 x 8.8cm Tank Hunter Guns
2 x Decal Sheets
11 x Unit Cards
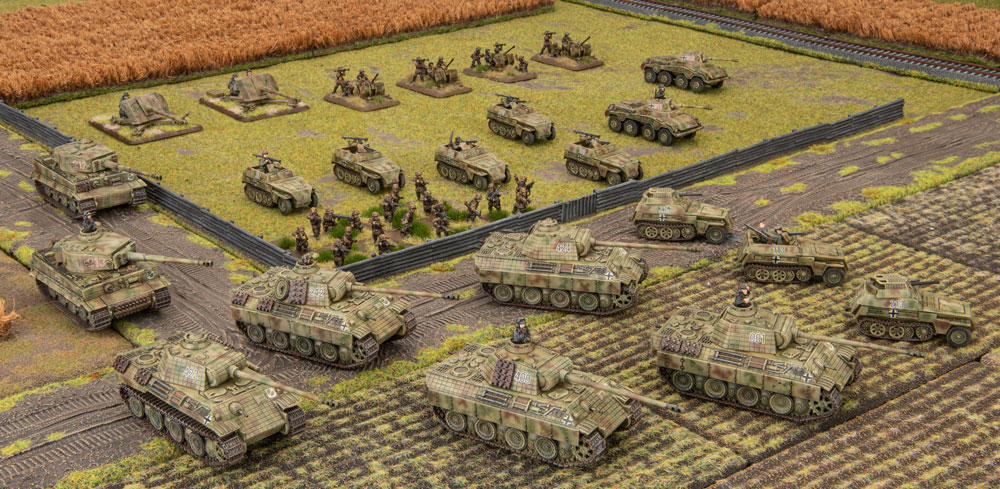
The bonus here is that the rulebook is included in the box – so the new player makes a saving right away. Now if we look at what Formations are in the D-Day: Waffen-SS book, we can see what we can maximize from what we get in the starter box. The best Formation to maximize this is the Panther SS Tank Company. Let us look at what units comprise this Formation:
1 Panther SS Tank HQ
1 Panther SS Tank Platoon
1 Panther SS Tank Platoon or Tiger SS Tank Platoon
0-1 Panther SS Tank Platoon or Panzer IV SS Tank Platoon or StuG SS Tank Platoon
0-1 Sd Kfz 10/4 SS Light AA Platoon or Sd Kfz 7/1 SS Quad AA Platoon
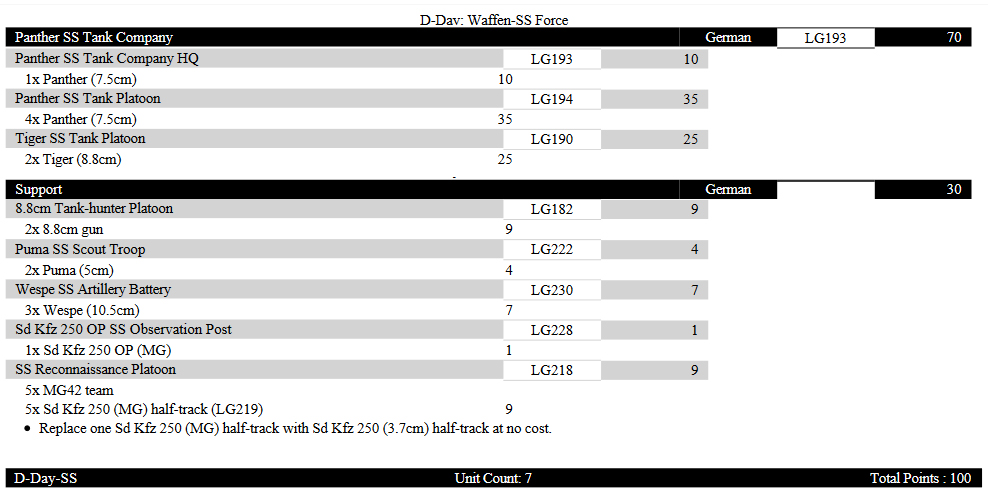
Looking at the Formation and what we get in the starter box, we can use all seven tanks in the Formation. To maximize our investment, we can add a small SS Reconnaissance Platoon in Formation support. We can also add the following support options; 8.8cm Tank Hunter Platoon, Puma SS Scout Car Troop, and Sd Kfz 250 OP. This leaves just two Sd Kfz 250 Half Tracks not used. For a 100pt list, to round out the force we need to add a Wespe SS Artillery Battery in support. So how does this look from list building perspective
So, what does this list have – 7 x AT14 Gun platforms. Can take on any tanks at range and all our tanks have FA9. Yes, the Panthers are hit on 3+ being Aggressive but also being Fearless, which means Remounting and Last Stand checks are on 3+ as well. The Tigers are absolute beasts and with 2+ Morale and Careful, its relatively survivable to take a two-tank platoon.
Infantry to hold objectives or attack out of a Spearhead created with the Pumas. 8.8cm guns with AT17 and 48” range will take care of even heavy tanks at long distance – one hit – dead. Perfect for an ambush or for sniping and keeping your opponent honest!
Armored artillery to pin down and remove dug in infantry and guns off the objectives whilst not being pinned themselves.
Pumas to Spearhead and cause a nuisance in the backfield with their AT9 gun – a threat to side armor of medium tanks!
For reserves, put the big Panther platoon in reserve with the Pumas.
To buy this army you need to only purchase the following for under $160:
1 x GEAB19 German LW “SS Panther Kampgruppe” Army Deal
$100
1 x FW265 D-Day: Waffen-SS Book
$20
1 x GBX155 Wespe Artillery Battery
$37
TOTAL
$157
We can also make some additions to the above list to change it a bit depending on your play style. I am a big fan on having some units pulling double duty and/or by making a tweak with a Command Card or two – so let’s have a look at an alternative list with a couple of minor tweaks but gives the army a different profile.
So, as you can see – the Formation and Formation Support itself does not change – just the support options.
The big difference is taking a full strength 8.8cm Tank Hunter Platoon instead of a short platoon. A full-strength unit should hang around long. With the upgrade to artillery command card, these guns now become an artillery unit as well as AT gun platforms with an indirect bombardment range of 88”! This unit can pull double duty, is careful and will cause your opponent all sorts of headaches!
To buy this army you need to only purchase the following for just over $165:
1 x GEAB19 German LW “SS Panther Kampgruppe” Army Deal
$100
1 x FW265 D-Day: Waffen-SS Book
$20
1x FW265C D-Day: Waffen-SS Command Card Pack
$10
1 x GBX175 8.8cm Tank Hunter Platoon (Plastic)
$36
TOTAL
$166
Now you might be wondering what to do with the two extra 8.8cm guns. In the D-Day: German book, you can take two platoons of 8.8cm Tank Hunters of 2-4 guns each. My favorite is to take two platoons of 3-4 guns in a D-Day: German Beach Defender list (that is a separate article to explore further soon). So, as you expand your army, you will have more flexibility to play different armies from both books.
There you have it. A couple of easy and versatile options to get into Flames Of War that is great on the budget and gives you the most bang for your buck starting a new force and the foundations to expand upon your German force.
Those who have followed previous Live Launches, will have probably seen my articles on list building, and army choices before. When the D-Day: American book came around, it was a super easy choice on what formation for my US army I would take – Paratroopers. Specifically, I built a full
formation choice in the book and platoons of Easy Company, 506th PIR, 101st Airborne as they were on the ORBAT going into Normandy on 6 th June 1944 – complete with Lt. Winters, Spiers, Nixon and the Toccoa Sergeants from real life and also immortalised in the HBO Series Band Of Brothers. This force was reliably backed up by my absolute favourite tank of the war – the M4 Sherman, in all its glorious forms. For the project I took loads of 75mm variants, a smattering of 76mm Shermans and also a platoon of 105mm too. In total I managed to paint almost 400points of US models for my army. Then, during the Hobby League Campaign, I managed a rather respectable 7 wins to just 2 losses and a draw. Not bad considering I’m known in the office for my poor dice rolling! Also during the Hobby League, I put together a D-Day: German Panzergrenadier Force, with Panzer IV and
Panthers which I really enjoyed using, but there is something about the Airborne formations that always draw me back. So at the same time I managed to put together an 80pt Fallschrimjager Force to swap out with the Panzergrenadiers as I desired.
It was as soon as the D-Day: British book landed on my desk, that I knew in my heart of hearts which formation I was destined to put together. A D-Minus 1 British Parachute Company – with as much AT as I could muster onto the planes and within the list.
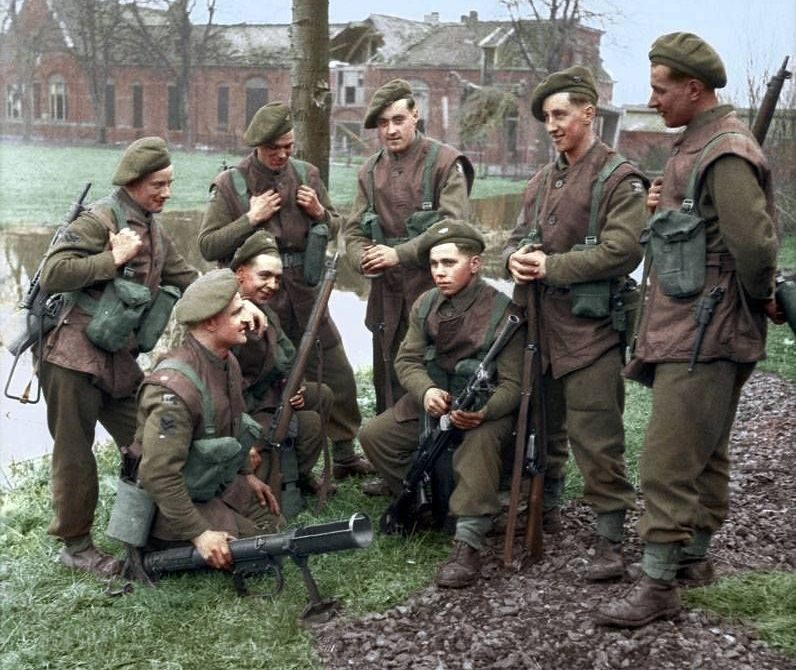
For a start, the new plastic sculpts for the British Paratroopers are probably my favourite plastics we have produced to date for infantry. I love the attention to detail on the helmets, smocks (including buttoned up ‘pull through’ at the back) the folds on the Denison smocks, as well as the variety of weapons each bloke is armed with – you have the ubiquitous SMLE rifle, Sten gun, Bren Gunner, as well as a plethora of officers and NCOS with Webley revolvers, moustaches and most importantly, berets.
I literally jumped at the chance to grab some of the plastics from our resident man of mystery sculptor Tim Adcock, and feverishly put them together. Soon I had enough troops for three full platoons, complete with PIATs and 2inch mortars, and I even managed to scrounge together some
6pdr AT guns as well as crew from my bits box that are perfect for making a mini diorama for the force.
Combined with the options for taking a Desert Rats Cromwell Armoured Squadron in support complete with embedded Firefly and I’ve got myself a well rounded army that is vicious in assaults, able to hold its own against most tank armies I will encounter with the AT of the 6pdr and the PIAT,
as well as flexible enough to be able to fulfill a variety of roles that I might face in a game. Further, I can see the army being repurposed for further Late War projects that I have my eye on in creating scenarios for, that involve bridges, Armoured rushes up long highways, and rear-guard actions involving umbrellas and hunting horns.
But most importantly, is the command cards for the British. I got a sneak peak at them, and suffice to say that I will be taking Mr Joe Ekins and a Lt. Col of the 6 th Airborne to tease victory for my games of Flames Of War.
The release of the D-Day: British list book is upon us, and for me personally I am excited to play with one formation in particular; Late War British paratoopers. Not only because this is the only formation I have fully based and painted, but also because of the versatility within the formation and the great history behind the men of the “Red Devils”.
The other big benefit is that for a newer player like myself, or at least a player that doesn’t get to game every weekend like he would like, the Airborne Formations provide a great deal of variety and have a huge range of tools, so they have a lot of options for different weapons and cope well with different play styles. On June 5th, 1944, the eve of the greatest and most ambitious amphibious assault in human history; thousands of men flew in the dead of night with the goal of dropping behind enemy lines and taking key objectives to halt the German response to the D-Day landings. The Red Devils, along with their American cousins, the 101st Screaming Eagles, were young pups in comparison to the veteran American para division the 82nd Airborne, which had already made one Combat drop into Sicily and taken part in extensive fighting both on the island and mainland Italy. Both divisions had a lot to prove in their maiden jump, and this can be seen in the Parachute
company’s stats. Their Fearless Motivation indicates that you can be sure that no matter the objective, the men of the 6th Airborne would stop at nothing to secure it. The Trained Skill rating of British is reflective of their relative inexperience, but brings with it the benefit of being able to fit more into your force.
This stat can be the make or break of any battle, as infantry caught out in the open and pinned down by artillery can quickly be torn to pieces by an infantry platoon or MG team, having the ability to quickly unpin your men and keep the momentum of an assault swinging in your favour can often be the key to victory in a battle. It’s also worth noting that this stat is spread across the board with all airborne troops and support weapons. In terms of support the Airborne boast a level of versatility that you’d realistically expect from a unit that has been dropped behind enemy lines and has to wait an unspecified length of time for relief. While 6 pdrs are cheaper and more numerous, if you’re wanting to put up any sort of resistance to the heavy German armor you’re likely to encounter, I recommend taking the more powerful and deadly 17pdr. For decent fire support at a relatively low cost you could do a whole lot worse than the Airlanding 75mm howitzers, with decent range they can be a real thorn in
Jerry’s side.
Check that Anti-Tank
Finally for your direct infantry fire support we have the option to take up to four teams of the trusty Vickers HMG, alongside providing area denial to fragile areas along your battle line, the Vickers HMG also has the ability to fire an “artillery barrage” with a range of 120 centimeters, essentially having your HMG teams act as secondary (very light) arty for your formation.
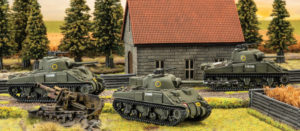
Now even with all that variation, coming up against panzer formations can be extremely difficult and daunting. That’s why I like to pair my Parachute formations with a tried and tested Sherman Armoured Squadron from the 11th Armoured Division, made up of a Sherman HQ consisting of 2x Sherman 75mm, and two large Sherman Armoured troops, made up out of three Sherman 75mm and one Sherman Firefly each.
This added formation usually should give you both the mobility and firepower to deal with what can sometimes be overwhelming German Armour. Although you must be careful not to waste your Shermans as they have poor front armour (6) and dismal side armour (4) leaving them vulnerable to pretty much any large calibre gun the Germans are able to field.
To recap, my go to Parachute/Sherman list is as follows:
This build is excellent for someone like myself, who has yet to master either Infantry or Armour tactics and prefers not place their eggs all in one basket. Having the Paras support your Shermans enables you to move freely without fear of being overwhelmed in an infantry assault and also gives you an added option of assault Anti tank positions with Infantry. Likewise having Shermans support your Paras gives added fire power to assaulting heavily fortified infantry positions and also against a determined German armoured counter attack.
The other bonus is that every feature of this force is part of a Formation, so my opponent has to break two Formations to rout me entirely, and while there are certainly other options I might take with a little more potency, the buffer of having two Formations is valuable for less experienced players (like me).
The 8th Armoured Brigade were one of the most experienced British Armoured Brigades in WW2. They had initially been formed in July 1941, from parts of the 6th Cavalry Brigade in Iraq and Syria and began training with Honey tanks. In 1942 they were brought up to strength with more Honey Tanks and Grants, only to have then taken away just before the Battle of Mersa Matruh in June 1942, and given as replacements to more experienced units. They were joined by the 3 rd RTR Lt Col “Pip” Roberts, and then in August sent to join XXX Corps as part of the 10th Armoured Division.
Their first action came at the end of August, at the at Bir Ridge in the Battle of Alam El Hafa, against Rommels abortive attack on the right flank in the prelude to the Second Battle of El Alamein. They took part in this battle as part of the 10 th Armoured Division and in Operation Supercharge, and had at the time 24 Crusaders, 57 Grants and 37 Shermans. They also were involved in the Allied push into Tunisia and the Mareth Line in early 1943 with XXX Corps as part of the British 8th Army. The Order of Battle in October 1942 was as follows:
3rd Royal Tank Regiment Nottinghamshire (Sherwood Rangers) Yeomanry Staffordshire Yeomanry (Queens Own Royal Regiment) 1 st Battalion Buffs (Royal East Kent Regiment) – Infantry 1 st Regiment, Royal Horse Artillery 97th (Kent Yeomanry) Field Regiment, Royal Artillery
They fought the remainder of the Axis forces in Africa until they surrendered on the 13th May 1943. Interestingly they were involved in some of the first battles against the Tiger I, in the Battle of Wadi Akarit, around the 6th and 7th of April. They had been fighting almost constantly for almost a year and at the end of the fighting in Africa, they were one of the
most experienced Brigades in the British Army.
The Brigade then made their way back to England in December of 1943, and after a period of extended leave, they were told they were going to be involved in the Invasion of Normandy, soon after the New Year. The high level of experience that they had gained during their Africa fighting, contrasted with many of the other units that were earmarked to be involved in the Normandy Invasion, many of which, had not seen any fighting since the Battle of France in 1940.
To spread the experienced units out to the other Armoured Divisions and Brigades, two armour Regiments from the Brigade were exchanged out. The 3rd RTR was exchanged with the 24th Lancers from the 29th Armoured Brigade in the 11 th Armoured Division, and the Staffordshire Yeomanry was exchanged with the 4th / 7th Royal Dragoon Guards from the 27th Armoured Brigade, another Independent Armour Brigade. There was also a new support regiment of artillery with the new self propelled 25pdrs (Sextons) and an attached Motor Rifle Battalion of the Kings Royal Rifle Corps.
Sexton self-propelled gun of 147th (Essex Yeomanry) Field Regiment
The Order of Battle for D-Day 6 June 1944 was: 4th / 7th Royal Dragoon Guards 24th Lancers Nottinghamshire (Sherwood Rangers) Yeomanry 12th Battalion – Kings Royal Rifle Corps 147th (Essex Yeomanry) Field Regiment, Royal Artillery
They were once again under XXX Corps on D-Day and would be involved in the assault on Gold Beach, an 8km stretch of beach between the Omaha and Juno Beaches. Gold Beach was defended by elements of the 716th Static Infantry Division and the 352nd Infantry Division. The assault on Gold Beach was made the by 50th Northumbrian Division (TTs), the 56th Independent Infantry Brigade, and was to be supported by the 8th Armoured Brigade.
The 8th Armoured Brigade had worked closely with the 50th Northumbrian Division in Africa, so it made sense they would help them in the assault here. Two Regiments of the 8th Armoured Brigade had been training with special DD Sherman (Duplex Drive), amphibious tanks, with the tanks designed to lead the assault onto the beaches and to provide cover and support fire for the assaulting infantry. Unfortunately there was not enough Sherman DD tanks available in time for D-Day, for the whole Brigade, and the 24th Lancers had standard Sherman tanks issued. As such, they could not join the battle until the beaches had been secured.
The Primary Objectives on D-Day for Gold Beach was to seize the town of Bayeux, the Caen-Bayeux road, and the Port of Arromanches; the Secondary Objectives were to make contact with the Americans landing at Omaha Beach to the West and the Canadians landing at Juno Beach to the East.
The DD tanks of the Nottinghamshire Yeomanry (Sherwood Rangers) supported the assault on the Jig Green section of Gold Beach with the 231st Infantry Brigade and followed by the 56th Infantry Brigade. While on the King section of Gold Beach the 4/7 Royal Dragoons helped support the attacks of the 69th and 151st Infantry Brigades.
As the water was very rough and choppy on D-Day, the Sherman DD tanks were released only a few hundred yards out of the shore, instead of the 2 miles out as first planned. This turned out to be very lucky for both Regiments involved, as even that close to shore, tanks were lost to the rough seas. The 4/7 Royal Dragoons lost 5 tanks, and the Sherwood Rangers
lost 8. If they had been released 2 miles out to sea as planned, it is very likely most would not have made it onto the beach.
This unexpected armoured assault on the beach surprised the German defenders, as they had not expected any Allied armour on the beaches until at least 5 hours into the invasion. Throughout the day both Regiments had all three squadrons committed continuously, and all objectives were obtained by the end of the day.
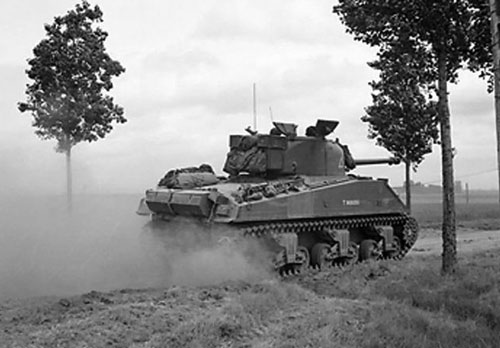
Sherman VC Firefly of 24th Lancers near Saint-Léger, 11 June 1944
On the 7th of June (D-Day +1), the 3 rd Regiment of the Brigade landed, the 24th Lancers, as well as their other supporting units. For the next 25 days the Brigade was involved in supporting many infantry divisions (50th and 49th ), in successful assaults on German positions around Bayeux, Tilly-sur-Seulles, and Villers Bocage. But the fighting was very heavy, with
the British facing the majority of German armour in Normandy, as well as hand held anti tank weapons like the Panzerfaust, and anti tank guns like the Pak 40. Over 25 days, 146 tanks were lost or put out of action, while claiming 86 German tanks and self propelled guns knocked out over the same period.
The 8 th Armoured Brigade would continue fighting through France and into the Netherlands and Belgium and finally into Germany in 1945 until the German surrender on the 4th May 1945. Having fought from one end of Africa to the other, and then chased the Germans from France and all the way back to Germany, and were involved in almost all of the major
battles along the way.
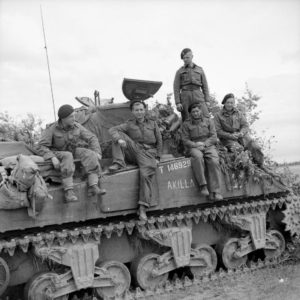
The crew of a Sherman tank named ‘Akilla’ of 1st Nottinghamshire Yeomanry, 8th Armoured Brigade, after having destroyed five German tanks in a day, Rauray, Normandy, 30 June 1944.
So how am I going to represent this on the tabletop? Well as this is for the British D-Day book release, I should probably start there! So it would seem picking a Formation would be the first step. As this Brigade was involved with the Landings on D-Day, picking a Sherman DD Armoured Squadron Company would seems apt. As in the early days of the D-Day battles this was exactly how this Brigade was organised, and it was not until July 1944 they moved back to standard organisation. Also, I need to be a bit different, so I chose the 24th Lancers, that is because they were a bit different too ……
The squadron had a strange unit organisation, as there was not enough available Sherman DD tanks, they had standard Sherman III and Firefly tanks, but still had the Sherman DD tank organisation. So they had as standard troops of 3 Shermans, but kept their Fireflies as a separate Troop of 3 Firefly tanks. This was different to how most other standard Sherman equipped units would operate, as they would typically attach one or even two Fireflies per troop (later in 1944) in case they ran into heavy German armour that their normal 75mm guns could not penetrate. They also had a Firefly attached to each Squadron HQ unit, so a full HQ for the 27 th Lancers would have 3 Shermans and a Firefly (12 pts + 5 pts) for 17 pts.
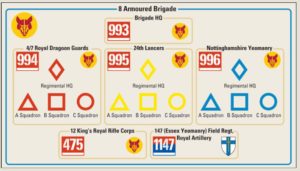
Also I thought I could take this opportunity to use up some old models from the metal/resin British Sherman kit (BBX08) that had the wonderful stowage and other things like track lengths modelled onto it, and to make them even more different, I was going to get special decals made up to match their historical markings. I think I’ve mentioned this before, but I really love building a force like this, as I then have to do extra research to find out what markings the Formation and support tanks have. Luckily as you can see above, in a previous article, they have done a lot of the hard work for me. So if I chose B Squadron, of the 27th Lancers they would have a yellow square, on the side of their turrets, a red and white 995, for their
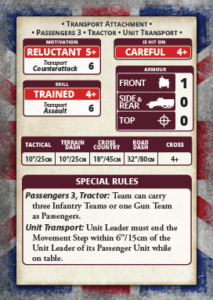
arm of service flash, and the yellow and red Fox Mask for their unit symbol. Similarly it has the information for any attached Motor Platoons (475) and the Sextons (1147) that historically supported the 8 th Armoured Brigade. See below the Command Cards for using Sextons and M5 half tracks that the Motor Platoons of the Kings Royal Rifles would have used to keep up with the Shermans.
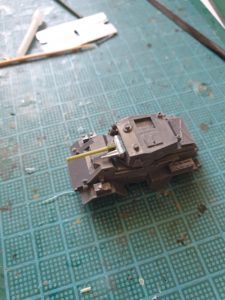
Also in another attempt to be different, I really felt that I “needed” Humber IV armoured cars, and Humber scout cars in my Force. As the Brigade did have Humber Scout cars as communication vehicles between the Scout Stuart tanks and the Squadron HQs. I mean don’t we all “need” these…… In game the Humber scout car and Dingo scout car would almost the same, stat wise, and the same for the Humber IV and the Daimler. So I converted
up some Humber IVs by using the Mid War Humber kit and cutting off the 15mm Besa MG, and adding a bit of plastic and the spare 2pdr gun barrels from the MW Valentine kit, and viola! A Humber IV armoured car! Add a Humber Scout Car, and you have a Humber Armoured Car Patrol, for 2 pts.
So let’s have a look at a 100 point list using this force…. I will say that the HQ is not strictly legal, but I’m sure in friendly games with reasonable opponent, if you explain what you are trying to do, most will let you re-create an historical force like this. Especially if you have gone to the effort of researching and modelling everything, just don’t expect to be able to take something like this to a tournament.
Sherman DD Armoured Squadron
Sherman DD Armoured Squadron HQ – 3 x Sherman (75mm), 1 x Firefly – 17 pts
Sherman DD Armoured Troop – 3 x Sherman (75mm) – 12 pts
Sherman DD Armoured Troop – 3 x Sherman (75mm) – 12 pts
Firefly Armoured Troop – 3 x Firefly (17 pdr) – 16 pts
Stuart Recce Armoured Troop – 3 x Stuart (37mm) – 6 pts
Crusader AA Platoon – 2 x Crusader A/A – 3 pts
Support
Humber (Daimler) Armoured Car Troop – 2 x Humber IV, 1 x Humber Scout Card – 2 pts
Humber (Daimler) Armoured Car Troop – 2 x Humber IV, 1 x Humber Scout Card – 2 pts
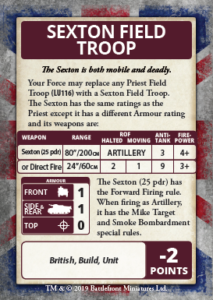
Sexton Field Troop – 4 x Sexton (25 pdrs) – 14 pts
Motor Platoon – 4 x Bren Gun Teams, 1 x PIAT, 1 x 2” mortar – 7 pts
Typhoon Fighter-Bomber Flight – 2 x Typhoons – 8 pts
Command Cards
M5 Half Track Transport – 1 pt
Sexton Field Troop
So from the list above, I have plenty of points in my Formation, with some versatile 75mm Shermans and also some Fireflies to take out any really tough armoured targets. Some of the lovely new plastic Stuarts to spearhead and harass light armour, and some Crusader AA tanks, to just hoon around and look cool! I am really looking forward to the new plastic Crusader AA Troop, I think it will be a blast to make and also to use on the field. I really do like self propelled AA for some reason……
We have the Motor Platoon to either quickly hold or take an objective, and two units of my new favourite Humber Scout cars to either block off/limit an opponents spearhead, and generally just harass enemy light units, and make infantry think twice about getting out of their foxholes and advancing.
I also have the Sextons, which with their 25 pdrs can be a reasonable anti tank unit in a pinch, but also give me mobile artillery and smoke options, and the cheaper cost compared to the Priest, allowed me an extra Armoured Car Troop. Also another of my favourites is the Typhoons! I am also really looking forward to the new plastic kits that Battlefront will be bringing out for their planes.
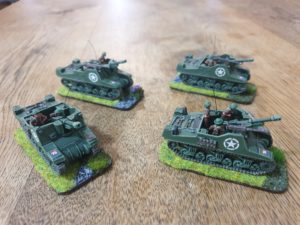
I have painted up a test Sherman, to see how the custom decals went, and also how I like the paint scheme I “borrowed” from Chris and his Big 4 of Late War British- Pretty happy with it …. now to paint the extra 20 or so models…
I hope to have an update for you soon with some more units painted and also some info on the other units the 8th Armoured Brigade would have had in support!
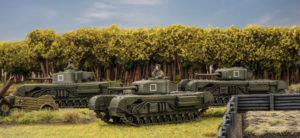
A while back when we first launched Late War with the release of Fortress Europe I got to participate in Battlefront’s Hobby League and I built a brand new force. I chose the British Churchills to be the centre of my army and with the latest new tidings in D-Day British the time has finally come to take this force into Normandy.
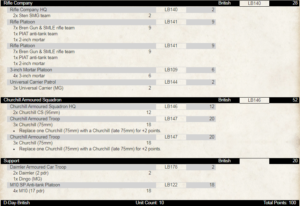
My current list is as follows:
It’s a well rounded force taking an infantry company with the Churchills and bringing all the tools I’ll need, whether it’s digging out the infantry with the 25 pdrs or hunting those Tigers with the M10s. So with all this in mind and what is already painted I’ll be aiming to keep the amount of work I need to do relatively low while maximising what I can take from the brand new book.
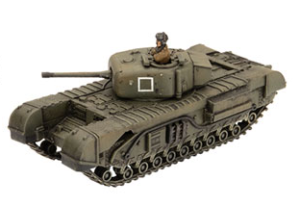
First up is the Churchills who have arguably the most to change. With the addition of the 75mm gun to their options, an additional point front and side armour and now with access to the Chuchill (late 75mm) with its whopping 11 front armour things are looking up! Stats increases of course come with points increases too but I’ll be trying to keep the core of my nine Churchills intact. My squadron HQ can now include the Churchill CS of which I’ll be taking two. This will keep the cost the same which is great for conveniences sake. My two Churchill Armoured Squadrons will be identical with both taking a Churchill (6 pdr), a Churchill (75mm) and a Churchill (Late 75mm) giving a great spread of guns and armour. Sure they’ll be slow but they’re tough and with the 2+ cross check very little is going to stop them. This brings the points total to 52 points spread over just 8 Churchills!
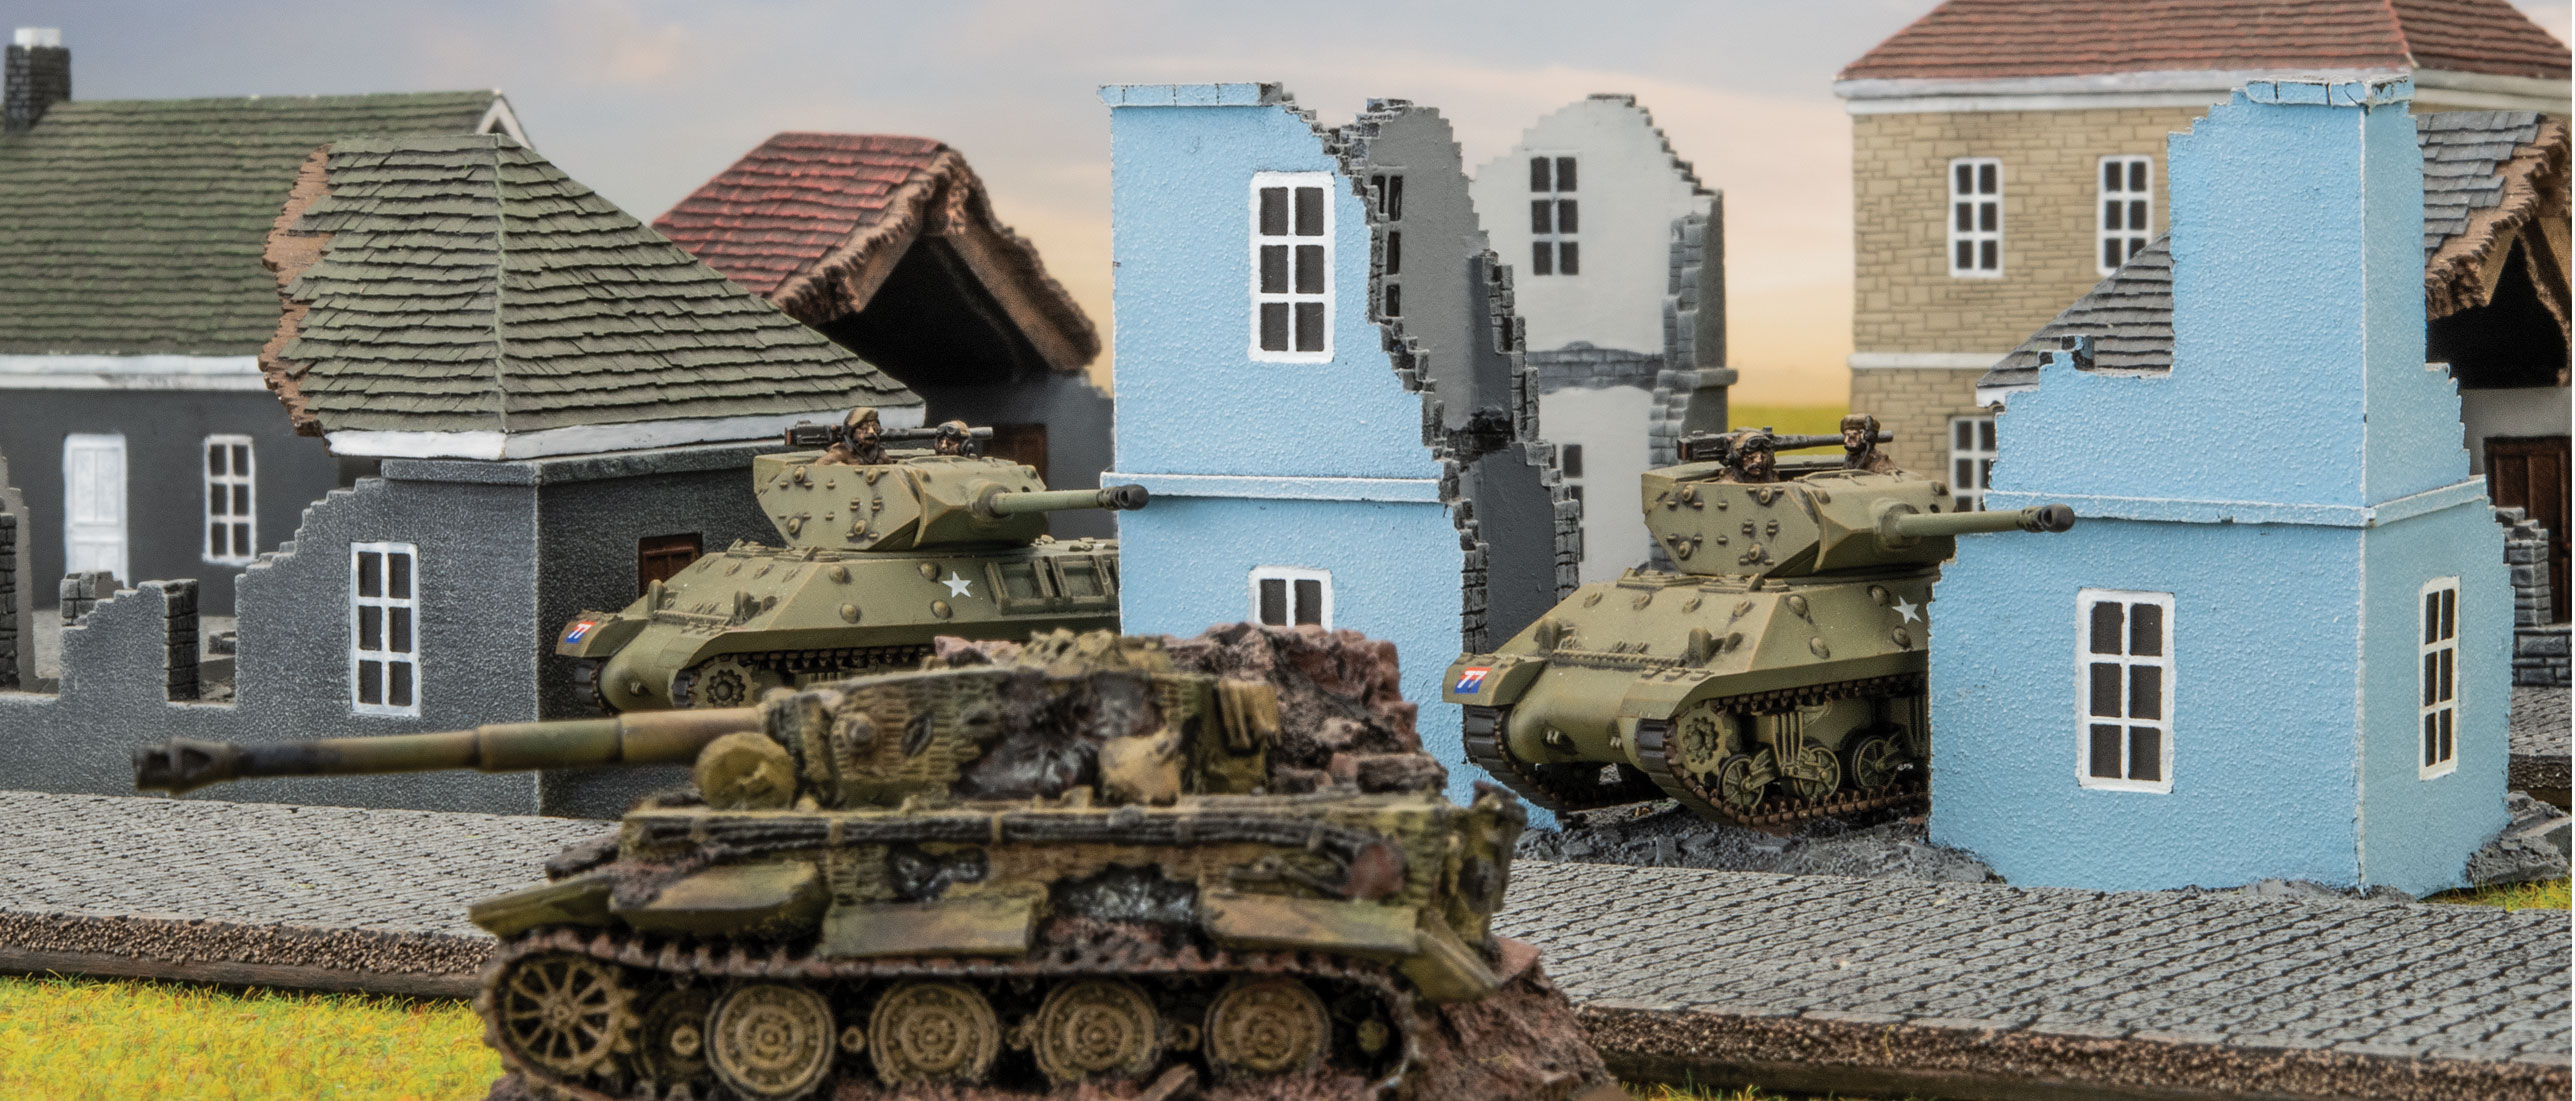
Churchills are great for infantry and lighter tanks but I’ll need something to help me with the big cats lurking out there. First stop is the M10s. I’m always happy to take four of these all armed with 17 pdrs. I often find that against an opponent who wants to keep their tanks alive these will become a high priority but the investment is worth it. This gives us 70 points in total and it’s already a solid force.
Now I want to take a hard look at my choice of infantry. I want to field an infantry formation and my options include going for some cheap and easy numbers with a Rifle Company or for few points more fielding a Parachute Company. There are pros and cons here. I already have everything I need painted and based to make a Rifle Company vs the Parachute Company which I have absolutely nothing started. For the sake of speed I’ll go with the Rifle Company for now. The total cost of this formation will be 20 points for the infantry platoons and HQ. While I’m at it I’ll throw in a four man strong 3-inch mortar platoon for 6 points and a Universal Carrier Patrol for some recon and extra guns. This brings the total formation cost to 28 points. Not bad at all. Just enough room for the new Armoured Car kits, which give me a scout and spearhead.
Summing it all up there’s minimal painting to be done here with the only thing I don’t own and have painted being the 3-inch Mortar Platoon. A very quick fix to make my Fortress Europe British into full-fledged D-Day: British. I admit losing my Stuarts hurts a little (such a fun little tank) but sadly I can’t find a home for them right now but maybe later on. Looking towards the future I could double down on Churchills and take an extra squadron and simply take a lone Rifle Platoon in support or I could look at turning that Rifle Company into a Parachute Company instead to get my hands on those pretty new British Paratrooper models. Heck, that might even begin a full fledged force totally invested in them but that will be a project for a future British release. For now I’m super happy with this force and once I’ve painted those Mortars I’ll be turning my brush towards a brand new force very very soon!
Up until now, my Late War British forces have all been based on the 7th Armoured Division, but I’ve been thinking that might have to change. I love the Churchill tank almost as much as the Cromwell (they’re just so boxy!), and have had a passion for them since building the old Airfix kit as a kid (although I didn’t enjoy the twenty or more parts for each track assembly!).
I started thinking about how I could keep the task relatively small, and came to the conclusion that, with a judicious rejigging of my existing stuff, I could do it fairly easily. I already have a motor company that could be used for the basis of a rifle company, and some support that can be transferred over. That means all I really need to do is get some Churchills painted up and I’m pretty much there. The force will have a battle-worn rifle company supported by a half-squadron of Churchill tanks, a troop of Crocodile flame-tanks, and a troop of M10s for anti-tank support.
My rifle company will be just the bare bones, an HQ and three weak rifle platoons (all that are left after several weeks of hard fighting). I can do this by adding three more rifle teams to my motor platoons. Sure, they’ll have an extra Bren gun, but I figure they kept it when they had to disband the third section, so that’s fine. Three platoons will give me plenty of flexibility as I can hold two objectives and still have a platoon free to manoeuvre.
Having played with even weaker motor platoons, I’m not worried about the low team count as they should always have plenty of fire support to shoot them on to the objective, and if they are charging, they’ll cut the enemy down to size before they can counterattack.
The Churchill tank brigades found that supporting an infantry battalion with squadron (a company-strength organization) of tanks was a bit clumsy, and soon changed to a half-squadron organisation to allow them to provide support wherever they were needed. My half-squadron will have an HQ of a Churchill (95mm) close-support tank for an ad-hoc artillery capability, with a spare uparmoured late-model Churchill (75mm) available for bigger games. The first troop will have another uparmoured 75mm, a basic 75mm, and a 6 pdr-armed Churchill, while the second one will just have two 75mm and one 6 pdr. The 6 pdr guns give me a bit better anti-tank capability against heavy tanks, while the 75mm guns give me a good solid 3+ firepower against most targets and are just as good against medium tanks.
The Crocodile flame-thrower tanks give me an excuse to make some of this interesting variant with its fuel trailer, and should make sure that my infantry assaults are successful. I’ll make a full troop of three of these, although I can only fit two in a 100-point force.
The last component will be my existing M10 (17 pdr) self-propelled guns. The Churchill regiments lacked the Firefly (17 pdr) tanks of the other armoured regiments, so often had M10 self-propelled anti-tank guns attached. They should come in handy if my opponents elect to bring lots of heavy tanks! I’d like to make some of the new plastic kits to replace my old metal and resin ones, but I’ll keep the ones I have for now.
All-in-all, it should be a fairly solid attacking force. I can’t really defend as I have too much armour, and I think I’ll be a bit slow-moving for mobile battles, so a solid Attack battleplan it will be. I don’t have any reconnaissance or artillery, but aggressive use of direct fire and a quick advance should mean that I really won’t miss it too much.
Hmm, time to pick up a couple of boxes of the new Churchills…
Ever since their arrival with the Mid War books Afrika Korps and Desert Rats, I’ve really enjoyed Command Cards. Formations and units in the army books are great as they are and give players a really balanced list to choose their armies from, but Command Cards allow players to really make
their force historical, or geared to a certain doctrine. However the option to include iconic units, warriors and tactical doctrines is fantastic, and whenever a new book is released, it is always the command cards that I look forward to the most.
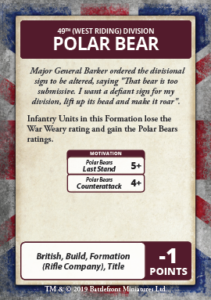
For the D-Day: British book, Andrew, Mike, and Phil have outdone themselves. There are six warriors of legend to use in your force, whether you have gone toward an infantry formation or an armoured squadron. From the only VC winner on D-Day itself, Stan Hollis, to young Joe Ekins in his Firefly scoring the kill shots on Tiger tanks at range, your choices are great. Further, there are a plethora of Title Cards to use for your force, which on the whole change one or more attributes of a particular force, from the 49th (West Riding) Division who amend their Counterattack rating for minus 1 point per platoon to a British build for an SAS Parachute Squadron, which uses a mix of units and amends the weapon profile of a standard Parachute Rifle Company, players are spoilt for choice!
I was particularly taken with the 49th Division Card – POLAR BEAR, because as a young Private in the UK Territorial Army, my regiment came under the command of the WW2 Division’s successor: 49th (East) Brigade, based originally in Grantham, Lincs and now just half a mile from the BF UK HQ in Nottingham. This forces me (kicking and screaming I assure you) to create a rifle company as Polar Bears. Even more interesting is a conversation during the Hobby League forums with a resident of Iceland, and my discovery that there were elements of the 49th Polar Bears stationed in Iceland as a garrison force! My how we got around, especially as my old regiment is now based in the South of England on the coast as befits their role…
With the Warriors, my Rifle Company could remain as the Army book allows ratings wise, and instead opt to take Stan Hollis VC as a warrior. Stan Hollis gives a much better motivation rating to a Rifle Platoon HQ in assaults, but also has a passive effect to nearby units effecting their Rally Rating to a 3+, which during assaults on the beaches or the bocage around objectives, will be invaluable!
And Joe Ekins – what a boy! As the gunner of any Firefly (17 pdr) which in my mind would be the Sherman Armoured Squadron, suddenly gets a great benefit in terms of his specific rules for shooting, and only for 4pts. He gets to re-roll any failed To Hit rolls (perfect for me as my dice rolls are sub par and a running joke in the office) but he also gains the precise rule. This lovely little addition means Target Armour is not increased for range when working out Armour Penetration. Which in terms of the Maths, suddenly puts most German armour at a disadvantage in a straight up shoot out.
1939-40
In 1939 the 50th Division was organised as a Motor Division and served in France in 1940, taking part in the evacuation at Dunkirk. After escaping, it was re-organised as a Infantry Division in Britain. It was sent on 22 April 1941 to North Africa and was reinforced by the 69 Brigade from the disbanded 23rd ‘Northumbrian’ Division
North Africa and Sicily
The division saw service in the Desert Campaign, where it lost the 150 Brigade at Gazala. Under-strength, it took part in the retreat to El Alamein, acting in reserve. During the 2nd Battle of El Alamein it was positioned in the south. It was reinforced with the 1st Free French Brigade and 1st Greek Brigade for its planned attack on the Italian Folgore (Airborne) Division. It was supported by elements of the British 7th Armoured Division. Later in the battle it was transferred north to take part in Operation Supercharge.
In Tunisia the 50th Division assaulted the Wadi Akrit position, and was then involved in the Sicily landings of 1943, where it landed at Avola.
The 168 Brigade was attached from the 56th Division during the campaign.
Northwest Europe
In October 1943 the division was withdrawn to Britain for reforming and training before landing on D-Day. The 231 Brigade (an independent unit formed from regular troops stationed on Malta) were permanently attached, and the 56 Brigade was temporarily attached for the initial beach assault. Later the 56 Brigade was transferred to the 49th ‘West Riding’ Division. D-Day For D-Day the 50th Division was given the beach code named “GOLD” to land on. It covered an 8km area between la Riviére in the west to Le Hamel in the East. The German defences in this area were manned by the 4th Company 441. Ost Battalion (4/441 Ost) and 7/736 Grenadier Regiment belonging to the 716. Infanteriedivision, which were located on the east flank, and I Battalion/916. Grenadier Regiment of the 352. Infanteriedivision. Manning the marshy area between these two formations were elements of the 3/441Ost. Weapons in this area were 5cm PaK38 guns in open concrete emplacements and 7.5cm guns mounted within pill boxes.
To the rear were several artillery batteries covering the beach area (Mont Fleury, Creully, Crépon, Ryes and Marefontaine farm).
The role of the 50th Division was to establish a beachhead between Arromanches-les-Bains and Ver-Sur-Mer, then head towards Route Nationale 13 (RN13) linking Bayeux to Caen.
The first wave was made up of the 231 and 69 Brigades; once the assault was complete, the follow-up formations of 56 and 151 brigades would push inland towards RN13 supported by tanks of the 8 Armoured Brigade.
The assault started at 07.25 hrs on the “King” sector of Gold beach, almost an hour late. The Green Howards, came ashore supported by DD tanks of the 4th/7th Royal Dragoon Guards. Following a massive bombardment from HMS Warspite and HMS Ramilles, the assault came in from a distance of seven miles out, unlike the Americans who had deployed from twelve miles out. The DD tanks were not deployed out at sea, but they were landed directly on to the beaches. This meant that the assaulting troops had armour supporting them directly on the beaches.
The 8 Armoured Brigade supported the 69 Brigade with the 4th/7th Royal Dragoon Guards on the right flank directed on Riviére, and on the left the Sherwood Rangers Yeomanry supported the 231 Brigade at Le Hamel. The 24th Lancers were held in reserve to be landed later in the afternoon, but due to bad weather and congestion they did not land until 7 June.
Due to the shelved nature of the beach, the landing craft grounded early and the troops had to wade ashore. The defences in this area were weak and the troops easily subdued the defenders. They then pushed on inland to silence the gun batteries behind.
On the “JIG” sector the 1st Battalion, Hampshire Regiment landed, but due to delays were without the support of tanks. Heavy machine-gun fire caused the death of the 1st Hampshire’s commanding officer and also their second in command (2iC) within minutes of landing.
The battle for Le Hamel ground to a halt and casualties mounted, but direct support by the 147th Field Regiment, Royal Artillery (2nd Army) helped to reduce the strongpoint and it was finally taken at 16.00 hours.
By the end of the day nearly all of the 50th Division’s objectives had been captured. In the east contact was made with the Canadians South of Tierceville. The 69, 56 and 151 Brigades dug in on a line from Vaux-sur-Aure to Coloumbs. The 56 Brigade completed the day one mile short of Bayeux, 151 Brigade group reached the Caen-Bayeux road and the 69 Brigade had linked up with the Canadians and advanced a massive eight miles inland. The 7th Battalion, Green Howards had advanced so far they had to be pulled back to Coloumbs. Patrols from the 2nd Gloucester’s had reached the outskirts of Bayeux.
To the west, Arromanches was reached at 2000 hours and reported clear of enemy an hour later.
The men of the 47 Royal Marine Commando dug in on Hill 72 south of the Longues-Sur-Mer battery; their objective of the Port en Bessin would not fall until the 8 June, after serious heavy fighting.
Fighting Inland
The next day the bridgehead was enlarged, St Leger was captured and the leading elements of the Sherwood Rangers entered Bayeux to a warm reception.
8 June saw the 8 Armoured Brigade form a mobile column consisting of the 61 Recce Regiment, 1st Dorsets, 288 Anti-tank Regiment, RA, plus A Company of the Cheshire Regiment. An advance was ordered on a two-axis front with the 61 Recce Regiment on the right and 24th Lancers on the left.
On 7 June the 6th Green Howards had been ordered to advance and by 10.00 hours had passed through Rucqueville en-route for Ducy-Ste-Marguerite. Meanwhile the 7th Battalion Green Howards had begun an assault on the wireless station west of the Coloumbs-Loucelles road. The attack, conducted by the A and C Companies with B Company in support, was a complete success and resulted in 50-60 prisoners being taken. Both battalions then dug in and started receiving reinforcements and conducting fighting patrols in the area until 11 June when, the advance began again.
9 June saw A company 1st Dorsets, with 4/7 Dragoon Guards in support, moving through Audrieu south of the Caen rail line, while the Sherwood Rangers moved west around Audrieu to find an open flank. As the 8th Durham Light Infantry (DLI) became available, they were attached to the Sherwood Rangers and moved towards Point 103 mounted on the tanks. By 13.00 hours they were firmly ensconced on Point 103 and the 24th Lancers and 147th Field Regiment, RA were ordered to move up.
An attack was ordered on St Pierre for 17.30 hours using the 8th DLI and 4/7 Dragoon Guards, supported by self-propelled guns of 147th Field Regiment and machine-guns of the 5th Cheshires. A captured POW reported that St Pierre (1km east of Tilly-sur-Seulles) was lightly held, but it was found later that this was incorrect. It was finally cleared of enemy by 19.00 hours. By the evening of 9 June St Pierre was held and the 1st Dorsets along with the 4/7 Dragoon Guards were on Point 103.
10 June saw the 8th DLI being attacked by elements of Panzer Lehr Panzerdivision to try to clear the British from St Pierre.
Attacks were also directed to clear Point 103 from the west. By the afternoon all attacks had been beaten off with heavy casualties to the Germans (2 Tigers, 4 Panzer IVs, and 3 75mm SPs). In the evening an American liason officer arrived and gave the 50th Division access to a 155mm Artillery Regiment allowing targets to be engaged outside the range of 147th Field Regiment’s guns.
On 11 June an attack on Cristot to the East of Point 103 using 69 Brigade was planned against elements of 12. SS-Panzerdivision. The 7th Green Howards were to advance on the left flank to secure Brouay and make contact with the Canadians at Putot-En-Bessin. Meanwhile 6th Green Howards were to attack Cristot with support from 4/7th Dragoon Guards and 147th Field Regiment. The attack failed to capture its objective and stalled one field short of Cristot and the attack on Brouay failed to penetrate the defensive positions.
On 12 June further attacks were planned to extend the bridgehead, an attack on the Tessel-Bretteville feature was organised and carried out in the morning. It was to be a two-part attack with the first objective the high ground overlooking La Caude Rus, and the second part the Juvigny to Fontenay-Le-Pessel road. The first objective was captured, but further progress was stalled by Tigers and Panthers in the woods around Point 102. Meanwhile the 69 Brigade had tried to clear the woods between Cristot and St Pierre, but suffered heavy casualties.
Orders were then received for the 50th Division to hold the line from Point 103 to La-Belle-Epine, the 8th DLI were pulled back from St Pierre and the Sherwood Rangers were ordered to cover the withdrawal.
This left the 69 Brigade holding Point 103 with the 5th East Yorks in support, while the 146 Brigade (49th ‘West Riding’ Division) held the Loucelles road.
Tilly-sur-Seulles
With its infantry brigade still waiting to land, 22 Armoured Brigade of the 7th Armoured Division was sent forward to assist the 50th ‘Tyne and Tees’ Division in taking Tilly-sur-Suelles. The mission was to follow the 50th Division’s 56 Brigade and, once they had opened a hole in the line, to exploit it all the way to Villers-Bocage and then press on to Evrecy, deep in the German rear.
On 11 June the 50th Division attacked in the area of Tilly-sur-Seulles, Juvigny, Hottot-les-Bagues, and la Senaudiere, only to find the newly arrived Panzer Lehr Division also attacking head on into the same area. As the forces clashed the 7th Armoured Division moved forward in support. Even with their support, the attack stalled well short of its intended line.
After another attack on St Pierre on the evening of 11 June the town was abandoned. The 8 Armoured Brigade withdrew to rest and refit and their positions were taken over by the 49th Division, which allowed the 50th Division to concentrate on Tilly-sur-Seulles.
On 14 June they launched an attack led by the 151 and 231 Brigades supported by the 4/7 Dragoon Guards. The objectives were the villages of Lingévres and Verriéres. The 6th DLI took Verriéres and pushed south towards Hottot-les-Bagues. Once more they faced the Panzer Lehr’s Panzergrenadiers through the difficult bocage country, where the defenders were always at an advantage. The attack was supported by heavy air and artillery support. The 9th DLI advanced towards Lingévres. They soon came under fire from a large wood astride of their axis of advance. Heavy casualties were taken, but they were finally were able to advance through the wood into the village. The village was taken and defensive positions were organised against German counter-attacks. The inevitable counter-attack arrived and quickly knocked out four 6 pdrs, but the supporting 4/7 Dragoon Guards were more successful, knocking out six Panthers. The Germans attacked again at 1615 hours from the west. Three more Panthers were knocked out by the DLI anti-tank gunners.
Much like the 9th DLI the 6th DLI were fired on from the wood in the line of their advance. They too were supported by a squadron of the 4/7 Dragoon Guards. They took the village, but could not advance any further forward. During the night they withdrew from the village to the north.
The following day the attack was taken over by the 56 Brigade, who completed the capture of Tilly-sur-Seulles. On 15 June the 231 Brigade took Hottot-les-Bagues with the 1st Hampshires. A German counter-attack supported by tanks ejected them from their prize, and another attack was arranged with the 2nd Devonshires leading. The village was once again held by evening, but the brigade command withdrew the battalion as the hold on the village was not secure. This allowed the Germans to attack Tilly-sur-Seulles and re-occupy it. The town was finally taken on 17 June. In the meantime the 50th Division became bogged down, and little further progress was made for the rest of June.
Another push to take Hottot-les-Bagues was launched on 9 July, but was pushed back by the Germans. Another attack was arranged by 11 July to be carried out by the 231 Brigade supported by the Sherwood Rangers. It was supported by a massive rolling barrage. Progress was made, but the village was not taken. It wasn’t until 19 July, after the Germans had withdrawn across the whole division front, that the village was finally securely in British hands.
Operation Bluecoat
The next major action of the 50th Division was in August during Operation Bluecoat. XXX Corps (7th Armoured, 43rd and 50th Divisions) objectives were Villers-Bocage, Aunay-sur-Odon and finally Mont Pincon. The operation began on 30 July and initially progress was slow. The 50th Division was held up at Amaye-sur-Seulles.
The British pushed the front line back by 13km (eight miles), seized the German dominated high ground south of Caen and drove a wedge between the German Seventh Army and Panzer Group West. Mont Pincon was finally taken by the 43rd ‘Wessex’ Division on 6 August.
The operation was not strategically vital in itself, but it facilitated the US advance by concentrating the increasingly depleted German forces on the Caen area.
After France The 50th Division was considered to have performed well in Normandy; in fact, out of the three divisions that were veterans of the desert (the others being 7th Armoured Division and 51st Highland) it performed the best. It was one of the driving forces behind the British advance. However, it was exhausted by the end of the battle.
It later played a minor role in Operation Market Garden, where the 231 Brigade was detached to help support the advance of Guards Armoured. The division stayed in northwest Europe until December 1944, when it was again returned to Britain, this time for the remainder of the war, and was converted into a training division. At the end of the war, it was sent to Norway and converted into British Ground Forces, Norway.
Since I’ve been spending my recent months learning Czech and enjoying Czech cinema, I was inspired to tackle the CIAB as a D-Day: British project. I am still cooking it up, so I will be sharing the project in short while on the home page, but for the time being I highly recommend everyone check out this Flames Of War article from which I got most of my info.
– Alex
The 1st Czechoslovak Independent Armoured Brigade Group with Jonathon Forsey
The opening of the Second Front in Europe on 6 June 1944 gave the exiled Czech troops who had been training in the UK the chance to take the fight to the Germans and, they hoped, the chance to take part in the liberation of their homeland.
Some Czech troops who had made their way to the UK had combat experience in the desert, others formed support units. This nucleus of troops formed an Infantry Brigade in mid April 1943, later converted to an Armoured Brigade in September 1943.
The men of the 1st Czechoslovak Independent Armoured Brigade Group (CIABG) were anxious to get to grips with the enemy who had forced them from their homes, but had to wait until 30 August 1944 before the Brigade was deployed to France, initially assembling at Falaise.
The Brigade
The Brigade, under General Alois Liska, was trained, organised and equipped along British lines. The troops who assembled at Falaise comprised a powerful mechanised all-arms force.
The Brigade HQ comprised Cromwell IV tanks and Sherman OP tanks for forward observers. The main “teeth” of the Brigade were found in the two (later three) armoured Regiments. The 1st Armoured Regiment under Maj. S. Rezabek and the 2nd under Lieut. Col F. Seda were similar, each comprising an RHQ of Cromwell VII tanks and a troop of Sherman Firefly VC tanks armed with the formidable 17pdr gun. Forward observers were carried in Cromwell IV OP tanks.
The Regiments each had an Armoured Recce Troop with Stuart VI Light tanks, and three squadrons, (‘A’,’B’ and ’C’) with Cromwell IV and VII tanks, plus Cromwell VIII 95mm Close support tanks in the SHQ. There were no Firefly or Challenger tanks in the squadrons themselves.
The Brigade’s Motor Battalion under Lieut. Col J. Chvalkovsky contained veterans who had seen service in North Africa, plus retrained troops of the former 200th (Czech) Light AA Regiment. The Battalion was organised along British lines, with troops riding in M5 halftracks and Universal Carriers, the Battalion including its own recce element in M3A1 White scout cars, plus 20mm Polsten AA guns and attached 6pdr anti tank guns, 3” Mortars and Vickers Medium Machine Guns.
The Brigade had its own Armoured Reconnaissance Squadron under Major V. Velimsky, comprising Stuart VI light tanks, Humber Scout cars and a small number of Cromwell tanks.
This unit was later expanded into the Brigade’s 3rd Armoured Regiment when the Brigade adopted a relatively static existence in the winter of 1944/45. This Armoured Regiment differed from the first two in the Brigade by being equipped with heavy Churchill III/IV and VI Infantry tanks. However, the Churchill’s did not see any offensive action during the siege.
The Brigade’s AT Battery, the “oddil K.P.U.V” under Maj. A. Sitek initially contained two troops of 17pdr anti-tank guns, initially towed by Chevrolet 30cwt trucks, later by Morris EA 4 x 4 vehicles. A third troop was added in the winter of 1944/45.
The Field Artillery Regiment under Col S.Rajmon initially comprised two batteries (“P” and “Q”) of towed 25 pound guns, with a further battery, (“R” Battery) added during the winter of 1944/45.
These core units were supported by an AA Troop with towed 40mm Bofors guns and an overworked and slightly under strength Engineer Company which was again expanded during the 1944/45 winter.
To the disappointment of the men of the CIABG, they were not to press East. Instead, they were directed to the Coast, with the mission of containing the remaining German bastions of the once formidable Atlantic Wall. The Allied advance stranded substantial German forces in ports along the coast and the defenders of these ports had been ordered by Hitler to hold them to the last.
To Dunkirk Liska’s men, as part of First Canadian Army (and later part of 21st Army Group) were assigned the role of containing the German garrison trapped in the port of Dunkirk. Canadian troops of the 2nd Canadian Infantry Division had arrived at Dunkirk in September 1944, contained the defenders and handed over the task of besieging the valuable port to the CIABG on 6 October 1944. The task was to contain the powerful but essentially immobile garrison, rather than to storm the port.
The siege role ill suited the Czechs, who had insufficient manpower for the task and lacked the specialist engineering vehicles necessary to reduce the inland defences.
The successful, but costly, captures of Le Havre, Dieppe, Boulogne and Calais had given the Allies caution. Dunkirk as a prize was not required at the cost of significant casualties. The mobile formation had to content itself with maintaining an impenetrable cordon around the city, prohibited by the French authorities from mounting any prolonged bombardment of the historic centre.
The Czechs were not alone in their task, being supported by Canadian and British heavy AA units, whose 3.7” AA guns were employed in the direct role, as were the additional 40mm Bofors guns of the 125th Light AA Regiment.
The 7th Royal Tank Regiment lent the support of its heavy Churchill tanks. A shortage of infantry was in part addressed by the formation of two battalions of Free French infantry formed from the local F.F.I (Forces Francaises d’Interieur) under Lieut. Col Lehagre, equipped and armed by the British.
The Defenders
Dunkirk, as part of the “Atlantic Wall”, possessed formidable defences to protect itself from attack from sea. These included concrete bunkers, pill boxes, coastal defence and anti-aircraft emplacements.
The inland part of the perimeter was defended by areas of flooded low country, bunkers, fortified farm houses, improvised pillboxes and thousands of mines, including British mines captured after the evacuation in 1940.
The defenders were well stocked with artillery, having over 80 pieces with calibres ranging up to 200mm, plus nearly 100 anti-tank guns of various calibres. Defenders were also plentiful, if their quality was uneven. At the time of the eventual surrender of the port to the CIABG on 8 May 1945, there were over 11,000 troops. These men were drawn from Luftwaffe, Kriegsmarine, Festung and Wehrmacht units, including 226th infantry Division, 346th, 711th, 49th and 97th Divisions and the 26th and 1046th Fortress Battalions. Of the total, approximately 2,000 were part of the Waffen-SS Reinecke Group. In accordance with common German practice, the defenders formed ad hoc Kampfgruppe to defend specific sectors of the perimeter. Losses during the siege amounted to approximately 1,000 men.
The Siege
As the CIABG lacked the means and the orders to take Dunkirk, the Czechs set about establishing a cordon to contain the garrison and prevent any breakout by valuable troops. The CIABG’s mission was to harass the defenders, engage in aggressive patrolling and cut off coastal supply routes.
Despite the relatively static nature of the operation, the men of the CIABG were occasionally able to demonstrate their prowess and mobility in mobile battle. On 28 October 1944, elements of the 2nd Armoured Regiment and the Motor Battalion conducted a feint which drew defenders out from their prepared positions.
A lightning riposte against the exposed German infantry saw over 40 casualties inflicted on the defenders at a cost of only two casualties to the CIABG. This operation drew significant praise for the manner of its execution from higher levels, including Field Marshal Montgomery.
These opportunities were, however, rare and morale did suffer as it became apparent that the Brigade was not to be permitted to join the U.S. forces which were heading toward the Czechoslovakian homeland. Only a token force of 150 men was permitted to accompany the U.S. Troops headed toward their eventual meeting with advancing Soviet forces.
On the positive side, casualties incurred during the siege were relatively light, amounting to 167 dead, 461 wounded and 40 missing. One peculiarity was that the availability of Czechs who had been forced to fight in the German Army, but who had been captured or deserted to the Allies meant that the Brigade actually grew over time, enabling the strengthening and addition of units as outlined above.
The CIAB In Flames Of War
There are two options for fielding the CIAB in D-Day: British. The Czechozlovak Motor Company can of course be represented with the D-Day: British Motor Company. Both Cromwell formations could be used to represent the CIAB tank companies for different purposes. Use the Armoured Recce Squadron to represent the Czechoslovak Cromwells, or use the Desert Rat Cromwell Armoured Squadron to represent the Czechoslovak Crowells with the HQ Friefly VCs apportioned out to the Cromwell troops in the company you’re representing.

 This comes in at 27pts and has eight units in the Formation and six units capable of Spearhead. Giving the infantry the “Best Infantry” Command Card upgrade, they are now Fearless, Veteran, Careful. This unit is now harder to hit, can Blitz and Stormtrooper on 3+ and being Fearless make them dangerous.
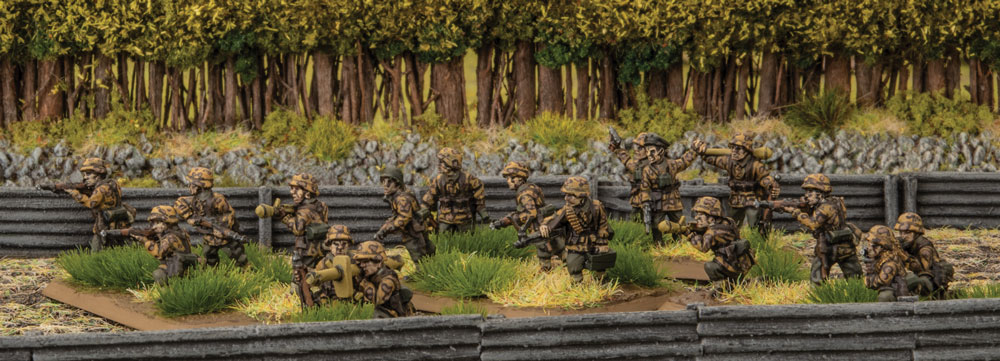
 So, let us look at what we need to consider from a support perspective for this list. They should be supported by tanks, high end AT, artillery and what we need to cater for around reserves. Most games are 100pts, but several tournaments are smaller in points – some one-day games have even gone to 50-60pt games to get four or five quicker fast paced games. This is where recon unit lists shine – more flexibility with smaller points than other formations. Looking at a standard 100pt game we have 73 points left to play with.
 Now we really should take some sort of armor – I love the StuG, and as we have eight AT14 or higher gun platforms already, I feel Tigers and Panthers would be overkill. A maxed out StuG SS Tank Platoon of five costs 24pts and upgrade them using the Command Card –“The Best StuG” for an additional 2pts per tank for 34pts. They become Fearless, Veteran, Careful and they can Assault on 4+ instead of 5+. At 34pts, they become your main reserve unit and you can put three of the Scout Troops in reserve with them to get to the 40pt threshold for reserves.
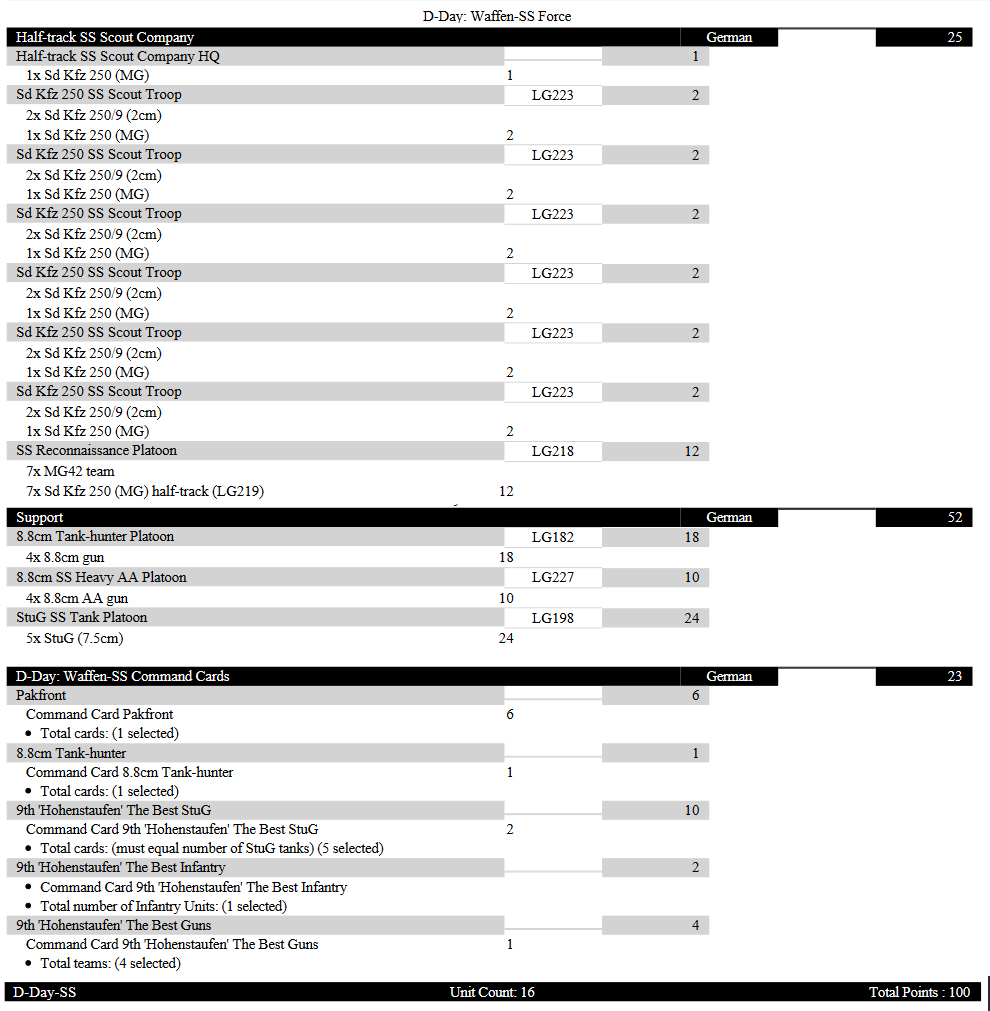 For a smaller sided game or tournament, you can change out some of the formation units, remove some of the Command Card upgrades, change the Stugs for Tigers, Panthers or Panzer IVs.
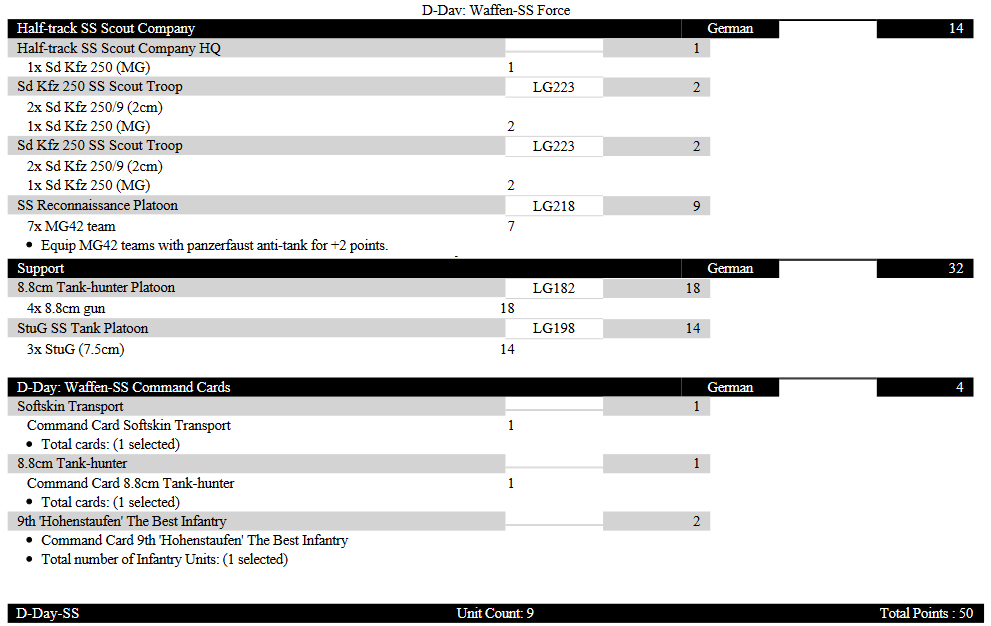 This command card formation can provide some interesting options and can take on the British and American recon formations with similar numbers. I hope this has given you some food for thought. Happy list building!


 This force was reliably backed up by my absolute favourite tank of the war – the M4 Sherman, in all its glorious forms. For the project I took loads of 75mm variants, a smattering of 76mm Shermans and also a platoon of 105mm too. In total I managed to paint almost 400points of US models for my army. Then, during the Hobby League Campaign, I managed a rather respectable 7 wins to just 2 losses and a draw. Not bad considering I’m known in the office for my poor dice rolling! Also during the Hobby League, I put together a D-Day: German Panzergrenadier Force, with Panzer IV and
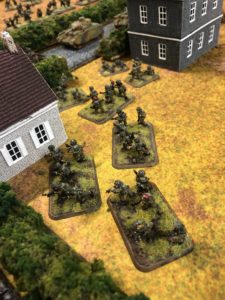
 Combined with the options for taking a Desert Rats Cromwell Armoured Squadron in support complete with embedded Firefly and I’ve got myself a well rounded army that is vicious in assaults, able to hold its own against most tank armies I will encounter with the AT of the 6pdr and the PIAT,
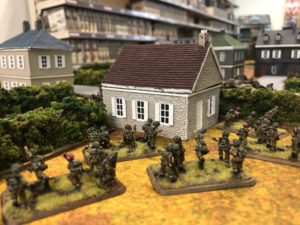 But most importantly, is the command cards for the British. I got a sneak peak at them, and suffice to say that I will be taking Mr Joe Ekins and a Lt. Col of the 6 th Airborne to tease victory for my games of Flames Of War.
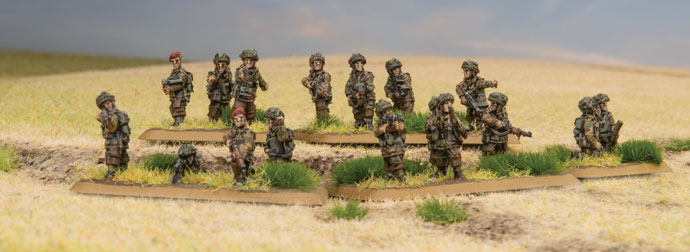 On June 5th, 1944, the eve of the greatest and most ambitious amphibious assault in human history; thousands of men flew in the dead of night with the goal of dropping behind enemy lines and taking key objectives to halt the German response to the D-Day landings. The Red Devils, along with their American cousins, the 101st Screaming Eagles, were young pups in comparison to the veteran American para division the 82nd Airborne, which had already made one Combat drop into Sicily and taken part in extensive fighting both on the island and mainland Italy. Both divisions had a lot to prove in their maiden jump, and this can be seen in the Parachute
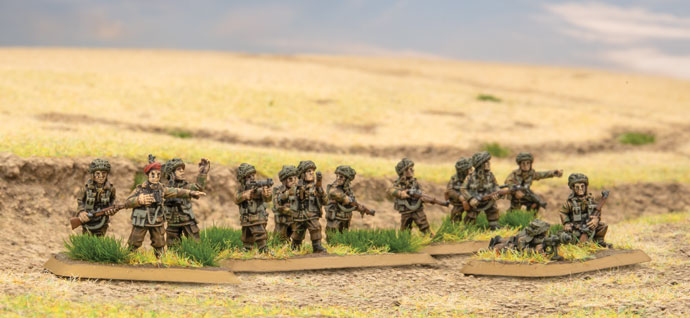 In terms of support the Airborne boast a level of versatility that you’d realistically expect from a unit that has been dropped behind enemy lines and has to wait an unspecified length of time for relief. While 6 pdrs are cheaper and more numerous, if you’re wanting to put up any sort of resistance to the heavy German armor you’re likely to encounter, I recommend taking the more powerful and deadly 17pdr. For decent fire support at a relatively low cost you could do a whole lot worse than the Airlanding 75mm howitzers, with decent range they can be a real thorn in
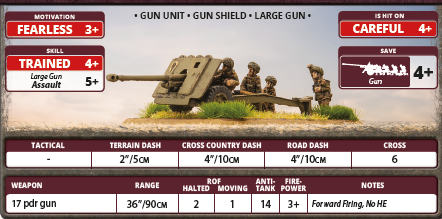

 This added formation usually should give you both the mobility and firepower to deal with what can sometimes be overwhelming German Armour. Although you must be careful not to waste your Shermans as they have poor front armour (6) and dismal side armour (4) leaving them vulnerable to pretty much any large calibre gun the Germans are able to field.
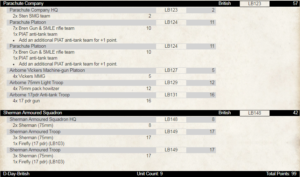
 The 8th Armoured Brigade were one of the most experienced British Armoured Brigades in WW2. They had initially been formed in July 1941, from parts of the 6th Cavalry Brigade in Iraq and Syria and began training with Honey tanks. In 1942 they were brought up to strength with more Honey Tanks and Grants, only to have then taken away just before the Battle of Mersa Matruh in June 1942, and given as replacements to more experienced units. They were joined by the 3 rd RTR Lt Col “Pip” Roberts, and then in August sent to join XXX Corps as part of the 10th Armoured Division.
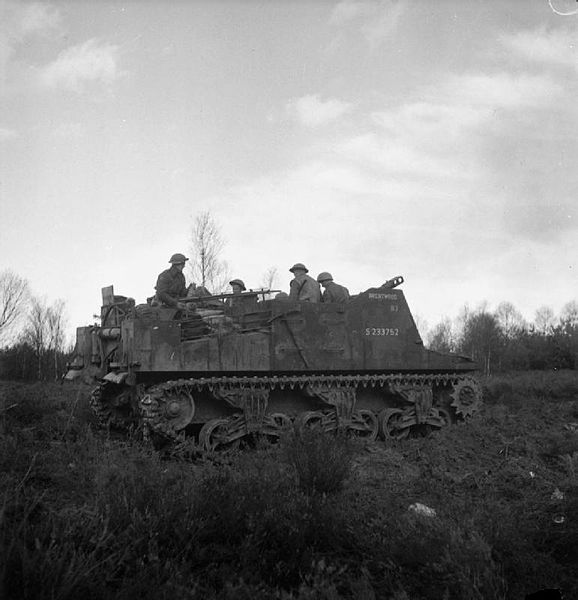
 Also another of my favourites is the Typhoons! I am also really looking forward to the new plastic kits that Battlefront will be bringing out for their planes.
 I have painted up a test Sherman, to see how the custom decals went, and also how I like the paint scheme I “borrowed” from Chris and his Big 4 of Late War British- Pretty happy with it …. now to paint the extra 20 or so models…

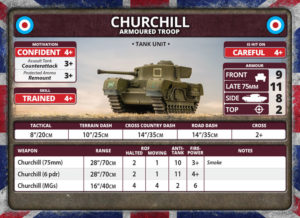 First up is the Churchills who have arguably the most to change. With the addition of the 75mm gun to their options, an additional point front and side armour and now with access to the Chuchill (late 75mm) with its whopping 11 front armour things are looking up! Stats increases of course come with points increases too but I’ll be trying to keep the core of my nine Churchills intact. My squadron HQ can now include the Churchill CS of which I’ll be taking two. This will keep the cost the same which is great for conveniences sake. My two Churchill Armoured Squadrons will be identical with both taking a Churchill (6 pdr), a Churchill (75mm) and a Churchill (Late 75mm) giving a great spread of guns and armour. Sure they’ll be slow but they’re tough and with the 2+ cross check very little is going to stop them. This brings the points total to 52 points spread over just 8 Churchills!
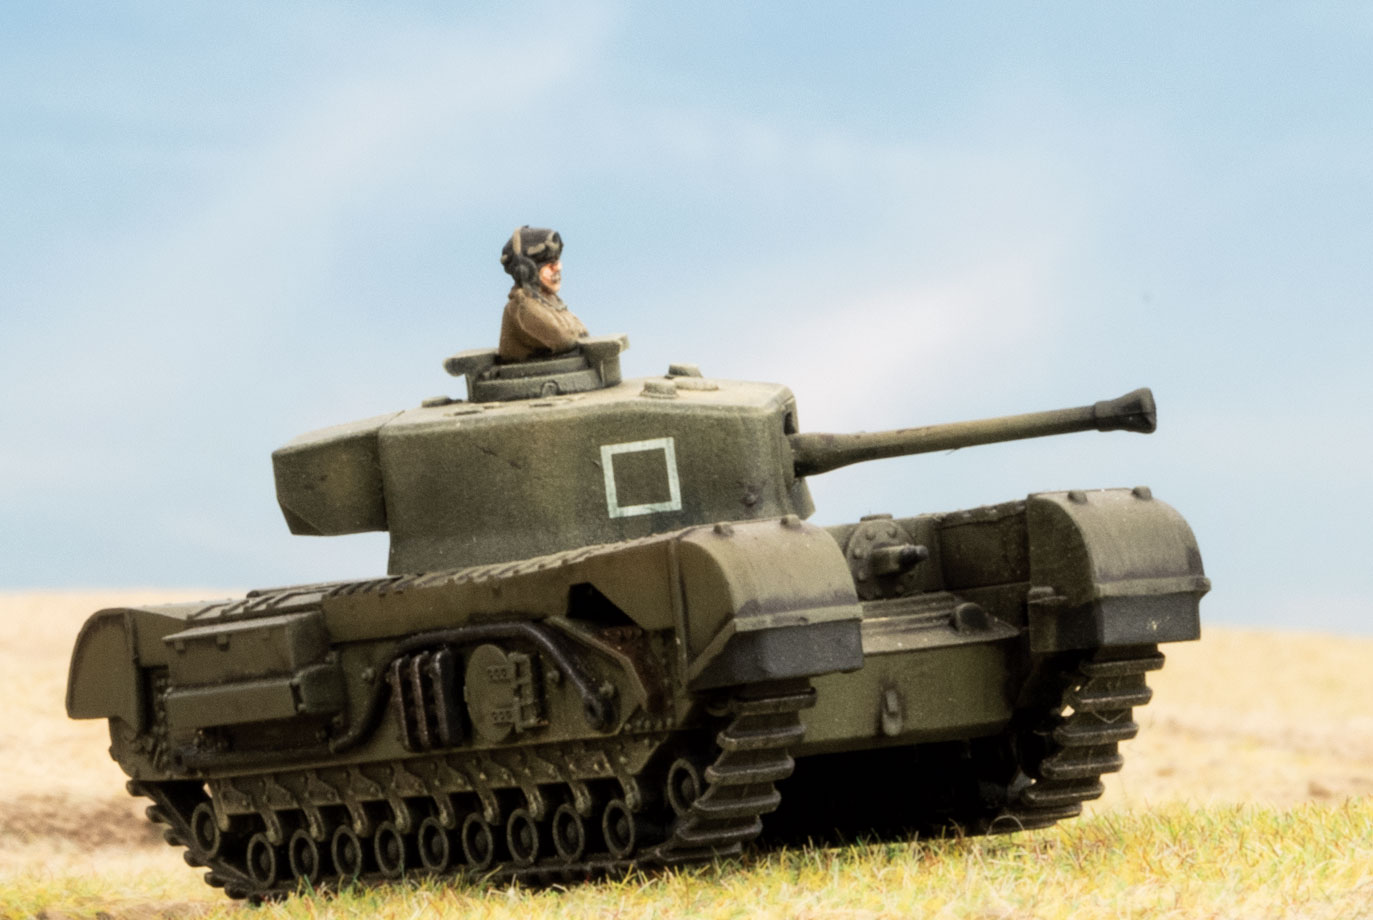

 My rifle company will be just the bare bones, an HQ and three weak rifle platoons (all that are left after several weeks of hard fighting). I can do this by adding three more rifle teams to my motor platoons. Sure, they’ll have an extra Bren gun, but I figure they kept it when they had to disband the third section, so that’s fine. Three platoons will give me plenty of flexibility as I can hold two objectives and still have a platoon free to manoeuvre.
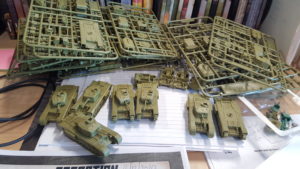
 I was particularly taken with the 49th Division Card – POLAR BEAR, because as a young Private in the UK Territorial Army, my regiment came under the command of the WW2 Division’s successor: 49th (East) Brigade, based originally in Grantham, Lincs and now just half a mile from the BF UK HQ in Nottingham. This forces me (kicking and screaming I assure you) to create a rifle company as Polar Bears. Even more interesting is a conversation during the Hobby League forums with a resident of Iceland, and my discovery that there were elements of the 49th Polar Bears stationed in Iceland as a garrison force! My how we got around, especially as my old regiment is now based in the South of England on the coast as befits their role…
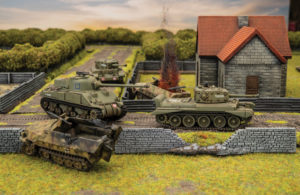
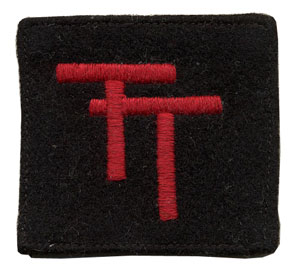 1939-40
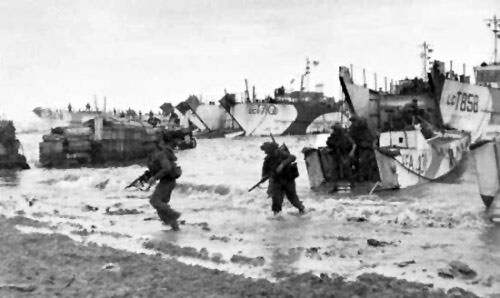 Northwest Europe
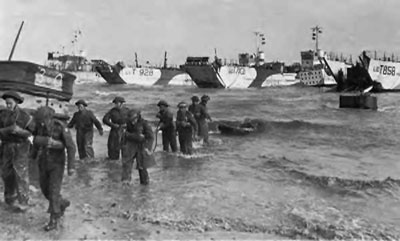
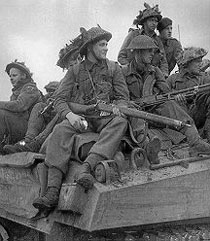 On the “JIG” sector the 1st Battalion, Hampshire Regiment landed, but due to delays were without the support of tanks. Heavy machine-gun fire caused the death of the 1st Hampshire’s commanding officer and also their second in command (2iC) within minutes of landing.
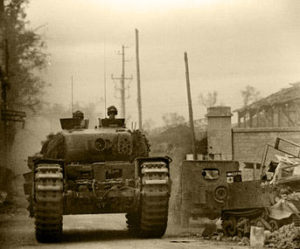
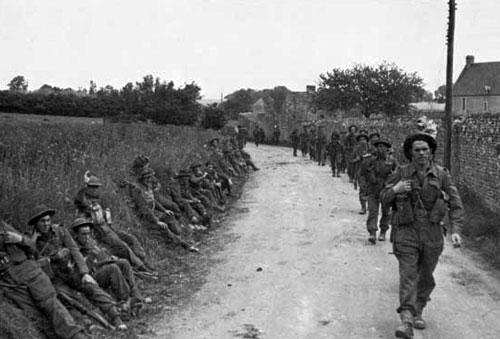
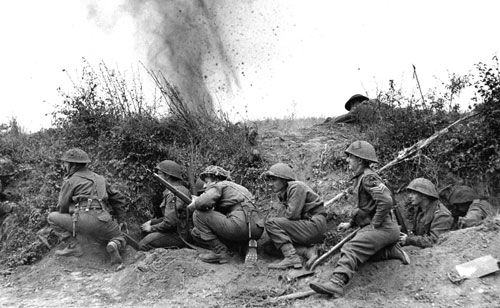
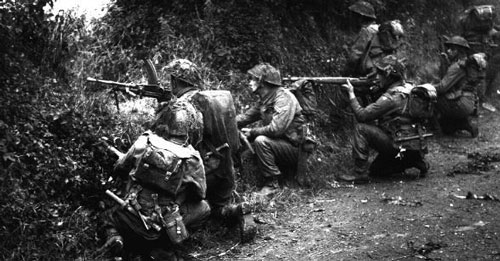
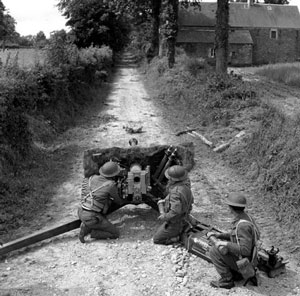 Much like the 9th DLI the 6th DLI were fired on from the wood in the line of their advance. They too were supported by a squadron of the 4/7 Dragoon Guards. They took the village, but could not advance any further forward. During the night they withdrew from the village to the north.
 Operation Bluecoat
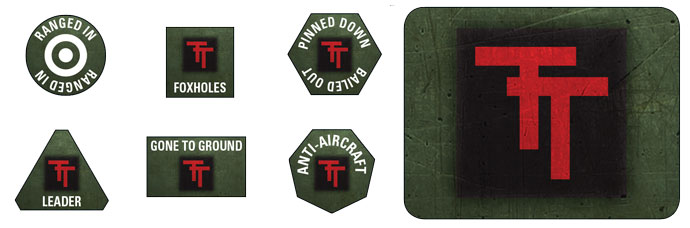
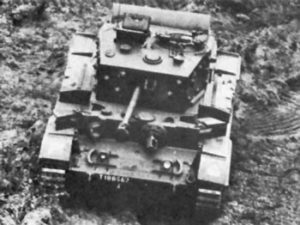 The Brigade
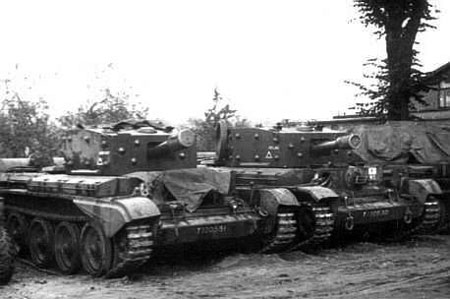
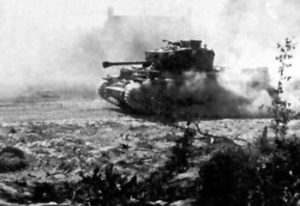 These core units were supported by an AA Troop with towed 40mm Bofors guns and an overworked and slightly under strength Engineer Company which was again expanded during the 1944/45 winter.
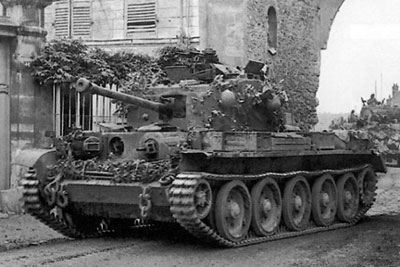 The siege role ill suited the Czechs, who had insufficient manpower for the task and lacked the specialist engineering vehicles necessary to reduce the inland defences.
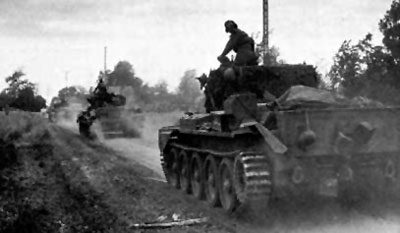
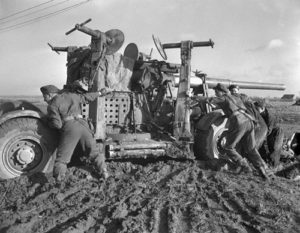 The Siege
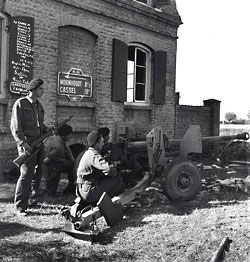 Despite the relatively static nature of the operation, the men of the CIABG were occasionally able to demonstrate their prowess and mobility in mobile battle. On 28 October 1944, elements of the 2nd Armoured Regiment and the Motor Battalion conducted a feint which drew defenders out from their prepared positions.