with Aaron Te Hira-Mathie
The release of the new British book for World War III set my brain whirring as to a unique theme for a miniature of HRM’s finest. I quickly decided that the obvious standby of the black and green camouflage scheme, whilst iconic and well suited to our notional 1985 conflict, was a little too
pedestrian for my tastes. With the standard scheme discarded I started to tax my memory (and images on the internet) for a look that was still ‘British’ but that would tick the box for being a bit unique.
Because the new Challenger Mk.1 MBT and Warrior IFV plastic kits come with the applique armour as optional parts I considered going with an Operation Granby (1991 Gulf War) look, however I heard murmurs around the office that at least one of the other very talented staff members was
considering this option, so I felt that would be duplication… and that just wouldn’t do, however much I liked the idea of an arid theme.
Armed with a thematic concept I considered that the green and yellow ‘BATUS’ (British Army Training Unit Suffield – Canada) would make for an interesting semi-arid camouflage scheme. But for where?
I looked at my bookshelf, and it hit me, Oil War takes place in an arid environment and is part of our hypothetical mid-1980s war. Eureka!
The backstory for my Brits was born, if any of you heard my interview with Simon Berman from The Brush Wielders Union you’ll know that I like to create a little backstory as this helps me to develop a look and feel for a
painting project.
 The backstory that I developed was that this force would be part of a British task force sent to the Middle East as part of the NATO/Western contingent taking part in the battle to halt the Soviet juggernaut using Iran as an invasion corridor in order to seize vital Oil resources, denying them from western forces embattled on the battlefields of Germany.
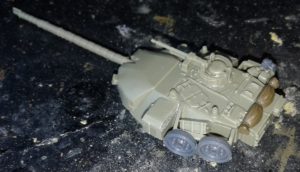
I decided this army should look ‘battleworn’, showing the signs of taking part in the bitter combat on the Middle East front. I wanted to do a proof of concept model, however the Challenger 1 models had yet to arrive here in
New Zealand, so I substituted a ‘Stillbrew’ equipped Cheiftain MBT in its place. At the same time I had an interesting idea for a Lynx AH.1 helicopter modified for this theatre of combat.
What follows Is a series of step by step photographs (and brief descriptions) detailing how these two models came into being.
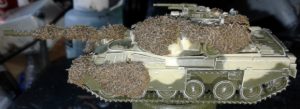
Oil War themed British Main Battle Tank:
 Step 1:
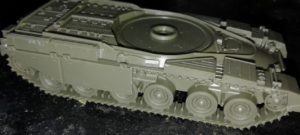
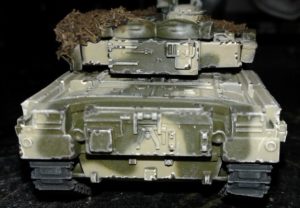
was putting together a tank that had some obvious wear as well as a ‘lived in’ look. So I cut off a couple of panels from each of the side armour shirts, and added some spare road wheels, Jerrycans and a cloth roll from my spares box.
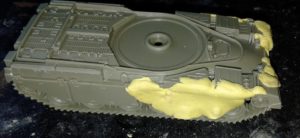
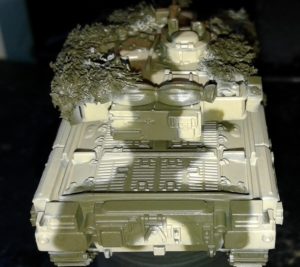
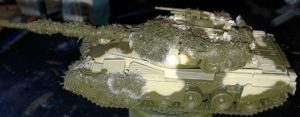
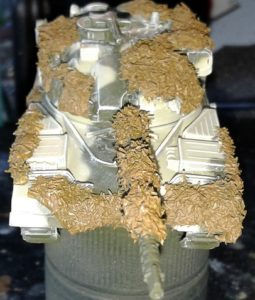
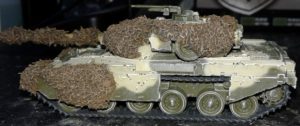
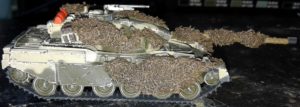
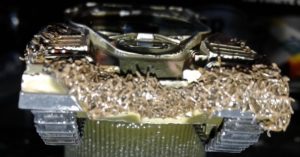
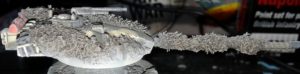
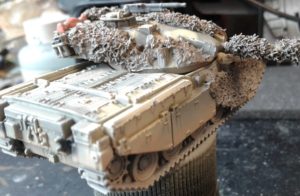
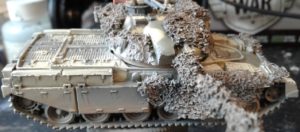
 Step 2: After building the base of the ‘canvas’ I decided that I wanted the vehicle to be liberally draped in ‘Barracuda’ type camouflage nets much like one sees pictures of British military vehicles on field exercises from the era. So I created the basic shapes of the nets with very thin pieces of Miliput modelling putty in various spots of the hull and turret as well as wrapped around the gun tube, being careful to try and avoid blocking optics or access hatches.
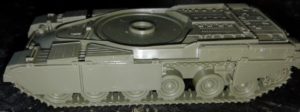
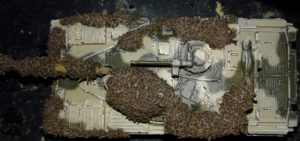
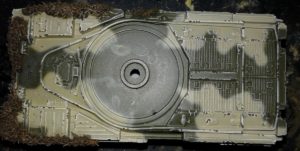
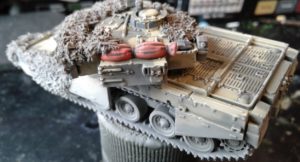
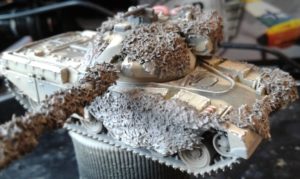
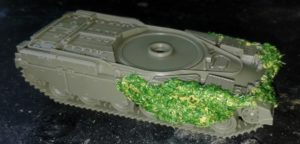 Step 3: With the basic shapes and locations of the camouflage nets in place, I then add the ‘leaf’ type texture of the net by brushing the dried Miliput with heavily watered down white glue. Then I cover these parts of the model with model railway ground clutter, and fix this in place by touching the ‘nets’ with a second coat of even more heavily watered down white glue, before leaving it to dry.
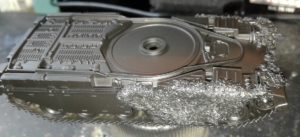
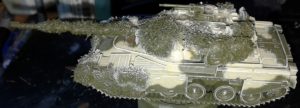
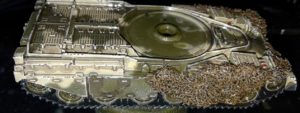
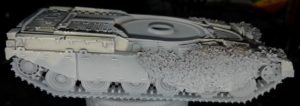
Step 4: I homogenised the colour of the model by spraying it with an all-enveloping coat of Vallejo black surface primer. This stage is a good idea as it gives the following paint something to ‘cling’ to as well as cutting down the likelihood of colour variations.
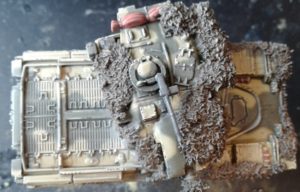
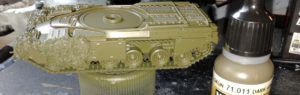 Step 5: Next I sprayed an all over coat of Vallejo Model Air 71.011 (Dark Green RLM83) as the base green for the camouflage pattern.
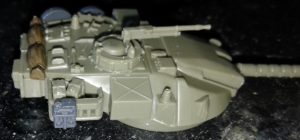
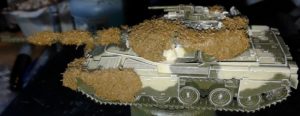
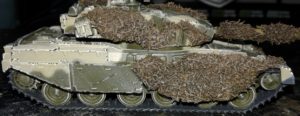
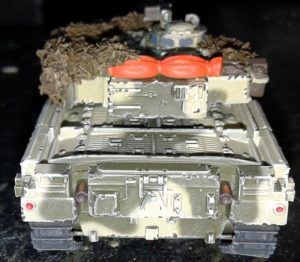
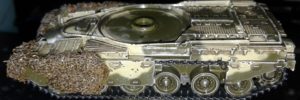
 Step 6: After the base green dried I added the camouflage pattern using Vallejo Model Air 71.143 (UK Light Stone BS361). In keeping with photographic records the scheme is random, but applied in such a way as to ‘break up’ the shape of the vehicle when viewed from a distance. At this stage I also elected to keep one of the armour skirt sections in the base green to give the impression of a replacement plate having been added but not painted camouflage.
 Step 7: After applying the camouflage pattern to the model I highlight the raised details and the edges of the model with an all over drybrush of Vallejo Model Color 70.837 (Pale Sand). While this is a very light colour to highlight the model with, it almost disappears on the finished product, but adds just a hint of definition. It also has the added benefit of slightly fading the two main colours.
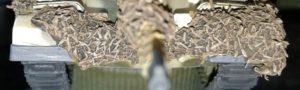
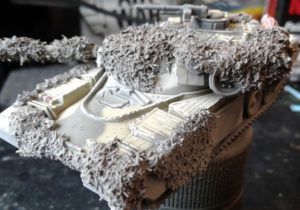
 Step 8: I start painting the colour of the netting. In this case I went for the brown side out due to the arid nature of the battlefield, so started with a
coat of Vallejo Model Colour 70.921 (English Uniform).
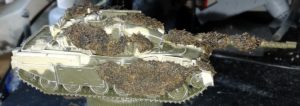
Step 9: Once all of the camouflage net elements are the same colour I liberally coat them with Vallejo Game Color 73.201 (Black Wash) to add some depth to camouflage nets.
Step 10: Once the black wash has completely dried I do a heavy drybrush of Vallejo Model Color 70.921 (English Uniform) so that only the very deepest recesses remain black.
Step 11: The camouflage netting looks fine at this point, however for a little extra definition I lightly drybrush them with Vallejo Model Color 70.873 (US Field Drab), concentrating on the most raised parts of the net texture.
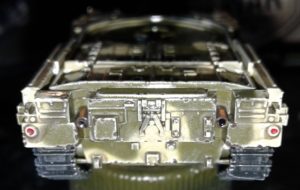
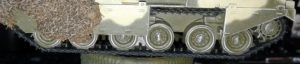 Step 12: Next I paint the tracks and main armament muzzle using Vallejo Model Air 71.251 (NATO Black).
Step 13: I paint the rubberised sections of the front guards with Vallejo Model Color 70.862 (Black Grey).
Step 14: To further add to the battleworn appearance of the model I add some chips and scrapes to the camouflage paint. To do this I paint small random shapes in likely high wear areas, such as around the bottom of track skirts, hatches/panels and on some corners, using Vallejo Model Color 70.837 (Pale Sand) on the yellow areas and Vallejo Model Color 70.886 (Green Grey) to simulate the paint wearing down in those spots.
Then I go back and paint spots of Vallejo Model Color 70.822 (German Camo Black Brown) over the previously ‘worn’ paint to simulate the paint wearing down to primer. In order to add some depth to the dark coloured tracks, gun muzzle and rubberised sections, I give these area a light drybrush using Vallejo Model Color 70.866 (Grey Green), concentrating on edges. I also take the opportunity to paint any of the exposed parts of the thermal sleeve surrounding the main gun tube with Vallejo Model Color 70.880 (Khaki Grey).
 Step 15: At this point I paint all the smaller details.
- Optics and Glass: Vallejo Model Color 70.816 (Luftwaffe Uniform)
- Cloth Roll/Air Recognition Panel Vallejo Model Color 70.956 (Light Orange)
- Jerrycans and MG Ammo boxes Vallejo Model Color 70.889 (Olive Brown)
- Fire Extinguisher bodies and Tail Reflectors Vallejo Model Color 70.957 (Flat Red)
- Exhaust Pipes Vallejo Model Color 70.822 (German Camo Black), then half covered with Vallejo Model Color 70.826 (German Camo Medium Brown), followed by covering half of the 70.826 with Vallejo Panzer Aces 301 (Light Rust) to make them appear slightly rusty.
- Commander’s MG Vallejo Model Color 70.863 (Gunmetal Grey)
- Fire Extinguisher heads Vallejo Model Color 70.865 (Oily Steel)
- Headlights and Commander’s Spot lamp Vallejo Model Color 70.997 (Silver)
Step 16: I coat the cloth roll, Jerrycans, Thermal Sleeve and MG with Vallejo Game Color 73.201 (Black Wash) After the wash is dry I repaint the Thermal Sleeve, Jerrycans and cloth roll with the same colours as before, making sure to leave the deepest recesses black.
Step 17: I spray coat the whole model with a gloss varnish.
Step 18: Once the gloss coat has set, I then cover the model with a dark brown enamel wash, in this case Tamiya Panel Line Accent Color (Dark Brown)
Ste p 19: Leaving the enamel wash to dry but not set (Usually 24-48 hours) I then clean most of the enamel off with white spirits using an old brush and cotton buds.
Letting the enamel getting to the mostly dry point, allows you to clean off most surfaces while leaving it deposited in around detail, giving your model shading and delineation. I left the cleaned model to set and dry for 48-72 hours, then gave it a full covering of matte varnish.
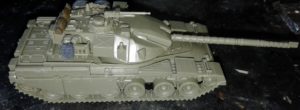
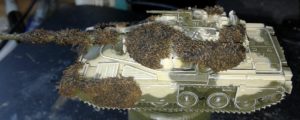
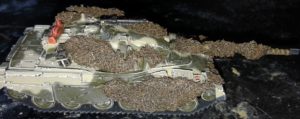
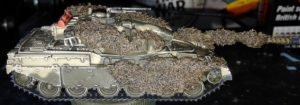
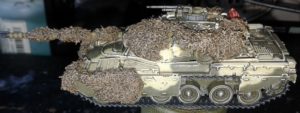
Step 20: Once the matte varnish dried I then loaded my airbrush with a light dusty colour (in this case Tamiya XF55 Deck Tan – However any light dusty coloured paint will suffice). I then sprayed a very light mist over the entire model to simulate the dust from an arid environment covering everything on the vehicle … be careful with this step, less is most certainly more. With the dusting done, I then concentrated more of this colour on lower portions of the model, to simulate old dust kicked up by the vehicle as it moves.
Step 21: To simulate dust that has been more freshly kicked up by the vehicle I loaded my airbrush up with a slightly darker dust colour (in this case Tamiya XF78 Wooden Deck Tan – however any dust colour will suffice). With this application of fresh dust, I concentrate entirely on the lower surfaces of the model.

Step 22: To finish making this Tank look like it is fresh out of action, I select a few obvious run off points around the model, from which I apply a few streaks of Vallejo Environment 73.824 (Streaking Grime) to simulate various types of grime flowing down angled surfaces from light rain. Then I apply a final coat of matte varnish … and job done.
And the finished product:
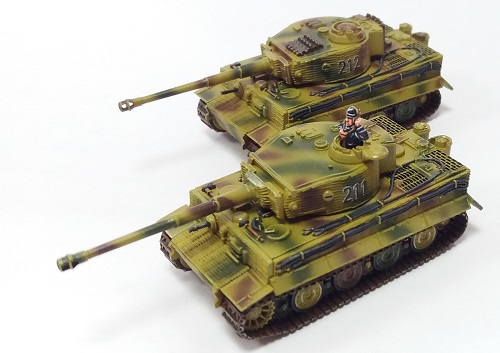
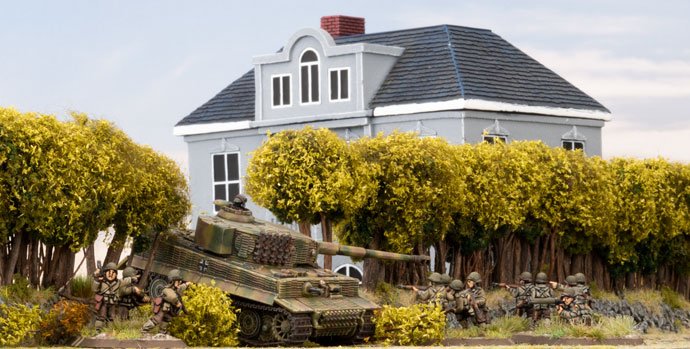
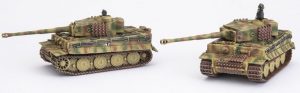
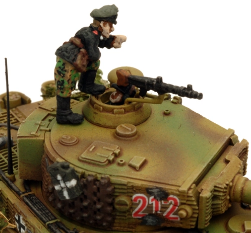 Chris has already mentioned in his article how much of an exceptional resource Blake’s Tale of Two Tigers series of articles is.
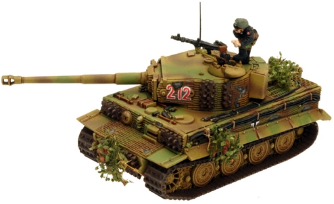
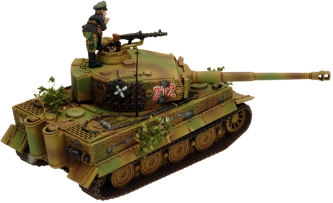 There’s a lot to learn, so make sure you have the article bookmarked if you’re planning to put together your own Tiger-based list… Although there’s nothing to say you couldn’t transfer some of the skills to our
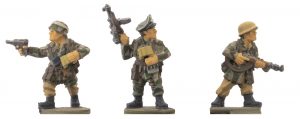
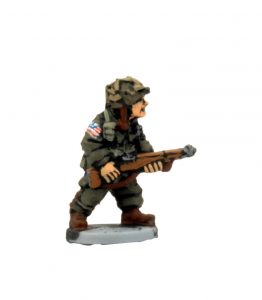
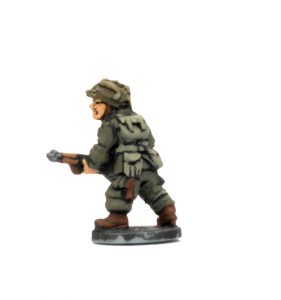
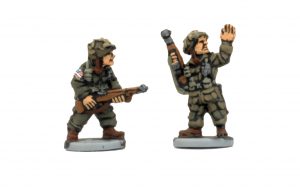
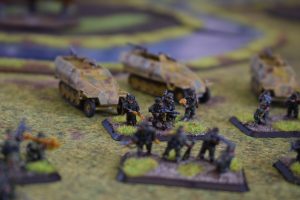
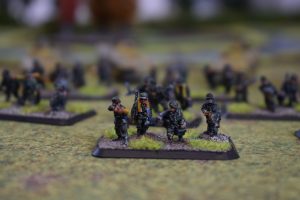
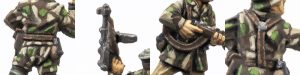
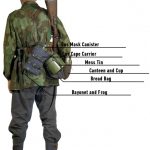
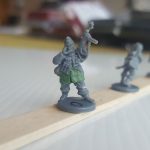
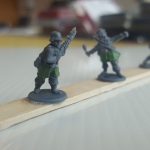
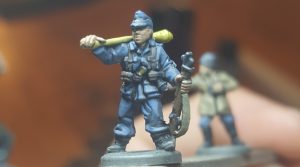
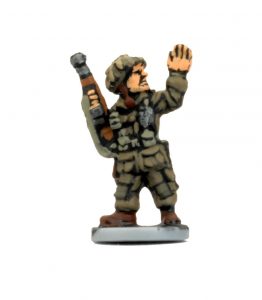
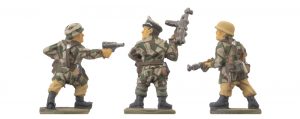 First I primed the figures with a black rattle can. Then to speed things up I airbrushed the figures Khaki. This gave me a light base colour to work over rather than trying to paint beige / tan over the black primer. It also meant I could drybrush on the German Camo Beige for the smocks to create initial shading. Then I simply block painted all the items, trying to be as neat as possible.
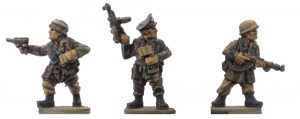
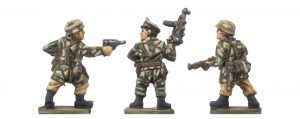
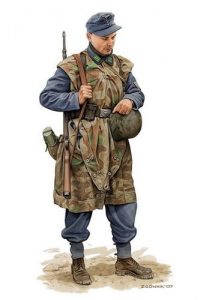
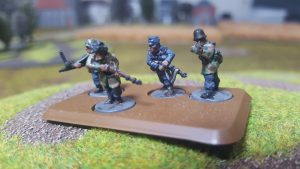
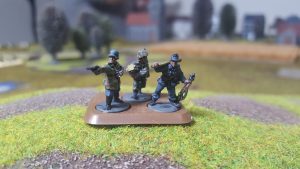
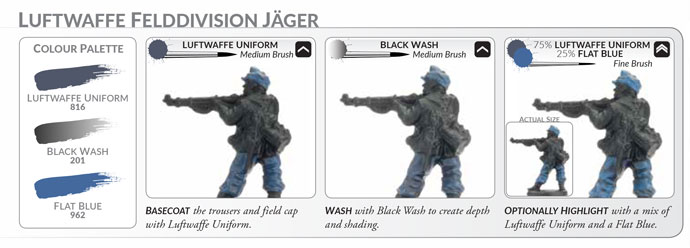
 A tabletop approximation of 16. Feld-Division (L) in Normandy, 1944, offers me both of these chances— an opportunity to paint Luftwaffe blue, and an opportunity to modify a few grenadier uniforms to reflect the very swish LwFD camouflage smock.
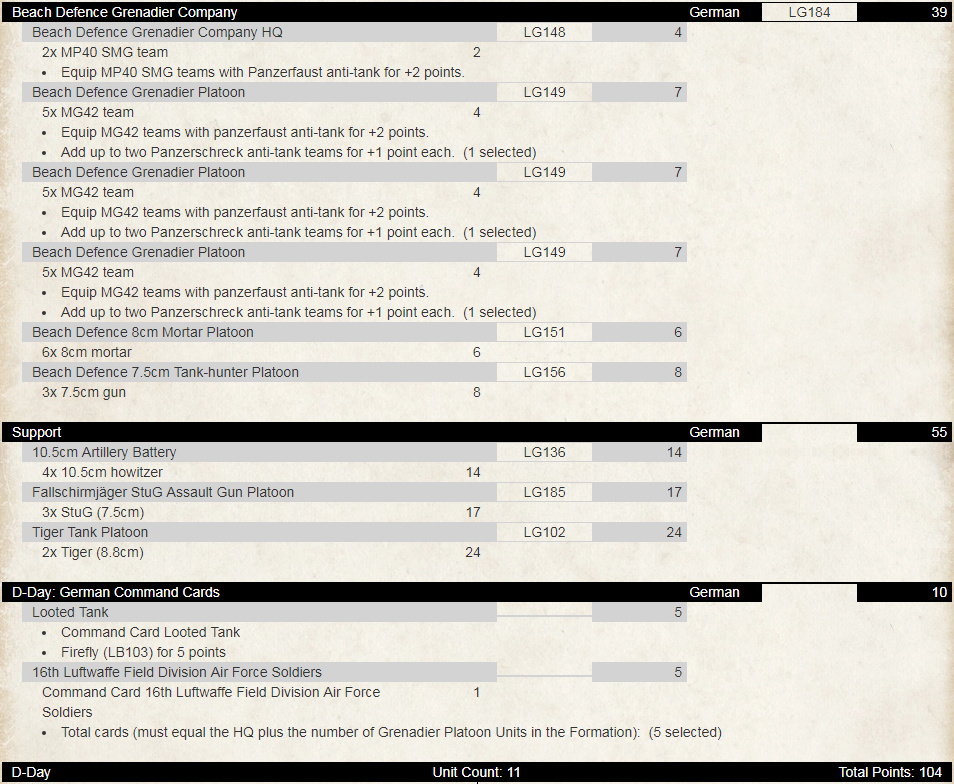
 Project Research
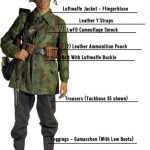
 The Rest of the Stuff in the List
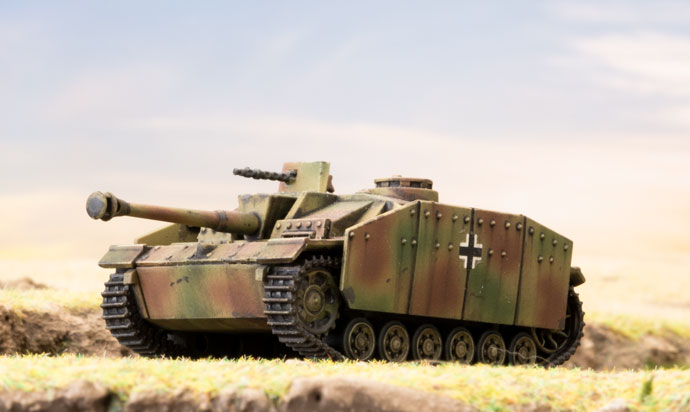
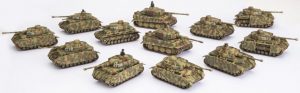
 With everyone in the Big Four selecting one of the four major Flames Of War Late War forces, it fell to Wayne to work on a German force which you can check out here on the
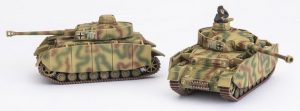
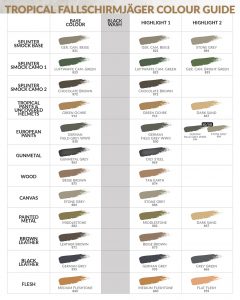
 The M1942 Uniform
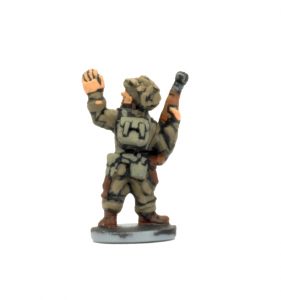 cotton that was a pale greenish-tan colour and I must admit to spending an awful lot of time experimenting to achieve, what I hope to be, the closest match possible. I try to avoid mixing different colours to achieve my basic uniforms but this uniform seems to bring on my OCD (Obsesive Colour Disorder) to get it closer than just plain Olive Drab (887 gets). The Olive Drab (887) is close but a bit too dark for my taste so, eventually, I settled on a 50/50 mix of Khaki (988) and the Olive Drab (887)
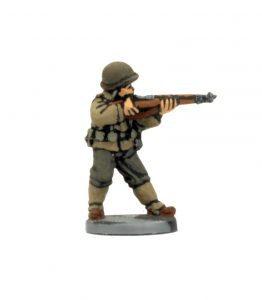 The Glidermen
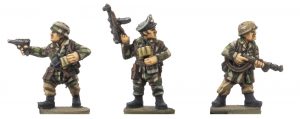