with Pete the Wargamer
Pete the Wargamer gets in and paints some of our new flexible plastic US Airborne figures ready to drop behind enemy lines…
Join the Battlefront team as we launch Bagration: Soviet

with Pete the Wargamer
Pete the Wargamer gets in and paints some of our new flexible plastic US Airborne figures ready to drop behind enemy lines…
with Evan Allen
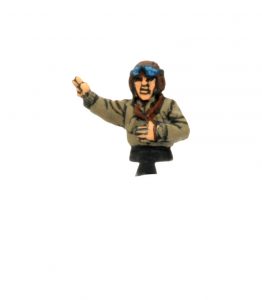
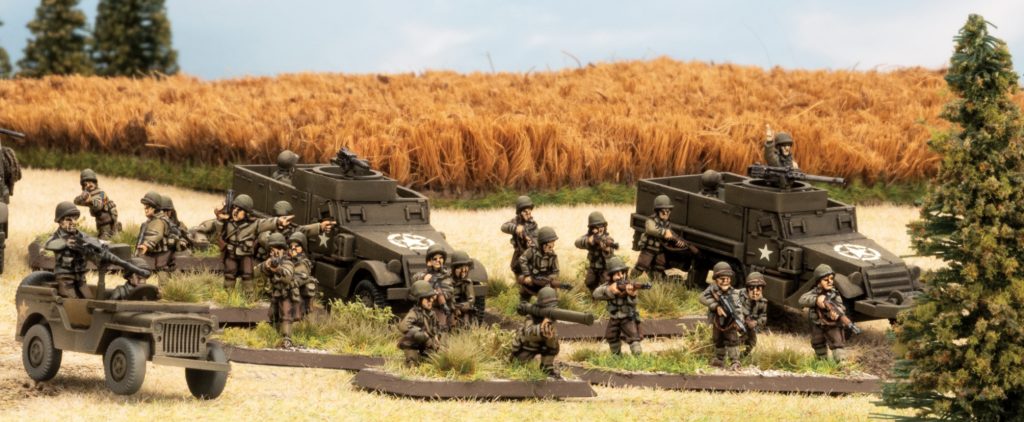
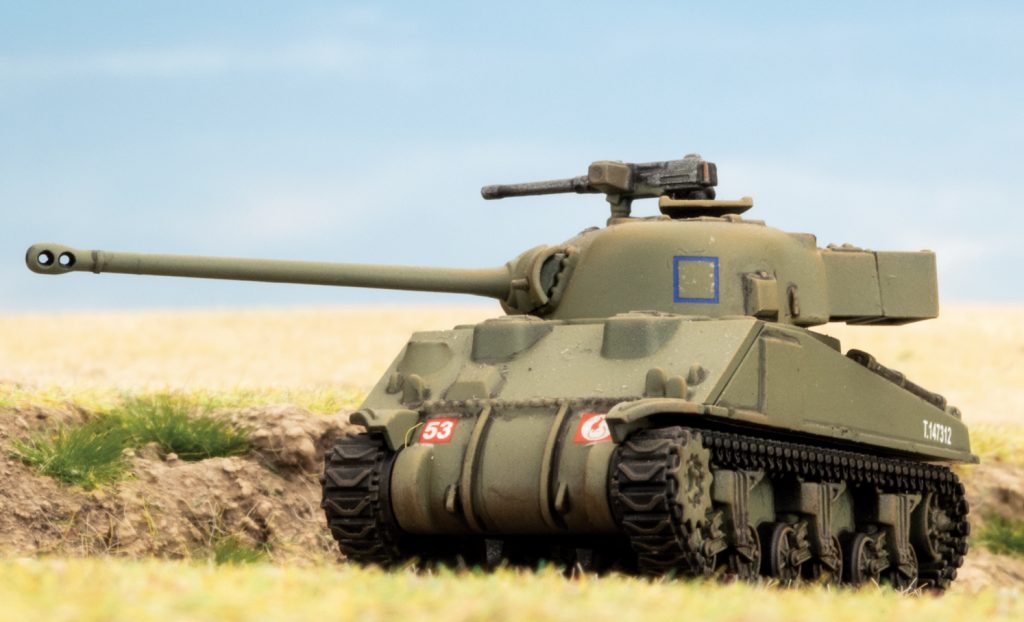
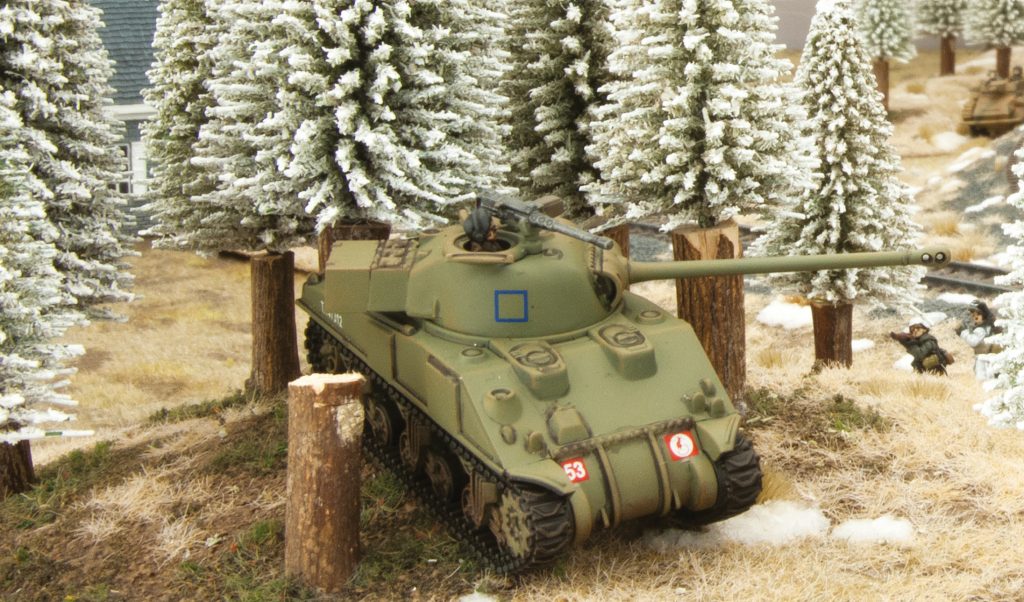
Nothing seems to cause as much confusion as colours of the uniforms worn by the United States Army during WWII. And this seems to be mainly due to the fact that the army entered the war in December 1941 wearing one uniform and finished the war in 1945 with another uniform, mixed them up in between, with a few other articles of clothing thrown in for good measure!
In this article I will attempt to portray these uniforms with pictures of BF miniatures painted with Vallejo’s Acrylics colours that I’ve personally chosen. So please treat all colour suggestions as a guide and not a decree. Also, I’ve purposely avoided one step in the painting process that I
normally use which is highlighting of the base colour. This is so you can see the original colour from the bottle and not just the highlighting I use,
which is add 10-15% VP Deck Tan (986) to the original base colour. For those that don’t use the
Vallejo range just cross-reference the
colours on the FOW colour chart to get your favourite paint brand equivalent. Throughout this article I’m going to use the designations that seem to be most commonly used to describe the uniforms and not necessarily the ‘official’ nomenclature.
7 December 1941. The United States is dragged forcibly into the war and the first US soldiers to see combat in the ETO, or ‘European Theatre of Operations’, land in Tunisia on 8 November 1942 during Operation Torch.
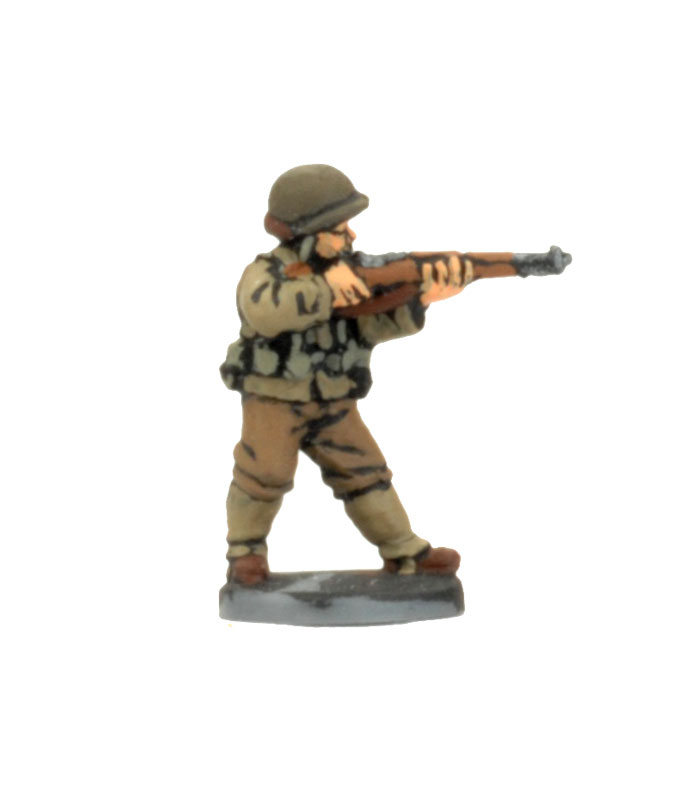
This figure is shown
wearing the M1941 or ‘Parsons’ jacket and Olive Drab woolen trousers with canvas leggings and M1 steel helmet. The G.I. in this uniform could be found in the Bocage hedgerows of Normandy to the snow-covered Ardennes, from the dusty Tunisian roads to the hills of Italy and anywhere else that a G.I. fought in the ETO.
| Uniform Part | Vallejo Colour |
| Jacket/leggings | Khaki (988) |
| Trousers | US Field Drab (873) |
| Webbing | Green Grey (886) |
| Helmet | Olive Drab (887) |
| Boots | Flat Brown (984) |
One uniform Item that can cause confusion is the HBT or ‘Herringbone Twill’ denim fatigue that the US Army issued. These were worn as working clothes during training etc. but were also worn over the top of the normal combat dress for amphibious operations such as the Tunisian
and Normandy landings. The olive green colour of the HBT’s was similar to the colour of the later M1943 uniform, which we’ll look at later.
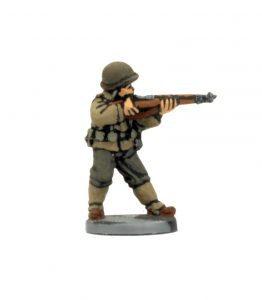
These two figures (Above and left) show a mixture of HBT shirt and trousers mixed with the OD woolen trousers and M1941 jacket. Again, this would be a common mix anywhere the G.I. fought.
| Uniform Part | Vallejo Colour |
| Herringbone Twill | US Dark Green (893) |
(Note. To differentiate between HBT and the M1943 uniform I’d suggest adding more Deck Tan to the highlight colour for the HBT material)
To add to the figure with the Herringbone twill trouser choice is the additional items issued for the Normandy landings. These consisted of the Assault jacket, worn over the normal jacket, and the waterproof gasmask bag. The Assault jackets had extra pockets for things like grenades
and ammo magazines that wouldn’t hinder the troops onto the beaches . The Gasmask bags, well just because, who knew what the Germans would do under such pressure?


| Uniform Item | Vallejo Colour |
| Assault jacket | Vallejo Olive Drab (887) |
| Gasmask bag | German Grey (995) |
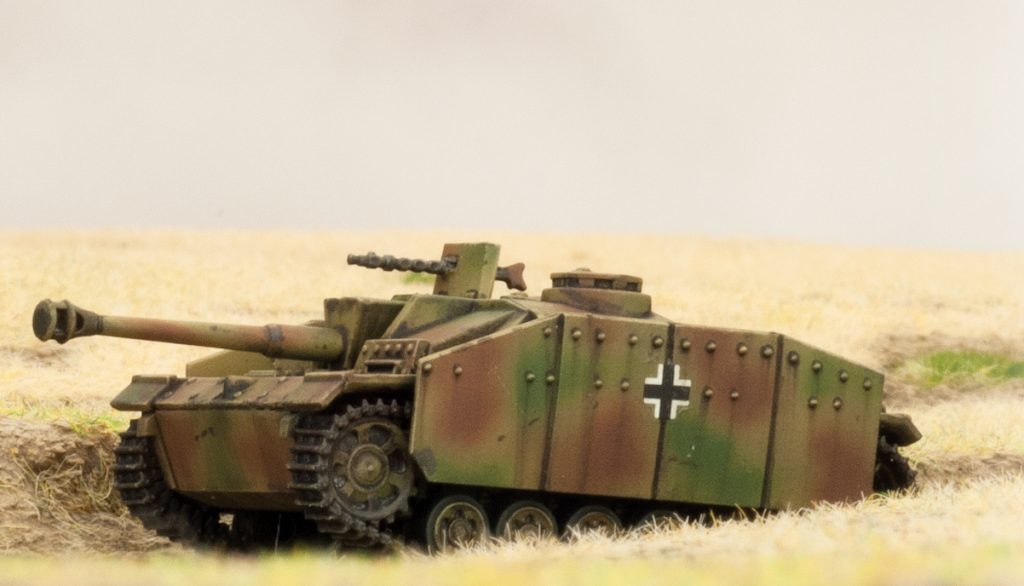
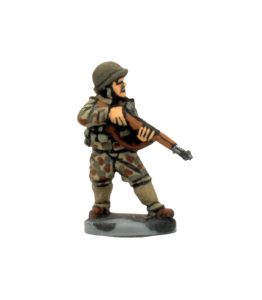 Camouflage uniforms were issued for a select few units in the ETO, mainly some units of 2nd ID, 30th ID and 2nd AD in the Normandy battle. The experiment was short-lived due to the similarity with the German camouflage uniforms, and some ‘friendly fire’ incidents took place as
a result of the confusion. But this does make for an interesting looking G.I.
This camouflage uniform was basically the HBT uniform printed in a camouflage pattern.
| Uniform Part | Vallejo Colour |
| Uniform Base | Khaki (988) |
| Camo. | Flat Brown (984) |
| Camo. | US Dark Green (893) |
| Leggings | Khaki (988) |
| Webbing | Green Grey (886) |
A trick I’ve learnt with camouflage uniform painting is once you’ve finished the pattern then go over the whole figure with a light dry brush of the original base colour. This should help blend in the pattern and prevent it from being to ‘loud’.
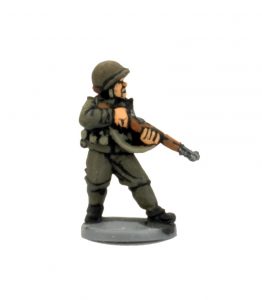 The M1943 uniform. This uniform is what usually springs to mind when thinking of the classic image of the wartime G.I. It was the end result of U.S. Army research and testing to develop a purpose made combat uniform that could be worn anywhere, anytime. The guiding principal was the ‘layered approach’ where you start with the basic uniform of Shirt and trousers then added jackets, liners, hoods etc to suit as the weather got colder or wetter. This uniform, with a few modifications, has evolved into the current uniform worn by the U.S. military and many other countries today.
The first issue was to the G.I.’s taking part in the Anzio landings in Italy and the new uniform proved itself an immediate success. Due to internal squabbling however, between the ETO command and the U.S. based command the issue of this much improved uniform was delayed until pretty much the end of the war for the troops already serving there. Most new troop formations that were shipped to the ETO after mid 1944 were wearing the new uniform but the rest had to soldier on through one of Europe’s worst winters wearing the older and less weather resistant uniform. With the new uniform also came ‘Shoe Pac’ which were an attempt to make the G.I.’s boots waterproof. They were a rubber and canvas overshoe that slipped over the boot and had metal clips to tighten. They were black in colour.
| Uniform Part | Vallejo Colour |
| M1943 uniform | US Dark Green (893) |
| Shoepacs | German Grey (995) |
| Webbing | Green Grey (886) |
 Tank crews had their own specialist uniforms issued to suit their requirements, namely bouncing around inside a tank! The most obvious symbols of the Tanker are the Windcheater jacket, which was highly sought after by all G.I.’s, and the M1942 Armoured forces Helmet. This Tank crewman has a windcheater jacket and a Tankers helmet.
| Uniform Item | Vallejo Colour |
| Windcheater | Khaki (988) |
| Helmet | Flat Brown (984) |
The standard U.S helmet became popular with tank crews as the M1942 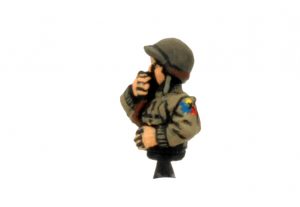 Tankers helmet offered no ballistic protection whatsoever. Also as the M1943 uniform became available Tankers were issued it as well.
| Uniform Part | Vallejo Colour |
| Helmet | Olive Drab (887) |
| Jacket | Khaki (988) |
Contrary to popular belief, if you’ve chosen an American force, you have a wide selection of paint schemes to choose from. Be it a ‘Gypsy’ mixture for a veteran unit or ‘uniform’ appearance for a freshly landed bunch of Greenhorns enjoy your painting and gaming.
with Andrew Haught
V4 Late War is here with loads of ways to get into playing Flames Of War— so where do you start? Well, if you want to just get a feel for the rules the FURY is an amazing box set for you, or if you want to get into the game with a friend, Hit the Beach gives you two awesome armies to play against each other. If you have some idea of what force you want to run, then picking up the corresponding Starter Force box set is what you want to do. This article covers the Soviet Starter Force but if you want to learn about the other three Starter Forces, there’s more info in previous posts.
This Starter Force gives you a lot of stuff to play around with right away, and like all the V4 boxsets you get a lot for your money. The British Starter Force has a total 17 armoured vehicles, a full 4-gun artillery battery, and an infantry platoon, with the whole army adding up to 82 points using the Fortress Europe book, the box can also be used for the upcoming D-Day: British book so it’s a great core set to pick up for players who want to play the British throughout the V4 journey. On top of models you will get a complete A5 rulebook, Start Here booklet, and your Unit cards, so you can start playing games as soon as you’re done building your force.
In The Box
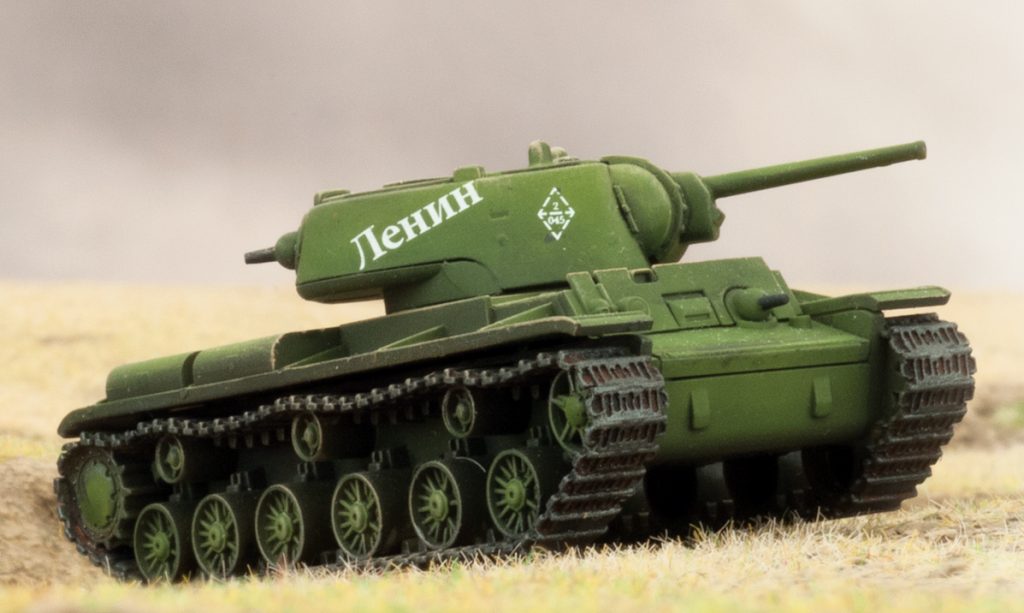
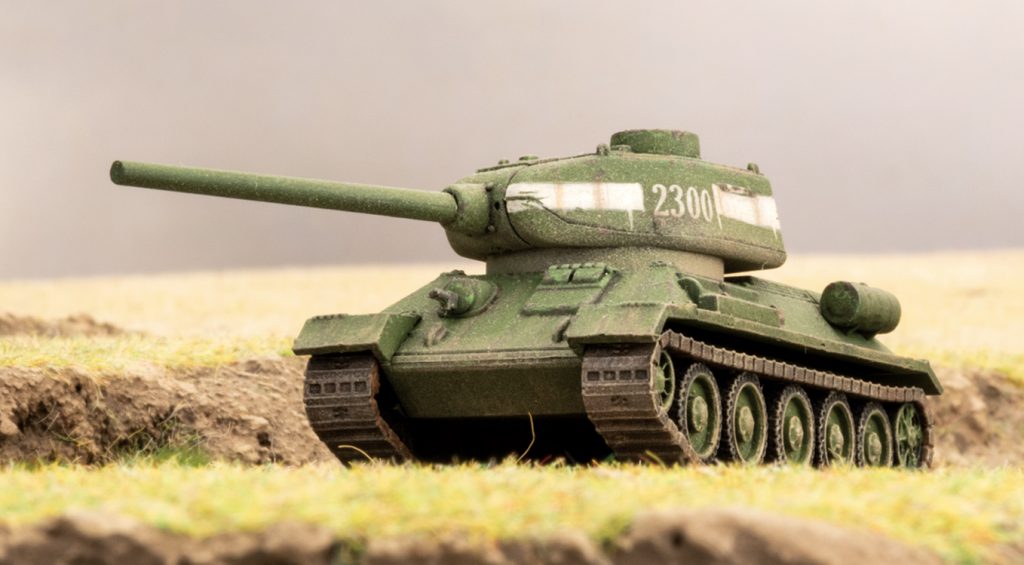
T-34 Tank Battalion HQ with 1x T-34 (76mm) Tank (3 Points)
T34 Tank Company with 5x T-34 (76mm) Tanks (15 Points)
T-70 Tank Company with 5x T-70 (45mm) Tanks (5 Points)
KV-1 Guards Heavy Tank Company with 3x KV Tanks (12 Points)
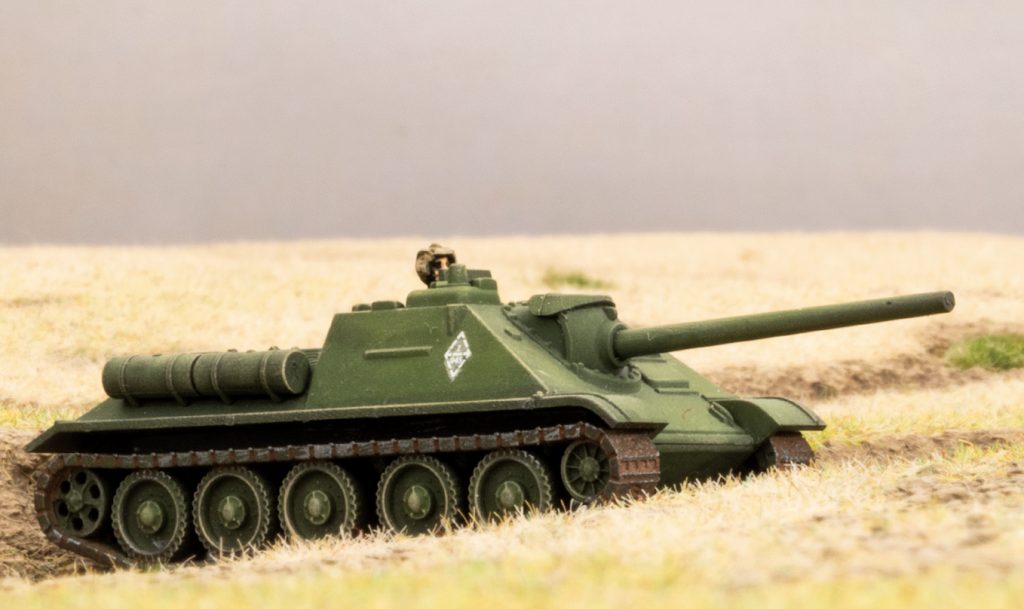
S085 Tank-Killer Battery with 4x SU-85 (85mm) Assault Guns (23 points)
Katyusha Guards Rocket Battery with 4x Katyusha Rocket Launchers (8 Points)
Total 66 Points
Creating a 100 Point List
This set gives you a ton to work with but Soviets are points-affordable, so we will need to add a few more things to make it a full 100 point list, but let’s keep it focussed. I think after playing around with your Starter force you may get a good feel of what you want to add but for those who want to start off with a full 100 points I would pick up five more T-34s, some flame tanks, and an 82mm Mortar platoon and you will be good to go. To get to 100 points you just need to add the following:
T34 Tank Company with 5x T-34 (76mm) Tanks (15 Points)
KV-8 Flame-Tank Company 3x KV-8 (45mm) Tanks (15 Points)
82 Mortar Company with 6 82mm Mortor Teams (4 Points)
Total 34 Points
Now, I would run the T-34s in platoons of 5 and have two working platoons, but you can combine them into a single ten tank platoon if you want the numbers.
Army Tactics
This army is pretty medium armour heavy, so you want to maximize your speed and numbers to hit tanks on the side amour and use your massive numbers to overrun any dug in troops with the sheer amount of firepower you can bring to bear on them. Your SU-85s are your strongest Anti-Tank assets so you want to place them somewhere that they can hit your opponent’s heavy armour no matter where they deploy them. Your artillery combined can decimate any dug in guns and infantry guarding objectives, while your heavy KV-1 can slowly move towards the objectives to take them.
Your T-70 light tanks are perfect to hunt and kill any lightly-armoured tanks your opponent has or to hold an objective against advancing infantry.
Hobby League
If you are looking to get in on the Hobby League at your local store or club the Starter Forces are ideal starting armies for the league. If you add the units I talked about before in the Creating a 100 Point List section you can easily use it for the hobby league.
If you do not know what the hobby league is or want to learn more check out our video about the Hobby League above.
The main goal of the Hobby league is to create a Flames Of War community where players can come together to play games and work on their armies. To this end players are rewarded for hitting certain painting goals throughout the league. The first month players aim to paint 50 points, at the end of the second month players will aim to finish another 25 points and at the end of the third month players aim to finish their final 25 points and end the League with a fully painted 100 point army. The League also feeds into the upcoming TableTopGaming Global campaign, so if you finish painting your army for the League you will be ready to participate in the Global Campaign.
Month 1 has a 50 point goal; it also ends in a 50 point tournament, so you will want to focus on your core formation to make sure you have a legal list to run in the tournament. For this I would paint the following units first,
T-34 Tank Battalion HQ with 1x T-34 (76mm) Tank (3 Points)
T34 Tank Company with 5x T-34 (76mm) Tanks (15 Points)
T-70 Tank Company with 5x T-70 (45mm) Tanks (5 Points)
82 Mortar Company with 6 82mm Mortar Teams (4 Points)
S085 Tank-Killer Battery with 4x SU-85 (85mm) Assault Guns (23 points)
Month 2 you are looking to paint another 25 points, you just painted core so let’s work on some more support and some heavy tanks.
Extra T-34s to add to your existing T34 Tank Company with 2x T-34 (76mm) Tanks (6 Points)
KV-1 Guards Heavy Tank Company with 3x KV Tanks (12 Points)
Katyusha Guards Rocket Battery with 4x Katyusha Rocket Launchers (8 Points)
This is a total 26 points (one over but it will count towards your next month so it’s all good)
For the Final month I am keeping it simple, this time you just have to paint up six tanks. This is what I am planning on painting for the last month,
KV-8 Flame-Tank Company 3x KV-8 (45mm) Tanks (15 Points)
Your remaining T-34s with 3x T-34 (76mm) Tanks (9 Points)
 At the end of month three you have another tournament and this time it’s a 100 point tournament so you will get to use your full army and get used to how it works in games. After that the Global TableTopGames Campaign begins having you and your friends fighting over Europe, you club or
store with rest of the world will be sending in their game results to contribute on the global scale making this one of the biggest campaigns you will ever participate in.
My final word of advice is to take time to enjoy painting your models your way and to learn as much as you can from others in the league to get the most out of the Flames Of War community.
with Andrew Haught
V4 Late War is here with loads of ways to get into playing Flames Of War— so where do you start? Well, if you want to just get a feel for the rules the FURY is an amazing box set for you, or if you want to get into the game with a friend, Hit the Beach gives you two awesome armies to play against each other. If you have some idea of what force you want to run, then picking up the corresponding Starter Force box set is what you want to do. This article covers the American Force but if you want to learn about the other three Starter Forces, there will be more info to come.
This Starter Force gives you a lot of stuff to play around with right away, and like all the V4 boxsets you get a lot for your money. The British Starter Force has a total 17 armoured vehicles, a full 4-gun artillery battery, and an infantry platoon, with the whole army adding up to 82 points using the Fortress Europe book, the box can also be used for the upcoming D-Day: British book so it’s a great core set to pick up for players who want to play the British throughout the V4 journey. On top of models you will get a complete A5 rulebook. A Start Here booklet, and your Unit cards, so you can start playing games as soon as you’re done building your force.
This American Box gives you a lot of stuff to play around with right away, like all the V4 boxsets you get a lot for your money. The American Starter Force has a total of 20 vehicles, and a full Amoured Rifle platoon, with the whole army adding up to 78 points using the US-D-day book. On top of models you will get a complete A5 rulebook, a Start Here booklet, and your Unit Cards, so you can start playing games as soon as you’re done building your force.
In The Box
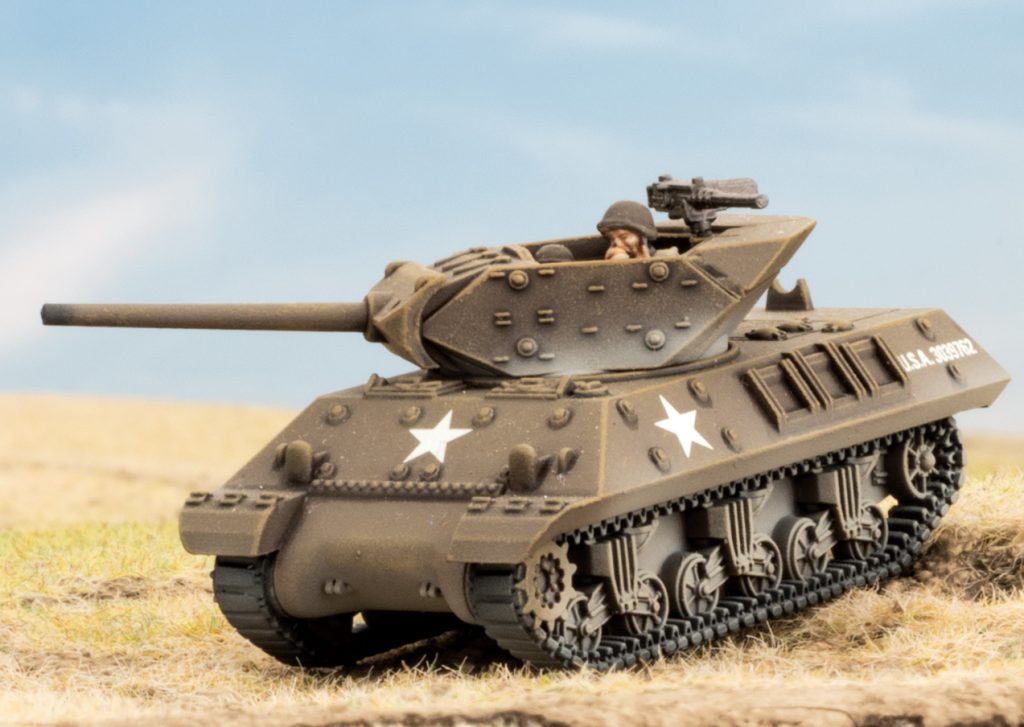
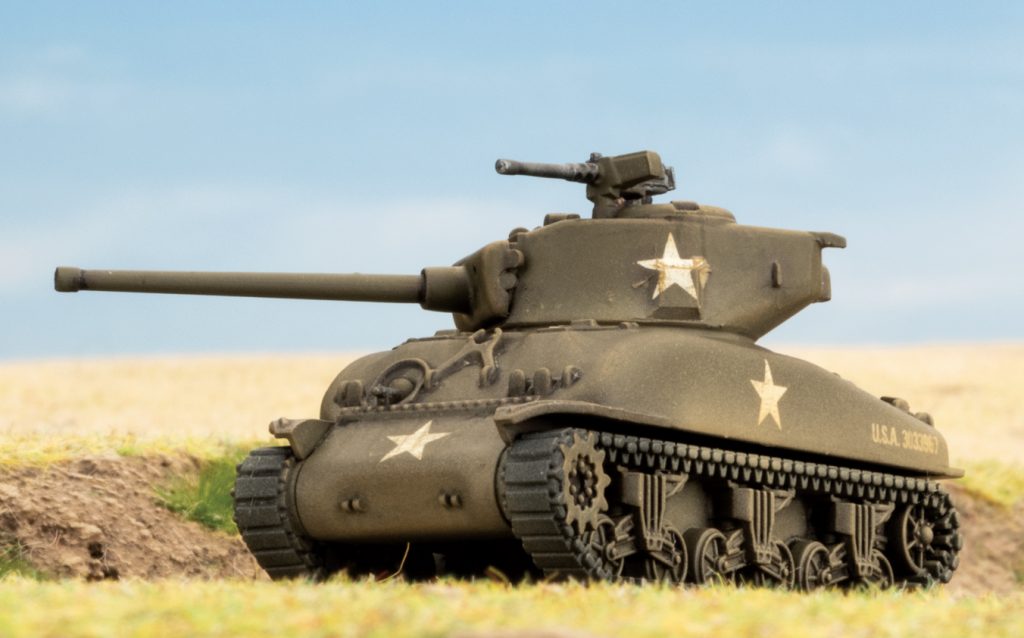
M4 Sherman Tank Company HQ with 2x M4 Sherman (75mm) Tanks (9 Points)
M4 Sherman Tank Platoon with 3x M4 Sherman (76mm) Tanks (17 Points)
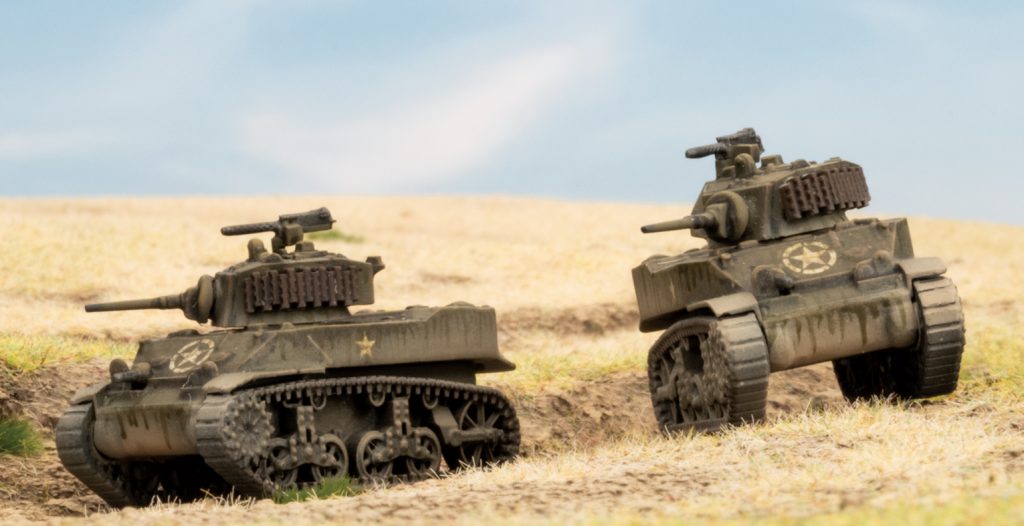
M5 Stuart Tank Platoon with 3x M5 Stuart (37mm) Tanks (7 Points)
Armoured Rifle Platoon at Full Strength (19 points)
M10 3-inch Tank Destroyer Platoon with 4x M10 (3-inch) Tanks (18 Points)
Priest Battery with 3x M7 Priest (105mm) Tanks (8 Points)
Total 78 Points
Creating a 100 point list
This box gives you your core force, so there are only a few more things you need to add to make it a full 100 point list. I think after playing around with your Starter Force you may get a good feel for what you want to add, but for those who want to start off with a full 100 points I would add another Sherman platoon, this time 4 Sherman (75mm) and some Recon with the Greyhound unit, this only gets us to 99 points, so adding a 1 point Command Card (D-Day: American) gets us to a total of 100 points . So to get to 100 points you just need to add the following,
M4 Sherman Tank Platoon with 4x M4 Sherman (75mm) Tanks (16 Points)
M8 Greyhound Cavalry Patrol with 2x Greyhounds and 2x Jeeps Tanks (5 Points)
Lucky Command Card (1 Point)
Total 22 Points
Army Tactics
The Sherman tanks will form the core of the list, putting down fire and threatening your opponent’s defences. The M10s are your tank-hunters, used to hunt down heavy tanks. The Stuarts make a perfect screening unit, they are fast and have just enough anti-tank to threaten other light tanks and armoured transports while having enough machine gun fire to keep infantry in their foxholes. Tanks are great at pushing the attack, but when it comes to defending an objective or holding a recently cleared objective, infantry are key. The Armoured Rifle Platoon is an army unto itself, and once dug in on an objective it becomes one hard nut to crack.
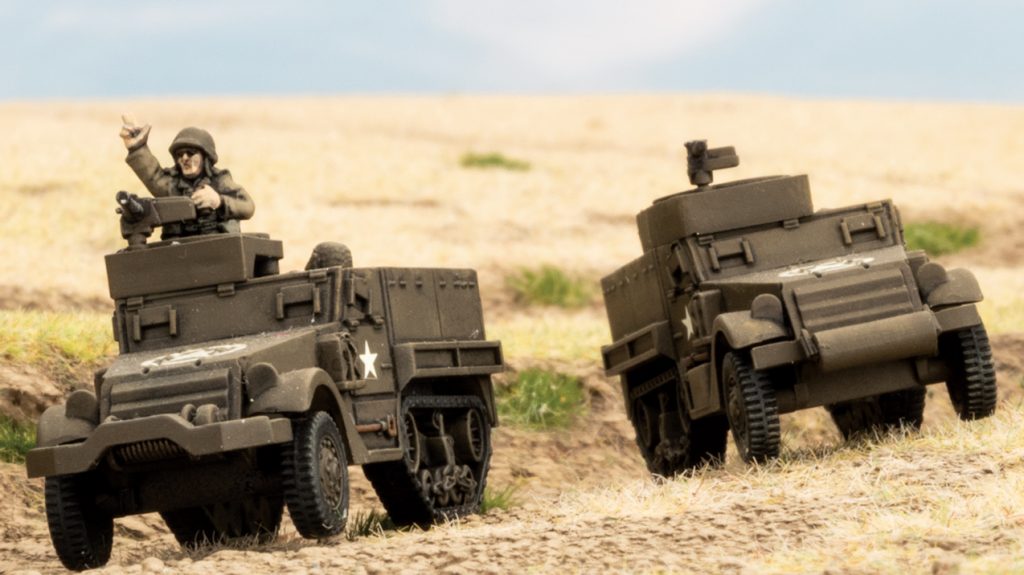
For support you have a Cavalry Recon Patrol, a great recon unit that will give the force some forward momentum at the start of the game, then shifting into a support role helping the Stuarts to keep enemy infantry units pinned down. The Priests are infantry and gun team killers and if zeroed in on an objective at the start of the game will wreak havoc on enemy forces defending that objective.
Hobby League
If you are looking to get in on the Hobby League at your local store or club the Starter Forces are ideal starting armies for the league. If you add the units I talked about before in the Creating a 100 Point List section you can easily use it for the hobby league.
If you do not know what the hobby league is or want to learn more check out our video about the Hobby League above.
The main goal of the Hobby league is to create a Flames Of War community where players can come together to play games and work on their armies. To this end players are rewarded for hitting certain painting goals throughout the league. The first month players aim to paint 50 points, at the end of the second month players will aim to finish another 25 points and at the end of the third month players aim to finish their final 25 points and end the League with a fully painted 100 point army. The League also feeds into the upcoming TableTopGaming Global campaign, so if you finish painting your army for the League you will be ready to participate in the Global Campaign.
Month 1 has a 50 point goal; it also ends in a 50 point tournament, so you will want to focus on your core formation to make sure you have a legal list to run in the tournament. For this I would paint the following units first,
Month 2 you are looking to paint another 25 points, you just painted core so let’s work on some more support and some Anti-Tank,
For the Final month I am focussing on the infantry and light armour,this will be a shift form the tanks you been painting but it will fill up those last points. This is what I would be planning on painting for the last month,
Now at the end of month three you have another tournament this time it’s a 100 point tournament so you will get to use your full army and get used to how it works in games. After that the Global TableTopGames Campaign begins having you and your friends fighting over Europe, you club or store with the rest of the world will be sending in their game results to contribute on the global scale making this one of the biggest campaigns you will ever participate in.
My final word of advice is to take time to enjoy painting your models your way and to learn as much as you can from others in the league to get the most out of the Flames Of War community.
with Andrew Haught
V4 Late War is here with loads of ways to get into playing Flames Of War— so where do you start? Well, if you want to just get a feel for the rules the FURY is an amazing box set for you, or if you want to get into the game with a friend, Hit the Beach gives you two awesome armies to play against each other. If you have some idea of what force you want to run, then picking up the corresponding Starter Force box set is what you want to do.
This German Box gives you a lot of stuff to play around with right away, like all the V4 boxsets you get a lot for your money. The German Starter Force has a total of 14 vehicles, 2 big 8.8 AA guns, a rocket artillery battery and a full Grenadier platoon, with the whole army adding up to 95 points using the German D-Day book. On top of models you will get a complete A5 rulebook, a Start Here booklet, and your Unit cards, so you can start playing games as soon as you’re done building your force.
In The Box
Panzer IV Tank Company HQ with 2x Panzer IV (7.5cm) Tanks (11 Points)
Panzer IV Tank Platoon with 3x Panzer IV (7.5cm) Tanks (16 Points)
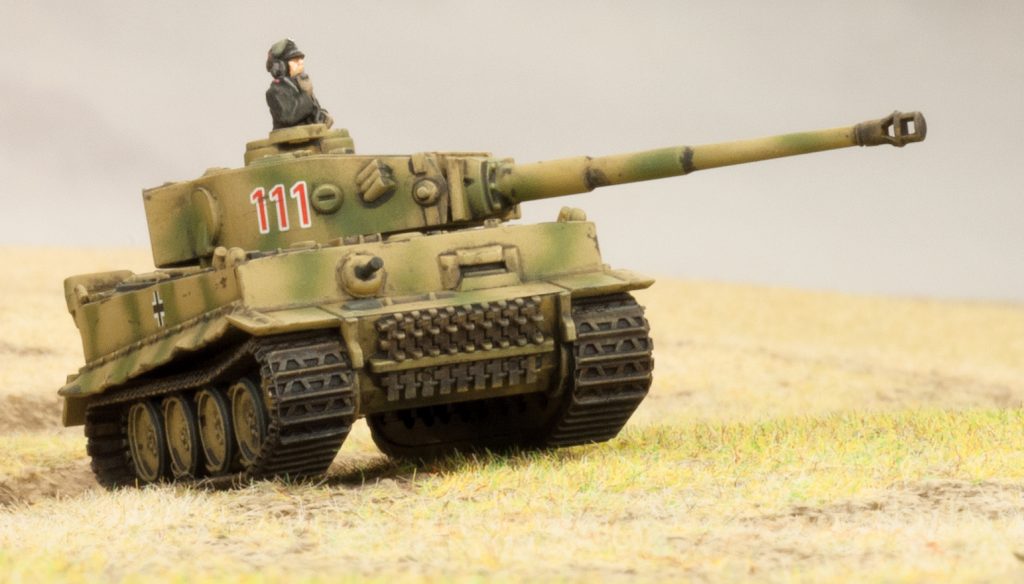
Tiger Tank Platoon with 2x Tiger (8.8cm) Tanks (24 points)
Armoured Panzergrenadier Platoon at Full Strength (12 Points)
Fallschirmjäger Stug Assault Gun Platoon with 3x StuG (7.5cm) Assault Guns (17 Points)
15cm Nebelwerfer Rocket Battery with 3x 15cm Nebelwerfer Rocket Launchers (9 Points)
8.8 Heavy AA Platoon with 2x 8.8cm AA Guns (6 Points)
Total 95 Points
Creating a 100 Point List
This box gives almost a full 100 point list, only 5 points shy, so there is not much you need to add to make it a full 100 point list. I think after playing around with your Starter force you may get a good feel for what you want to add but for those who want to start off with a full 100 points I would simply add a Puma Scout Platoon, this only gets us to 99 points, so adding a 1 point Command Card (starting with D-Day: German) gets us to a total of 100 points. So to get to 100 points all you need to add is the following,
Puma Scout Platoon with 2x Puma (5cm) Tanks (4 Points)
Lucky Command Card (1 Point)
Total 5 Points
Army Tactics
This army is well rounded with artillery, infantry, heavy anti-tank guns, and a great selection of tanks. With the core of your force I would recommend attacking with this force. Your mix of tanks gives you loads of good options to knock out your opponent’s tanks. The Tigers being some of your best anti-tank should focus more on your opponents heavy armour, supported by the 8.8 AA guns. Use your artillery to soften your opponent’s defences and use your German Halftrack infantry and Tanks to assault their objectives and to win the game.
Hobby League
If you do not know what the hobby league is or want to learn more check out our video about the Hobby League above.
The main goal of the Hobby league is to create a Flames Of War community where players can come together to play games and work on their armies. To this end players are rewarded for hitting certain painting goals throughout the league. The first month players aim to paint 50 points, at the end of the second month players will aim to finish another 25 points and at the end of the third month players aim to finish their final 25 points and end the League with a fully painted 100 point army. The League also feeds into the upcoming TableTopGaming Global campaign, so if you finish painting your army for the League you will be ready to participate in the Global Campaign.
Month 1 has a 50 point goal; it also ends in a 50 point tournament, so you will want to focus on your core formation to make sure you have a legal list to run in the tournament. For this I would paint the following units first,
Panzer IV Tank Company HQ with 2x Panzer IV (7.5cm) Tanks (11 Points)
Panzer IV Tank Platoon with 3x Panzer IV (7.5cm) Tanks (16 Points)
Tiger Tank Platoon with 2x Tiger (8.8cm) Tanks (24 points)
Strictly-speaking, this is 51 points but fine enough for the 50 point tournament as it is close enough, it will be up to your event organizer to make the final call on these things but all the core set 50 point armies listed in these articles are fine to run in the Hobby league 50 point tournament.
Month 2 you are looking to paint another 25 points, you just painted core so let’s work on some more support and some Recon,
For the Final month I would focus on the last bits, tactically you can add your 1 point command card here to your list’s HQ, and this will round out your 100 point list,
Now at the end of month three you have another tournament this time it’s a 100 point tournament so you will get to use your full army and get used to how it works in games. After that the Global TableTopGames Campaign begins having you and your friends fighting over Europe, you club or store with the rest of the world will be sending in their game results to contribute on the global scale making this one of the biggest campaigns you will ever participate in.
My final word of advice is to take time to enjoy painting your models your way and to learn as much as you can from others in the league to get the most out of the Flames Of War community.
with Andrew Haught
V4 Late War is here with loads of ways to get into playing Flames Of War— so where do you start? Well, if you want to just get a feel for the rules the FURY is an amazing box set for you, or if you want to get into the game with a friend, Hit the Beach gives you two awesome armies to play against each other. If you have some idea of what force you want to run, then picking up the corresponding Starter Force box set is what you want to do. This article covers the British Starter Force but if you want to learn about the other three Starter Forces, there will be more info to come.
This Starter Force gives you a lot of stuff to play around with right away, and like all the V4 boxsets you get a lot for your money. The British Starter Force has a total 17 armoured vehicles, a full 4-gun artillery battery, and an infantry platoon, with the whole army adding up to 82 points using the Fortress Europe book, the box can also be used for the upcoming D-Day: British book so it’s a great core set to pick up for players who want to play the British throughout the V4 journey. On top of models you will get a complete A5 rulebook. A Start Here booklet, and your Unit cards, so you can start playing games as soon as you’re done building your force.
In The Box
Sherman Armoured Squadron HQ With 2x Sherman (75mm) Tanks (8 Points)
Sherman Armoured Troop with 2x Sherman (75mm) Tanks and 1x Firefly Tank (13 Points)
Stuart Recce Patrol with 3x Stuart (37mm) Tanks (8 Points)
Churchill Armoured Troop with 3x Churchill (6pdr) Tanks (12 Points)
Motor Platoon at Full Strength (7 Points)
Universal Carrier Patrol with 3x Universal Carrier (MG) Tanks (2 Points)
25 pdr Field Troop with 4x 25pdr Guns (14 Points)
M10 SP Anti-Tank Platoon with 4x M10 (17pdr) Tanks (18 Points)
Total 82 Points
Creating a 100 Point List
This box gives you a lot of what you need but you will still need to pick up a few things to get a 100 points, but not much. After playing around with your Starter force you may get a good feel for what you want to add but for those who want to start off with a full 100 points I would pick up a few more Shermans and a Firefly and you will be good to go. To get to a 100 points you just need to add the following
Sherman Armoured Troop with 3 Sherman (75mm) Tanks and one Firefly Tank (17 Points)
1 Sherman OP Observation Post with one Sherman OP Tank (1 point)
Total 18 Points
Army Tactics
This army is pretty Armour heavy, so you want to move fast and hit hard, use your Fireflies and M10 (17pdrs) to hunt your opponent’s heavy tanks while your Churchills and Shermans rush the objective. Your artillery and infantry can be left to hold your objectives or secure your flank, while the Universal Carriers and Stuarts help spear head your army forward and hit advancing enemy troops.
This list is well rounded but prefers to be on the attack, so when picking your battle plans it’s a good idea to pick attack with this army.
The Hobby League
If you are looking to get in on the Hobby League at your local store or club the Starter Forces are ideal starting armies for the league. If you add the units I talked about before in the Creating a 100 Point List section you can easily use it for the hobby league.
If you do not know what the hobby league is or want to learn more check out our video about the Hobby League above.
The main goal of the Hobby league is to create a Flames Of War community where players can come together to play games and work on their armies. To this end players are rewarded for hitting certain painting goals throughout the league. The first month players aim to paint 50 points, at the end of the second month players will aim to finish another 25 points and at the end of the third month players aim to finish their final 25 points and end the League with a fully painted 100 point army. The League also feeds into the upcoming TableTopGaming Global campaign, so if you finish painting your army for the League you will be ready to participate in the Global Campaign.
Painting Goals
Having painting goals can be daunting, but luckily the League makes it easier by creating a community of painters helping each other out and supporting one another during the process. Painting an army is rewarding and is a fun relaxing thing to do, whether you are alone or with a group of friends. To help those trying to figure out how to break up your 100 point army for the League I put together my guide on what I would paint to reach each month’s goals.
Month 1 has a 50 point goal; it also ends in a 50 point tournament, so you will want to focus on your core formation to make sure you have a legal list to run in the tournament. For this I would paint the following units first,
Sherman Armoured Squadron HQ With 2x Sherman (75mm) Tanks (8 Points)
Sherman Armoured Troop with 2x Sherman (75mm) Tanks and 1x Firefly Tank (13 Points)
Start Recce Patrol with 3x Stuart (37mm) Tanks (8 Points)
Universal Carrier Patrol with 3x Universal Carrier (MG) Tanks (2 Points)
M10 SP Anti-Tank Platoon with 4x M10 (17pdr) Tanks (18 Points)
1 Sherman OP Observation Post with one Sherman OP Tank (1 point)
Month 2 you are looking to paint another 25 points, you just painted the tanks up so let’s work on some infantry and gun teams. This is what I would paint up for month 2,
Motor Platoon at Full Strength (7 Points)
25 pdr Field Troop with 4x 25pdr Guns (14 Points)
A spare Sherman to add to your Sherman Armoured Troop (4 Points)
For the Final month I am keeping it simple, this time you just have to paint up six tanks. This is what I am planning on painting for the last month,
Sherman Armoured Troop with 2x Sherman (75mm) Tanks and 1x Firefly Tank (13 Points)
Churchill Armoured Troop with 3x Churchill (6pdr) Tanks (12 Points)
Now at the end of month three you have another tournament this time it’s a 100 point tournament so you will get to use your full army and get used to how it works in games. After that the Global TableTopGames Campaign begins having you and your friends fighting over Europe, you club or store with the rest of the world will be sending in their game results to contribute on the global scale making this one of the biggest campaigns you will ever participate in.
My final word of advice is to take time to enjoy painting your models your way and to learn as much as you can from others in the league to get the most out of the Flames Of War community.
with Andrew Haught
Join Andrew as he walks you through our upcoming Hobby League! Be sure to pester your local store or club to get a copy so you and your gaming buddies can help grow a Flames Of War group in your community!
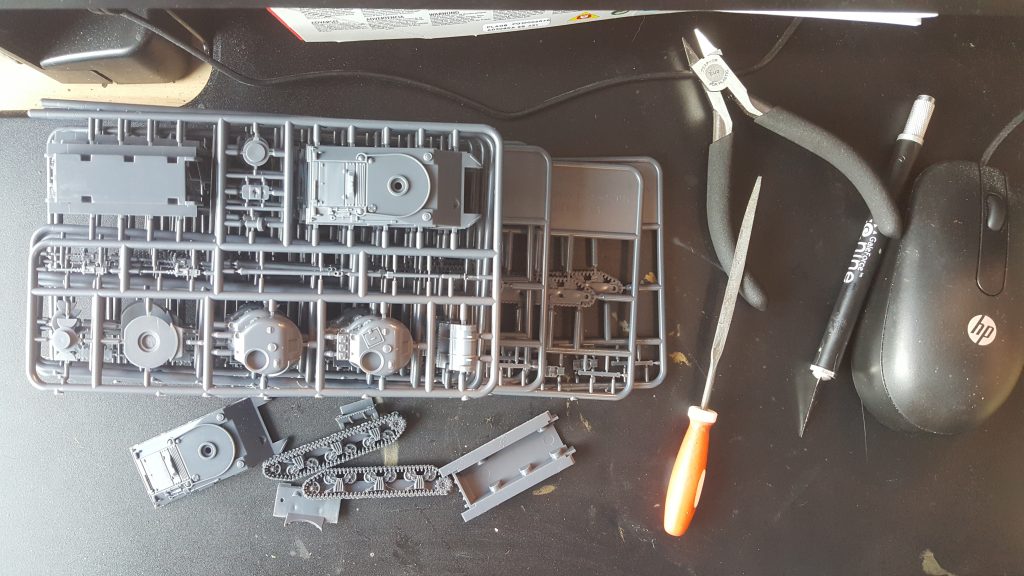
To help you get your models in tip top shape for the table, we teamed up with Pete the Wargamer to bring you some easy to follow tutorials using all the good info from Colours of War…
with Aaron Te Hira Mathie
Not being a big World War 2 ‘guy’ I don’t have an army to expand upon.
However, I have set myself a little challenge for the launch day.
I’m going to try and complete a platoon of British Sherman tanks
Over the course of the day we shall see how far I get.
with Aaron Te-Hira Mathie
![]()
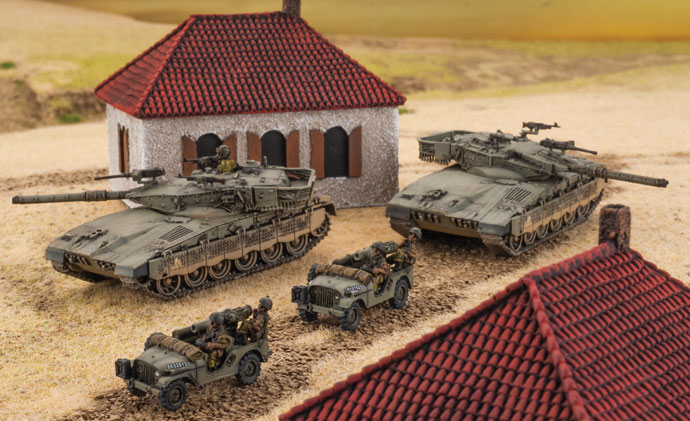
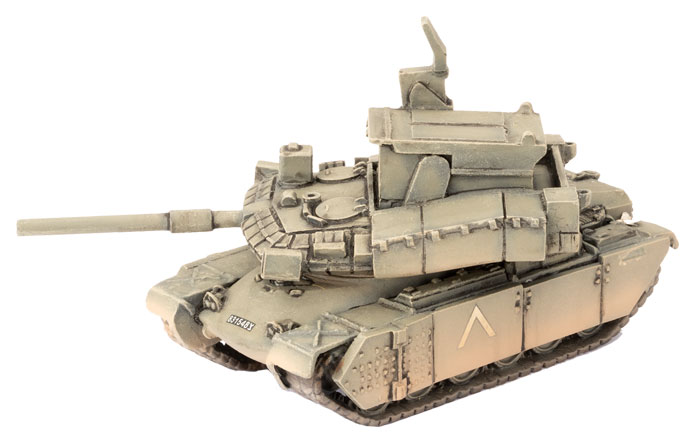
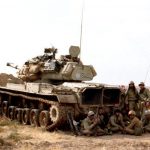
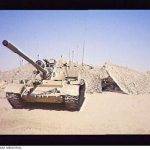
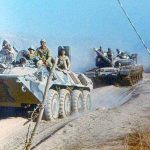
With the release of Oil War we at Battlefront are taking a trip back to the desert. In this book we seek to examine the first days of a major conflict between the two superpowers of the Cold War era spreading out to encompass Western Asia. As part of this enlarging of the conflict as we have envisioned it, we examine four armies, Israel, Iran, Iraq, and Syria.
The book sets down some organisational structures and basic philosophies of use that each of these armies employed based on their long or on-going experiences of fighting in this inhospitable environment. They determine everything from what equipment and tactics they use, to how they paint their military equipment.
 Twentieth century warfare is dominated by ranged combat, as such, the problem has three prongs. Spotting a target, identifying the target, and ensuring the target is within range of the weapon system/s at your disposal.
The battlefield of the 1980s is an interesting cross-section of emerging technologies that seek to make the three tasks above more simple, and older ideas and technologies that are more tried and tested.
Items like Thermal Imagers and Laser Rangefinders do indeed make the problems of spotting, identifying, and ranging potentially more simple, however at the time these pieces of technology were bulky, expensive, and difficult to maintain.
So while parts of an army might have access to some or all, the vast majority of troops still only have the Mk.1 eyeball, and this is where camouflage comes in.
So what is the basic purpose of camouflage?
Some of you already know, but some will not.
The answer is that camouflage, especially with regards to large pieces of equipment (for instance a Main Battle Tank), is used to fool the human brain into thinking that the object being viewed is not there, something else or at a different distance than it is.
 Some environments make this task more simple as the terrain comprises of a large number of obstacles that can be used to obscure the target in part, or in total.
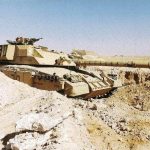
These types of terrain features are not nearly as prevalent in a desert.
The terrain in desert environments is often marked by flat open areas providing little in the way of natural cover and concealment. Therefore the paint job on your Tank is fairly unlikely to fool anyone into thinking that it is a small hill or clump of trees as it might in Europe.
The only way that this is going to work in an arid desert environment is to bury the item in the sand, while this is a workable option for static defences it is not an ideal situation if mobile warfare is the name of the game.
The armies examined in Oil War approach the problem from two directions.
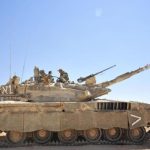
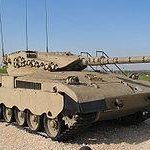
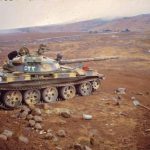
Israel and Iran choose to paint their ground based military equipment in a drab light green grey colour. The reason is that these armies are expecting to fight in varied terrain, from the desolate Negev desert to the more temperate Golan Heights and Southern Lebanon in the case of the IDF.
Therefore they have decided to go with a neutral colour that will not stick out in either type of environment when clean, and with local dust will do a good job of blending in, thus rendering the vehicle more difficult to detect.
Iran/Israeli Colours
This approach does a good job of concealing, therefore making the task of locating the target more of a challenge, however it does not address the problems of target identification and ranging to the same degree.
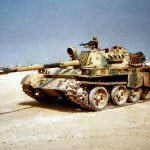
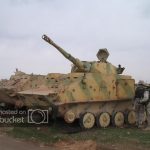
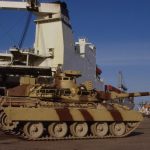
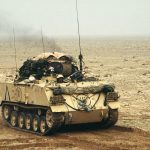
Iraq and Syria approach the issue by employing camouflage patterns.
These are more terrain specific and more time consuming to apply, but do break up the shape of the piece of equipment more effectively, therefore making accurate target identification and ranging more difficult, at the expense of being able to be used in multiple environments without being changed.
Iraqi Colours
Other armies briefly mentioned in the book generally approach the problem in much the same way.
Syrian Colours
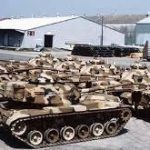
So for instance, the US forces for the most part were deploying for Exercise BRIGHTSTAR in Egypt, therefore would for the most part be using the Grey Desert version of MERDC, which consists of a sand coloured base, overpainted with field drab, earth yellow and black.
US Colours

Whereas the Soviet forces are depicted as using their ubiquitous drab green.
However, this does not Have to be the case. Team Yankee takes place in an alternate reality, so you could paint your Soviet models in the green and beige camouflage pattern used by them during their military involvement in Afghanistan during the 1980s, equally US forces could be using the all over light sand colour as seen during the 1991 Gulf War, as could your Iraqi forces.
Soviet Colours

If you do choose to paint your forces in camouflage, it is a good idea to see if an existing template exists. If so, use that if historical accuracy is your jam.
French Colours

This also generally means that the hard work of figuring out colour placement and shape, in order to best break up the shape of the piece of equipment, has already been done.
British Colours

However, in the case of camouflage schemes that have been applied without a template (for instance Iraq or Syria), a good way to approach the situation, is to either find historical photographs to help give you a general look and feel, applying basic camouflage principles (for instance ensuring that no surface is entirely one colour) or a combination of both. In this way you will be able to ensure a more lifelike appearance to your miniatures.