Bloody Omaha Mini Campaign,
Game 1 Andrew Vs Ashleigh
Battle Report by Andrew
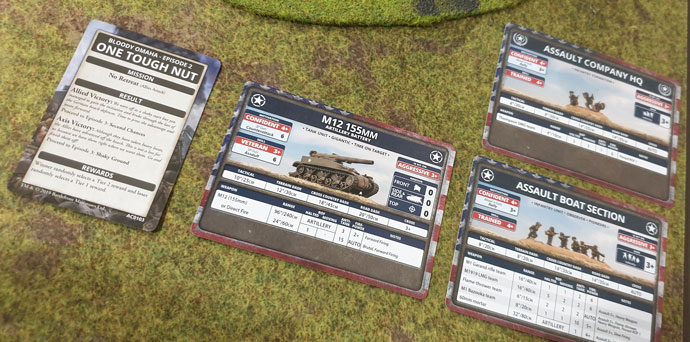
Today we decided to play a quick day long Bloody Omaha Ace Campaign! The plan was to use the Bloody Omaha deck to play three games, using our hobby league 50 point armies, playing among the NZ league members that I could. We decided to roll off the first mission in the campaign as we only had time to play three games. The Germans won the roll so I started my first game against Ashleigh (she was playing for the Germans). Her British army consisted of nothing but armor, a nasty match up for my 50 point 29th infantry division Assault Company. We were both running our 50 point hobby league armies.
Setting up the game we were playing the Episode 2 card, One Tough Nut. This mission is No Retreat! Since both Ashleigh and I are playing Allied forces we rolled off to see who was defending, luckily I am defending. I quickly choose to defend the city thinking that was my best bet. The game started off as you would think, the tanks moved forward and took pot shots at range against my infantry. On my first turn I ambushed my 155 artillery to hit Ashleigh’s Churchill tanks, I managed to knock out one. Luckily Ash had one Churchill that stayed bailed and I was able to weather the return fire only suffering a few bailed out artillery tanks.| The game went on trading shoots with not much changing; I started moving my infantry through the buildings from reserves. This lasted until one turn when Ashleigh killed 5 infantry teams in one platoon with one round of shooting form her Carriers! I knew I would have to move! My next turn saw my artillery take out Ashleigh’s Churchill tanks and my bazookas getting lucky killing two Stuarts with moving shoots! Both the Churchill and Stuart tanks ran away! In reaction Ashleigh moved back and started shelling me from range, I responded by taking pot shots with artillery bombardments among her tanks, the third turn of bombardments I hit four of her tanks, all but one of them rolled a 1! With firepower 2+ my artillery took out the core of Ashleigh list, and it was just a matter of a few more morale rolls before her tanks retreated off the table. A victory for my 29th infantry Division. I would move on to my next game with Luke, due to having just played Hasty attack in our last game we played, Luke and I decided to play Dust Up instead.
Bloody Omaha Mini Campaign,
Game 2 Andrew Vs Luke
Battle Report by Andrew I also got to play in game two, this time I am playing against Luke. He brought his panzer IVs and again I was facing an all tank list.
I decided to do my normal reserves at 50 points for this match up even though I didn’t get to put my 155s in ambush. I stuck my two infantry units around the objectives and my 155 in the back comer prepping for an artillery strike.
Luke places a single Panzer IV unit in his deployment area and I was suddenly filled with hope, I only had to knock out one tank unit, then I could get to his objectives with my reserves! Turn one went to Luke and he rushed me, I was not expecting that, but I prepared myself for conflict sooner than I thought.
Turn one nothing really happened on turn two I saw that Luke was rushing for my 155s. He moved behind the church making hard for me to direct fire at him. I instead fired on him with infantry I had in the town, they moved forward through the buildings and opened up on his tanks, doing nothing. “Well”, I thought “That’s my artillery dead next turn”. Luke next turn had him wanting to Blitz around the building, 4 Panzer IVs would make quick work of my FA0 artillery tanks. But he failed the roll and then failed to hit me at all! Luck was on my side and I decided to open up on his tanks with my 155s! I knocked out two tanks! I really could not have asked for more.
Next turn I only lost two of my 155s, a bargain my 2 artillery for two Panzer IV tanks. On my turn I was able to bring in an infantry platoon from reserve, and they killed the last two tanks! Hurrah, now to deal with the rest of Luke’s tanks coming in from the other side of the table! Luke’s next turn he move his HQ and his other panzer 4 platoon up and destroyed the last of my 155s. ouch well it isup to my bazookas to hold him off.
On my turn I moved one of my infantry platoons to reinforce the forward objective and got one more reserved that made a beeline to Luke’s table edge getting 2 turns away from capturing the objective!
Feeling the pressure Luke assaults my infantry and two of me bazookas bail two of his tanks on their way in. He misses, my bazookas miss on their assault. Luke fails his counter assault and I take his two bailed tanks! His company command moves in to assault and my bazookas straight up killed both of Luke’s HQ tanks, winning me the game, and earning themselves a nice medal to boot! Another Victory for the 29th Infantry Division! We moved on from the Second Chances card to Rat Catchers, for this game Phil and Cameron are facing each other, Phil playing for the Allies and Cameron for the Axis. I’ll leave it to Phil to write up that final battle report.
This week we take a closer look at the D-Day: Global Campaign Battlefront and the crew over at OnTableTop are running later this year. We have done several campaigns with OnTableTop in the past for Team Yankee and those who played in those will recognize this campaign- even though there are a few key differences. The campaign itself will have players fighting their way through the battles of Normandy taking over Routes and securing Areas that will earn their side a bonus when fighting in that route during the next week.
This Global Campaign kit is flexible and can be played during the online campaign, linking both your store’s campaign and the online campaigns together; or it can be played offline at any time using just the campaign kit. Each kit will have a ruleset, a campaign map, recruitment posters, and a set of stickers to mark your progress.
The online part of the campaign will link gaming communities from across the world together to fight over a global map. Along with recording your games and adding your side’s victories you can also write up your battle reports and share them with the online community, earning cool achievements and giving your side even more of an edge.
Did I say edge? Well, here is a non-obvious segue way into talking about Tactical Edge cards! Those who are participating in the Hobby League you will earn Tactical Edge cards to use during this campaign. These cards give you a one use boost for any game you play during the campaign, giving you an “edge” in your games. If you didn’t take part in the Hobby League then you don’t have to worry about these cards, unless your opponent has, then be afraid! Be very afraid!
Just kidding, the cards are cool and have cool effects, but none of them are game-breaking on their own, so if you don’t have them and your opponent does it’s not the end of the world.
Well that’s it for our first look at the Global Campaign, later on we will go even more in depth on what’s in the campaign kits and we will go over how the campaign will work. For now why not join in the global discussion over on our Facebook forums and let us know what side you will be representing in the global campaign.
D-Day: German gives contains Formations and Command Cards for representing the Fallschirmjäger forces present in Normandy during the Allied Invasion of France. This article covers the history of those key units so you have all the info you need to model your FJ force on one of these historical forces.
The best German infantry units based in France in 1944 were the regiments of the Fallschirmjägerdivisions or parachute divisions. Although they were actually Luftwaffe troops, these units were by this time in the war, tactically subordinated to Army command.
Towards the end of 1943, Hitler had approved a plan proposed by Göring to rapidly expand the size of the Fallschirmtruppen.
Up until this point in time the German Airborne forces consisted of 2 Parachute Divisions (1. and 2. Fallschirmjägerdivision) which had formed the XI Flieger Korps. Under Göring’s ambitious scheme, these two units would provide cadres to form two more airborne division, the 3. and 4. Fallschirmjägerdivisions.
The 1st and 4th Airborne Divisions would together become I. Fallschirm-Korps (I Parachute Corps) while the 2nd and 3rd Divisions would constitute II. Fallschirm-Korps (II Parachute Corps), two parachute armies with an anticipated strength of 100,000 first rate soldiers, equal in status to Himmler’s Waffen SS units in recruiting, weaponry and training. 5. Fallschirmjägerdivision was then formed in March 1944 and also joined II. Fallschirm-Korps.
II. Fallschirm-Korps, commanded by General Eugen Meindl, was allocated by the Commander of the Western Theatre, Field Marshal Gerd von Rundstedt, to the Seventh Army, commanded by General Friedrich Dollmann, in Brittany. It would in May 1944 be made up of the following units:
• 2. Fallschirmjägerdivision (refitting in Koln-Wahn, Germany after recently returning from the Eastern Front – soon to be headquartered in Brest, France);
• 3. Fallschirmjägerdivision (headquarters at Huelgoal, Brittany);
• 5. Fallschirmjägerdivision (headquarters at Rennes, Brittany); and
• 6. Fallschirmjägerregiment (formally a regiment of 2. Fallschirmjägerdivision, but attached to II. Fallschirm-Korpsand based in the Lessay-Monte Castre-Carentan area)
By D-Day, Göring’s grand plan to rival the Waffen-SS was far from reality. Some units of the II. Fallschirm-Korps such as the 6. Fallschirmjägerregiment and 3. Fallschirmjägerdivision were generally well equipped and had excellent personnel.
Together they could easily be considered the most competent infantry units at von Rundstedt’s disposal and they fought with distinction throughout the campaign. 2. Fallschirmjägerdivision and 5. Fallschirmjägerdivision were by comparison, poorly trained, undermanned and badly equipped. However, they too fought with the esprit-de-corps of all Fallschirmtruppen and helped forge a combat reputation respected by all Allied opponents.
6. Fallschirmjägerregiment In October 1943, as part of the general expansion of the Fallschirmtruppen, 6. Fallschirmjägerregiment was transferred from 2. Fallschirmjägerdivision to 3. Fallschirmjägerdivision, where it was split into various cadres and deactivated.
In November 1943 the Regiment was activated again and began to reorganise in January 1944 with the goal of having the training and equipping of its troops completed within four months. As 2. Fallschirmjägerdivision was in action on the Eastern Front, 6. Fallschirmjägerregiment was subordinated directly to the Fallschirmjäger Armee.
The Regiment was organised along the same lines as a standard German Army Infantry Regiment, having three battalions, each of which was made up of three rifle companies and a heavy company. The 13th Company was a heavy mortar company, the 14th an anti-tank company and the 15th an engineer company. As of 6 June 1944 6. Fallschirmjägerregiment was arranged as follows:
6. Fallschirmjägerregiment
– Commander: Major von der Heydte
– Adjutant: Hauptmann Peiser
The total fighting strength of 6. Fallschirmjägerregiment at this time was 3,457 officers and men. This was considerably larger than an equivalent Army unit and the rifle companies of the Regiment had twice as many light machine-guns as a standard Infantry Division’s companies. The men were also of a higher quality compared with many of the other more standard units at this time. At least a third of the officers and a good portion of the non-commissioned officers were veterans, having fought in Crete, North Africa and Russia. The remainder of the men were all volunteers, with the average age across the Regiment being 17 ½ years. Morale was excellent and interestingly enough the whole Regiment was jump trained, each man having made six day-time and three night-time jumps.
The main weakness of the 6. Fallschirmjägerregiment was the same as all of the regiments and divisions of von Rundstedt’s army – they simply lacked any real transport capability. Each company in the Regiment had an average of two trucks, and the seventy trucks across the whole unit were of fifty different makes – German, French, Italian and even British.
In May 1944 the Regiment was deployed to Normandy and spread out amongst the towns at the base of the Cotentin peninsula. These were Lessay, Periers, Raids, St Georges-de-Bohon, Meautis, Baupe and Monte Castre. It was assigned to LXXXIV Corps and for supply purposes attached to 91. Luftlandedivision, an air-landing division. Together they formed the strategic reserve for the Corps.
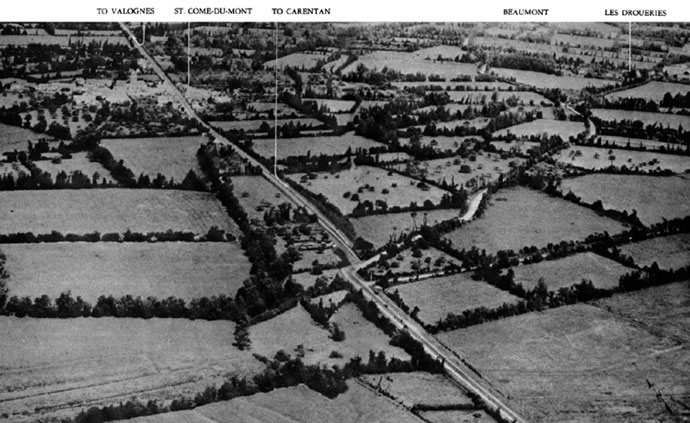
D-Day From the first moments of the airborne invasion of France 6. Fallschirmjägerregiment was in action against American paratroopers from the US 101st Airborne Division. Scattered fire-fights continued throughout the night, until about 0600 on 6 June the Regiment was given orders to assemble and clear the region between Carentan and St. Mere-Eglise of enemy troops. It was no easy task to withdraw troops currently spread out, in action and with limited transport and get them to the assembly point so it took until early afternoon for the initial movement and reorganisation to be completed.
The troops then moved through Carentan which Major von der Heydte had already determined was not occupied by American troops. 3. Bataillion initially remained behind in the town with the 13th Company, protecting the Regiment’s rear areas, while the regimental command post was set up at St. Come du Mont. 1. Bataillion moved out towards St. Marie-du-Mont while 2. Bataillion advanced on St. Mere-Eglise. At first the advances made good time, but by midnight both battalions were in heavy contact just short of their objectives. 1. Bataillion found the US paratroopers at St. Marie-du-Mont had linked up with the 4th Infantry Division moving inland from Utah beach. Earlier in the evening and again before dawn on 7 June waves of American gliders and paratroopers began to drop across the entire combat area, and the two battalions, found themselves low on ammunition and increasingly cut-off from the Regimental rear areas.
2. Bataillion successfully withdrew and attempted to link up with the now surrounded 1. Bataillion but was unable to move more than a few hundred yards east of St. Come du Mont. By now 1. Bataillion was trying to extricate itself to the south. While crossing through open fields and marshes north of the Douve River it came under fire from small groups of the 501st and 506th Parachute Infantry Regiments (PIR). The American troops were able to bluff the 1. Bataillion into believing they were facing overwhelming US strength and the majority of the battalion surrendered, with only 25 men escaping to Carentan.
Other elements of the 506th PIR, supported by 6 Sherman tanks of the 746th Tank Battalion and the guns of the 65th Armoured Field Artillery Battalion, advanced on St. Come du Mont which von der Heydte had now protected with 2 battalions of his own troops. While the US paratroopers made headway, they could not dig the Jäger out from their defences amongst the solid Norman hedgerows. The attack was called off so a much larger assault could be launched the following day. On 8 June St. Come du Mont was defended by III. Bataillon, 1058. Regiment, 91. Luftlandedivisionand two companies from III. Bataillon, 6. Fallschirmjägerregiment. Against them the Americans launched the 1st and 2nd Battalions, 506th PIR, 3rd Battalion 501st PIR, 3rd Battalion, 327th Glider Infantry, 8 light tanks and the 65th Armoured Field Artillery Battalion.
The Glider Infantry and 501st PIR attempted to encircle the town and cut off the German’s retreat, while the units of the 506th PIR advanced directly into St. Come du Mont. An intense artillery barrage (2500 105mm rounds in the first 1 ½ hours) smashed into the defenders and as the 1058. Grenadiers started to show signs of cracking, von der Heydte decided that with no more reserves to commit, it was time to withdraw. His men were forced to fight their way past the 501st PIR, but the majority of the German forces were able to escape to the west and retreat back into Carentan.
Carentan The Americans immediately began to prepare an assault on Carentan, readying four regiments (501st, 502nd and 506th PIR and 327th Glider Infantry) for the attack A two pronged attack down the main causeway in Carentan (502nd) and across the river flats to the east of the city (327th) was put into action. The causeway was a six to nine feet high embankment above the marshland with four bridges that crossed the Douve and its associated canals. The German defenders had destroyed one of the bridges. In the mid afternoon of 10 June men from the 3rd Battalion, 502nd PIR advanced in single file down the causeway. They soon came under heavy machine-gun fire from the Fallschirmjäger in a farmhouse and bocage which took a heavy toll on the US paratroopers. The fourth bridge was also blocked by a Belgian Gate, which meant, just one man could squeeze through at a time. The Americans were held at this point until past midnight, when they were able to filter men past the barricade.
On the morning of 11 June, an intense artillery barrage was arranged to force the Jäger out of the farmhouse. This failed, and it wasn’t until the US Battalion Commander personally led a dramatic charge against the position that the German paratrooper’s rifle pits and machine-gun posts in front of the building and along the hedgerows were knocked out. Three American battalions had been used in the action thus far and this attack had finally exhausted 502nd PIR meaning the 506th PIR would have to take over the advance.
327th Glider Infantry had also slowly made headway and by the morning of 11 June they were just a few hundred yards from the eastern outskirts of Carentan, where they were finally stopped by German fire.
By now von der Heydte’s men were running seriously short of ammunition. Supplies had not been able to come forward due to the shortage of motor transport and the Allied air forces interdiction of the Normandy road network.
This had also held up any reinforcements that were trying to reach Carentan. The only resupply came during the night of 11/12 June when ammunition was air dropped to the Fallschirmjäger southwest of the city.
On the evening of 11 June 501st and 506th PIR were committed to the battle and throughout the night the US paratroopers watched as Carentan was subjected to near continual naval gun fire, artillery, mortar and tank destroyer bombardment. At 0200 hours on 12 June 506th attacked Hill 30 to south of the city and from there, at 0500 hours they assaulted the city. From the northeast 327th Glider Infantry also drove into Carentan, with the two units meeting up at 0730. 501st PIR circled the city, linking up with 506th PIR, closing the trap around German defenders. Remarkably, the German defenders seemed to offer little resistance.
Unbeknownst to the Americans, von der Heydte had recognised the danger and before dark on 11 June had withdrawn from Carentan and set up a new defensive line to the southwest of the city. This line held against the attacks by 501st and 506th PIR that resumed on the afternoon of 12 June.
On 12 June the reinforcements that were meant to assist 6. Fallschirmjägerregiment in holding Carentan finally arrived, the 17. ‘Gotz von Berlichingen’ SS-Panzergrenadierdivision. Annoyed that Fallschirmjäger had given up the city, Brigadeführer Ostendorff, the SS Commander, at first sought von der Heydte’s arrest for defeatism, but was eventually calmed down by his superiors. The Jäger were now subordinated to the SS Division and on 13 June, together they launched a counter attack to regain Carentan.
The attack, supported by assault guns from 17. SS-Panzerabteilung hit both 501st and 506th PIR at 0630 and drove them back towards the city. II. Bataillon, 6. Fallschirmjägerregiment managed to get into Carentan and took up positions near the railway station, however they were forced to retreat when 502nd PIR and a combat group made up of a battalion of tanks and a battalion of armoured infantry from 2nd Armoured Division and supported by the 14th Armoured Field Artillery Battalion were committed to the battle. By the early afternoon the initiative had swung back to the Americans and the attack was repulsed. This was the last time German forces attempted to retake Carentan.
The next few weeks saw less activity in this sector of the battlefield as the American units there passed over to the defensive while the main US operations shifted to the taking of Cherbourg. The Americans around Carentan sought to consolidate their gains and bring in reinforcements. The 6. Fallschirmjägerregiment remained active, patrolling and probing the US defences, whilst constantly preparing their own defences with bunkers, mines and barbed wire.
St. Germain-sur-Seves
Mid July found 6. Fallschirmjägerregiment entrenched around the village of St. Germain-sur-Seves on a small ‘island’ bordered by the Seves River, marshland and creeks. All of this area was heavy bocage country. Opposing them was the US 90th Infantry Division, a unit that had fought hard and suffered heavy casualties thus far in the campaign and who was now largely made up of green replacements. The 90th had been tasked with taking St. Germain-sur-Seves as a prelude to the main attack on St. Lo. At 0630 hours on 22 July after a heavy artillery barrage 358th Regiment of 90th Infantry Division breached the forward lines of III. Bataillon, 6. Fallschirmjägerregiment penetrating more than a 800 yards inside German lines. But here there was little cover for the advancing American troops and they came under a steady crossfire. Around midday, von der Heydte ordered his 16. Kompanie, commanded by Oberfeldwebel (Sergeant) Alexander Uhlig to counterattack the Americans, re-establish the German main line of defence, and if possible capture a couple of prisoners.
Major von der Heydte had incorrectly assumed that the American attack was a small reconnaissance in force and that Uhlig’s company of 32 men would be enough to successfully complete the mission.
However, after a brief survey of the battlefield Uhlig realised his unit would be facing at least 300 US soldiers. Seemingly unconcerned by this disparity at 1800 he launched his attack into the right flank of the 358th 1st battalion and over the next three hours his men drove the Americans back 350 yards. Four Jäger were lost in the attack, but as Uhlig had been unable to take any prisoners he decided to continue.
As he listened to the US infantry digging in overnight, Uhlig decided that he would need to launch his next attack from the other flank to achieve surprise. He then went looking for reinforcements and was promised 2 MG42 heavy machine-guns and 16 men from 3. Bataillon. He also found a tank commander from the 2. ‘Das Reich’ SS-Panzerdivision who arranged for 3 panzers to support the attack the next morning.
Uhlig positioned the MG 42s to stop any reinforcements from reaching the American’s forward positions, and also to block the unit he would be attacking from retreating back to the US main lines. The machine-gunners were ordered not to fire in support of the initial assault, keeping their presence as a surprise. The first assault began around 0700 on 23 July, and it took two more attacks to break the Americans. Down to just one panzer by this time, the third assault broke through to the 1st Battalion’s command post and the men of that unit began to fall back in panic or surrender. Many of those that retreated were cut down by the two emplaced MG 42s who now opened fire.
Uhlig’s company of 50 men and one panzer had captured over 200 American soldiers through the effective use of his limited resources, terrain, close armour support, well-positioned machine guns and their cumulative effect on a green battalion.
Immediately after the battle, the Jäger witnessed several US Army chaplins trying to help the wounded men in no-man’s land. Impressed by their bravery an impromptu ceasefire began, later formalised by von der Heydte into a three hour truce which also allowed an exchange of wounded prisoners.
On 24 October 1944 Alexander Uhlig was awarded the Knight’s Cross for his actions near St. Germain-sur-Seves in July. He would later be captured by members of the 90th Infantry Division and survive the war.
Cobra
6. Fallschirmjägerregiment was still operating with 2. ‘Das Reich’ SS-Panzerdivision when American forces launched Operation Cobra. The regiment, together with the SS troops were forced to break out of the Roncey Pocket in the final days of July 1944.
Days later 6. Fallschirmjägerregiment was again almost surrounded in the Villedieu pocket, but acting on his own initiative von der Heydte led his Regiment out of the trap.
On 31 July what remained of 6. Fallschirmjägerregiment was attached to 353. Infanteriedivision. Formed into a small kampfguruppe the Jäger made up the infantry division’s reserve and were moved to wherever the action was thickest or a penetration in the German main line of resistance most likely.
On 10 August the 6. Fallschirmjägerregiment was ordered to disengage and move to Nancy in Northeastern France for refitting.
The 6. Fallschirmjägerregiment suffered approximately 3000 casualties during the Normandy Campaign.
You can read a collection of community content ranging from reviews to force overviews, battle reports to Command Card forces from the great Flames Of War community.
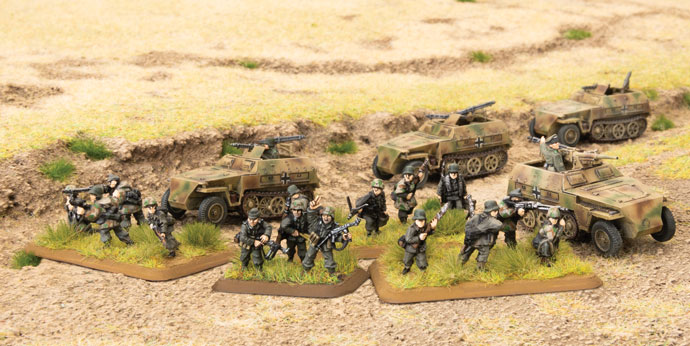
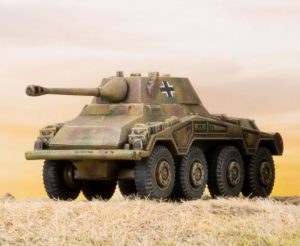
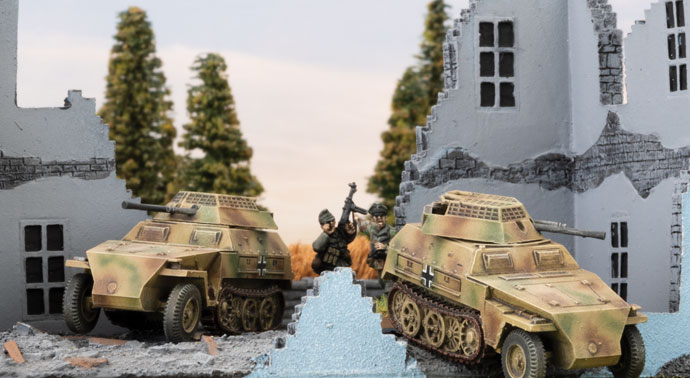
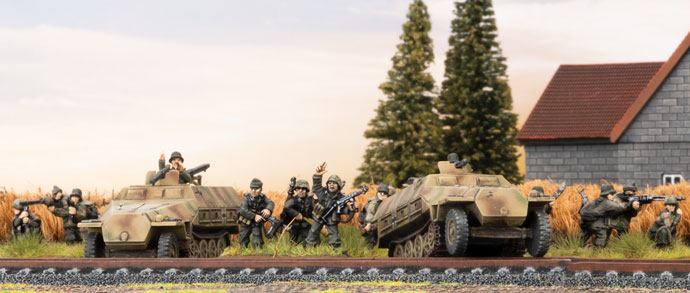
The coolest thing about the new Reconnaissance Company in D-Day: German is its flexibility. It’s similar to an Armoured Panzergrenadier Company in many ways, but lighter, faster, and more flexible. With the war turning against them, German panzer divisions found themselves fighting on the defensive more often than making grand offensives. As a result, the reconnaissance battalions were used as the divisional reserve, to fill gaps in the line, or to cover retreats more than as a true reconnaissance force. The reconnaissance company fills these roles well, and can be built in three different ways to reflect this.
If I’m building a divisional reserve type force, I want to create a battlegroup mixing tanks and armoured infantry for a flexible approach to battle. The core of the force would be a Reconnaissance Company HQ and a pair of Reconnaissance Platoons, all in light Sd Kfz 250 half-tracks, as an assault force. I could swap one of these out for a normal Armoured Panzergrenadier Platoon to save a few points, but I like the increased firepower of the extra half-tracks and the Scout ability to keep my infantry alive as they work their way forward.
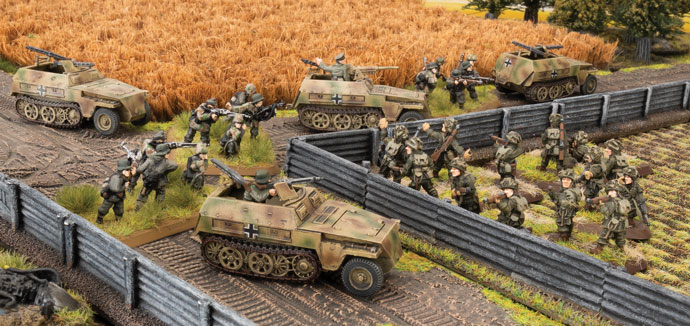
I’d back them up with a Scout Troop of Sd Kfz 250 (2cm) armoured cars to give me some spearhead capability and a useful economy-of-force unit to tie down enemy troops where my main force isn’t. The 8cm Mortar Section and 7.5cm Gun Platoon, give me more Sd Kfz 250 half-track goodness, and relieve my tanks of infantry support duties, making the infantry more self-sufficient. That useful little company comes in at around 44 points if I keep one of the 7.5cm Gun Platoon at two rather than three vehicles. Since I’ve plenty of other guns in my tanks, I don’t think I’ll miss the extra vehicle.
That leaves me a solid 56 points for the tank component. I could go with five Panther tanks for some heavy fire support, but as I envision this as a free-wheeling attack force, I think a company of ten Panzer IV tanks works better. As a separate formation, it’s strong enough to fight its own battle in support of the reconnaissance, and gives me two formations to keep me in the fight. The last point would probably go on the Lucky command card for that extra bit of luck when I really need it.
A defensive force to fill a gap in the line would be a bit different. Here, I’d probably look at adding four Panthers as a powerful reserve striking force (rather than the Panzer IVs), while boosting the core company with a 7.5cm Tank Hunter Platoon to give me more resilience against tanks. Since I don’t need as much mobility, I think I’d also trade in the half-tracks from one platoon to give all of my infantry Panzerfausts. The plan here would be to dig in the platoon without half-tracks with the anti-tank guns on the most vulnerable objective, while a mobile group of all of my half-tracks manoeuvres to keep the enemy at bay until my Panthers arrive, then counterattacks to secure victory. To build a true reconnaissance force for mobile operations, I might look at the Puma Scout Company command card for my second formation in place of tanks. A company of nine Puma eight-wheelers with three 7.5cm armoured card for fire support would set me back 24 points. Adding a second Sd Kfz 250 (2cm) and the 7.5cm Tank-hunter Platoon to my Reconnaissance Company burns up another 14 points. Throw in a platoon of overlong 8.8cm tank-hunters for heavy tank killing, and I’ve got a force that is mostly light, fast and mobile, but still packing a heavy punch.
No matter how you organise it, the Reconnaissance Company has plenty of flexibility and potential (as well as lots of really cute Sd Kfz 250 half-tracks!).
In early 1944, the situation in France was clearly the quiet before the storm. An Allied invasion would come, probably in the summer, but until then it was a quiet place to rebuild divisions shattered in the desperate autumn and winter battles on the Eastern Front behind the ‘Atlantic Wall’ fortifications lining the coast.
The challenge faced by the German commanders, Rommel and von Rundstedt, was how to combine these disparate forces into a battle-winning force. Should the panzers support the beach defences closely? Or should they operate with complete freedom, seeking to strike a battle-winning blow to cut off and destroy the Allied armies once ashore? What would be the best way to handle the massive Allied superiority in numbers, artillery, especially heavy naval gunfire, and aircraft? They made their choices and failed. Can you do better, defeating the Allied invasion and saving Germany?
What’s In The Book?
Beach Defence Grenadier Company
Plenty of cost-effective firepower, with lots of ways of getting even more.
Grenadier platoons can increase their firepower with more machine-guns, added heavy machine-guns, and Panzerfaust and Panzerschreck anti-tank weapons.
Poorly-trained family men, limited skill, weak in assaults, and easier to hit than most German troops.
Lots of anti-tank and artillery options with 5cm or 7.5cm anti-tank guns, 8cm and 12 cm mortars, and 7.5cm and 15cm guns.
Good for holding ground, but don’t expect too much from them.
Easy to convert from Grenadier Company in Fortress Europe.
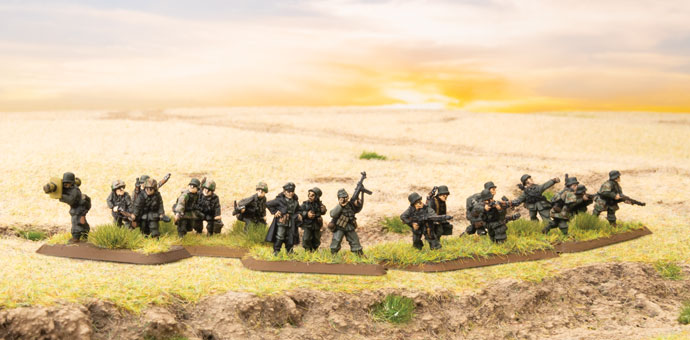
Fallschirmjäger Company
Large platoons of fearless, high-quality infantry.
Platoons can get extra firepower with heavy machine-guns, and Panzerfaust, and Panzerschreck anti-tank weapons.
Well defended against tanks with both Panzerfaust and Panzerschreck anti-tank weapons and 7.5cm anti-tank guns.
Lots of mortars 8cm and 12cm guns.
Good for holding ground, even better for taking it.
Exciting new addition to Late War.
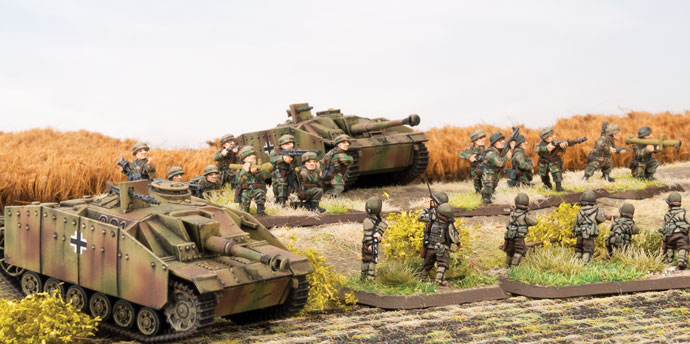
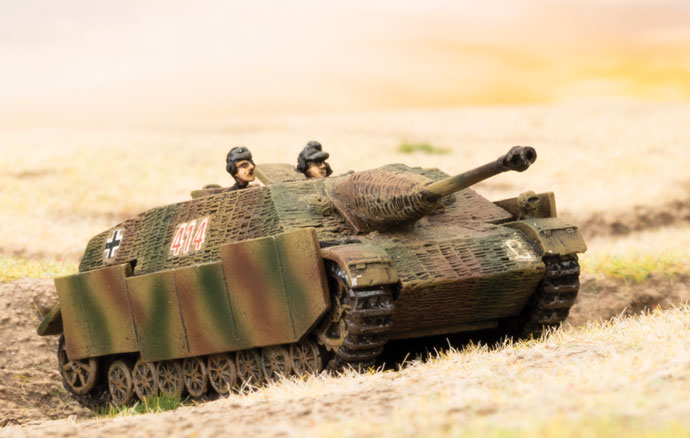
Fallschirmjäger StuG Assault Gun Company
StuG assault gun has better front armour and the same gun as a Panzer IV medium tank, but has no turret so can’t shoot targets to the flanks, and is less effective when assaulting infantry.
StuH assault howitzer has a brutal gun with 2+ firepower for knocking out enemy guns and infantry.
StuH assault howitzers operate in a separate platoon and can fire as artillery to support StuG platoons or grenadiers.
Company can include an integrated Fallschirmjäger or Beach Defence Grenadier Platoon to protect the assault guns.
Work well with infantry. Assault guns provide fire support. Infantry cover vulnerable flanks.
Easy to convert from StuG Assault Gun Company in Fortress Europe.
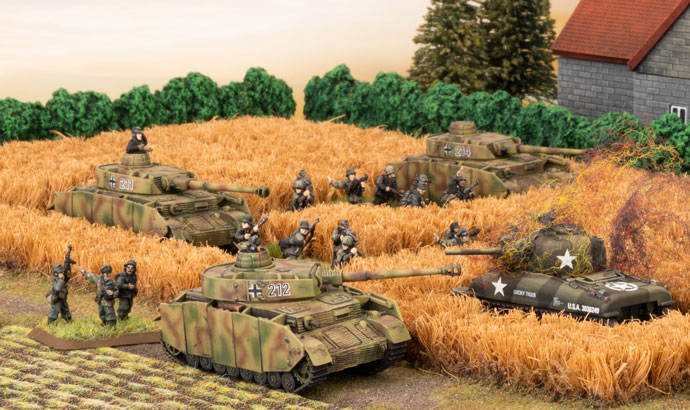
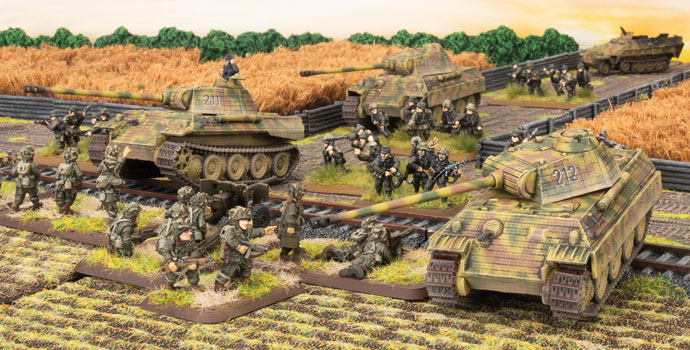
Panther Tank Company
Medium tanks with enough armour to stop any Allied anti-tank gun and a gun that can easily penetrate any Allied tank, and fast to boot!
Thinner side and top armour make more vulnerable than heavy tanks like the Tiger.
Integrated self-propelled anti-aircraft (including Möbelwagen quad 20mm on Panzer IV chassis) help keep Allied aircraft at bay.
Flexibility. Can swap out platoons of Panther tanks for a platoon of Tiger heavy tanks and a platoon of Panzer IV medium tanks.
Easily outclasses all opposition, just watch out for your flanks.
Easy to convert from Panther Tank Company in Fortress Europe.
Panzer IV Tank Company
Baseline medium tanks. Good armour and better guns than Allied medium tanks.
Protected ammunition storage and bazooka skirts limit effectiveness of US Bazookas, British PIATs, and Soviet anti-tank rifles.
High-quality crews give tactical advantages.
Integrated self-propelled anti-aircraft (including Möbelwagen quad 20mm on Panzer IV chassis) help keep Allied aircraft at bay.
Flexibility. Can swap out a platoon of Panzer IV tanks for a platoon of Tiger heavy tanks or Panther tanks.
Gives you the numbers to match the Allies, while still exceeding them in quality.
Easy to convert from Panzer III & Panzer IV Tank Company in Fortress Europe.
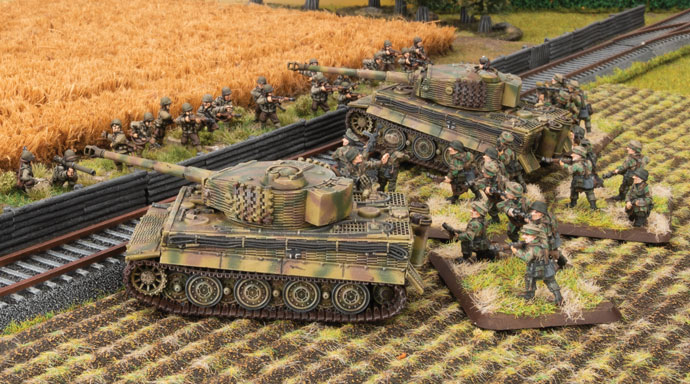
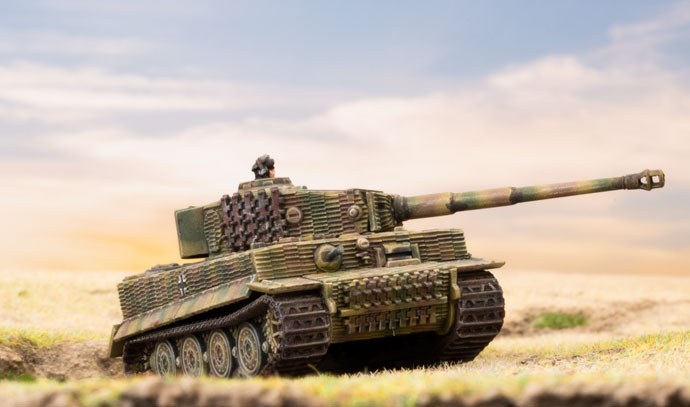
Tiger Tank Company
Elite heavy tanks with thick armour and powerful guns, yet more mobile than most medium tanks. Ploughs through terrain without a problem.
Almost immune to medium tanks, artillery, and infantry.
Integrated self-propelled anti-aircraft to help keep Allied aircraft at bay.
Expensive quality, but still cheap enough to field a good-sized company.
Easy to convert from Tiger Tank Company in Fortress Europe.
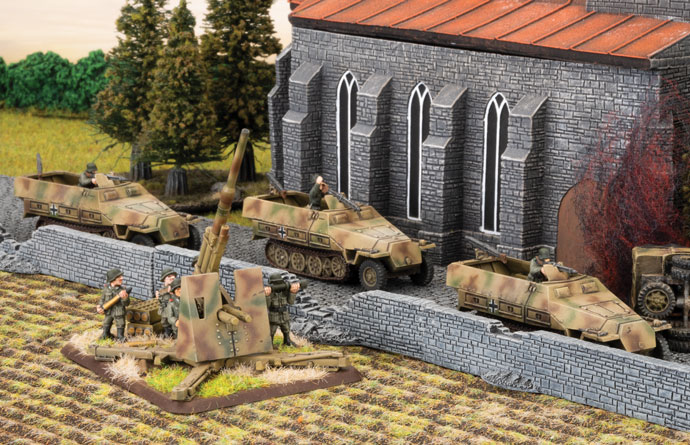
Armoured Panzergrenadier Company
Armoured Sd Kfz 251 half-tracks for battlefield mobility, even under fire.
Infantry can assault while mounted in their half-tracks to overrun light opposition.
Half-tracked heavy weapons, including 8cm mortars, 2cm AA, 7.5cm guns, and flame-throwers. Grille gives integrated 15cm heavy artillery.
Flexibility to take dismounted troops. Save points by leaving the half-tracks at home.
Fast and mobile with plenty of firepower in the attack, solid with massive firepower in the defence.
Easy to convert from Panzergrenadier Company in Fortress Europe.
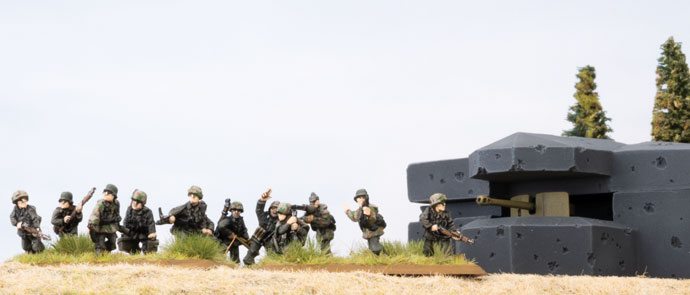
Panzergrenadier Company
High quality infantry.
MG teams give plenty of firepower.
Can add Panzerfaust and Panzerschreck anti-tank weapons and 7.5cm anti-tank guns to keep tanks at bay.
Plenty of integrated weapons, including heavy machine-guns, 8cm and 12cm mortars, 2cm AA, and 7.5cm and 15cm guns.
Option to include half-tracked heavy weapons for a mobile attacking force.
Flexibility to take a platoon in half-tracks as a mobile strike force.
Plenty of firepower to cover attacks or break up enemy attacks. Trained for clever, aggressive attacks and tenacious defence.
Easy to convert from Panzergrenadier Company in Fortress Europe.
Up to 7 half-tracks per platoon for maximum mounted firepower.
Sneaky scout versions of 8cm mortar and 7.5cm gun half-tracks.
All-new armoured including:
2cm, Puma 5cm, and 7.5cm eight-wheelers.
Light 2cm half-tracked armoured cars.
Armoured cars are integrated into formation.
Flexibility to take armoured and dismounted panzergrenadier platoons.
Can be integrated into armoured and dismounted panzergrenadier companies.
Sneak into position, then hit hard and fast.
Easy to convert from Panzergrenadier Company in Fortress Europe.
Support
New Jagdpanzer IV tank-hunter. Cheap, effective, mobile.
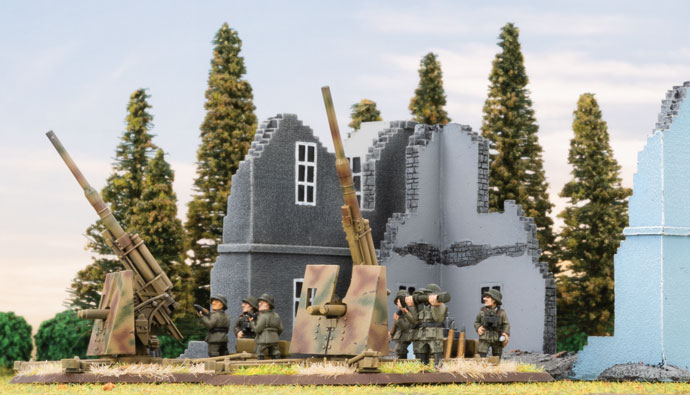
Super-deadly long 8.8cm anti-tank guns on cruciform turntable have all-round field of fire.
Plenty of AA options to counter Allied aircraft. Self-propelled single and quad 2cm, or ground mounted 2cm light or 8.8cm heavy AA guns.
Lots of artillery choice, with Hummel 15cm and Wespe 10.5cm self-propelled guns, 10.5cm howitzers, and 15cm Nebelwerfer rocket launchers.
Allied air superiority prevents any German air support in Normandy..
How Do the Germans Play?
The Germans in Normandy have three distinct styles, although they can be profitable mixed and matched for even greater customisation to match your approach.
The first style comes with the Beach Defence Grenadier Company. This formation has a hard crust and a soft gooey centre. It relies entirely on firepower to keep the enemy at bay. If the enemy ever gets through your wall of fire, you will suffer badly. On the other hand, since everything is so cheap, that wall of fire can be very imposing. The second comes with the Fallschirmjäger Company. This formation is the exact opposite. These guys are hard right the way through! Although they can turn on the firepower, particularly with plenty of mortars, they really shine when they get up close and personal with the enemy. Their deadliness is lethal to infantry, and almost as scary to tanks, thanks to their bazooka-like Panzerschrecks and short-ranged Panzerfausts.
The panzer divisions provide the third style. Whether tanks or panzergrenadiers, these troops have the best equipment in the world, and are highly skilled and won’t quit. Fighting cleverly, these elite troops can tackle greater numbers with ease.
Combining these different styles can also be profitable. You could back your beach defence troops with a hard-hitting armoured battlegroup, or use beach defence troops to hold an objective while your panzers pivot onto the enemy flanks. Your Fallschirmjäger can benefit from the compact firepower of the panzer divisions supporting their attacks, or provide the panzers with a core of shock troops to assault the objective.
In summary, a successful German force will use their superiority in equipment, training, skill, and cleverness, combined with a good dose of aggression, to keep the initiative, hit the enemy in their weak spots, while minimising the enemy’s opportunities to hit them back.
Normandy Campaign Missions
D-Day: Greman includes three new missions and a linked campaign. The first mission is Armoured Fury, a mobile battle where the attackers must push past an enemy spearhead to seize objectives deep in enemy territory, while at the same time preventing the spearhead from pushing on further. It recreates both the German armoured counterattack late on D-Day that pushed between the British spearheads to reach the sea, cutting the British sector in half, and the desperate German counterattack at Mortain, trying to reach the coast and cut off the American breakout.
The second mission is Outflanked. Here the defenders must extend their line to avoid being outflanked by the attackers, reflecting the battles in the week after D-Day before the lines solidified as both sides sought to find an open flank. The third mission is Breakout, which allows you to refight the desperate German attempts to escape encirclements at Roncey, Falaise, and then Mons. The attacker is trapped between the encircling defenders and the troops closing in behind them. They must breakout or die.
These three missions are linked together with two standard missions from the rulebook in a simple campaign where the outcome of one battle has an effect on the next. If the German player can breakout from encirclement in the fifth mission, they win the campaign.
Who are the Warriors
The D-Day: German command card pack includes six warriors: Friedrich Adario, Heinz Auert, Wilhelm Bäder, Heinz Deutsch, Hermann Droppman, and Kurt Knispel. These tough fighters were all awarded the Knight’s Cross, one of Germany’s highest awards.
Kurt Knispel, veteran of years of combat on the Eastern Front, led a platoon of Tiger heavy tanks in Normandy. As the highest scoring tank ace, Knispel rarely missed his target, and refused to leave the battlefield until the task was completed.
Wilhelm Bäder and Hermann Dropmann led grenadiers into battle. Bäder, an ex-artilleryman, made good use of his formation’s mortars and infantry guns, while Dropmann, despite being a colonel in charge of a whole regiment, knocked out five tanks in close combat in a single day, for a career total of at least fifteen tanks.
Friedrich Adario and Heinz Deutsch were both deadly efficient anti-tank commanders. Adario’s long 8.8cm guns were deadly when striking from ambush, destroying well over one hundred British tanks from long range in the Normandy campaign. Deutsch led a StuG assault gun platoon, and ended the war with a claim to 46 Allied tanks destroyed. Heinz Auert was a real fire eater who commanded a reconnaissance company. Rarely waiting to give the enemy time to prepare, or time for his supporting troops to arrive, Auert attacked, catching the enemy by surprise as they were preparing their own attack.
Command Cards
The command cards introduce a new concept, title cards. These cards have the title of a division and a special rule giving the division’s flavour. The key is that you can only have one title in your force. Beach defence troops gain five different varieties from fast bicycle troops to specialist assault battalions, from reluctant ‘volunteers’ from the prisoner of war camps to the higher-quality 352nd Infantry Division. Your beach defence troops can also enhance their firepower with cheaper, but not as well-trained, artillery, anti-aircraft, and anti-tank options.
The Fallschirmjäger paratroopers add three different titles from the barely-trained 5th Fallschirmjäger Division to von der Heydte’s elite 6th Fallschirmjäger Regiment. The panzers round out their options with three more divisions to join the basic Panzer Lehr. These range from the superb 2nd Panzer Division which adopted night attacks to avoid Allied firepower to the barely-trained 116th ‘Greyhound’ Panzer Division.
Other ways in which you can customise your force include crewing your Tiger tanks with aces, allowing your assault guns’ escort platoon to operate as true tank riders, upgrading your infantry to pioneers, armouring your self-propelled anti-aircraft guns, allowing your heavy anti-tank guns to fire as artillery, and creating fortified defences with MG and anti-tank nests, dug-in tanks, and misplaced and forgotten minefields. You can even cause the Allied heavy bombers to score an ‘own goal’, delaying their own reserves!
There are also a few new formations, such as scout companies equipped with various armoured cars.
Last, but not least, the Lucky card gives you a useful one-point filler, giving you that critical re-roll just when you need it.
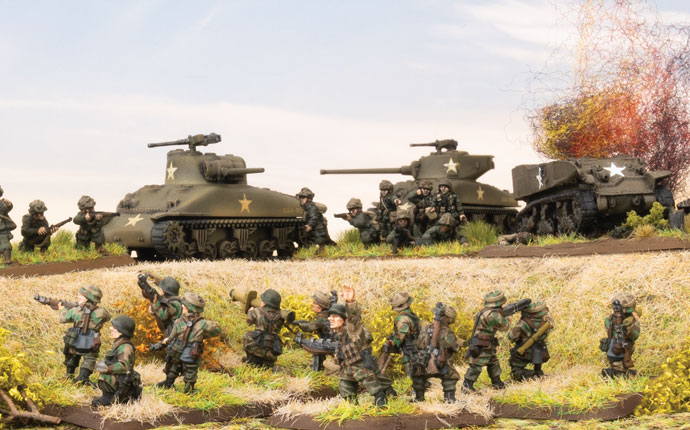
Wayne and I sat down to play a game of Flames Of War and we wanted to do a beach landing. Since I was still working my 29th Infantry Div beach landing Assault Company I decided to do something a little different than what I normally play for this Beach Landing game. I wanted to play Rangers. Rangers in V4 are incredibly cool. They are assault monsters and if they can get in close they will kill everything with their +2 to hit in Assaults.
Now, when brewing up a list for a Beach Landing mission, as an ally force you want to focus on the units that will cycle back onto the table: the infantry units, so I want at least 3 units, but the way the Rangers work I only get two per formation so I need to bring two formation. This is one of the strong aspects of the Rangers since their formations are small you can get multiple company commanders to help motivate your troops and keep your forces moving. With the core troops I wanted to add some artillery in the form of Mortars and Naval Gun Support. And since we are going D-Day let’s get some Duplex Drive tanks via the DD Sherman Command card.
Here is the list I ran against Wayne in our game:| Ranger Company 1
Ranger HQ 1 Point
Ranger Platoon 10 Points
Ranger Platoon 10 Points
Ranger Mortar platoon with 6 guns
Ranger Company 2 Ranger HQ 1 Point
Ranger Platoon 10 Points
Ranger Platoon 10 Points
Support
M4 Sherman Tank Platoon with 4 tanks 14 Points
Command Cards Lucky 1 Pont
Naval Gun Support 12 Points
Sherman DD 0 Points
If you add it up you can see we were playing below the normal 100 point level, at 75 points. This was due to the fact we were playing in a recorded battle report and we wanted to keep it short. But 100 points is where the game truly shines and if you wanted to add 25 more points to this list I would add the following,
Ranger Company 3 Ranger HQ 1 Point
Ranger Platoon 10 Points
Ranger Platoon 10 Points
Add a fifth tank to the M4 Sherman Platoon +4 Points
That gets you to 100 point easy and you will have even more troops on the table to harass your opponents.
Wayne and I were playing the FUBAR mission found in the D-Day: American book, we wanted to show off the basic mission and give players a look into how the mission is played. We could have played the Pointe Du Hoc Variant rules that would have let us play the beach landing the Rangers ran into on D-Day. Both missions work as FUBAR is a great representation of the Omaha beach landings.
I won’t tell you how the game went as you can watch our battle report video to find that out but I will go into the basic tactics of this list.
This list is all about attacking, you move your infantry in and you overwhelm your target with sheer numbers. During the FUBAR beach landing mission you have to take both objectives but your opponent’s resources are quite limited so try and mass up on both objectives. Your Shermans are limited resources so be careful with them and get them up the beach quickly and have them focus on taking out bunkers, start with the AT bunkers and once they are dealt with move on to the MG nests. Something else to keep in mind when building non-Ranger Tank forces, Rangers formations are cheap point wise to add to your force. For 21 points you get two full units of Rangers and an HQ, so you get re-rolls and some of the best Assaulting units the Americans have to offer. Its easy to build a well forces list and slot the Ranger platoon in, for example,
M4 Sherman Company M4 Sherman Company HQ with 2 Tanks 7 Points
M4 Sherman Tank Platoon with 5 tanks 18 points
M4 Sherman Tank Platoon with 5 tanks 18 points
M4 Sherman (76) Tank Platoon with 5 tanks 23 points
M4 81mm Armoured Mortar Platoon 2 Points
Ranger Company Ranger HQ 1 Point
Ranger Platoon 10 Points
Ranger Platoon 10 Points
Support
Priest Artillery Battery with 3 Priests 8 Points
Sherman OP 3 Points
There is a hundred points and the Rangers are the perfect include, if you have to defend well you get two full strength Ranger platoons to dig in on the objectives, with their 3+ moral rating they will rally and stay in the fight longer than most other American infantry units. Add in their 2+ to hit in assaults and you have a defending unit your opponent does not want to assault into. Ranger weakness to keep in mind, they are easy to hit, so HMGs and other high rate of fire hostiles are a big threat, you want to use your tanks and artillery to deal with those threats before the Rangers move into the assault.

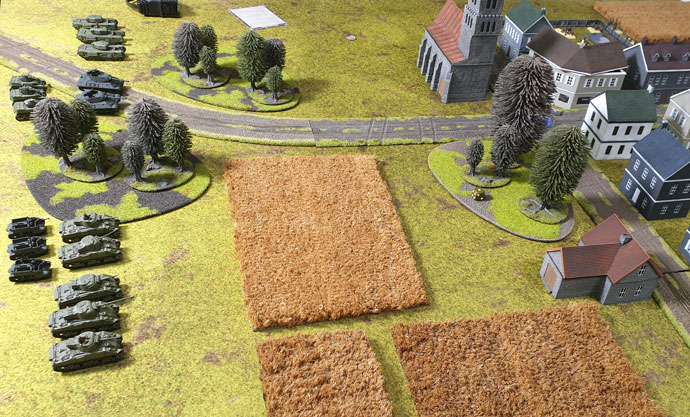 The game started off as you would think, the tanks moved forward and took pot shots at range against my infantry. On my first turn I ambushed my 155 artillery to hit Ashleigh’s Churchill tanks, I managed to knock out one. Luckily Ash had one Churchill that stayed bailed and I was able to weather the return fire only suffering a few bailed out artillery tanks.|
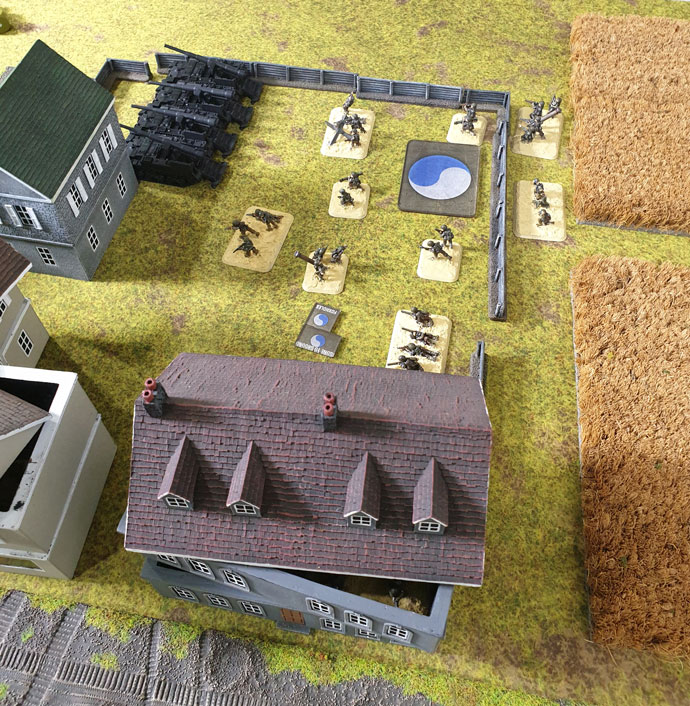 The game went on trading shoots with not much changing; I started moving my infantry through the buildings from reserves. This lasted until one turn when Ashleigh killed 5 infantry teams in one platoon with one round of shooting form her Carriers! I knew I would have to move!
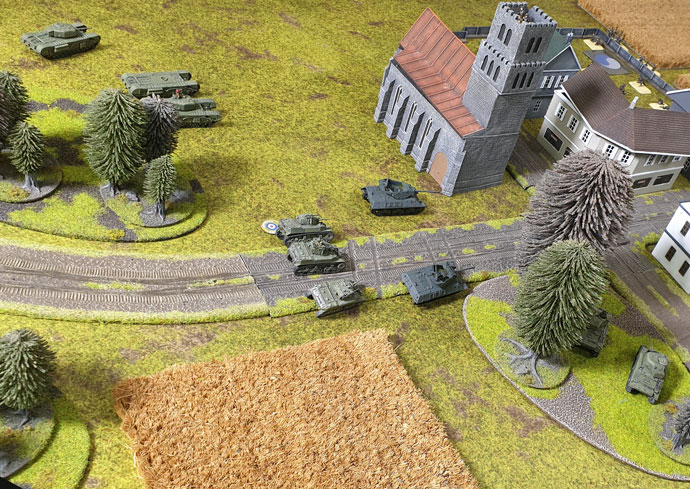 My next turn saw my artillery take out Ashleigh’s Churchill tanks and my bazookas getting lucky killing two Stuarts with moving shoots! Both the Churchill and Stuart tanks ran away! In reaction Ashleigh moved back and started shelling me from range, I responded by taking pot shots with artillery bombardments among her tanks, the third turn of bombardments I hit four of her tanks, all but one of them rolled a 1! With firepower 2+ my artillery took out the core of Ashleigh list, and it was just a matter of a few more morale rolls before her tanks retreated off the table.
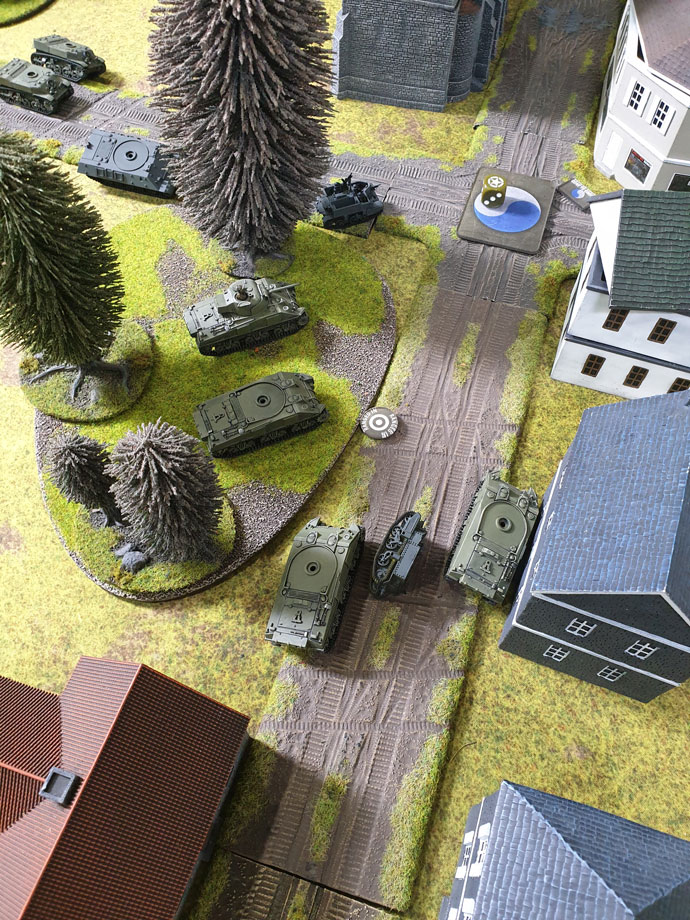 A victory for my 29th infantry Division. I would move on to my next game with Luke, due to having just played Hasty attack in our last game we played, Luke and I decided to play Dust Up instead.
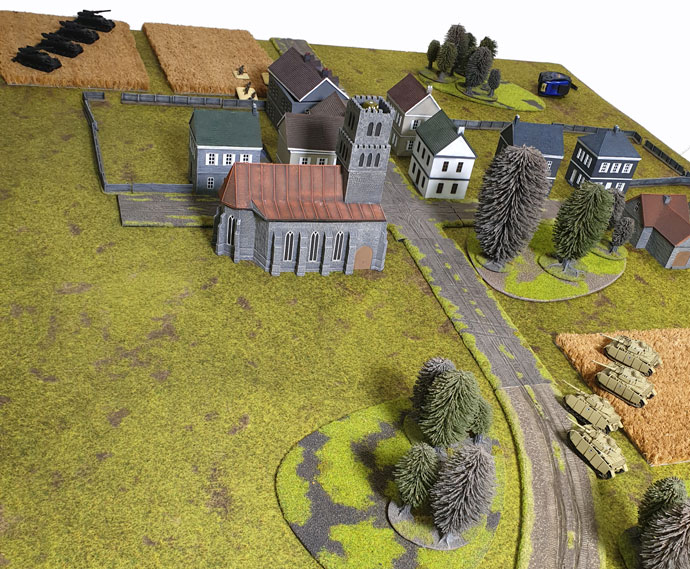 Turn one went to Luke and he rushed me, I was not expecting that, but I prepared myself for conflict sooner than I thought.
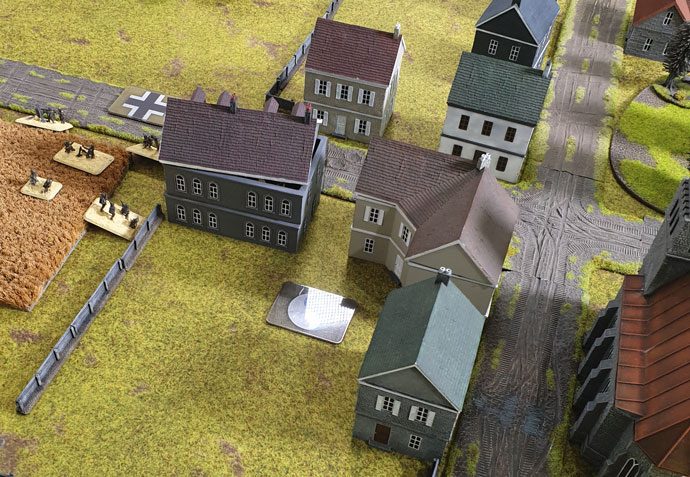 Luke next turn had him wanting to Blitz around the building, 4 Panzer IVs would make quick work of my FA0 artillery tanks. But he failed the roll and then failed to hit me at all! Luck was on my side and I decided to open up on his tanks with my 155s! I knocked out two tanks! I really could not have asked for more.
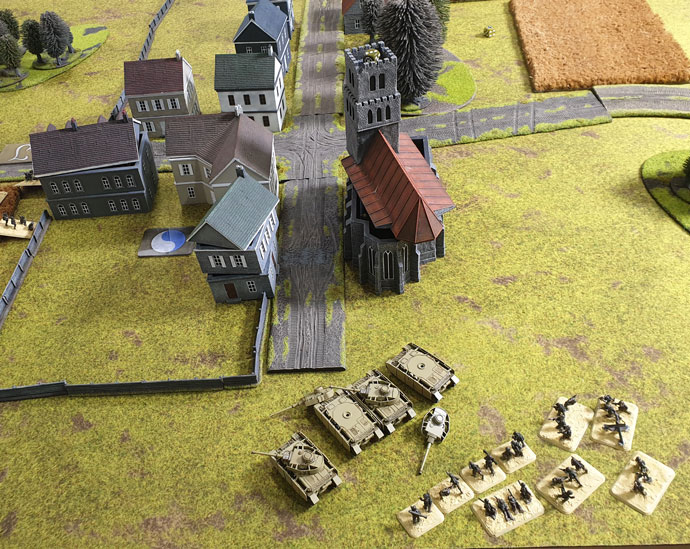 Luke’s next turn he move his HQ and his other panzer 4 platoon up and destroyed the last of my 155s. ouch well it isup to my bazookas to hold him off.
 Another Victory for the 29th Infantry Division! We moved on from the Second Chances card to Rat Catchers, for this game Phil and Cameron are facing each other, Phil playing for the Allies and Cameron for the Axis. I’ll leave it to Phil to write up that final battle report.
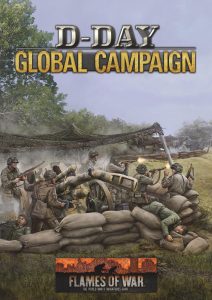 This week we take a closer look at the D-Day: Global Campaign Battlefront and the crew over at OnTableTop are running later this year. We have done several campaigns with OnTableTop in the past for Team Yankee and those who played in those will recognize this campaign- even though there are a few key differences. The campaign itself will have players fighting their way through the battles of Normandy taking over Routes and securing Areas that will earn their side a bonus when fighting in that route during the next week.
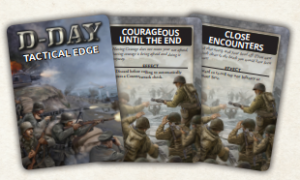 Did I say edge? Well, here is a non-obvious segue way into talking about Tactical Edge cards! Those who are participating in the Hobby League you will earn Tactical Edge cards to use during this campaign. These cards give you a one use boost for any game you play during the campaign, giving you an “edge” in your games. If you didn’t take part in the Hobby League then you don’t have to worry about these cards, unless your opponent has, then be afraid! Be very afraid!
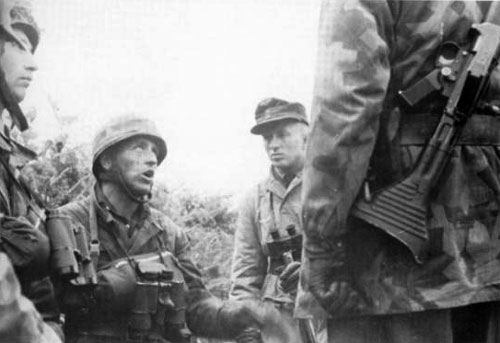 The best German infantry units based in France in 1944 were the regiments of the Fallschirmjägerdivisions or parachute divisions. Although they were actually Luftwaffe troops, these units were by this time in the war, tactically subordinated to Army command.
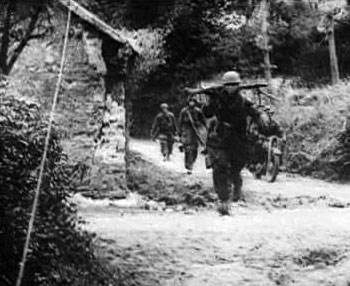 II. Fallschirm-Korps, commanded by General Eugen Meindl, was allocated by the Commander of the Western Theatre, Field Marshal Gerd von Rundstedt, to the Seventh Army, commanded by General Friedrich Dollmann, in Brittany. It would in May 1944 be made up of the following units:
 2. Fallschirmjägerdivision and 5. Fallschirmjägerdivision were by comparison, poorly trained, undermanned and badly equipped. However, they too fought with the esprit-de-corps of all Fallschirmtruppen and helped forge a combat reputation respected by all Allied opponents.
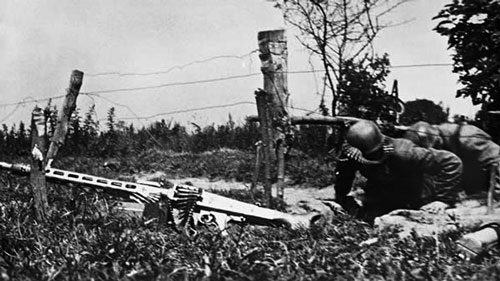 6. Fallschirmjägerregiment was arranged as follows:
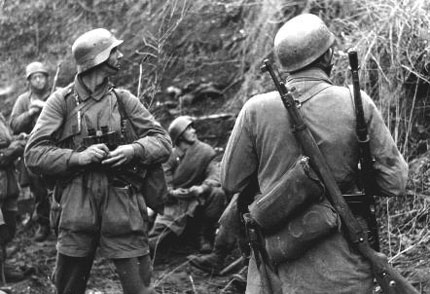
 At first the advances made good time, but by midnight both battalions were in heavy contact just short of their objectives. 1. Bataillion found the US paratroopers at St. Marie-du-Mont had linked up with the 4th Infantry Division moving inland from Utah beach. Earlier in the evening and again before dawn on 7 June waves of American gliders and paratroopers began to drop across the entire combat area, and the two battalions, found themselves low on ammunition and increasingly cut-off from the Regimental rear areas.
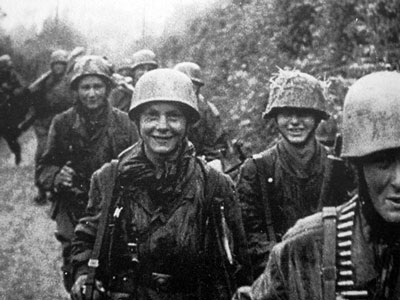 On 8 June St. Come du Mont was defended by III. Bataillon, 1058. Regiment, 91. Luftlandedivisionand two companies from III. Bataillon, 6. Fallschirmjägerregiment. Against them the Americans launched the 1st and 2nd Battalions, 506th PIR, 3rd Battalion 501st PIR, 3rd Battalion, 327th Glider Infantry, 8 light tanks and the 65th Armoured Field Artillery Battalion.
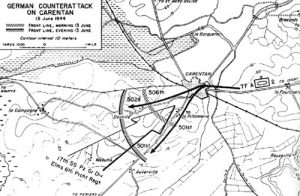 In the mid afternoon of 10 June men from the 3rd Battalion, 502nd PIR advanced in single file down the causeway. They soon came under heavy machine-gun fire from the Fallschirmjäger in a farmhouse and bocage which took a heavy toll on the US paratroopers. The fourth bridge was also blocked by a Belgian Gate, which meant, just one man could squeeze through at a time. The Americans were held at this point until past midnight, when they were able to filter men past the barricade.
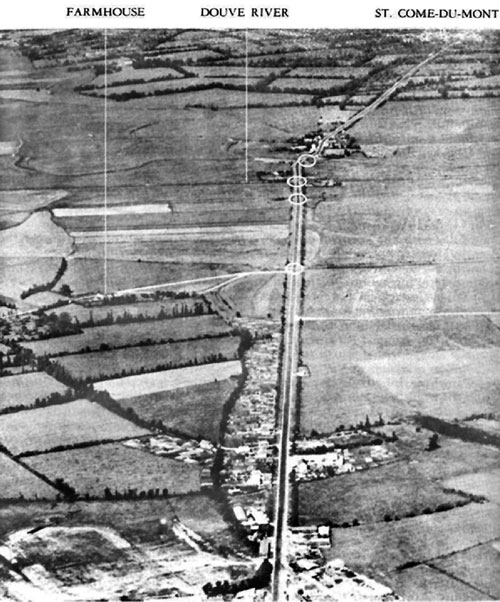
 At 0630 hours on 22 July after a heavy artillery barrage 358th Regiment of 90th Infantry Division breached the forward lines of III. Bataillon, 6. Fallschirmjägerregiment penetrating more than a 800 yards inside German lines. But here there was little cover for the advancing American troops and they came under a steady crossfire. Around midday, von der Heydte ordered his 16. Kompanie, commanded by Oberfeldwebel (Sergeant) Alexander Uhlig to counterattack the Americans, re-establish the German main line of defence, and if possible capture a couple of prisoners.
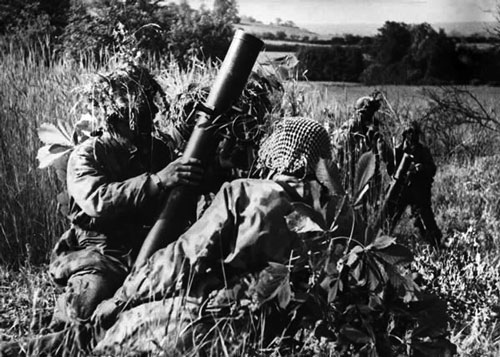 The first assault began around 0700 on 23 July, and it took two more attacks to break the Americans. Down to just one panzer by this time, the third assault broke through to the 1st Battalion’s command post and the men of that unit began to fall back in panic or surrender. Many of those that retreated were cut down by the two emplaced MG 42s who now opened fire.
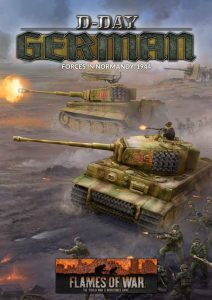 You can read a collection of community content ranging from reviews to force overviews, battle reports to Command Card forces from the great Flames Of War community.
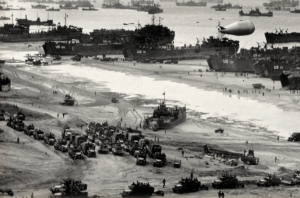
 In early 1944, the situation in France was clearly the quiet before the storm. An Allied invasion would come, probably in the summer, but until then it was a quiet place to rebuild divisions shattered in the desperate autumn and winter battles on the Eastern Front behind the ‘Atlantic Wall’ fortifications lining the coast.
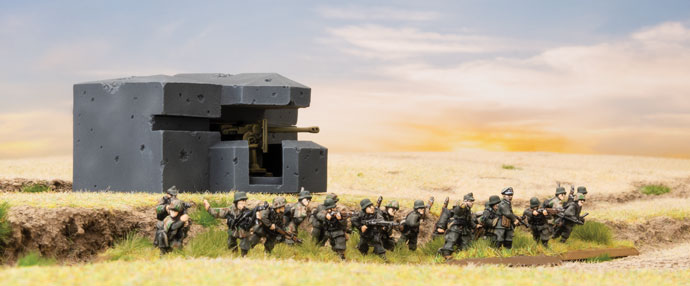

 The Fallschirmjäger paratroopers add three different titles from the barely-trained 5
 Ranger Company 1
 Something else to keep in mind when building non-Ranger Tank forces, Rangers formations are cheap point wise to add to your force. For 21 points you get two full units of Rangers and an HQ, so you get re-rolls and some of the best Assaulting units the Americans have to offer. Its easy to build a well forces list and slot the Ranger platoon in, for example,
 Ranger weakness to keep in mind, they are easy to hit, so HMGs and other high rate of fire hostiles are a big threat, you want to use your tanks and artillery to deal with those threats before the Rangers move into the assault.