with Aaron Te-Hira Mathie
DDPM 4 Colour
Desert Disruptive Pattern Material (DDPM) comes in three flavours. The first version was introduced in 1985. This version simply replaced the four colours of the temperate/tropical DPM with browns and tans. At the time this variant was introduced there was no real requirement for the UK’s MoD to acquire very many uniforms in this colourway. It was therefore sold directly or through licensing agreements to various nations in the Middle East, including (but not restricted to) Iraq and Saudi Arabia.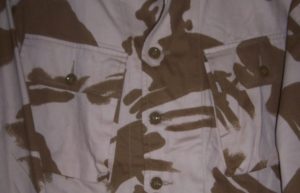
‘Dense’ DDPM
The second variant was heavily used by the UK forces during operation Granby (the first Gulf War). The primary reason for this version coming into being was the realisation that British troops might be mistaken for enemy troops if deployed to the Gulf wearing the four colour Desert DPM.
A three coloured type was trialled, however it was deemed to be too close to the four colour type, so a two coloured version was rapidly developed.
This version is often described as ‘dense’ pattern as three of the four standard DPM colours were replaced with a medium brown over a tan base, causing the darker shapes to cover a large amount of the light colour.
While this was a quick expedient to get into production, an important factor as the troop build up during ‘Desert Shield’ gathered pace (therefore a pressing need for an appropriate uniform existed), it was considered too dark to be properly effective in the sun soaked sands of the Middle East.
Ironically enough a variant of this colourway was chosen for the later ‘Soldier 95 and Soldier 2000’ type desert camouflage uniforms.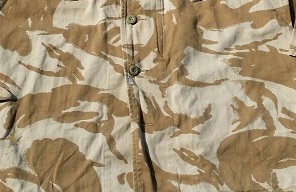
‘Sparse’ DDPM
Toward to end of the first Gulf War the British stared to deploy a variant considered to be more effective in the theatre of operations. This version referred to as ‘sparse’ DDPM is quite similar to the type described above, however the pattern essentially does away with replacing the shapes of the two minor colours in temperate DPM with dark brown in favour of those shapes being the same light tan as the base colour of the uniform. This has the effect of creating a more sparse type of camouflage pattern. This variant was fairly short lived, existing only between late 1991 and the introduction of the ‘Soldier 95’ uniforms (both temperate and desert) during 1995/96.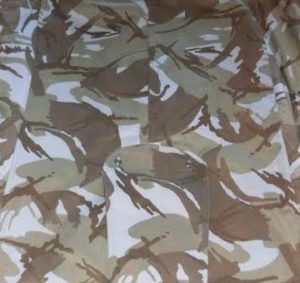
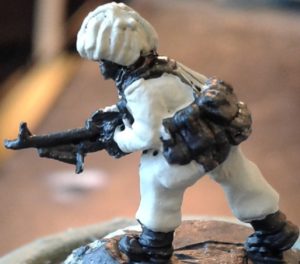
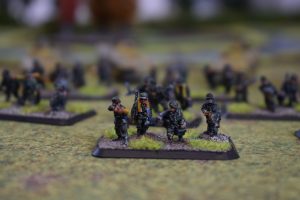
For the figure below I chose to go for the most common variant, ‘dense DDPM’. For the purposes of our fictional conflict any of the versions would be appropriate, with the four colour type being the least anachronistic for 1985, but also far more complicated to replicate in the 15mm scale. However in a case of art imitating life I don’t consider it to be particularly far fetched for one (or both) of the two colour types to be quickly developed for exactly the same reasons that they were in the real world.
 Step 1:
The figure is uncoated with black Vallejo Surface Primer to give the follow on paint something to ‘bite’ into.
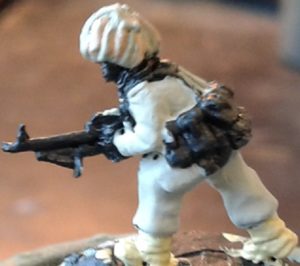
 Step 2: Next I paint the uniform base colour of Vallejo Model Color 70.884 (Stone Grey).
 Step 3:
Then I paint Vallejo Model Color 70.821 (German Camo Beige WWII) as the main colour for the Hessian strips on the Helmet.

Step 4:
Following the main color of the Helmet strips I paint a random selection of the hessian strips with Vallejo Model Color 70.843 (Cork Brown).
Step 5:
Then I give the Boots a coat of Vallejo Model Color 70.976 (Buff).
 Step 6:
With the desert tans in place I next colour the ’58 Pattern Web Gear and Scrim netting scarf with Vallejo Model Color 70.920 (German Uniform).
Step 7: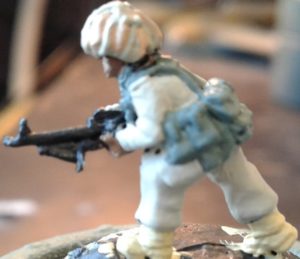
I start with Vallejo Model Color 70.875 Beige Brown as the base colour for the flesh.
 Step 8:
I paint the plastic furniture of the weapon with Vallejo Model Color 70.862 (Black Grey).
 Step 9:
I move onto metallics, starting with Vallejo Model Color 70.863 (Gunmetal Grey) on the metal parts of the figure’s L7 GPMG.
Step 10:
I complete the initial block painting of the figure using Vallejo Model Color 70.801 (Brass) for the belt of rounds hanging off the left side of the GPMG.
 Step 11:
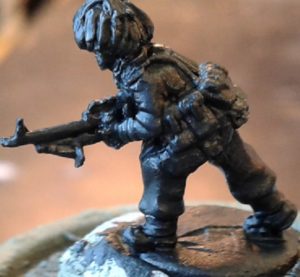
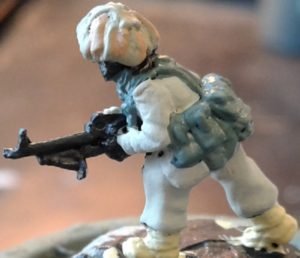
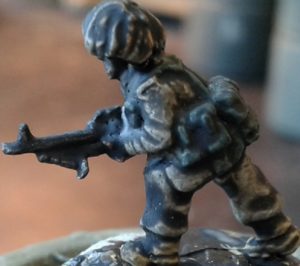
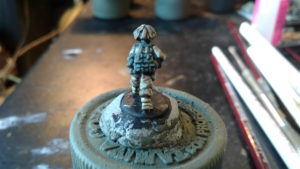
With the block painting done, I then cover the figure with an all over coat of Vallejo Game Color 73.201 (Black Wash).
 Step 12:
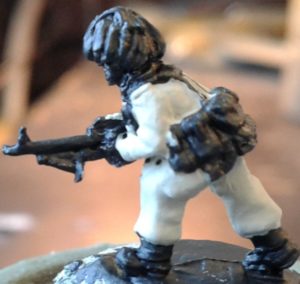
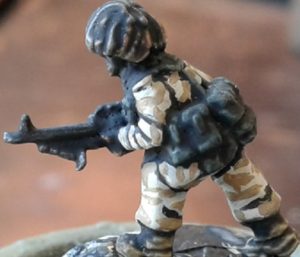
Once the Wash is dry, I go back over the uniform with Vallejo Model Color 70.884 (Stone Grey), careful to leave creases and recesses black. Then I add the DPM pattern by painting a series of swirls and stripes using Vallejo Model Color 70.873 (US Field Drab).
Step 13: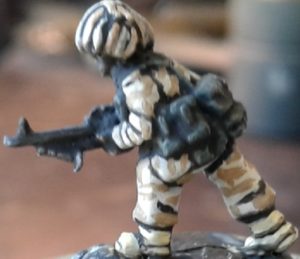
I then recolour the light Hessian strips with Vallejo Model Color 70.821 (German Camo Beige WWII), and the dark strips with 70.843 (Cork Brown).
At the same time I use Vallejo Model Color 70.976 (Buff) on the Boots, careful to leave the recesses black in all cases, to add shadow depth to the figure.
 Step 14:
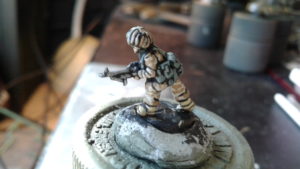
The various desert tan parts of the figure complete, I then use Vallejo Model Color 70.920 (German Uniform) to define the Web Gear and scrim scarf. I also start to define the figure’s flesh by applying a 50/50 mix of Vallejo Model Color 70.875 (Beige Brown) and 70.955 (Flat Flesh) to all but the deepest face and hand details.
Step 15: I complete the skin by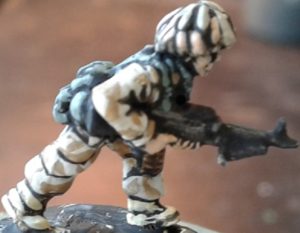 painting the highest parts of the flesh (for instance Hose, Cheek bones etc) with a highlight of Vallejo Model Color 70.955 (Flat Flesh).
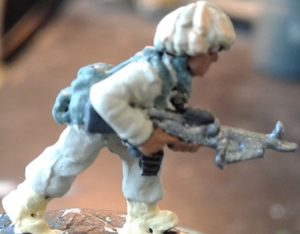
Step 16:
Before finishing the metallic colours, I go back over the GPMG’s plastic furniture with Vallejo Model Color 70.826 (Black Grey).
 Step 17:
The metallics are then re-defined using Vallejo Model Color 70.863 (Gunmetal Grey) for the metal parts of the weapon and 70.801 (Brass) for the ammunition belt.
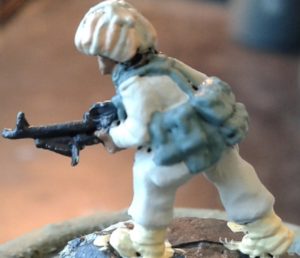
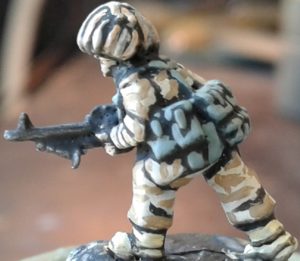
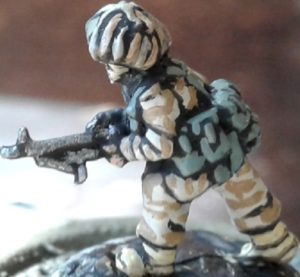
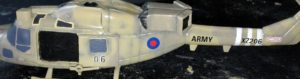
And the finished product after a coat of matte varnish: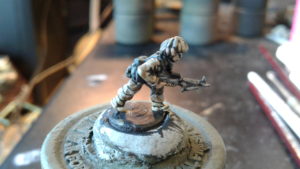
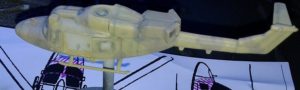
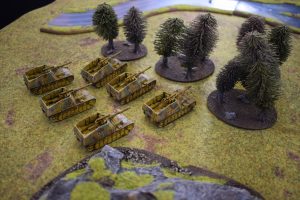
 Because of that the colour scheme that I chose for the Lynx is the two tone yellow and tan camouflage pattern. I also wanted to add a few unique touches to this model, as you will see from the following step by step pictures and brief explanations.
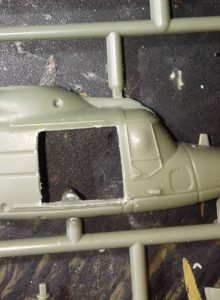 Step 1: The first unique touch that I conceived of was to have the sliding doors slid back. This required a bit of surgery using a very sharp scalpel and file.
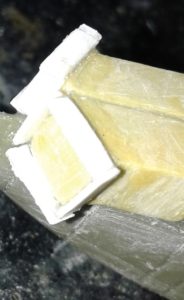
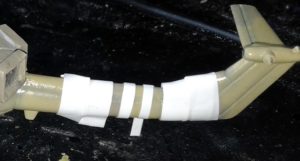
 Step 2: Once I had the doors suitably removed, I had to decide if I was going to build an interior or blank off the doorways. Whilst a detailed interior would look cool, and be an awesome modelling project, it would somewhat defeat the purpose, so I chose blank off the opened doorways. Therefore I used some 0.5mm plastic card and Muliput modelling putty.
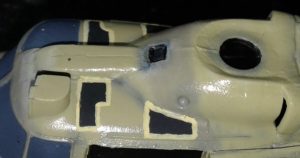
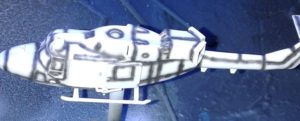 Step 4: With the model now assembled and suitably modified, the next step is to start painting the model. I first sprayed a light grey surface primer.
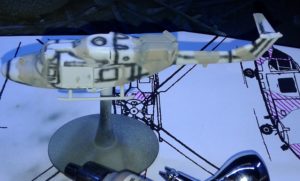
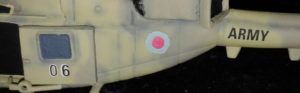
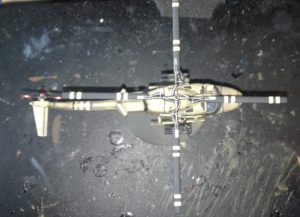
 Step 6: After the two primary colours of the model were dry, I sprayed a coat of gloss varnish over the top. Normally this stage would be thoroughly unnecessary, however I wanted to paint white ‘invasion’ stripes toward the rear of the tail, and the best way to do this would be to mask the area off, and I didn’t want to risk damaging the paint beneath.
 Once the area had been marked off with Tamiya masking tape, I sprayed Vallejo Model Air 71.279 (Insignia White).
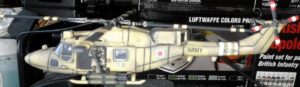
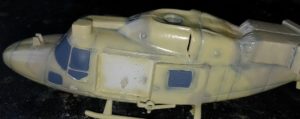 Step 7: Next up I decided to paint up the glass areas of the model using Vallejo Model Color 70.816 (Luftwaffe Uniform)
 Step 8: With the glass areas being more defined I decided to paint on the non-slip panels on the cabin roof of the aircraft. I painted to black portion using Vallejo Model Air 71.251 (NATO Black), and then I outlined these shapes using Vallejo Model Colour 70.916 (Sand Yellow).

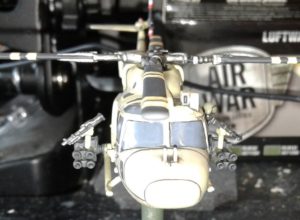
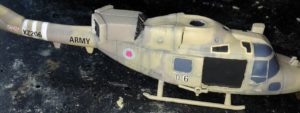 Step 11: Helicopters are dirty animals, so I added some random streaks of Vallejo Engine 73.817 (Petrol Spills) to simulate various types of grime running down the fuselage.
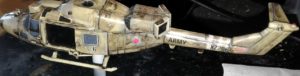
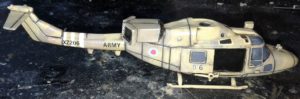 Step 12: I then applied a second all over gloss varnish, then coated the model with an enamel was, in this case Tamiya Panel Line Accent Color (Dark Brown). After allowing the enamel to set for around 24 hours I whiped most of the enamel off with white spirits, an old paint brush and cotton buds, leaving only recessed details on the model dark brown, to add depth paint.
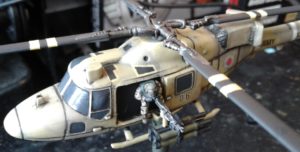
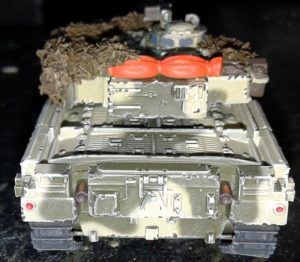
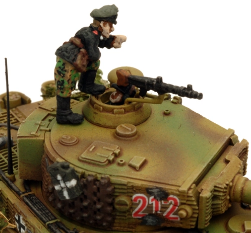
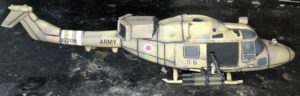 Step 13: I then started to add the final touches to the model. I started with the BGM 71 TOW ATGM launchers, which I painted Vallejo Model Air 71.251 (NATO Black) on the launcher racks, and Vallejo Model Color 70.887 (US Olive Drab) on the missile tubes. At this point I departed from the inspiration photos that I had been using, by adding a crew chief figure and M60D door mounted MGs from the UH-1 Iroquois (Huey) kit. Being as this aircraft is supposed to represent one taking part in the notional 1985 conflict I decided that the crew had scrounged a couple of MGs and pintles from ‘in-theatre’ then mounted them to the already existing weapon fairings in order to provide some local defensive firepower against light ground threats. I then painted the crew chief in ‘desert DPM’, using the following colours.
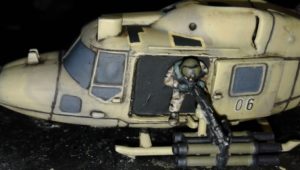
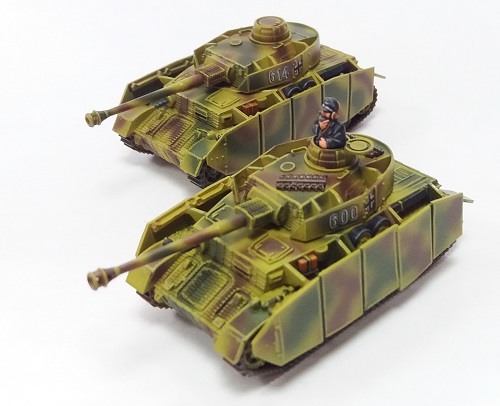
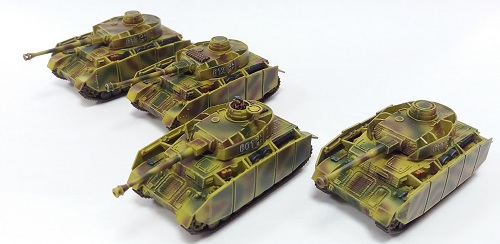
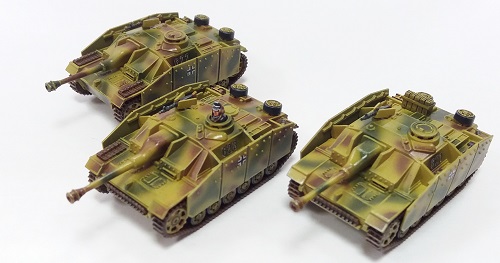
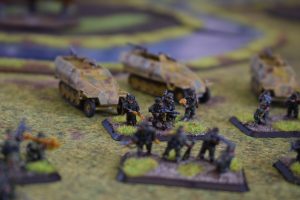
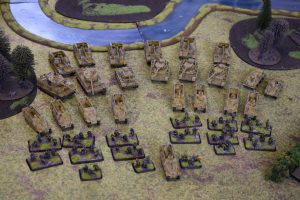
 The backstory that I developed was that this force would be part of a British task force sent to the Middle East as part of the NATO/Western contingent taking part in the battle to halt the Soviet juggernaut using Iran as an invasion corridor in order to seize vital Oil resources, denying them from western forces embattled on the battlefields of Germany.
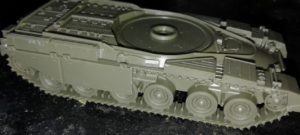
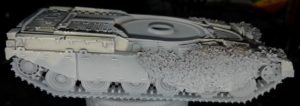
 Step 1:
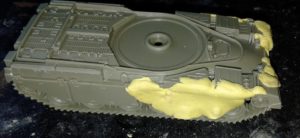
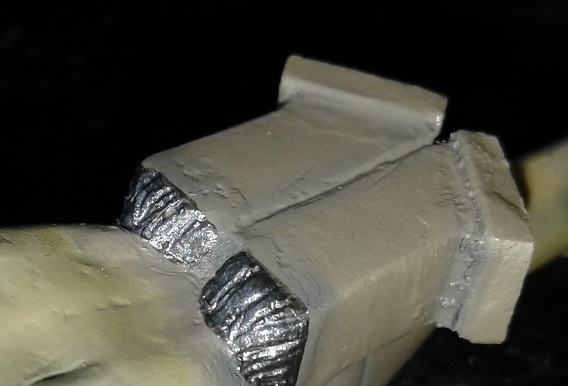
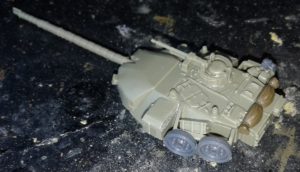
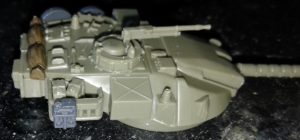
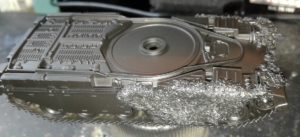
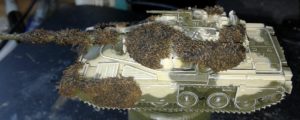
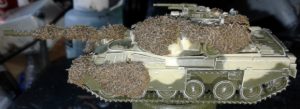
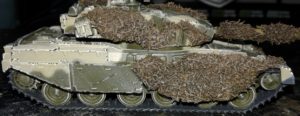
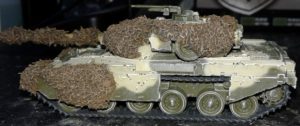
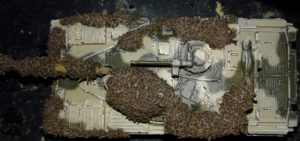
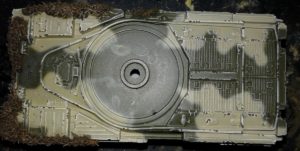
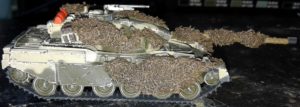
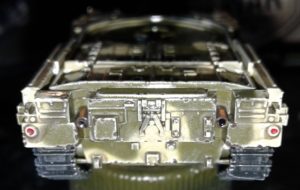
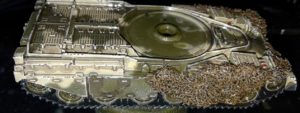
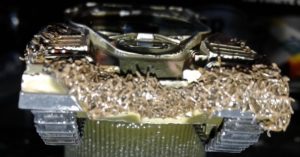
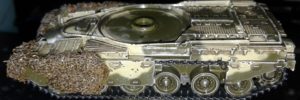
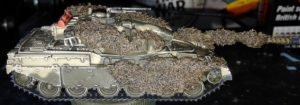
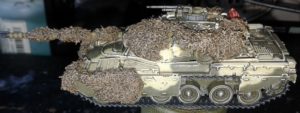
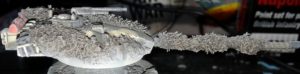
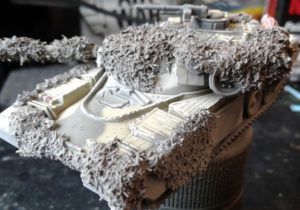
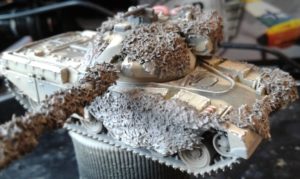
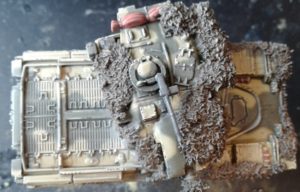
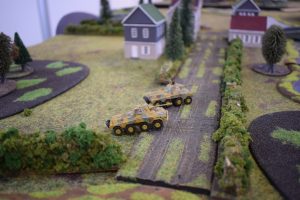
 Step 2: After building the base of the ‘canvas’ I decided that I wanted the vehicle to be liberally draped in ‘Barracuda’ type camouflage nets much like one sees pictures of British military vehicles on field exercises from the era. So I created the basic shapes of the nets with very thin pieces of Miliput modelling putty in various spots of the hull and turret as well as wrapped around the gun tube, being careful to try and avoid blocking optics or access hatches.
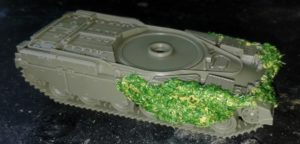 Step 3: With the basic shapes and locations of the camouflage nets in place, I then add the ‘leaf’ type texture of the net by brushing the dried Miliput with heavily watered down white glue. Then I cover these parts of the model with model railway ground clutter, and fix this in place by touching the ‘nets’ with a second coat of even more heavily watered down white glue, before leaving it to dry.
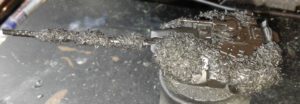
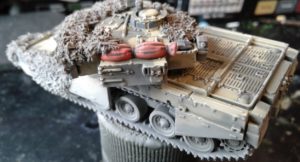
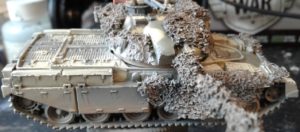
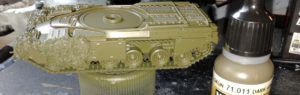 Step 5: Next I sprayed an all over coat of Vallejo Model Air 71.011 (Dark Green RLM83) as the base green for the camouflage pattern.
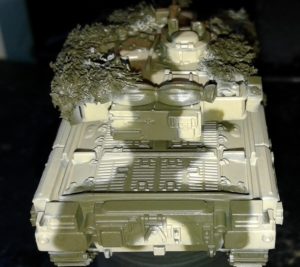
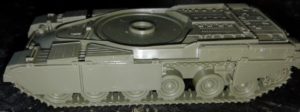
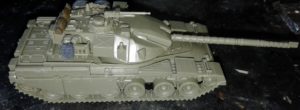
 Step 6: After the base green dried I added the camouflage pattern using Vallejo Model Air 71.143 (UK Light Stone BS361). In keeping with photographic records the scheme is random, but applied in such a way as to ‘break up’ the shape of the vehicle when viewed from a distance. At this stage I also elected to keep one of the armour skirt sections in the base green to give the impression of a replacement plate having been added but not painted camouflage.
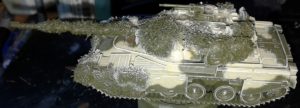 Step 7: After applying the camouflage pattern to the model I highlight the raised details and the edges of the model with an all over drybrush of Vallejo Model Color 70.837 (Pale Sand). While this is a very light colour to highlight the model with, it almost disappears on the finished product, but adds just a hint of definition. It also has the added benefit of slightly fading the two main colours.
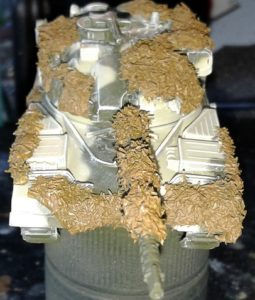
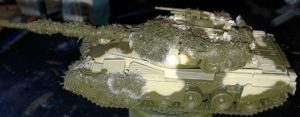
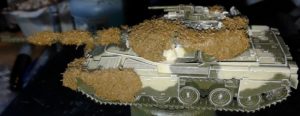 Step 8: I start painting the colour of the netting. In this case I went for the brown side out due to the arid nature of the battlefield, so started with a
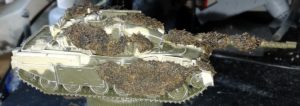
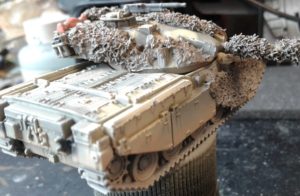
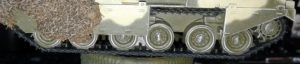 Step 12: Next I paint the tracks and main armament muzzle using Vallejo Model Air 71.251 (NATO Black).
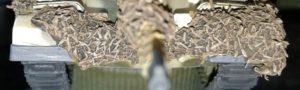
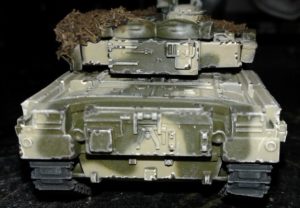
 Step 15: At this point I paint all the smaller details.
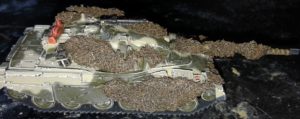

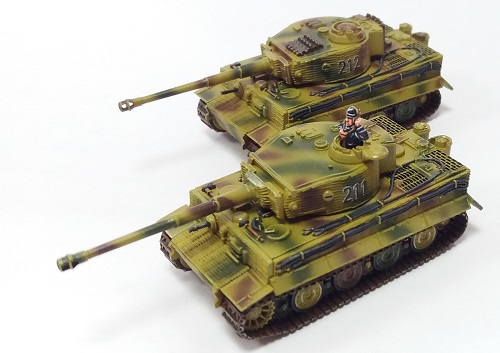
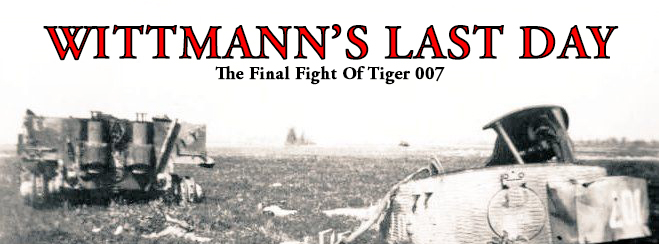
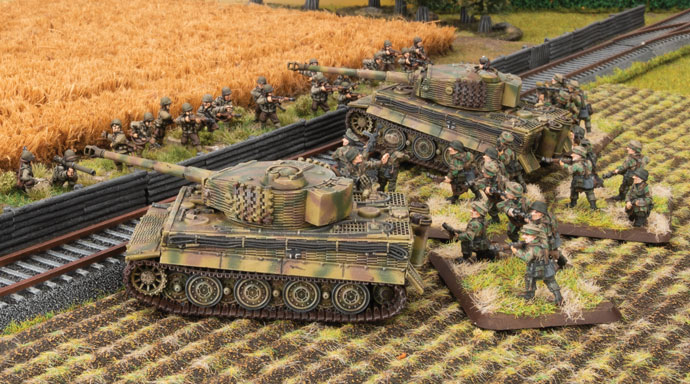
 Chris has already mentioned in his article how much of an exceptional resource Blake’s Tale of Two Tigers series of articles is.
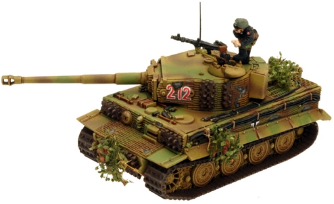
 There’s a lot to learn, so make sure you have the article bookmarked if you’re planning to put together your own Tiger-based list… Although there’s nothing to say you couldn’t transfer some of the skills to our