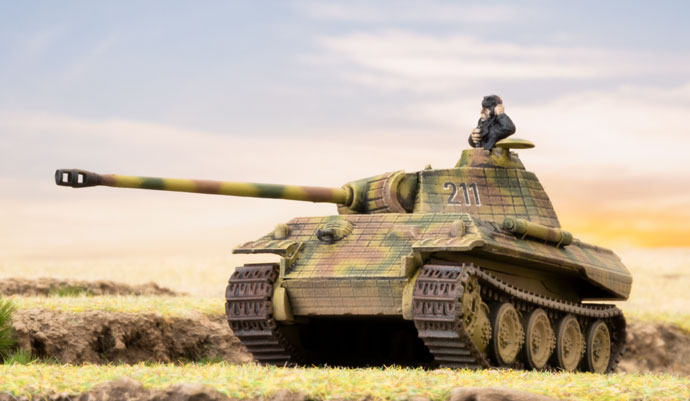
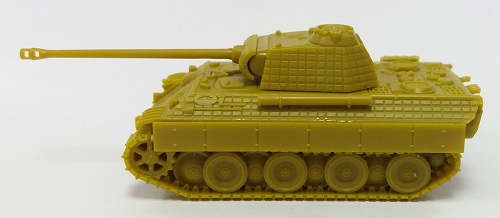
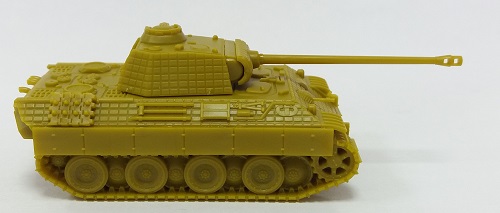
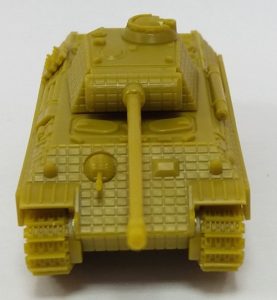
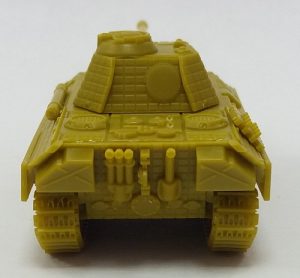
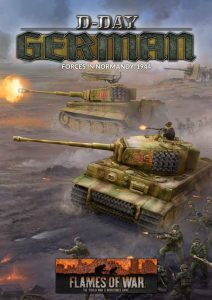
One of the most exciting kit releases coming with D-Day: German is the Panther A with Zimmerit in all plastic. Here, Kai (BF Malaysia) takes us through a brief overview of the Panther tank and the brand new Panther kit.
The Tank
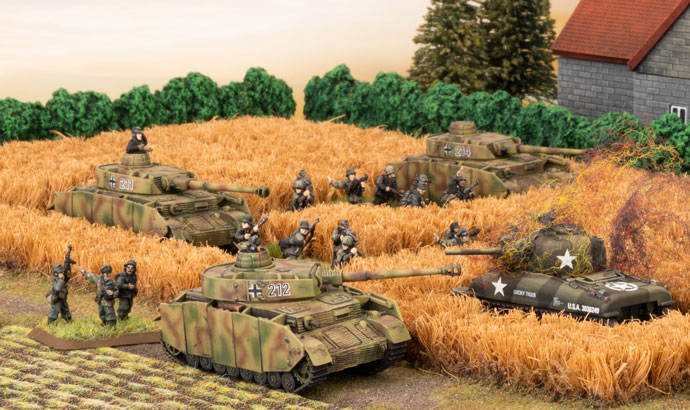
The Panzer V ‘Panther’ Ausf. A was the second production type of the formidable German medium tank. Many of the reliability issues of the prior Ausf. D, such as engine and transmission problems, were rectified by the time the Panther A faced the Allied invasion in the villages of Normandy.
With a potent 7.5cm KwK 42 L/70 gun and 80mm of sloped frontal armour, it was superior to any individual tank the Americans and British could bring to bear. At the same time, the Panther had superior manoeuvrability compared with the Tiger tank. 2,200 Panther A tanks were built, making it the second-most numerous Panther variant after the Ausf. G. The Panther A saw service on the Eastern Front, as well as in Normandy and Italy, so you’ll
have plenty of opportunities to field – or face – this deadly steel beast.
View from the Factory
The plastic Panther A model has been a long time coming! Needless to say, several members of our Malaysian team were quite happy to be the first hobbyists in the world to build this model.
The new Panther A kit has been designed to use the same track sprue that goes with our older Panther G model. Some of the parts on the track sprue – like the exhaust pipes and the ball-mounted hull MG with Zimmerit – have just been waiting all these years to come together in an all- plastic kit.
Our early assembly tests at the factory helped to ensure that all parts from both old and new sprues fit perfectly. Do note that early Panther A tanks were equipped with a pair of vertical exhaust pipes at the rear of the tank, but later production tanks had a triple pipe coming out of the left side instead of the normal single left pipe, to help with cooling.
This could be a great way to distinguish some Panther A tanks in the Late-War period as newly-arrived replacements! The new hull and turret have been modelled with the Panther A’s Zimmerit anti-mine paste, giving it a very distinctive textured look compared with our Panther G model. Anticipating that Soviet infantry would begin using magnetic anti-tank mines, the Germans began applying the paste to new Panther A tanks in the factory in late 1943 – but ultimately abandoned the practice by September 1944.
My first Flames Of War army was German, my Fortress Europe army was German, and when Hobby League started up and everybody had gravitated to the other three forces it seemed like I was destined for Germans again. Luckily for me, with D-Day: German on the horizon I was able to take a deep dive into all the exciting German forces and pick a unique and colourful force to work on.
The key to embarking on any project, Flames Of War or otherwise, is to latch onto something you find interesting. For me, that meant the opportunity to either modify units in my force or paint a colour I haven’t painted before- because after two lots of grenadiers in Field Grey, I was frankly not that interested in doing it a third time around.
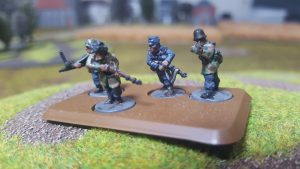
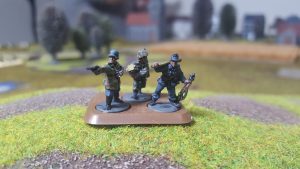
A tabletop approximation of 16. Feld-Division (L) in Normandy, 1944, offers me both of these chances— an opportunity to paint Luftwaffe blue, and an opportunity to modify a few grenadier uniforms to reflect the very swish LwFD camouflage smock.
Having spent an afternoon spitballing with Phil and Andrew, I came up with a list representing 16. Feld-Division (L) roughly as they were during Operation Goodwood, supported by bits of 21. Panzerdivision.
I’m working out of the very exciting D-Day: German, which isn’t out yet—but then again, what’s the point of hanging out at the Battlefront Studio if I can’t get a little early access. With this in mind, here are my first 50 points:As I’m sure you can see, my first 50 points give me a playable formation, but it is also all infantry, which is something of a mountain to climb in only a month—especially since I’m also hoping to pull off some figure modifications to make the miniatures
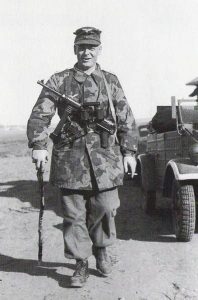
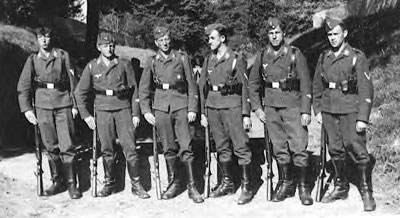
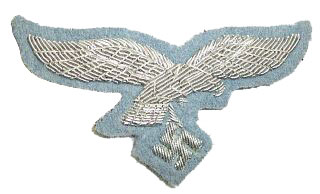
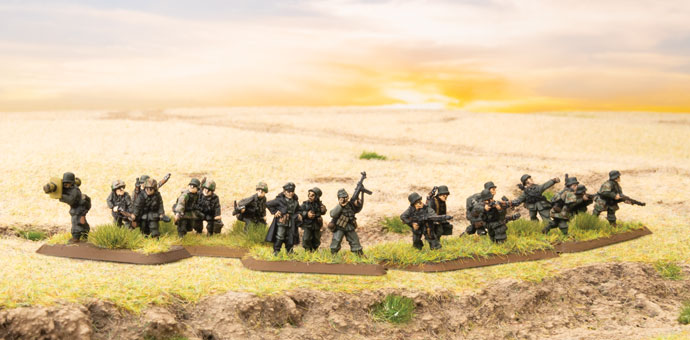
A Brief History of Luftwaffe Field Divisions The Luftwaffe Field Divisions were raised from the ranks of regular old Luftwaffe ground crew. They weren’t the most exceptional troops on account of having never signed up for infantryman duties, and their inception as dedicated field divisions was more a response to suggestions that the German Army could do with a few hundred thousand more warm bodies than it was the establishment of a military unit full of guys who found their natural calling as foot-sloggers after making a brief detour into air force work (kind of like switching your major at university mid-degree because you found out anthropology was really more your thing than law). In any case, the LwFDs kept their organisation and remained under the leadership of Luftwaffe officers until late in 1943 when they were reorganised and transferred to the Heer.
Project Research Up until their transfer, Luftwaffe Feld-Division boys were outfitted with the traditional feldblau Luftwaffe Uniform, making them a distinctive blue on the battlefield, quite obviously different to the feldgrau of the Heer. After being subsumed into the army structure, the LwFD boys were outfitted with regular feldgrau Heer uniforms as their original blues ran out. This will give me the opportunity to paint a mixture of Luftwaffe and Heer uniforms and equipment for my force, as by 1944, there would have been a good mix of kit and uniform. A great source for uniforms is this here 18th Luftwaffe Field Division https://18thluftwaffefielddivision.weebly.com/our-kit.html> reenactment group (who don’t appear to have any info on their ‘About Us’ page, so I can’t thank them), and there is a full list of kit I could apply to my LwFD (you can follow the link and see the list yourself) and there is also this handy tidbit on the subject of mixed Heer/Luftwaffe uniforms:
“Very frequently we can see, especially as the war progressed into 1944-45, the use of Heer uniforms and insignia within the ranks of the LwFD. Not only was supply of uniforms and equipment transitioned to Heer supply, but also the replacements of men. It is for these reasons that we find such variance in equipment and uniforms through to the end of the war.”
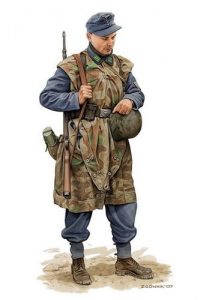
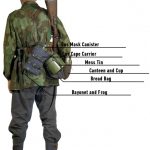
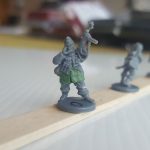
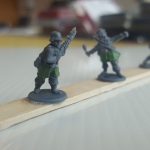
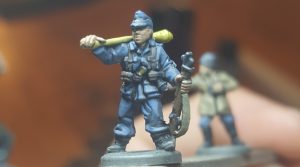
Smock and Roll One of the key features of the Luftwaffe field boys was their iconically formless and ubiquitous camouflage smock. The picture at the top of the article shows a man of the Luftwaffe Field Divisions in one of these splinter-camo smocks. The plastic grenadier kit doesn’t happen to be wearing these smocks. If I were playing my LwFD as kitted fully in Heer or fully in Luftwaffe standard service uniforms this would be no problem, I would just paint then feldgrau of feldblau or a mixture of the two and be on my merry way. But no, I’m going to model a selection of my figures in this iconic smock—and that means Green Stuff.
The simple recipe is to trim off the bottom of the uniform jacket, slice off any pockets, and then with a rubber clay brush (as tiny as you can get it) start spreading the green stuff around the waist of the figure and down to just above his knees. The Luftwaffe camo smock did not have any breast pocket, so you could either shave those off the figures or very thinly green stuff around them to hide them, but in most cases there is enough webbing and extra bits of equipment already covering them. The smock did have a pocket on either thigh which you could model with two tiny squares of green stuff.
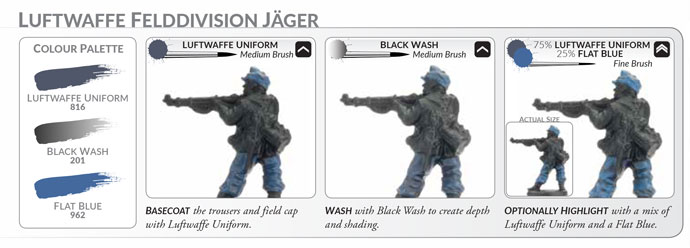
After priming, I painted the smock according to the instructions in Colours Of War, a mixture of German Camo Beige and Green Ochre, then highlighted with German Camo Beige. To separate my Luftwaffe camo pattern from the Heer I picked a slightly different colour combination, using Vallejo Panzer Aces Splinter Blotches I & II, which give a brighter colour palette and are a good colour choice for FJs too.
The guys in blue also benefited from Colours of War, as I followed the Luftwaffe Jaeger instruction in the book to get that bright blue I was so looking forward to painting.
The Rest of the Stuff in the List My 50 points of modified Luftwaffe infantry is certainly a bit ambitious, but it’s comforting to know that the following months will see me painting only a handful of tanks, so it’s not the end of the world.The 10.5cm guns in the support are being modelled as captured Russian guns from the Eastern Front just to add another point of visual interest to the list- they are close enough in use and effectiveness that it’s not beyond the pale to use the 10.5cm Unit Card for those models.
The elements of 21. Panzer that backed up the Luftwaffe in Caen will be represented by a pair of Tiger tanks, a handful of three or four StuGs, and a captured Sherman Firefly. Instead of keeping the list strictly to 100 points, I’m actually painting up a few more points worth of things so I have the option to switch and swap the odd unit or two to give the force a lot more modularity.
Make sure you check back on the Hobby League page each week to see what the gang has been up to, and to see how you can get involved with the Hobby League in your local store or club.
With the release of D-Day: German comes a series of Command Cards used to represent various specific units from the German defence of Normandy. One such Command Card, Air Force Soldiers, gives players the chance to field 16. Luftwaffe Feld-Division. This card could equally be used to represent many of the Luftwaffe Field Divisions of the war, so we dug up an article from the archives outlining the history of the Luftwaffe Field Divisions- perhaps there’s one here for you to represent on the table with D-Day: German…
In the desperate winter of 1941, the Heer, the German Army, was on the defensive after its failed advance on Moscow. Every available unit was thrown into the battle, including the Luftwaffe Fallschirmjäger (air force paratroops). One such unit was the Luftlandesturmregiment, Air-landing Assault Regiment, under Generalmajor Meindl. The regiment’s casualties were so severe that it was withdrawn early in 1942.
However, Generalmajor Meindl and his staff remained behind and formed Division Meindl from spare Luftwaffe ground crew. Under the veteran Fallschirmjäger commander the division fought well in the defence of Cholm.
By the spring of 1942, the Army’s need for troops to replace its casualties was so acute that they convinced Hitler to transfer surplus troops from the Luftwaffe to the Heer. Reichsmarshall Herman Göring, Commander In Chief of the Air Force, was furious. Not only would his personal empire be diminished, but also the reactionary Army, the very organisation responsible for the failures of the previous year, would corrupt his loyal National Socialist airmen.
Instead he offered 22 Luftwaffen Felddivisionen, 22 Air Force Field Divisions, that would remain under air force control, although under army command. The success of Meindl’s division swung the balance, and Göring got his way.
The first ten of these divisions were organized in September of 1942, and, still in their air force-blue uniforms, dispatched to the Eastern Front.
Unfortunately, despite their brand new equipment (the envy of army units still fighting with old, worn out gear from previous battles), they had very little infantry training and little heavy support. Unlike Meindl’s division, their officers were airmen with no knowledge of ground combat at all. As a result, the first Luftwaffe field divisions did not perform well when they entered combat. The remaining divisions formed in early 1943 were little better.
At least one half-formed division was overrun by the spearhead of a Soviet attack while marching to the front, still having conducted no training at all! In November 1943, all remaining Luftwaffe field divisions were converted to regular infantry divisions under full army control.
Luftwaffe field divisions were approximately half the size of their Heer counterparts.
A normal Infanteriedivision had three regiments each of three infantry battalions and an artillery regiment. A Luftwaffe Felddivision had only four Jäger (light infantry) battalions and a single battalion of artillery (often only equipped with out-dated mountain guns or heavy mortars). On top of this, whereas the Infanteriedivision had an anti-tank battalion, a reconnaissance battalion, and a pioneer battalion, the Felddivision often had only one company of each.
The best-equipped divisions had full battalions, but even then, the anti-tank battalion only had 15 anti-tank guns in three companies, one of nine 5cm PaK38, and two each of three 7.5cm PaK40, and no other anti-tank guns in the entire division! There were two positive features though. Firstly, each division had a full Luftwaffe anti-aircraft battalion with four powerful 8.8cm FlaK18 anti-aircraft guns. Secondly, the divisions were entirely equipped with trucks as gun transports and supply vehicles. They had no horses at all.
Divisional Histories
1. Luftwaffe Felddivision (Generalleutnant Gustav Wilke) Relieved the Spanish 250. Infanterie Division, the famous Blue Division, in November 1942, taking up positions north of Lake Ilmen between Moscow and Leningrad.
This was supposed to be an easy sector, and remained quiet until January 1944 when the Red Army launched a massive attack through the division’s sector, wiping the division out in a matter of days.
The division’s artillery was initially only one battalion of 7.5cm GebK15 mountain guns. It was strengthened by two more battalions in 1943, although the battalions may have only had two batteries of four guns each!
2. Luftwaffe Felddivision (Oberst Hellmuth Pätzold)
Was formed at the same time as 1. Luftwaffe Felddivision and was similarly equipped. Additionally it had a company of six StuG D assault guns. The division occupied a sector of the Rzhev salient in November 1942. Unusually, its positions were facing west!
On 25 November the southern part of the division was overrun by a massive Red Army attack, although the northern flank held on until 9 December. The division was rescued by 19. Panzerdivision and Grossdeutschland and reoccupied its positions.
The division was attacked again in October 1943 in its new positions near Nevel, abandoning most of its heavy equipment and retreating rather hastily (as the German Army delighted in pointing out to the Luftwaffe). The division continued to fight on until disbanded in January 1944.
3. Luftwaffe Felddivision (Generalleutnant Robert Pistorius)
Formed at the same time as 1. & 2. Luftwaffen Felddivision, this division occupied positions south of Nevel (north of Vitebsk just west of the Rzhev salient). It had a fairly quiet time until Christmas Eve, 1943 when it was attacked by the 5th Tank Corps. The division was quickly cut off and overrun, being disbanded in January 1944.
4. Luftwaffe Felddivision (Oberst Hans-Georg Schreder)
Took up position south of 3. Luftwaffe Felddivision near Nevel. Initially it had one battalion of two batteries of 10.5cm NW40 heavy mortars for its artillery. It gained four more batteries in two more battalions during the summer of 1943. The division was heavily engaged in the battle around Vitebsk, and later absorbed the remnants of the 3. Luftwaffe Felddivision after its disbandment. 4. Luftwaffe Felddivision fought on until it was destroyed in the Vitebsk pocket in June 1944.
5. Luftwaffe Felddivision (Oberst Hans-Bruno Schulz-Heyn)
While the first four divisions fought in the north around Moscow, 5. Luftwaffe Felddivision was sent south to Army Group B in the Caucasus. It was posted to defend Krasnodar, near the Black Sea, with the Rumanian Cavalry Corps. On 11 January 1943 the Red Army launched Operation Mountain to push Army Group B from the Caucasus. The attack split 5. Luftwaffe Felddivision in two. Half remained with the Cavalry Corps, while the other half fought with 4. Gebirgsjägerdivision further north. The fighting continued until May, by which time the division was reunited in the Kuban bridgehead, the only remaining German toehold in the Caucasus. In late May, the division withdrew to Crimea to reorganise before moving to the front lines at Melitopol, just north of the Crimean Peninsula, in September where it absorbed 15. Luftwaffe Felddivision as replacements for previous losses. On 9 October 1943, the Red Army launched another major offensive that cut off the Crimean Peninsula. The division was retreated westward and fought on until disbanded in May 1944.
6. Luftwaffe Felddivision (Generalleutnant Rudolf Peschel)
After defending Velikiye Luki, north of the Rzhev salient, in heavy fighting in November and December 1942, 6. Luftwaffe Felddivision took up position between of 2. & 3. Luftwaffen Felddivisionen near Nevel in July 1943. There it received additional artillery batteries to form weak second and third artillery battalions.
It remained there until the attacks of January 1944.
It fought off heavy attacks with the help of the Hornisse tank-hunters of 519. Panzerjägerabteilung, winning the Knights Cross for the divisional commander and Obergefreiter Heinz Reichmann. It then absorbed the remnants of 2. Luftwaffe Felddivision to replace its losses. The division was destroyed in the Vitebsk pocket in June 1944.
7. Luftwaffe Felddivision (Generalmajor Wolf Freiherr Von Biedermann)
Was hastily rushed to the front to hold the line on the Chir River after the encirclement of Stalingrad. It was involved in continuous fighting until March, 1943 when it was disbanded and the survivors used to strengthen 15. Luftwaffe Felddivision. Oberleutnant Emil Eitel won the Knights Cross during this period.
The division’s artillery was a single battalion of 7.5cm GebK15 mountain guns. They were supported by a company of five StuG D assault guns.
8. Luftwaffe Felddivision (Generalleutnant Wilibald Spang)
Although 8. Luftwaffe Felddivision was supposed to be organised the same as 7. Luftwaffe Felddivision, it was slightly different due to the way it was formed. Kampfgruppe Statel (formed from rear-area Luftwaffe troops retreating from Stalingrad under Oberst Rainer Statel) was already in combat on the Chir River when the rest of the division, newly arrived from Germany, was assigned to a different sector.
While moving up to their assigned positions, the anti-tank battalion and leading battalions ran headlong into the Soviet spearhead and were annihilated. The survivors of the division fought on throughout the winter. In April 1943 what was left of the division was used to strengthen 15. Luftwaffe Felddivision.
9. Luftwaffe Felddivision (Generalmajor Ernst Michael)
The next series of Luftwaffe divisions had a little longer to organise and actually had two regiments of three infantry battalions. In the case of 9. Luftwaffe Felddivision they were 17. & 18. Luftwaffen Jägerregimenter (light infantry regiments). Although the division had no assault guns, it did have two weak battalions of artillery, and in theory, full battalions of anti-tank, pioneers, and infantry reconnaissance.
It joined the divisions guarding the Soviet troops trapped in the Orienbaum pocket on the coast just west of Leningrad in December 1942. It initially occupied an 11-mile front, but this was later increased to 23 miles. Far too long a stretch for such a weak division. One battalion briefly fought with 227. Infanteriedivision around Lake Ladoga, before returning to guard the pocket in March 1943.
The sector was quiet until 14 January 1944, when a massive Soviet attack by the 2nd Shock Army burst through the division. The attack by five infantry divisions and a tank brigade destroyed the Luftwaffe division in just four days. 10. Luftwaffe Felddivision (Generalmajor Walter Wadhehn)
Like 9. Luftwaffe Felddivision, 10. Luftwaffe Felddivision spent most of its life guarding the Orienbaum pocket. In January 1943 a Kampfgruppe or battlegroup from the division fought near Lake Ladoga, supported by four Tiger tanks from 502. schwere Panzerabteilung and Marder tank-hunters of 563 Panzerjägerabteilung.
The same attack that destroyed 9. Luftwaffe Felddivision rolled over the division, although Kampfgruppe Helling fought on until the division was officially disbanded in February 1944. The commander of 19. Luftwaffe Jägerregiment, Oberst Matussek, won the German Cross in Gold for his valiant defence.
Unlike the 9. Luftwaffe Felddivision, the division had three battalions of artillery. One with twelve 10.5cm NW40 heavy mortars, and two battalions of twelve 7.5cm GebK15 mountain guns.
11. Luftwaffe Felddivision
This division was formed in Greece for guard duties and did not see combat until late 1944 as it retreated through the Balkans.
12. Luftwaffe Felddivision (Generalleutnant Herbert Kettner)
One of the two really good Luftwaffe field divisions, 12. Luftwaffe Felddivision was part of Army Group North from February 1943 until the end of the war. It had 23. & 24. Luftwaffen Jägerregimenter, each of three battalions, and two battalions of artillery, each with twelve old 1897-model French 75mm guns. Its anti-tank battalion had twelve new 7.5cm PaK40 anti-tank guns, twelve 2cm FlaK38 anti-aircraft guns, and ten StuG assault guns with long 7.5cm guns.
In February 1943 they entered combat near Lake Ladoga north of 1. Luftwaffe Felddivision. They stopped a Soviet attack in their area winning two German Crosses in Gold in the process. They fought hard and well in the January 1944 fighting and in the subsequent retreats. They were finally cut off in the Courland pocket and ended the war fighting in East Prussia.
13. Luftwaffe Felddivision (Generalmajor Hans Korte)
Entered the line south of 12. Luftwaffe Felddivision in February 1943. It took part in the July 1943 battles, but was destroyed in the retreat in January 1944.
14. Luftwaffe Felddivision
This division spent the war performing garrison duties in Norway.
15. Luftwaffe Felddivision (Generalmajor Eduard Muhr)
This division was scratched together from local air force units around Rostov in November 1942. It absorbed the survivors of 7. & 8. Luftwaffen Felddivisionen in April 1943 and received its artillery regiment from France in May. Its first battles were in July 1943 near Taganarog on the Sea of Azov just west of Rostov. The division was surrounded, but broke out leaving most of its heavy weapons behind. Hauptmann Eitel won a posthumous Knights Cross leading 30. Luftwaffe Jägerregiment through enemy lines.
In October the remnants were at Melitopol on the Dnepr River when they were overrun again. The survivors were absorbed into 5. Luftwaffe Felddivision south of Zaphorye.
16. Luftwaffe Felddivision
Fought in France, 1944 and destroyed at Caen soon after D-Day.
17. Luftwaffe Felddivision
Destroyed defending the Seine crossings in France, 1944, during the breakout from Normandy.
18. Luftwaffe Felddivision
Destroyed in the Mons pocket in France, September 1944.
21. Luftwaffe Felddivision (Generalmajor Richard Schimpf)
21. Luftwaffe Felddivision was formed from Division Meindl, which had five regiments each of four infantry battalions, but little else. Division Meindl was formed as an overall command for the numerous air force security battalions and hastily formed defence battalions that suddenly found themselves in the front lines during the Soviet 1941 winter offensive. When it was formed in February 1942, the regiments were all attached to infantry divisions between Leningrad and Moscow.
1. Luftwaffe Feldregiment was with 218. Infanteriedivision in and around the Cholm pocket.
2. Luftwaffe Feldregiment was with 5. Jägerdivision near Staraya Russia.
3. Luftwaffe Feldregiment was with 12. Infanteriedivision in and around the Demyansk pocket.
4. Luftwaffe Feldregiment was with 18. Infanteriedivision (mot) around Lake Ilmen.
5. Luftwaffe Feldregiment was with 290. Infanteriedivision in and around the Demyansk pocket.
Between then and December 1942, when 21. Luftwaffe Felddivision was formed, the division was reunited and held the southern flank of the newly opened corridor to Demyansk and Cholm. The newly formed division only had four regiments, the fifth having been disbanded. It gained an artillery regiment with French guns in the summer of 1943, along with an assault gun battery of four long-barrelled StuG III assault guns (increased by a further six StuG IV in 1944) and ten 7.5cm PaK40 guns. Each regiment was also reported as having as many as ten 7.62cm PaK36(r) anti-tank guns. At this point it was easily the strongest Luftwaffe field division in existence.
The division was involved in heavy fighting from March 1944 until it surrendered in the Courland pocket at the end of the war.
22. Luftwaffe Felddivision
Disbanded before fully formed.
The Big Four Of Late War is a four-man journey through Late War starting with an army box each and working through every Late War release of V4. With everyone in the Big Four selecting one of the four major Flames Of War Late War forces, it fell to Wayne to work on a German force which you can check out here on the Big Four Website…
Be sure to regularly check out the Big Four website during the course of the Late War journey- as you can see from the quality of Wayne’s painting here, the Big Four put a lot of effort into presenting exceptional armies.
You can read a collection of community content ranging from reviews to force overviews, battle reports to Command Card forces from the great Flames Of War community.
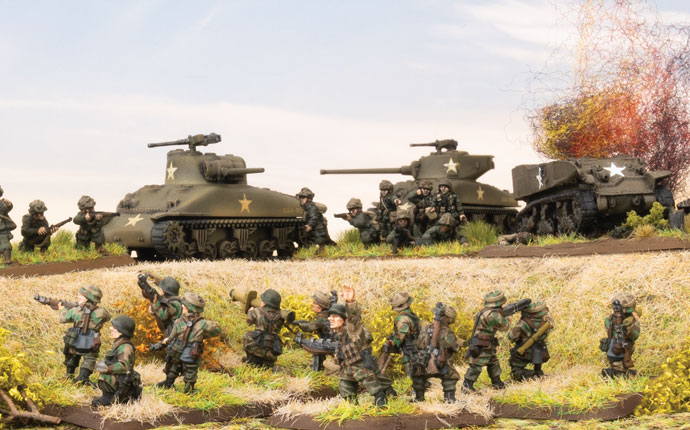
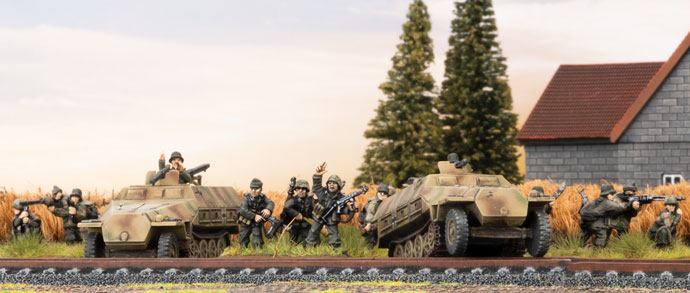
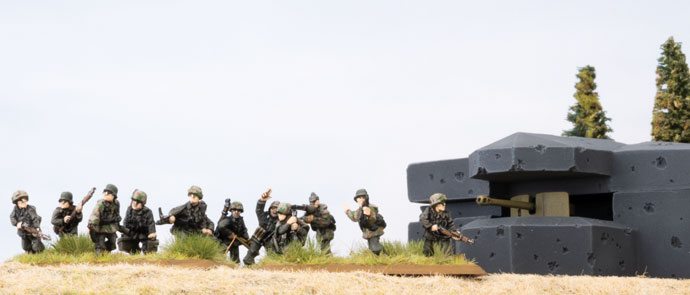
The coolest thing about the new Reconnaissance Company in D-Day: German is its flexibility. It’s similar to an Armoured Panzergrenadier Company in many ways, but lighter, faster, and more flexible. With the war turning against them, German panzer divisions found themselves fighting on the defensive more often than making grand offensives. As a result, the reconnaissance battalions were used as the divisional reserve, to fill gaps in the line, or to cover retreats more than as a true reconnaissance force. The reconnaissance company fills these roles well, and can be built in three different ways to reflect this.
If I’m building a divisional reserve type force, I want to create a battlegroup mixing tanks and armoured infantry for a flexible approach to battle. The core of the force would be a Reconnaissance Company HQ and a pair of Reconnaissance Platoons, all in light Sd Kfz 250 half-tracks, as an assault force. I could swap one of these out for a normal Armoured Panzergrenadier Platoon to save a few points, but I like the increased firepower of the extra half-tracks and the Scout ability to keep my infantry alive as they work their way forward.
I’d back them up with a Scout Troop of Sd Kfz 250 (2cm) armoured cars to give me some spearhead capability and a useful economy-of-force unit to tie down enemy troops where my main force isn’t. The 8cm Mortar Section and 7.5cm Gun Platoon, give me more Sd Kfz 250 half-track goodness, and relieve my tanks of infantry support duties, making the infantry more self-sufficient. That useful little company comes in at around 44 points if I keep one of the 7.5cm Gun Platoon at two rather than three vehicles. Since I’ve plenty of other guns in my tanks, I don’t think I’ll miss the extra vehicle.
That leaves me a solid 56 points for the tank component. I could go with five Panther tanks for some heavy fire support, but as I envision this as a free-wheeling attack force, I think a company of ten Panzer IV tanks works better. As a separate formation, it’s strong enough to fight its own battle in support of the reconnaissance, and gives me two formations to keep me in the fight. The last point would probably go on the Lucky command card for that extra bit of luck when I really need it.
A defensive force to fill a gap in the line would be a bit different. Here, I’d probably look at adding four Panthers as a powerful reserve striking force (rather than the Panzer IVs), while boosting the core company with a 7.5cm Tank Hunter Platoon to give me more resilience against tanks. Since I don’t need as much mobility, I think I’d also trade in the half-tracks from one platoon to give all of my infantry Panzerfausts. The plan here would be to dig in the platoon without half-tracks with the anti-tank guns on the most vulnerable objective, while a mobile group of all of my half-tracks manoeuvres to keep the enemy at bay until my Panthers arrive, then counterattacks to secure victory. To build a true reconnaissance force for mobile operations, I might look at the Puma Scout Company command card for my second formation in place of tanks. A company of nine Puma eight-wheelers with three 7.5cm armoured card for fire support would set me back 24 points. Adding a second Sd Kfz 250 (2cm) and the 7.5cm Tank-hunter Platoon to my Reconnaissance Company burns up another 14 points. Throw in a platoon of overlong 8.8cm tank-hunters for heavy tank killing, and I’ve got a force that is mostly light, fast and mobile, but still packing a heavy punch.
No matter how you organise it, the Reconnaissance Company has plenty of flexibility and potential (as well as lots of really cute Sd Kfz 250 half-tracks!).
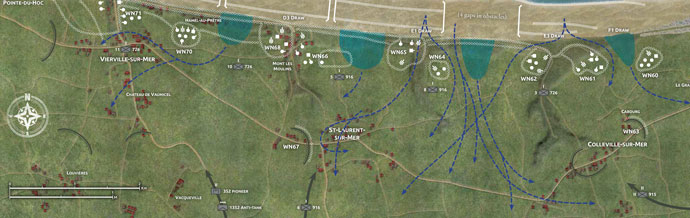
In early 1944, the situation in France was clearly the quiet before the storm. An Allied invasion would come, probably in the summer, but until then it was a quiet place to rebuild divisions shattered in the desperate autumn and winter battles on the Eastern Front behind the ‘Atlantic Wall’ fortifications lining the coast.
The challenge faced by the German commanders, Rommel and von Rundstedt, was how to combine these disparate forces into a battle-winning force. Should the panzers support the beach defences closely? Or should they operate with complete freedom, seeking to strike a battle-winning blow to cut off and destroy the Allied armies once ashore? What would be the best way to handle the massive Allied superiority in numbers, artillery, especially heavy naval gunfire, and aircraft? They made their choices and failed. Can you do better, defeating the Allied invasion and saving Germany?
What’s In The Book?
Beach Defence Grenadier Company
Plenty of cost-effective firepower, with lots of ways of getting even more.
Grenadier platoons can increase their firepower with more machine-guns, added heavy machine-guns, and Panzerfaust and Panzerschreck anti-tank weapons.
Poorly-trained family men, limited skill, weak in assaults, and easier to hit than most German troops.
Lots of anti-tank and artillery options with 5cm or 7.5cm anti-tank guns, 8cm and 12 cm mortars, and 7.5cm and 15cm guns.
Good for holding ground, but don’t expect too much from them.
Easy to convert from Grenadier Company in Fortress Europe.
Fallschirmjäger Company
Large platoons of fearless, high-quality infantry.
Platoons can get extra firepower with heavy machine-guns, and Panzerfaust, and Panzerschreck anti-tank weapons.
Well defended against tanks with both Panzerfaust and Panzerschreck anti-tank weapons and 7.5cm anti-tank guns.
Lots of mortars 8cm and 12cm guns.
Good for holding ground, even better for taking it.
Exciting new addition to Late War.
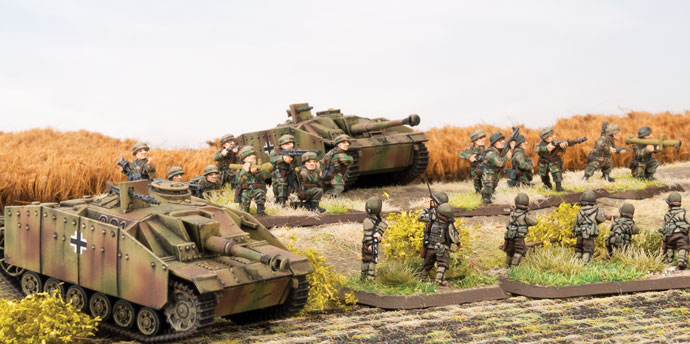
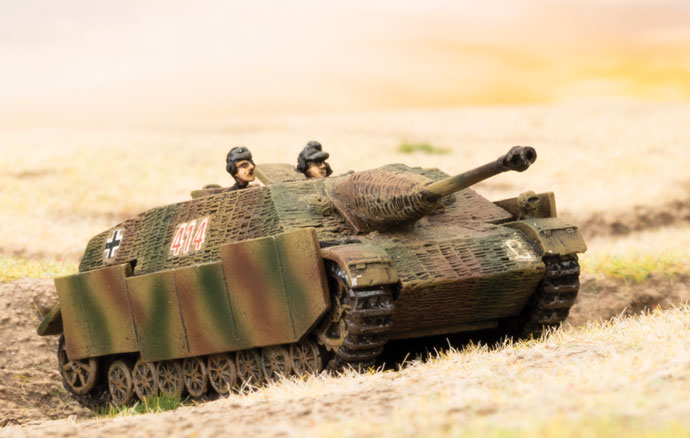
Fallschirmjäger StuG Assault Gun Company
StuG assault gun has better front armour and the same gun as a Panzer IV medium tank, but has no turret so can’t shoot targets to the flanks, and is less effective when assaulting infantry.
StuH assault howitzer has a brutal gun with 2+ firepower for knocking out enemy guns and infantry.
StuH assault howitzers operate in a separate platoon and can fire as artillery to support StuG platoons or grenadiers.
Company can include an integrated Fallschirmjäger or Beach Defence Grenadier Platoon to protect the assault guns.
Work well with infantry. Assault guns provide fire support. Infantry cover vulnerable flanks.
Easy to convert from StuG Assault Gun Company in Fortress Europe.
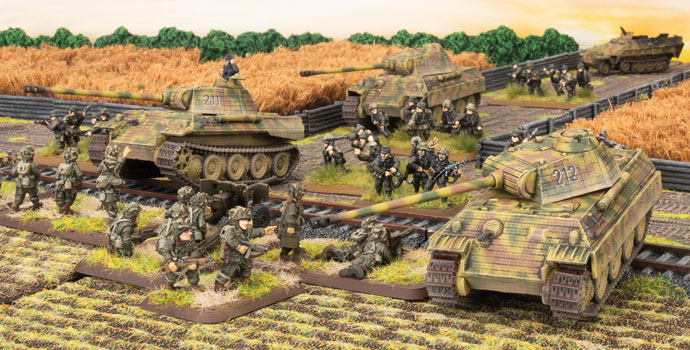
Panther Tank Company
Medium tanks with enough armour to stop any Allied anti-tank gun and a gun that can easily penetrate any Allied tank, and fast to boot!
Thinner side and top armour make more vulnerable than heavy tanks like the Tiger.
Integrated self-propelled anti-aircraft (including Möbelwagen quad 20mm on Panzer IV chassis) help keep Allied aircraft at bay.
Flexibility. Can swap out platoons of Panther tanks for a platoon of Tiger heavy tanks and a platoon of Panzer IV medium tanks.
Easily outclasses all opposition, just watch out for your flanks.
Easy to convert from Panther Tank Company in Fortress Europe.
Panzer IV Tank Company
Baseline medium tanks. Good armour and better guns than Allied medium tanks.
Protected ammunition storage and bazooka skirts limit effectiveness of US Bazookas, British PIATs, and Soviet anti-tank rifles.
High-quality crews give tactical advantages.
Integrated self-propelled anti-aircraft (including Möbelwagen quad 20mm on Panzer IV chassis) help keep Allied aircraft at bay.
Flexibility. Can swap out a platoon of Panzer IV tanks for a platoon of Tiger heavy tanks or Panther tanks.
Gives you the numbers to match the Allies, while still exceeding them in quality.
Easy to convert from Panzer III & Panzer IV Tank Company in Fortress Europe.
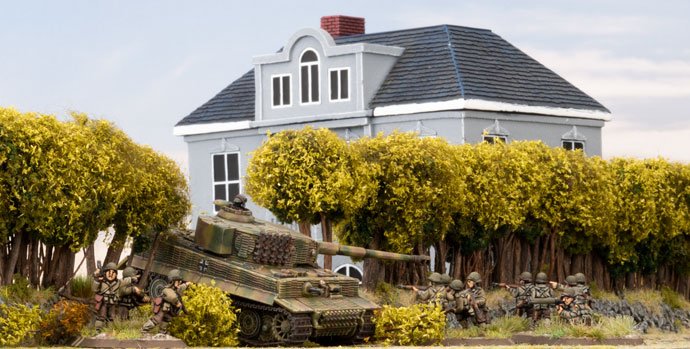
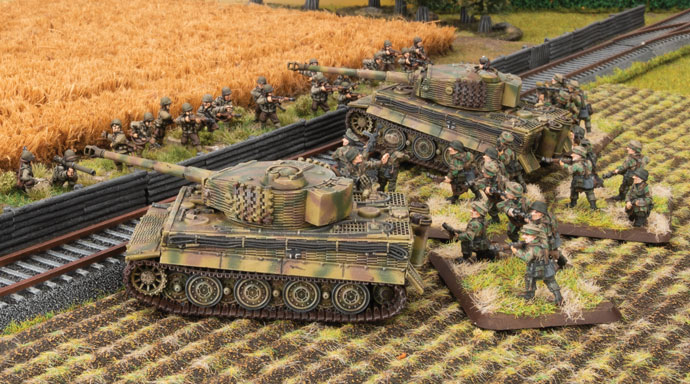
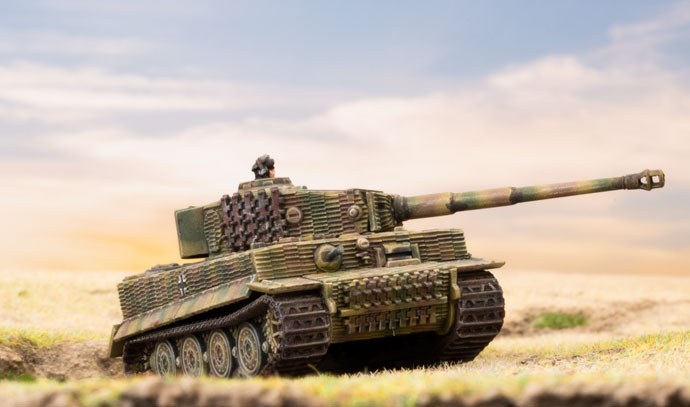
Tiger Tank Company
Elite heavy tanks with thick armour and powerful guns, yet more mobile than most medium tanks. Ploughs through terrain without a problem.
Almost immune to medium tanks, artillery, and infantry.
Integrated self-propelled anti-aircraft to help keep Allied aircraft at bay.
Expensive quality, but still cheap enough to field a good-sized company.
Easy to convert from Tiger Tank Company in Fortress Europe.
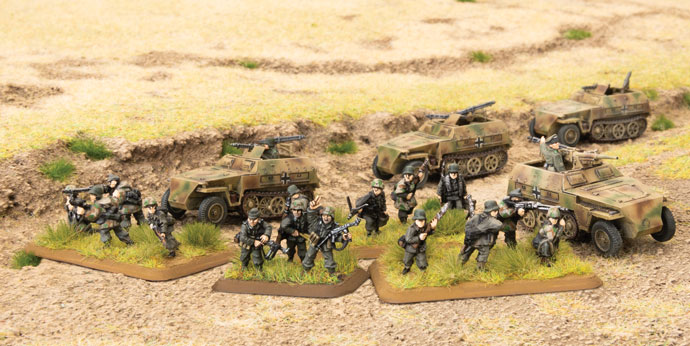
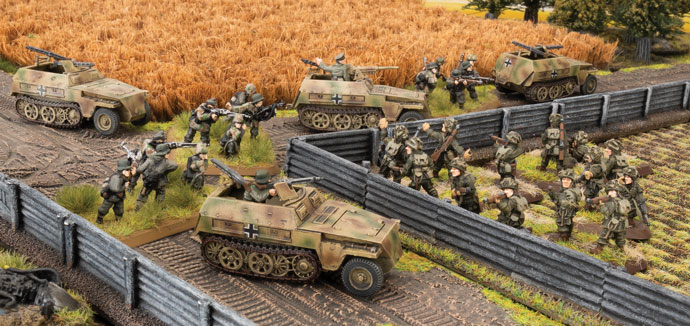
Armoured Panzergrenadier Company
Armoured Sd Kfz 251 half-tracks for battlefield mobility, even under fire.
Infantry can assault while mounted in their half-tracks to overrun light opposition.
Half-tracked heavy weapons, including 8cm mortars, 2cm AA, 7.5cm guns, and flame-throwers. Grille gives integrated 15cm heavy artillery.
Flexibility to take dismounted troops. Save points by leaving the half-tracks at home.
Fast and mobile with plenty of firepower in the attack, solid with massive firepower in the defence.
Easy to convert from Panzergrenadier Company in Fortress Europe.
Panzergrenadier Company
High quality infantry.
MG teams give plenty of firepower.
Can add Panzerfaust and Panzerschreck anti-tank weapons and 7.5cm anti-tank guns to keep tanks at bay.
Plenty of integrated weapons, including heavy machine-guns, 8cm and 12cm mortars, 2cm AA, and 7.5cm and 15cm guns.
Option to include half-tracked heavy weapons for a mobile attacking force.
Flexibility to take a platoon in half-tracks as a mobile strike force.
Plenty of firepower to cover attacks or break up enemy attacks. Trained for clever, aggressive attacks and tenacious defence.
Easy to convert from Panzergrenadier Company in Fortress Europe.
Up to 7 half-tracks per platoon for maximum mounted firepower.
Sneaky scout versions of 8cm mortar and 7.5cm gun half-tracks.
All-new armoured including:
2cm, Puma 5cm, and 7.5cm eight-wheelers.
Light 2cm half-tracked armoured cars.
Armoured cars are integrated into formation.
Flexibility to take armoured and dismounted panzergrenadier platoons.
Can be integrated into armoured and dismounted panzergrenadier companies.
Sneak into position, then hit hard and fast.
Easy to convert from Panzergrenadier Company in Fortress Europe.
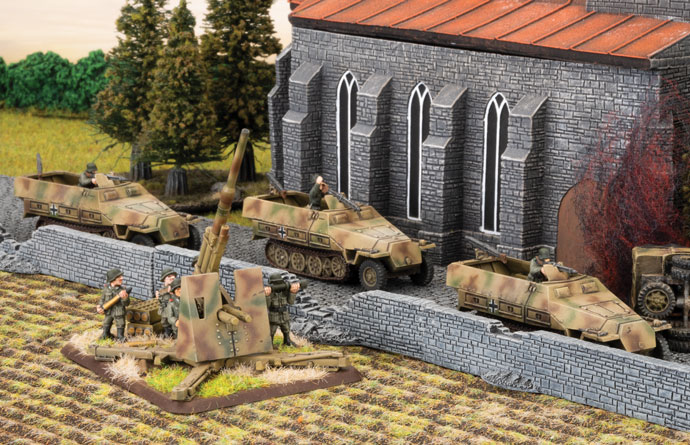
Support
New Jagdpanzer IV tank-hunter. Cheap, effective, mobile.
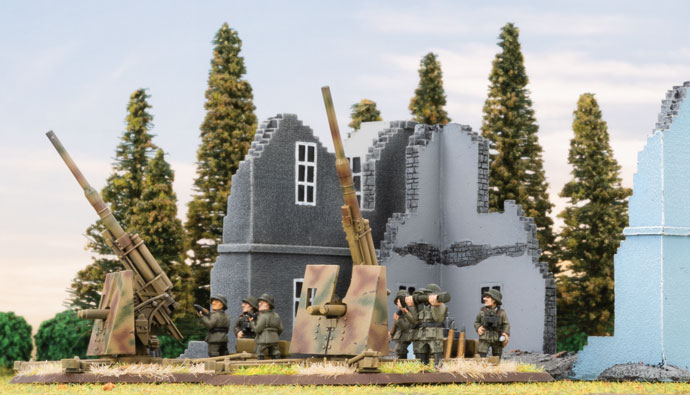
Super-deadly long 8.8cm anti-tank guns on cruciform turntable have all-round field of fire.
Plenty of AA options to counter Allied aircraft. Self-propelled single and quad 2cm, or ground mounted 2cm light or 8.8cm heavy AA guns.
Lots of artillery choice, with Hummel 15cm and Wespe 10.5cm self-propelled guns, 10.5cm howitzers, and 15cm Nebelwerfer rocket launchers.
Allied air superiority prevents any German air support in Normandy..
How Do the Germans Play?
The Germans in Normandy have three distinct styles, although they can be profitable mixed and matched for even greater customisation to match your approach.
The first style comes with the Beach Defence Grenadier Company. This formation has a hard crust and a soft gooey centre. It relies entirely on firepower to keep the enemy at bay. If the enemy ever gets through your wall of fire, you will suffer badly. On the other hand, since everything is so cheap, that wall of fire can be very imposing. The second comes with the Fallschirmjäger Company. This formation is the exact opposite. These guys are hard right the way through! Although they can turn on the firepower, particularly with plenty of mortars, they really shine when they get up close and personal with the enemy. Their deadliness is lethal to infantry, and almost as scary to tanks, thanks to their bazooka-like Panzerschrecks and short-ranged Panzerfausts.
The panzer divisions provide the third style. Whether tanks or panzergrenadiers, these troops have the best equipment in the world, and are highly skilled and won’t quit. Fighting cleverly, these elite troops can tackle greater numbers with ease.
Combining these different styles can also be profitable. You could back your beach defence troops with a hard-hitting armoured battlegroup, or use beach defence troops to hold an objective while your panzers pivot onto the enemy flanks. Your Fallschirmjäger can benefit from the compact firepower of the panzer divisions supporting their attacks, or provide the panzers with a core of shock troops to assault the objective.
In summary, a successful German force will use their superiority in equipment, training, skill, and cleverness, combined with a good dose of aggression, to keep the initiative, hit the enemy in their weak spots, while minimising the enemy’s opportunities to hit them back.
Normandy Campaign Missions
D-Day: Greman includes three new missions and a linked campaign. The first mission is Armoured Fury, a mobile battle where the attackers must push past an enemy spearhead to seize objectives deep in enemy territory, while at the same time preventing the spearhead from pushing on further. It recreates both the German armoured counterattack late on D-Day that pushed between the British spearheads to reach the sea, cutting the British sector in half, and the desperate German counterattack at Mortain, trying to reach the coast and cut off the American breakout.
The second mission is Outflanked. Here the defenders must extend their line to avoid being outflanked by the attackers, reflecting the battles in the week after D-Day before the lines solidified as both sides sought to find an open flank. The third mission is Breakout, which allows you to refight the desperate German attempts to escape encirclements at Roncey, Falaise, and then Mons. The attacker is trapped between the encircling defenders and the troops closing in behind them. They must breakout or die.
These three missions are linked together with two standard missions from the rulebook in a simple campaign where the outcome of one battle has an effect on the next. If the German player can breakout from encirclement in the fifth mission, they win the campaign.
Who are the Warriors
The D-Day: German command card pack includes six warriors: Friedrich Adario, Heinz Auert, Wilhelm Bäder, Heinz Deutsch, Hermann Droppman, and Kurt Knispel. These tough fighters were all awarded the Knight’s Cross, one of Germany’s highest awards.
Kurt Knispel, veteran of years of combat on the Eastern Front, led a platoon of Tiger heavy tanks in Normandy. As the highest scoring tank ace, Knispel rarely missed his target, and refused to leave the battlefield until the task was completed.
Wilhelm Bäder and Hermann Dropmann led grenadiers into battle. Bäder, an ex-artilleryman, made good use of his formation’s mortars and infantry guns, while Dropmann, despite being a colonel in charge of a whole regiment, knocked out five tanks in close combat in a single day, for a career total of at least fifteen tanks.
Friedrich Adario and Heinz Deutsch were both deadly efficient anti-tank commanders. Adario’s long 8.8cm guns were deadly when striking from ambush, destroying well over one hundred British tanks from long range in the Normandy campaign. Deutsch led a StuG assault gun platoon, and ended the war with a claim to 46 Allied tanks destroyed. Heinz Auert was a real fire eater who commanded a reconnaissance company. Rarely waiting to give the enemy time to prepare, or time for his supporting troops to arrive, Auert attacked, catching the enemy by surprise as they were preparing their own attack.
Command Cards
The command cards introduce a new concept, title cards. These cards have the title of a division and a special rule giving the division’s flavour. The key is that you can only have one title in your force. Beach defence troops gain five different varieties from fast bicycle troops to specialist assault battalions, from reluctant ‘volunteers’ from the prisoner of war camps to the higher-quality 352nd Infantry Division. Your beach defence troops can also enhance their firepower with cheaper, but not as well-trained, artillery, anti-aircraft, and anti-tank options.
The Fallschirmjäger paratroopers add three different titles from the barely-trained 5th Fallschirmjäger Division to von der Heydte’s elite 6th Fallschirmjäger Regiment. The panzers round out their options with three more divisions to join the basic Panzer Lehr. These range from the superb 2nd Panzer Division which adopted night attacks to avoid Allied firepower to the barely-trained 116th ‘Greyhound’ Panzer Division.
Other ways in which you can customise your force include crewing your Tiger tanks with aces, allowing your assault guns’ escort platoon to operate as true tank riders, upgrading your infantry to pioneers, armouring your self-propelled anti-aircraft guns, allowing your heavy anti-tank guns to fire as artillery, and creating fortified defences with MG and anti-tank nests, dug-in tanks, and misplaced and forgotten minefields. You can even cause the Allied heavy bombers to score an ‘own goal’, delaying their own reserves!
There are also a few new formations, such as scout companies equipped with various armoured cars.
Last, but not least, the Lucky card gives you a useful one-point filler, giving you that critical re-roll just when you need it.
Wayne “the Veteran” Turner is one of the longest serving employees in the company, having worked in almost every department of the company from Game Design to Production. These days he finds himself primarily working on Team Yankee, but a return to Late War has him excited to return to World War II and the chance to build his first Panzer IV based German army.

 A tabletop approximation of 16. Feld-Division (L) in Normandy, 1944, offers me both of these chances— an opportunity to paint Luftwaffe blue, and an opportunity to modify a few grenadier uniforms to reflect the very swish LwFD camouflage smock.
 Project Research
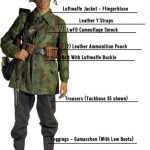
 The Rest of the Stuff in the List
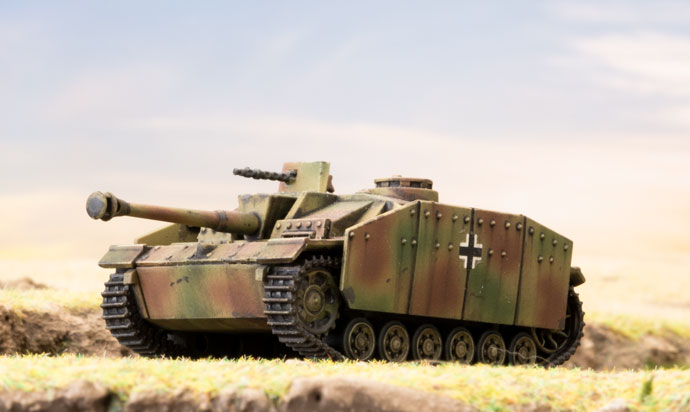
 In the desperate winter of 1941, the Heer, the German Army, was on the defensive after its failed advance on Moscow. Every available unit was thrown into the battle, including the Luftwaffe Fallschirmjäger (air force paratroops). One such unit was the Luftlandesturmregiment, Air-landing Assault Regiment, under Generalmajor Meindl. The regiment’s casualties were so severe that it was withdrawn early in 1942.
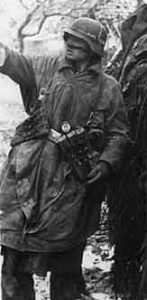 By the spring of 1942, the Army’s need for troops to replace its casualties was so acute that they convinced Hitler to transfer surplus troops from the Luftwaffe to the Heer. Reichsmarshall Herman Göring, Commander In Chief of the Air Force, was furious. Not only would his personal empire be diminished, but also the reactionary Army, the very organisation responsible for the failures of the previous year, would corrupt his loyal National Socialist airmen.
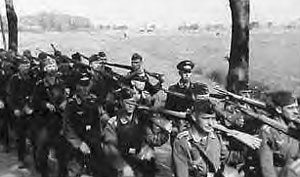 Luftwaffe field divisions were approximately half the size of their Heer counterparts.
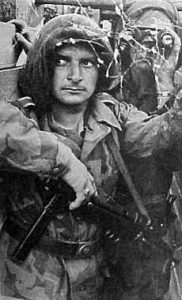 2. Luftwaffe Felddivision (Oberst Hellmuth Pätzold)
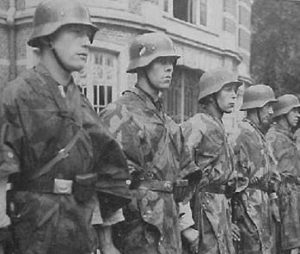 4. Luftwaffe Felddivision (Oberst Hans-Georg Schreder)
 7. Luftwaffe Felddivision (Generalmajor Wolf Freiherr Von Biedermann)
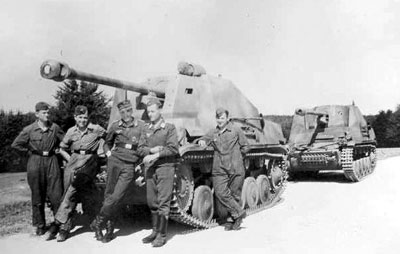
 10. Luftwaffe Felddivision (Generalmajor Walter Wadhehn)
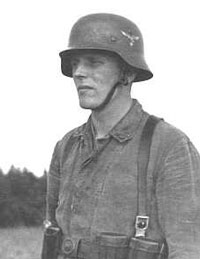 11. Luftwaffe Felddivision
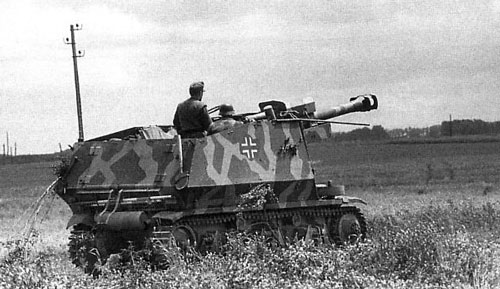 17. Luftwaffe Felddivision
 Between then and December 1942, when 21. Luftwaffe Felddivision was formed, the division was reunited and held the southern flank of the newly opened corridor to Demyansk and Cholm. The newly formed division only had four regiments, the fifth having been disbanded. It gained an artillery regiment with French guns in the summer of 1943, along with an assault gun battery of four long-barrelled StuG III assault guns (increased by a further six StuG IV in 1944) and ten 7.5cm PaK40 guns. Each regiment was also reported as having as many as ten 7.62cm PaK36(r) anti-tank guns. At this point it was easily the strongest Luftwaffe field division in existence.
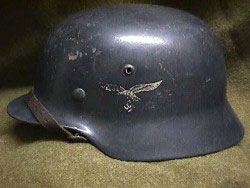 The division was involved in heavy fighting from March 1944 until it surrendered in the Courland pocket at the end of the war.
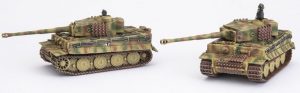 With everyone in the Big Four selecting one of the four major Flames Of War Late War forces, it fell to Wayne to work on a German force which you can check out here on the
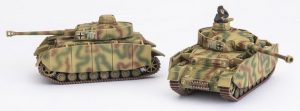
 You can read a collection of community content ranging from reviews to force overviews, battle reports to Command Card forces from the great Flames Of War community.
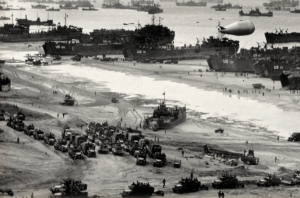
 In early 1944, the situation in France was clearly the quiet before the storm. An Allied invasion would come, probably in the summer, but until then it was a quiet place to rebuild divisions shattered in the desperate autumn and winter battles on the Eastern Front behind the ‘Atlantic Wall’ fortifications lining the coast.

 The Fallschirmjäger paratroopers add three different titles from the barely-trained 5
