Bloody Omaha Mini Campaign,
Game 1 Andrew Vs Ashleigh
Battle Report by Andrew
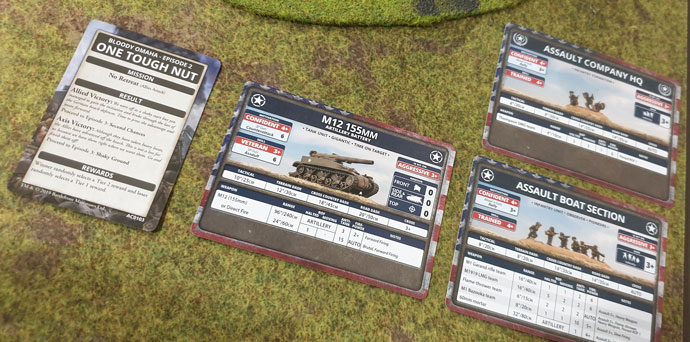
Today we decided to play a quick day long Bloody Omaha Ace Campaign! The plan was to use the Bloody Omaha deck to play three games, using our hobby league 50 point armies, playing among the NZ league members that I could. We decided to roll off the first mission in the campaign as we only had time to play three games. The Germans won the roll so I started my first game against Ashleigh (she was playing for the Germans). Her British army consisted of nothing but armor, a nasty match up for my 50 point 29th infantry division Assault Company. We were both running our 50 point hobby league armies.
Setting up the game we were playing the Episode 2 card, One Tough Nut. This mission is No Retreat! Since both Ashleigh and I are playing Allied forces we rolled off to see who was defending, luckily I am defending. I quickly choose to defend the city thinking that was my best bet. The game started off as you would think, the tanks moved forward and took pot shots at range against my infantry. On my first turn I ambushed my 155 artillery to hit Ashleigh’s Churchill tanks, I managed to knock out one. Luckily Ash had one Churchill that stayed bailed and I was able to weather the return fire only suffering a few bailed out artillery tanks.| The game went on trading shoots with not much changing; I started moving my infantry through the buildings from reserves. This lasted until one turn when Ashleigh killed 5 infantry teams in one platoon with one round of shooting form her Carriers! I knew I would have to move! My next turn saw my artillery take out Ashleigh’s Churchill tanks and my bazookas getting lucky killing two Stuarts with moving shoots! Both the Churchill and Stuart tanks ran away! In reaction Ashleigh moved back and started shelling me from range, I responded by taking pot shots with artillery bombardments among her tanks, the third turn of bombardments I hit four of her tanks, all but one of them rolled a 1! With firepower 2+ my artillery took out the core of Ashleigh list, and it was just a matter of a few more morale rolls before her tanks retreated off the table. A victory for my 29th infantry Division. I would move on to my next game with Luke, due to having just played Hasty attack in our last game we played, Luke and I decided to play Dust Up instead.
Bloody Omaha Mini Campaign,
Game 2 Andrew Vs Luke
Battle Report by Andrew I also got to play in game two, this time I am playing against Luke. He brought his panzer IVs and again I was facing an all tank list.
I decided to do my normal reserves at 50 points for this match up even though I didn’t get to put my 155s in ambush. I stuck my two infantry units around the objectives and my 155 in the back comer prepping for an artillery strike.
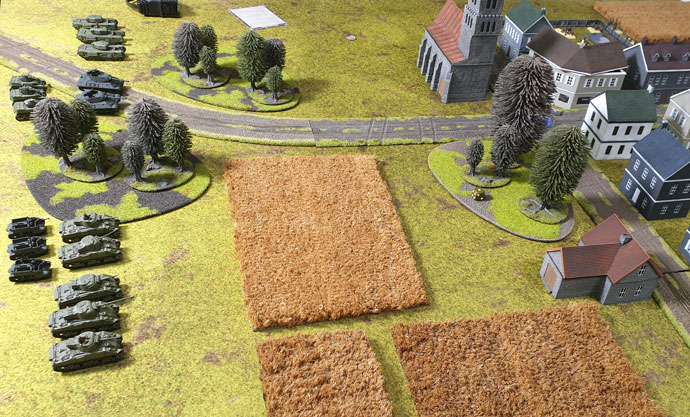
Luke places a single Panzer IV unit in his deployment area and I was suddenly filled with hope, I only had to knock out one tank unit, then I could get to his objectives with my reserves! Turn one went to Luke and he rushed me, I was not expecting that, but I prepared myself for conflict sooner than I thought.
Turn one nothing really happened on turn two I saw that Luke was rushing for my 155s. He moved behind the church making hard for me to direct fire at him. I instead fired on him with infantry I had in the town, they moved forward through the buildings and opened up on his tanks, doing nothing. “Well”, I thought “That’s my artillery dead next turn”. Luke next turn had him wanting to Blitz around the building, 4 Panzer IVs would make quick work of my FA0 artillery tanks. But he failed the roll and then failed to hit me at all! Luck was on my side and I decided to open up on his tanks with my 155s! I knocked out two tanks! I really could not have asked for more.
Next turn I only lost two of my 155s, a bargain my 2 artillery for two Panzer IV tanks. On my turn I was able to bring in an infantry platoon from reserve, and they killed the last two tanks! Hurrah, now to deal with the rest of Luke’s tanks coming in from the other side of the table! Luke’s next turn he move his HQ and his other panzer 4 platoon up and destroyed the last of my 155s. ouch well it isup to my bazookas to hold him off.
On my turn I moved one of my infantry platoons to reinforce the forward objective and got one more reserved that made a beeline to Luke’s table edge getting 2 turns away from capturing the objective!
Feeling the pressure Luke assaults my infantry and two of me bazookas bail two of his tanks on their way in. He misses, my bazookas miss on their assault. Luke fails his counter assault and I take his two bailed tanks! His company command moves in to assault and my bazookas straight up killed both of Luke’s HQ tanks, winning me the game, and earning themselves a nice medal to boot! Another Victory for the 29th Infantry Division! We moved on from the Second Chances card to Rat Catchers, for this game Phil and Cameron are facing each other, Phil playing for the Allies and Cameron for the Axis. I’ll leave it to Phil to write up that final battle report.
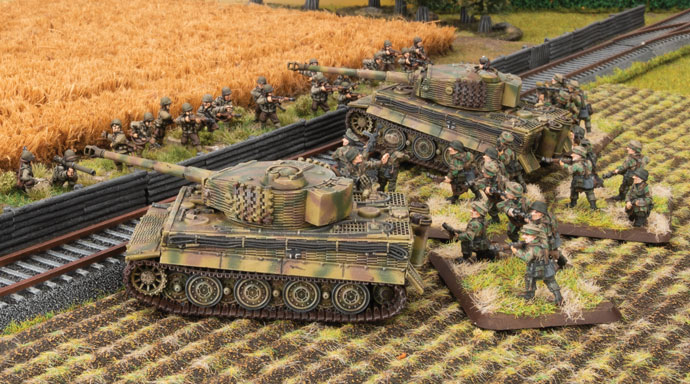
One of the many neat bits of kit you can find in D-Day: German is the Puma and its variants. To give you a bit of background on this unique beast before you bring it to the table we’ve unleashed another great historical article form the Flames Of War archive.
“The best patrols I had were those with clean guns. Even worthwhile targets were only reported and not engaged; that is the business of others. A troop leader with a tendency to bang away is useless for reconnaissance purposes since he is soon located by the enemy and chased like a rabbit. A report giving the location of an enemy tank leaguer is of infinitely more value than five shot-up lorries.”
– Oberst a.D. Fabian von Bonin von Ostau on German armoured reconnaissance tactics
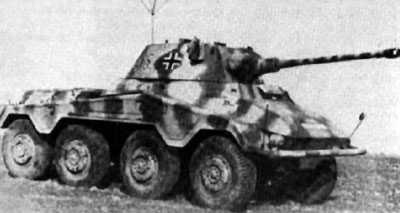
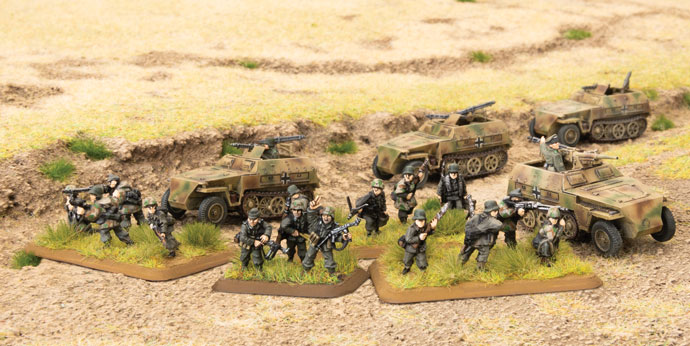
The 234 series of armoured cars was one of the most advanced concepts in wheeled fighting vehicle designs to appear during the war. It had improvements in armour, speed and range. In its original 1940 concept the 234 series was to operate in hot climates. The Czech firm Tatra produced its air-cooled V-12 diesel engine that had an out put of 220hp. The Bussing organization made the hull, which was made of monocoque construction. Daimler-Benz and Schichau were jointly responsible for the turret.
The Puma also addressed the most common complaint among armoured car crewmen; the lack of firepower when forced to engage the enemy. It included the same 50mm KwK L/60 gun carried in the Panzer III Ausf J and L tanks in a cramped enclosed turret with all around traverse. The gun did feature a muzzle break and the vehicle carried 55 rounds for the main gun. The weight of the 50mm gun and turret did result in the loss of some speed for the Puma, but this proved to be insignificant in the vehicles combat performance.
By the time of the Normandy campaign the basic organization of the armoured recon battalion had changed from its original 1939 organization.
Battalion Headquarters
Staff Company (Stabskompanie)
No. 1 Armoured Recon Company (Panzerspahkompanie)
No. 2 Recon Company (Aufklarungskompanie)
No. 3 Recon Company
No. 4 Heavy Company
Supply Company (Versorgungskompanie)
In practice this organization was only theoretical. The Pumas were to make up the Panzerspähkompanie of all Panzer divisions, but by the summer of 1944 there were not enough Pumas to fill the organisational needs of Germany’s Panzer divisions.
The Sd Kfz 234/2 would see action in Normandy in three Panzer divisions. 2. Panzerdivision and Panzer Lehr Panzerdivision were both fully equipped with the “Puma” having a compliment of 26 vehicles. The 2. Panzerdivision’s along with the Panzer Lehr division’s Pumas can be represented with the D-Day: German. First SS Panzer “Liebstandarte Adolf Hitler” also had a number of Puma armoured cars but did not posses a full compliment of them.
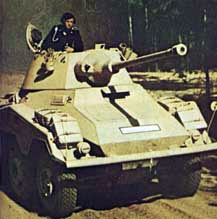
The combat techniques of the Puma were to see but not be seen and engage the enemy only when necessary. The radio was its most important weapon for its primary mission. Most of the time the Pumas were organized into three car groups for intelligence gathering missions on enemy movements and locations. Of all the missions the Puma crew were assigned infiltration was the most difficult. Oberst a.D. Fabian von Bonin von Ostau explains: “The initial penetration into unknown enemy territory was difficult. For this purpose our own local attacks were taken advantage of before the enemy could recover his balance. When one had achieved some penetration, the advance became easier.”
German crews learned important techniques to improve stealth such as easing the vehicles in to gear and running in low gear so they made very little noise. This was opposed to American crewmen who were known for ‘gunning’ their engines and thus giving away their positions to a skilled observer. The Puma were used to find the enemy, screen the flanks, and the companies were only used together in certain situations such as to screen the division during a withdrawal. According to Heinz Guderian they conducted “the ground reconnaissance for the panzer divisions they were assigned to. Only in open terrain, when being followed or to protect a withdrawal is the company used together.” The Puma performed well in its traditional roll and even showed strength on the attack.
The Pumas first saw combat in Normandy with the Panzer Lehr division’s drive into the invasion zone on 8 June. A few days later on the night of 13 June Pumas of 2nd Panzer Division engaged elements of the US 26th infantry near Caumont which had inconclusive results.
The Panzer division’s greatest enemy in Normandy proved to be the Allied fighter-bombers and the Pumas struggled with the foe as well. The stealth and infiltration techniques practiced by the Aufklärungs companies whose emphasis was on seeking cover during the day did help a high percentage of Pumas to survive the heavy damage the Panzer division took during Normandy. Of the original 26 Pumas from the Panzer Lehr division that started the campaign 8 survived Falaise Gap. In that same time only 20 tanks survived out of the starting strength of 109.
As the Panzer divisions involved in the Normandy campaign were rebuilt in the fall of 1944 the Sd Kfz 234/2 was no longer available in any numbers and was replaced with the more readily available Sd Kfz 234/1 and Sd Kfz 234/3 at that time. With the end of the campaign in Normandy, so too ended the reign of the Puma as the Panzer division’s premiere armoured car.
Sources Milsom, John and Peter Chamberlain, German Armoured Cars of World War II, Charles Scribner’s Sons, New York: 1974.
Perrett, Bryan, German Armoured Cars and Reconnaissance Half-Tracks 1939 – 1945, Ospresy Publishing, New York: 1999.
Having completed my first Hobby League army and played a couple of games, found I was missing building and painting an army. So back to D-Day: German it was last gaming night. With others in the club discussing Panthers and Tiger lists and their merits, I found the Stug Assault Gun Company calling out to me. So working on a 100 point limit I drafted up my first list. I have gone all out complete sections of StuGs and StuHs. I am planning on
using the StuHs as an anvil in the centre of my army and using the StuG
platoons as the hammers on the flanks. The StuHs also have some other great benefits on the table: Artillery for when they have no direct fire options and with Anti-Tank 3 they have a good chance of taking out enemy tanks or at least a bail. Adding in Brutal, HEAT and Smoke these are going to form the solid core of my force.
In my recent games I have found my infantry to be invaluable, I was tempted by a platoon of Fallschirmjaeger but points wise just could not fit them in, so I took Beach Defence Grenadier Platoon. I am not expecting great things from these troops. But They are going to sit on any objectives I have and dig themselves in and hopefully be a tiny thorn against my opponent. To round out the list I dropped in 6 Nebelwerfers as I want to try out the salvo template and have another smoke option on the table. So to ensure that both the StuHs and Nebs can fire have added in a Panzer III OP.
I’m really looking forward to playing with this list and seeing how it fairs on the table.
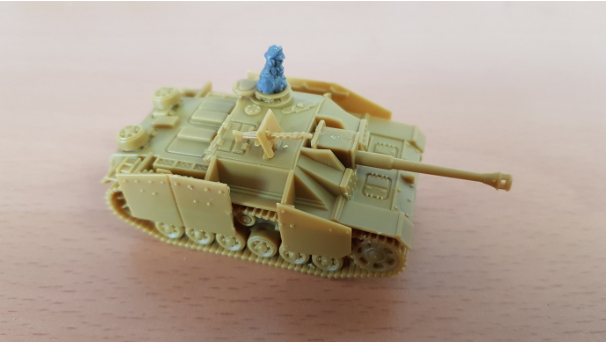
So with the list completed I got on to building some models. Over the last
couple of lunch breaks I have managed to assembly the following models:
With most of the army complete I need to build one more StuH and then the 2 HQ StuGs and 3 more Nebs, the infantry are already primed so I will start work on those over the course of this week.
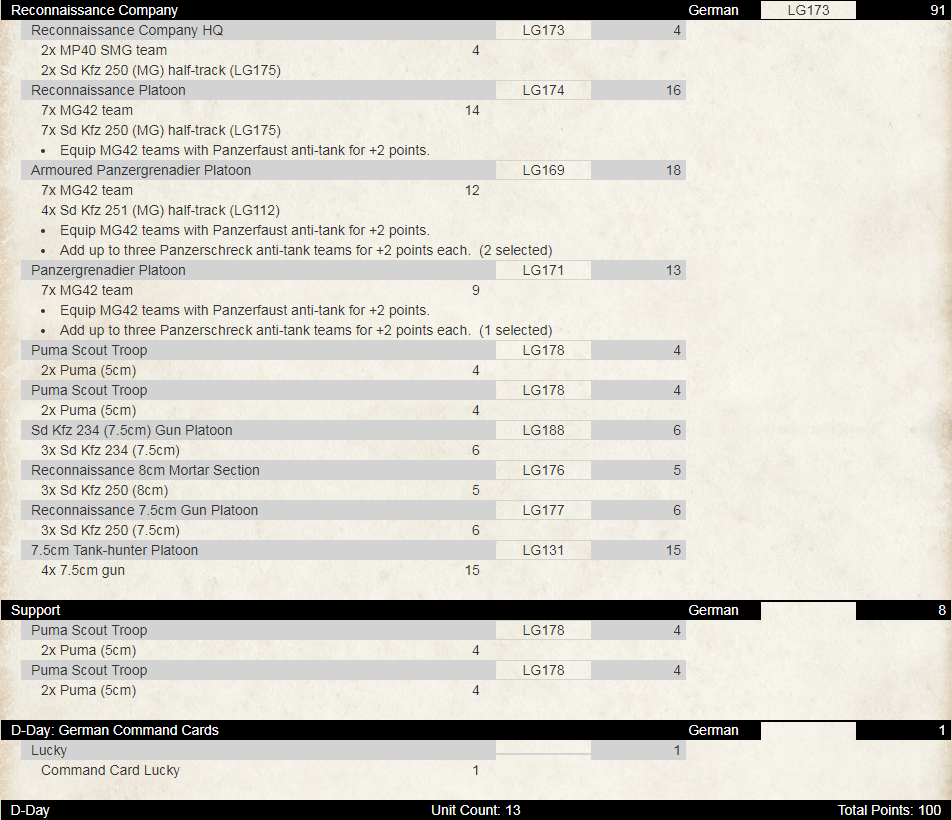
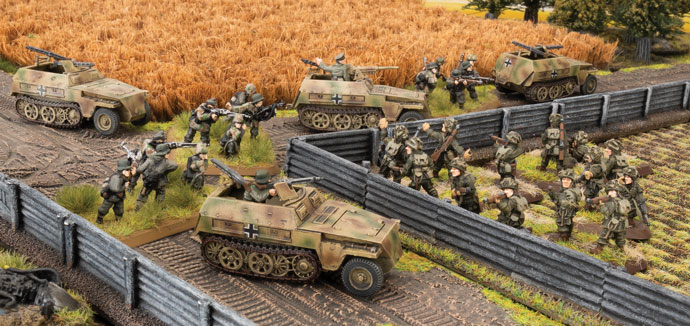
My favorite list from V3 was the Panzerspahkompany from Grey Wolf, so when D-Day: Germans hit my desk and I saw the Reconnaissance Company in the Forces list I rushed to page 59 and looked at what I knew I would be building. Being a Recon force for the Panzer divisions, mobility is a key element to this force, so I started with 2 platoons of Pumas with the 5cm and added a SD Kfz 234/3 (7.5 cm) Gun platoon for better Firepower, and HEAT bonus. Here is where the TANKS line of products also benefit a Flames Player as you can flesh out the extra vehicles needed with TANKS Pumas (TANKS27)…
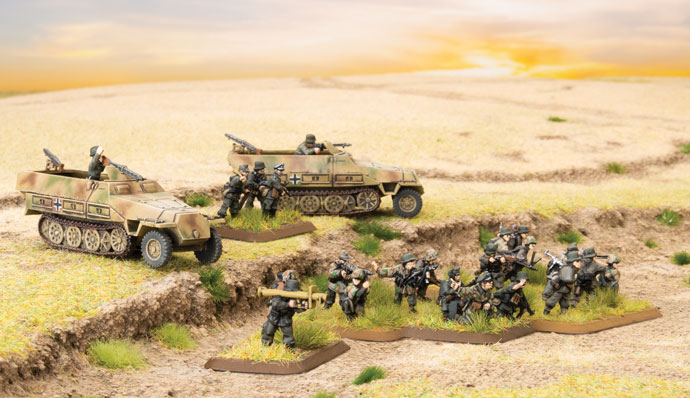
Filling the Core requirements, I choose one Reconnaissance Platoon, and a full Armored PanzerGrenadier Platoon to get a couple of Panzerschreks in for assaulting tanks off objectives, or holding off an assaulting tank force.
Then I filled out more core slots because this force is fragile, and can’t hold up to large losses. So, a Recon 8cm Mortar, and Armored 7.5 Gun Platoon were added in. Having a template weapon to help pin and a smoke bombardment for screening, yes please. Lastly the 7.5cm Pak 40 Tank Hunters help with board denial, and having higher than AT 9. These will probably hold an objective with the 3rd infantry platoon of Panzergrenadiers on foot.
I was really debating adding in an artillery, as Wespes, or the Command Card that allows swapping my Jagdpanzer IV with a Brummbar. While that is a more balanced option it didn’t feel like a fit with this mostly mobile force. Thus, I beefed up the infantry with Panzerfausts, and additional Panzerschrecks, and added 2 additional 5cm Puma platoons. Most of the force has scout/spearhead which means you can really open up deployment options to put things where you want.
This gives me a mobile force with plenty of AT when flanking shots can be had. The multiple pairs Vet Pumas serves as a shiny distraction (because they won’t survive long) but they tie up enemy fire long enough for the infantry to move up, punch a hole, and hold on long enough to secure the victory.
Not being your typical German force also allows you to paint something different. As such this force will get the less often seen ‘Octopus’ pattern rather than the typical 3 color ‘Ambush’ seen.
I chose 2nd Panzer partially for the Token set, partially because before I cracked the book my thoughts were Panthers, and partially because the Sd Kfz 250s won’t release til early October, I can simulate being refit in France, and not making the front lines until Operation Luttich. Now to get this force assembled, painted and head West to Normandy.
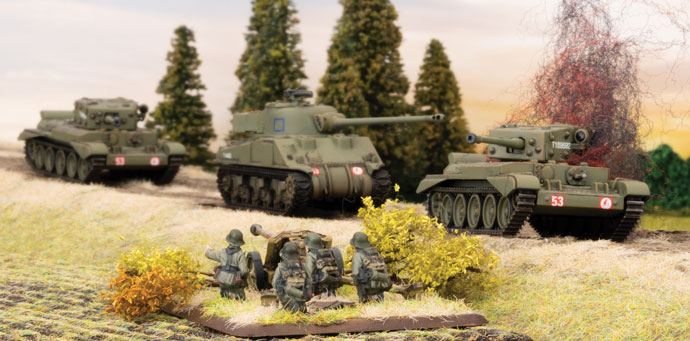
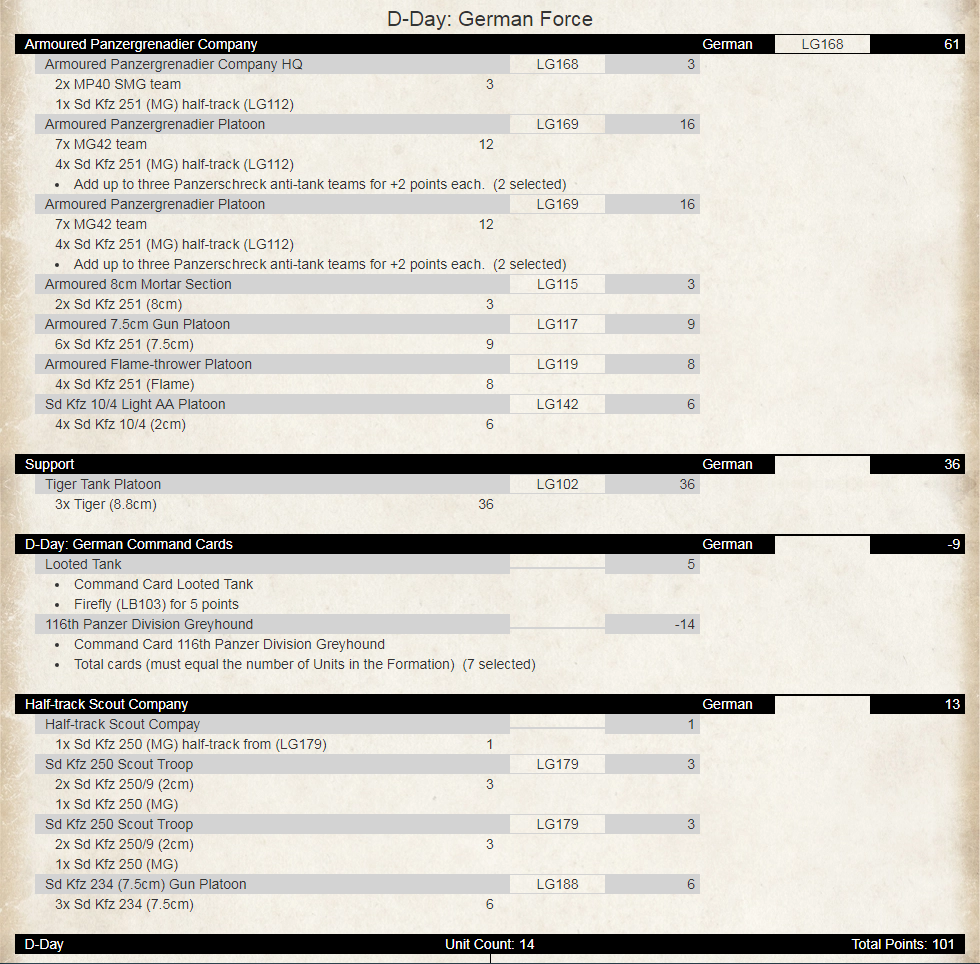
When playing Germans I often find it difficult to bring the big and shiny toys, while having a force that is substantial enough to cover all of the bare necessities. The force I’ve come up with allows me to have at least one thing for every kind of scenario I expect to face on the table.
The Panzergrenadiers are there to hold objectives, or assault enemy objectives. The Armored Mortars are for a smoke screen or pinning enemy infantry. The Armored Gun platoon is for ambushing and killing medium and light armor. The AA is rather self explanatory, but could easily be pressed into service killing light vehicles or infantry. I brought the Tigers because they can handle almost any tanks that they come across, and can be put in reserve to cover my 40 point requirement. The Sdkfz 250s are for Spearheads and emergency AA. The Sdkz 234 7.5cms add in a little extra pizzazz.
The card that makes this all possible is the 116 th Panzer Division card. For the steep discount of -2 points per unit in my primary formation, I take a hit to both Last Stand, and Tactics, a sacrifice I’m willing to make as it saves me 14 points overall. This discount from this card pays for one of my two Panzergrenadier Platoons!
Honestly I took this formation for only two reasons, to get some recon assets, but more importantly to get the Sdkfz 234 7.5cm Heavy Scout Platoon! They’re just too cool to pass up, they’re Pumas but better because they have a better Firepower rating, as well as HEAT.
I wouldn’t possibly be able to pass on taking a Firefly, everyone knows that
the best Allied tanks are driven by Germans after all!
D-Day: German gives contains Formations and Command Cards for representing the Fallschirmjäger forces present in Normandy during the Allied Invasion of France. This article covers the history of those key units so you have all the info you need to model your FJ force on one of these historical forces.
The best German infantry units based in France in 1944 were the regiments of the Fallschirmjägerdivisions or parachute divisions. Although they were actually Luftwaffe troops, these units were by this time in the war, tactically subordinated to Army command.
Towards the end of 1943, Hitler had approved a plan proposed by Göring to rapidly expand the size of the Fallschirmtruppen.
Up until this point in time the German Airborne forces consisted of 2 Parachute Divisions (1. and 2. Fallschirmjägerdivision) which had formed the XI Flieger Korps. Under Göring’s ambitious scheme, these two units would provide cadres to form two more airborne division, the 3. and 4. Fallschirmjägerdivisions.
The 1st and 4th Airborne Divisions would together become I. Fallschirm-Korps (I Parachute Corps) while the 2nd and 3rd Divisions would constitute II. Fallschirm-Korps (II Parachute Corps), two parachute armies with an anticipated strength of 100,000 first rate soldiers, equal in status to Himmler’s Waffen SS units in recruiting, weaponry and training. 5. Fallschirmjägerdivision was then formed in March 1944 and also joined II. Fallschirm-Korps.
II. Fallschirm-Korps, commanded by General Eugen Meindl, was allocated by the Commander of the Western Theatre, Field Marshal Gerd von Rundstedt, to the Seventh Army, commanded by General Friedrich Dollmann, in Brittany. It would in May 1944 be made up of the following units:
• 2. Fallschirmjägerdivision (refitting in Koln-Wahn, Germany after recently returning from the Eastern Front – soon to be headquartered in Brest, France);
• 3. Fallschirmjägerdivision (headquarters at Huelgoal, Brittany);
• 5. Fallschirmjägerdivision (headquarters at Rennes, Brittany); and
• 6. Fallschirmjägerregiment (formally a regiment of 2. Fallschirmjägerdivision, but attached to II. Fallschirm-Korpsand based in the Lessay-Monte Castre-Carentan area)
By D-Day, Göring’s grand plan to rival the Waffen-SS was far from reality. Some units of the II. Fallschirm-Korps such as the 6. Fallschirmjägerregiment and 3. Fallschirmjägerdivision were generally well equipped and had excellent personnel.
Together they could easily be considered the most competent infantry units at von Rundstedt’s disposal and they fought with distinction throughout the campaign. 2. Fallschirmjägerdivision and 5. Fallschirmjägerdivision were by comparison, poorly trained, undermanned and badly equipped. However, they too fought with the esprit-de-corps of all Fallschirmtruppen and helped forge a combat reputation respected by all Allied opponents.
6. Fallschirmjägerregiment In October 1943, as part of the general expansion of the Fallschirmtruppen, 6. Fallschirmjägerregiment was transferred from 2. Fallschirmjägerdivision to 3. Fallschirmjägerdivision, where it was split into various cadres and deactivated.
In November 1943 the Regiment was activated again and began to reorganise in January 1944 with the goal of having the training and equipping of its troops completed within four months. As 2. Fallschirmjägerdivision was in action on the Eastern Front, 6. Fallschirmjägerregiment was subordinated directly to the Fallschirmjäger Armee.
The Regiment was organised along the same lines as a standard German Army Infantry Regiment, having three battalions, each of which was made up of three rifle companies and a heavy company. The 13th Company was a heavy mortar company, the 14th an anti-tank company and the 15th an engineer company. As of 6 June 1944 6. Fallschirmjägerregiment was arranged as follows:
6. Fallschirmjägerregiment
– Commander: Major von der Heydte
– Adjutant: Hauptmann Peiser
The total fighting strength of 6. Fallschirmjägerregiment at this time was 3,457 officers and men. This was considerably larger than an equivalent Army unit and the rifle companies of the Regiment had twice as many light machine-guns as a standard Infantry Division’s companies. The men were also of a higher quality compared with many of the other more standard units at this time. At least a third of the officers and a good portion of the non-commissioned officers were veterans, having fought in Crete, North Africa and Russia. The remainder of the men were all volunteers, with the average age across the Regiment being 17 ½ years. Morale was excellent and interestingly enough the whole Regiment was jump trained, each man having made six day-time and three night-time jumps.
The main weakness of the 6. Fallschirmjägerregiment was the same as all of the regiments and divisions of von Rundstedt’s army – they simply lacked any real transport capability. Each company in the Regiment had an average of two trucks, and the seventy trucks across the whole unit were of fifty different makes – German, French, Italian and even British.
In May 1944 the Regiment was deployed to Normandy and spread out amongst the towns at the base of the Cotentin peninsula. These were Lessay, Periers, Raids, St Georges-de-Bohon, Meautis, Baupe and Monte Castre. It was assigned to LXXXIV Corps and for supply purposes attached to 91. Luftlandedivision, an air-landing division. Together they formed the strategic reserve for the Corps.
D-Day From the first moments of the airborne invasion of France 6. Fallschirmjägerregiment was in action against American paratroopers from the US 101st Airborne Division. Scattered fire-fights continued throughout the night, until about 0600 on 6 June the Regiment was given orders to assemble and clear the region between Carentan and St. Mere-Eglise of enemy troops. It was no easy task to withdraw troops currently spread out, in action and with limited transport and get them to the assembly point so it took until early afternoon for the initial movement and reorganisation to be completed.
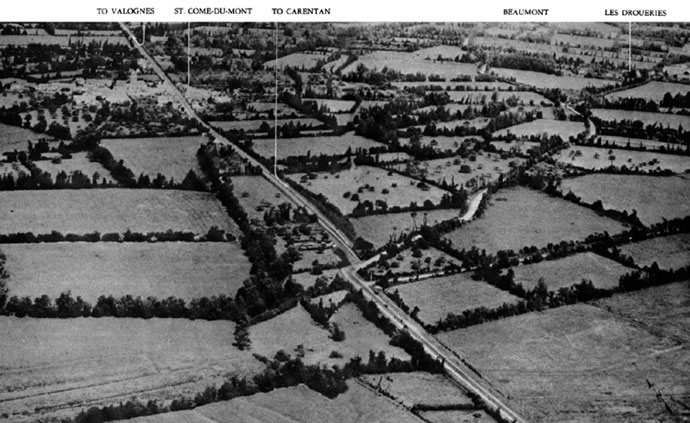
The troops then moved through Carentan which Major von der Heydte had already determined was not occupied by American troops. 3. Bataillion initially remained behind in the town with the 13th Company, protecting the Regiment’s rear areas, while the regimental command post was set up at St. Come du Mont. 1. Bataillion moved out towards St. Marie-du-Mont while 2. Bataillion advanced on St. Mere-Eglise. At first the advances made good time, but by midnight both battalions were in heavy contact just short of their objectives. 1. Bataillion found the US paratroopers at St. Marie-du-Mont had linked up with the 4th Infantry Division moving inland from Utah beach. Earlier in the evening and again before dawn on 7 June waves of American gliders and paratroopers began to drop across the entire combat area, and the two battalions, found themselves low on ammunition and increasingly cut-off from the Regimental rear areas.
2. Bataillion successfully withdrew and attempted to link up with the now surrounded 1. Bataillion but was unable to move more than a few hundred yards east of St. Come du Mont. By now 1. Bataillion was trying to extricate itself to the south. While crossing through open fields and marshes north of the Douve River it came under fire from small groups of the 501st and 506th Parachute Infantry Regiments (PIR). The American troops were able to bluff the 1. Bataillion into believing they were facing overwhelming US strength and the majority of the battalion surrendered, with only 25 men escaping to Carentan.
Other elements of the 506th PIR, supported by 6 Sherman tanks of the 746th Tank Battalion and the guns of the 65th Armoured Field Artillery Battalion, advanced on St. Come du Mont which von der Heydte had now protected with 2 battalions of his own troops. While the US paratroopers made headway, they could not dig the Jäger out from their defences amongst the solid Norman hedgerows. The attack was called off so a much larger assault could be launched the following day. On 8 June St. Come du Mont was defended by III. Bataillon, 1058. Regiment, 91. Luftlandedivisionand two companies from III. Bataillon, 6. Fallschirmjägerregiment. Against them the Americans launched the 1st and 2nd Battalions, 506th PIR, 3rd Battalion 501st PIR, 3rd Battalion, 327th Glider Infantry, 8 light tanks and the 65th Armoured Field Artillery Battalion.
The Glider Infantry and 501st PIR attempted to encircle the town and cut off the German’s retreat, while the units of the 506th PIR advanced directly into St. Come du Mont. An intense artillery barrage (2500 105mm rounds in the first 1 ½ hours) smashed into the defenders and as the 1058. Grenadiers started to show signs of cracking, von der Heydte decided that with no more reserves to commit, it was time to withdraw. His men were forced to fight their way past the 501st PIR, but the majority of the German forces were able to escape to the west and retreat back into Carentan.
Carentan The Americans immediately began to prepare an assault on Carentan, readying four regiments (501st, 502nd and 506th PIR and 327th Glider Infantry) for the attack A two pronged attack down the main causeway in Carentan (502nd) and across the river flats to the east of the city (327th) was put into action. The causeway was a six to nine feet high embankment above the marshland with four bridges that crossed the Douve and its associated canals. The German defenders had destroyed one of the bridges. In the mid afternoon of 10 June men from the 3rd Battalion, 502nd PIR advanced in single file down the causeway. They soon came under heavy machine-gun fire from the Fallschirmjäger in a farmhouse and bocage which took a heavy toll on the US paratroopers. The fourth bridge was also blocked by a Belgian Gate, which meant, just one man could squeeze through at a time. The Americans were held at this point until past midnight, when they were able to filter men past the barricade.
On the morning of 11 June, an intense artillery barrage was arranged to force the Jäger out of the farmhouse. This failed, and it wasn’t until the US Battalion Commander personally led a dramatic charge against the position that the German paratrooper’s rifle pits and machine-gun posts in front of the building and along the hedgerows were knocked out. Three American battalions had been used in the action thus far and this attack had finally exhausted 502nd PIR meaning the 506th PIR would have to take over the advance.
327th Glider Infantry had also slowly made headway and by the morning of 11 June they were just a few hundred yards from the eastern outskirts of Carentan, where they were finally stopped by German fire.
By now von der Heydte’s men were running seriously short of ammunition. Supplies had not been able to come forward due to the shortage of motor transport and the Allied air forces interdiction of the Normandy road network.
This had also held up any reinforcements that were trying to reach Carentan. The only resupply came during the night of 11/12 June when ammunition was air dropped to the Fallschirmjäger southwest of the city.
On the evening of 11 June 501st and 506th PIR were committed to the battle and throughout the night the US paratroopers watched as Carentan was subjected to near continual naval gun fire, artillery, mortar and tank destroyer bombardment. At 0200 hours on 12 June 506th attacked Hill 30 to south of the city and from there, at 0500 hours they assaulted the city. From the northeast 327th Glider Infantry also drove into Carentan, with the two units meeting up at 0730. 501st PIR circled the city, linking up with 506th PIR, closing the trap around German defenders. Remarkably, the German defenders seemed to offer little resistance.
Unbeknownst to the Americans, von der Heydte had recognised the danger and before dark on 11 June had withdrawn from Carentan and set up a new defensive line to the southwest of the city. This line held against the attacks by 501st and 506th PIR that resumed on the afternoon of 12 June.
On 12 June the reinforcements that were meant to assist 6. Fallschirmjägerregiment in holding Carentan finally arrived, the 17. ‘Gotz von Berlichingen’ SS-Panzergrenadierdivision. Annoyed that Fallschirmjäger had given up the city, Brigadeführer Ostendorff, the SS Commander, at first sought von der Heydte’s arrest for defeatism, but was eventually calmed down by his superiors. The Jäger were now subordinated to the SS Division and on 13 June, together they launched a counter attack to regain Carentan.
The attack, supported by assault guns from 17. SS-Panzerabteilung hit both 501st and 506th PIR at 0630 and drove them back towards the city. II. Bataillon, 6. Fallschirmjägerregiment managed to get into Carentan and took up positions near the railway station, however they were forced to retreat when 502nd PIR and a combat group made up of a battalion of tanks and a battalion of armoured infantry from 2nd Armoured Division and supported by the 14th Armoured Field Artillery Battalion were committed to the battle. By the early afternoon the initiative had swung back to the Americans and the attack was repulsed. This was the last time German forces attempted to retake Carentan.
The next few weeks saw less activity in this sector of the battlefield as the American units there passed over to the defensive while the main US operations shifted to the taking of Cherbourg. The Americans around Carentan sought to consolidate their gains and bring in reinforcements. The 6. Fallschirmjägerregiment remained active, patrolling and probing the US defences, whilst constantly preparing their own defences with bunkers, mines and barbed wire.
St. Germain-sur-Seves
Mid July found 6. Fallschirmjägerregiment entrenched around the village of St. Germain-sur-Seves on a small ‘island’ bordered by the Seves River, marshland and creeks. All of this area was heavy bocage country. Opposing them was the US 90th Infantry Division, a unit that had fought hard and suffered heavy casualties thus far in the campaign and who was now largely made up of green replacements. The 90th had been tasked with taking St. Germain-sur-Seves as a prelude to the main attack on St. Lo. At 0630 hours on 22 July after a heavy artillery barrage 358th Regiment of 90th Infantry Division breached the forward lines of III. Bataillon, 6. Fallschirmjägerregiment penetrating more than a 800 yards inside German lines. But here there was little cover for the advancing American troops and they came under a steady crossfire. Around midday, von der Heydte ordered his 16. Kompanie, commanded by Oberfeldwebel (Sergeant) Alexander Uhlig to counterattack the Americans, re-establish the German main line of defence, and if possible capture a couple of prisoners.
Major von der Heydte had incorrectly assumed that the American attack was a small reconnaissance in force and that Uhlig’s company of 32 men would be enough to successfully complete the mission.
However, after a brief survey of the battlefield Uhlig realised his unit would be facing at least 300 US soldiers. Seemingly unconcerned by this disparity at 1800 he launched his attack into the right flank of the 358th 1st battalion and over the next three hours his men drove the Americans back 350 yards. Four Jäger were lost in the attack, but as Uhlig had been unable to take any prisoners he decided to continue.
As he listened to the US infantry digging in overnight, Uhlig decided that he would need to launch his next attack from the other flank to achieve surprise. He then went looking for reinforcements and was promised 2 MG42 heavy machine-guns and 16 men from 3. Bataillon. He also found a tank commander from the 2. ‘Das Reich’ SS-Panzerdivision who arranged for 3 panzers to support the attack the next morning.
Uhlig positioned the MG 42s to stop any reinforcements from reaching the American’s forward positions, and also to block the unit he would be attacking from retreating back to the US main lines. The machine-gunners were ordered not to fire in support of the initial assault, keeping their presence as a surprise. The first assault began around 0700 on 23 July, and it took two more attacks to break the Americans. Down to just one panzer by this time, the third assault broke through to the 1st Battalion’s command post and the men of that unit began to fall back in panic or surrender. Many of those that retreated were cut down by the two emplaced MG 42s who now opened fire.
Uhlig’s company of 50 men and one panzer had captured over 200 American soldiers through the effective use of his limited resources, terrain, close armour support, well-positioned machine guns and their cumulative effect on a green battalion.
Immediately after the battle, the Jäger witnessed several US Army chaplins trying to help the wounded men in no-man’s land. Impressed by their bravery an impromptu ceasefire began, later formalised by von der Heydte into a three hour truce which also allowed an exchange of wounded prisoners.
On 24 October 1944 Alexander Uhlig was awarded the Knight’s Cross for his actions near St. Germain-sur-Seves in July. He would later be captured by members of the 90th Infantry Division and survive the war.
Cobra
6. Fallschirmjägerregiment was still operating with 2. ‘Das Reich’ SS-Panzerdivision when American forces launched Operation Cobra. The regiment, together with the SS troops were forced to break out of the Roncey Pocket in the final days of July 1944.
Days later 6. Fallschirmjägerregiment was again almost surrounded in the Villedieu pocket, but acting on his own initiative von der Heydte led his Regiment out of the trap.
On 31 July what remained of 6. Fallschirmjägerregiment was attached to 353. Infanteriedivision. Formed into a small kampfguruppe the Jäger made up the infantry division’s reserve and were moved to wherever the action was thickest or a penetration in the German main line of resistance most likely.
On 10 August the 6. Fallschirmjägerregiment was ordered to disengage and move to Nancy in Northeastern France for refitting.
The 6. Fallschirmjägerregiment suffered approximately 3000 casualties during the Normandy Campaign.
Normally when I put together a list, there is an aesthetic or historical reason behind it and I am able to give (at length) reasons why I have chosen that Army. Alas, and much to the relief of my wife, this time is a little different for the German D-Day book. I won’t be waxing lyrical about specific units or
historical formations. Instead I have actually approached the book from a gamer’s point of view, albeit with some restrictions. I started as I always do with writing my ideal list, regardless of points, for the units I have seen in the book that I want in my army. This time, it was the turn of copious amounts of Panzer IV, Panthers, and troops to enter the fray and get my appetite whet. One thing to bear in mind with the German Book for D-Day is that there are a lot of options for units. The first thing a player will notice is, similar to Fortress Europe, you can take multiple tank formations of Tigers and the bigger tanks that the Germans employed in the later stages of 1944. This poses an issue as to take lots of tanks, costs lots of points. Hence my decision to go with Panzer IV, that ubiquitous workhorse of the Heer, in quantity with some elite tanks attached. Hello Panthers! The tracks, the guns, the turrets… I knew I had to take some Panthers to show the American 76mm who was boss of the battlefield. Now with the German D-Day book there is another variant of the Panther – The Panther A.
The key difference between this and the Panther G, which most people will know, is the application of Zimmerit on the hull and turret. And the new plastic kit delivers in bucket loads.
Sculpted directly on the plastic is the Zimmerit and it looks seriously good. To round off my force, from a gaming perspective, I needed some troops.
So I add some Panzergrenadiers, sadly bereft of their Halftracks so as to squeeze them into the army at full stand sized companies. Plus by doing this I was able to keep the model count low. Time is money and having already committed to building a 100pt army of US Paras, with their lovely high model count, for the UK Office Hobby League, I wanted as few stands and tanks to paint as possible. Then it was time to trim the list. First out were extra Panzers and Panthers to maintain an equilibrium in points so as to make sure any one formation wasn’t too high, but also so I could squeeze in a second formation of troops to hold and contest objectives, and be a pivot for my tanks to run off. I eventually managed to come up with this list: Now to decide on a paint scheme!
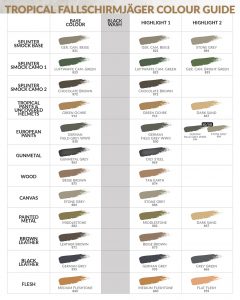
I’m currently starting a new force from D-Day: German, the Fallschirmjäger StuG Assault Gun Company. Instead of having it themed for Normandy, I’m using it to represent Fallschirmjäger & StuGs in the Italian Campaign.
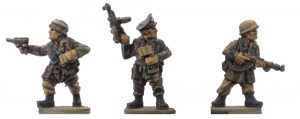
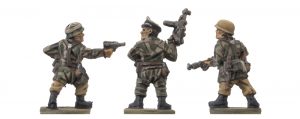
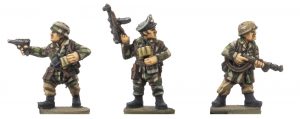
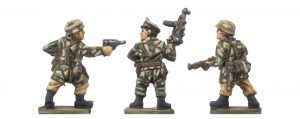
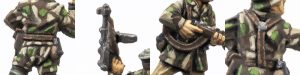
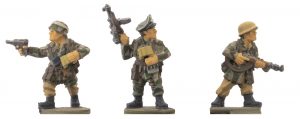
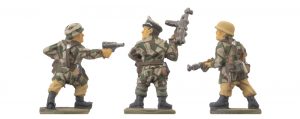
Here’s how I’m painting the new Late-War Plastic Fallschirmjäger figures for my Italy themed platoon in tropical uniforms.
Basecoat
First I primed the figures with a black rattle can. Then to speed things up I airbrushed the figures Khaki. This gave me a light base colour to work over rather than trying to paint beige / tan over the black primer. It also meant I could drybrush on the German Camo Beige for the smocks to create initial shading. Then I simply block painted all the items, trying to be as neat as possible.
Wash
This step is simple as I just cover the entire figure with Black Wash. This darkens everything quite a lot, but I like the way it defines all the elements. It also makes it easy to re highlight with the same base colours without having to find lighter shades.
Highlights
As mentioned above, I generally go back with the base colours and highlight the raised surfaces of everything. Then I sometimes do a second highlight with a different colour on some items.
See below for all the colours I used, but feel free to experiment with your own:
Quick Tip- Worn Leather
A simple way to achieve a worn leather look on straps and bags is to gently dab the edges with a lighter colour. It’s like an edge highlight but the dabbing action gives it a more irregular, worn look.
Now that I’ve figured out my colour choices, I’ve got a lot more figures to paint, and also all the StuGs! I think the platoon will look quite interesting with it’s mix of yellow and field grey pants, and the yellow un covered helmets.
Speaking of uncovered helmets, one last tip: Sponge on some German grey to show the yellow paint chipping off.

 The game started off as you would think, the tanks moved forward and took pot shots at range against my infantry. On my first turn I ambushed my 155 artillery to hit Ashleigh’s Churchill tanks, I managed to knock out one. Luckily Ash had one Churchill that stayed bailed and I was able to weather the return fire only suffering a few bailed out artillery tanks.|
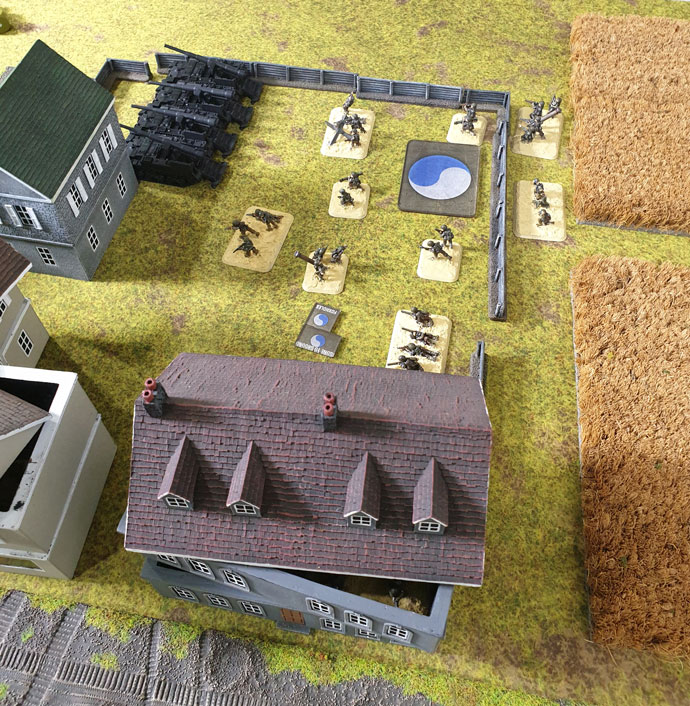 The game went on trading shoots with not much changing; I started moving my infantry through the buildings from reserves. This lasted until one turn when Ashleigh killed 5 infantry teams in one platoon with one round of shooting form her Carriers! I knew I would have to move!
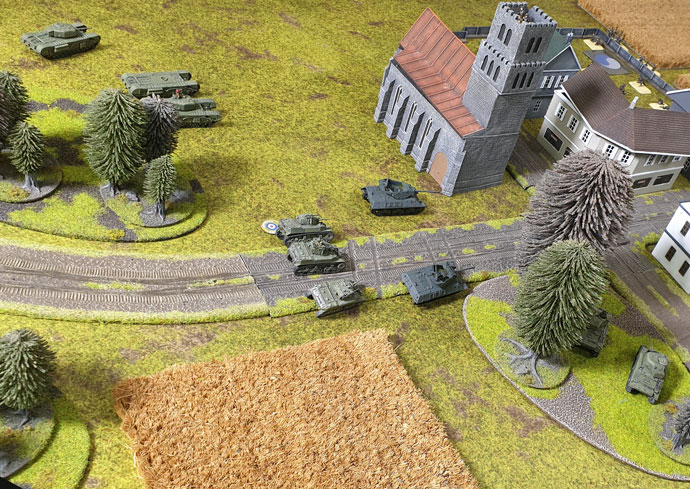 My next turn saw my artillery take out Ashleigh’s Churchill tanks and my bazookas getting lucky killing two Stuarts with moving shoots! Both the Churchill and Stuart tanks ran away! In reaction Ashleigh moved back and started shelling me from range, I responded by taking pot shots with artillery bombardments among her tanks, the third turn of bombardments I hit four of her tanks, all but one of them rolled a 1! With firepower 2+ my artillery took out the core of Ashleigh list, and it was just a matter of a few more morale rolls before her tanks retreated off the table.
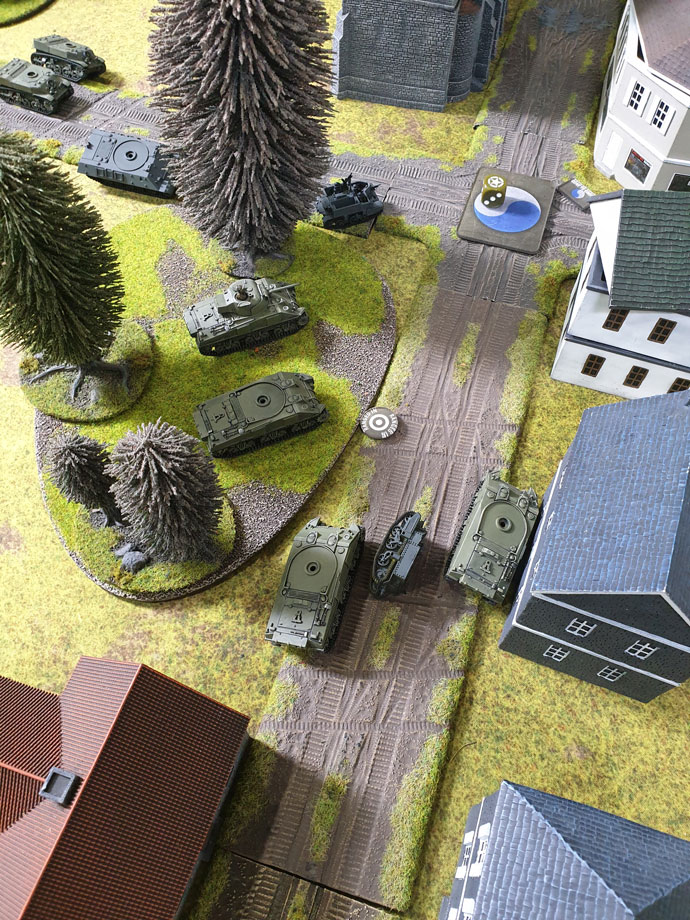 A victory for my 29th infantry Division. I would move on to my next game with Luke, due to having just played Hasty attack in our last game we played, Luke and I decided to play Dust Up instead.
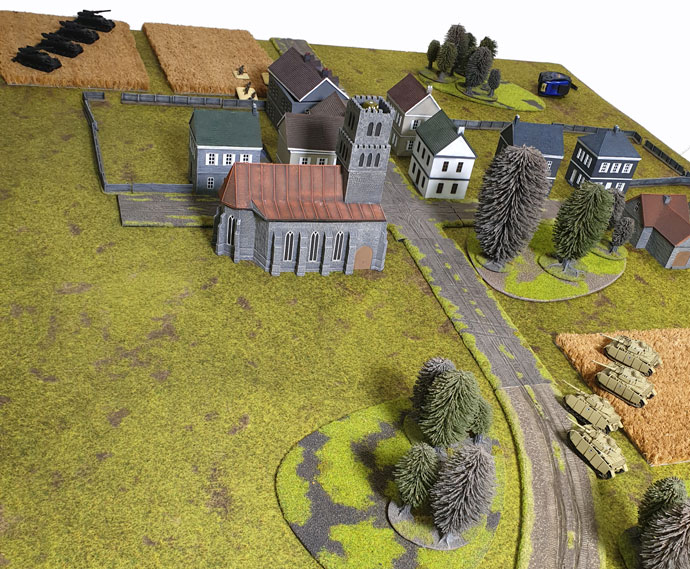 Turn one went to Luke and he rushed me, I was not expecting that, but I prepared myself for conflict sooner than I thought.
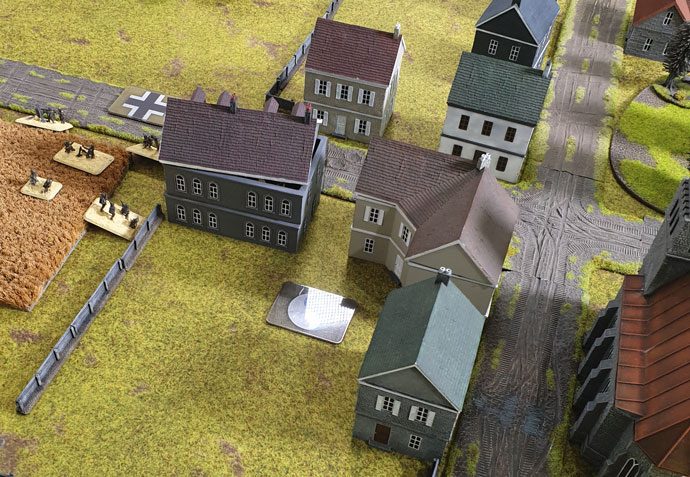 Luke next turn had him wanting to Blitz around the building, 4 Panzer IVs would make quick work of my FA0 artillery tanks. But he failed the roll and then failed to hit me at all! Luck was on my side and I decided to open up on his tanks with my 155s! I knocked out two tanks! I really could not have asked for more.
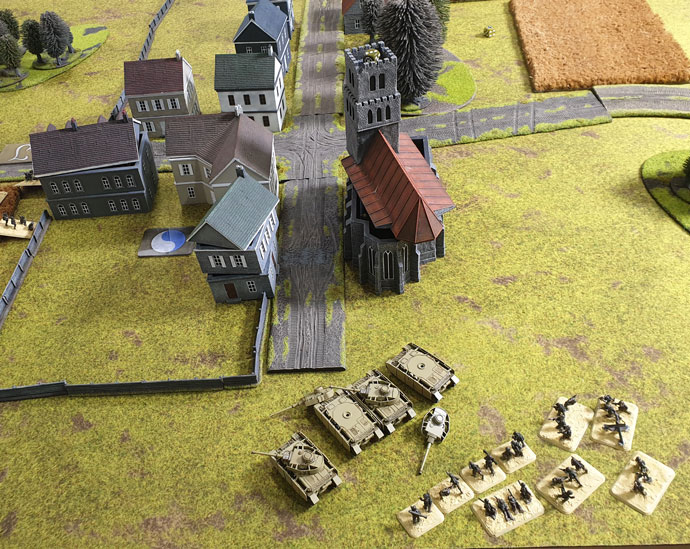 Luke’s next turn he move his HQ and his other panzer 4 platoon up and destroyed the last of my 155s. ouch well it isup to my bazookas to hold him off.
 Another Victory for the 29th Infantry Division! We moved on from the Second Chances card to Rat Catchers, for this game Phil and Cameron are facing each other, Phil playing for the Allies and Cameron for the Axis. I’ll leave it to Phil to write up that final battle report.
 One of the many neat bits of kit you can find in D-Day: German is the Puma and its variants. To give you a bit of background on this unique beast before you bring it to the table we’ve unleashed another great historical article form the Flames Of War archive.
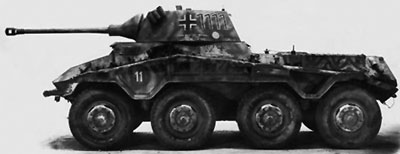

 Of all the missions the Puma crew were assigned infiltration was the most difficult. Oberst a.D. Fabian von Bonin von Ostau explains: “The initial penetration into unknown enemy territory was difficult. For this purpose our own local attacks were taken advantage of before the enemy could recover his balance. When one had achieved some penetration, the advance became easier.”
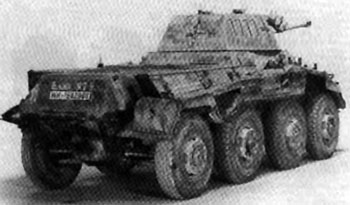 The Puma were used to find the enemy, screen the flanks, and the companies were only used together in certain situations such as to screen the division during a withdrawal. According to Heinz Guderian they conducted “the ground reconnaissance for the panzer divisions they were assigned to. Only in open terrain, when being followed or to protect a withdrawal is the company used together.” The Puma performed well in its traditional roll and even showed strength on the attack.
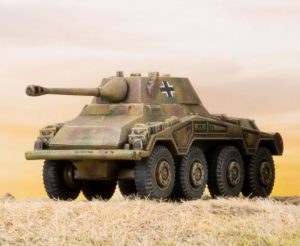 The Panzer division’s greatest enemy in Normandy proved to be the Allied fighter-bombers and the Pumas struggled with the foe as well. The stealth and infiltration techniques practiced by the Aufklärungs companies whose emphasis was on seeking cover during the day did help a high percentage of Pumas to survive the heavy damage the Panzer division took during Normandy. Of the original 26 Pumas from the Panzer Lehr division that started the campaign 8 survived Falaise Gap. In that same time only 20 tanks survived out of the starting strength of 109.
 With others in the club discussing Panthers and Tiger lists and their merits, I found the Stug Assault Gun Company calling out to me. So working on a 100 point limit I drafted up my first list.
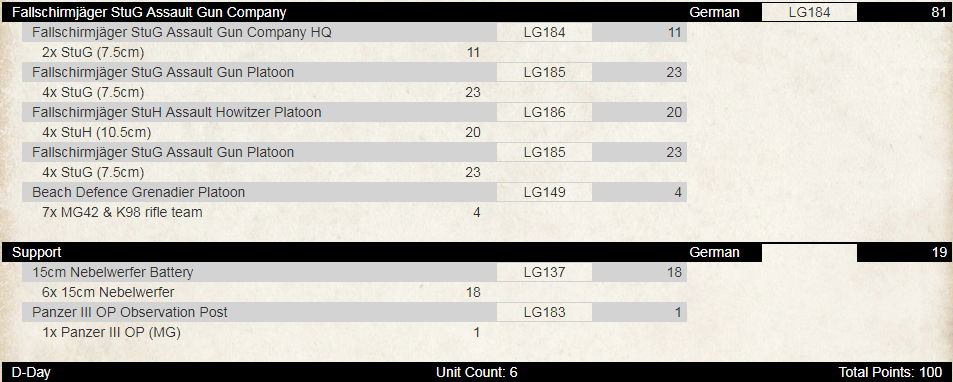
 The StuHs also have some other great benefits on the table: Artillery for when they have no direct fire options and with Anti-Tank 3 they have a good chance of taking out enemy tanks or at least a bail. Adding in Brutal, HEAT and Smoke these are going to form the solid core of my force.
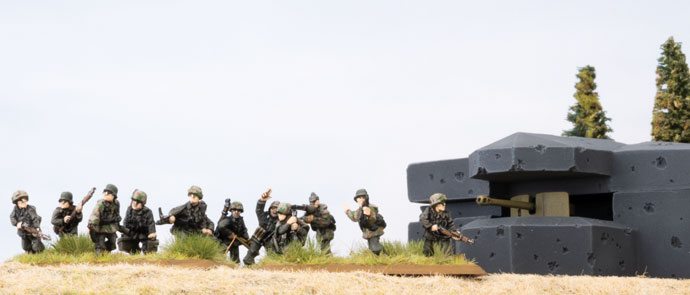 To round out the list I dropped in 6 Nebelwerfers as I want to try out the salvo template and have another smoke option on the table. So to ensure that both the StuHs and Nebs can fire have added in a Panzer III OP.
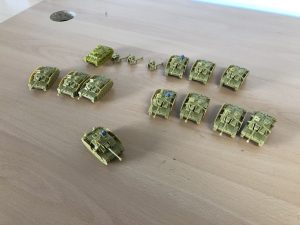

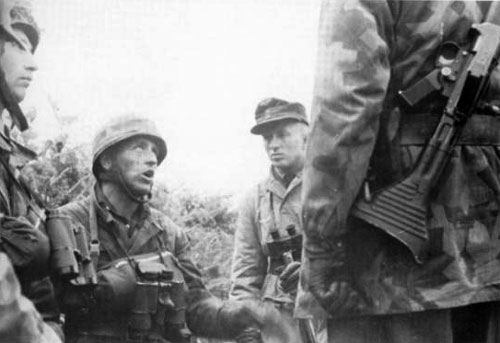 The best German infantry units based in France in 1944 were the regiments of the Fallschirmjägerdivisions or parachute divisions. Although they were actually Luftwaffe troops, these units were by this time in the war, tactically subordinated to Army command.
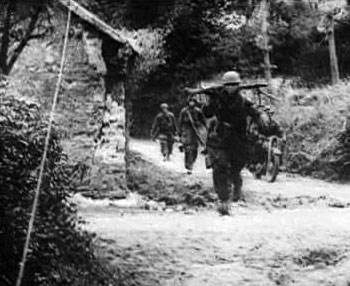 II. Fallschirm-Korps, commanded by General Eugen Meindl, was allocated by the Commander of the Western Theatre, Field Marshal Gerd von Rundstedt, to the Seventh Army, commanded by General Friedrich Dollmann, in Brittany. It would in May 1944 be made up of the following units:
 2. Fallschirmjägerdivision and 5. Fallschirmjägerdivision were by comparison, poorly trained, undermanned and badly equipped. However, they too fought with the esprit-de-corps of all Fallschirmtruppen and helped forge a combat reputation respected by all Allied opponents.
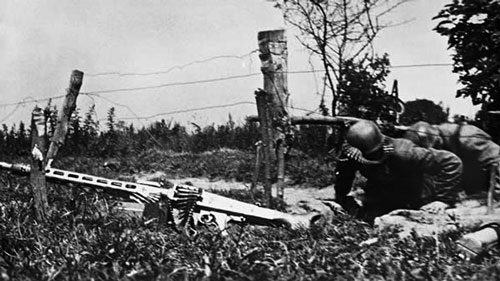 6. Fallschirmjägerregiment was arranged as follows:
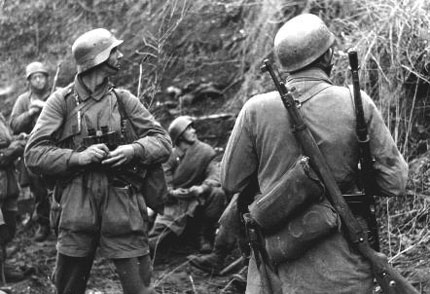
 At first the advances made good time, but by midnight both battalions were in heavy contact just short of their objectives. 1. Bataillion found the US paratroopers at St. Marie-du-Mont had linked up with the 4th Infantry Division moving inland from Utah beach. Earlier in the evening and again before dawn on 7 June waves of American gliders and paratroopers began to drop across the entire combat area, and the two battalions, found themselves low on ammunition and increasingly cut-off from the Regimental rear areas.
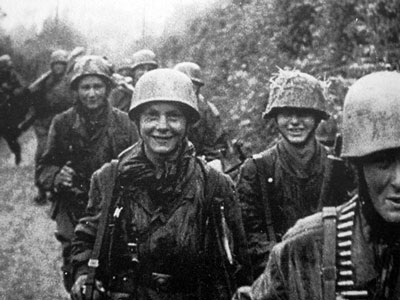 On 8 June St. Come du Mont was defended by III. Bataillon, 1058. Regiment, 91. Luftlandedivisionand two companies from III. Bataillon, 6. Fallschirmjägerregiment. Against them the Americans launched the 1st and 2nd Battalions, 506th PIR, 3rd Battalion 501st PIR, 3rd Battalion, 327th Glider Infantry, 8 light tanks and the 65th Armoured Field Artillery Battalion.
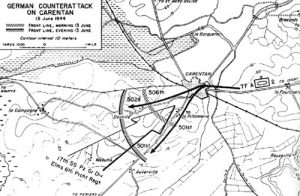 In the mid afternoon of 10 June men from the 3rd Battalion, 502nd PIR advanced in single file down the causeway. They soon came under heavy machine-gun fire from the Fallschirmjäger in a farmhouse and bocage which took a heavy toll on the US paratroopers. The fourth bridge was also blocked by a Belgian Gate, which meant, just one man could squeeze through at a time. The Americans were held at this point until past midnight, when they were able to filter men past the barricade.
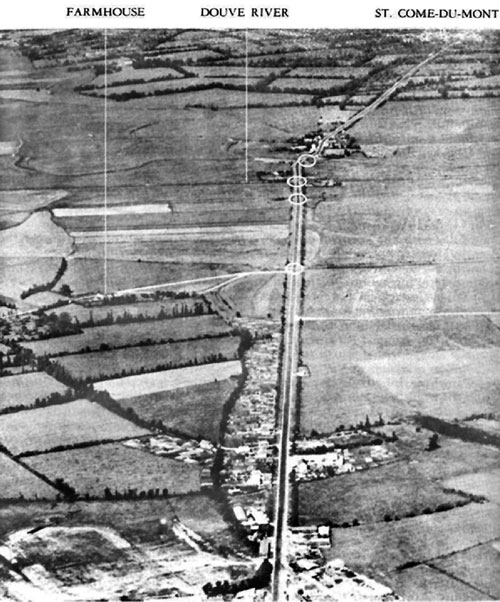
 At 0630 hours on 22 July after a heavy artillery barrage 358th Regiment of 90th Infantry Division breached the forward lines of III. Bataillon, 6. Fallschirmjägerregiment penetrating more than a 800 yards inside German lines. But here there was little cover for the advancing American troops and they came under a steady crossfire. Around midday, von der Heydte ordered his 16. Kompanie, commanded by Oberfeldwebel (Sergeant) Alexander Uhlig to counterattack the Americans, re-establish the German main line of defence, and if possible capture a couple of prisoners.
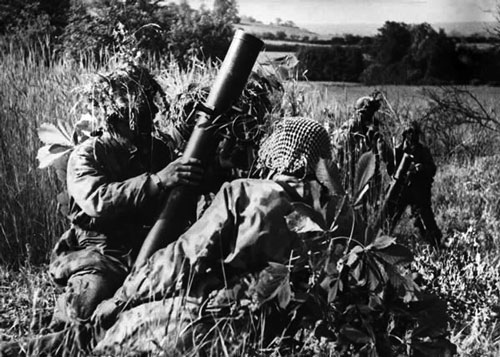 The first assault began around 0700 on 23 July, and it took two more attacks to break the Americans. Down to just one panzer by this time, the third assault broke through to the 1st Battalion’s command post and the men of that unit began to fall back in panic or surrender. Many of those that retreated were cut down by the two emplaced MG 42s who now opened fire.
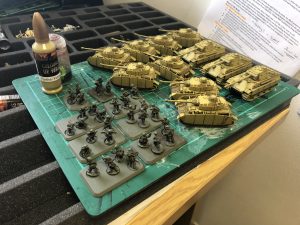 I started as I always do with writing my ideal list, regardless of points, for the units I have seen in the book that I want in my army. This time, it was the turn of copious amounts of Panzer IV, Panthers, and troops to enter the fray and get my appetite whet. One thing to bear in mind with the German Book for D-Day is that there are a lot of options for units. The first thing a player will notice is, similar to Fortress Europe, you can take multiple tank formations of Tigers and the bigger tanks that the Germans employed in the later stages of 1944.
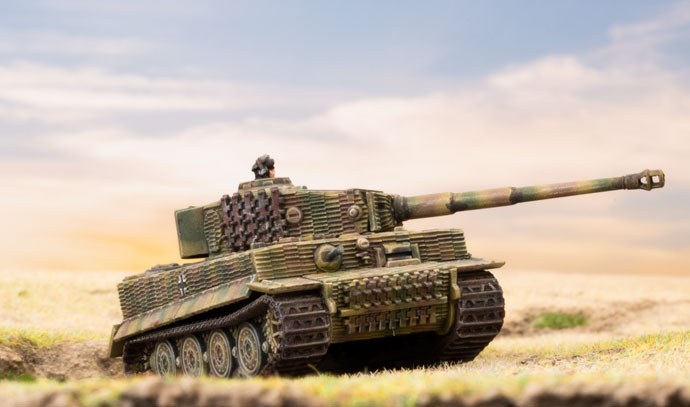 This poses an issue as to take lots of tanks, costs lots of points. Hence my decision to go with Panzer IV, that ubiquitous workhorse of the Heer, in quantity with some elite tanks attached. Hello Panthers! The tracks, the guns, the turrets… I knew I had to take some Panthers to show the American 76mm who was boss of the battlefield. Now with the German D-Day book there is another variant of the Panther – The Panther A.
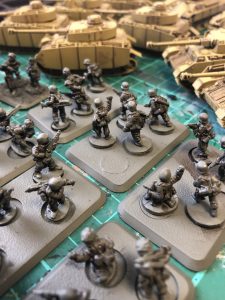 Time is money and having already committed to building a 100pt army of US Paras, with their lovely high model count, for the UK Office Hobby League, I wanted as few stands and tanks to paint as possible. Then it was time to trim the list. First out were extra Panzers and Panthers to maintain an equilibrium in points so as to make sure any one formation wasn’t too high, but also so I could squeeze in a second formation of troops to hold and contest objectives, and be a pivot for my tanks to run off. I eventually managed to come up with this list:
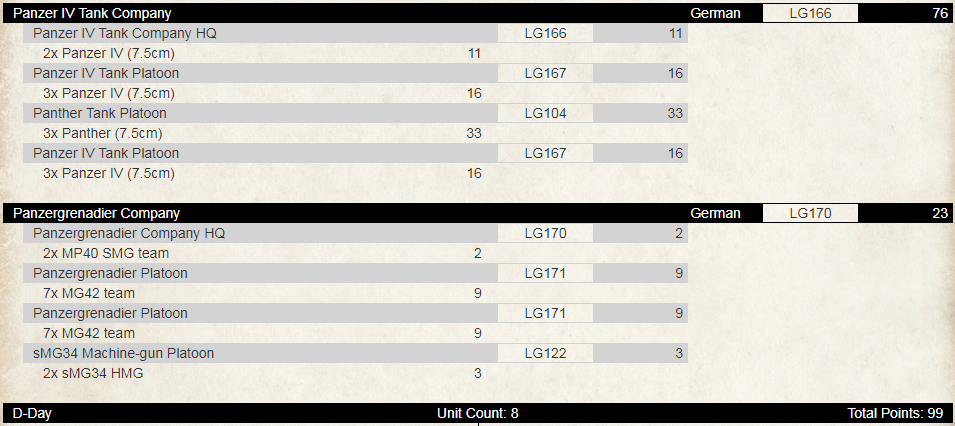
 First I primed the figures with a black rattle can. Then to speed things up I airbrushed the figures Khaki. This gave me a light base colour to work over rather than trying to paint beige / tan over the black primer. It also meant I could drybrush on the German Camo Beige for the smocks to create initial shading. Then I simply block painted all the items, trying to be as neat as possible.