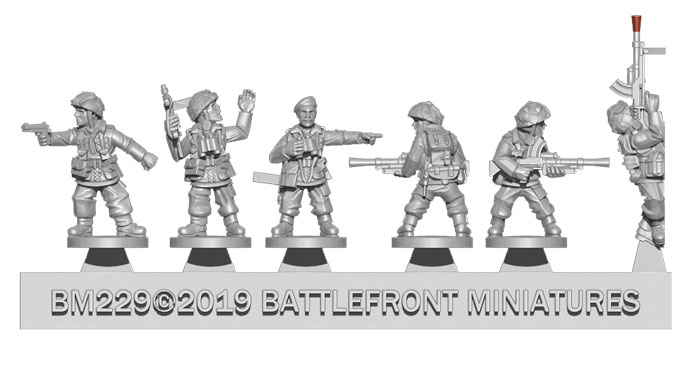
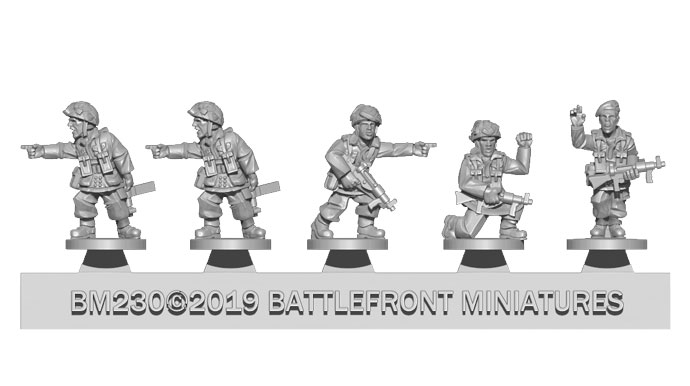
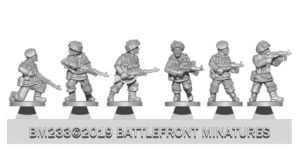
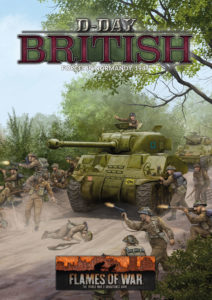
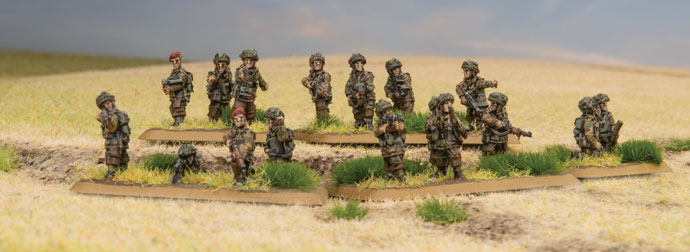
With the release of D-Day: British comes the first of our Thermoplastic figures, the British Airborne.
Since Thermoplastic is a relatively new technology, and as working with it is slightly different to any of our other plastic figures, it’s worth taking you through a few primers on how Thermoplastic behaves and how you can get the most out of our new figures.
The process through which the new figures are cast is similar to other casting methods for the plastics we offer- injection moulding of heated plastic. The point of difference with the new Thermoplastic technology is that the figures are cast in flexible moulds. The flexible moulds allow for undercuts, which means more detail on the figures can be cast, and that detail is much truer to the original design. Flexible moulds also allow us to broaden the number of poses we can deliver with the range of figures, meaning our infantry forces are about to get more dynamic than ever before.
None of these technical details are truly that relevant to us as modellers, but it is important to know that this casting method holds the fine detail we’ve all come to expect from Battlefront figures
Thermoplastic is a lightweight plastic with a medium amount of flex. Thermoplastic figures come on a sprue similar to the flexible plastic infantry, with eight or so figures on a single strip of Thermoplastic. Before you get started on your infantry, there are a few key differences between Thermoplastic figures and other infantry materials
Prep
As is the case with all miniature casting processes, Thermoplastic casting can occasionally leave a little flash or sometimes lines where the two halves of the mould join together. To clean these up you need to run a sharp hobby blade along the mould lines to slice them off flush with the actual figure. Filing or scraping the figure isn’t recommended and will leave a feathery residue behind. The Thermoplastic material can be cut or drilled out the same as any other infantry figure, so if you want to do head swaps or any other conversions, you will be able to as usual.
Gluing
Thermoplastic isn’t quite the same plastic as the stuff our hard plastic figures or vehicle kits are made of, and as such won’t weld with plastic cement. We recommend you use superglue to fix figures to their bases. You will also need to use super glue if you are doing any sorts of conversions on the figures themselves.
Painting
As always, it’s recommended to prime your figures before you paint them. Just like the flexible plastic figures, no paint will flake off the miniature with regular day-to-day flexing, however that doesn’t mean you shouldn’t prime the figures anyway to ensure paint adhesion. In any case, painting the new Thermoplastic figures offers no new difficulties or differences from your regular painting routine.
We are excited to get the first of our new figures out and in your hands for D-Day: British, and we are really looking forward to getting the most out of this new material as we refine and improve the process.
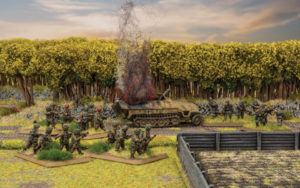
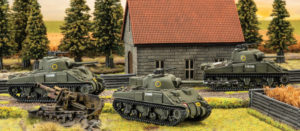
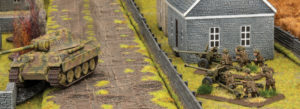
Up until now, my Late War British forces have all been based on the 7th Armoured Division, but I’ve been thinking that might have to change. I love the Churchill tank almost as much as the Cromwell (they’re just so boxy!), and have had a passion for them since building the old Airfix kit as a kid (although I didn’t enjoy the twenty or more parts for each track assembly!).
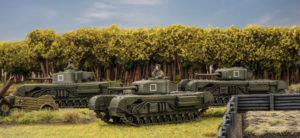
I started thinking about how I could keep the task relatively small, and came to the conclusion that, with a judicious rejigging of my existing stuff, I could do it fairly easily. I already have a motor company that could be used for the basis of a rifle company, and some support that can be transferred over. That means all I really need to do is get some Churchills painted up and I’m pretty much there. The force will have a battle-worn rifle company supported by a half-squadron of Churchill tanks, a troop of Crocodile flame-tanks, and a troop of M10s for anti-tank support.
My rifle company will be just the bare bones, an HQ and three weak rifle platoons (all that are left after several weeks of hard fighting). I can do this by adding three more rifle teams to my motor platoons. Sure, they’ll have an extra Bren gun, but I figure they kept it when they had to disband the third section, so that’s fine. Three platoons will give me plenty of flexibility as I can hold two objectives and still have a platoon free to manoeuvre.
Having played with even weaker motor platoons, I’m not worried about the low team count as they should always have plenty of fire support to shoot them on to the objective, and if they are charging, they’ll cut the enemy down to size before they can counterattack.
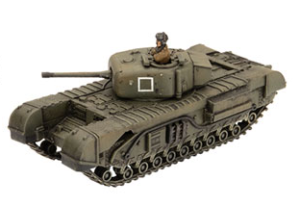
The Churchill tank brigades found that supporting an infantry battalion with squadron (a company-strength organization) of tanks was a bit clumsy, and soon changed to a half-squadron organisation to allow them to provide support wherever they were needed. My half-squadron will have an HQ of a Churchill (95mm) close-support tank for an ad-hoc artillery capability, with a spare uparmoured late-model Churchill (75mm) available for bigger games. The first troop will have another uparmoured 75mm, a basic 75mm, and a 6 pdr-armed Churchill, while the second one will just have two 75mm and one 6 pdr. The 6 pdr guns give me a bit better anti-tank capability against heavy tanks, while the 75mm guns give me a good solid 3+ firepower against most targets and are just as good against medium tanks.
The Crocodile flame-thrower tanks give me an excuse to make some of this interesting variant with its fuel trailer, and should make sure that my infantry assaults are successful. I’ll make a full troop of three of these, although I can only fit two in a 100-point force.
The last component will be my existing M10 (17 pdr) self-propelled guns. The Churchill regiments lacked the Firefly (17 pdr) tanks of the other armoured regiments, so often had M10 self-propelled anti-tank guns attached. They should come in handy if my opponents elect to bring lots of heavy tanks! I’d like to make some of the new plastic kits to replace my old metal and resin ones, but I’ll keep the ones I have for now.
All-in-all, it should be a fairly solid attacking force. I can’t really defend as I have too much armour, and I think I’ll be a bit slow-moving for mobile battles, so a solid Attack battleplan it will be. I don’t have any reconnaissance or artillery, but aggressive use of direct fire and a quick advance should mean that I really won’t miss it too much.
Hmm, time to pick up a couple of boxes of the new Churchills…
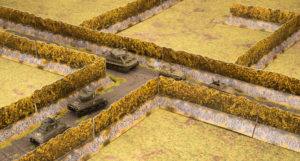
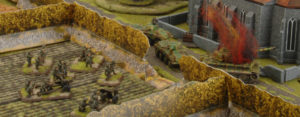
One of the key features of the Normandy Campaign was the bocage. A feature unique to that French countryside, bocage defined the combat of the Normandy breakout as Allied forces slogged their way through the thick vegetation, and German defenders sprung ambushes from every thicket and hedgerow.
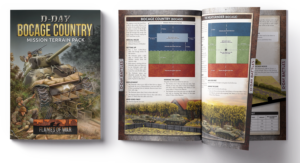
To make the bocage battles of Normandy accessible to Flames Of War players everywhere, and following the wild success of our D-Day: Beach Assault Mission Terrain Pack, we’ve put together the D-Day: Bocage Mission Pack- over 8 metres of cardboard bocage to match the bocage missions found in D-Day: British.
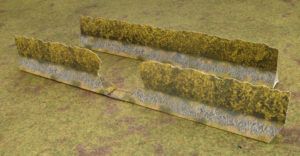
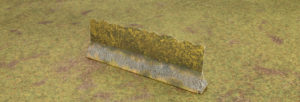
Bocage Country Mission Terrain Pack offers enough bocage (40 pieces, to be exact) to fill a full 4′ x 4′ (120cm x 120cm) bocage table, with corners, straights, and bocage of varying length.
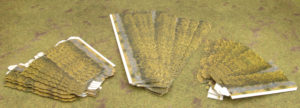
The bocage pieces are simple to assemble- so simple we already did it. All it takes to get started is to fold the bocage pieces into shape. Tabs and pre-run foldlines make setting up easy, and in ten minutes you have an entire table’s worth of bocage ready to set up in a variety of layouts.
Everything comes flat packed, and even when you’ve folded it all out for gaming, it fits away snugly in a file box for storage. The pack also contains an 8-page bocage scenario booklet, giving you everything you need to get started playing right from the word go.
Ever since their arrival with the Mid War books Afrika Korps and Desert Rats, I’ve really enjoyed Command Cards. Formations and units in the army books are great as they are and give players a really balanced list to choose their armies from, but Command Cards allow players to really make
their force historical, or geared to a certain doctrine. However the option to include iconic units, warriors and tactical doctrines is fantastic, and whenever a new book is released, it is always the command cards that I look forward to the most.
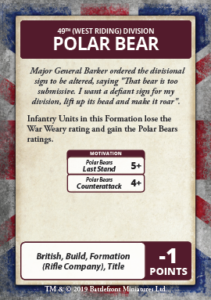
For the D-Day: British book, Andrew, Mike, and Phil have outdone themselves. There are six warriors of legend to use in your force, whether you have gone toward an infantry formation or an armoured squadron. From the only VC winner on D-Day itself, Stan Hollis, to young Joe Ekins in his Firefly scoring the kill shots on Tiger tanks at range, your choices are great. Further, there are a plethora of Title Cards to use for your force, which on the whole change one or more attributes of a particular force, from the 49th (West Riding) Division who amend their Counterattack rating for minus 1 point per platoon to a British build for an SAS Parachute Squadron, which uses a mix of units and amends the weapon profile of a standard Parachute Rifle Company, players are spoilt for choice!
I was particularly taken with the 49th Division Card – POLAR BEAR, because as a young Private in the UK Territorial Army, my regiment came under the command of the WW2 Division’s successor: 49th (East) Brigade, based originally in Grantham, Lincs and now just half a mile from the BF UK HQ in Nottingham. This forces me (kicking and screaming I assure you) to create a rifle company as Polar Bears. Even more interesting is a conversation during the Hobby League forums with a resident of Iceland, and my discovery that there were elements of the 49th Polar Bears stationed in Iceland as a garrison force! My how we got around, especially as my old regiment is now based in the South of England on the coast as befits their role…
With the Warriors, my Rifle Company could remain as the Army book allows ratings wise, and instead opt to take Stan Hollis VC as a warrior. Stan Hollis gives a much better motivation rating to a Rifle Platoon HQ in assaults, but also has a passive effect to nearby units effecting their Rally Rating to a 3+, which during assaults on the beaches or the bocage around objectives, will be invaluable!
And Joe Ekins – what a boy! As the gunner of any Firefly (17 pdr) which in my mind would be the Sherman Armoured Squadron, suddenly gets a great benefit in terms of his specific rules for shooting, and only for 4pts. He gets to re-roll any failed To Hit rolls (perfect for me as my dice rolls are sub par and a running joke in the office) but he also gains the precise rule. This lovely little addition means Target Armour is not increased for range when working out Armour Penetration. Which in terms of the Maths, suddenly puts most German armour at a disadvantage in a straight up shoot out.
1939-40
In 1939 the 50th Division was organised as a Motor Division and served in France in 1940, taking part in the evacuation at Dunkirk. After escaping, it was re-organised as a Infantry Division in Britain. It was sent on 22 April 1941 to North Africa and was reinforced by the 69 Brigade from the disbanded 23rd ‘Northumbrian’ Division
North Africa and Sicily
The division saw service in the Desert Campaign, where it lost the 150 Brigade at Gazala. Under-strength, it took part in the retreat to El Alamein, acting in reserve. During the 2nd Battle of El Alamein it was positioned in the south. It was reinforced with the 1st Free French Brigade and 1st Greek Brigade for its planned attack on the Italian Folgore (Airborne) Division. It was supported by elements of the British 7th Armoured Division. Later in the battle it was transferred north to take part in Operation Supercharge.
In Tunisia the 50th Division assaulted the Wadi Akrit position, and was then involved in the Sicily landings of 1943, where it landed at Avola.
The 168 Brigade was attached from the 56th Division during the campaign.
Northwest Europe
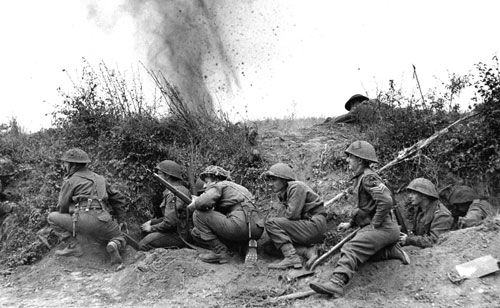
In October 1943 the division was withdrawn to Britain for reforming and training before landing on D-Day. The 231 Brigade (an independent unit formed from regular troops stationed on Malta) were permanently attached, and the 56 Brigade was temporarily attached for the initial beach assault. Later the 56 Brigade was transferred to the 49th ‘West Riding’ Division. D-Day For D-Day the 50th Division was given the beach code named “GOLD” to land on. It covered an 8km area between la Riviére in the west to Le Hamel in the East. The German defences in this area were manned by the 4th Company 441. Ost Battalion (4/441 Ost) and 7/736 Grenadier Regiment belonging to the 716. Infanteriedivision, which were located on the east flank, and I Battalion/916. Grenadier Regiment of the 352. Infanteriedivision. Manning the marshy area between these two formations were elements of the 3/441Ost. Weapons in this area were 5cm PaK38 guns in open concrete emplacements and 7.5cm guns mounted within pill boxes.
To the rear were several artillery batteries covering the beach area (Mont Fleury, Creully, Crépon, Ryes and Marefontaine farm).
The role of the 50th Division was to establish a beachhead between Arromanches-les-Bains and Ver-Sur-Mer, then head towards Route Nationale 13 (RN13) linking Bayeux to Caen.
The first wave was made up of the 231 and 69 Brigades; once the assault was complete, the follow-up formations of 56 and 151 brigades would push inland towards RN13 supported by tanks of the 8 Armoured Brigade.
The assault started at 07.25 hrs on the “King” sector of Gold beach, almost an hour late. The Green Howards, came ashore supported by DD tanks of the 4th/7th Royal Dragoon Guards. Following a massive bombardment from HMS Warspite and HMS Ramilles, the assault came in from a distance of seven miles out, unlike the Americans who had deployed from twelve miles out. The DD tanks were not deployed out at sea, but they were landed directly on to the beaches. This meant that the assaulting troops had armour supporting them directly on the beaches.
The 8 Armoured Brigade supported the 69 Brigade with the 4th/7th Royal Dragoon Guards on the right flank directed on Riviére, and on the left the Sherwood Rangers Yeomanry supported the 231 Brigade at Le Hamel. The 24th Lancers were held in reserve to be landed later in the afternoon, but due to bad weather and congestion they did not land until 7 June.
Due to the shelved nature of the beach, the landing craft grounded early and the troops had to wade ashore. The defences in this area were weak and the troops easily subdued the defenders. They then pushed on inland to silence the gun batteries behind.
On the “JIG” sector the 1st Battalion, Hampshire Regiment landed, but due to delays were without the support of tanks. Heavy machine-gun fire caused the death of the 1st Hampshire’s commanding officer and also their second in command (2iC) within minutes of landing.
The battle for Le Hamel ground to a halt and casualties mounted, but direct support by the 147th Field Regiment, Royal Artillery (2nd Army) helped to reduce the strongpoint and it was finally taken at 16.00 hours.
By the end of the day nearly all of the 50th Division’s objectives had been captured. In the east contact was made with the Canadians South of Tierceville. The 69, 56 and 151 Brigades dug in on a line from Vaux-sur-Aure to Coloumbs. The 56 Brigade completed the day one mile short of Bayeux, 151 Brigade group reached the Caen-Bayeux road and the 69 Brigade had linked up with the Canadians and advanced a massive eight miles inland. The 7th Battalion, Green Howards had advanced so far they had to be pulled back to Coloumbs. Patrols from the 2nd Gloucester’s had reached the outskirts of Bayeux.
To the west, Arromanches was reached at 2000 hours and reported clear of enemy an hour later.
The men of the 47 Royal Marine Commando dug in on Hill 72 south of the Longues-Sur-Mer battery; their objective of the Port en Bessin would not fall until the 8 June, after serious heavy fighting.
Fighting Inland
The next day the bridgehead was enlarged, St Leger was captured and the leading elements of the Sherwood Rangers entered Bayeux to a warm reception.
8 June saw the 8 Armoured Brigade form a mobile column consisting of the 61 Recce Regiment, 1st Dorsets, 288 Anti-tank Regiment, RA, plus A Company of the Cheshire Regiment. An advance was ordered on a two-axis front with the 61 Recce Regiment on the right and 24th Lancers on the left.
On 7 June the 6th Green Howards had been ordered to advance and by 10.00 hours had passed through Rucqueville en-route for Ducy-Ste-Marguerite. Meanwhile the 7th Battalion Green Howards had begun an assault on the wireless station west of the Coloumbs-Loucelles road. The attack, conducted by the A and C Companies with B Company in support, was a complete success and resulted in 50-60 prisoners being taken. Both battalions then dug in and started receiving reinforcements and conducting fighting patrols in the area until 11 June when, the advance began again.
9 June saw A company 1st Dorsets, with 4/7 Dragoon Guards in support, moving through Audrieu south of the Caen rail line, while the Sherwood Rangers moved west around Audrieu to find an open flank. As the 8th Durham Light Infantry (DLI) became available, they were attached to the Sherwood Rangers and moved towards Point 103 mounted on the tanks. By 13.00 hours they were firmly ensconced on Point 103 and the 24th Lancers and 147th Field Regiment, RA were ordered to move up.
An attack was ordered on St Pierre for 17.30 hours using the 8th DLI and 4/7 Dragoon Guards, supported by self-propelled guns of 147th Field Regiment and machine-guns of the 5th Cheshires. A captured POW reported that St Pierre (1km east of Tilly-sur-Seulles) was lightly held, but it was found later that this was incorrect. It was finally cleared of enemy by 19.00 hours. By the evening of 9 June St Pierre was held and the 1st Dorsets along with the 4/7 Dragoon Guards were on Point 103.
10 June saw the 8th DLI being attacked by elements of Panzer Lehr Panzerdivision to try to clear the British from St Pierre.
Attacks were also directed to clear Point 103 from the west. By the afternoon all attacks had been beaten off with heavy casualties to the Germans (2 Tigers, 4 Panzer IVs, and 3 75mm SPs). In the evening an American liason officer arrived and gave the 50th Division access to a 155mm Artillery Regiment allowing targets to be engaged outside the range of 147th Field Regiment’s guns.
On 11 June an attack on Cristot to the East of Point 103 using 69 Brigade was planned against elements of 12. SS-Panzerdivision. The 7th Green Howards were to advance on the left flank to secure Brouay and make contact with the Canadians at Putot-En-Bessin. Meanwhile 6th Green Howards were to attack Cristot with support from 4/7th Dragoon Guards and 147th Field Regiment. The attack failed to capture its objective and stalled one field short of Cristot and the attack on Brouay failed to penetrate the defensive positions.
On 12 June further attacks were planned to extend the bridgehead, an attack on the Tessel-Bretteville feature was organised and carried out in the morning. It was to be a two-part attack with the first objective the high ground overlooking La Caude Rus, and the second part the Juvigny to Fontenay-Le-Pessel road. The first objective was captured, but further progress was stalled by Tigers and Panthers in the woods around Point 102. Meanwhile the 69 Brigade had tried to clear the woods between Cristot and St Pierre, but suffered heavy casualties.
Orders were then received for the 50th Division to hold the line from Point 103 to La-Belle-Epine, the 8th DLI were pulled back from St Pierre and the Sherwood Rangers were ordered to cover the withdrawal.
This left the 69 Brigade holding Point 103 with the 5th East Yorks in support, while the 146 Brigade (49th ‘West Riding’ Division) held the Loucelles road.
Tilly-sur-Seulles
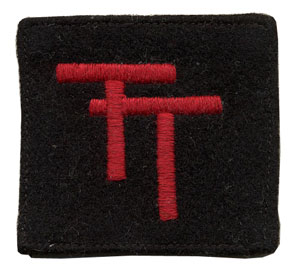
With its infantry brigade still waiting to land, 22 Armoured Brigade of the 7th Armoured Division was sent forward to assist the 50th ‘Tyne and Tees’ Division in taking Tilly-sur-Suelles. The mission was to follow the 50th Division’s 56 Brigade and, once they had opened a hole in the line, to exploit it all the way to Villers-Bocage and then press on to Evrecy, deep in the German rear.
On 11 June the 50th Division attacked in the area of Tilly-sur-Seulles, Juvigny, Hottot-les-Bagues, and la Senaudiere, only to find the newly arrived Panzer Lehr Division also attacking head on into the same area. As the forces clashed the 7th Armoured Division moved forward in support. Even with their support, the attack stalled well short of its intended line.
After another attack on St Pierre on the evening of 11 June the town was abandoned. The 8 Armoured Brigade withdrew to rest and refit and their positions were taken over by the 49th Division, which allowed the 50th Division to concentrate on Tilly-sur-Seulles.
On 14 June they launched an attack led by the 151 and 231 Brigades supported by the 4/7 Dragoon Guards. The objectives were the villages of Lingévres and Verriéres. The 6th DLI took Verriéres and pushed south towards Hottot-les-Bagues. Once more they faced the Panzer Lehr’s Panzergrenadiers through the difficult bocage country, where the defenders were always at an advantage. The attack was supported by heavy air and artillery support. The 9th DLI advanced towards Lingévres. They soon came under fire from a large wood astride of their axis of advance. Heavy casualties were taken, but they were finally were able to advance through the wood into the village. The village was taken and defensive positions were organised against German counter-attacks. The inevitable counter-attack arrived and quickly knocked out four 6 pdrs, but the supporting 4/7 Dragoon Guards were more successful, knocking out six Panthers. The Germans attacked again at 1615 hours from the west. Three more Panthers were knocked out by the DLI anti-tank gunners.
Much like the 9th DLI the 6th DLI were fired on from the wood in the line of their advance. They too were supported by a squadron of the 4/7 Dragoon Guards. They took the village, but could not advance any further forward. During the night they withdrew from the village to the north.
The following day the attack was taken over by the 56 Brigade, who completed the capture of Tilly-sur-Seulles. On 15 June the 231 Brigade took Hottot-les-Bagues with the 1st Hampshires. A German counter-attack supported by tanks ejected them from their prize, and another attack was arranged with the 2nd Devonshires leading. The village was once again held by evening, but the brigade command withdrew the battalion as the hold on the village was not secure. This allowed the Germans to attack Tilly-sur-Seulles and re-occupy it. The town was finally taken on 17 June. In the meantime the 50th Division became bogged down, and little further progress was made for the rest of June.
Another push to take Hottot-les-Bagues was launched on 9 July, but was pushed back by the Germans. Another attack was arranged by 11 July to be carried out by the 231 Brigade supported by the Sherwood Rangers. It was supported by a massive rolling barrage. Progress was made, but the village was not taken. It wasn’t until 19 July, after the Germans had withdrawn across the whole division front, that the village was finally securely in British hands.
Operation Bluecoat
The next major action of the 50th Division was in August during Operation Bluecoat. XXX Corps (7th Armoured, 43rd and 50th Divisions) objectives were Villers-Bocage, Aunay-sur-Odon and finally Mont Pincon. The operation began on 30 July and initially progress was slow. The 50th Division was held up at Amaye-sur-Seulles.
The British pushed the front line back by 13km (eight miles), seized the German dominated high ground south of Caen and drove a wedge between the German Seventh Army and Panzer Group West. Mont Pincon was finally taken by the 43rd ‘Wessex’ Division on 6 August.
The operation was not strategically vital in itself, but it facilitated the US advance by concentrating the increasingly depleted German forces on the Caen area.
After France The 50th Division was considered to have performed well in Normandy; in fact, out of the three divisions that were veterans of the desert (the others being 7th Armoured Division and 51st Highland) it performed the best. It was one of the driving forces behind the British advance. However, it was exhausted by the end of the battle.
It later played a minor role in Operation Market Garden, where the 231 Brigade was detached to help support the advance of Guards Armoured. The division stayed in northwest Europe until December 1944, when it was again returned to Britain, this time for the remainder of the war, and was converted into a training division. At the end of the war, it was sent to Norway and converted into British Ground Forces, Norway.
Since I’ve been spending my recent months learning Czech and enjoying Czech cinema, I was inspired to tackle the CIAB as a D-Day: British project. I am still cooking it up, so I will be sharing the project in short while on the home page, but for the time being I highly recommend everyone check out this Flames Of War article from which I got most of my info.
– Alex
The 1st Czechoslovak Independent Armoured Brigade Group with Jonathon Forsey
The opening of the Second Front in Europe on 6 June 1944 gave the exiled Czech troops who had been training in the UK the chance to take the fight to the Germans and, they hoped, the chance to take part in the liberation of their homeland.
Some Czech troops who had made their way to the UK had combat experience in the desert, others formed support units. This nucleus of troops formed an Infantry Brigade in mid April 1943, later converted to an Armoured Brigade in September 1943.
The men of the 1st Czechoslovak Independent Armoured Brigade Group (CIABG) were anxious to get to grips with the enemy who had forced them from their homes, but had to wait until 30 August 1944 before the Brigade was deployed to France, initially assembling at Falaise.
The Brigade
The Brigade, under General Alois Liska, was trained, organised and equipped along British lines. The troops who assembled at Falaise comprised a powerful mechanised all-arms force.
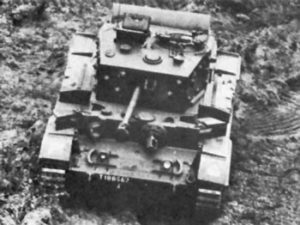
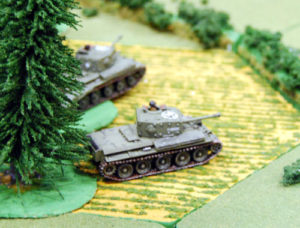
The Brigade HQ comprised Cromwell IV tanks and Sherman OP tanks for forward observers. The main “teeth” of the Brigade were found in the two (later three) armoured Regiments. The 1st Armoured Regiment under Maj. S. Rezabek and the 2nd under Lieut. Col F. Seda were similar, each comprising an RHQ of Cromwell VII tanks and a troop of Sherman Firefly VC tanks armed with the formidable 17pdr gun. Forward observers were carried in Cromwell IV OP tanks.
The Regiments each had an Armoured Recce Troop with Stuart VI Light tanks, and three squadrons, (‘A’,’B’ and ’C’) with Cromwell IV and VII tanks, plus Cromwell VIII 95mm Close support tanks in the SHQ. There were no Firefly or Challenger tanks in the squadrons themselves.
The Brigade’s Motor Battalion under Lieut. Col J. Chvalkovsky contained veterans who had seen service in North Africa, plus retrained troops of the former 200th (Czech) Light AA Regiment. The Battalion was organised along British lines, with troops riding in M5 halftracks and Universal Carriers, the Battalion including its own recce element in M3A1 White scout cars, plus 20mm Polsten AA guns and attached 6pdr anti tank guns, 3” Mortars and Vickers Medium Machine Guns.
The Brigade had its own Armoured Reconnaissance Squadron under Major V. Velimsky, comprising Stuart VI light tanks, Humber Scout cars and a small number of Cromwell tanks.
This unit was later expanded into the Brigade’s 3rd Armoured Regiment when the Brigade adopted a relatively static existence in the winter of 1944/45. This Armoured Regiment differed from the first two in the Brigade by being equipped with heavy Churchill III/IV and VI Infantry tanks. However, the Churchill’s did not see any offensive action during the siege.
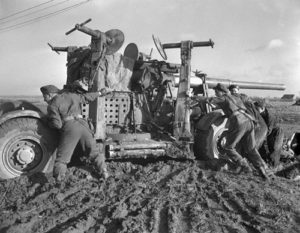
The Brigade’s AT Battery, the “oddil K.P.U.V” under Maj. A. Sitek initially contained two troops of 17pdr anti-tank guns, initially towed by Chevrolet 30cwt trucks, later by Morris EA 4 x 4 vehicles. A third troop was added in the winter of 1944/45.
The Field Artillery Regiment under Col S.Rajmon initially comprised two batteries (“P” and “Q”) of towed 25 pound guns, with a further battery, (“R” Battery) added during the winter of 1944/45.
These core units were supported by an AA Troop with towed 40mm Bofors guns and an overworked and slightly under strength Engineer Company which was again expanded during the 1944/45 winter.
To the disappointment of the men of the CIABG, they were not to press East. Instead, they were directed to the Coast, with the mission of containing the remaining German bastions of the once formidable Atlantic Wall. The Allied advance stranded substantial German forces in ports along the coast and the defenders of these ports had been ordered by Hitler to hold them to the last.
To Dunkirk Liska’s men, as part of First Canadian Army (and later part of 21st Army Group) were assigned the role of containing the German garrison trapped in the port of Dunkirk. Canadian troops of the 2nd Canadian Infantry Division had arrived at Dunkirk in September 1944, contained the defenders and handed over the task of besieging the valuable port to the CIABG on 6 October 1944. The task was to contain the powerful but essentially immobile garrison, rather than to storm the port.
The siege role ill suited the Czechs, who had insufficient manpower for the task and lacked the specialist engineering vehicles necessary to reduce the inland defences.
The successful, but costly, captures of Le Havre, Dieppe, Boulogne and Calais had given the Allies caution. Dunkirk as a prize was not required at the cost of significant casualties. The mobile formation had to content itself with maintaining an impenetrable cordon around the city, prohibited by the French authorities from mounting any prolonged bombardment of the historic centre.
The Czechs were not alone in their task, being supported by Canadian and British heavy AA units, whose 3.7” AA guns were employed in the direct role, as were the additional 40mm Bofors guns of the 125th Light AA Regiment.
The 7th Royal Tank Regiment lent the support of its heavy Churchill tanks. A shortage of infantry was in part addressed by the formation of two battalions of Free French infantry formed from the local F.F.I (Forces Francaises d’Interieur) under Lieut. Col Lehagre, equipped and armed by the British.
The Defenders
Dunkirk, as part of the “Atlantic Wall”, possessed formidable defences to protect itself from attack from sea. These included concrete bunkers, pill boxes, coastal defence and anti-aircraft emplacements.
The inland part of the perimeter was defended by areas of flooded low country, bunkers, fortified farm houses, improvised pillboxes and thousands of mines, including British mines captured after the evacuation in 1940.
The defenders were well stocked with artillery, having over 80 pieces with calibres ranging up to 200mm, plus nearly 100 anti-tank guns of various calibres. Defenders were also plentiful, if their quality was uneven. At the time of the eventual surrender of the port to the CIABG on 8 May 1945, there were over 11,000 troops. These men were drawn from Luftwaffe, Kriegsmarine, Festung and Wehrmacht units, including 226th infantry Division, 346th, 711th, 49th and 97th Divisions and the 26th and 1046th Fortress Battalions. Of the total, approximately 2,000 were part of the Waffen-SS Reinecke Group. In accordance with common German practice, the defenders formed ad hoc Kampfgruppe to defend specific sectors of the perimeter. Losses during the siege amounted to approximately 1,000 men.
The Siege
As the CIABG lacked the means and the orders to take Dunkirk, the Czechs set about establishing a cordon to contain the garrison and prevent any breakout by valuable troops. The CIABG’s mission was to harass the defenders, engage in aggressive patrolling and cut off coastal supply routes.
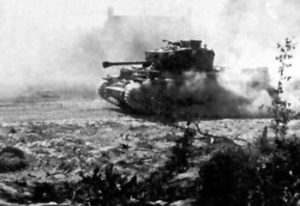
Despite the relatively static nature of the operation, the men of the CIABG were occasionally able to demonstrate their prowess and mobility in mobile battle. On 28 October 1944, elements of the 2nd Armoured Regiment and the Motor Battalion conducted a feint which drew defenders out from their prepared positions.
A lightning riposte against the exposed German infantry saw over 40 casualties inflicted on the defenders at a cost of only two casualties to the CIABG. This operation drew significant praise for the manner of its execution from higher levels, including Field Marshal Montgomery.
These opportunities were, however, rare and morale did suffer as it became apparent that the Brigade was not to be permitted to join the U.S. forces which were heading toward the Czechoslovakian homeland. Only a token force of 150 men was permitted to accompany the U.S. Troops headed toward their eventual meeting with advancing Soviet forces.
On the positive side, casualties incurred during the siege were relatively light, amounting to 167 dead, 461 wounded and 40 missing. One peculiarity was that the availability of Czechs who had been forced to fight in the German Army, but who had been captured or deserted to the Allies meant that the Brigade actually grew over time, enabling the strengthening and addition of units as outlined above.
The CIAB In Flames Of War
There are two options for fielding the CIAB in D-Day: British. The Czechozlovak Motor Company can of course be represented with the D-Day: British Motor Company. Both Cromwell formations could be used to represent the CIAB tank companies for different purposes. Use the Armoured Recce Squadron to represent the Czechoslovak Cromwells, or use the Desert Rat Cromwell Armoured Squadron to represent the Czechoslovak Crowells with the HQ Friefly VCs apportioned out to the Cromwell troops in the company you’re representing.
As those who’ve been reading my articles over the years will know, I have had a fascination for the 7th Armoured Division, the ‘Desert Rats’ in Normandy since I was a kid. My Late War Desert Rats force is easily the biggest part of my collection, so the obvious question is: what difference does the latest version of the rules make? I’ll look at my two formations: a Cromwell Armoured Squadron and a Motor Company, separately.
My Desert Rats force back when we first switched to V4
Cromwell Armoured Squadron
There are two ways to build a Cromwell Armoured Squadron in D-Day: British: the Desert Rats Cromwell Armoured Squadron and the Cromwell Armoured Recce Squadron. Since the 7th Armoured Division had both types, I could go either way, but my tanks are marked as 1st Royal Tank Regiment, I’ll go with the Desert Rats Cromwell Armoured Squadron. The main tanks in the formation are the Cromwell and the Firefly, so let’s see what’s changed.
Cromwell Tanks
The Cromwell has the same speed and cross capability, and the same armour that it used to have, so it’s still blazingly fast and has about the same armour as a Sherman or T-34. The gun is the same as the Sherman’s 75mm, so no surprises there. The 95mm in the close-support tanks of the HQ gain a little with better Firepower and better Anti-tank and Brutal for direct-fire. The artillery Firepower improvement from 5+ to 3+ should make them a lot more lethal, especially when combined with the re-rolled saves for repeat bombardments. I’m looking forward to seeing them rip enemy anti-tank guns to pieces! Gamewise, I think the biggest difference is the ability to use their dash speed without the risk inherent in moving fast in the earlier versions of the game.
Firefly Tanks
The Firefly’s speed and armour is also the same, as is the 17 pdr gun apart from gaining an extra 4”/10cm range, which may be useful when covering a fast dash onto the flank by the Cromwells. The ratings of both types of tank are much the same. They are still Reluctant, although the Remount is now a straight 3+ rather than having the old Cautious not Stupid rule. They are Careful, so are still hit on 4+. Their Skill rating is Trained, so like most they are OK at Movement Orders like Blitz Move and Shoot and Scoot, a welcome addition in the latest version that should give me more options to do clever things.
The old British tank rule of Semi-Indirect Fire (giving a re-roll for long-range shooting) is gone, so I’ll need to be a little more circumspect in my initial shooting before the charge to close range, but I doubt that it will make that much difference.
Stuarts and Crusader A/A Tanks
My force also has Stuart light tanks and Crusader A/A tanks. The Stuart is virtually unchanged, and is still a great little Spearhead unit to help with deployment, and a sneaky unit to keep the enemy on their toes later in the game — enemy armoured cars beware, my scouts bite! The Crusader A/A has improved considerably. It’s lost a point of ROF, now ‘only’ 4, but is faster and better armoured, and most importantly has 4”/10cm of extra range making it easier to keep my tanks under its umbrella. Most importantly, it’s halved in price relative to my Cromwells, so it is much easier to include in the force!
The Verdict
A full squadron with Stuarts and Crusader A/A is now 98 points compared with 1935 points under the old version. That’s a significant reduction allowing me to field the whole squadron in a normal game! I’ve lost the Semi-Indirect Fire, but I’ve gained a whole extra troop of tanks, so I think they will perform very well thank you! I’m a happy camper so far.
Motor Company
For those who are confused by British terminology, a Motor Company is a rifle company optimised for transport in light trucks or half-tracks. Other armies might have called it a motorised or armoured rifle company or something similar, but not the British!
Like my armoured squadron, my Desert Rats Motor Company has the works as far as the formation is concerned. It’s got three small infantry platoons, three universal carrier scout patrols, two 6 pdr anti-tank platoons, a Vickers MMG platoon, and a pair of 3-inch mortars, backed up with two platoons of M10 (17 pdr) SP anti-tank guns. The most noticeable change up front is that the armoured transports aren’t in the D-Day: British book. Instead, they are available through command cards. While I appreciate the flexibility of not having to take the transports, I have found them so useful in the past that I probably will continue to take them.
What’s Changed
So what else has changed? Well the most noticeable change (and the fact that it’s so minor shows how little has changed) is an extra 4”/10cm range on my 6 pdr anti-tank guns. This could be useful on occasion, but as I use the M10 SPs for long range shooting and position the 6 pdr guns for survivability and to protect the infantry, I doubt it’ll make that much difference.
Another change is that the choice of how my Vickers MMGs deploy is now part of building my force. I have to choose whether they will be mounted on their carriers or on foot and that’s how they stay. I’m going to have to experiment to see which works better for me. At the moment, I’m tempted to keep them mounted.
My M10 (17 pdr) SP anti-tank guns have picked up an extra point of front armour and 4”/10cm more range, and like all SP guns, lost a bit in assault capability — something I won’t miss!
The pair of 3-inch mortars gain from the new artillery rules, particularly the re-rolled saves from repeat bombardments, so that makes me happy. Oh wow! I just realised that their Firepower went up from 6 to 4+, making them three times as deadly — watchout enemy anti-tank guns and machine-guns!
The last time I got to take this force out for a spin.
The Verdict
A company with the M10s and transports is now 88 points compared with 1850 points under the old version. Once again, that’s a significant reduction. Combined with a few performance boosts. I’m happy there as well.
Support
The only support I have so far are a flight of Typhoons and some unpainted Sexton SP artillery. The Typhoons haven’t changed much aside from a little extra range on their rocket bombardment (and fortunately I have a spare painted from earlier versions, so I’m set for the change from one to two aircraft models in the unit). That extra range might be useful at times for avoiding anti-aircraft fire. The Sextons are a command card that modifies the Priest Field Troop in the book, and like all artillery, they gain a bit of extra effectiveness. I think I might finally have to get them painted to support my motor company!
In Closing
I’ve placed or won in tournaments with both formations, and I look forward to a lot more gaming using them in the new version. I don’t think they’ll play particularly differently, but I look forward to finding out! Whatever the differences, it’ll be good to get them back on the table again.
With not much change needed to my existing force, I’m tempted to start a force of Churchill tanks and modify my motor company into a rifle company. Hmmm, the new Wasp flame-throwers look good. Hey, I could add Crocodile flame tanks as well… hey Chris, can I place an order!
On June 6th, 1944 the Allied forces launched one of the largest amphibious assaults ever. This book follows the British and Commonwealth forces that overcame the German defences and claimed Sword, Gold, and Juno beaches as well as the breakout after. The forces in the book are broken down into three major groups: you have your regular war weary units that form the backbone of your forces, you have your Desert Rat veterans and lastly you have your elite troops like the Commandos and Airborne units. These options are perfect to build any list for D-Day and the breakout.
Parachute Company
Tough and deadly troops, able to hit hard in Assaults and hold their own when assaulted. Extra anti-tank with up to two PIATs in each platoon.
Light unit with a good selection of integrated units, Anti-Tank, machine-guns and artillery, almost a whole army unto itself. Can parachute into battle in airborne assault missions. With the extra PIATs and access to 6pdrs and 17pdrs in the formation, this formation is one that tanks will need to be wary of.
Airlanding Company
Elite deadly troops the Airlanding Company will be a hard unit to shift.
The Airlanding Company is well equipped with their own light mortar and up to two PIATs in each platoon. Has the option to take a fourth Airlanding Platoon. Can land by glider in airborne assault missions. Has access to two 6pdr Anti-tank platoons and a 17pdr platoon to give you all the anti-tank assets an Airlanding Rifle Company could want.
Commando Troop
The Commando Troops are some of the most elite troops you can find. Being Fearless Vets is good, having Deadly on top of that makes them assault monsters hitting on a 2+, and that’s even better. The Commandos have the standard platoon layout but with the Commando stats this unit is far from standard. Commando Troops are small with only machine-guns and mortar units integrated into the formation. This makes them ideal to match up with another formation that could use some of the best troops backing them up. Commandos are good at pretty much anything they do. If you need to assault an Objective, hold an Objective, or take out a stubborn enemy platoon, there is no other unit in the book better suited to the job.
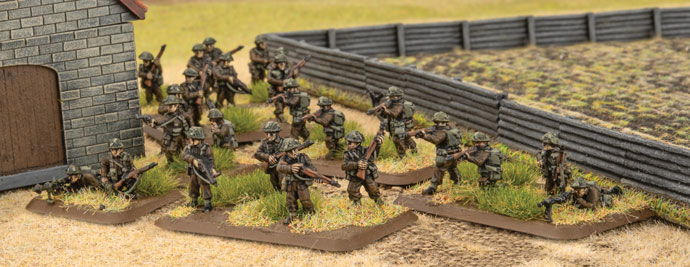
Two Rifle Companies The Desert Rats have less morale than the regulars, for this the Desert Rat troops are cheaper to field. The Rifle Companies make up the backbone of the British forces, they are reliable and well trained. Rifle Platoons are cost-effective platoons that are deadly in the assault. Rifle Platoons can choose to attack at night, giving your troops the cover of darkness while advancing. The Formation boasts loads of options, mortars, anti-tank guns, machine-guns, and Recon. The Universal Carrier Patrols of the Infantry Company gives your troops the edge by Spearheading your assaults. Wasps give your troops flamethrowers that can clear an Objective in a jiffy.
Easy to convert from Rifle Company in Fortress Europe. You can use the same models to play both the regular and the Desert Rat Rifle Companies.
Two Sherman Squadrons
The Sherman Armoured Squadron is your normal Sherman Company that has integrated Fireflies in your Sherman Troops, giving you the higher anti-tank of the Firefly tanks in each platoon. The Sherman DD Squadron is a unique formation that has your Firefly Armoured Troops formed into a single unit giving you a more focussed anti-tank unit. This leaves their normal Shermans on their own, with platoons of 3. Cost-effective medium tanks, the Sherman gives you a cheap tank that can hold its own in most tank duels. The Stuart Recce Patrol gives your tanks spearhead, and an effective light tank that can both screen infantry and other light tanks.
The Crusader AA gives you some much needed AA that can keep up with the tanks. Easy to convert from the M4 Sherman Tank Company in Fortress Europe.
Churchill Armoured Squadron
Heavy Tanks that can take on enemy tanks and infantry alike. Need more armour? You can upgrade one of your tanks in each troop to a Churchill (Late 75mm), this gives the Churchill a whooping front armour of 11!
Need more AT? You can take a 6pdr in each unit to up your Anti-Tank to 11.
If you have the points you can bring up to five platoons of Churchills, along with Stuart Recce and Crusader AA tanks, all this gives you a really tough force in just one Formation!
Cromwell Armoured Squadron The Cromwell Armoured Recce Squadron gains the Scout rule in each of their platoons. They also don’t have a firefly in their platoons giving them a different feel altogether than the Desert Rats Cromwell Armoured Squadron. Desert Rats Cromwell Armoured Squadron have reduced morale compared to the Recce Squadron. Each unit also has a Firefly tank integrated into their platoons giving them a heavy Anti-Tank tank within their Troops. The Cromwell is a fast tank that has great Terrain, Cross Country, and Road Dashes. Use these tanks to outflank an unwitting opponent or to speed to an Objective before their reinforcements have time to arrive.
Motor Companies Like the Rifle Companies there are two kinds of Motor Company, the Desert Rat and the regular Company. The Desert Cat Company has a lower morale rating, making them cheaper than the regular troops. Motor Platoons are small and cheap, this is the perfect Unit to add to another much larger Formation that needs to use up those last points. Motor troops are equipped with Bren guns making them ideal defenders, and giving them a lot more firepower than their small size would denote. Motor Companies are like miniature Rifle Companies, with lots of options to fill out your points and help round out your force.
Support The Armoured Car Troop gives recon assets to any Formation that needs them. The M10 SP Anti-Tank troop gives you mobile heavy anti-tank. The 17pdr boasts a massive anti-tank of 14 that can penetrate most everything your opponents will throw at you. The 17pdr Anti-Tank Troop is great on the defense, just dig them in and watch your opponent worry about their tanks the whole game.
The Crocodile tank is the ideal infantry killer, with its rate of fire 5 flamethrower! Coming in at 21 points for three these tanks are well worth it. Along with their flamethrower they also have a gun and massive front armour of a Churchill (Late 75mm).
The AVRE is a deadly anti-infantry tank that can be devastating if your opponent lets it get close enough. The 25pdrs and the Priest Field Troop artillery give your forces some powerful artillery support on top of all your integrated artillery in your Formations. The Bofors Light AA Troop gives you AA in all of your formations, giving you protection from aircraft and a nice light anti-tank weapon in a pinch. The Typhoon Fighter-Bomber with its rockets can devastate even the heaviest of tanks. How Do The British Play?
The British have loads of interesting options that run the gambit from from the cheaper Desert Rat Motor Company to the most elite Commando Troops. It all comes down to your play style.
When you want to play defensively you will want to build your force around one of the Rifle Companies. These companies give you the core of what you need to be defensive, add in some of the Churchills and M10s to give you the armour you need to keep your enemy tanks at bay. Once dug in, a British Rifle Company is hard to shift, and scary to assault.
When you want to be aggressive you have loads of choices. For a more tank-focussed army the Cromwell tanks are fast but expensive, so you want to pair them with Motor Troops or Rifle Companies. If you go with Shermans you can better afford the more elite infantry choices like Airborne or Commandos. If you want to focus on infantry then the Airborne Companies and Commando Company are some of your best fighters, bring them and a unit of Cromwells in support and you will have a strong striking force. Normandy Campaign Missions D-Day: British book includes four more missions, three breakthrough Bocage missions and another Airborne mission. The first mission is the Brew Up mission, the defender is surrounded by attacking players who deploy in a random way.
The second mission Bocage Country is your normal Bocage mission that has the Attacker fighting their way though Bocage while the defenders try to hold them off as they wait for reserves.
The Third Bocage mission is The Meatgrinder mission. In this mission player deploy on either side of the table and both have to fight their way to a central objective that goes live on the sixth turn.
The last mission is an Airborne mission, Seize and Hold. In this mission we mix things up, with the Defenders having to attack into the Attackers who just air landed and took the objectives. The Defender will have to move quickly to as the the Attacker will win if they keep the Defenders at bay for six turns.
Warriors Of D-Day British
The British D-Day Command cards include six Warriors: Richard Pine-Coffin, Peter Young, Stan Hollis, Joe Ekins, David V. Currie, Sydney Valpy Radley-Walters. Richard. Pine-Coffin
Faced with defending Pegasus Bridge with only half of his battalion present, Lt-Colonel R. G. Pine-Coffin mounted a counterattack using available personnel to repel the German assault. Lt-Colonel R. G. Pine-Coffin is a Parachute Formation Commander that gives himself and any attached united better counter attack ratings. He also hits on a 2+ in Assaults.
Peter Young
To inspire his men’s confidence under fire, Lt-Colonel Peter Young told them that 15 feet of standing crops would stop a bullet. He may well have been right as none were hit. Either way, his men learned to make excellent use of any cover they could find. This Commando Formation Commander gives his unit the ability to go Go to Ground while on the move.
Stan Hollis
On D-Day, Company Sergeant Major (CSM) Stan Hollis saved D Company by single- handedly taking out two key HMG Bunkers and capturing 25 German defenders. This Rifle Company Formation Commander gives himself and units from his formation that are close-by improved Rally ratings.
Joe Ekins
Trooper Joe Ekins was a Firefly gunner who destroyed four tanks in a single day, including three Tiger tanks. One of the Tiger tanks he faced that day was commanded by Michael Wittmann, and some speculation would have it that Joe Ekins fired the shot that killed Wittmann, but that is still disputed to this day. This tank Warrior takes over a Firefly in one of your Sherman platoons. Ekins’ Firefly gains re-rolls To Hit, and he ignores the armour bonus on tanks he fires at that are over 16”/40cm away.
David V. Currie
Major David V Currie made a point of regularly checking on his men—whether they were his own tank company or another company that his tanks were working with. On several occasions he dismounted from his tank to lead his men under fire. This Sherman Tank Company Formation Commander gives himself boosted command range, and he may roll an additional dice when in assaults.
Sydney Valpy Radley-Walters
Major Sydney Valpy Radley-Walters has the distinction of being the western Allies’ top ace during the war. His tank squadron is one of many that claims to have taken out the German tank ace, Michael Wittmann. This Sherman Tank Company Formation Commander gives himself a better Blitz Move Order on a 3+ and forces any enemy tanks hit by him to re-roll successful armour saves. Command Cards
This set of command cards introduces a new type of Command Card to British forces, Title Cards. These cards have the title of a division and a special rule giving the division’s flavour. The key is that you can only have one title in your force.
Title Cards for the British give you access to more unique and flavourful formations. These cards allow you to use existing formations from the book to create new lists that focus on particular units or formations. These cards also add in Canadian Divisions, Guard Divisions, Scottish Divisions, Polish Tanks, Welsh Divisions and more. With a simple card you can transform a unit like your British Rifle Company to a Welsh Division that has a different Last Stand and Dig In ratings while you are near an Objective. That’s the real cool thing about Title Cards, they let you take existing armies you may have, and by adding one card you have another army that works a bit differently than it did before.
Along with the new Titles you have everything you have come to expect in a Command Card set, new Formations and interesting upgrades to old ones.
As a special side bonus the pack also comes with one American Command Card for the 29th. Those who know me know that the 29th is one of my favorite companies in Flames Of War, and I really wanted to add the 29th Infantry Card to the American Command Card box but the timing was off. This card lets you bring in Crocodiles from the British book- Crocodiles that were not coming out till the British book, so I had to wait, and was able to sneak it into this set.

 My rifle company will be just the bare bones, an HQ and three weak rifle platoons (all that are left after several weeks of hard fighting). I can do this by adding three more rifle teams to my motor platoons. Sure, they’ll have an extra Bren gun, but I figure they kept it when they had to disband the third section, so that’s fine. Three platoons will give me plenty of flexibility as I can hold two objectives and still have a platoon free to manoeuvre.
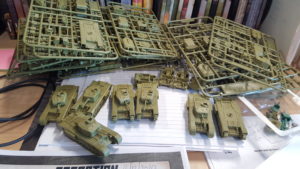
 The pack also contains an 8-page bocage scenario booklet, giving you everything you need to get started playing right from the word go.
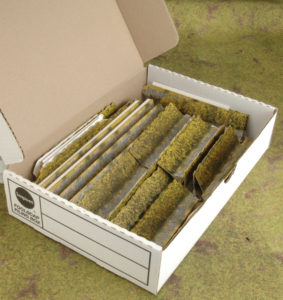
 I was particularly taken with the 49th Division Card – POLAR BEAR, because as a young Private in the UK Territorial Army, my regiment came under the command of the WW2 Division’s successor: 49th (East) Brigade, based originally in Grantham, Lincs and now just half a mile from the BF UK HQ in Nottingham. This forces me (kicking and screaming I assure you) to create a rifle company as Polar Bears. Even more interesting is a conversation during the Hobby League forums with a resident of Iceland, and my discovery that there were elements of the 49th Polar Bears stationed in Iceland as a garrison force! My how we got around, especially as my old regiment is now based in the South of England on the coast as befits their role…
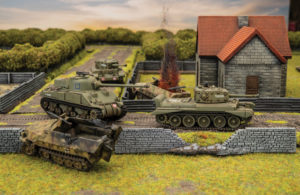
 1939-40
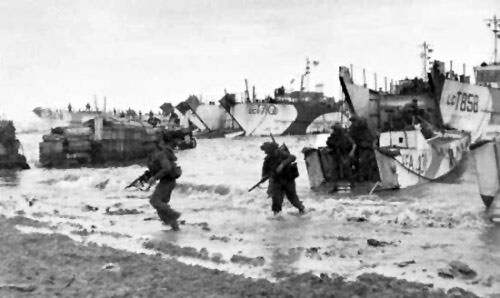 Northwest Europe
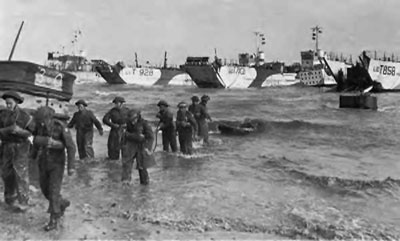
 On the “JIG” sector the 1st Battalion, Hampshire Regiment landed, but due to delays were without the support of tanks. Heavy machine-gun fire caused the death of the 1st Hampshire’s commanding officer and also their second in command (2iC) within minutes of landing.
 Much like the 9th DLI the 6th DLI were fired on from the wood in the line of their advance. They too were supported by a squadron of the 4/7 Dragoon Guards. They took the village, but could not advance any further forward. During the night they withdrew from the village to the north.
 Operation Bluecoat
 The Brigade
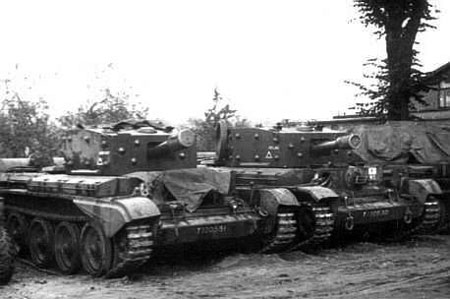
 These core units were supported by an AA Troop with towed 40mm Bofors guns and an overworked and slightly under strength Engineer Company which was again expanded during the 1944/45 winter.
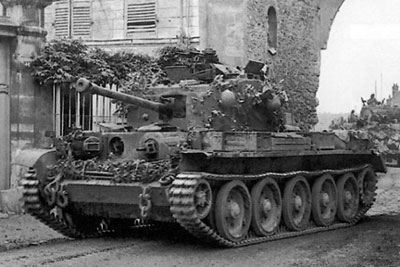 The siege role ill suited the Czechs, who had insufficient manpower for the task and lacked the specialist engineering vehicles necessary to reduce the inland defences.
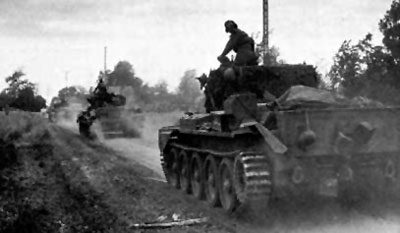
 The Siege
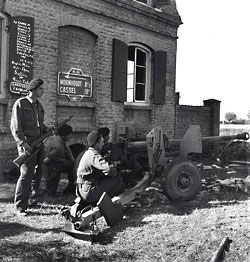 Despite the relatively static nature of the operation, the men of the CIABG were occasionally able to demonstrate their prowess and mobility in mobile battle. On 28 October 1944, elements of the 2nd Armoured Regiment and the Motor Battalion conducted a feint which drew defenders out from their prepared positions.
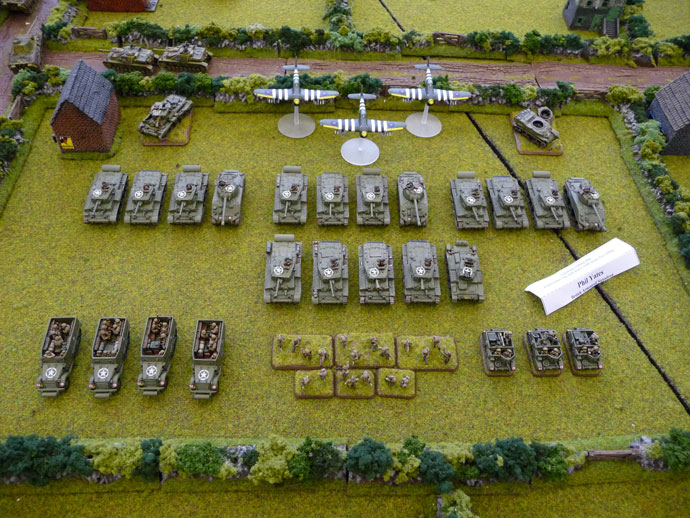
 Cromwell Tanks
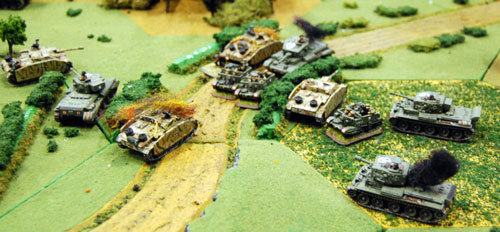

 On June 6th, 1944 the Allied forces launched one of the largest amphibious assaults ever. This book follows the British and Commonwealth forces that overcame the German defences and claimed Sword, Gold, and Juno beaches as well as the breakout after. The forces in the book are broken down into three major groups: you have your regular war weary units that form the backbone of your forces, you have your Desert Rat veterans and lastly you have your elite troops like the Commandos and Airborne units. These options are perfect to build any list for D-Day and the breakout.
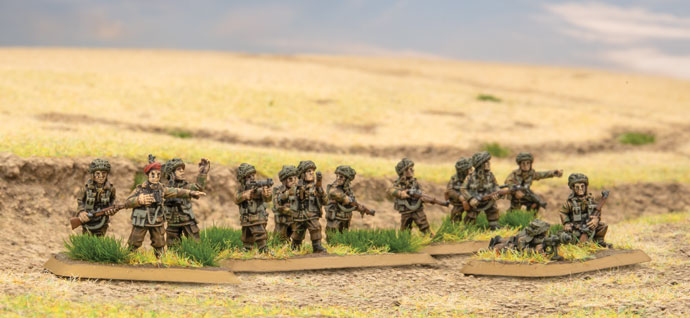
 Churchill Armoured Squadron
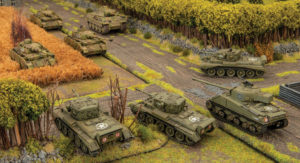
 How Do The British Play?
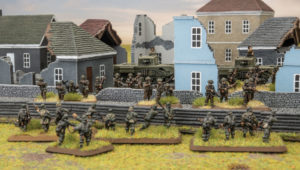 Normandy Campaign Missions
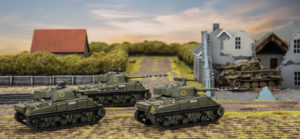 Richard. Pine-Coffin
 Command Cards