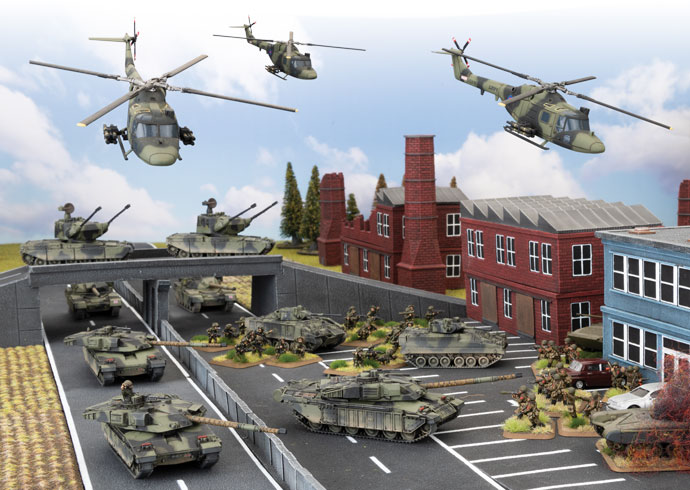
Chris Potter headed over to Goblin TV to chat about the new Challenger tank kit.
Author: Chris Townley
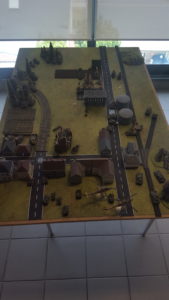
Phil v Wayne: The Defence of Shellerton Scenario
with Phil Yates and Wayne Turner, Battlefront NZ
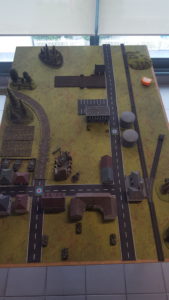
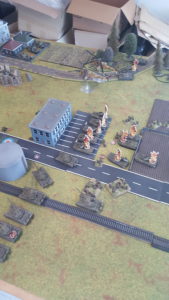
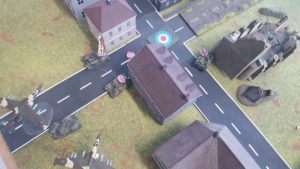
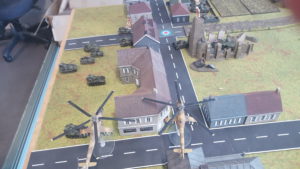
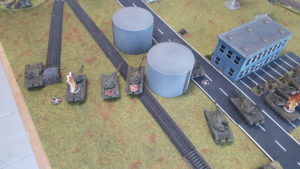
To celebrate launch day, Phil and Wayne had a little scuffle with the Studio army collection. The scenario was the classic Defence of Shellerton, with Phil playing British (of course) and Wayne taking the lead elements of the Soviet invasion force.
Phil
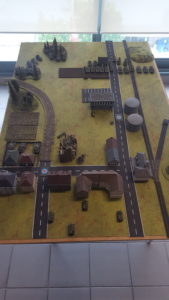
When I was ordered to hold Shellerton against the lead Soviet element, I was moderately surprised as I’d wargamed exactly that situation in training. So it was with a sense of deja vu that I deployed my forces. I put my attached platoon from the Irish Guards forward in the factory by the fuel tanks as a bastion to slow the enemy advance down the main road, placing hasty minefields on their flanks to delay any attempt to bypass them. With only one troop of Chieftains immediately available, I placed them in the farm on the left flank where they had an excellent field of fire while blocking any advance down the side road. I was surprised to find the church wrecked by an apparently random bomb, but pleased to take advantage of the cover that game me for my own tank. The artillery deployed behind the town and my Swingfires remained in reserve.
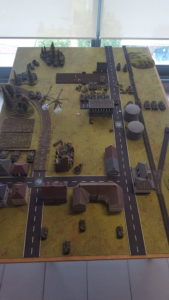
In front of the factory bastion, the killing ground was perfectly executed. The pre-planned artillery bombardment cut down the advancing infantry and destroyed half-a-dozen BMPs, while my Chieftain troop finished off the rest. The infantry even scored a couple of T-72s with their Charlie-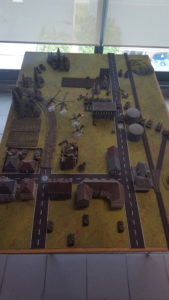
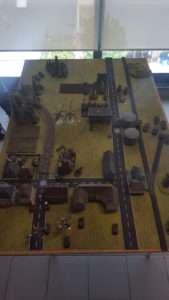
It was perhaps fortuitous that I had left my Swingfires in reserve as long as I did. When they moved up into firing positions at the rear of the town, their ambush was ineffective and quickly attracted most of the fire that had been directed at me. I lost one of the lightly-armoured vehicles to a strafing run by aircraft, and the other two were damaged, but remained in action.
Around this time, the battle started to swing. The long awaited Blowpipes arrived, promptly shooting down one of the aircraft harassing me and driving them off, and one of my reserve Chieftain troops showed up to reinforce the right flank where the Soviet tanks had finally broken through my minefields, flanking both my position and the infantry bastion. Their accurate fire quickly destroyed several Soviet tanks.
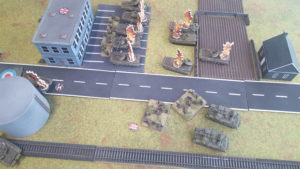
The sustained heavy fire had knocked out radio communications with the Irish Guards early in the battle, but as they were holding out well, that seemed like a minor problem, However, with the loss of every visible tank and my position being covered in a pall of dust and running low on anti-tank ammunition, it appears that the Guardsmen thought themselves the lone survivors, so when the Soviet tanks passed through their minefields with minor losses and overran their flanking anti-tank position, while the fire from the front had not abated as the SP AA guns had moved to close range, it appears that they felt they had little option but to surrender after a hard-fought battle.
Having lost my forward bastion and with the Soviet tanks advancing into Shellerton itself, my own position was overrun, and a fighting withdrawal to the next line of defence was ordered. The Battle for Shellerton was over.
The good news is that I hear that the replacements for the Chieftains we lost are likely to be the new Challengers. With their much improved front armour and engines, I doubt that I would have lost the battle. Even the heavy aircraft missiles would have had trouble penetrating them!
Wayne
Even though I worked on adding the new material to World War III: British, the original book, Iron Maiden, is really Phil’s baby, as are the scenarios. It seemed right and proper that Phil should command the British, while I took the dastardly Soviets.
As luck would have it the Soviet forces from the scenario is similar to what I have run in the past with my own Soviet force, so I had a good idea how it would handle.
I simply planned to push hard, down one flank while tying up resources on the other flank. The forward of the two objectives was on the sealed road running parallel to the railway line on my left, while the approaches to the further objective on the right provided more concealment, but was well protected by four Chieftains. On the left flank Phil had placed his dismounted Mech Platoon in a factory building and a string of minefields on the open ground around it.
My BMP-2 Motor Rifle Company and seven of my T-72s would attack the Mech Platoon and take the building and the objective behind it. On the right my other six T-72s would tie up the Chieftains, keeping them from interfering in the left-hand attack. I’d use my Hinds and SU-25 to also concentrate on the Chieftains and any reserves that may arrive.
What happened?
I started the battle as planned pushing up on the right to attack the factory building, dismounted my Motor Rifles and moving the BMPs forward to shoot up the Mech Platoon. That first round of shooting did not go well. I ended up rolling over 30 dice for just two hits. I didn’t kill a single team, let alone pin them down. On the other flank half of my T-72s failed cross checks and I wasn’t able to engage the Chieftains heavily. My Hinds failed to kill a tank and my SU-25 didn’t even turn up.
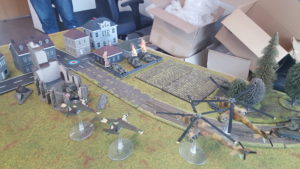
Phil’s firepower continued to prove effective, knocking out all nine of my BMP-2s in the first turn, and grinding down my Motor Rifles in the subsequent turns with his Mech Platoon and Abbot artillery. When he finally got his Swingfire anti-tank missile carriers in turn three the T-72s on the right began to suffer.
Meanwhile on my left, I pushed into the minefields with my mine plough tanks in an attempt to clear them. I lost one tank and had two bailed in the process. I eventually cleared a gap for my tanks in turn 4, but not before I had lost a T-72 to close-range Carl Gustav anti-tank fire from the factory.
Phil had brought on his Blowpipes and I lost SU-25 to them during an anti-tank missile run on the Chieftain formation commander.
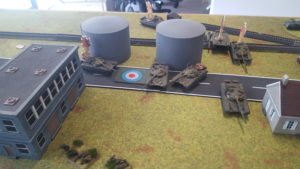
Conclusion
Considering how the game was panning out to that point, it was an unexpected result. However, it does show if you keep at your plan, it can still sometimes work in spite of your terrible dice. I feel another turn and Phil’s fresh Chieftain Troop would have cleaned things up, but pushing hard won the game before that could happen.
Aaron’s Oil War British: Part III
with Aaron Te-Hira Mathie
DDPM 4 Colour
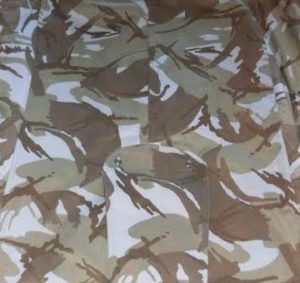
Desert Disruptive Pattern Material (DDPM) comes in three flavours. The first version was introduced in 1985. This version simply replaced the four colours of the temperate/tropical DPM with browns and tans. At the time this variant was introduced there was no real requirement for the UK’s MoD to acquire very many uniforms in this colourway. It was therefore sold directly or through licensing agreements to various nations in the Middle East, including (but not restricted to) Iraq and Saudi Arabia.
‘Dense’ DDPM
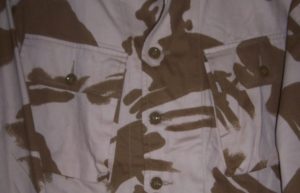
The second variant was heavily used by the UK forces during operation Granby (the first Gulf War). The primary reason for this version coming into being was the realisation that British troops might be mistaken for enemy troops if deployed to the Gulf wearing the four colour Desert DPM.
A three coloured type was trialled, however it was deemed to be too close to the four colour type, so a two coloured version was rapidly developed.
This version is often described as ‘dense’ pattern as three of the four standard DPM colours were replaced with a medium brown over a tan base, causing the darker shapes to cover a large amount of the light colour.
While this was a quick expedient to get into production, an important factor as the troop build up during ‘Desert Shield’ gathered pace (therefore a pressing need for an appropriate uniform existed), it was considered too dark to be properly effective in the sun soaked sands of the Middle East.
Ironically enough a variant of this colourway was chosen for the later ‘Soldier 95 and Soldier 2000’ type desert camouflage uniforms.
‘Sparse’ DDPM
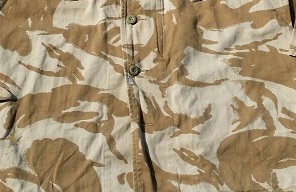
Toward to end of the first Gulf War the British stared to deploy a variant considered to be more effective in the theatre of operations. This version referred to as ‘sparse’ DDPM is quite similar to the type described above, however the pattern essentially does away with replacing the shapes of the two minor colours in temperate DPM with dark brown in favour of those shapes being the same light tan as the base colour of the uniform. This has the effect of creating a more sparse type of camouflage pattern. This variant was fairly short lived, existing only between late 1991 and the introduction of the ‘Soldier 95’ uniforms (both temperate and desert) during 1995/96.
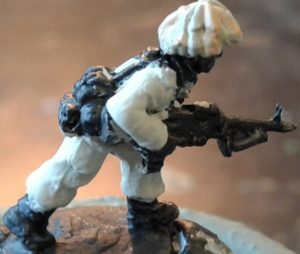
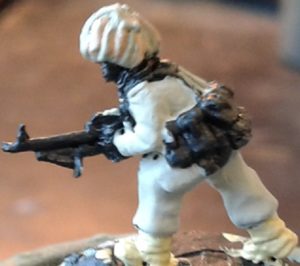
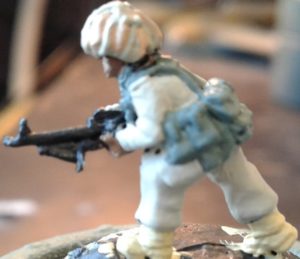
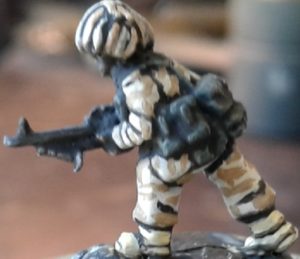
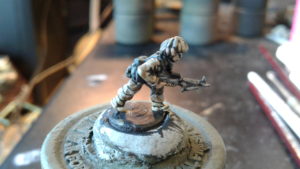
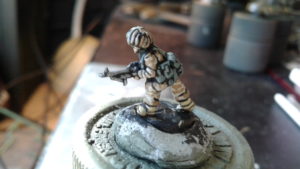
For the figure below I chose to go for the most common variant, ‘dense DDPM’. For the purposes of our fictional conflict any of the versions would be appropriate, with the four colour type being the least anachronistic for 1985, but also far more complicated to replicate in the 15mm scale. However in a case of art imitating life I don’t consider it to be particularly far fetched for one (or both) of the two colour types to be quickly developed for exactly the same reasons that they were in the real world.
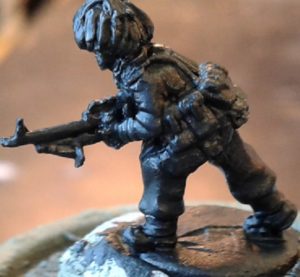
The figure is uncoated with black Vallejo Surface Primer to give the follow on paint something to ‘bite’ into.
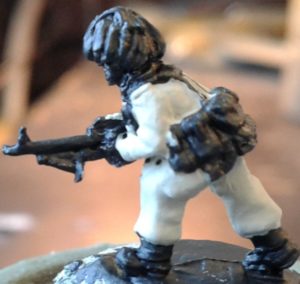
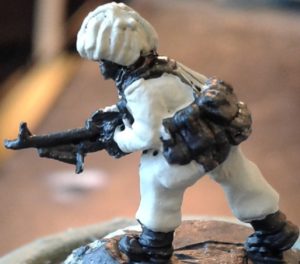
Then I paint Vallejo Model Color 70.821 (German Camo Beige WWII) as the main colour for the Hessian strips on the Helmet.
Step 4:
Following the main color of the Helmet strips I paint a random selection of the hessian strips with Vallejo Model Color 70.843 (Cork Brown).
Step 5:
Then I give the Boots a coat of Vallejo Model Color 70.976 (Buff).
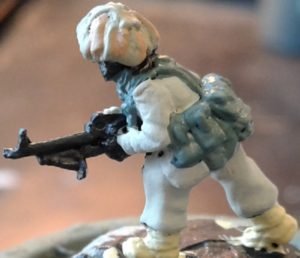
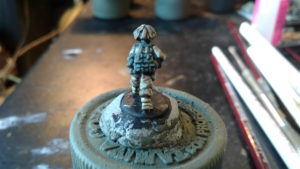
With the desert tans in place I next colour the ’58 Pattern Web Gear and Scrim netting scarf with Vallejo Model Color 70.920 (German Uniform).
Step 7:
I start with Vallejo Model Color 70.875 Beige Brown as the base colour for the flesh.
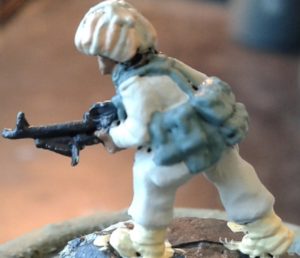
I paint the plastic furniture of the weapon with Vallejo Model Color 70.862 (Black Grey).
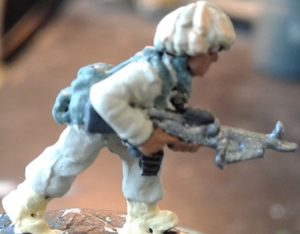
I move onto metallics, starting with Vallejo Model Color 70.863 (Gunmetal Grey) on the metal parts of the figure’s L7 GPMG.
Step 10:
I complete the initial block painting of the figure using Vallejo Model Color 70.801 (Brass) for the belt of rounds hanging off the left side of the GPMG.
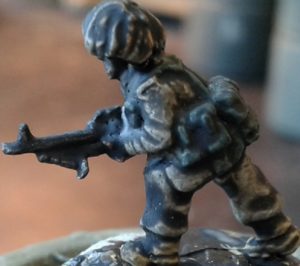
With the block painting done, I then cover the figure with an all over coat of Vallejo Game Color 73.201 (Black Wash).
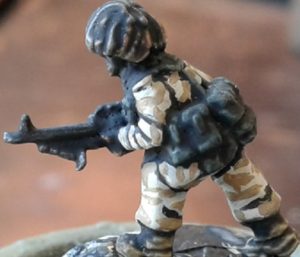
Once the Wash is dry, I go back over the uniform with Vallejo Model Color 70.884 (Stone Grey), careful to leave creases and recesses black. Then I add the DPM pattern by painting a series of swirls and stripes using Vallejo Model Color 70.873 (US Field Drab).
Step 13:
I then recolour the light Hessian strips with Vallejo Model Color 70.821 (German Camo Beige WWII), and the dark strips with 70.843 (Cork Brown).
At the same time I use Vallejo Model Color 70.976 (Buff) on the Boots, careful to leave the recesses black in all cases, to add shadow depth to the figure.
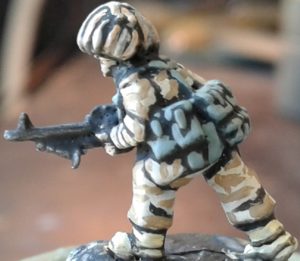
The various desert tan parts of the figure complete, I then use Vallejo Model Color 70.920 (German Uniform) to define the Web Gear and scrim scarf. I also start to define the figure’s flesh by applying a 50/50 mix of Vallejo Model Color 70.875 (Beige Brown) and 70.955 (Flat Flesh) to all but the deepest face and hand details.
Step 15: I complete the skin by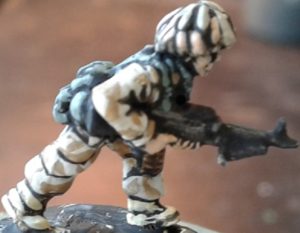
Step 16:
Before finishing the metallic colours, I go back over the GPMG’s plastic furniture with Vallejo Model Color 70.826 (Black Grey).
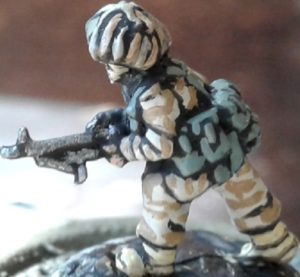
The metallics are then re-defined using Vallejo Model Color 70.863 (Gunmetal Grey) for the metal parts of the weapon and 70.801 (Brass) for the ammunition belt.
And the finished product after a coat of matte varnish:
Pete the Wargamer Paints British Desert Armour
with Pete the Wargamer
Pete sits down to give you all the steps you need to dress your WWIII: British forces for engagements in the desert, using the M109 as the test case.
Introduction to Team Yankee: OnTableTop
with Chris Potter, Battlefront UK, and John Lyons, OnTableTop
Chris sat down with John Lyons, OnTableTop’s resident tread-head to chat context and changes for the new WWIII: Team Yankee:
Know Your Foe
with Chris Allen
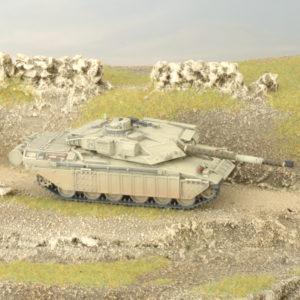
We will be discussing vehicles previously not fielded in the region, their capabilities and how to defeat them.
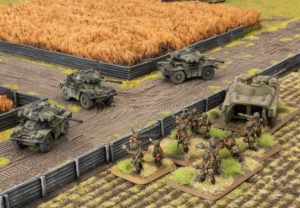
The British have continued to flood the sector with any and all equipment they can muster and have turned to the older Fox Scout car. While new to the hostilities it is an older vehicle that is armed with a 30mm cannon and is more than a match for our BMPs in a gun fight. The vehicle is less mobile and will restrict its movement to open ground and roads but is small and easily hidden so can be difficult to engage directly until it starts shooting which can be a problem for our lead forces.
The British continue to rely heavily on massed reconnaissance forces to
determine out axis of advance and attrit our lead forces. Make no mistake this vehicle is dangerous and is being seen conducting rehearsals in large number. Combined arms against these packs of cars is key. Artillery can easily scatter them or dissuade them from using terrain like urban areas for
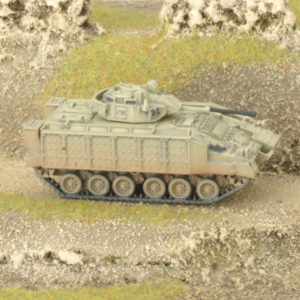
cover and should be used more than liberally when these vehicles are engaged. Their crews across their entire vehicle fleet have fought on long after others would have left their vehicles behind, this is expected to be the case with the Fox so mass firepower and ensure their destruction. They have no ability to affect our tanks and small coys of tanks work well against them as they are similar to the Warrior IFV which we will discuss shortly.
What makes this armour interesting is that it has been specifically designed to defeat HEAT warheads. While this has an effect against all HEAT warheads it is of significant importance for smaller shoulder based weapons and smaller missiles such as the RPG-7 and the Spigot missile. These weapons become ineffective against chobham armour even against the side armour of the vehicle. What does this mean to you the commander on the ground?
Shoulder fired anti-tank weapons used by Infantry units can’t stop these monsters from assaulting. We are very used to having complete command of positions with our RPGs against vehicles and it is possible to bail a Challenger or a Warrior but is incredibly unlikely so you will need other nearby supporting units such as BMPs or tanks to make your defensive fire effective. Both of these units are incredibly effective at taking objectives in the late game so expect that they will hold back and attempt to attrit our forces before pushing forward.
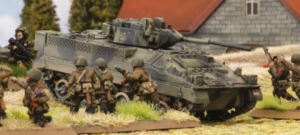
Brutal goes a long way. Even early model tanks like the T-62 are perfect at hunting these vehicles and pinning the infantry they support. For the Challenger, Chobham along with the frontal armour make it incredibly resilient against our ground-based weapons. Even powerful missile systems like the Storm will find it incredibly difficult to hurt these, our defense scientists suggest a hit from an AT-6 Spiral missile will only destroy an up- armoured Challenger 11% of the time. Flanking these vehicles is the only ground based solution, and is risky, but while the British Army is planning a great offensive spearheaded by these tanks we have a different opinion of the situation.
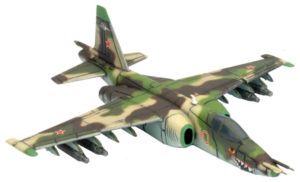

SU-25s with hundreds of 40mm rounds. With more armour than the Gepard this vehicle is more suited to supporting ground operations and can rapidly destroy light armoured vehicles and infantry formations, so expect it will be in a position to move forward. While it will be rare to see all three systems in an area at once, it is a possibility, but this will most likely come at the cost of other support. It is also very difficult in most of the European theatre to hide three large units like this against an entire attacking force.
Using artillery and direct fire weapons to suppress or destroy these is key and destroying them will open the air for the air force to take apart the other elements of the enemy force. Remember enemy air defence systems can only fire on air or ground targets at a time so threatening them with both at once will force them to make tough decisions and provide you with options. The other main support vehicle being pushed up to the front is their version of the Grad, an MLRS system that primarily delivers scatterable munitions such as DPCIM and mines.

your disposal will see you to victory.
Remember the following when planning for battle:
- Once your reconnaissance has determined the enemy force you face you need to understand it and its key elements so you can divide an destroy it, dividing and destroying is the key to victory.
- Identify what elements NEED to be destroyed by the air force
- Identify threats to the air force and plan their destruction if you don’t you will lose your air support and then have serious problems on the ground.
- The British want a war of small attrition, they fight like cockroaches always staying if you do not eradicate them, too much is never enough when it comes to the application of firepower, destroy units and move to the next or risk being delayed or even taking critical losses from the remnants of their force.
- Their artillery systems are now a threat to not only platoons, but entire companies. If you ignore the firepower of the British army you will not survive long enough for punishment by higher.
- The British army has the most numerous reconnaissance force on the front. They are more than capable of counter reconnaissance and attrition tasks.Combined arms is the way ahead as they cannot stand against the might of our armour. This ends the briefing for today. Happy hunting Comrades.
The Marksman
with Garry Wait
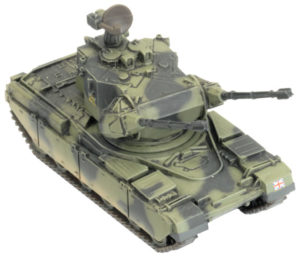
It was acknowledged that the British Army’s reliance on missile systems was overoptimistic and a few within the Ministry of Defence noted that the Argentines had been pleased to have available Swiss Oerlikon twin 35mm Antiaircraft weapons on ground mounts for the Falkland Island defences.
Some of these weapons had even been captured and pressed into use with the RAF Regiment, who were delighted to have a solid backup to the longer ranged but troubled Rapier system.
Thatcher met with Minister of Defence Michael Heseltine in 1985 to discuss options as tensions had historygrown extremely hot with the Soviets. When the Iron Lady asked about options, Heseltine’s private secretary had a brainstorm. He pointed out that the Finns had expressed interest in a Marconi systems private development, the Marksman. This was a modular turret that could be mated to almost any Main Battle Tank. The Finns had in fact ordered a prototype system to be tested and put onto a modified Polish made T55. Although the testing was in the preliminary stages, the weapon
had shown promise.
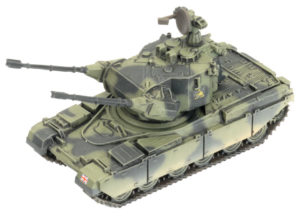
With the Challenger tank coming on line and taking over from existing MBT regiments, two squadrons of recently replaced Chieftains were stripped of their turrets and assigned to the fledgling project. For the first time since the Crusader SPAAG of World War II, the British Army had access to a world
class self propelled anti aircraft gun. Done in complete secrecy, this weapon would even surprise the average “squaddie” who expressed their shock and admiration at the exciting new designs when displayed for the first time on Salisbury Plain.
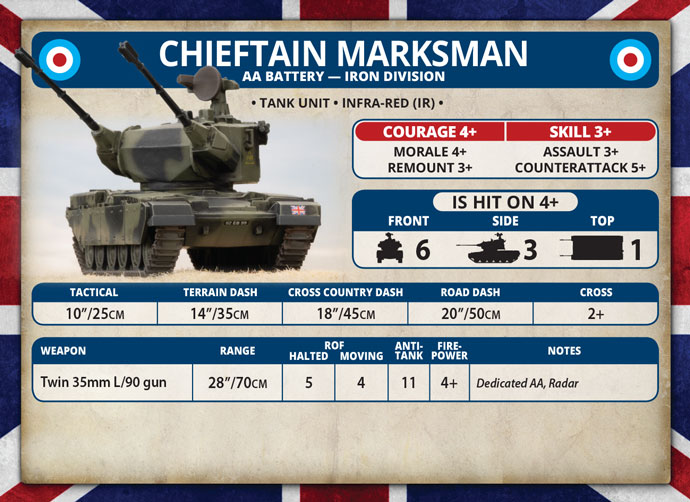
The Marksman provide an outstanding gun platform and was noted to be even more stable than the T55 the Finns had provided for testing, as the Chieftain was larger and more robust for the heavy recoil of the twin cannons. Some wag tried to describe it as a Brit Gepard, which was shouted down by indignant Royal Ordinance Factory staff. One superintendent pointed out that not only was it better armoured than the Gepard, it also had a laser rangefinder for engaging ground targets out to 8 kilometres, Marconi radar enabling air targets to be engaged out to 12 kilometres and fully stabilised gun sights for the commander and gunner. British technology had actually improved on the work of the Bundeswehr’s prized SPAAG.
More than a few officers bemoaned the fact that it had taken the Cold War turning hot to get the stingy taps of the Treasury to open a little more to provide funds for this superb weapon. Having access to ammunition kindly provided by the Argentine Army had proved helpful in getting reluctant bean counters to sign off on the process.
Initially, as the British Army was already heavily committed with the British Army of the Rhine, operators from the Royal Air Force Auxilary Regiment were integrated with British Army Chieftain crews to provide composite teams to operate the new equipment. This ensured a clever mix of
experienced gunners to operate the expensive new electronics and qualified drivers to maintain the frustrating Leyland engines of the Chieftain tanks. As Corps assets within British Army of the Rhine, the new vehicles were extremely popular and the seven batteries tended to see lots of action in the
Third World War. It was a particularly innovative weapon that took the battlefields in World War III as the Marksman. British troops soon found that the Marksman worked very well as a “backstop” support to the highly
successful Tracked Rapier. Occasionally ground commanders got overconfident and put the Marksman in the front line as a fire support weapon. Even with the thick hull armour of the Chieftain chassis, the vehicles didn’t stand up long against infantry RPG fire and cases are known of local commanders being castigated for such waste of scarce resources for inappropriate missions.
In game terms, you will find the system works very well as a complement to the existing missile systems as a mobile and well armoured platform capable of medium range effective AA support. As summarised to the troops on issue originally :
DO :
- Keep the Marksman at range, behind the front line armoured forces it’s designed to protect.
- Prioritise against air targets which are the bread and butter of the Marksman system.
- Protect the Marksman with combined dismounted and armoured forces, ensuring it’s not swamped by enemy infantry.
- Team up the Marksman with Tracked Rapier and if possible Blowpipe to ensure the full range of Air Defence assets are used appropriately. The key is to have Rapiers at the back, Blowpipe in concealing terrain scanning the skies while the Marksman keeps up with the armoured thrust forward.
- Plan the use of the Marksman carefully, using it’s excellent rate of fire and mobility to provide an umbrella of firepower over your vulnerable armoured spearhead.
DON’T :
- Risk the Marksman unit as a solo asset, remember you’re part of a larger team.
- Assume that the Marksman is a dedicated armour killer. You only carry 20 rounds per gun of APFSDS ammunition. Make them count. Your primary mission must be air defence, the anti vehicle ammunition is not there for use as a primary choice.
- Overestimate the range of the guns. Unlike the missile systems of the Rapier and Blowpipe that you’ve become used to, the Marksman is lethal – except at shorter ranges. Use the mobility of the vehicle to make the enemy pay. You have exceptional firepower and mobility and this should be used carefully.
- Run the depleted formation, Marksman provide best support as a full unit.
- Expose the Marksman to enemy fire until you’ve cleared the way. This secret weapon is priceless and not to be squandered in small scale efforts.
In conclusion, the combination of the two forces used here – Royal Tank Regiment and Royal Artillery – bring to mind the two mottos, which are respectively “Fear Naught” and “Ubique” (which translates as “Everywhere”) The Marksman truly allows your armoured crews to Fear Naught, Everywhere.
Aaron’s Oil War British Part II
with Aaron Te Hira-Mathie
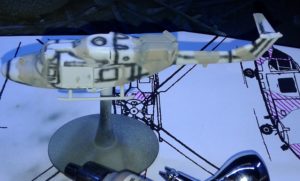
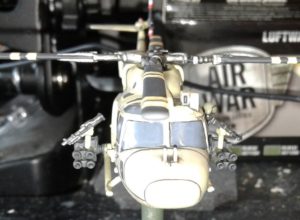
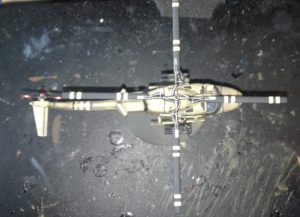
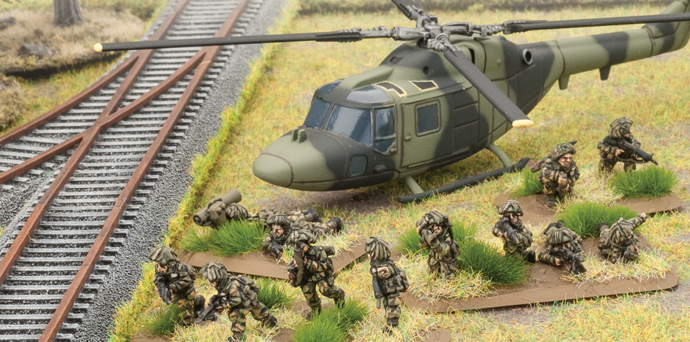
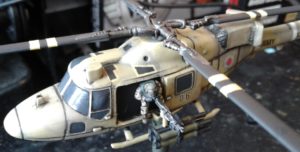
Oil War themed Westland Lynx AH.1
For the Lynx I was far more heavily influenced by the Lynx helicopters used by UK forces during Operation Granby.
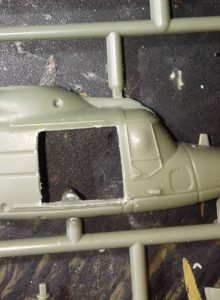
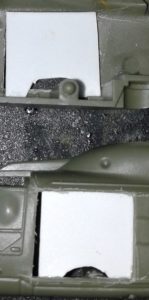
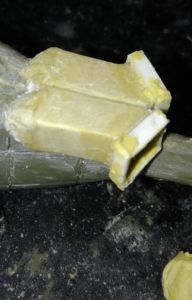
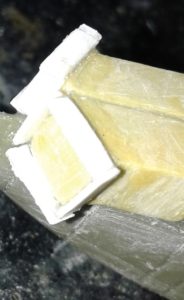
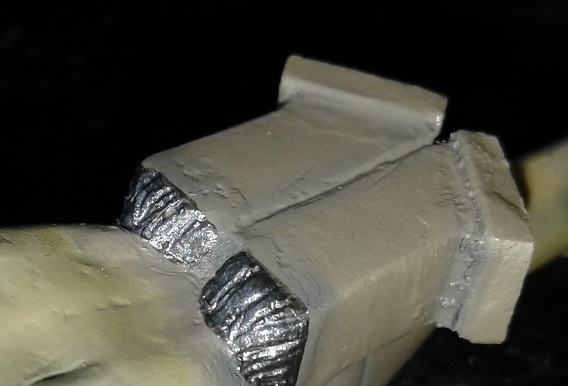
Step 3: After looking at a lot of pictures of Operation Granby era Lynx helicopters, one of the most striking additions were the squared off exhausts designed as a countermeasure to defeat heat seeking missiles. Initially I started to build these exhausts out of plastic card, however as I started to do this it was proving to be time consuming and complicated. However before giving up on the idea, I thought that I would try to make a simplified model using Miliput … with some plastic card embellishments.
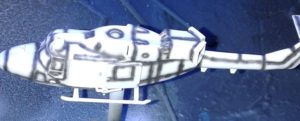
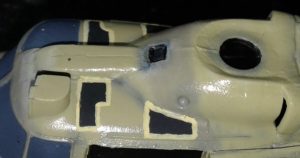
Normally I would then start with a base colour, however in this case I decided to ‘pre-shade’ the model. To do this I sprayed Vallejo Model Air 71.251 (NATO Black) along panel lines and where details meet the main part of the model. The reason to do this is add a small amount of subtle depth to the follow on paint work.
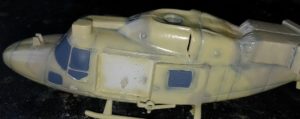
Step 5: After the pre-shade I moved on to starting the camouflage pattern. I started by spraying Vallejo Model Air 71.138 (US Sand), the darker of the two main colours in the pattern. In order to make the pre-shade work is to ensure that the paint going over it needs to be quite thin and built up in layers so that the differences in the tones of the primers shows through. How much you build up the main coat determines how heavily worn the final paint looks.
Once the tan colour was applied, I moved onto the yellow colour, in this case Vallejo model Air 71.143 (UK Light Stone). This colour was applied by building up thin layers until the desired effect was reached.
As you see the two colours are quite close to each other. This was an intentional choice as the Operation Granby aircraft were painted in the two colours that I used, therefore the camouflage scheme on the real aircraft is not particularly defined.
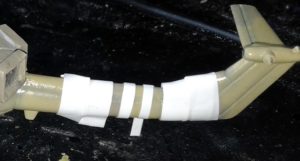
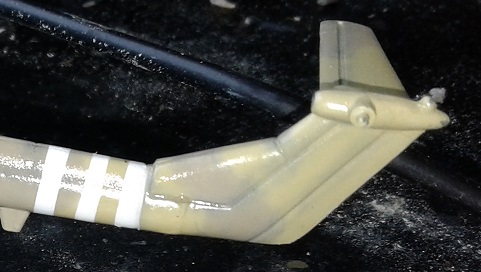

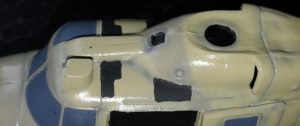
Step 9: I took this opportunity to paint some of the smaller details like the flashing light at the top of the tail, and the front grills of the exhaust system.
– Flashing light Vallejo Model Color 70.947 (Red)
– Grills Vallejo Model Color 70.865 (Oily Steel)
Then I coated the grills at the front of the exhaust box with Vallejo Game Color 73.201 (Black Wash).


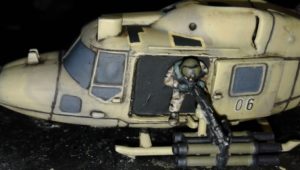
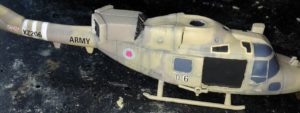
Step 10: I then applied the decals from the kit, and added a couple of decal numbers on the doors from my spares stash. Once the decals were dry, I then re-coloured the roundels to the more lightly colored ‘lo-viz’ type by
carefully hand brushing Vallejo Model Air 71.103 (Grey Blue RLM84)over the blue sections and a mixture of Vallejo Model Color 70.947 (Red) and Vallejo Model Color 70.993 (White Grey) over the
red sections of the roundels.


- Uniform, Vallejo Model Color 70.884 (Stone Grey), with Vallejo Model Color 70.873 (US Field Drab) DPM camouflage shapes.
- Boots, 70.880 (Khaki Grey)
- Gloves and vest, Vallejo Model Color 70.920 (German Uniform)
- Helmet, Vallejo Model Color 70.887 (US Olive Drab)
- M60D, Vallejo Model Color 70.863 (Gunmetal Grey) with a Vallejo Game Color 73.201 (Black Wash) overcoat.
Step 14: I then painted the main and tail rotors with Vallejo Model Air 71.251 (NATO Black), with Vallejo Model Color 70.916 (Sand Yellow) stripes on the main rotor, with Vallejo Model Air 71.279 (Insignia White) and Vallejo Model Color 70.947 (Red) stripes on the tail rotor. The mechanical parts of the rotor system I painted with Vallejo model Color 70.865 (Oily Steel) overcoated with Vallejo Game Color 73.201 (Black Wash).
So that’s my air support and armour sorted, all that’s left is my infantry in Desert DPMs. Coming right up…
Pete The Wargamer Paints British Armour
To celebrate the launch of WWIII: British, our buddy Pete the Wargamer has a step-by-step guide for how to paint your British armour for World War III.
Being an FO: Using Artillery in WWIII: Team Yankee
with Scott McCorley
An FO is someone who spots for the artillery unit or battery and their primary role is to guide the rounds on target with the help of a laser range finder that gives a 10 figure grid reference, or with a tested method of map to ground with the help of an artillery protractor and a 8 figure grid reference.
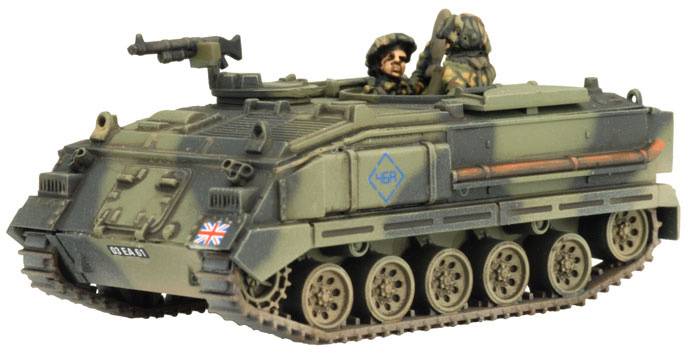
(Joint Terminal Attack Control) for strike aircraft.
So how does this become relevant in our games of WWIII: Team Yankee? There are many ways our FOs can be used in our games be it to spot or range in on a new viable target location. Having our FOs in cover and in prime position with good line of sight is a must for the continued use of our artillery in subsequent turns. Having an FO twill help with the +1 to range going a long way, especially if your target may be in short or tall terrain or covered by a smoke screen. Remember, any team leader can also spot for your artillery but only the FO has the +1 to range in.
Now let’s move onto the Artillery and what the FO has to work with out in the field.
So using your artillery on the enemy infantry is a good start as it can prepare the way for your own infantry or tanks for an assault, but can also pin enemy infantry down, and is very useful if there are any ATGM (Anti-Tank Guided Missiles) in the unit. Now if you are going to use your artillery to help launch an assault this can be tricky as it requires some good judgment on the template and ranging in so that you won’t get that danger close or within 4” of the template with any of your teams.
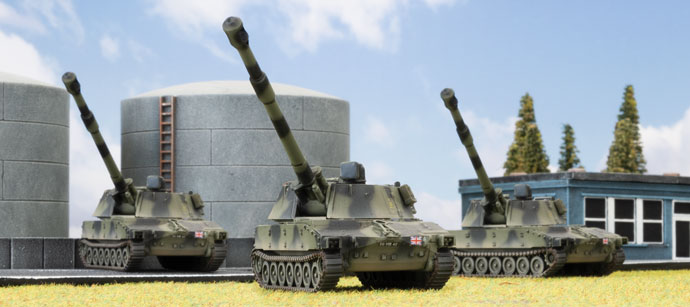
As most tanks have a top armour of two it makes it hard to destroy them, and the chance of making them bail quite low so it’s best to leave heavy armour to the dedicated anti- tank units like milians and spandrels. The best use in this case is to go after soft skinned AFVs as their top armour is ether one or zero and if it’s a transport a good chance to take out some pesky infantry as well. Also of the opportunity arise direct fire is also good against AFVs as most SPs artillery (self-propelled guns) have a good AT and FP to destroy them.
So that’s two ways of basic use of artillery and our FO, but here is where things can get interesting.
Other types of arty like the rockets, mortars and special shells, deployment of arty, the use of ranged in markers for certain missions and smoke bombardments is where we’re headed next. First of the different types and how to use them.
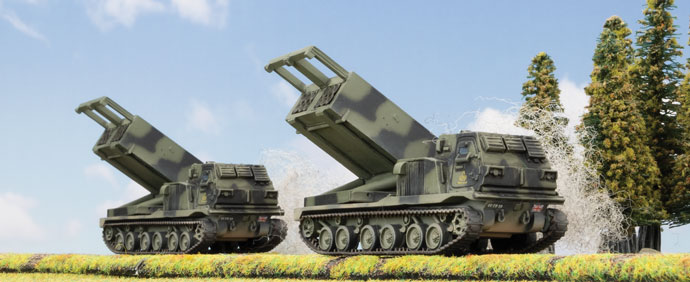
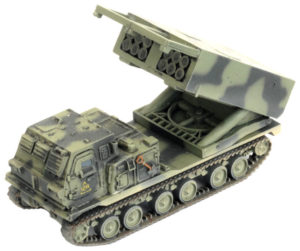
Rockets are great for coverage and area suppression of a target being a salvo rather than arty, so a bigger template. This is great for getting large blobs of infantry or AFVs that are too spread out for normal arty to target and hit, even better now with the new weapon system like the British MRLS.
Now once again don’t think you will be able to destroy tanks, as rockets tend to have a low AT rating.
Next up the mortar. Mortars like rockets don’t have the AT rating so don’t expect them to take out tanks or AFVs in droves. Best use for these is to lay down some smoke to ether get your infantry in position for an assault or to cover a flank of your precious tanks from enemy AT fire while they advance. Also don’t forget if they are targeting infantry repeat that bombardment next turn to make them more effective.
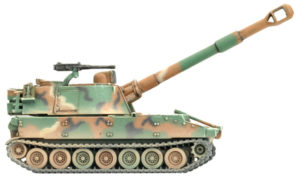
Now onto the special shells. While all types of special ammo will require you to pay the extra points, what you want to know is it worth taking. Well yes and no, first let’s talk about the types, most arty like the M109s and the 2S3s give you the option to take thing like copperhead rounds or the reds equivalent. The drawback to these is its either direct fire which requires line of sight or an FO to guide it onto the target. Great for tanks as it has a higher AT than normal and gives you a better chance to do damage to them.
Next up minelets, oh boy do I love these! The best job for mines is choke points- good old choke points. For those of you not military-minded a choke point is where you funnel the enemy into a kill zone so you can wipe them out or manage a larger force by a smaller one. So for example West Germans, Leo 2 Company up against a BMP horde. Just seeing this can give a player nightmares but with the use of minelets you can force your opponent to reposition their units around the mines and giving you the best use of your guns. Best used in conjunction with the terrain as well to achieve that choke-point.
Bomblets operate on the same principal as rockets, great for suppression.
Also don’t forget Smoke bombardments as these are great for covering the advance of your forces especially out in the open.
advise against it as your arty is very soft skinned and prone to being destroyed if able to be seen. The other one is the deployment of the ranged in marker at the start of deployment for certain missions, if placed well can give you an advantage from the start. Choosing were to place it can be difficult but if placed in a wood in the enemy deployment zone this can then deter infantry and keep them pinned from turn one, it also helps avoid the +1 to range in for the template if it touches short or tall terrain and smoke.
Another is to place it in the most likely axis of advance of the enemy’s route as it can force them to rethink how to move and allow you to set up that all important choke point. So that is some of the uses for arty and FO’s.
Lastly weighing up the cost of arty to things like air support it can become a difficult choice, especially if you are a Soviet or East German player, NATO players might find it a bit easier. At the end of the day it comes down to what role you want them for, be it cheap mortars and rockets for suppression and smoke or arty for range and the direct fire just in case things start to look bad.
So enjoy and happy spotting.

