 with Wayne Turner
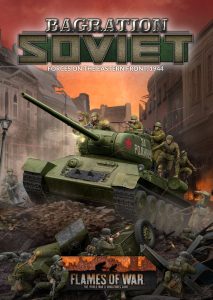
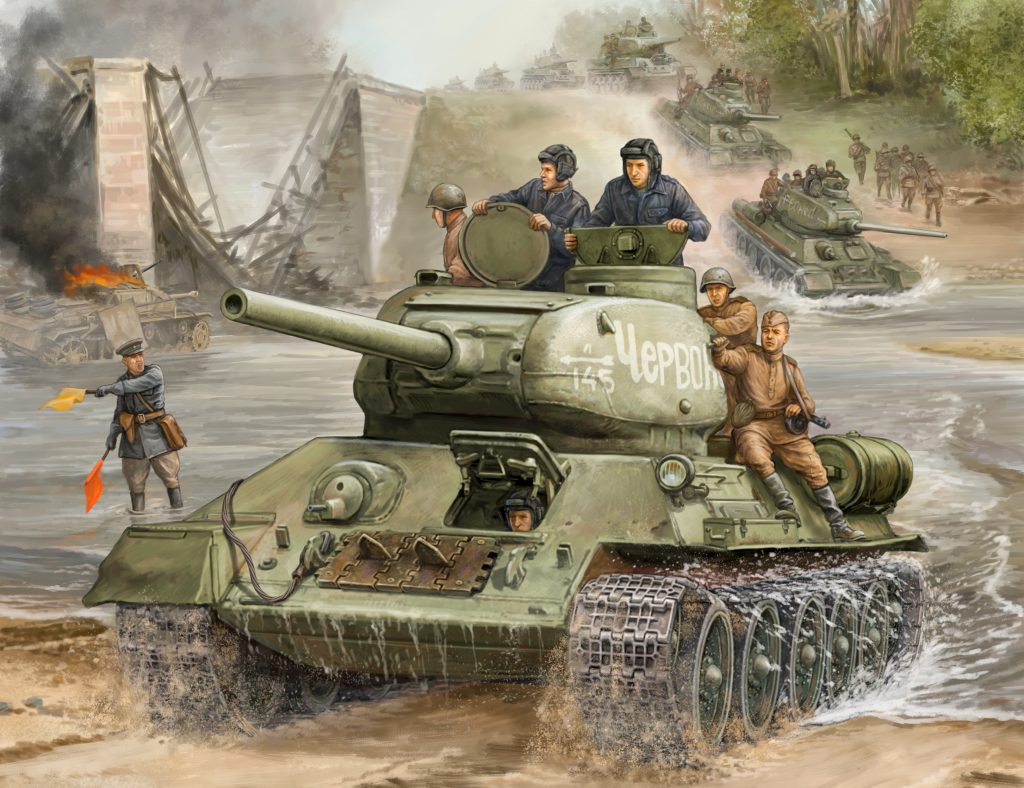
With the D-Day series of books coming to a close it is time to shine the spotlight on the Eastern Front. The first in our series of three Bagration books is Bagration: Soviet covering the Soviet forces on the Eastern Front in 1944.This book is jam packed full of interesting Soviet Formations and Units, as well as plenty of background, and three new river crossing themed missions.
The Bagration: Soviet book starts with background covering the pivotal events of Operation Bagration, the Soviet Army’s massive offensive against the Germans centred on Byelorussia that began on 22 June 1944.
Check out Bagration: Soviet in the online store here…
The front end of the book also features a comprehensive special rules section, Know your Tanks and Know your Infantry section to familiarise you with what you will find in the following pages.
The Force diagram is packed full of choices with nine Tank, five Infantry, and one Recon formation to choose from, as well as expansive support choices.
You will also find scattered throughout the book plenty more background covering the units and battles of Operation Bagration.
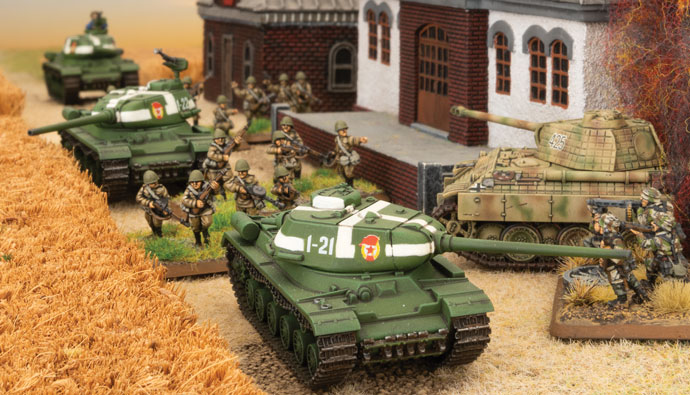
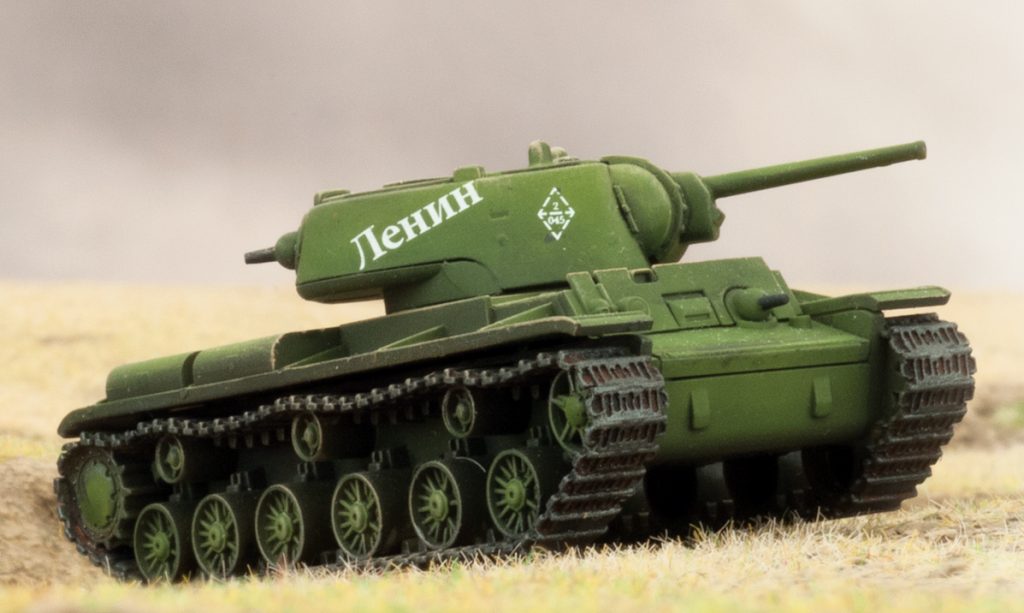
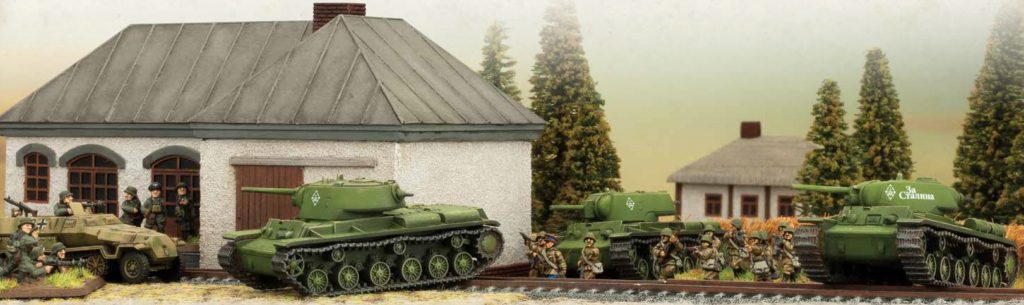
IS-2 Guards Heavy Tank Regiment
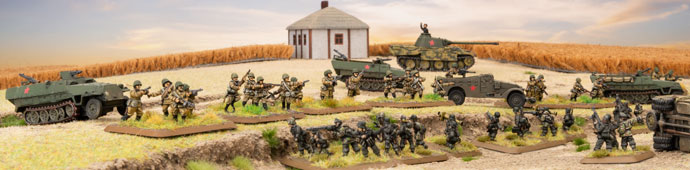
The first Formation is IS-2 Guards Heavy Tank Regiment. This hard hitting formation is equipped with IS-2 heavy tanks organised into a HQ of one IS-2, two to four IS-2 Guards Heavy Tank Companies of 3-5 IS-2 tanks. One of these can be armed with the IS-85 instead, for less hitting power, but a higher ROF. These Guards tanks are rated Confident 4+, with a Counterattack 3+ and Last Stand 3+. They are Veteran Skill 3+, but are Hit On Aggressive 3+.
The fifth Unit can be an infantry choice of a SMG Company, Hero SMG Company or Engineer-Sapper Company.
IS-2 is a formidable beast with armour front 10, side 8, and top 2. It is armed with a 122mm gun with a range 28”/70cm, ROF 1/1, anti-tank 14, with Brutal and Slow Firing. Additional armament includes a 12.7mm AA MG, and a MG.

IS-85 Guards Heavy Tank Regiment
Our second Formation is the IS-85 Guards Heavy Tank Regiment. This is organised in a similar manner to the IS-2 formation, but equipped with the IS-85 tank. The IS-85 was created from an early batch of IS tanks when the 122mm guns were not ready for production. Three Guards Heavy Tank Regiments were equipped with them in early 1944.
IS-85 has the same thick armour as the IS-2, with armour front 10, side 8, and top 2. However, it is armed with a 85mm gun with a range 28”/70cm, ROF 2/1, anti-tank 12. Additional armament includes a MG (the 12.7mm AA MGs were not fitted until IS-2 production was in full swing).
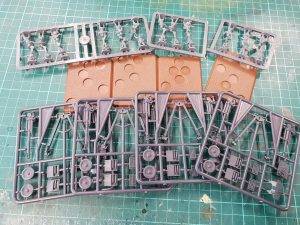
This will also see the release of the plastic SBX62 IS-2 Guards Heavy Tank Company, which can do both the IS-2 and IS-85 tank. Keep an eye out for the Spotlight on this great kit.
Heavy SP Artillery Regiment
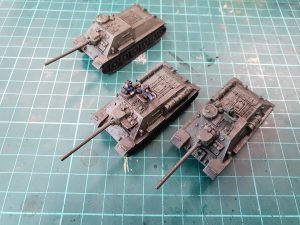
The third Formation in Bagration: Soviet is the Heavy SP Artillery Regiment armed with the ISU-122 or ISU-152 heavy assault guns. These powerful weapons are almost as heavily armoured as the IS tanks with armour front 9, side 8, and top 2. The ISU-122 is armed with a 122mm gun and can fire both direct or as artillery. Artillery range is 72”/180cm, with AT 3 and FP 3+. Direct fire range is 28”/70cm, ROF 1/1, AT 14 and FP 2+ with Brutal, Forward Firing, and Slow Firing. They also have an option to be fitted with a 12.7mm AA MG.
The ISU-152 is similar, but armed with a 152mm gun. Artillery range is 64”/160cm, with AT 3 and FP 2+. Direct fire range is 20”/50cm, ROF 1/1, AT 13 and FP AUTO with Brutal, Forward Firing, and Slow Firing.
These ISU assault guns are rated Confident 4+, with a Counterattack 5+ and Last Stand 3+. They are Trained Skill 4+, Assault 5+, and are Hit On Aggressive 3+.
Formation allows you to field a mix of ISU-122 and ISU-152 in Heavy SP Batteries of two to five ISUs, commanded by an HQ of one IS-2 tank. The fifth unit of the formation is an infantry unit of a SMG Company, a Hero SMG Company or an Engineer-Sapper Company.
Both the ISU-122 and ISU-152 can be made from the ISU plastic kit, an excellent kit that will be released with Bagration: Soviet. Check out the Spotlight featuring this fantastic plastic model SBX63 ISU Heavy SP Battery.

Medium SP Artillery Regiment
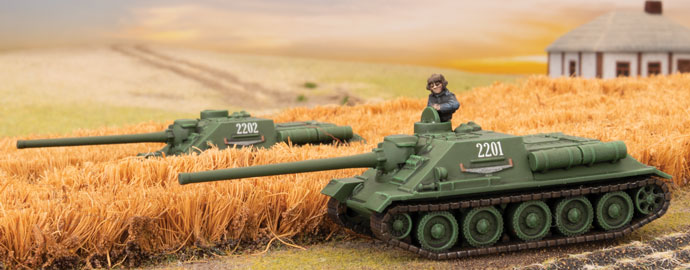
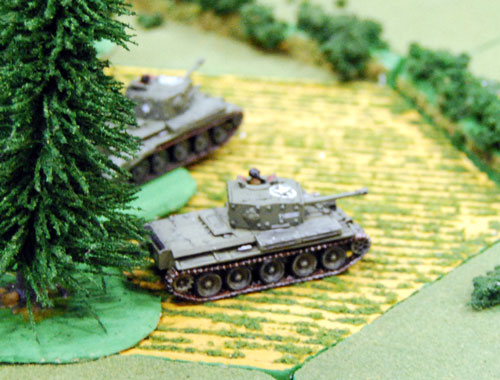
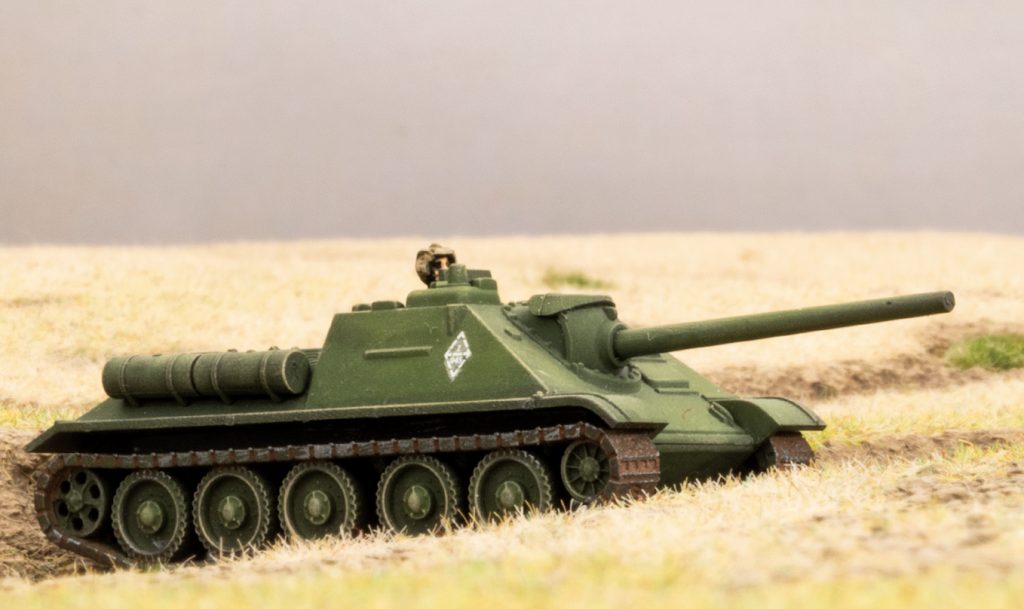
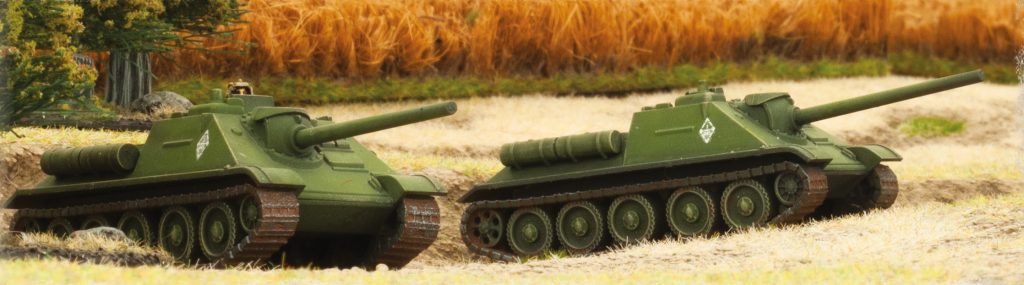
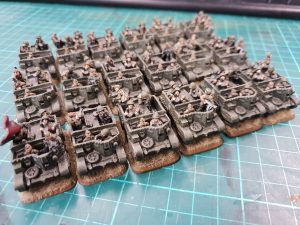
The fourth Formation is the Medium SP Artillery Regiment. This Formation is commanded by an Headquaders of one T-34 (85mm) and made up of two to four Tank-killer Batteries armed with SU-85, SU-85M or SU-100. A fifth unit can be either a SMG Company or a Hero SMG Company. As specialist tank-killer formations they are rated Fearless 3+ with Counterattack 4+, Skill is Veteran 3+ with Assault 5+, and they are Hit On Careful 4+.
SU-85 will be familiar to those who have built Soviet forces for Mid-war. It was armed with an 85mm gun with range 28”/70cm, ROF 2/1, anti-tank 12 with Forward Firing. It armour is front 5, side 5, top 1.
During the first production run of what would become the SU-100, the 100mm gun was not initially ready, so a batch was made with the new hull mounting the 85mm gun. These became known as the SU-85M. These have the same gun as the SU-85, but their armour is front 7, side 5, top 1.
The third unit option is the SU-100 which mounts the 100mm gun on the above hull, giving it a range 32”/80cm, ROF 1/1, AT 15, FP 2+ with Forward Firing and Slow Firing.
All three models are available as plastic kits in SBX64 SU Tank-killer Battery.
Light SP Artillery Regiment
This section ends with the Light SP Artillery Regiment, a simple formation with an HQ of T-70 light tank and two to four SU-76 Light SP Batteries, and either a SMG Company or a Hero SMG Company. The Light SP Artillery are rated Confident 4+, with Counterattack 6 and Last Stand 3+, Skill Trained 4+, with Assault 6, and Hit On Aggressive 3+.
The SU-76 assault gun can either fire as artillery or in direct fire. Artillery range 72”/180cm, AT 2, FP 4+. In direct fire it has range 24”/60cm, ROF 2/1, AT 9, FP 3+ with Forward Firing. It is also lightly armoured with front 4, side 1, top 0.
A new plastic SU-76 kit makes this formation a really interesting option. See the SBX65 SU-76 Light SP Battery spotlight.

Engineer-Sapper Battalion
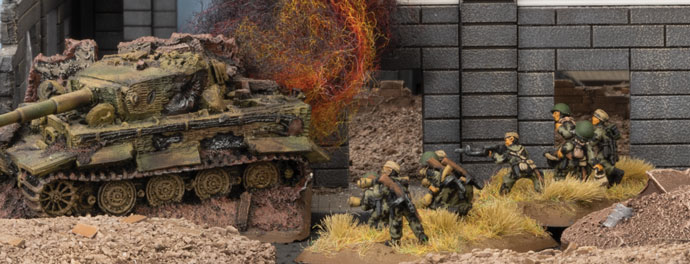
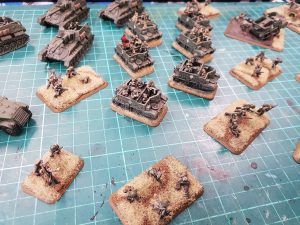
The first of the Bagration: Soviet infantry formations is the Engineer-sapper Battalion. This offers the unique Soviet assault engineers with their camouflage suits and body armour. The formation is organised as an HQ of two PPSh SMG teams, and two to three Engineer-Sapper Companies. They can also take an attached tank unit of IS-2 Guards Heavy Tank Company, ISU-122 Heavy SP Battery, ISU-152 Heavy SP Battery, or OT-34 Flame-tank Company.
The Engineer-Sappers have some diverse options with which to tailor your unit. The basic build is made up of 8-20 PPSh SMG teams with one or two DP MG teams for extra long range firepower. However, they are also armed with Smoke Pots which can be used once per game to drop a two-gun Smoke Bombardment before they assault. They are also Pioneers who are expert at clearing mines. Their body armour gives them a save on a 6 in Assaults.
The tailoring comes in the unit options with Panzerfausts, anti-tank rifles, Maksim HMGs, Flame-throwers, and 82mm mortars all available to enhance their fighting abilities.
Check their excellent models in the SBX67 Engineer-Sapper Company spotlight.
Hero Shock Rifle Battalion
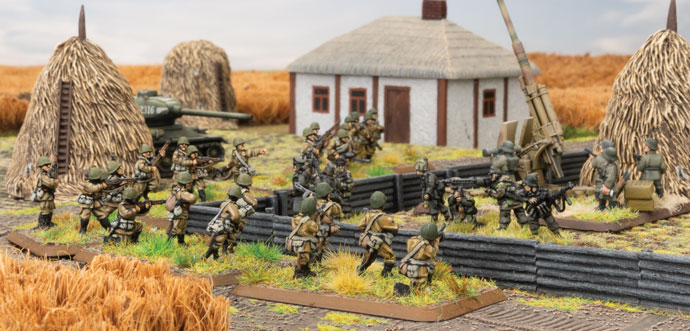
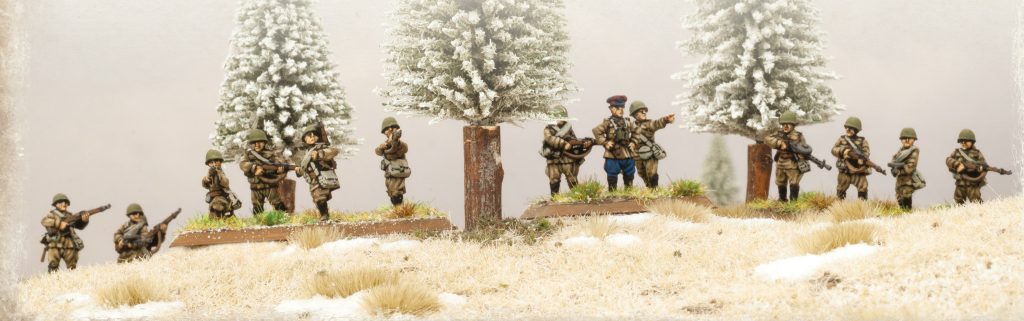
In the opening battles of Operation Bagration it was the men of the Hero Shock RIfle Battalions that initially assaulted the German front lines supported by the Guards heavy tanks or heavy SP artillery.
This formation can be made up of Hero Shock Rifle Companies, Storm Groups, or Hero SMG SMG Companies. The formation also has machine-gun, 82mm and 120mm mortars, scouts, and 45mm anti-tank companies.
The Hero Shock Rifle Companies are a little larger than the Hero RIfle Company found in Fortress Europe, having benefited from reinforcements in preparation for Operation Bagration. These troops are excellently rated being Fearless 3+, Veteran 3+ and Hit On Aggressive 3+. They can have 9 to 13 DP MG & M1891 rifle teams and Komissar giving them Motivation 2+ while the Komissar is still with the unit. They can also add anti-tank rifles, HMGs, and Flame-throwers for additional firepower.
These troops can be represented using the excellent plastic troops of SBX79 RIfle Company.
Instead of one of your Hero Shock Rifle Companies and your Hero SMG Company, you can choose to take up to two Storm Groups. These troops are armed with 6-7 PPSh SMG teams, a PTRD anti-tank rifle, a Maksim HMG, and a 82mm mortar, and can add an additional Maksim HMG and a Flame-thrower. There are very experienced troops rated Fearless 3+, Veteran 3+ with Assault 2+ and are Hit On Careful 4+.
These troops have their own box, SBX81 Storm Group.

Rifle Battalion
Not all the troops assaulting the Germans on 22 June 1944 were veteran shock troops, some from the Rifle Battalions that made up the bulk of the Red Army. These troops can be just as determined.
A RIfle Battalion is made up of an HQ, two to three Rifle Companies, one of which can be a Penal Company, and a SMG Company. The formation also has its own machine-guns, mortars, anti-tanks and scouts.
The riflemen have motivation of Confident 4+, but the presents of their Komissar gives them 3+. Their skill is Green 5+, but they Assault on 4+. Their Hit On is Aggressive 3+. These can be big units with 15 to 22 DP MG & M1891 rifle teams and a Komissar. To this they can add HMGs, anti-tank rifles and flame-throwers.
The Penal Company offers you some assault troops with which to soften up the enemy. These troops have nothing to lose, so have motivation Fearless 3+ with a Komissar bringing that to 2+. They are skill Green 5+, but Assault on 3+. However they only pass Tactics on 6. Their Hit On is Aggressive 3+ and Save on 4+.
The Scout Platoon, which can be taken with the Hero Shock Rifle Battalion and Rifle Battalion, provides the formation with some Spearhead troops to infiltrate the enemy’s positions.
These troops can also be represented using the excellent plastic troops of SBX79 Rifle Company and SBX80 SMG Company.
The third section of Bagration: Soviet covers troops given the job of rushing through the broken German lines to cause havoc among the retreating troops. These are the troops of the Motor Rifle Divisions.
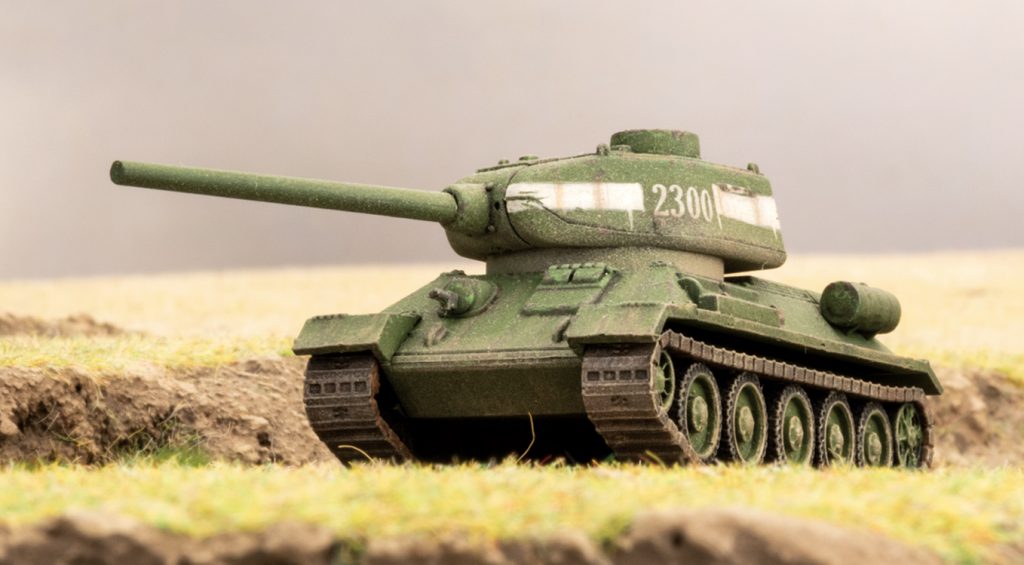
Hero T-34 (85mm) Tank Battalion
Hero Troops are the troops that have been in battle for a while and have been reduced down to a core of competent soldiers.
The Hero T-34 (85mm) Tank Battalion is the first of out all T-34/85 formations. With an HQ of a T-34 (85mm) and two to three Hero T-34 (85mm) Tank Companies this formation has plenty of punch. It is further backed up by its own anti-aircraft platoon, a Hero SMG Company, a 82mm Mortar Company, and choice of 45mm, 57mm or 76mm Anti-tank Companies.
These Hero troops are rated Confident 4+, Trained 4+ with Tactics 3+, and are Hit On Aggressive 3+.
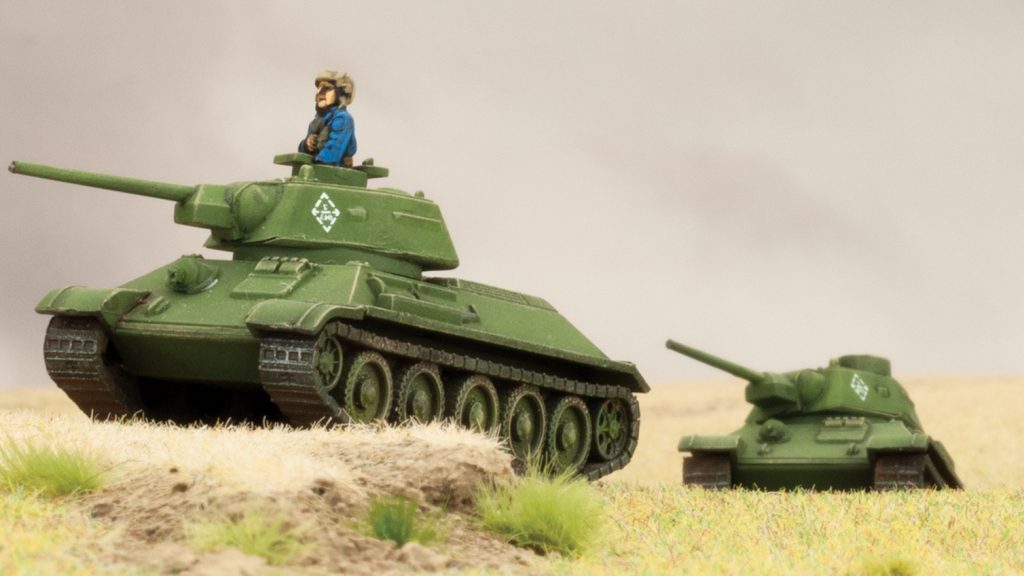
Hero T-34 (85mm) Tank Companies are compact Units of three or four T-34 (85mm) tanks. These tanks have good protection with armour front 6, side 5, and top 1. They are armed with the 85mm gun with range 28”/70cm, ROF 2/1, AT 12, FP 3+, and MGs.
These are available in plastic where you can either get a box of five with SBX66 T-34 Tank Company or jump in with both feet and grab 21 T-34 tanks in the SUAB12 T-34 Tank Battalion.
This formation also sees a new anti-aircraft option with the ZSU M19 Anti-aircraft Platoon. This unit is armed with the Lend-lease American M17 AA half-track. Its Quad .50 cal AA MGs give it range 20”/50cm with ROF 5/3, AT 4 and FP 5+ with Dedicated AA. The half-track is lightly armoured to protect it from small arms fire with front 1, side 0 and top 0.
This will be an all plastic kit available with SBX78 ZSU M17 Anti-aircraft Platoon.
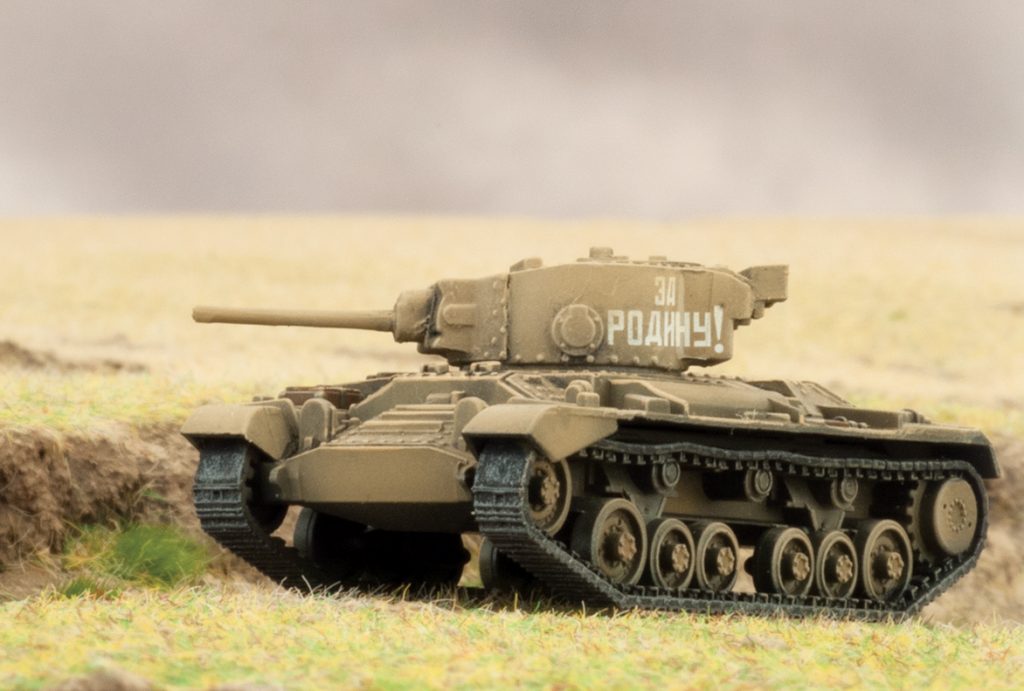
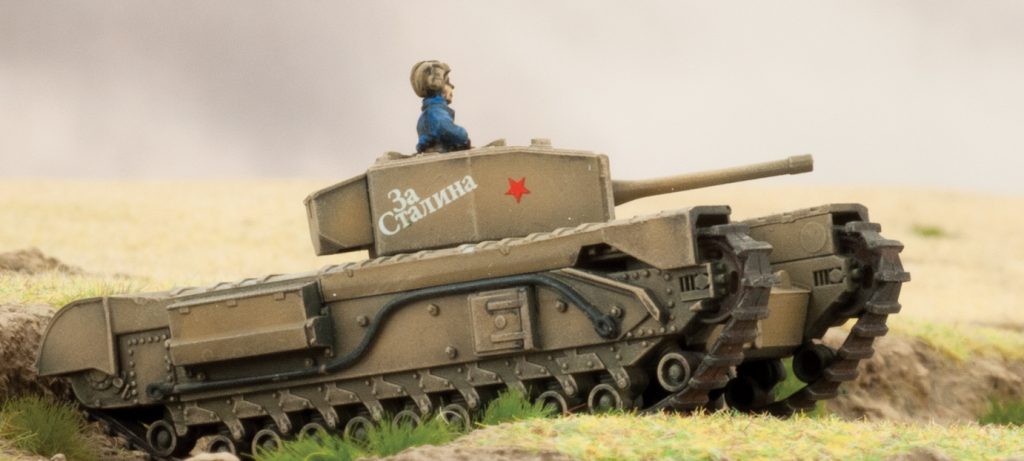
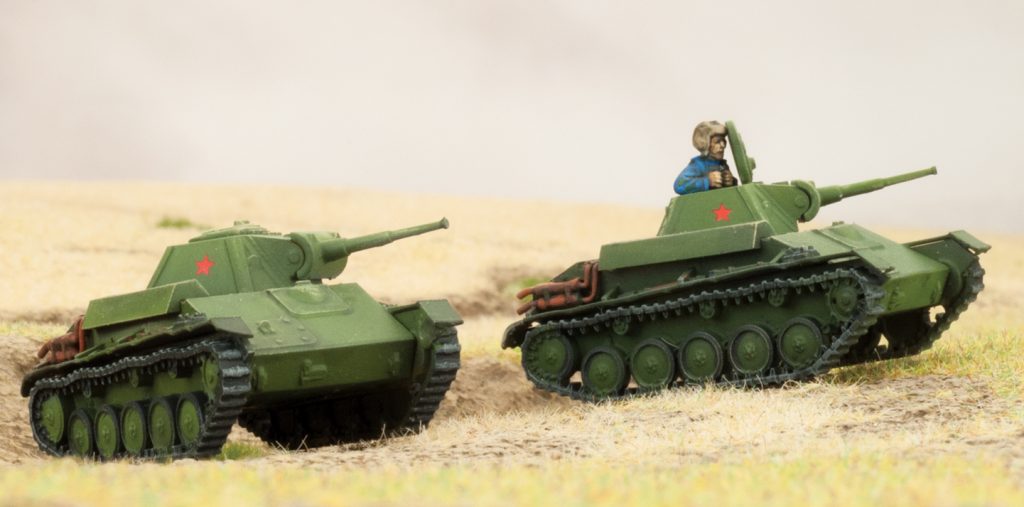
Hero T-34 Tank Battalion
The Hero T-34 Tank Battalion allows you to take a mix of T-34 (76mm) and T-34 (85mm) tank in your Hero T-34 Tank Companies. The formation also contains options for a Hero T-70 Tank Company or a Hero Valentine Tank Company. This formation offers a real variety of different tanks. It also has its own anti-aircraft, Hero SMG Company, 82mm mortars, and anti-tank guns.
The T-34 (76mm) is armed with a 76mm gun with range 24”/60cm, ROF 2/1, AT 9, FP 3+ with Overworked (+1 To Hit for Moving)
The T-70 is a light tank armed with a 45mm gun. It is quite well-armoured for a light tank with front 4, side 2, top 1. The 45mm gun has a range 20”/50cm, ROF 1/1, AT 7, FP 4+ with Overworked.
The British Valentine was supplied to the Soviets as part of the Lend-lease program. Though the British thought of it as an infantry tank, the Soviets designated it a light tank and gave it to light tank companies. The Valentine is therefore quite well-armoured with front 6, side 5, top 1. The Soviets got a mix of types, some with 2 pdr guns others with 6 pdr guns. The 2 pdr gun has a range 24”/60cm, ROF 2/1, AT 7, FP 4+ with No HE. The 6 pdr gun has a range 28”/70cm, ROF 2/1, AT 10, FP 4+ with No HE, No MG and Overworked. The Valentine (2 pdr) also has a MG.
To field these troops have a look at these for the T-34s SBX66 T-34 Tank Company or SUAB12 T-34 Tank Battalion. For the T-70s check out SBX68. For the Valentines see SBX69.
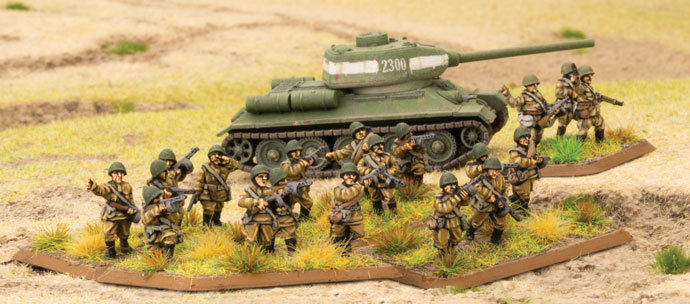
Hero Motor Rifle Battalion
The Hero Motor Rifle Battalion is a well-equipped formation with its core of infantry, its own selection of support weapons like machine-guns, mortars, and anti-tank guns, and it also has its own tanks and reconnaissance troops.
The Hero Motor Rifle Company that make up two to three of your formation units are well-rated with Confident 4+ motivation backed up by a Komissar (3+ motivation). Their skill is Veteran 3+, with 2+ in Assaults. Their Hit On rating is Aggressive 3+. They have 7-10 DP MG teams (Range 16”/40cm, ROF 2/2, AT 2, FP 6) and a Komissar. They can add PTRD anti-tank rifle teams and Maksim HMG teams for more firepower.
These troops can also be represented using the excellent plastic troops of SBX79 RIfle Company and SBX80 SMG Company.
Their fourth infantry unit is the Hero SMG Company (which is included in many formations throughout the book as you may have noted). This simple, but effective unit is armed with 5-7 PPSh SMG teams (Range 4”/10cm, ROF 3/3, AT 1, FP 6 with Pinned ROF 1) and a Komissar team. They have the same ratings as the Hero Motor RIfle Company.
Use SBX80 SMG Company to field these excellent troops.
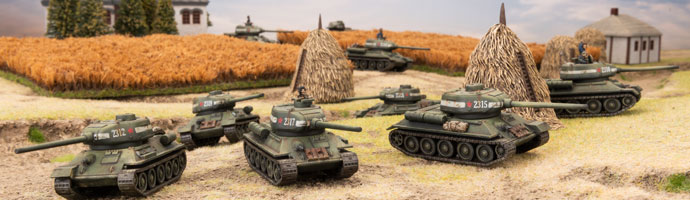
T-34 Tank Battalion
The T-34 Battalion is a mixed unit with both T-34 (76mm) and T-34 (85mm) tanks. They can also have a light tank company with either T-70 or Valentine light tanks. Their formation also contains anti-aircraft, mortars, anti-tank and SMG troops.
To field these troops have a look at these for the T-34s SBX66 T-34 Tank Company or SUAB12 T-34 Tank Battalion. For the T-70s check out SBX68. For the Valentines see SBX69.
Motor Rifle Battalion
Like the Hero version of these troops, the Motor Rifle Battalion formation is almost fully contained combined arms force, with its own machine-guns, mortars, anti-tank, anti-aircraft, reconnaissance and tanks. These troops have a motivation of Confident 4+ with a Komissar making it 3+, skill is Trained 4+, but with 3+ in Assaults. They are Hit On 3+, and Save on 4+.
The Motor Rifle Companies are quite large with between 10 and 28 DP MG teams and a Komissar. They can also add anti-tank rifles and HMGs to this total.
They can also take the SMG Company with the same ratings, but armed with 15-22 PPSh SMG teams and a Komissar. They can also take a couple of additional Flame-throwers (Range 4”/10cm, ROF 4/4, AT 2, FP AUTO, with Flame-thrower, Heavy Weapon, and Pinned ROF 2).
These troops can also be represented using the excellent plastic troops of SBX79 RIfle Company and SBX80 SMG Company.
Reconnaissance Company
The final formation in Bagration: Soviet is the Reconnaissance Company. This formation has a good mix of troops and units. It is built around a core of submachine-gun infantry which can fight on foot or be transported in Lend-lease M3 scout cars or captured German Sd Kfz 251 half-tracks. Both transport options give some protection from rifle and machine-gun fire. The formation is rated motivation Confident 4+ with Last Stand 3+, skill Veteran with Assault 2+, and Hit On Aggressive.
The Armoured Reconnaissance Platoon can have 4-6 PPSh SMG teams mounted in either of the above transport options. This unit used the Spearhead rule.
If you take the foot option are four Recce DP MG teams with an option to add a Flame-thrower. They also use the Scout rule in addition to Spearhead.
To field the infantry from an Armoured Reconnaissance Platoon or a Reconnaissance Platoon use SBX80 SMG Company.
For the M3 Scout Transports use SU206 M3 Scout Transport. For the Sd Kfz 251 use GBX152 Sd Kfz 251 Transports.
The Formation can also have its own 82mm mortar Company, 76mm anti-tank Company, and tank company.
Last, but not least they come with their own little armoured cars, the BA-64. This gives you another Spearhead unit. The BA-64 Armoured Car Platoon has 3-7 BA-64s, these can be armed with MGs or PTRD anti-tank rifles. They armoured to protect them from small arms fire with front 1, side 1, top 0.
The new plastic BA-64 comes in the SBX76 Armoured Car Platoon box.
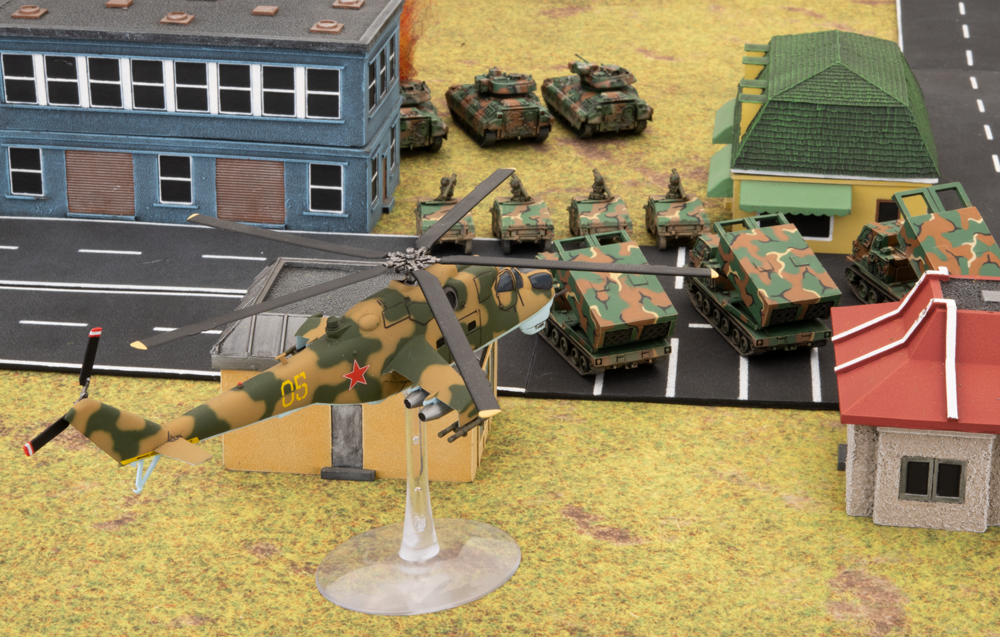
Support
The support is full of great stuff to support your Soviet force in the field. There are OY-34 and KV-8 Flame-tank Companies for burning your way through the defences of the enemy. A good selection of Tank-killer Companies, armed with 45mm guns, 57mm guns, 76mm guns, and 100mm guns. The 100mm gun packs a mighty punch with range 32”/80cm, ROF 1/1, AT 15, FP 2+, with Slow Firing and Forward Firing.
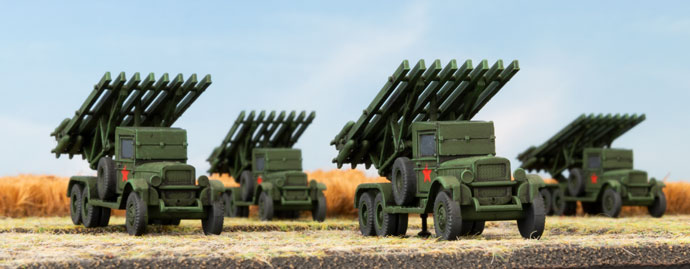
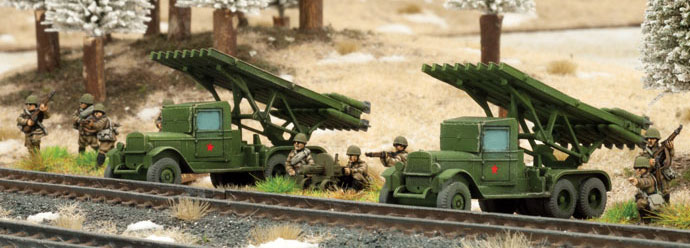
For artillery support you can have the infamous Katyusha rocket launcher, 76mm, 122mm, or 152mm artillery batteries. You can also now take the new BA-64 armoured car to mount our artillery observer.
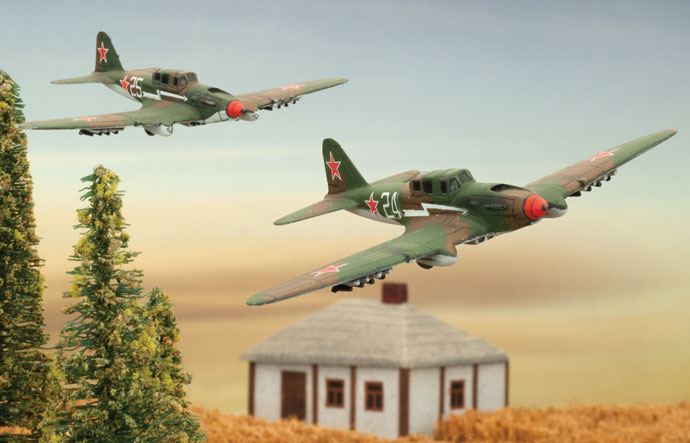
For air support you can choose from two variants of the IL-2 Shturmovik, one with 23mm guns (Range 6”/15cm, ROF -/2, AT 6, FP 5+), bombs and rockets, or one with a 37mm gun (Range 8”/20cm, ROF -/2, AT 8, FP 4+), as well as bombs and rockets.
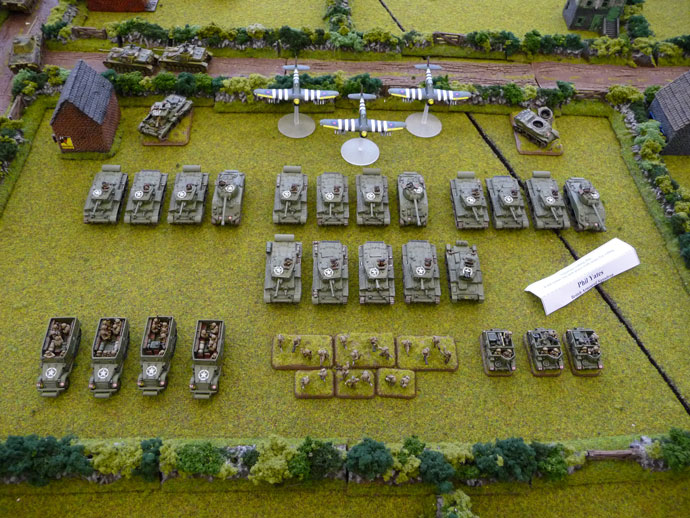
After the support you will find a sample army based on the new Soviet Start Force Heavy Assault Group, a painting guide, a basing guide, a Eastern Front Terrain guide, and section on City Fighting.
 Bagration Battles
 Bagration Battles
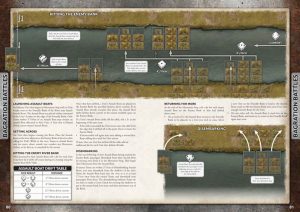
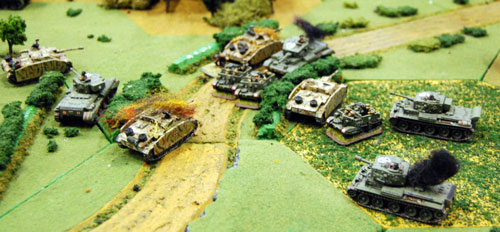
The final section in the book introduces River Crossing rules. River crossing were a common feature of the battles on the Eastern Front, and during Operation Bagration in particular. We have included rules so you can recreate these set piece battles in Flames of War.
You will find River Assault rules, three River Crossing missions, a Linked Campaign incorporating the new missions along with missions from the rulebook. The book ends with a comprehensive catalogue on Bagration: Soviet models, your easy guide to collecting your Soviet Force.
The book is packed full of content, and there is probably a formation or two to tempt anybody looking and getting into Flames Of War on the Eastern Front. Enjoy!
~Wayne

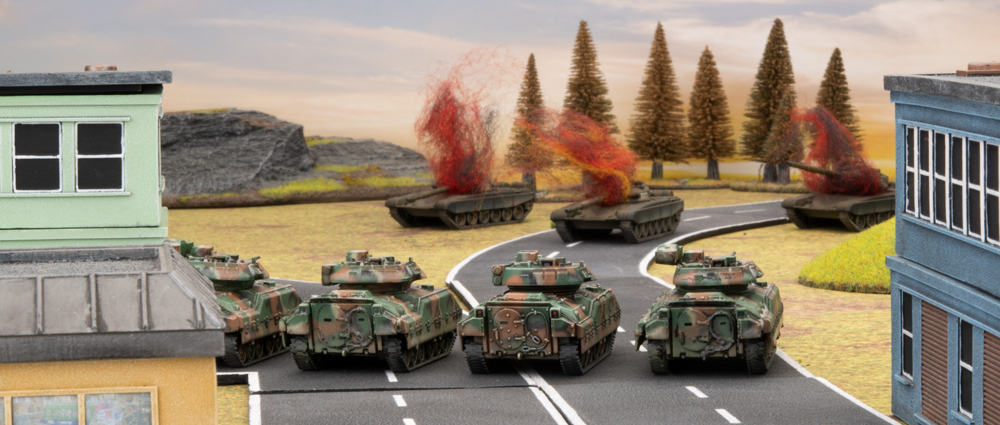

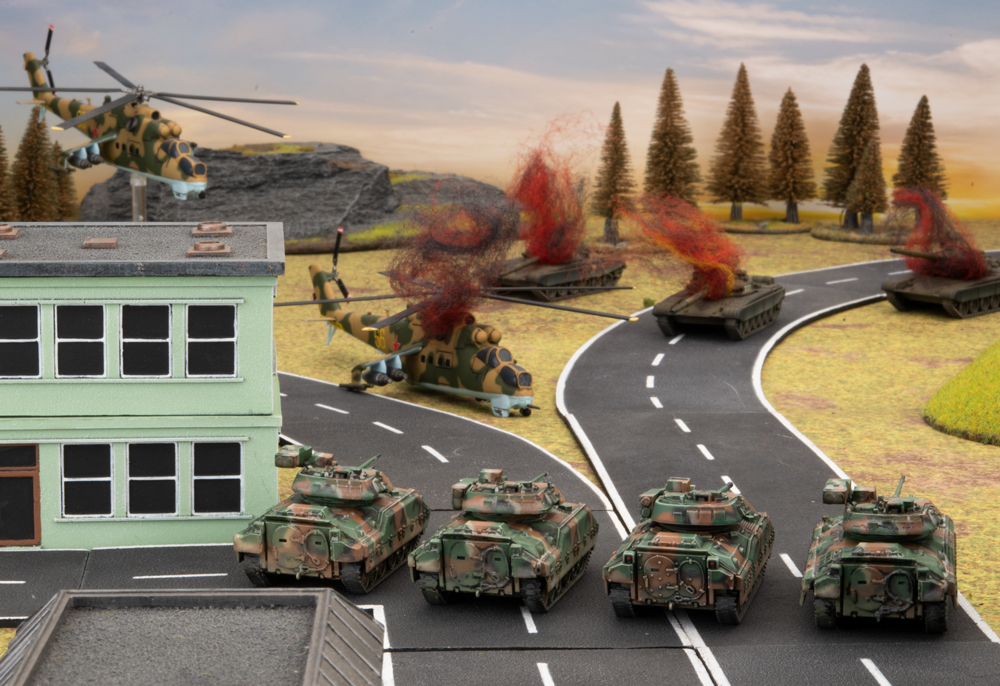
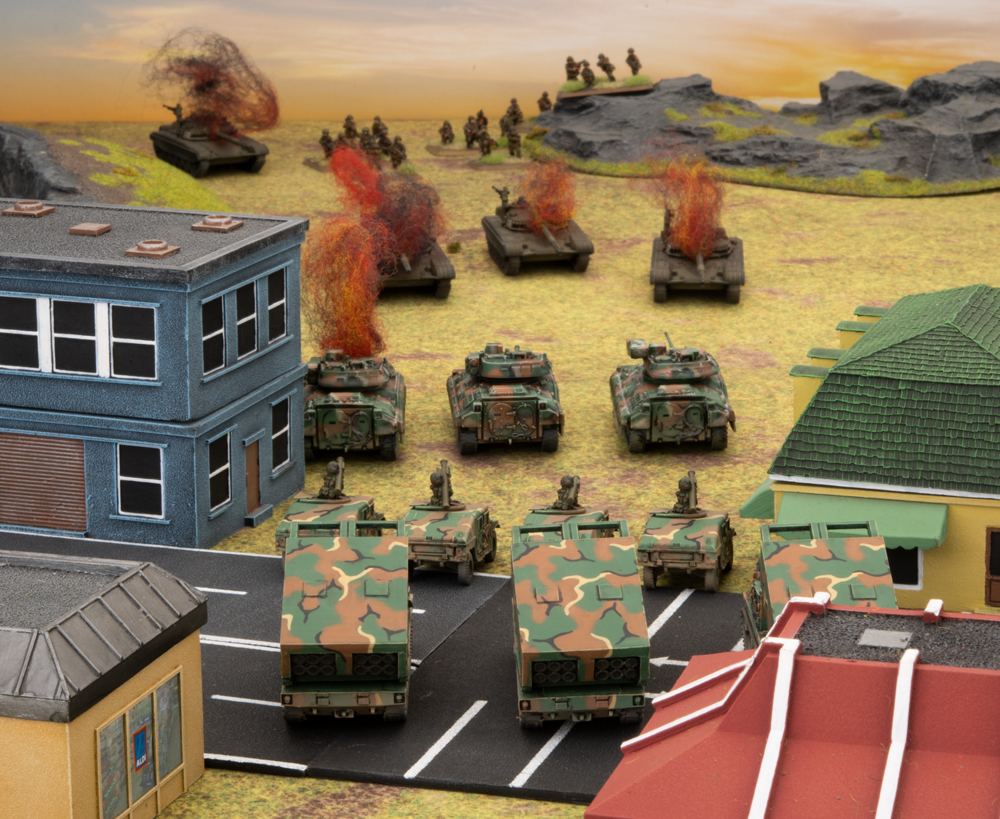

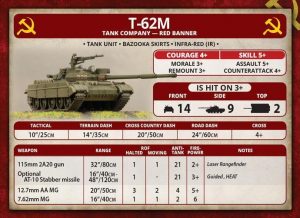 This tank is all gun. With AT 21 with a range of 32” the T-62M packs the same punch as the T-72M, capable of running and gunning and being a threat to almost anything on the table. While AT 21 isn’t the scariest sight to front armour 18 and 19 tanks, remember quantity has a quality all its own. Many armies have learned this against the BMP-2, but the BMP-2 can’t move and shoot against targets and cunning NATO opponents will use that against you to devastating effect. The T-62Ms ability to manoeuvre while firing will help put opponents on the back foot and I would argue this is what it excels at. The gun is only ROF 1 like other Soviet tanks and this will limit the damage per turn you can inflict but when used appropriately can threaten tanks but just pull apart support units and really unbalance the field for the rest of your army to exploit. The 115mm 2A20 gun doesn’t have the brutal characteristic Soviet tankers are used to with the T-64 and T-72 but the supporting machine guns do a pretty decent job of digging out enemy infantry if push comes to shove.
 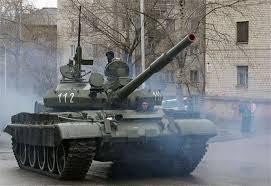 The T-62M does have armour, it does, just not much. This puts it in an odd place, it has enough armour to protect it from IFV fire and the lightest of man portable anti tank weapons, but even light tank guns like the 105mm found on older models of NATO equipment are more than capable of ripping through the T-62M. Tanks like the Leopard 1 or the AMX-30 are perfectly equipped to take on these tanks with both the number and the gun to do the job where as heavier more modern tanks like the Leopard 2 are over equipped. With side armour 9 the tank is more heavily armoured than the T-72 but is still vulnerable to a great variety of weapons. With Bazooka skirts this is a little better bumping up to side armour 10 against HEAT but with weapons like the Carl Gustav and the RPG-7 on the table this is of little benefit. You can’t depend on the side armour to save you so make sure you can’t be hit in the side where possible and you’re doing great.
 Soviet attacks generally come in three flavours, frontal and flanking attacks and the envelopment. Now for obvious reasons Soviet planning at all times attempted to avoid frontal attacks as they were the most costly and tended to get bogged down in defences and played to the enemy’s strengths. On the table we see great similarity to this and I would argue this is why ‘alpha striking’ or using your ability to shoot first is often the worst choice for Soviet players and specifically Soviet tankers. With all the advantages at play for a defender, concealment and being gone to ground, most NATO targets will require 6s to hit. While the T-62 does come in great number it doesn’t overcome the low rate of fire of our tanks and so opening fire on your first turn is often a mistake, as it can make the hunter become the hunted, with muzzle flashes identifying each and every tank for NATO forces to then engage in brutal return volleys.

 Support