with Ales Potocnik
Hi! My name is Ales, and I am a designer behind some of the figure miniatures produced for Flames of War. For this article, I will guide you through the process of creation from beginning to final product. It is quite a specific line of work since the production of miniatures requires knowledge in different areas; such as 3D sculpting, casting processes, working with small scales, materials, and prototyping equipment. I also had a great opportunity to learn from Charles Woods, who was kind enough to provide me with some guidance. I couldn’t do what I do without a great team behind me, providing me with useful tips and ideas to even further push the miniatures look and improvements.
 There are a lot of things that are very specific when you are designing to such a small scale. Not only the size, there are certain technical requirements due to the way the final plastic miniatures are produced. Lines have to be extra crisp in order to get out as much detail as we possibly can, there is a necessary increase in the thickness of certain small bits, because in the end you are left with a choice. Either you can have a detail that is slightly off in size, or not have it all. The same issue would arise with long thin plastic objects which would be prone to breaking. My job is to think ahead for all the processes and final design and adjust the best I can for the best possible result.
The designing process starts off with a brief that gets written up by Miniature Design Lead Evan. The brief then gets either approved or refined and after that, it ends up in my hands. Briefs will usually include details on uniform and equipment layout, height of the miniatures, and specifics that will need to be taken into account on what we want. I tend to gather up as much additional material, books and references as I can, since some of the details are very specific or certain parts can’t be distinguished easily in the historical photographs due to quality and size. After all I am looking at gear details on photos where it is not always the intention to capture that at all.
At this point I will start designing in 3d software, usually starting with a 10mm bottom round platform for size reference, moving on to uniforms and then moving on piece by piece. While I design the likes of shoes, pants, belts, entrenching tools, ammo pouches, gasmasks etc., I’m still not designing absolutely everything. Often I am provided with weapons that were designed by other freelance 3D artists working for Battlefront, shaving down the time I would spend on it as an individual, meaning, we are moving faster in the creation. This part usually takes quite some time, since all the parts are designed in a way for them to be as distinguishable as possible, and there is A LOT of gear that differs from soldier to soldier based on their tasks and ranks. While I am at this step, I often bug game designers with searching questions, or I ask for additional information from the Miniature Design lead.
Once we are happy with the miniature design look in digital form, I take over the process of prototyping on our high-accuracy 3D printer. Sometimes when we are in a pinch and we can’t decide for example, a helmet size, it really comes in handy to test them out in physical form. As I am satisfied with the model, it gets a final check up by Evan, and then gets prototyped so we can send it over for inspection.
We make absolutely sure we go through all the quality control steps. Previewed by Miniature Lead again in physical form, checked by our staff members and me, then checked and later on approved by the bosses. If the miniature is not up to standard, we repeat the whole cycle, but most of the time we only need to make minor corrections & adjustments. It is essential that we are communicating a lot at this stage through the way the miniature is designed. If we miss this window of opportunity and we want a change later on to a basic model, I have to make changes to all of the miniatures I’ve already made. For example: if we are not happy with the way shoes are made, I have to remove the old ones, add the new model of the shoes I have made, pose them, and add the details and folds for each individual miniature. Once you stack up 50 shoe changes it turns out to be a few work days of work, making it difficult to stick to deadlines.
Finally, we move on to what I refer to as “making the range”.
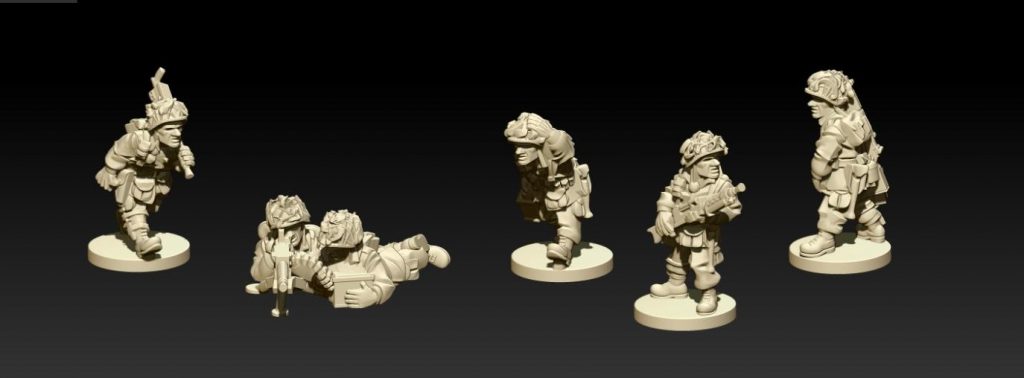
This is the process of creating the miniatures and posing them. More direction at this part, since the figure range gets segmented. Riflemen, Mortars, Bazookas, Light machine gun crews and many more. Each usually have different and distinct equipment.
Always looking for cool poses, we base the soldiers on image references, our previous miniatures, and sometimes just trying out something that we think would look cool. At this stage I am looking for any possible undercuts (area that do not have straight lines and would cause the plastic to grab if cooled in the mould) and any other problematic areas which could cause trouble in production by orienting the miniature in an imaginary mould. The gear that I have previously designed now comes into play and gets added on each posed soldier, and adjusted based on the pose, gravity, and orientation. They are also given the right weapons if they carry them.
Each individual figure gets reviewed at this stage again and approved – one by one.
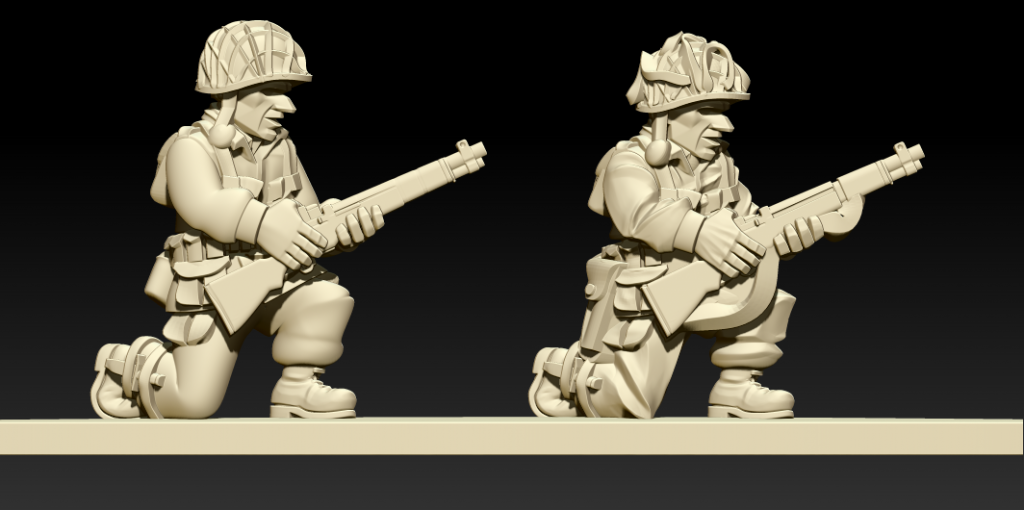 After we are happy with the pose, there comes detailing. Based on the pose, I am adding folds to the clothing, shape to backpacks and pockets based on how full they are, straps and different unique attributes to each single one of them. You must be careful not to overdo it with the gear stacking though! Soldiers can start looking like waddling penguins real fast with all the gear at such a small scale. This process is most difficult for a 3D artist to get used to, since small miniatures are treated completely differently than the large ones. Each crease and fold needs to be exaggerated and needs to be as sharp as you can get it.
As I add the details, myself and Design Lead go over all of them and review them one more time – digitally. After this it’s more prototypes being printed and again, we all review them since you can never get the exact same result you get on screen. Here we make any final adjustments to the entire range of figures. When the adjustments are done, we are left with final version, Version 2. The soldiers get grouped up, sprues are added in 3D software to specifications and requirements, and off they go to mass production!
 The M1942 Uniform
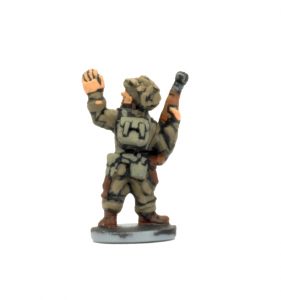 cotton that was a pale greenish-tan colour and I must admit to spending an awful lot of time experimenting to achieve, what I hope to be, the closest match possible. I try to avoid mixing different colours to achieve my basic uniforms but this uniform seems to bring on my OCD (Obsesive Colour Disorder) to get it closer than just plain Olive Drab (887 gets). The Olive Drab (887) is close but a bit too dark for my taste so, eventually, I settled on a 50/50 mix of Khaki (988) and the Olive Drab (887)
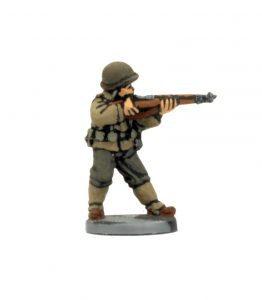 The Glidermen
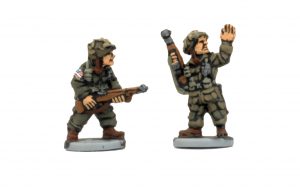
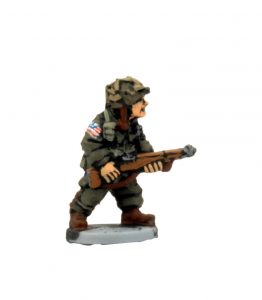
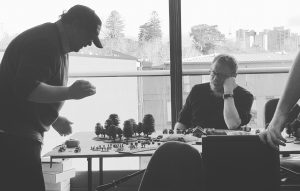 Meanwhile, Pete and I sat down to split a Jeep sprue between us and had a great bit of fun putting together this neat little kit.
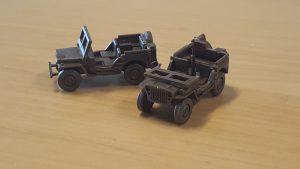
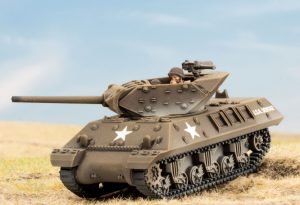 This leaves me with 17-points left to spend on support. Now I could have used those points to add 4 x M4 Sherman tanks, which I’ve already got assembled and painted from my Mid-War army, but instead I’m going with an M7 Priest Artillery Battery of 6, mainly for the smoke screen it can lay down to protect my M10s as they advance (or retreat) and to pulverize any enemy infantry they come across. With 1-point left it was time to peruse the Command Cards. I was tempted by the “Lucky” card from the command deck, but I just could not pass up the “2,000 lbs. Bomb Load” card for my P-47 Flight. With anti-tank 4 and fire power 2+, plus no penalty for having only 1 or 2 weapons firing, it seems like a winner to me and worth replacing my 500 lb. bombs and rocket load out.
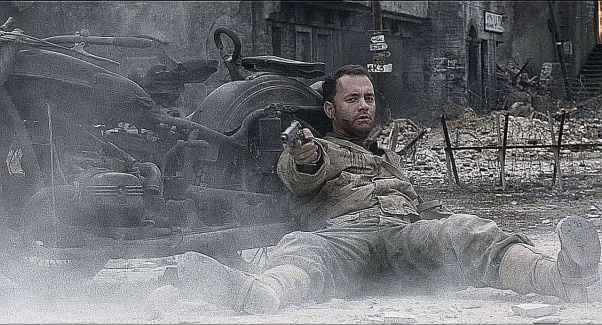
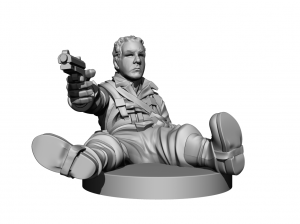
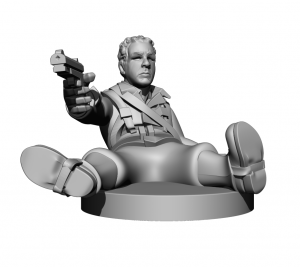 I took a little bit of liberty since it is inspired by the movie and not exact reproduction, and tilted his head back, and raised the pistol. This was done simply to make him look cooler and even more defiant. At this stage there are no details on the character yet, only the fold at the belt, and distortion on the webbing in the stomach area. These come in later. I already did some work on the face too. The amount of detail I am adding is way more than usual since something like a lip would be less than one tenth of a millimetre thick!