
Category: Bulge: American
US Tank Destroyers – Seek, Strike and Destroy
With Adam Brooker
Bulge: American is a book a lot of people that play Late War US have been waiting for, especially those that used to enjoy Tank Destroyer Companies in the previous version. As before this all late war US Commanders had was the M10 ‘Wolverine’ which has been the TD work horse for Tank Destroyer Companies since Mid War. With the release of the Bulge: American book we see the addition of two more Tank Destroyers, the speedy M18 ‘Hellcat’, and the Big Cat Killer, M36 ‘Jackson’. The M18 Hellcat gives you a more manoeuvrable ‘glass cannon’ style of play, while the M36 Jackson is up-gunned to fight the larger German tanks, and can be beefed up to make it even harder to kill!
So you now have a few extra tools in your toolbox against the Big Cats, but they all work in different ways, let’s go through and see just how these tank hunters work, and their general strengths and weaknesses.
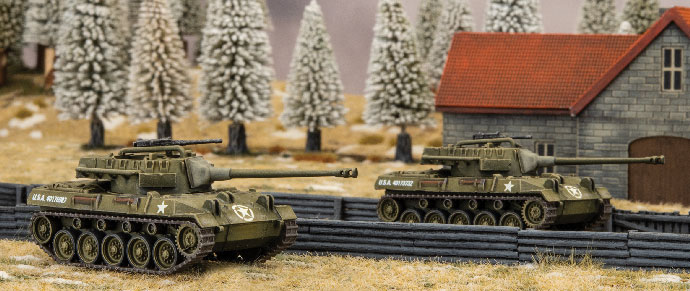
M10 Tank Destroyer
First up, the work horse, the M10 Tank Destroyer, as an aside, it is often given the nickname Wolverine now, especially in model kits, but there is no evidence it was ever called this during WW2. It was either called an M10 or just TD, it seems that model kit companies may have invented the nickname to help sales, as it was never officially given the designation Wolverine, like the M4 was given Sherman.
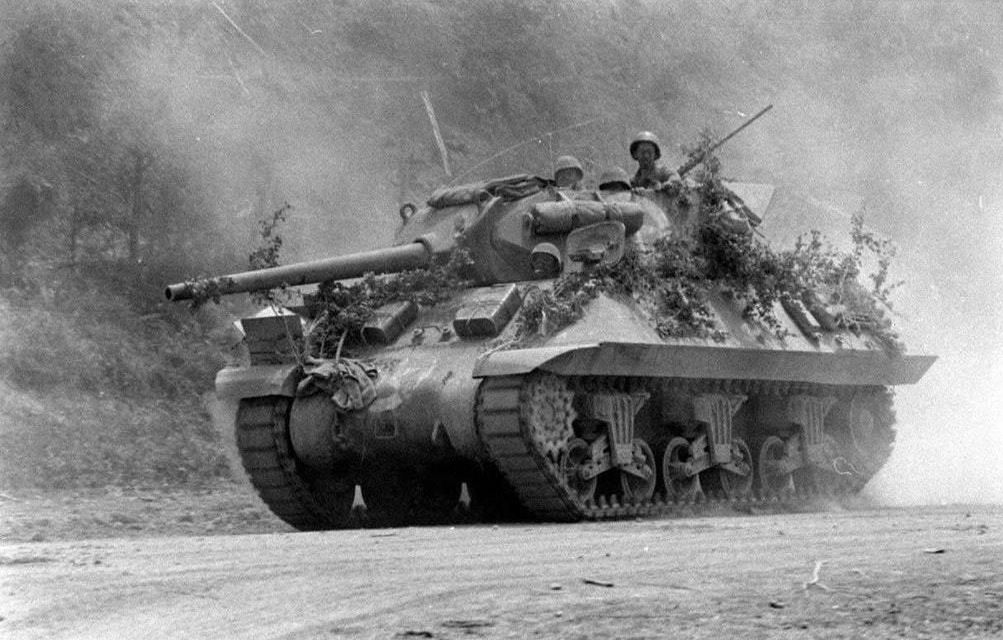
The M10 was an early design by the Bureau of Ordnance built around the US Tank Destroyer Doctrine, which was the mode of use that the US devised to defeat the German Blitzkrieg Doctrine or armoured spearhead doctrine. The US combined arms doctrine in WW2, was that tanks like the M4 Sherman would be used to support an assault on a defensive position by infantry and artillery and then they were to be used to exploit a breakthrough, and also to engage any enemy armour that they found during this assault. So really the M4 Sherman was only ever designed to support infantry, and was up-gunned almost under duress later in the war, as it was not originally intended to fight enemy armour, it was a support tank only according to their doctrine.
So what was to be used to fight a mass armoured breakthrough against your lines? A thin line of static anti-tank guns will not work if there is room to manoeuvre or enough mass, as the German Blitzkreig in France and Poland showed. The US came up with the Tank Destroyer Doctrine to combat this, the Tank Destroyers were designed to be a manoeuvrable version of the towed anti tank guns, to be held in reserve and then moved quickly to the area of the enemy breakthrough. They would then use speed, aggressive manoeuvring, and ambush tactics to defeat the enemy thrust.
It was to be purely defensive, they were not allowed to chase or charge at enemy tanks, they did not have the armour for it really anyway, and were to fight from defensive positions, and to withdraw using speed if they could not defeat the thrust, so as not to waste their vehicles and to set up another ambush in front of the enemy further down the line of their advance, direct contact in the open with enemy armour was to be avoided whenever possible. So this required a fast, well armed vehicle, with a turret to make aiming from a stationary position easier, which is what the 3” Gun Motor Carriage M10 was. It was also much cheaper to produce than a Panzer IV, Panther or Tiger, so had an economy of force there, compared to the cost of enemy losses.
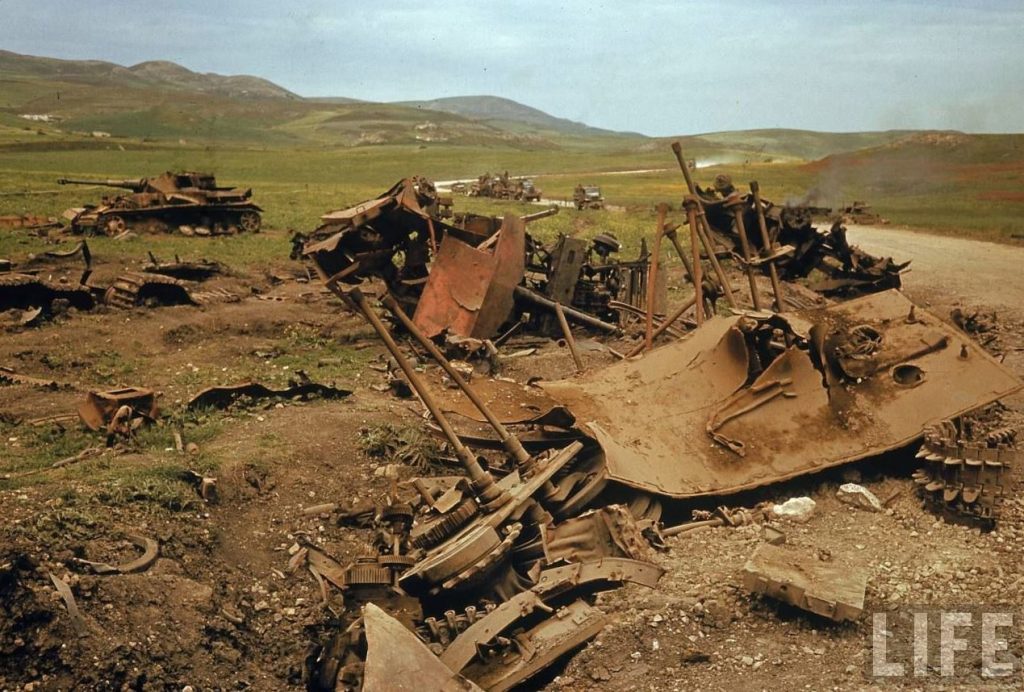
It was first deployed in March 1943 in El Guettar in the North Africa Campaign, in the perfect scenario for the Tank Destroyer doctrine, it was going to blunt an armoured spearhead from a defensive position. 12 3” M10s and 31 75mm M3 half-tracks (an interim tank destroyer design), blunted the German attack, knocking out 52 of the 57 attacking German tanks including a Tiger. But this victory was not without cost, the US forces lost 5 of the 12 3” M10s, and 25 of the 75mm M3 half-tracks, which were heavy losses, but it did prove the worked in the minds of the US command, and the cost economically for the Germans, was much more than the cost of the half-tracks and M10s for the US.
The US losses in this battle seem to have been potentially higher because of the emphasis put on aggressive manoeuvring in the first TD manuals given to the TD crews, could be misinterpreted by crews. It seems that the crews were overly aggressive and put themselves into poor positions in an attempt to knock out the enemy armour, as they were charging at enemy tanks instead of staying in a better defensive position. So after this battle, in early 1944 the wording of the TD manuals was changed to put less emphasis on the aggressive verbiage, to prevent crews leaving excellent defensive positions for poor attacking positions in a TD not designed for that role.
It should be noted this battle was one of the few times the Tank Destroyer Battalions were used to defend against a German armoured thrust in the manner it was designed to meet them. It did work, and would have worked with much less losses, if you had more experienced crews and more M10s that were more suited to the role, instead of the interim M3 75mm half-track, but all in all a success for the doctrine.
It should be noted one of the deficiencies of the M10 was its slow turret traverse, which was unpowered, and the crew needed to hand crank it to traverse, which took 80 seconds to rotate a full 360°. This was rectified in both the M18 and M36 which had powered traverse systems installed in the turrets.
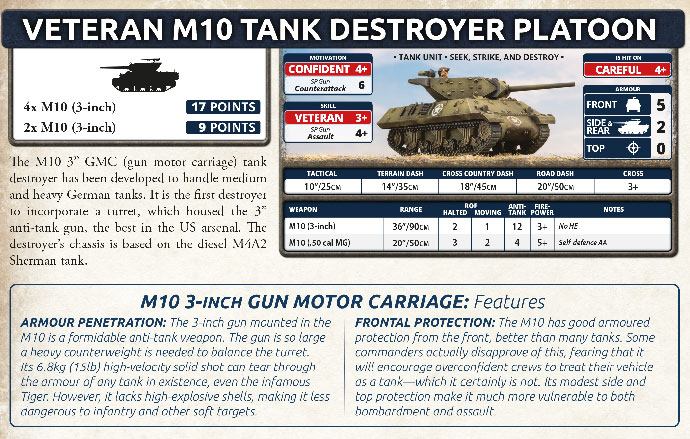
So in game the M10 has a reasonable front armour of 5, and a side and rear of 2, and open topped, so a top armour of 0. This FA 5 was good in mid war, where it had a decent chance of saving against shots frontally at range, but coming into late war, where anti-tank values are progressively getting higher, this is less competitive. It has the 3” M7 gun, with 36” range, an AT of 12, and 3+ firepower, with No HE. This is still a good gun for Panzer IVs, but anything larger/heavier than that it will struggle to penetrate unless it is in a flanking position, it also is not suited to blasting out anything with a infantry save due to the No HE rule.
It had a top speed of around 48 km/h on roads, which was fairly fast in 1943 when it was introduced, this translates to a 10” tactical move, a 14” terrain dash, 18” cross country dash, and a 20” road dash, with a 3+ cross check. This is a very manoeuvrable vehicle, that has a good chance of moving out of any difficult terrain that it may use as cover for an ambush, this is usually where this TD excels is late war, 8 shots of AT 12 in the side or rear if firing from ambush, then moving if needed.
The one difference from D-Day: American to Bulge: American is a slight cost increase of 1 point per 2 TDs, as they are now Veteran M10s, for which you gain Veteran (3+) skill. You still of course have the excellent Seek, Strike, and Destroy rule, that all TDs have – which allows you to attempt to make a Shoot and Scoot Movement Order after succeeding in a Blitz Movement Order earlier the same turn, both of which will now be easier to pass with your 3+ skill. This Blitz and Shoot and Scoot combination is a great trick to have up your sleeve, allowing you to sit behind a hill or other terrain, Blitz out, fire at full rate of fire, then move back with a Shoot and Scoot, both rely on your improved tactics 3+.
So overall it is still a capable TD, but it’s starting to get outclassed by its larger prey like the Panther, and even bigger prey like the Tiger, King Tiger, etc. Luckily the only formation you can take these in is the M36 Tank Destroyer Company, which has the up gunned M36 Jackson (90mm) which can more easily penetrate a Panther or Tiger frontally. So you can use the older M10 TD for lesser prey while the M36 deals with the bigger prey.
M36 Tank Destroyer
This TD also seems to have been given the unofficial nickname ‘Jackson’, similar to the M10 ‘Wolverine’, this does not seem to have been used officially during WW2, where it was just called an M36. It appears the model makers have struck again, but to be honest I like these nicknames, and often personally just call them Jacksons…
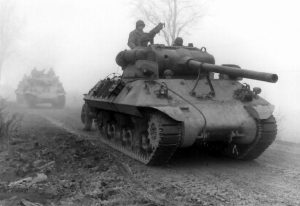 This TD is what the others call when they can’t deal with the big cats!! It was designed specifically to counter the larger German tanks like Panthers and Tigers that were being produced in more numbers, and to be able to penetrate them frontally at range with its 90mm M3 gun. In this capacity and how it designed to be used it worked very well, but this success led to misuse.
The M36 was essentially a M10 hull with a new turret on top that could mount and rotate a 90mm M3 anti-tank gun. It had a counter-weight at the rear of the turret and powered traverse to allow the large 90mm gun to be mounted, so the turret was slightly bigger and higher than the M10, it replaced. The older M10 was eventually being replaced with both M18s and M36s, so this allowed the assembly lines to quickly switch production.
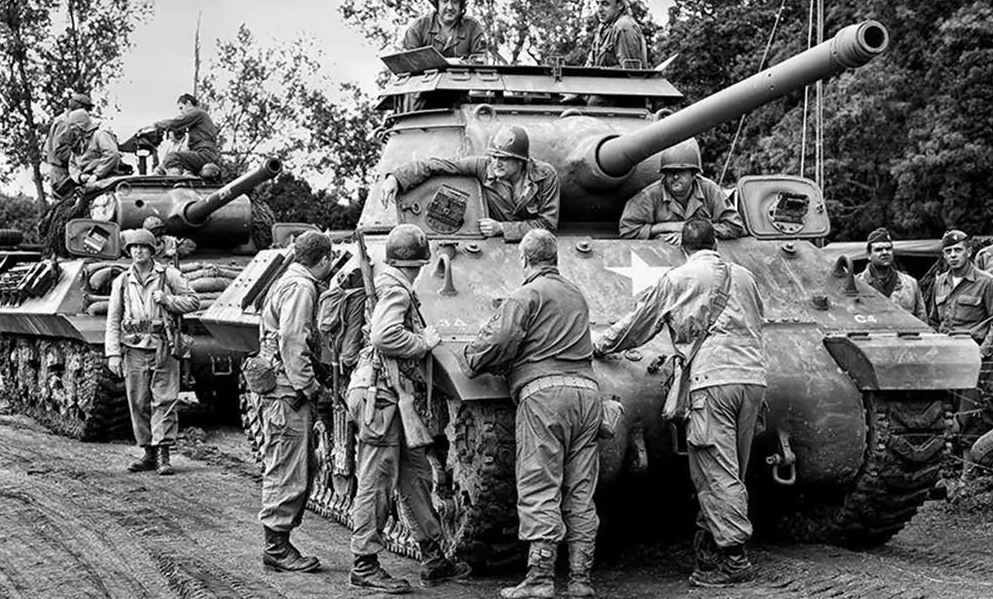
It could penetrate a Panther or Tiger frontally from about 2000m, but it had to hit the vulnerable areas, so they generally had to get even closer to guarantee a one shot kill. Advancing troops into Germany liked this TD as they now had an effective weapon against German heavy tanks frontally rather than having to attempt to flank it, which usually led to the loss of advancing US tanks. But this success came at a cost, as it started to be used more as a tank, advancing to support infantry, rather than its stand-off, ambushing role.
Also as it was open topped it was vulnerable to supporting mortar and artillery fire as well as small arms assault by infantry, in fact the preferred German tactic for dealing with tank destroyers was artillery airburst overhead, which killed many crews. Some TD crews improvised canvas covers to stop hand grenades, while other made turret top armour from armoured sheets from captured vehicles, which did help and was standardised by 1945, but nothing but a fully armoured top would protect against the airburst artillery. They were also ambushed in turn by German anti-tank guns and assault gun, where they did not have the armour tanks led to high casualties, but the US Commanders often had no choice, they needed to knock out those German tanks, and the M36 was often the only tool they had.
In the tank battles of the Roer Plain in 1944, this was clearly evident, three companies of Shermans from the 67th Armored Regiment knocked out only 5 Panthers, while the M36s of the 702nd TD Battalion attached to it knocked out 15 Panthers as well as 8 Panzer IVs.
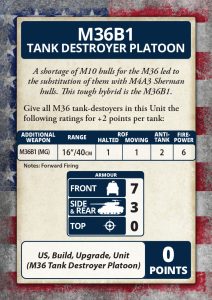 The M36 was so effective and demand was so high that they ran out of M10A1 hulls, and in October to December 1944, 187 M36B1 were made. This variant mounted the M36 turret on and Sherman M4A3 hull, which gave it increased armour and an extra hull mounted MG. This variant with the extra frontal armour, would help slightly when the M36 was pushed into more of a support role, and also the addition of the top armour sheets in 1945 onwards.
 In January 1945 they ran out of M10A1 hulls entirely, and mounted the M36 turret on older M10 hulls that had been brought back from Europe, creating the M36B2, with an additional 724 of these produced.
You can find the command card for the M36B1 in the Bulge American Command Card pack, which also has some other great upgrades for your force. I think this variant will be a great conversion project with the new plastic kits giving you all the parts you need to make this. I will be doing some up myself!
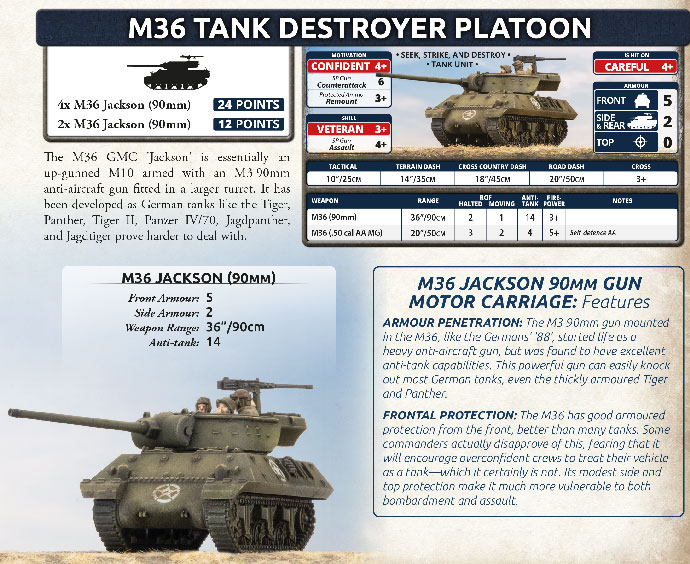
The M36 in game is essentially an upgraded M10, with all the unit statistics being the same, except for the new 90mm M3 main gun. It still has the same range as the smaller 3” gun on the M10, but with an increased AT 14 and does not have the No HE special rule, so no negative to hit infantry and gun teams.
You should be able to handle Panthers and Tigers with this TD although a Ferdinand/Elefant will still laugh at you and ask for more… There are rumours of even larger Wunderwaffe coming out the secret laboratory’s of Germany which your gun may not be able to penetrate… pray this is not true….
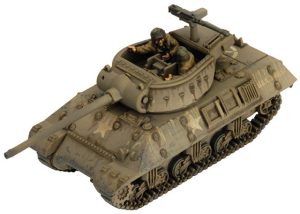
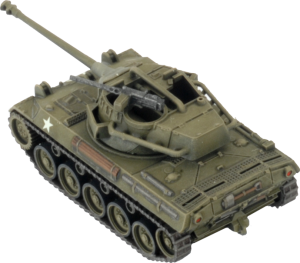
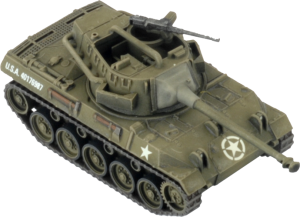
M18 Hellcat
The M18 Hellcat or 76mm Gun Motor Carriage M18 (M18 GMC) is the literal embodiment of the Tank Destroyer Doctrine. It was one of the fastest tracked vehicles of WW2 with a top speed of 89 km/h (55 mph) on road and 42 km/h (26 mph) off road, and the fastest US armoured fighting vehicle on road. Also given the kill to loss ratio of the Hellcat in WW2 it was the most successful US Tank Destroyer during the war, outscoring any other tank or tank destroyer.
The M18 Hellcat was all about speed, using speed as armour, using speed to get into position quickly to stop and enemy spearhead, and using speed to quickly flank an enemy tank that its gun could not defeat frontally. This was how the tank destroyer doctrine was envisioned, and why the M18 was designed as it was, and most of the crews loved it. The speed is what gave it the nickname Hellcat, being able to go up to 60 mph on roads, but was governed to 55 mph to prevent premature failure and wear.
To get this speed almost all armour was sacrificed, with only a maximum of 25mm of armour on the front of the turret, and the rest of the turret and hull having an average of 12mm thick plate. The Gun mantlet had an additional 19mm plate, but even this would not stop a Panzer IV AP round, let alone any of the larger German vehicles. This armour was just enough to stop any large calibre machine gun rounds, but nothing larger. But given Allied armour could not stop most German anti-tank weapons at this period of the war, this reduction of armour did not effect the average survivability of M18 crew.
Having an open top did give the crew excellent vision for spotting any enemy armour, but like the other open topped TD’s, it remained vulnerable to small arms fire, grenades, and as discussed before, the Germans favourite weapon against TD crews, airburst artillery.
Its 76mm M1A1 gun was the same gun seen on the up-gunned 76mm Shermans, which did give improved performance compared to the 75mm on a Sherman, but it still had trouble consistently penetrating a Panther or Tiger frontally, and usually when engaging one of these tanks, they would use their speed to quickly redeploy to the flank, where its gun could more easily penetrate its weaker side or rear armour.
The top speed of the Hellcat was rarely used in combat, but often a panzer commander was surprised by how quickly a Hellcat would turn up on their flank, when they expected it to still be engaging it from the front.
The M18 first saw action in Anzio (well the T70 prototype did), but most were in the European Theatre (19 M16 TD Battalions), with one M18 TD equipped Battalion in the Mediterranean Theater (805th), and some in the Pacific Theater later in the war, in Okinawa and the Philippines ( only the 637th saw combat). In general most of TD battalions that converted to the M18 from the M10 liked the vehicle, but one TD Battalion (835th) flat out refused to convert to the M18, and stayed using the M10. Their concerns seemed to be the lack of armour protection compared to the M10.
Against the Germans the M18 was very successful, in September 1944, around the Nancy bridgehead, the 704th TD Battalion in support of the 4th Armoured Division found the German 113th Panzer Brigade, in the early morning fog. A M18 Hellcat Platoon from C Company, came upon a German tank in the fog, they quickly knocked out 5 tanks for the loss of one M18. They continued firing and knocked out another 10 tanks ( some of which were Panthers) for the loss of two more M18s.
Another example is the fighting around the Battle of the Bulge in December 1944, defending Noville against a push by the veteran German 2nd Panzer Division, they used the top speed of their TDs to get in front of the enemy spearhead via roads and ambush them as they advanced. M18s of the 705th TD as well as Paratroopers from 1st Battalion, US 506th Parachute Infantry Regiment, knocked out 30 German tanks (including Tigers) as well as up to 1000 infantry casualties on the supporting German infantry.
This is another example of the Tank Destroyer Doctrine being used successfully to stop a German armoured thrust, which rarely happened in this period of WW2. But here it is thought the high speed allowed the M18s to quickly re-position and re-engage the enemy, which not only confuse them, but made the Germans think they were facing a much larger force than was actually present. This slowed and eventually stalled their thrust and allowed the US forces to hold the town overnight.
Overall only around 2500 of a planned 9000 M18s were supplied to the US Army, with no other ally being interested in using it. Although it was successful in what it was designed to do, it was more often being forced into a support role, rather than its intended task of stopping mass enemy armoured forces. This is simply because the Germans were now on the defensive, and it rarely had a chance to perform the task it was designed to do. As the war progressed deeper into the Germany, assaulting enemy positions, some of the M18 TD Battalions were converted into M36 TD Battalions, as the need to defeat larger tanks frontally increased.
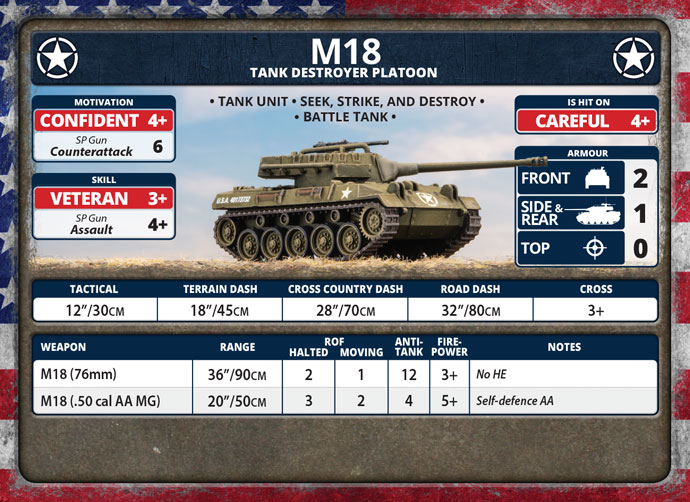
In game terms, think of essentially the same gun of the M10, on a much faster, less armoured chassis. This TD screams fire and manoeuvre, with a tactical move of 12” and a blistering terrain dash of 18”, if used in space and in conjunction with some terrain, will be very good at flanking slower enemy vehicles. It still has the veteran skill, so can also use the Seek, Strike, and Destroy rule to pop in and out of terrain as well. But be very aware of your low armour, a FA of 2 and a Side Armour of 1 means you better hope your opponent fails his firepower save…… Even better is if you are not hit at all, so always try to fire from concealment to give you the best chance at surviving any return fire.
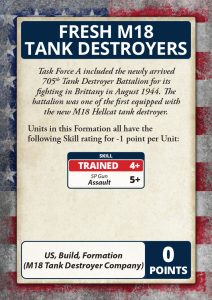 There are a few cards in the Command Card pack that relate to the M18s. One is the Fresh M18 Tank Destroyers Card, this represents the 705th TD Battalion I mentioned above, but earlier in the war around Normandy and the fighting to break out. It gives you the option of cheaper M18s (-1pt per unit), at the cost of their skill (4+). Which depending on your style of play, may allow you to fit in some extra units for the point cost, but just don’t expect to pass your Blitz or Shoot and Scoot tests very often….
Another is the Sandbag Armour (which can be used on all tanks) to give you essentially improvised armour ( a 5+ save), against firepower 5+ and above shots, but it also reduces your dash speed, which may not be a good idea on an M18, but could be useful on a M36 or M36B1??
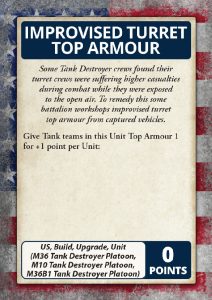 Units in the M36 Company can take Improvised Top Turret Armour, which for a cost of +1 pt per unit, gives you a Top Armour of 1… This can be very useful and one I would very much consider taking. Nothing can be more annoying than having your Tank Destroyers killed by tiny mortars… frankly its embarrassing… and you want to avoid that airburst artillery don’t you…… I really like the idea of a M36B1 with top armour….
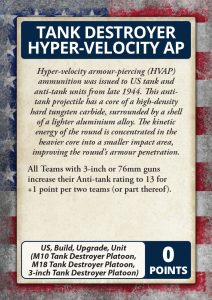
The final gem from the Command Card deck is the Tank Destroyer Hyper-Velocity AP card, I’m pretty sure all my TD’s that can will be taking this…. I feel it is a must have for the M18s, but the M10s have the M36 to take care of the bigger kitties.
 T4 (M93) HVAP help remedy the issue of the 76mm guns on the Sherman and M18, which was insufficient penetration, a tungsten carbide core (which at the time was rare and had to be imported mostly from China) was wrapped in a steel and aluminium shell, which is used to concentrate the kinetic energy of the round in a smaller area, this increased armour penetration. It was introduced in small numbers in September 1944, with most crew only having a few precious HVAP T-shot rounds per vehicle, if at all. I’ve read 2 or 3 per vehicle by early 1945, and initially only 1 round a month…. hoard them like fresh socks I think. But it did allow them to reliably penetrate a Tiger or Panther frontally at ranges of 1000 yards or less, and the crews only used them at great need.
For +1 point, per 2 teams (or part thereof), you gain AT13, this can be applied to all M10 and M18 Platoons, this can make it that little bit easier to penetrate a Panther or Tiger frontally, which in some situations you don’t have a choice but to do that. So go nuts… I will, your unit must have found a secret stash like mine did!!!
I hope this gives you a good idea of the different TD units in the Bulge American book, as well as the Command Cards that allow you lots of interesting upgrades. For me personally I am really looking forward to the M18 Company, but the M36 Company, with the mix of M10 and M36s allows a good mix and the command cards allow even more variation.
Just remember to use you Blitz and Shoot and Scoot roll when you can, you are paying for those skills and rules, so make use of them!
Battlefront LIVE BATTLE REPORT: Operation: Uranverein Finale – Bulge: Americans Vs British

We are now starting the fourth and final battle report. Luke and Ryan are going head to head once more on Twitch. Be sure to drop by and get a look at some of the new models in action on the table.
Click here to go to the Battlefront Miniatures Twitch Channel…
Upgrading your Shermans with the Command Cards
With John Lee
With each release I look forward to seeing what interesting or unique command cards accompany the book and I found several ways to upgrade, downgrade or transform the new Sherman (Lates) and Easy Eights. So, let’s look at some of the options available to us. Some of these cards can also be stacked together to give you some more interesting options.
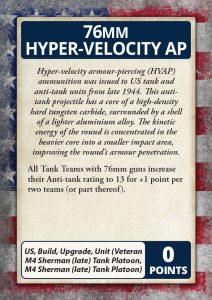
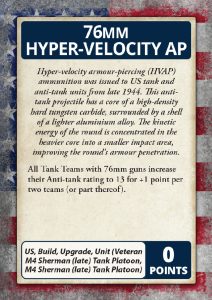 Let’s look at increasing the firepower of our 76mm tanks in the unit first with the “76mm Hyper-Velocity AP” Command Card. This card allows all teams to increase their AT from 12 to 13. This can make a big difference – especially as you get two shots on the move with stabiliser and can take on Tigers and Panthers from the front with a bit more certainty. The cost is +1pt per two teams (or part thereof). This card applies to a (Veteran M4 Sherman (late) Tank Platoon or M4 Sherman (late) Tank Platoon.
Next, we can look at how we can up armour our Shermans with three cards available. The first is “Uparmoured M4 Sherman (Late)” which allows you to upgrade the armour of your Sherman to FA8 SA5 TA1. Now our Shermans have almost as much front armour as a Tiger or Panther! Now, the additional weight reduces the cross rating to 4+. It costs +1pt per tank in the platoon and applies to any M4 Sherman (late) Tank Company HQ and any M4 Sherman (late) Tank Platoon).
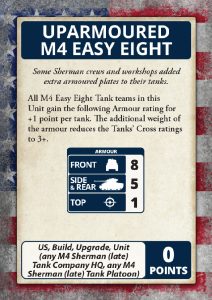 The next card is essentially the same but for East Eights titled “Uparmoured M4 Easy Eight”. They get the same buff, and their cross ratings reduce from 2+ to 3+ and costs the same +1pt per tank in the platoon. This card applies to any M4 Sherman (late) Tank Company HQ and any M4 Sherman (late) Tank Platoon.
The third card is “Sandbag Armour”, which again, costs +1pt per tank in the platoon. This card allows you a chance to save against those pesky infantry anti-tank weapons such as panzerfausts and panzershreks. Especially when you are trying to assault them off an objective! If a tank fails its armour save against one of these weapons, roll another die and on a 5+ the sandbag armour stops the shot otherwise resolve the hit as normal. Due to the additional weight of the armour, reduce all tanks dash speeds by 2”. This card applies to any tank unit.
As these cards increase the cost of your units, you have a couple of options to rein some of those costs back in. The first is called “M4 Sherman Tanks” and applies to any 75mm armed Shermans in your units. You can replace the late version M4A3 with the earlier M4A1 version for -1pt per tank. This applies to any M4 Sherman (late) Tank Company HQ, and any M4 Sherman (late) Tank Platoon.
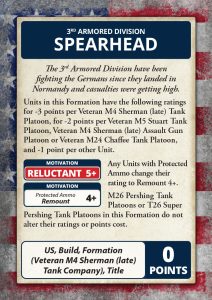 The second is called “3rd Armoured Division Spearhead” and is a title card meaning you cannot take any other title cards in your force. The advantage here is that you can deduct -3pts per Veteran M4 Sherman (late) Tank Platoon, -2pts per Veteran M5 Stuart Tank Platoon, Veteran M4 Sherman (late) Assault Gun Platoon or Veteran M24 Chaffee Tank Platoon, and -1 point per another Unit. The effect is that your motivation goes from Confident to Reluctant with 4+ remount. You cannot apply this to M26 Pershing Tank Platoons or T26 Super Pershing Tank Platoons in this Formation. This card only applies to those mentioned units in the Veteran M4 Sherman (late) Tank Company Formation.
I like to run 76mm armed Shermans and I can see myself up-armouring them to FA8 and sandbags with the HVAP AT13 upgrade. I would run these in the Veteran M4 Sherman (late) Tank Company Formation where I can also take a Super Pershing and Chaffee’s for speed and HE. To get some points back I will use the 3rd Armoured Division Spearhead Title Card. Here is how I might run a 105pt list using these command card upgrades:
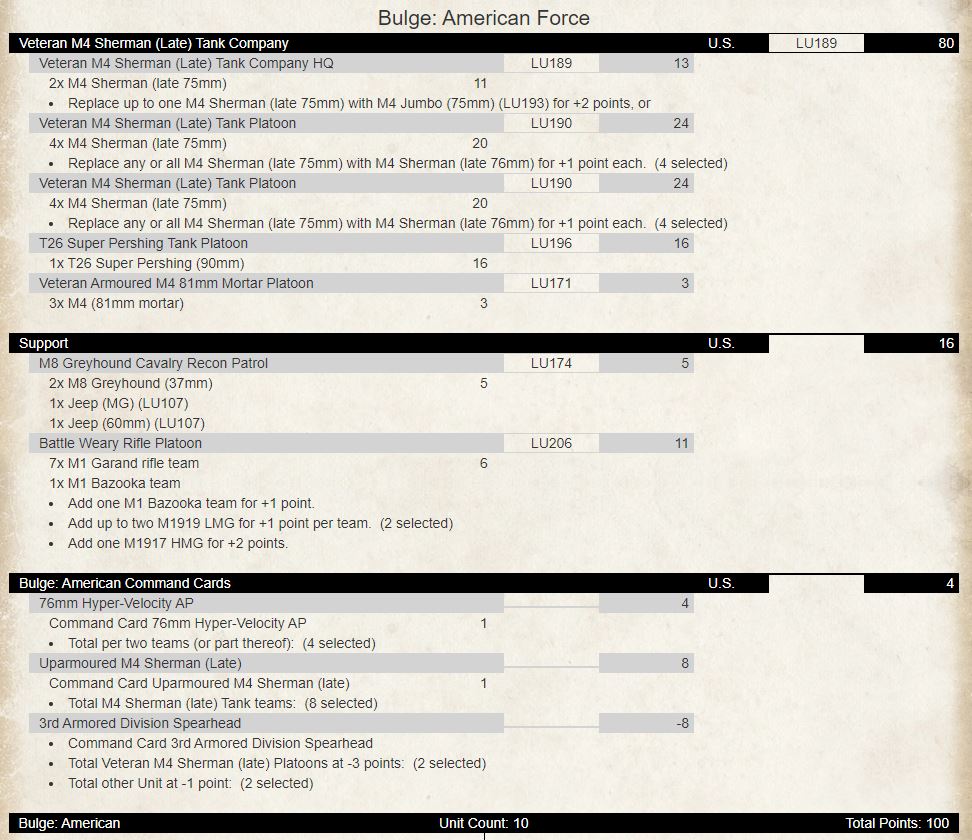
By using a combination of the above cards, we have managed to create a cool Sherman formation with a Super Pershing for sniping big enemy armour whilst your eight up-gunned and up-armoured 76mm AT13 Shermans are spearheaded into position with HQ Jumbo leading the way to bounce hits. The Armoured mortars to provide smoke and a template to pin infantry before the assault goes in and the rifle platoon to either support the attack or defend an objective.
I hope this gives you some food for thought around running Shermans and some interesting upgrades, and for the modellers amongst you, to add some custom sandbags or armour to your Shermans!
Bulge: American Previews
![]()
Bulge American Command Cards
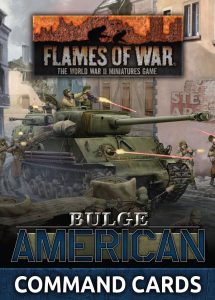 Contains 61 cards to enhance your force, field iconic warriors and customise your units.
Command Cards allow Flames Of War generals to field iconic warriors, build new types of units, field new types of equipment, enhance your commander’s capabilities, and bring new tactics and stratagems to the battlefield.
Order your Bulge: American Command Cards here…
Command Cards are entirely optional and can be added to your force in two ways. You can add them to your normal point cost, just as you would add a unit to your force, or you and your opponent can agree on a set amount of points that each may use just to add Command Cards to your lists.
Many Command Cards are hidden until they are used, so you’re never quite sure what your opponent’s battle plans are until they are revealed. While hidden, Command Cards do not affect their attached unit—a player must reveal them if they wish to gain the benefits of the card. Some Command Cards must be revealed at the start of the game; these cards are used to build your army and have the keyword ‘Build’.
Download a copy of the Command Card Rules here…
Check out the Command Card Q&A here…
The Bulge: American Command Card pack is a full set of Late War Command cards, like in Mid-War you can add these cards to your force for a point cost listed on the card. But there have been some changes to the Late War Command Cards as well; we have two new types of command cards, Titles and Equipment. Here is a list of what command cards come in the box.
The Bulge: American Command Card List
|
|
Command Card Previews
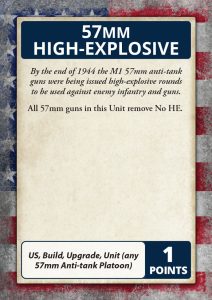
As you might expect, the Bulge: American pack has many of the same Command Cards as other nations like Softskin Transport, Lucky, etc. However, you will also find a great variety of cards for Warriors, Unit and Formation builds, as well as cards that enhance a particular part of your Forces capabilities. You will find plenty of flavourful cards as well to give your force a feel all of its own. As an example, there are a number of different build cards. Some do simple things like 57mm HIGH-EXPLOSIVE, which removes the No HE rule from a 57mm Anti-tank Platoon for 1 point for the Unit. The similar 76mm HYPER-VELOCITY AP card increases the Anti-tank rating of M4 Sherman 76mm guns to 13 (from 12) for +1 point per two teams (or part thereof).
 An example Unit Build card is the 10.5cm PROVISIONAL FIELD ARTILLERY. After the hard fighting of Normandy, the US Army is desperately short of 105mm ammunition. The solution was to field batteries of captured guns. With this card you can field a battery of captured German 10.5cm howitzers instead of your normal US 105mm howitzers. Other similar cards allow you to field captured German 8.8cm or Long 8.8cm guns instead.
There are a number of Formation Build cards. The 291st Engineer Combat Battalion cards are also title cards and allow you to field a Formation of engineers with the Damned Engineers! Card. This is combined with the Engineer Combat Platoon card to build your units. The other 291st Engineer Combat Battalion Title cards include ROADBLOCK which allows you to field Anti-tank Obstacles and Barbed Wire Entanglements in addition to Minefields in mission that allow you force to field Minefields, and BOOBY TRAPS which allows you to convert one Minefield into four Booby Traps which you deploy in the Ambush part of the Starting Step.
Other Formation Build cards included are M24 Chaffee Cavalry Tank Company, M5 Stuart Cavalry Tank Company, and Cavalry Recon Troop.

M4 Jumbo Assembly Guide
M24 Chaffee Assembly Guide
M4 Easy Eight Assembly Guide
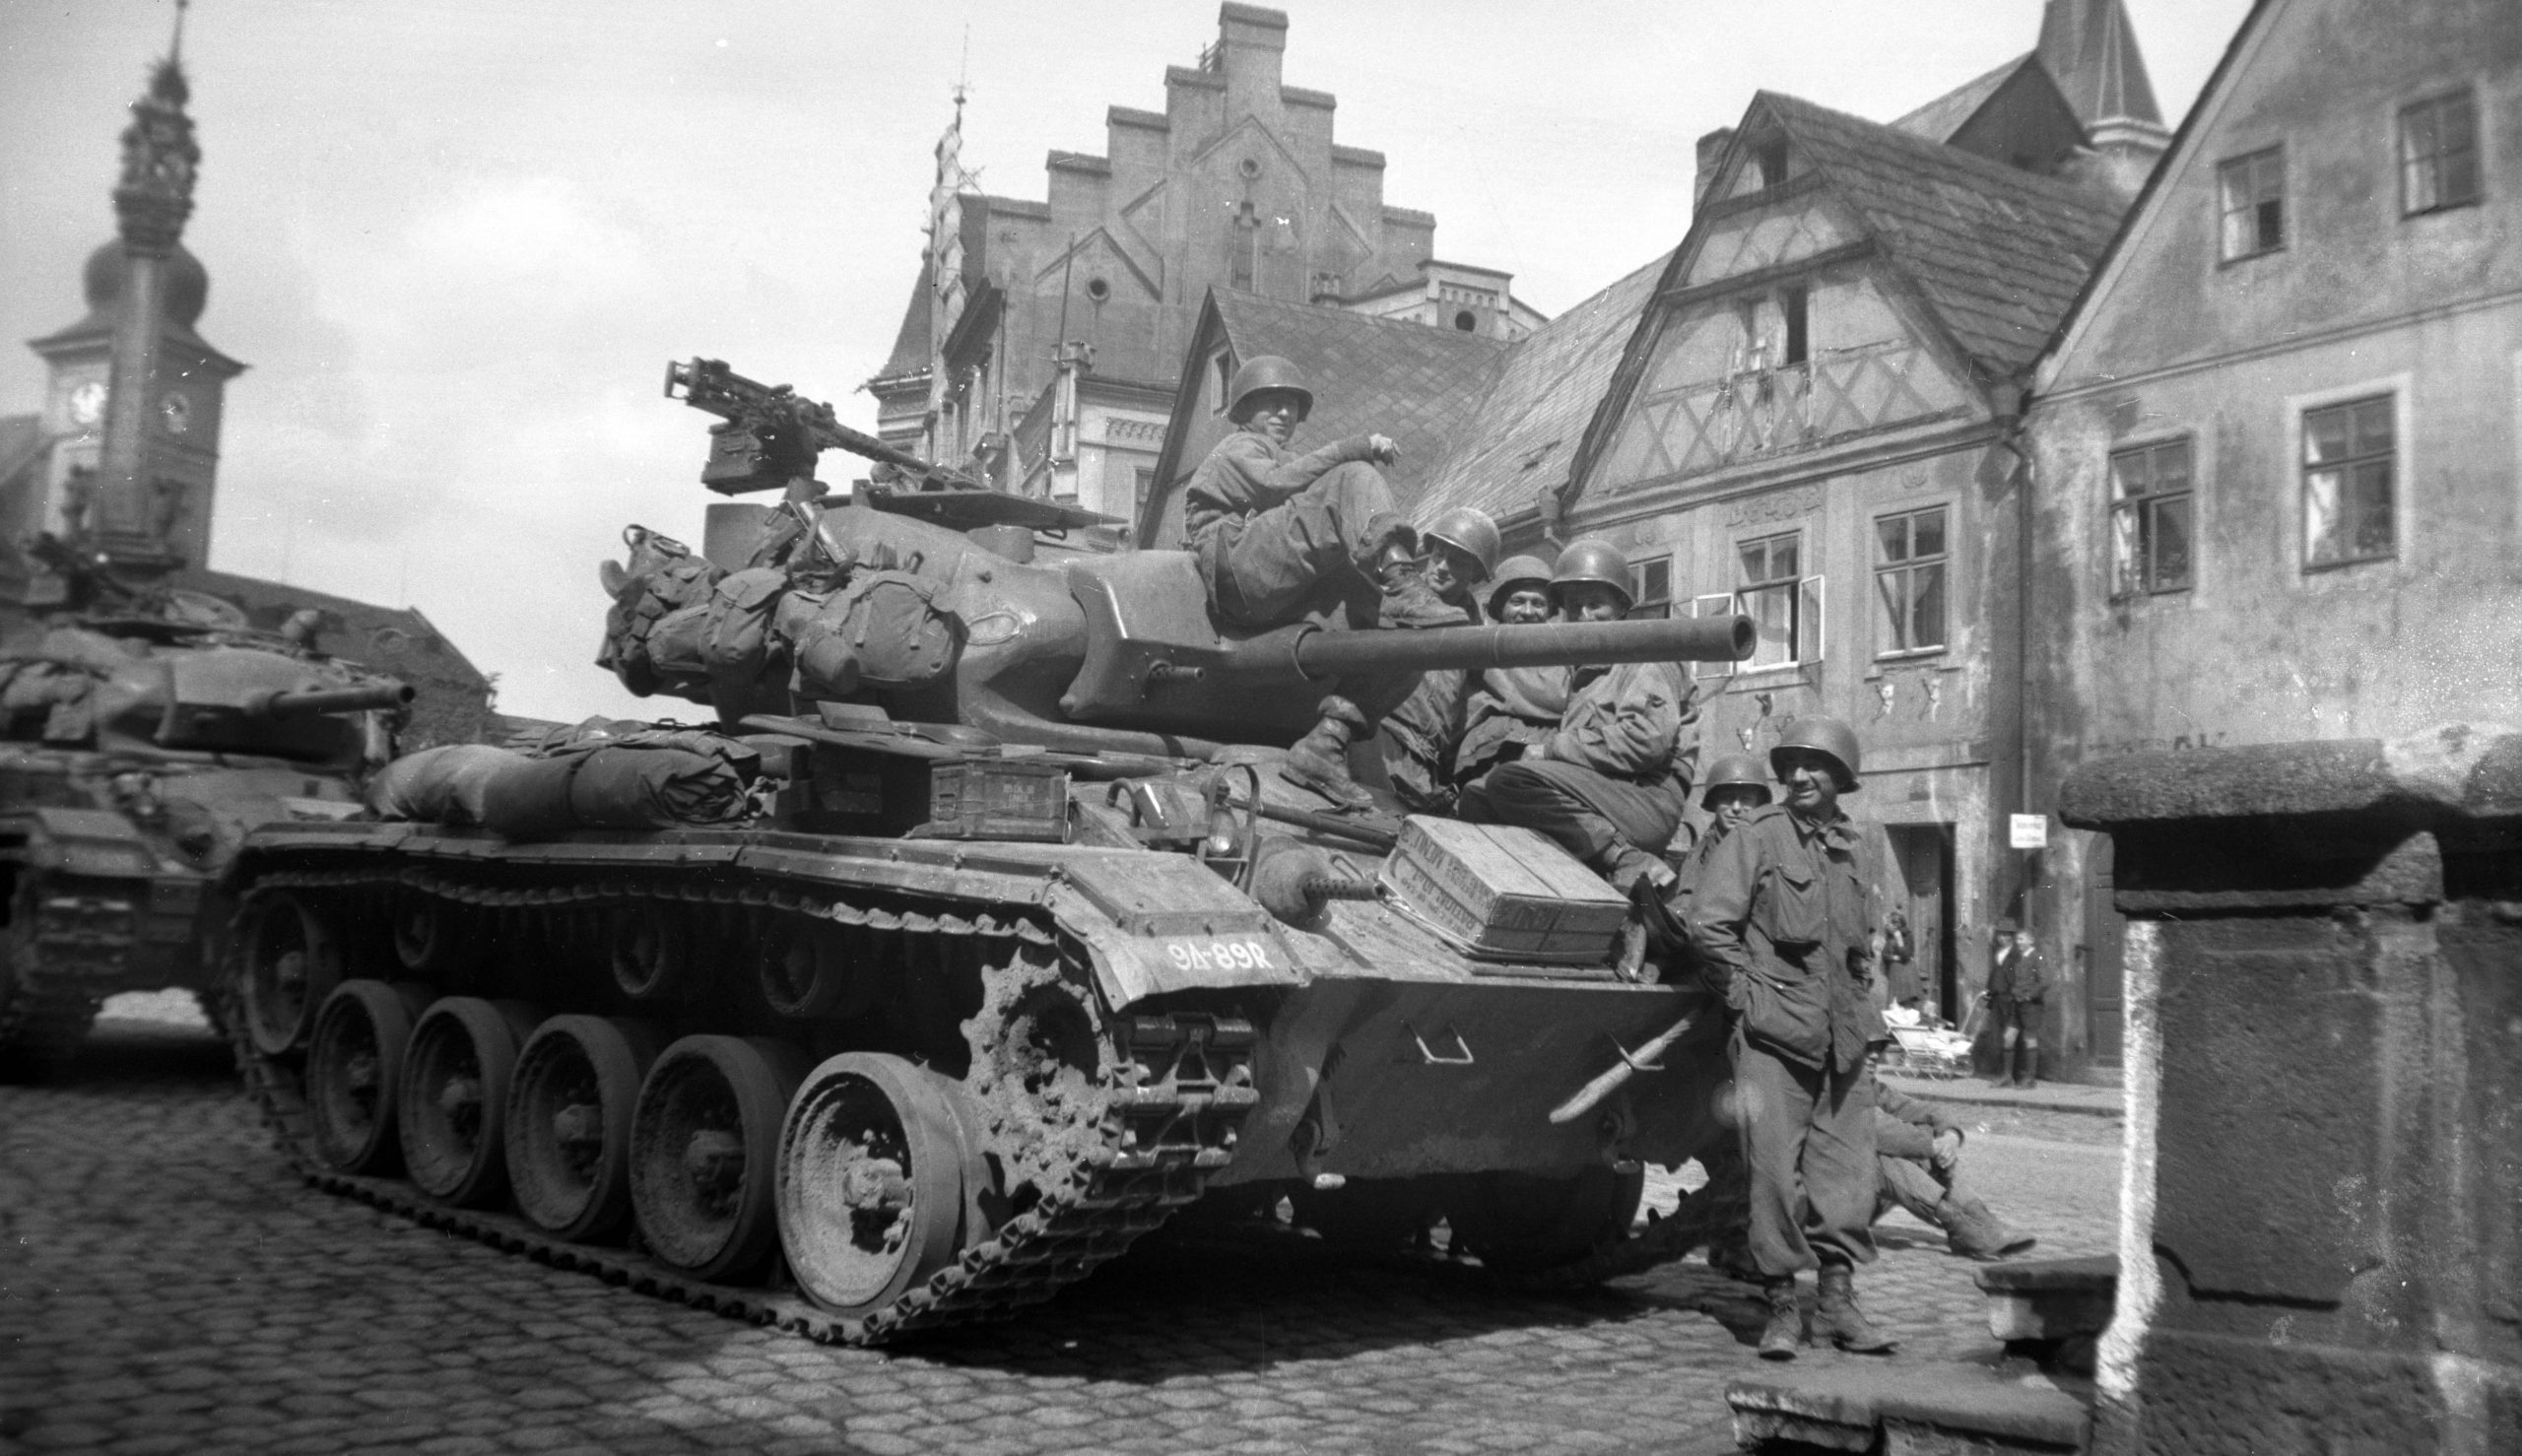
The Need For Speed! – The M24 Chaffee
 With Adam Brooker
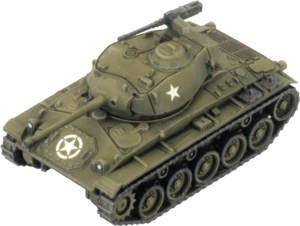
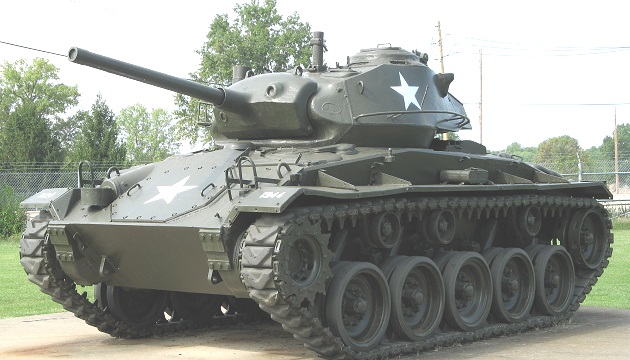
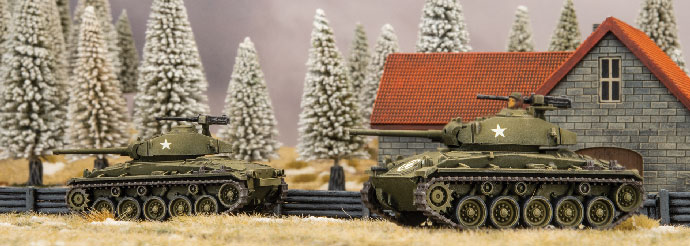
I do love me a light tank, and the M24 Chafee is in my opinion the best light tank of WW2, and also in Flames of War. It is fast, deadly and a blast to play! Playing against them, I can’t tell you how frustrating it is to try to pin down a few of these units if played well!
It was built as a replacement for the M5 Stuart, and in terms of firepower and speed, it is definitely a success, it also has a .50 cal machine gun on a pintle mount, for anti-aircraft and close defence. The 75mm gun on the Chaffee was a new lightweight design, which was a derivative of the 75mm gun used on the B-25H Mitchell bomber, it had the same ballistics as the 75mm M3 gun on the Sherman, but utilised a more thinly walled barrel and a more compact recoil mechanism, that allowed it to fir in the more compact Chaffee turret. It does have a slightly higher profile, so harder to hide behind foliage, but overall a much better tank that the M5 Stuart, and much liked by the crews.
Crews liked the improved off-road performance, and reliability, but most of all the 75mm gun, which was a significant upgrade from the 37mm gun on the M5 Stuart and allowed the crews a chance to fight back against superior German Tanks if they were forced to, and was also good for infantry support and blasting out anti-tank guns. But it should be noted, that by this time of the war its armour could only really protect it from small arms, and any German anti-tank gun, tank or hand-held anti-tank weapon would easily penetrate it. So they were still relying on their speed and skill to stay alive.
That speed was one of the main advantages of the Chaffee, and it got that speed from a twin V8 Cadillac motor that allowed it to get up to 56 km/h (36 mph) on roads, it was also half the weight of the M4 Sherman at 20 tonnes. Also it had excellent off-road performance, from its torsion bar suspension and 16-inch wide tracks, that gave it excellent ground pressure and traction to the Chaffee over soft ground. Combining that speed, gun and off-road performance make the Chaffee a great scout vehicle, if you then give that tank to experienced US Cavalry crew, you get a very potent scout tank indeed.
The first M24 Chaffee’s arrived in November 1944, but only 34 vehicles to the US 2nd Cavalry Group in France before the US pushed into Germany in December 1944, and into what turned into the Battle of the Bulge. Both Troop F of the 2nd Cavalry Reconnaissance Squadron, and Troop F of the 42nd Cavalry Reconnaissance Squadron, received17 Chaffee’s each, which were soon rushed to the southern sector of the Ardennes, to help push back the advancing German spearheads.
A US force to ‘accidentally’ be one of the first units to use the Chaffee in combat was the 740th Tank Battalion. Before the Ardenne Offensive they had been trialling tanks as part of the secret CDL Project (Canal Defence Light) – where tanks were mounted with large high powered searchlights, to illuminate the battlefield and blind the enemy. This project had been abandoned and the unit was in the process of returning to a normal tank battalion at the First Army Ordnance Depot at Aywaille, Belgium when the German offensive began. A tanker recalls on the 18th of December ‘things were getting bad in the breakthrough, and rapidly getting worse! A good many outfits had been completely overrun and Von Rundstedt was gaining momentum rapidly. ’. They were immediately tasked with moving towards the German spearhead and to help in the defence, but the 740th Battalion commander had to explain they had no tanks, only 3 Shermans were available to them and working at that time…. the Depot commander then issued orders for the nearby Ordnance Vehicle Park to issue the tankers with ‘anything the men could drive or shoot!’, so they quickly went to see what they could commandeer and repair.
They found only 24 Sherman tanks in the depot all in disrepair, and only 15 Shermans could be made operable by robbing parts from the others, also none had full ammo loads. They worked all night in getting them fit for battle, some vehicles did not even have radios, so they had to rely on hand signals for communications in combat later. They also got an assortment of Tank Destroyers (one M36 and some M10s), M8 Scott Assault guns and M7 Priests for the Assault gun platoon, seven M5 Stuarts and two M24 Chaffee’s that had been sent to the depot by accident.

The next day they moved out to help the beleaguered 119th Infantry Regiment at Stoumont, which had already lost one battalion and the other two were at half strength. The Battalion eventually took out three Panthers and stalled the German attack there, although there are no first-hand accounts of the Chaffee’s exploits there, this does seem to be one of the first times they were taken into combat, and just goes to show how surprised the allies were by the German push through the Ardenne.
Although they were a great new addition to the Allied arsenal, and widespread use started in December 1944, supply never kept up with demand, and many armoured divisions were still using mostly the older M3/M5 Stuarts, and some Armoured Divisions did not receive their Chaffee’s until after the wars end. Chaffee’s were even supplied to the British under the lend lease program with the famous 7th Armoured Division (Red Rats) reconnaissance squadrons being the first to receive them, later in the war the British 11th Armoured Division also used them in concert with the new British Comet tank, their excellent speed complimenting each other.
Overall the Chaffee was an excellent scout and light tank, and many countries used these vehicles well into the 60’s and 70’s, and the last country to use them was Uruguay used an upgraded variant from 1958 to 2019 with an impressive 61 years of service.
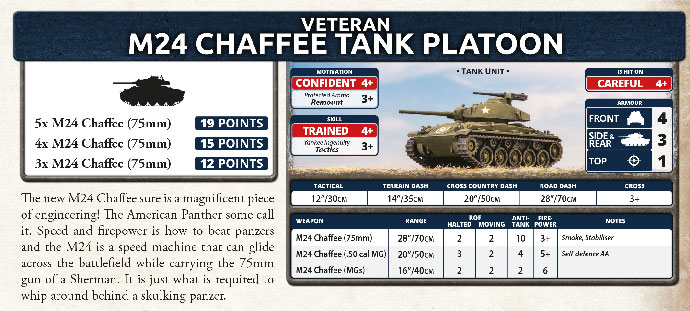
Well that is enough about the history of the Chaffee, let’s look at how it handles in game. The Chaffee has a front armour of 4, an upgrade on the 3 of the M5 Stuart, and the Tactical and Terrain Dash is the same, an exceptional 12” and 14” respectively. The Stuart still does have a slightly faster cross country dash of 24” compared to the 20” of the Chaffee, but it is still very fast, and the better gun and armour more than makes up for that. The Road Dash and Cross checks are the same, 28” and 3+ for both.
The stand out improvement is the 75mm main gun, with a range of 28”, AT 10 and 3+ firepower, this is significantly better than the old 37mm gun mounted on the M5 Stuart, and gives you a fair chance of knocking out Panzer IVs frontally and Panthers from the Flank, you may even be able to knock out a Tiger I with a lucky side shot.
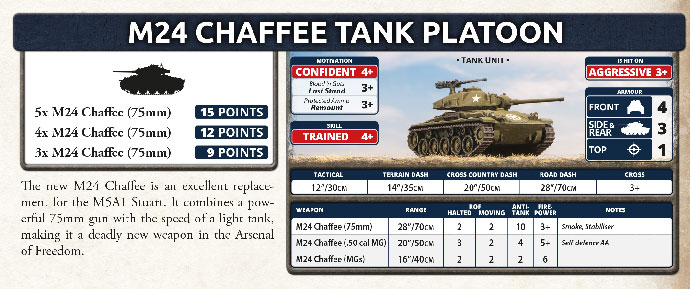
You have the option of two Formations for the M24 Chaffee, as well as most US Tank Companies can take them as an option in their Formations as well. The Veteran M24 Chaffee Tank Company and the regular M24 Chaffee Tank Company, both are identical in structure but the Chafee’s and M8 Scott’s of the Veteran Company have the Yankee Ingenuity rule (3+ Tactics) and a To Hit of 4+ so are a bit more expensive than the regular Chaffee’s.
The regular Chaffee’s are cheaper, and have the standard LW US Blood’ n Guts rule which gives an improved Last Stand of 3+, but pay for this with a To Hit of 3+ and a poorer Skill check value of 4+. So are less likely to pass the Blitz check they would need to make the most of their excellent mobility and great gun, and more likely to get hit, so need to make best use of range and concealment until they are ready to close in.
One thing to be conscious of for both the Veteran and Regular Chaffee units is that they do not have Scout or Spearhead rules, they are a light tank in game and not a true scout tank. So you will need to remember to bring a few of those scout units to make the most out of their mobility and the spearhead rule.
In fact sometimes it is better to not even present a target at all until it is to your benefit, rather than take losses in try to pull off unlikely kills at range. You still have the Stabilizer rule, which increases your ROF to 2 whilst moving, but adds +1 To Hit modifier to your rolls, but it does seem the doctrine of firing more projectiles in the air means more chances to hit is operating here…..
I still think it is better to fire from long range, and concealment is the best option if available, and using Blitz to get a ROF of 2 without a negative modifier is best. Unless its a Hail Mary, the stabilised firing is probably best used at close ranges and if you can get the flank or rear of the target, otherwise you may be unlikely to hit anything.
The best targets for the Chaffee are the support units, the half tracks, self propelled artillery, the AA vehicles, and other recon and scout units, if you can have the Chaffees out marauding through these, it allows your real tank killers to focus on the tanks, and not be tempted to take the easy kills and wasting their high AT shots. Only after you have got rid of those should you try to help taking out the big cats.
The Caffee can be great either as a full formation of them or as a support to your main formation, but try to remember they don’t have the armour to take much fire in return, and pretty much any German anti-tank weapon will punch holes in it… so use it more like you would a German Puma, take your opportunities while you can, but avoid return fire, as they will likely turn into piles of scrap.
The most fun I think would be the Veteran Chaffe Company, using your high skill to blitz and scoot and shoot, making the most of your mobility, gun and skills, but if you enjoy a challenge and want to play in expert mode, use the regular Chaffee Company, the trade off is you can take more toys with the cheaper regular formation, you just have to last long enough to make use of them.
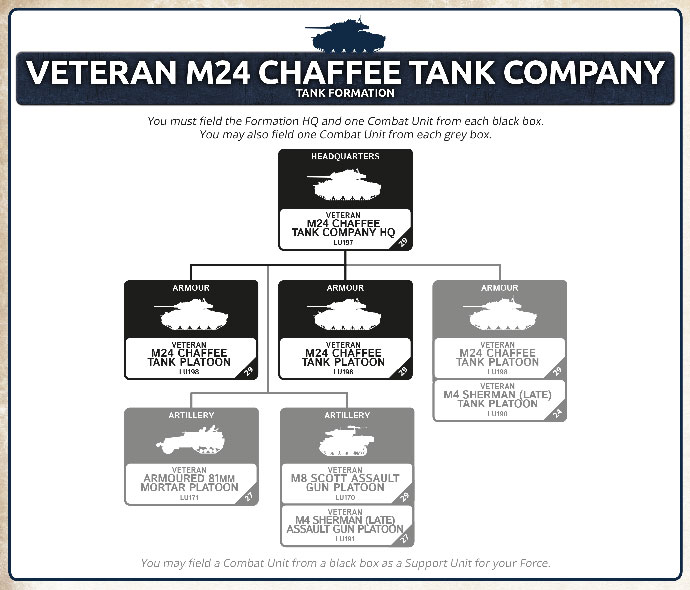
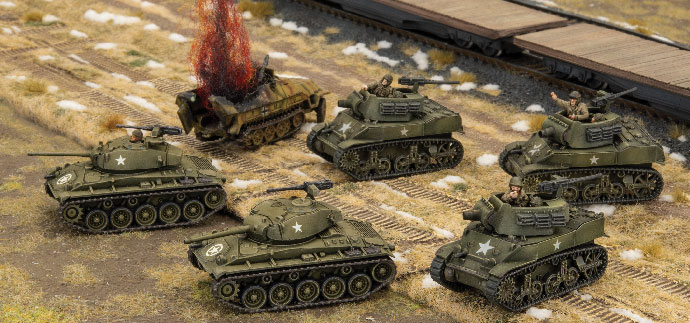
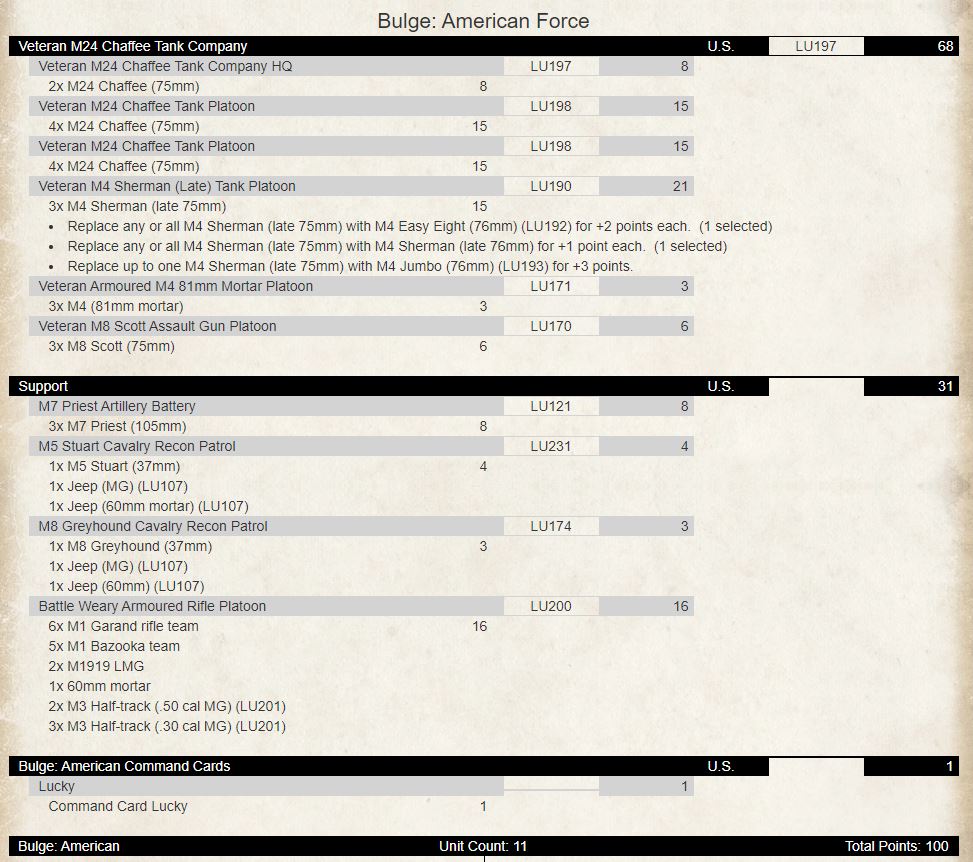
I have put together a force with the Veteran Company, making sure to take all the Formation units I could. The Veteran 81mm Mortars and M8 Scott Assault guns will be good for providing smoke and also pinning or taking out enemy anti-tank weapons, support weapons and artillery. I have 10 Chaffees in total, and three Shermans (including a Jumbo) to give me 76mm AT 12 firepower, they will occupy the enemy tanks from the front while the Chaffees work around the flanks. I have 3x M7 Priests to dig out any stubborn infantry, and a battleweary armoured rifle platoon to either hold one of my objectives or push forward and take an objective after it has been softened up.
Rounding it out with a Greyhound and Stuart Cav Recon platoons to give me Spearhead capability and to make the most of my mobility, and also just to extra harassing units. Then my obligatory LUCKY card for missions that require reserves (so to re-roll my reserves roll), or to keep for when I really need a roll to succeed. This list may find it hard going against a dug in infantry force, but if played well and thoughtfully should handle most games.
I think the Chaffee will make a great addition to any US Force and the new plastic Chaffee models look fantastic! I may have to swap out all my older metal ones for these beauties. Happy Gaming!