
When players think of the West German army they usually think of an elite force, with highly skilled infantry, good morale, and very modern vehicles. In Team Yankee v1 West Germany had the Leopard 2, the best tank in the game and now that we’re running v2 the Leopard 2A5 will dominate the field, West German infantry is second only to the Israelis but with better weapons, like the Milan.
This is reflected in the ability to only deploy small but effective units. Multiple formations are not common in NATO (with some exceptions like British recce or American HMMWV) but are also far rarer when talking about West German. When considering this you run the risk of being outnumbered by the enemy, especially in a blue vs red game.
Coming in at 33 points is a Leopard 2 Zug, which now isn’t the most expensive tank in the West German arsenal. Czechs and Syrians can deploy 33 T-55AM2s for the same amount, Iranians can deploy 24 T-62s, and East Germans can deploy 12 T-72Ms. Despite these tanks not being a threat for a Leopard 2 frontally, their number may allow them to flank the Front Armour 18 tank and easily destroy them.
If you are already a West German player you’ll know what I’m talking about, but playing expensive tanks that cost 17 points each, or the latest IFV like the Marder 2 may not be the best way to field West German forces and this where the M113 Panzergrenadier Kompanie really shines!

M113 Panzergrenadier Kompanie
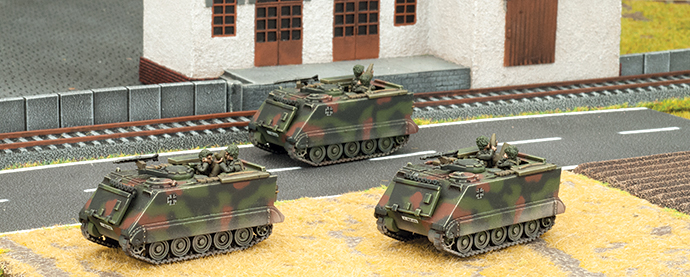
A Panzergrenadier battalion consists of three Panzergrenadier companies. Two of them are mounted in Marders 1 and one is mounted in M113s. The M113 equipped Zug are organized the same as Marder-equipped ones, but they have three Milan anti-tank missile systems instead of two. Unfortunately, they don’t have access to the Carl Gustav anti-tank team, but that shouldn’t be a problem.
M113s are equipped with a 7.62 machine gun so they’re good at pushing back assaulting infantry during the defensive fire stage, but cannot manage enemy armoured personnel carriers. They lack the great gun on the Marder 2 (ROF 3/3, AT11, FP 4+) or the good gun on the Marder 1 (ROF 3/2, AT 7, FP 5+) but they keep the platoon cheap. A full M113 Panzergrenadier Zug costs the same as a full Marder 1 Panzergrenadier Zug and is 33% cheaper than a Marder 2, and in both cases, you get an extra Milan team.
The M113 Panzergrenadier Kompanie is composed of the HQ and two compulsory slots. One must be a M113 Panzergrenadier Zug, while the other one can be another M113 Panzergrenadier Zug or a Leopard 1 Panzer Zug. There is also another slot that is not compulsory, for another M113 Panzergrenadier Zug. As expected of a West German formation other slots give core units all the support required. There are two reconnaissance slots for Luchs armoured cars, which are the perfect fit to provide some cheap spearhead movement costing only 2 points for two vehicles.
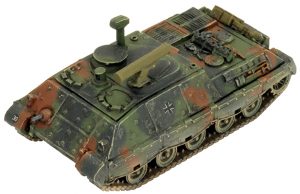
Artillery is an important part of every war and the M113 Panzermorser is a definite must-have with its low cost and ability to shoot smoke bombardment. Adding an additional 6 armoured mortars should be enough to provide you with the necessary support, however, if you want higher quality you can always look at the M109G as an alternate option. It’s more expensive but is also more effective. Unfortunately, the M113 Panzergrenadier Kompanie only has access to the American version of the M109 instead of the newer M109A3G, but West German players can find all the support needed inside the formation anyway.
 Aircraft are usually a great threat for elite forces with their attacks being lethal against expensive tanks. Because of this having an anti-aircraft element is essential in every World War III list, particularly in a West German one. Even though this isn’t a traditional West German list, including anti-aircraft is important, try adding 4 Gepards since they’re also extremely effective against IFVs. Last but not least we have more AT21 because sometimes 9 Milan anti-tank teams are simply not enough. If you are looking for an alternate option try the Jaguar. They’re an interesting choice and thanks to the Forward Defense rule they can be deployed in addition to a normal tank platoon with a front armour of 4+.
This is my M113 Panzergrenadier formation:
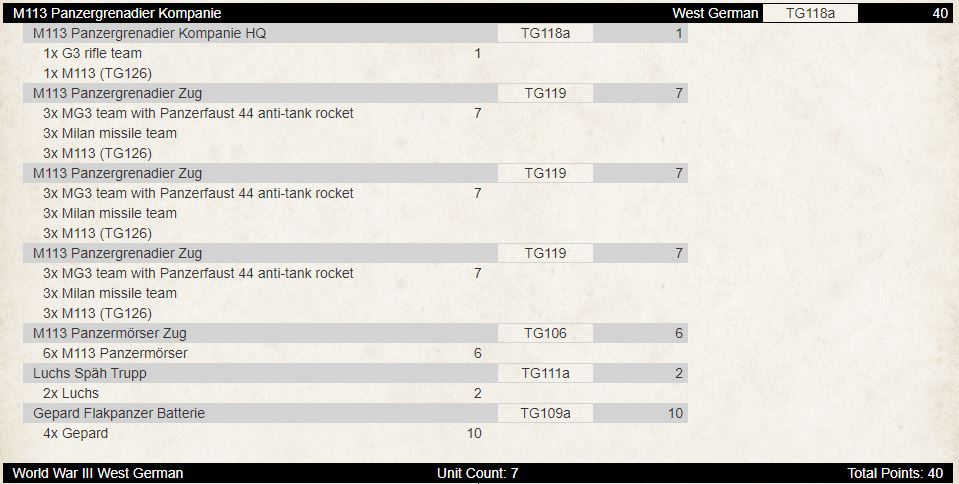
This is a great base for a West German Formation, consisting of three M113 Panzergrenadier Zug with 9 Milan anti-tank teams. Don’t focus only on Milan mind you, keep in mind we are talking about three units and that means you can occupy more ground by deploying them from different points. For example, take the Manoeuvre stance where some units have to stay and others have to move, you have recon for the Spearhead movement. Anti-aircraft or anti-IFV shots are provided by Gepards while the M113 Panzermorser platoon gives artillery or smoke support all for just 40 points. That means you still have more than 50% of your points for the rest of the force. Nice for a West German force, don’t you think? The rest is up to you, you could also deploy 3 Leopard 2s or 2 Leopard 2A5s if you really miss 3rd generation Main Battle Tanks, but this isn’t something I would recommend.
Leopard 1 Panzer Kompanie
Let’s look at another second-line formation with the German-made tank after World War II: the Leopard 1. These days there are many Main Battle Tanks roaming the World War III battlefields, however, this older tank can still be a threat for many WARPAC tanks. That’s the reason why the Bundeswehr didn’t retire them from service.
A Panzerdivision was made up of three brigades. Two of these brigades were equipped with Leopard 2 main battle tanks while the third brigade was a panzergrenadier brigade equipped with Leopard 1 tanks. They were to be the second line of defence after the Leopard 2s had engaged enemies and were on the retreat.
In the game the Leopard I is a lightly armoured tank. Its front armour is only 9, which is not enough to block a main battle tank’s shots. The good news is that every shot from an anti-tank over 17 will kill you without any hope of survival. Why is it good news? Well, if your opponent is shooting at your Leopard 1s with an anti-tank of 21 or 22, then their tanks definitely cost more points.
That means your opponent is investing many points into destroying just a few of your tanks. Because Leopard 1s are hit on 4+, statistically only 50% of shots should connect, (33% if you are maneuvering carefully using some concealment) meaning your maneuverability is your best defence. The side armour is quite poor at a value of 5, but the Leopard 1 also does benefit from Bazooka skirts which can provide a little bit of protection but won’t stop an assault from enemy infantry.
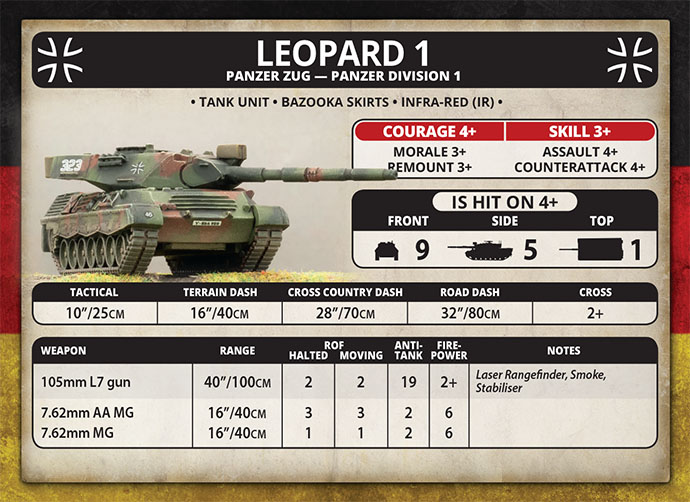
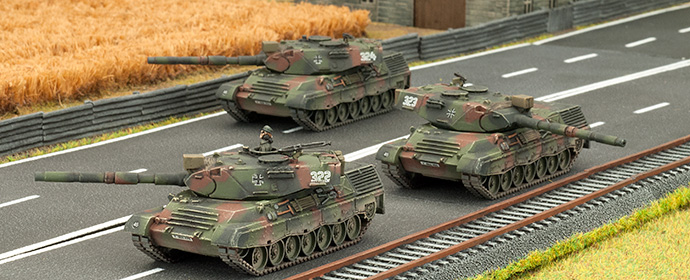
The third armour value is the top armour and is lower than the standard at just 1. This doesn’t make a great difference in close combat but will against artillery. Keeping your Leopard 1 moving and close to terrain should help with this problem. By now you’ll know not to trust the Leopard 1 armour, just try not to get hit! Its saving grace is the 105mm L7 gun with a range of 40” it can hit a target before the target has an opportunity to fire back. In fact, the Leopard 1s ROF is the same halted and moving, giving you the added benefit of moving out fast and getting off the first shot with anti-tank 19! This will be a real threat for the tanks of the WARPAC that usually put West Germany in trouble. A front Armour of 14-15 won’t offer much protection against this gun, so deploying a larger number of tanks is recommended. For less than 10 points you can deploy 3 Leopard 1s and with a small extra point spend you can have 4 tanks deployed. Being able to deploy a four-tank platoon is quite an incredible feat for West Germany.
The Leopard 1 Panzer Kompanie must be consist of an HQ (that can be composed of one or two tanks) and one Leopard 1 Panzer Zug. The second compulsory platoon can be another Leopard 1 Panzer Zug, a Marder 1 Panzergrenadier Zug or a M113 Panzergrenadier Zug. Usually, if you need an infantry platoon in the formation, I suggest the M113 Panzergrenadier Zug as it adds more anti-tank 21 to the force. You can also add another Leopard 1 Panzer Zug to bring more tanks to the table. The rest of the formation choice is the same as the M113 Panzergrenadier Zug we discussed before as both these formations are in the same brigade
This an example of a Leopard 1 formation:

With 4 Leopard 1s per Zug, managing a tank swarm should be easy since you shoot at least 28 shots a turn. Anti-aircraft (and as we know anti-IFV) fire is provided by Gepards while high-quality artillery support is guaranteed by M109. Depending on the force you should have enough points left for support to deploy what the formation lacks. High anti-tank support is heavily recommended with an infantry platoon. An M113 Panzergrenadier Zug with three Milan missiles will be the perfect addition, adding both infantry team and anti-tank support for cheap!
To properly finish this article I’d like to share the new version of my old West German list:
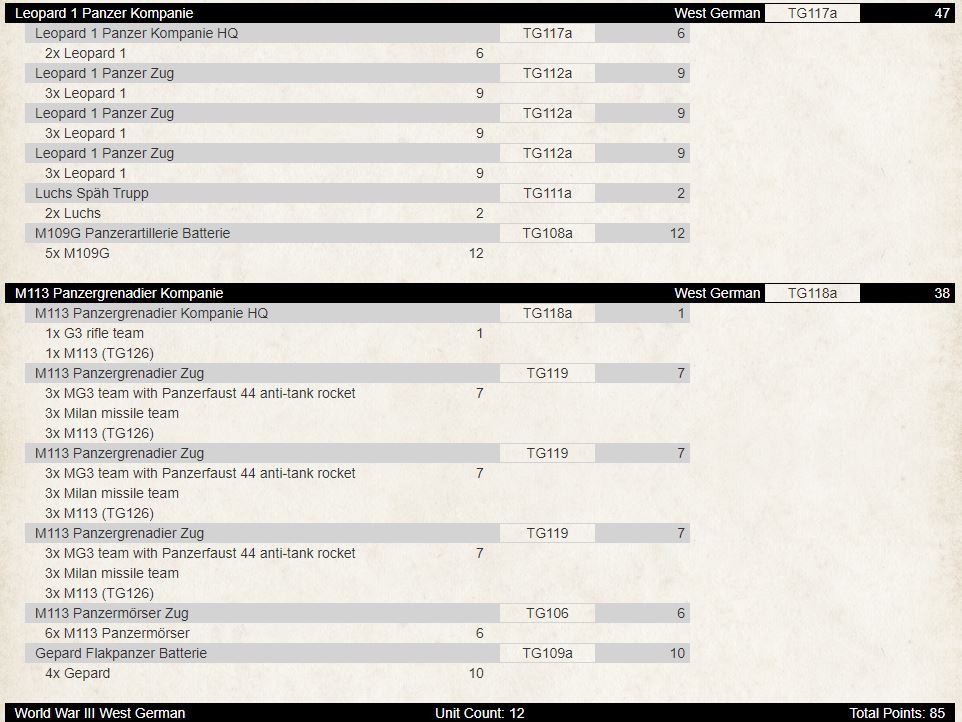
As I’m sure you notice I have used more or less the same base I used on the base formations. The most important thing is to balance the support units between the formation. Remember that Leopard 1s are quite easy to destroy (at least if you are able to hit them!) so giving this formation some extra units should allow it to survive until the end of the match.