
With Joe Saunders
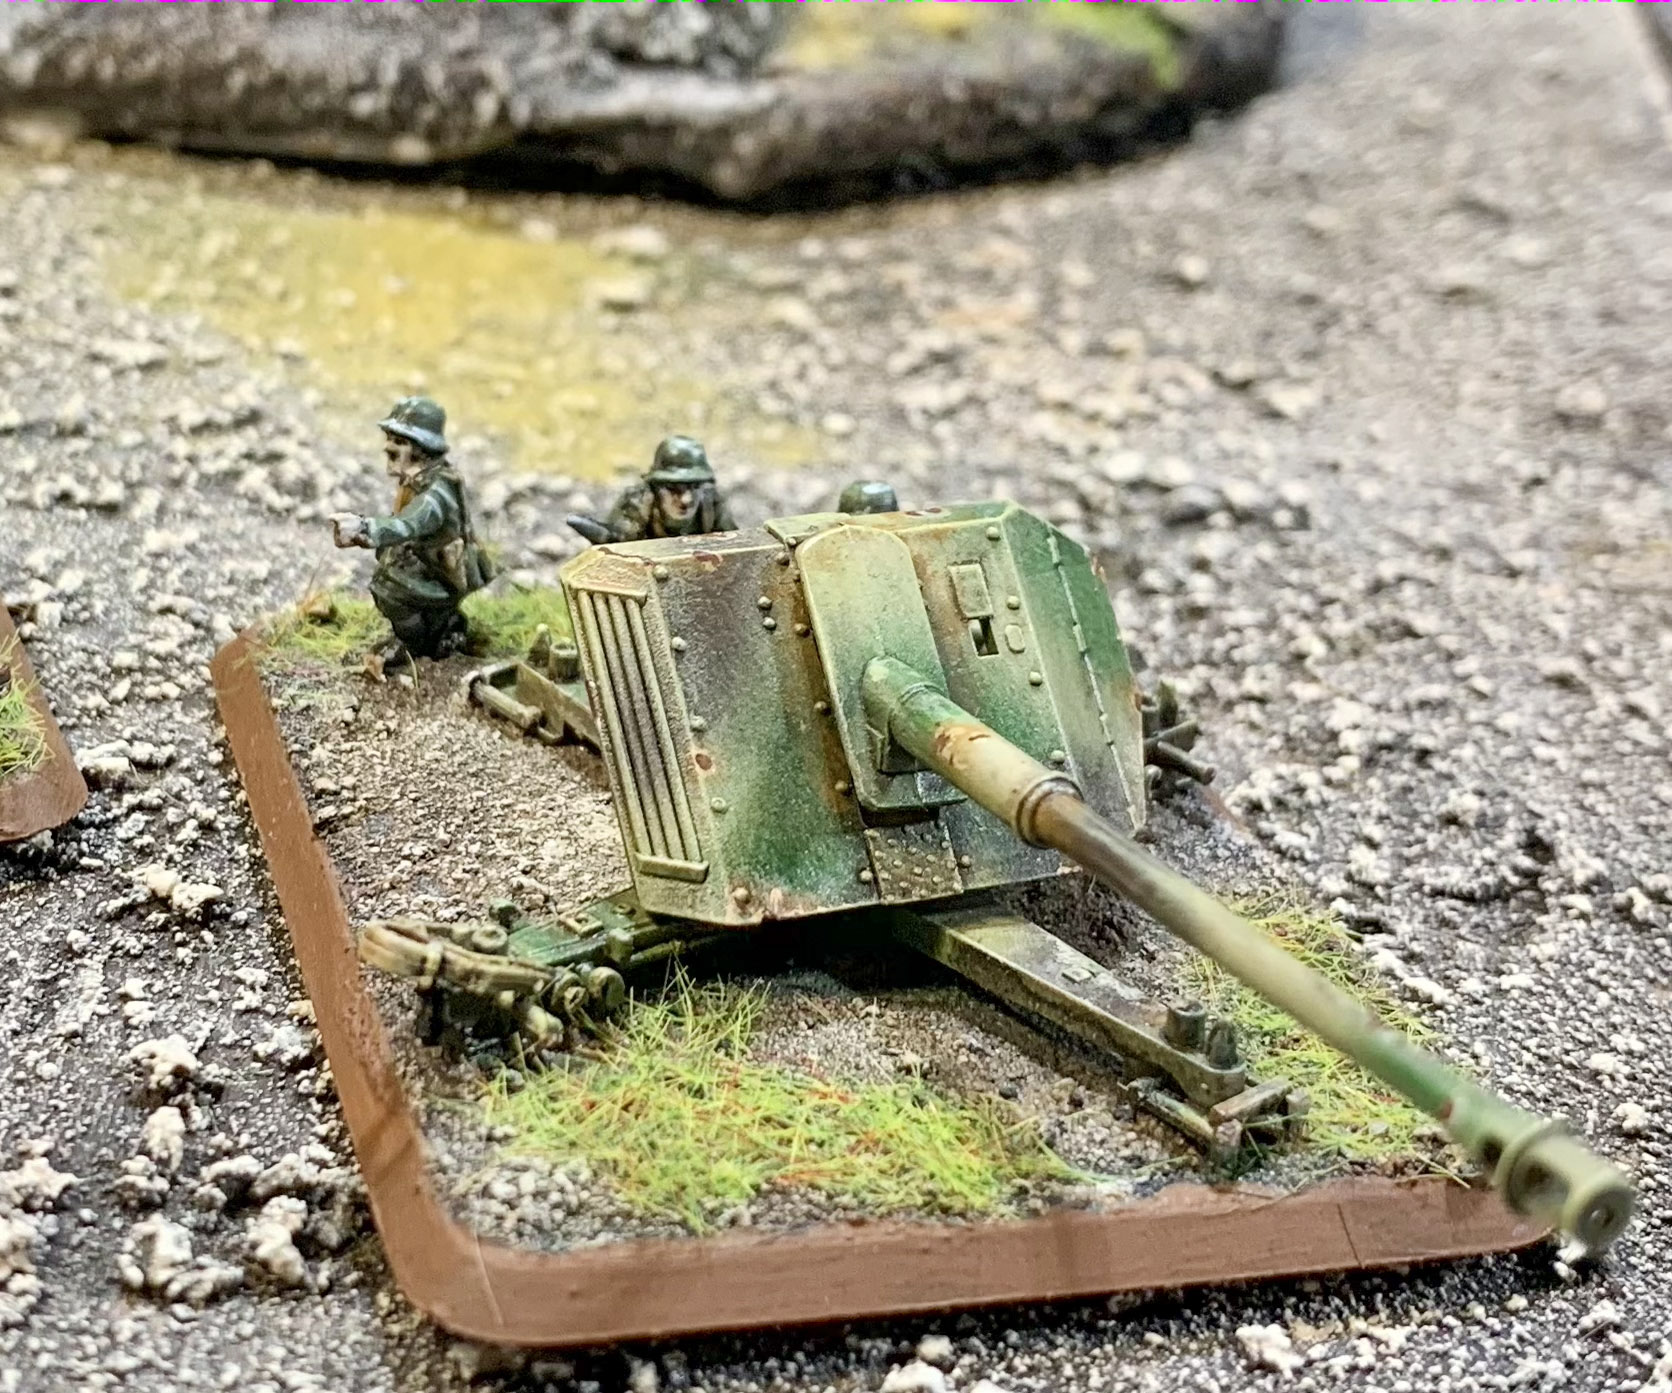
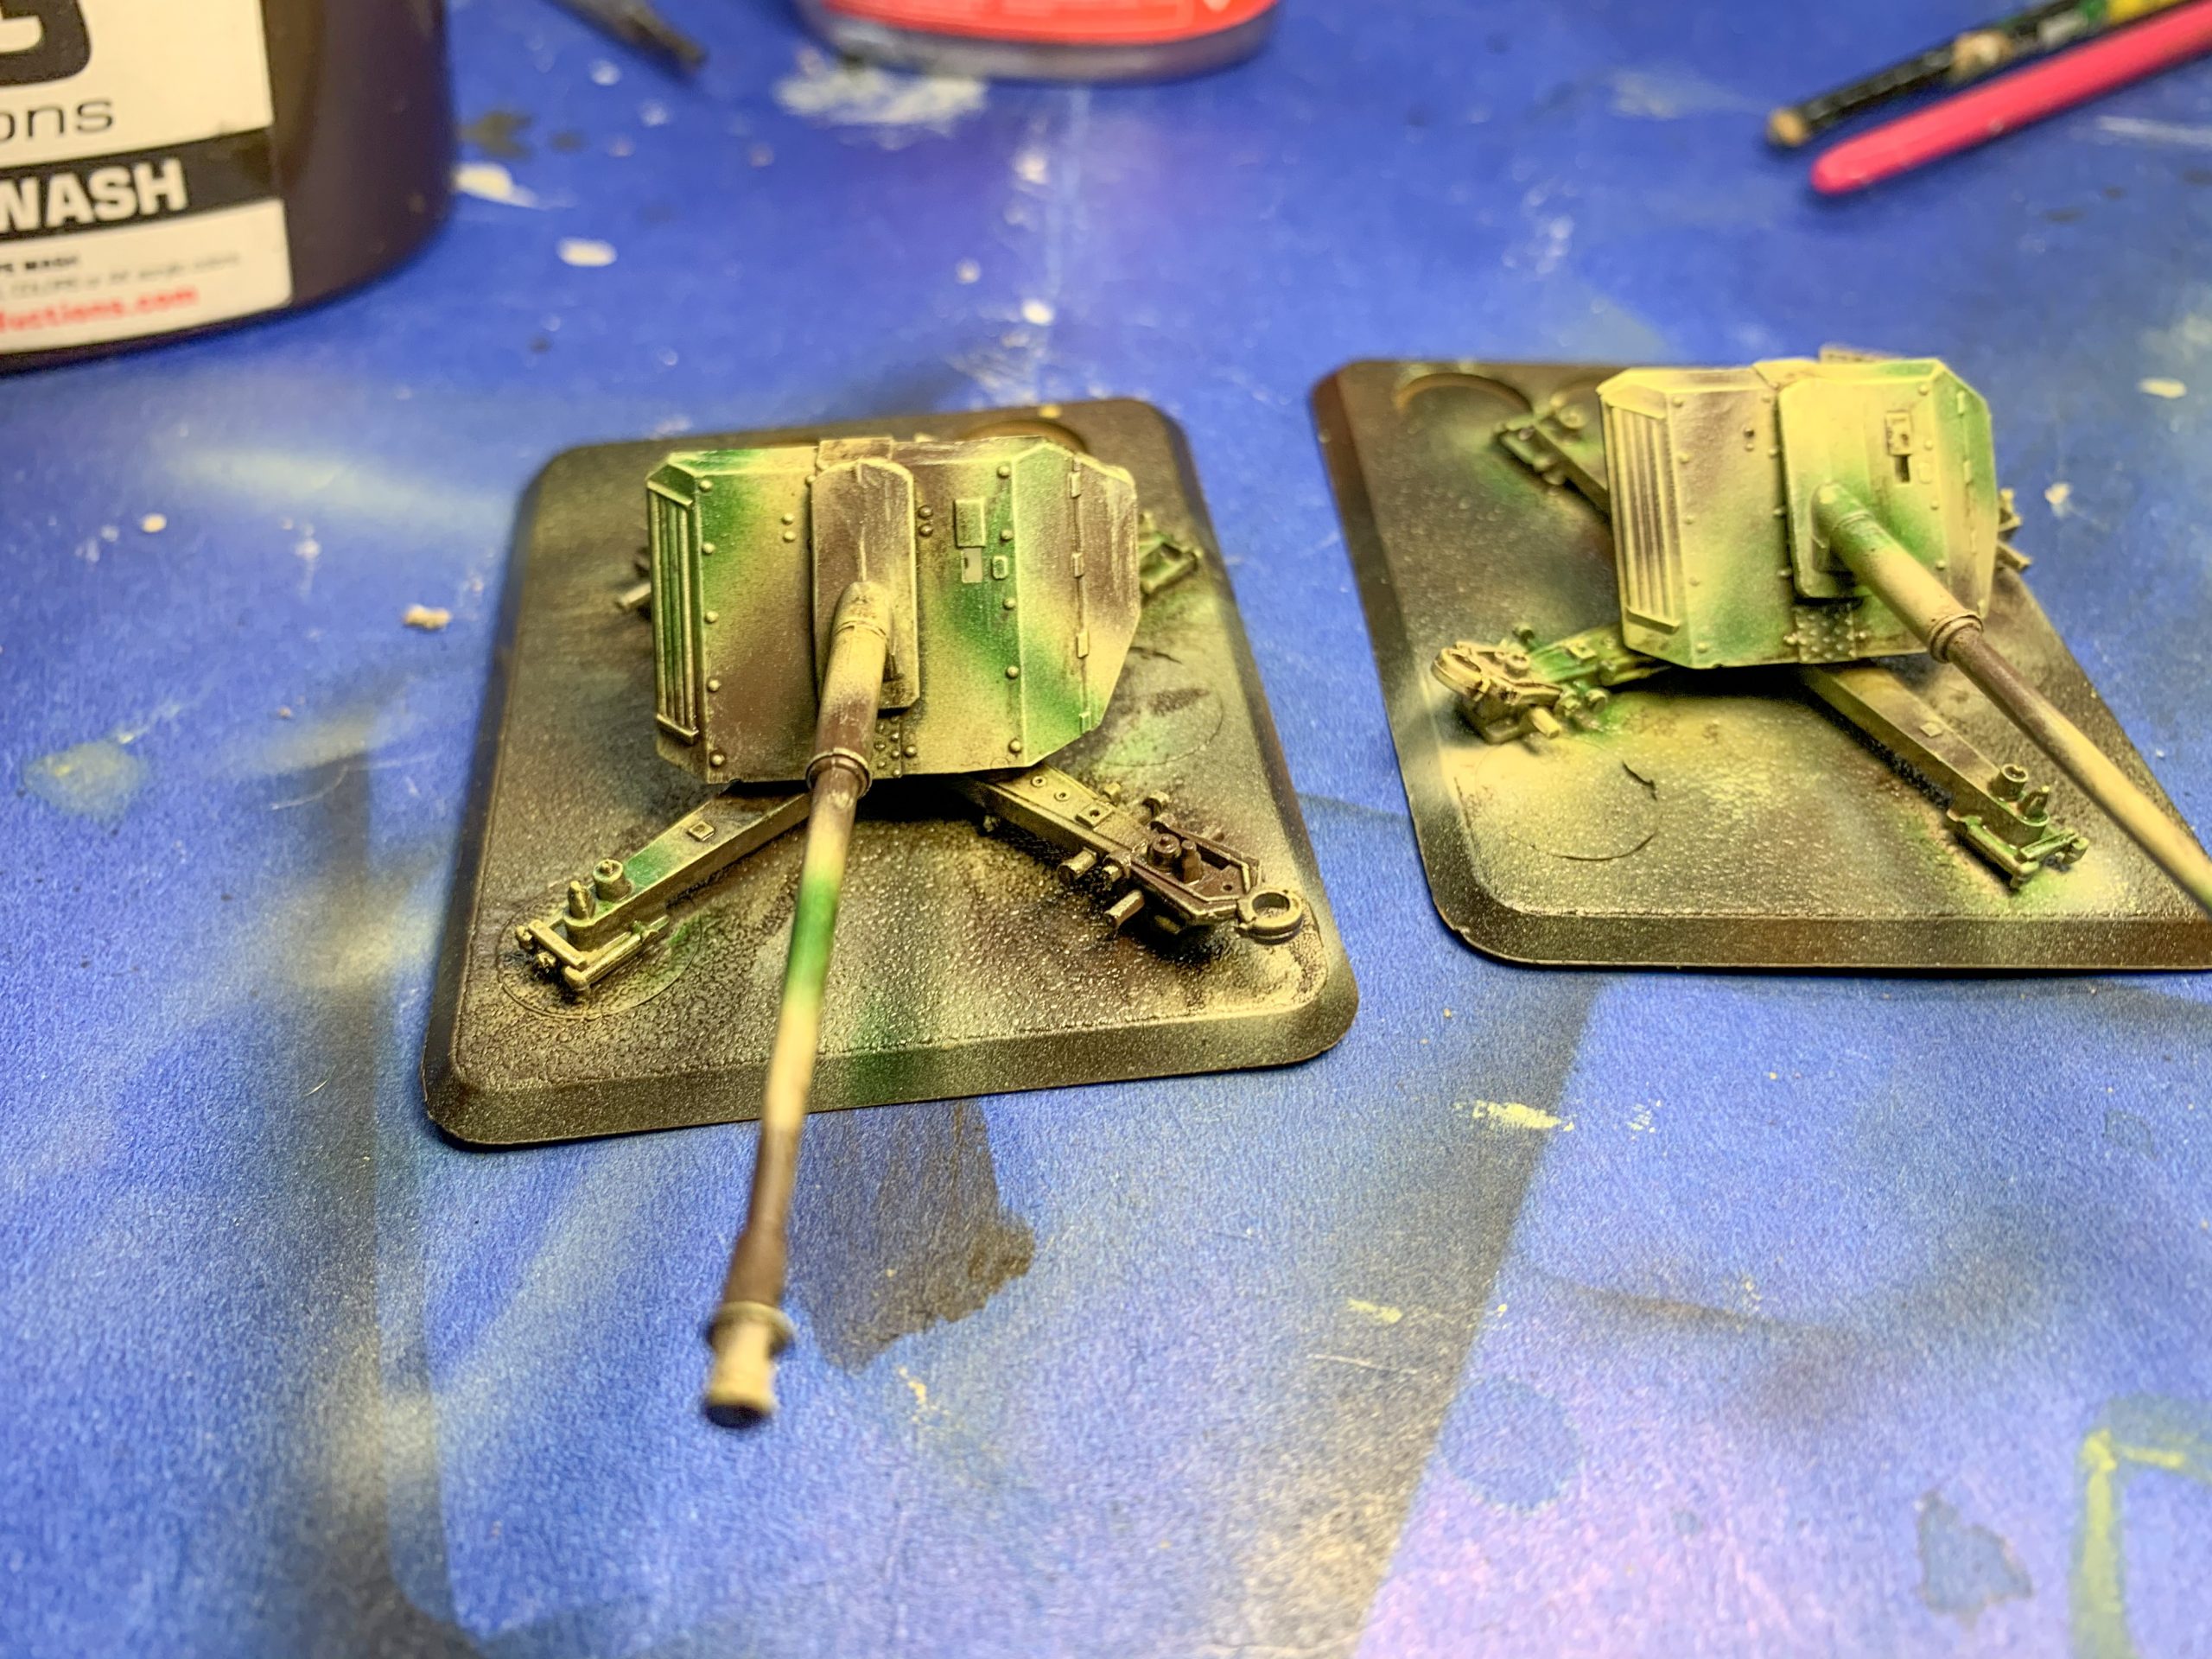
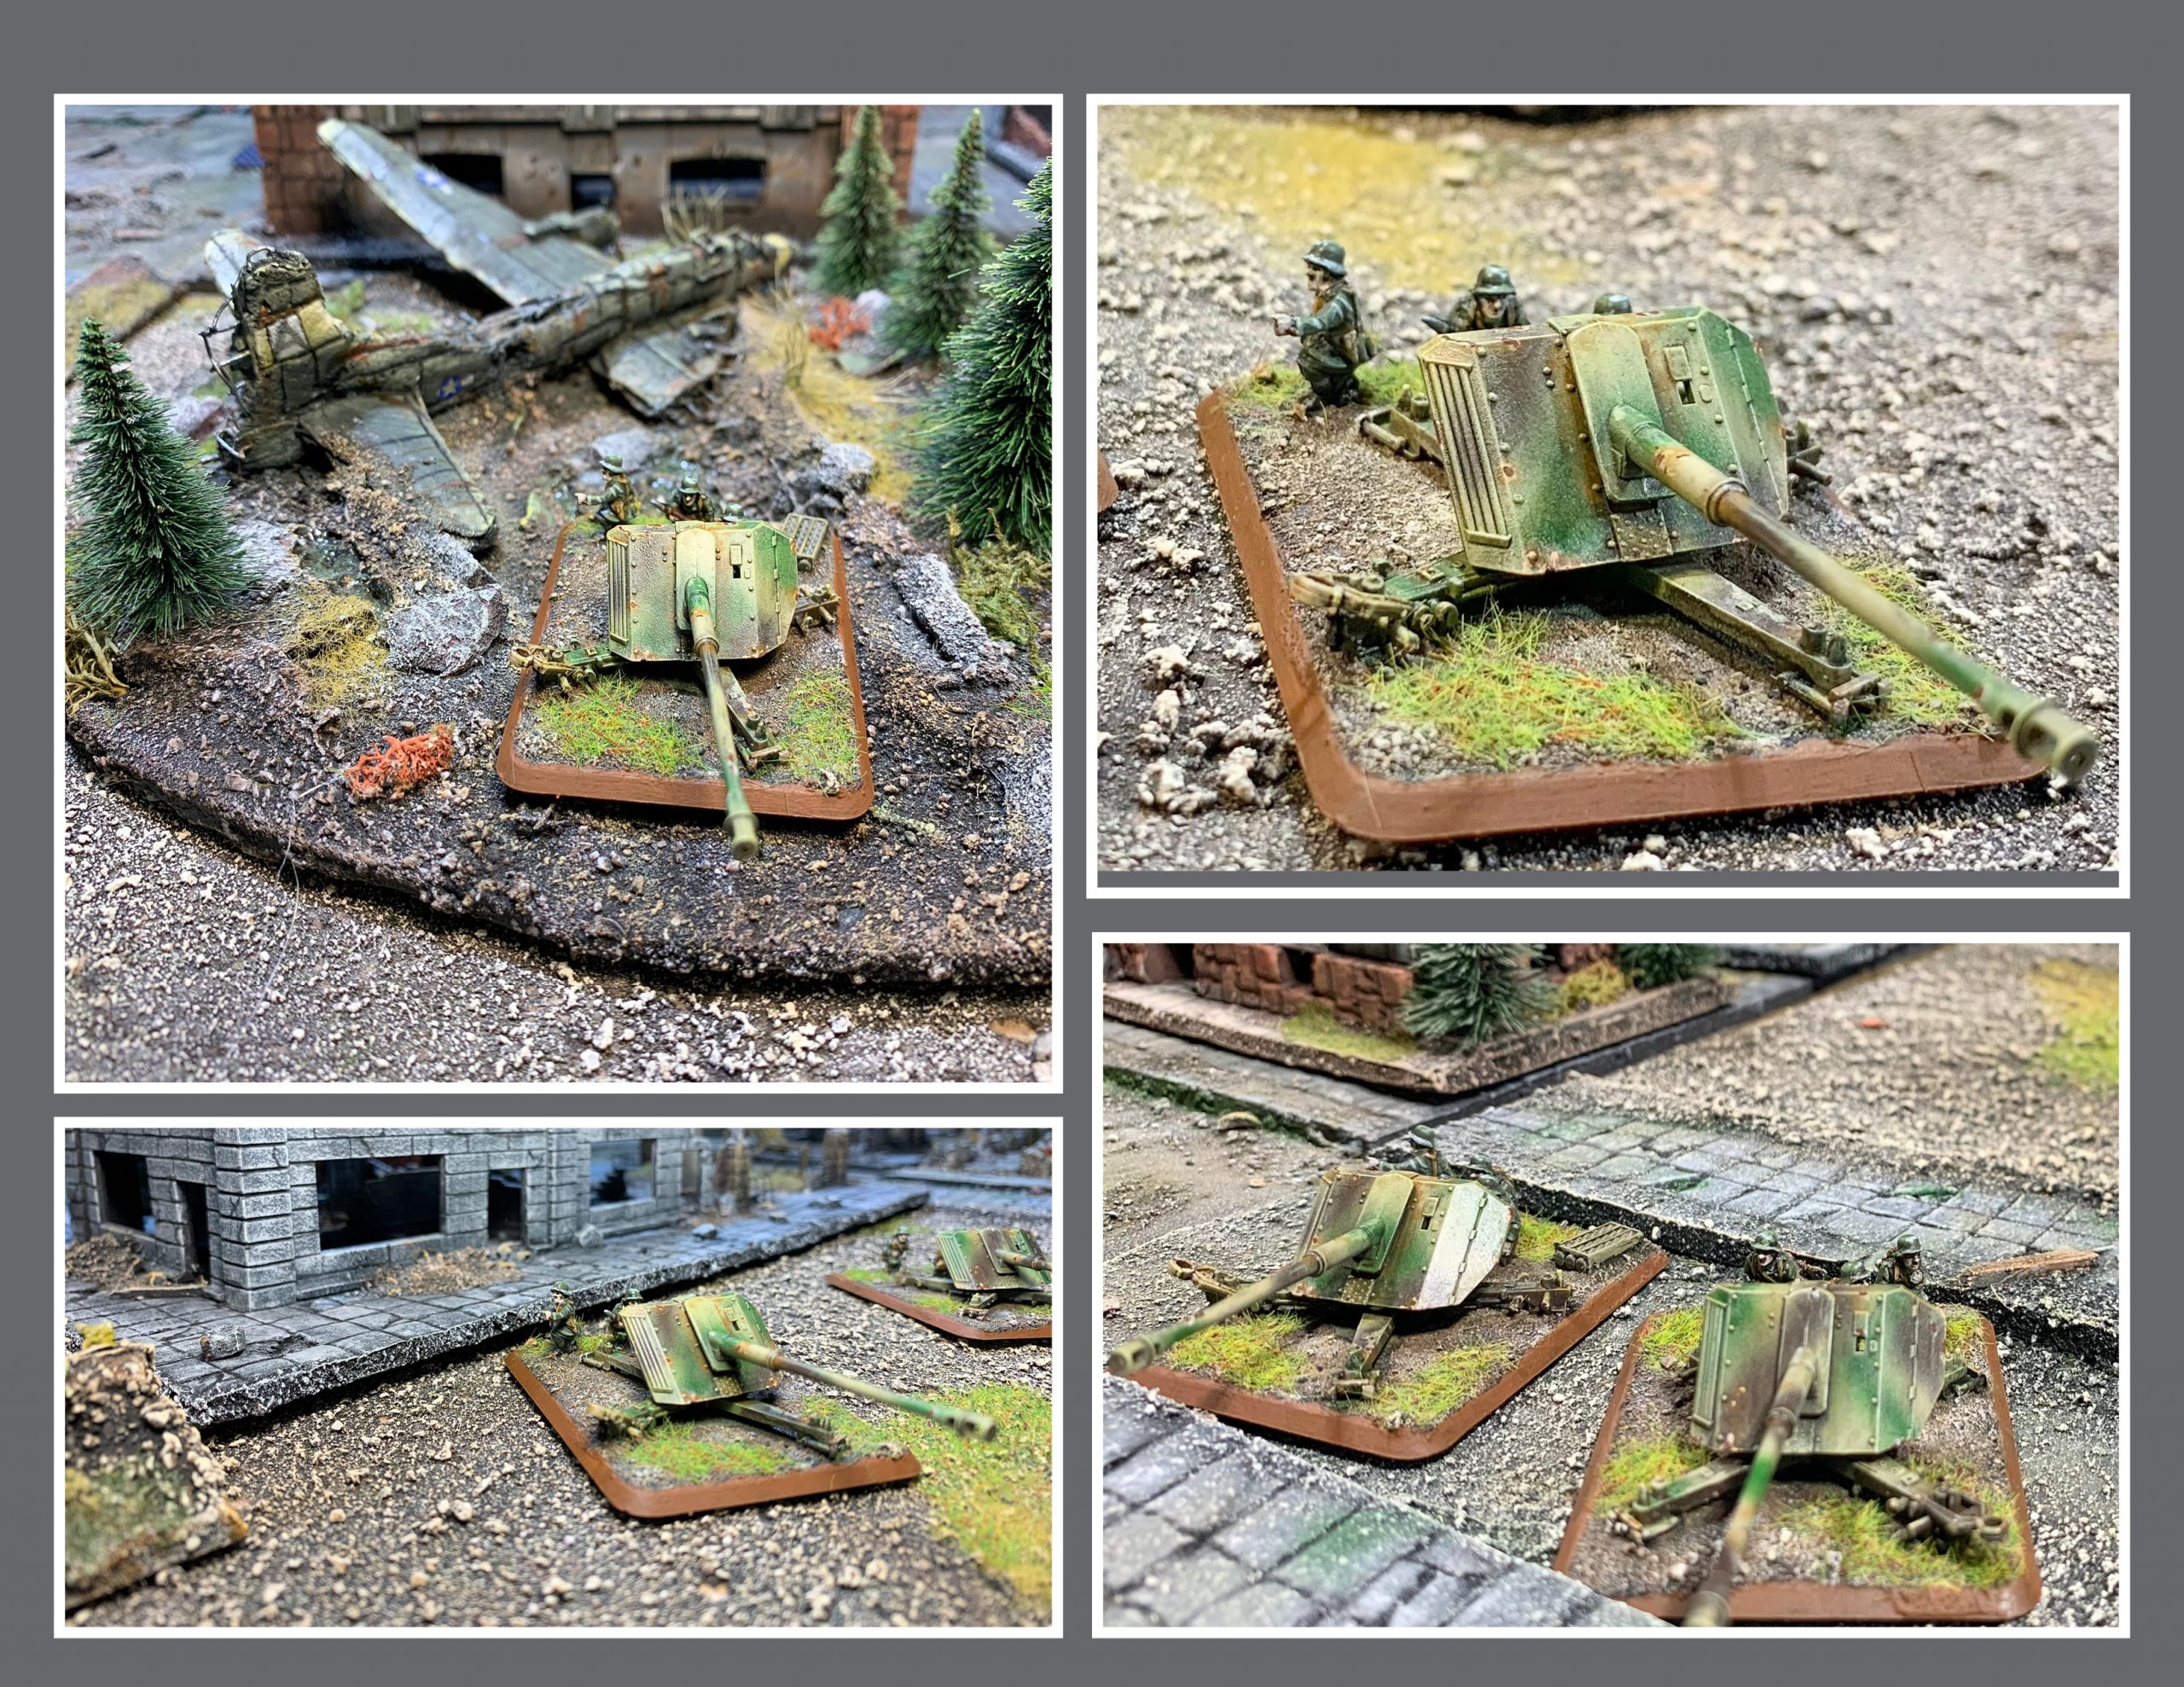
With the launch of the new book Bagration: German I decided it was time to update my Axis colour schemes to something suitable for the Late War time period. I also decided that it would be appropriate to start with some PaK 43s, since the Soviets are currently bringing a lot of heavy armour to the game. I figured the Late War 88 punching out 2 AT 17 shots a turn would be a good place to start and an easy way to show my opponents that the German army is not out of the fight yet.
To come up with this paint scheme I tested it a few times on some spare models until I felt I had it right. Then I recorded the process and colours in a notebook I keep at my painting desk. You should always keep a record of your paint schemes so you can go back and reproduce them at a later date. I had to learn this the hard way. (I have no clue how I got my D-Day American force looking the way it does and every new unit I add is just a little off because I failed to write the details down!)
Materials:
Before any painting project, I gather the necessary materials and ensure I have them in proper quantity. (Nothing is as frustrating as running out of paint halfway through a project!). This is what I used for this project:
| Airbrush & Compressor | Vallejo Model Air Black Primer | Game Colour Earth Brown |
| Airbrush Thinner | Vallejo Model Air DK Yellow Primer | Vallejo Dark Sea Grey |
| Paintbrushes (All Sizes) | Earth Tone Acrylic Paints | Game Colour Wolf Grey |
| Mig Enamel Thinner | Vallejo Model Air: Ivory Sand | Vallejo Field Grey |
| Testors Rust Wash | Vallejo Model Air: Armour Brown | Vallejo Africa Corps Uniform |
| Water | Vallejo Model Air: Olive Green | Black Acrylic Paint |
| Mig Dark Wash Enamel | Vallejo Model Air: Earth Yellow | Vallejo Light Flesh |
| Acrylic Matt Varnish | Vallejo German Yellow | Army Painter Flesh Wash |
| Acrylic Gloss Vanish | Vallejo Hull Red | Balsa Wood Strip |
| Craft knife | Vallejo Iraqi Sand | Sprue Cutters |
| Plastic Glue | Craft Knife | Hot Glue Gun & Glue |
| Super Glue | Sand Box Sand | Kitty Litter (Clean) |
| 2 pipettes | Rubbing Alcohol |
With the materials gathered It was time to start the project. Below is a step by step to reproduce my method. If you want to use this as a rough guide please do so. If you lack a tool or type of paint all you need to do is substitute something similar.
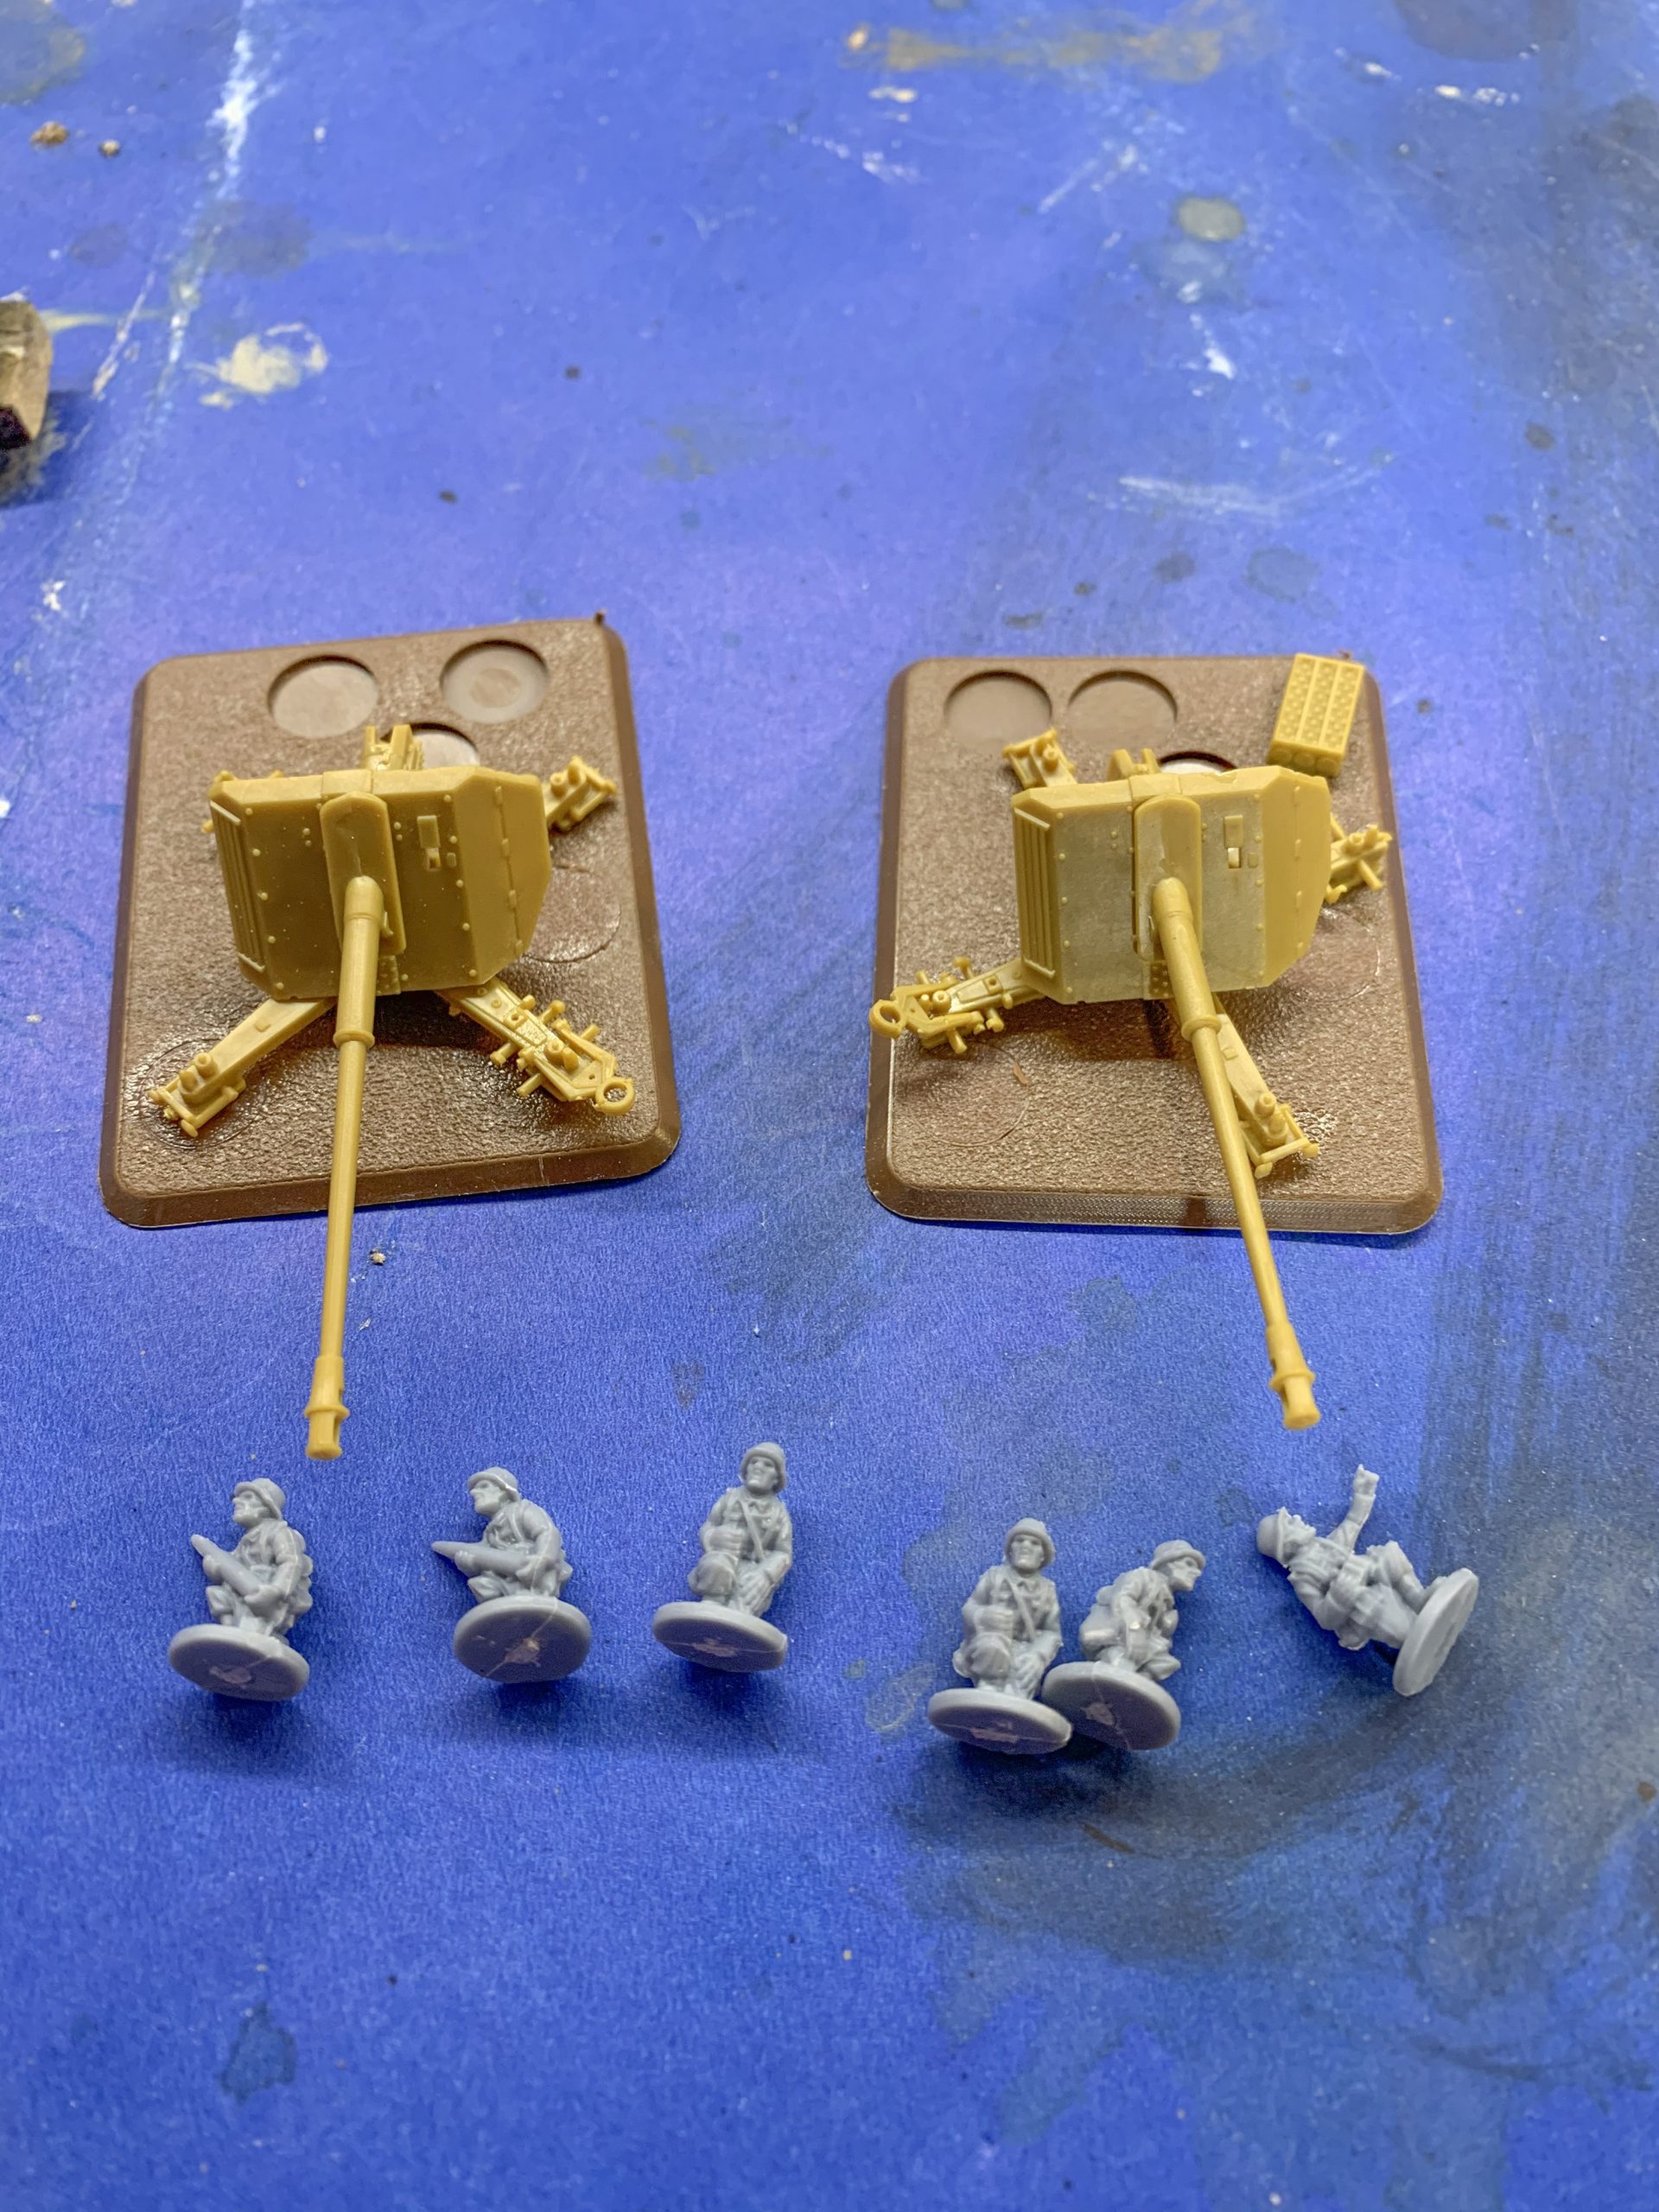
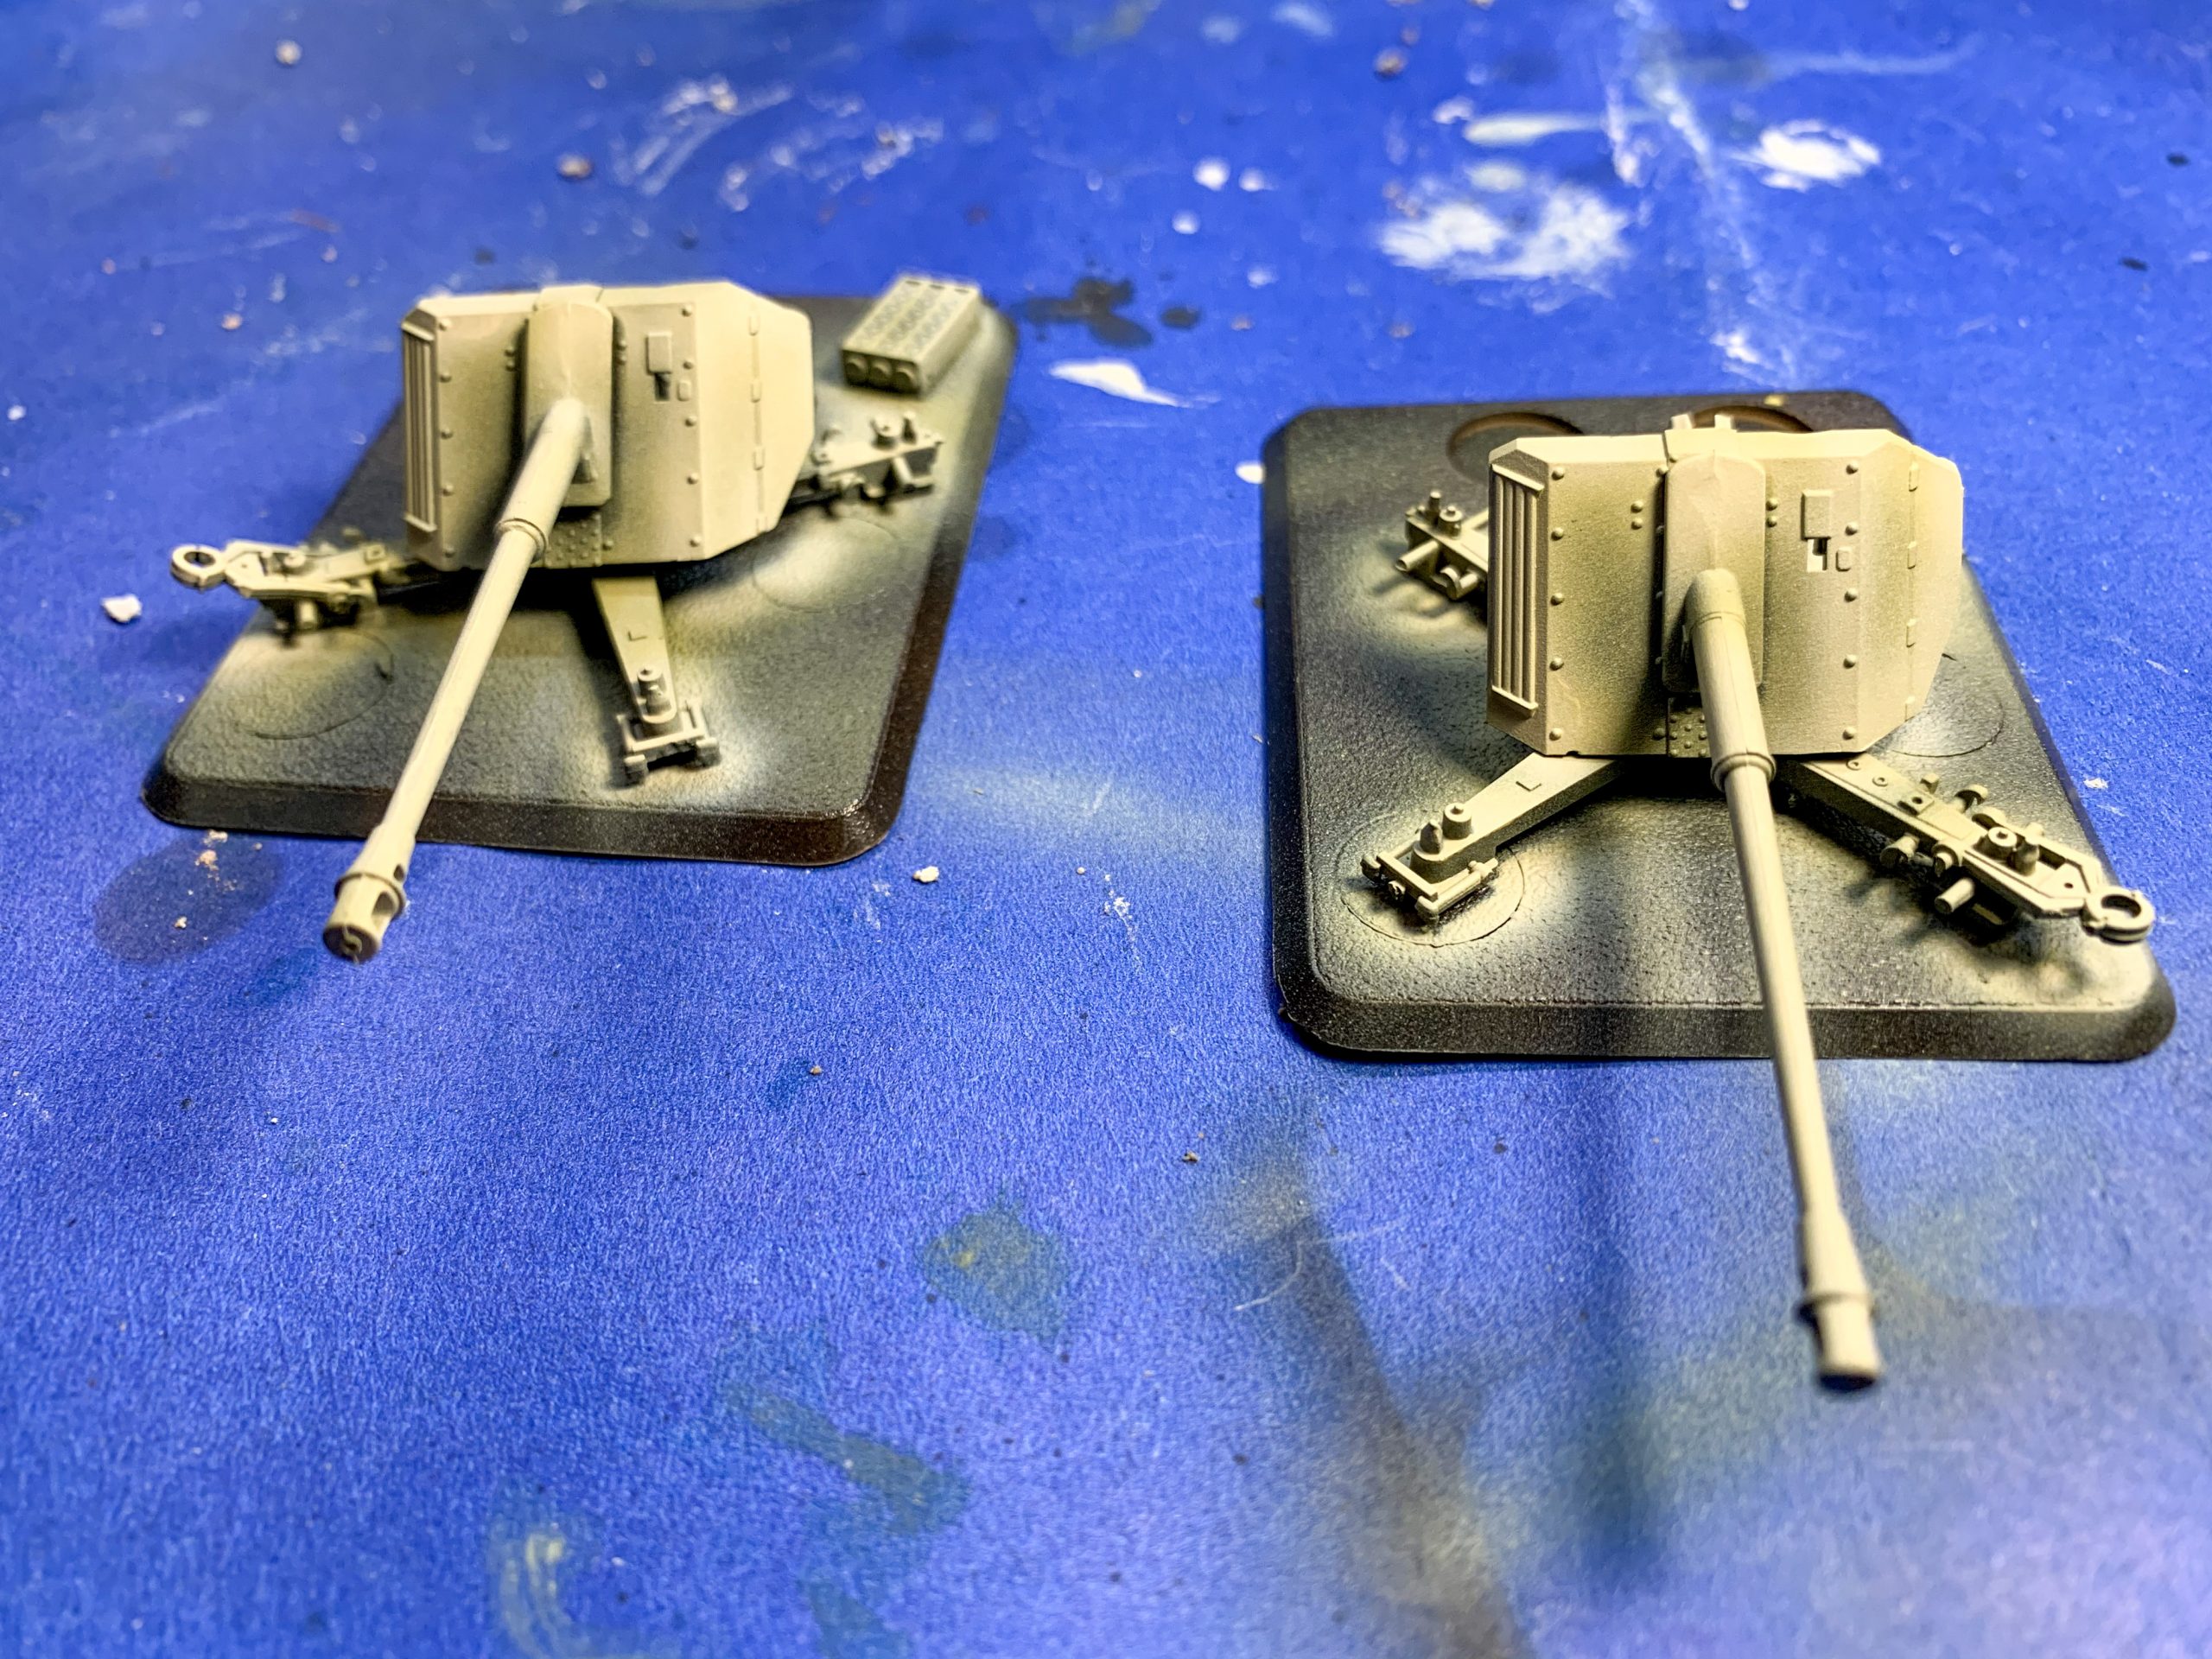
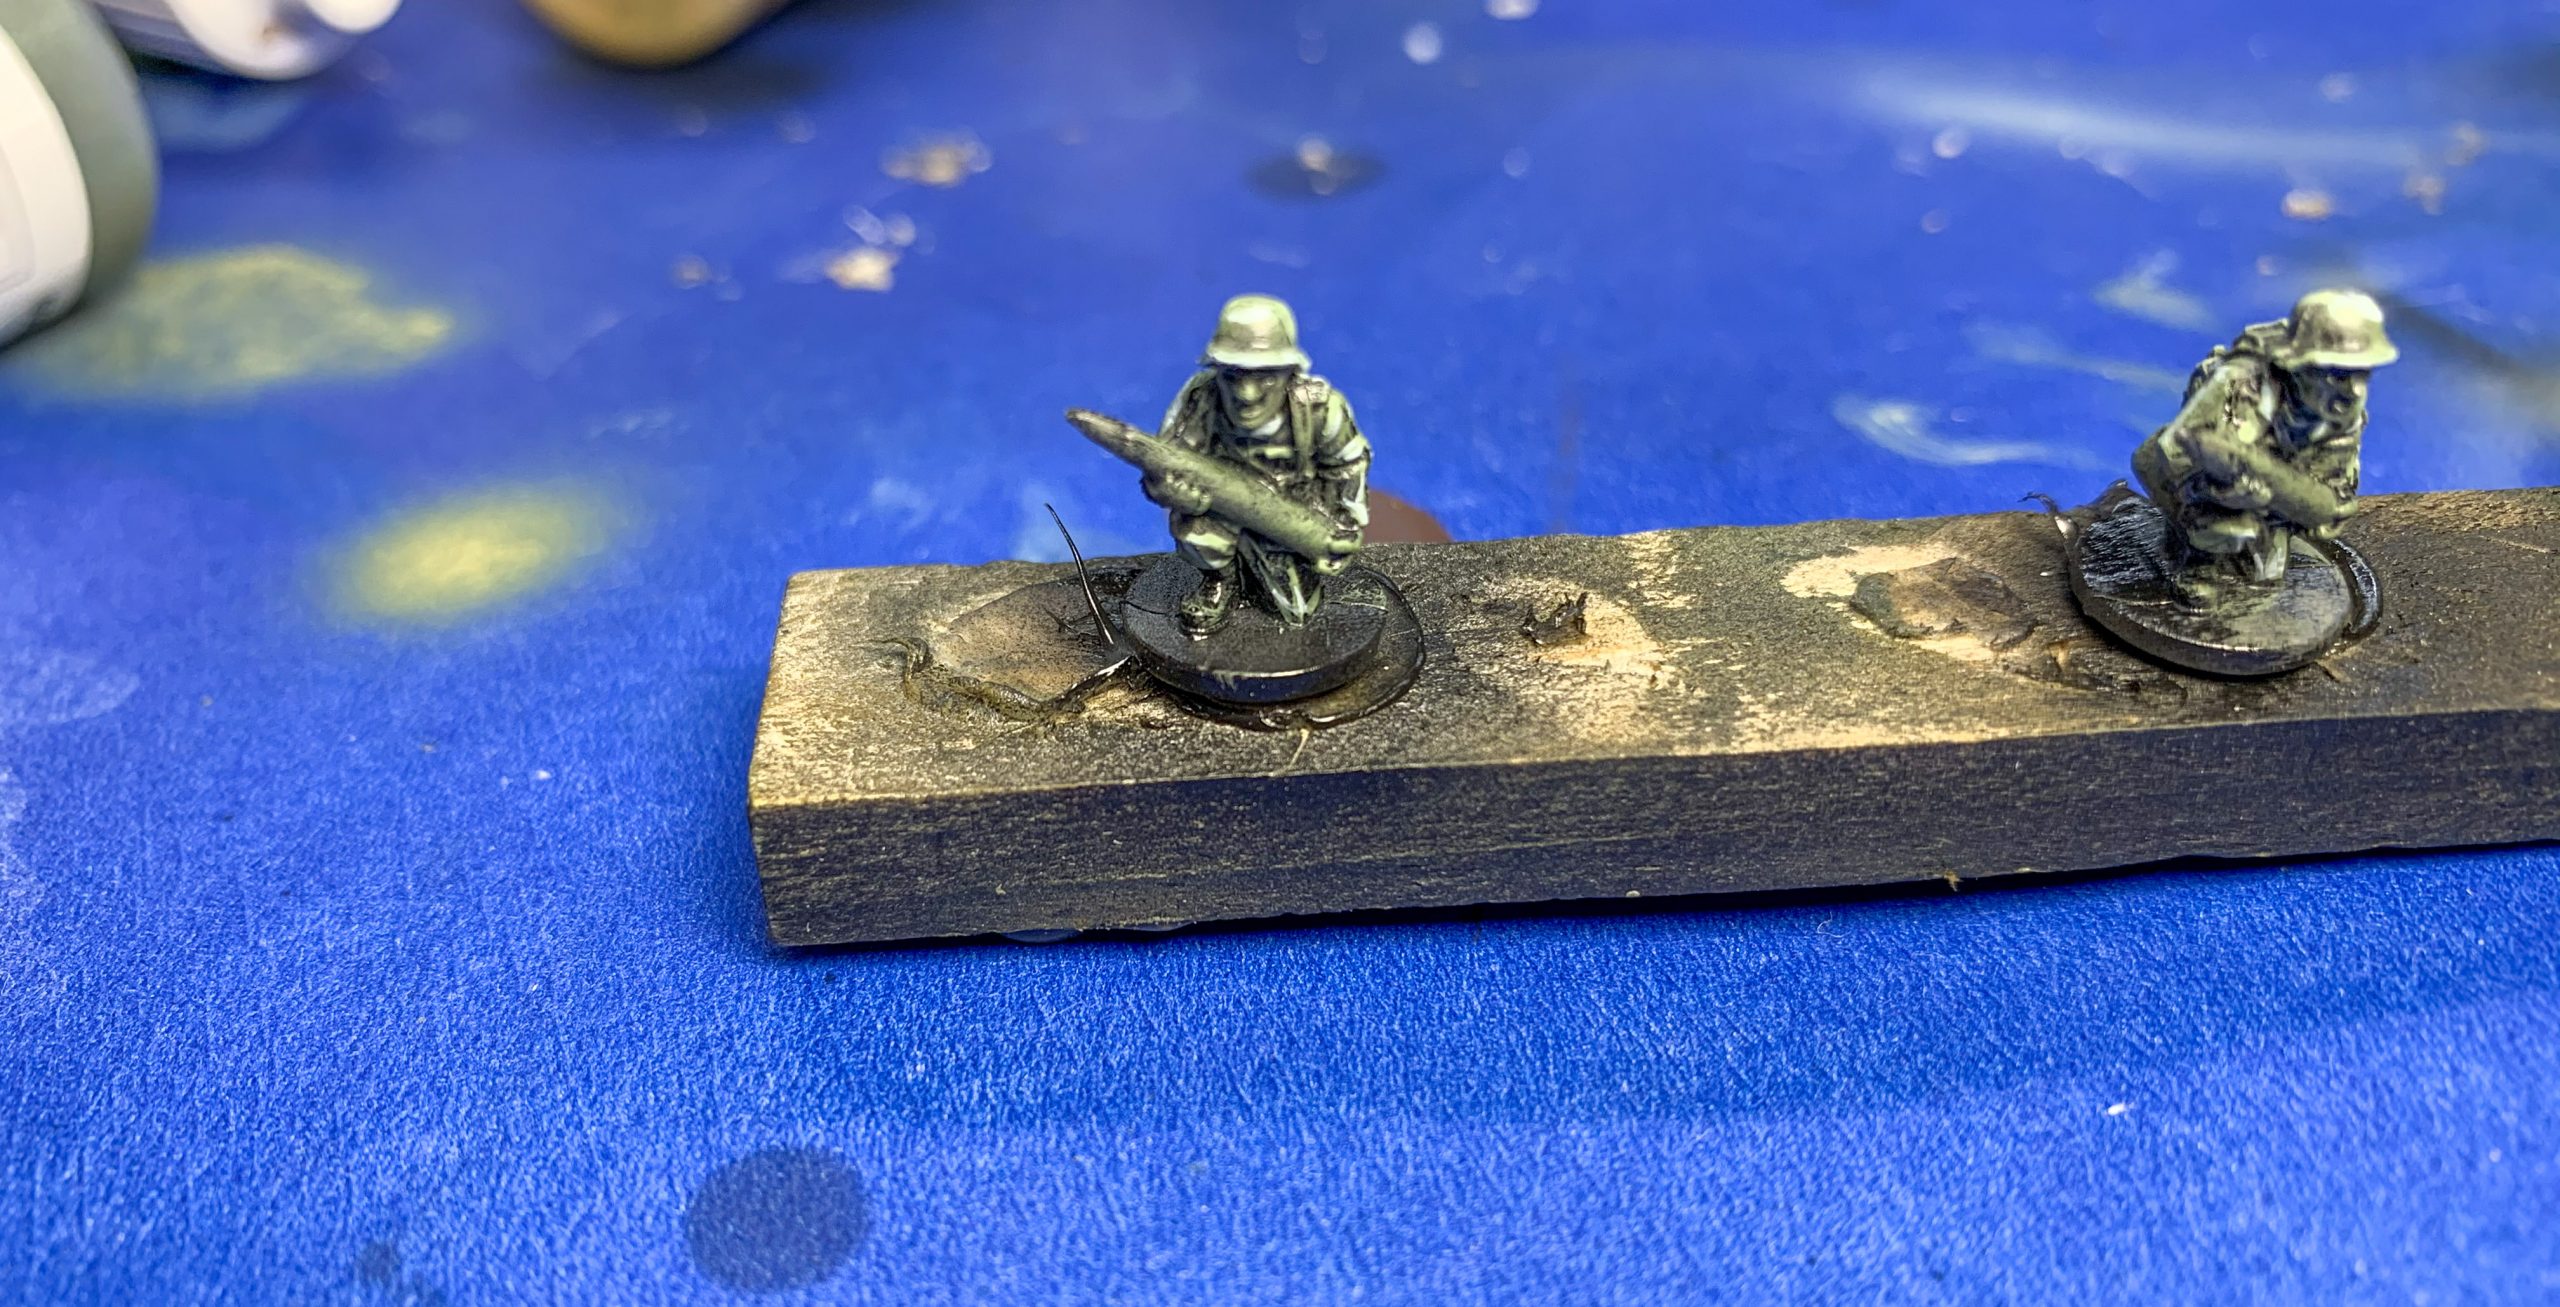
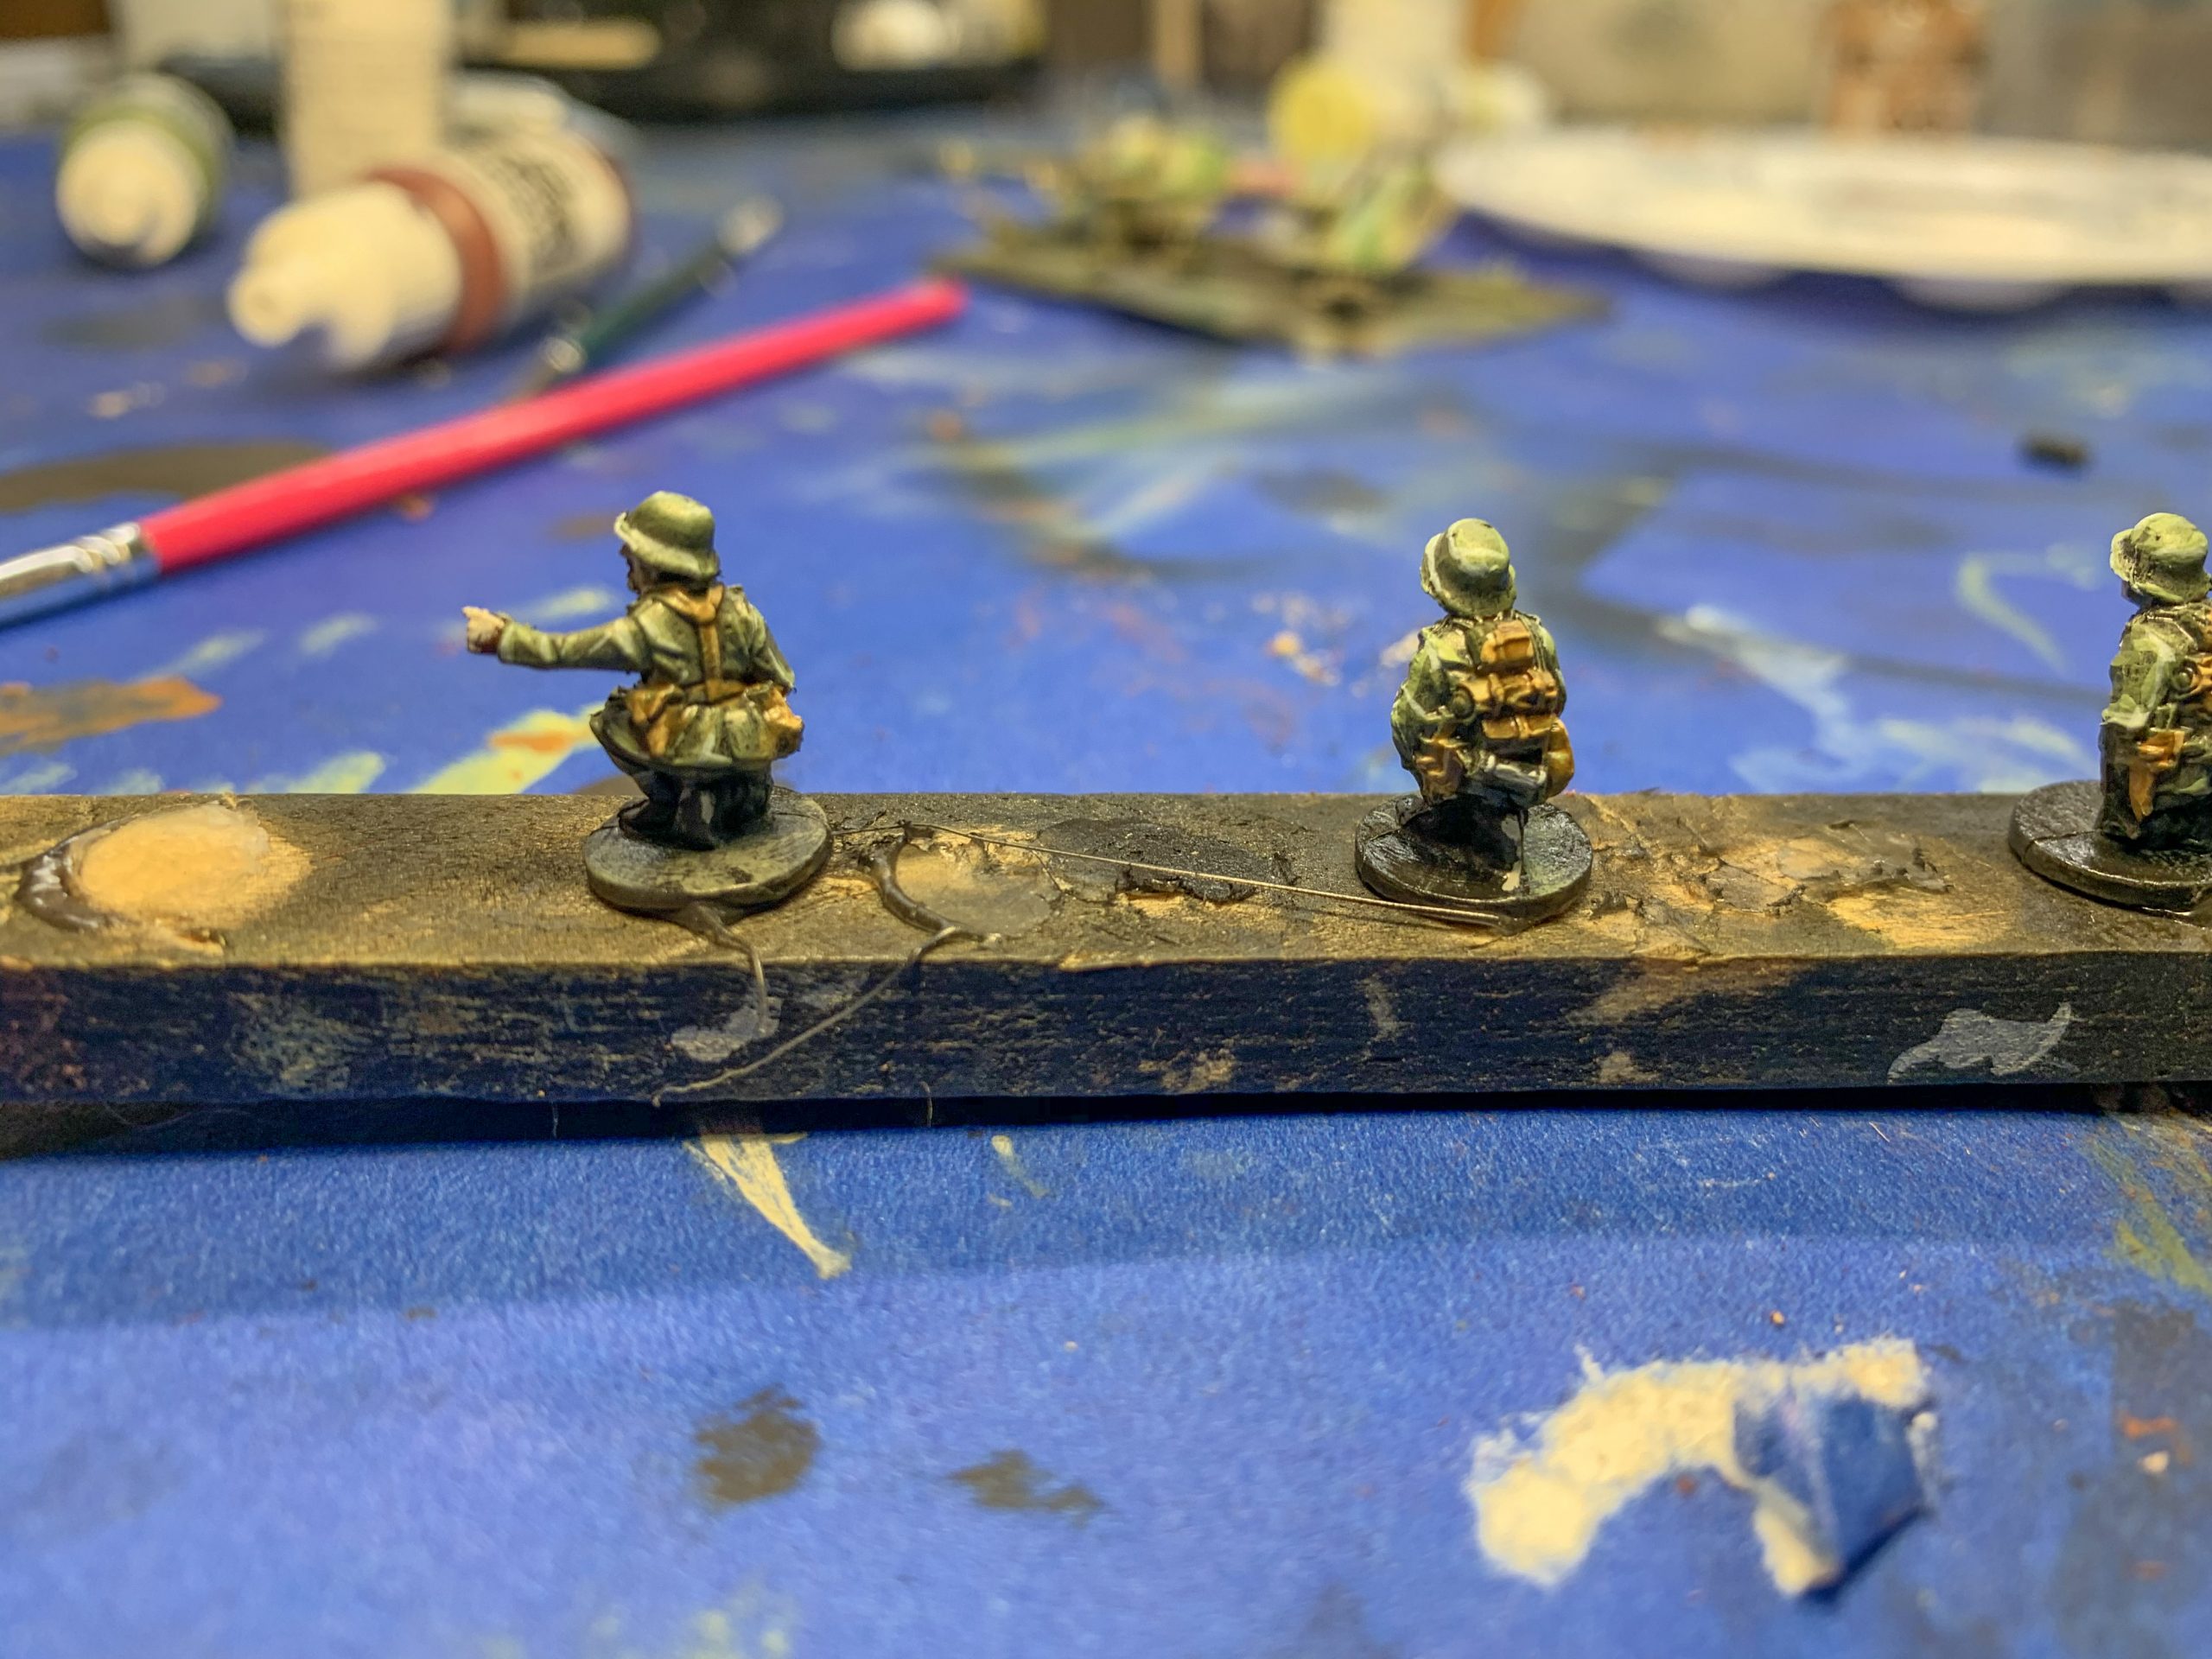
1. Preparing the Model: Using the sprue cutters, cut the parts of the model and crew off of the sprues. Use the craft knife to remove any flash or scars from the parts. Using the plastic glue assemble the model according to the instructions. At this time, glue the canons to the bases and using the hot glue gun adhere the crew to a strip of balsa wood to make them easier to handle while painting.
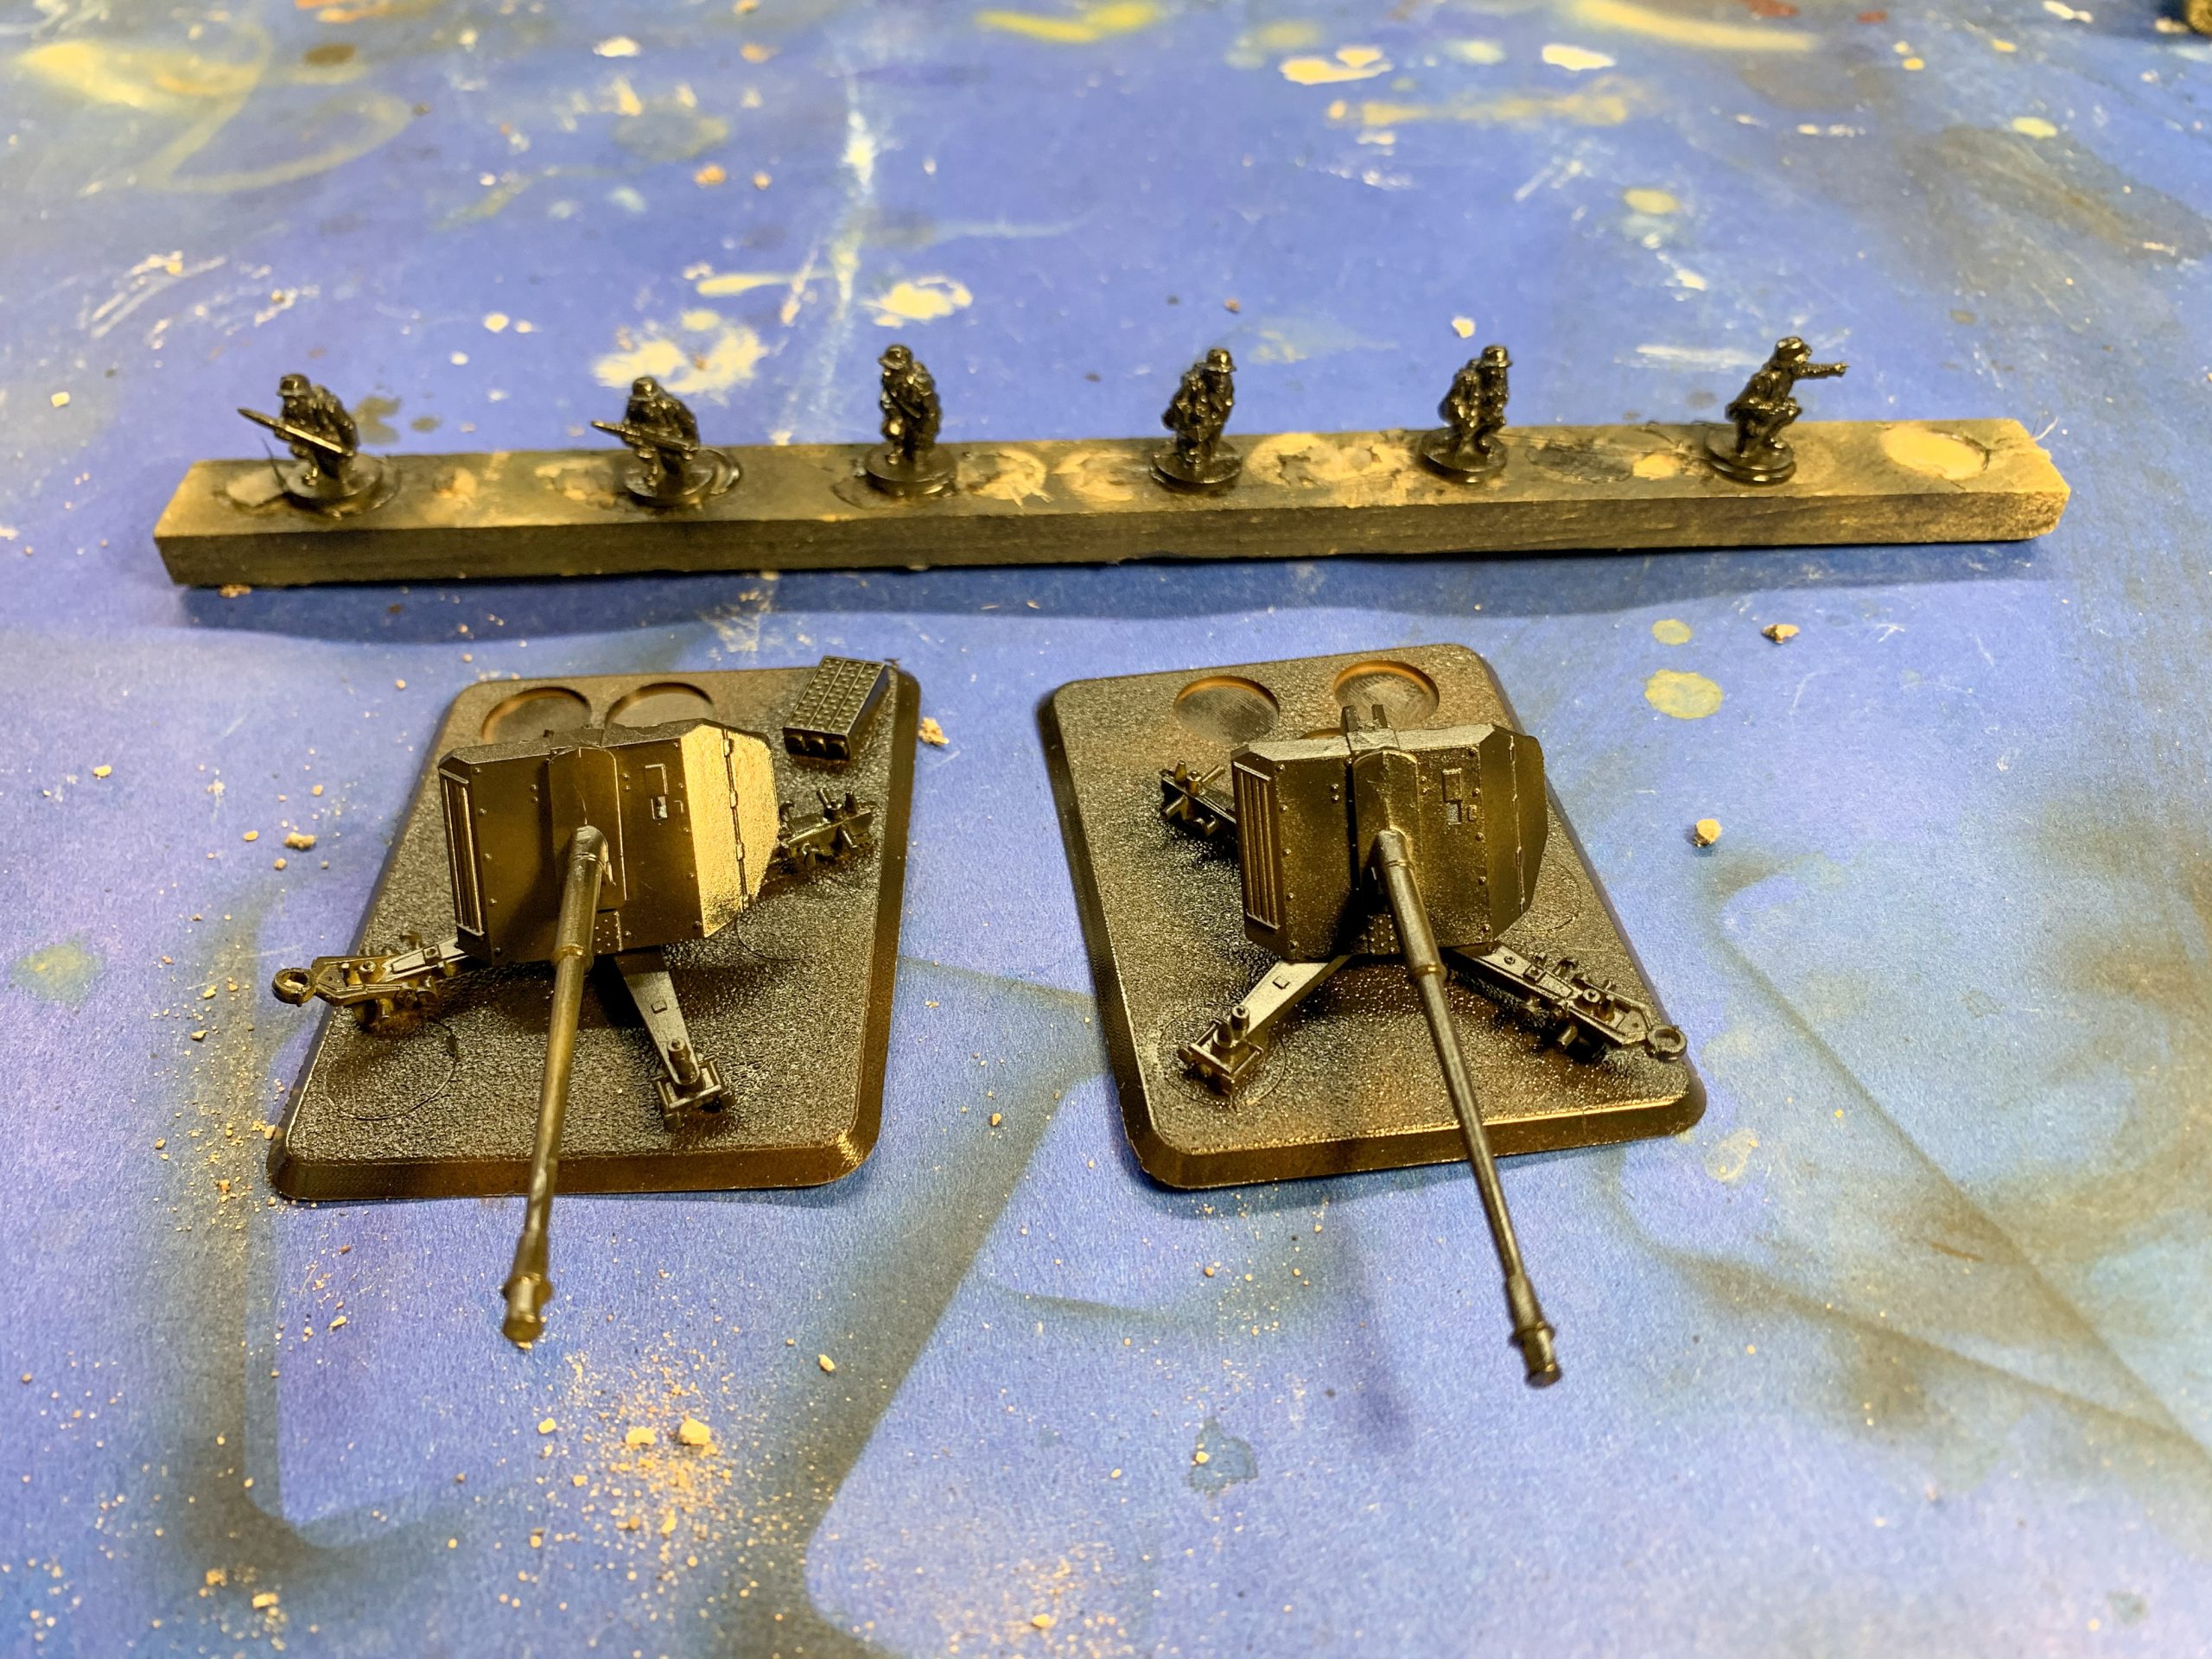
2. Primer: Using the airbrush, spray 2 light coats of the black primer on the models and crew
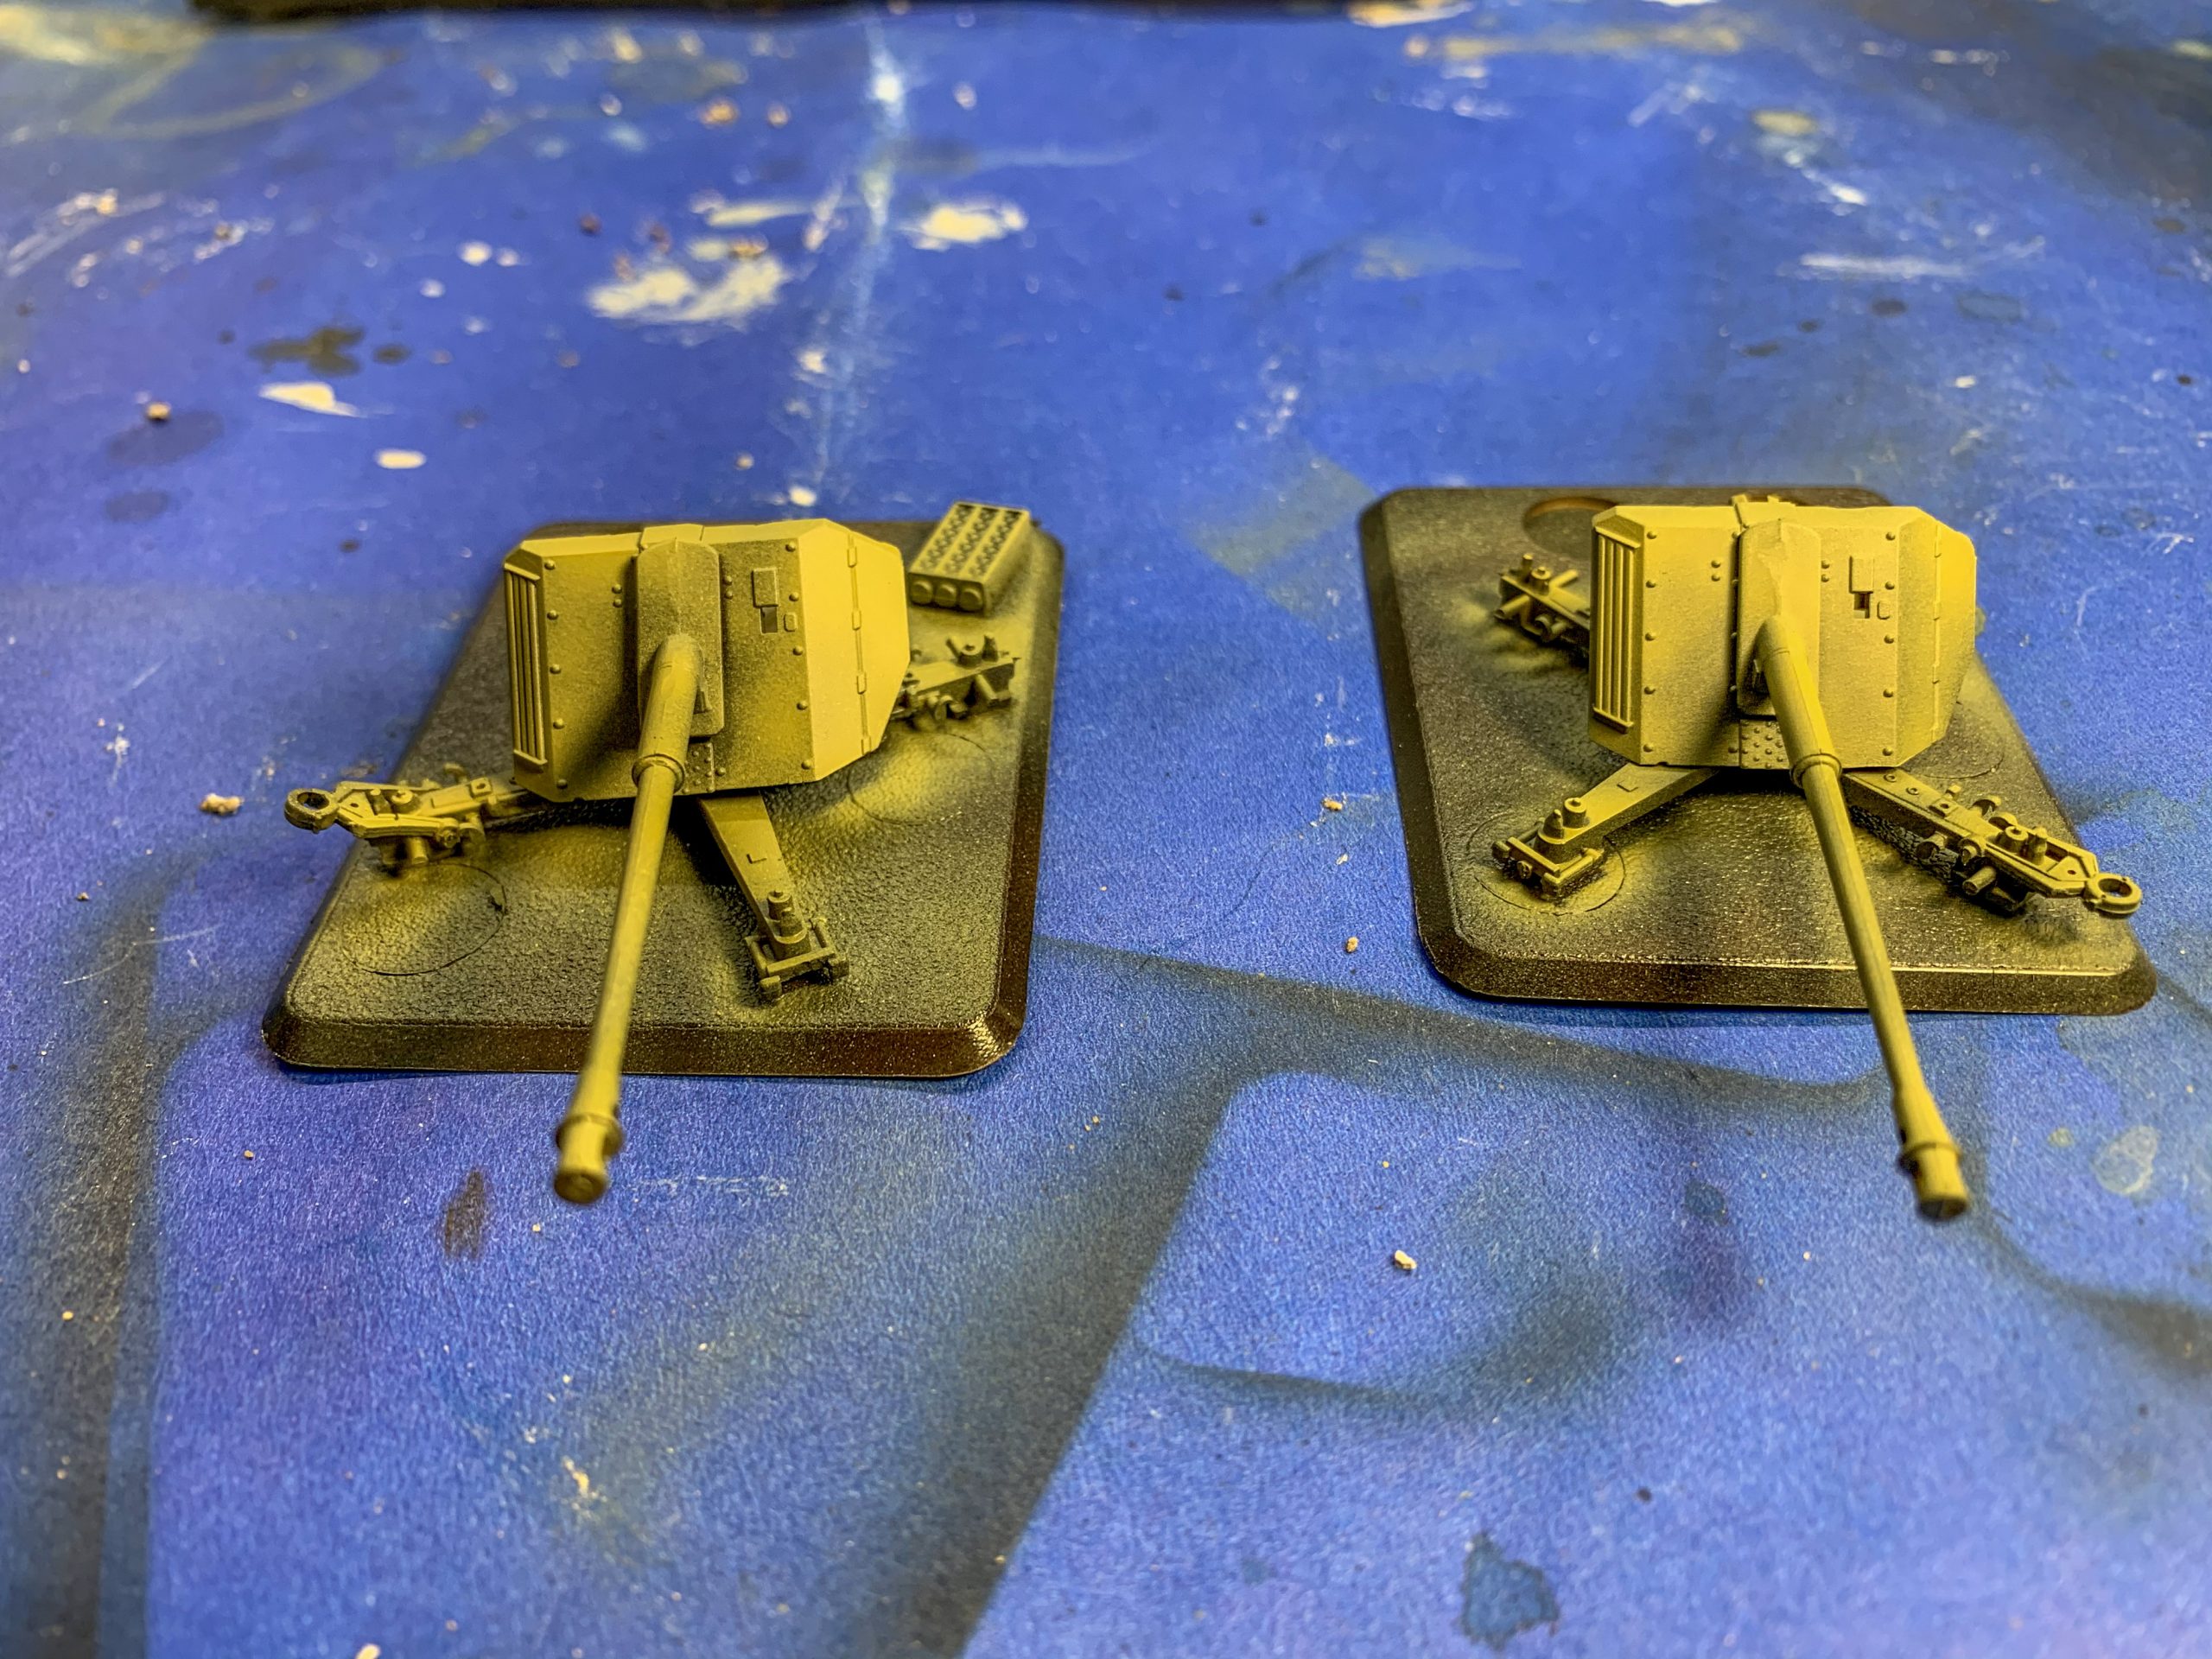
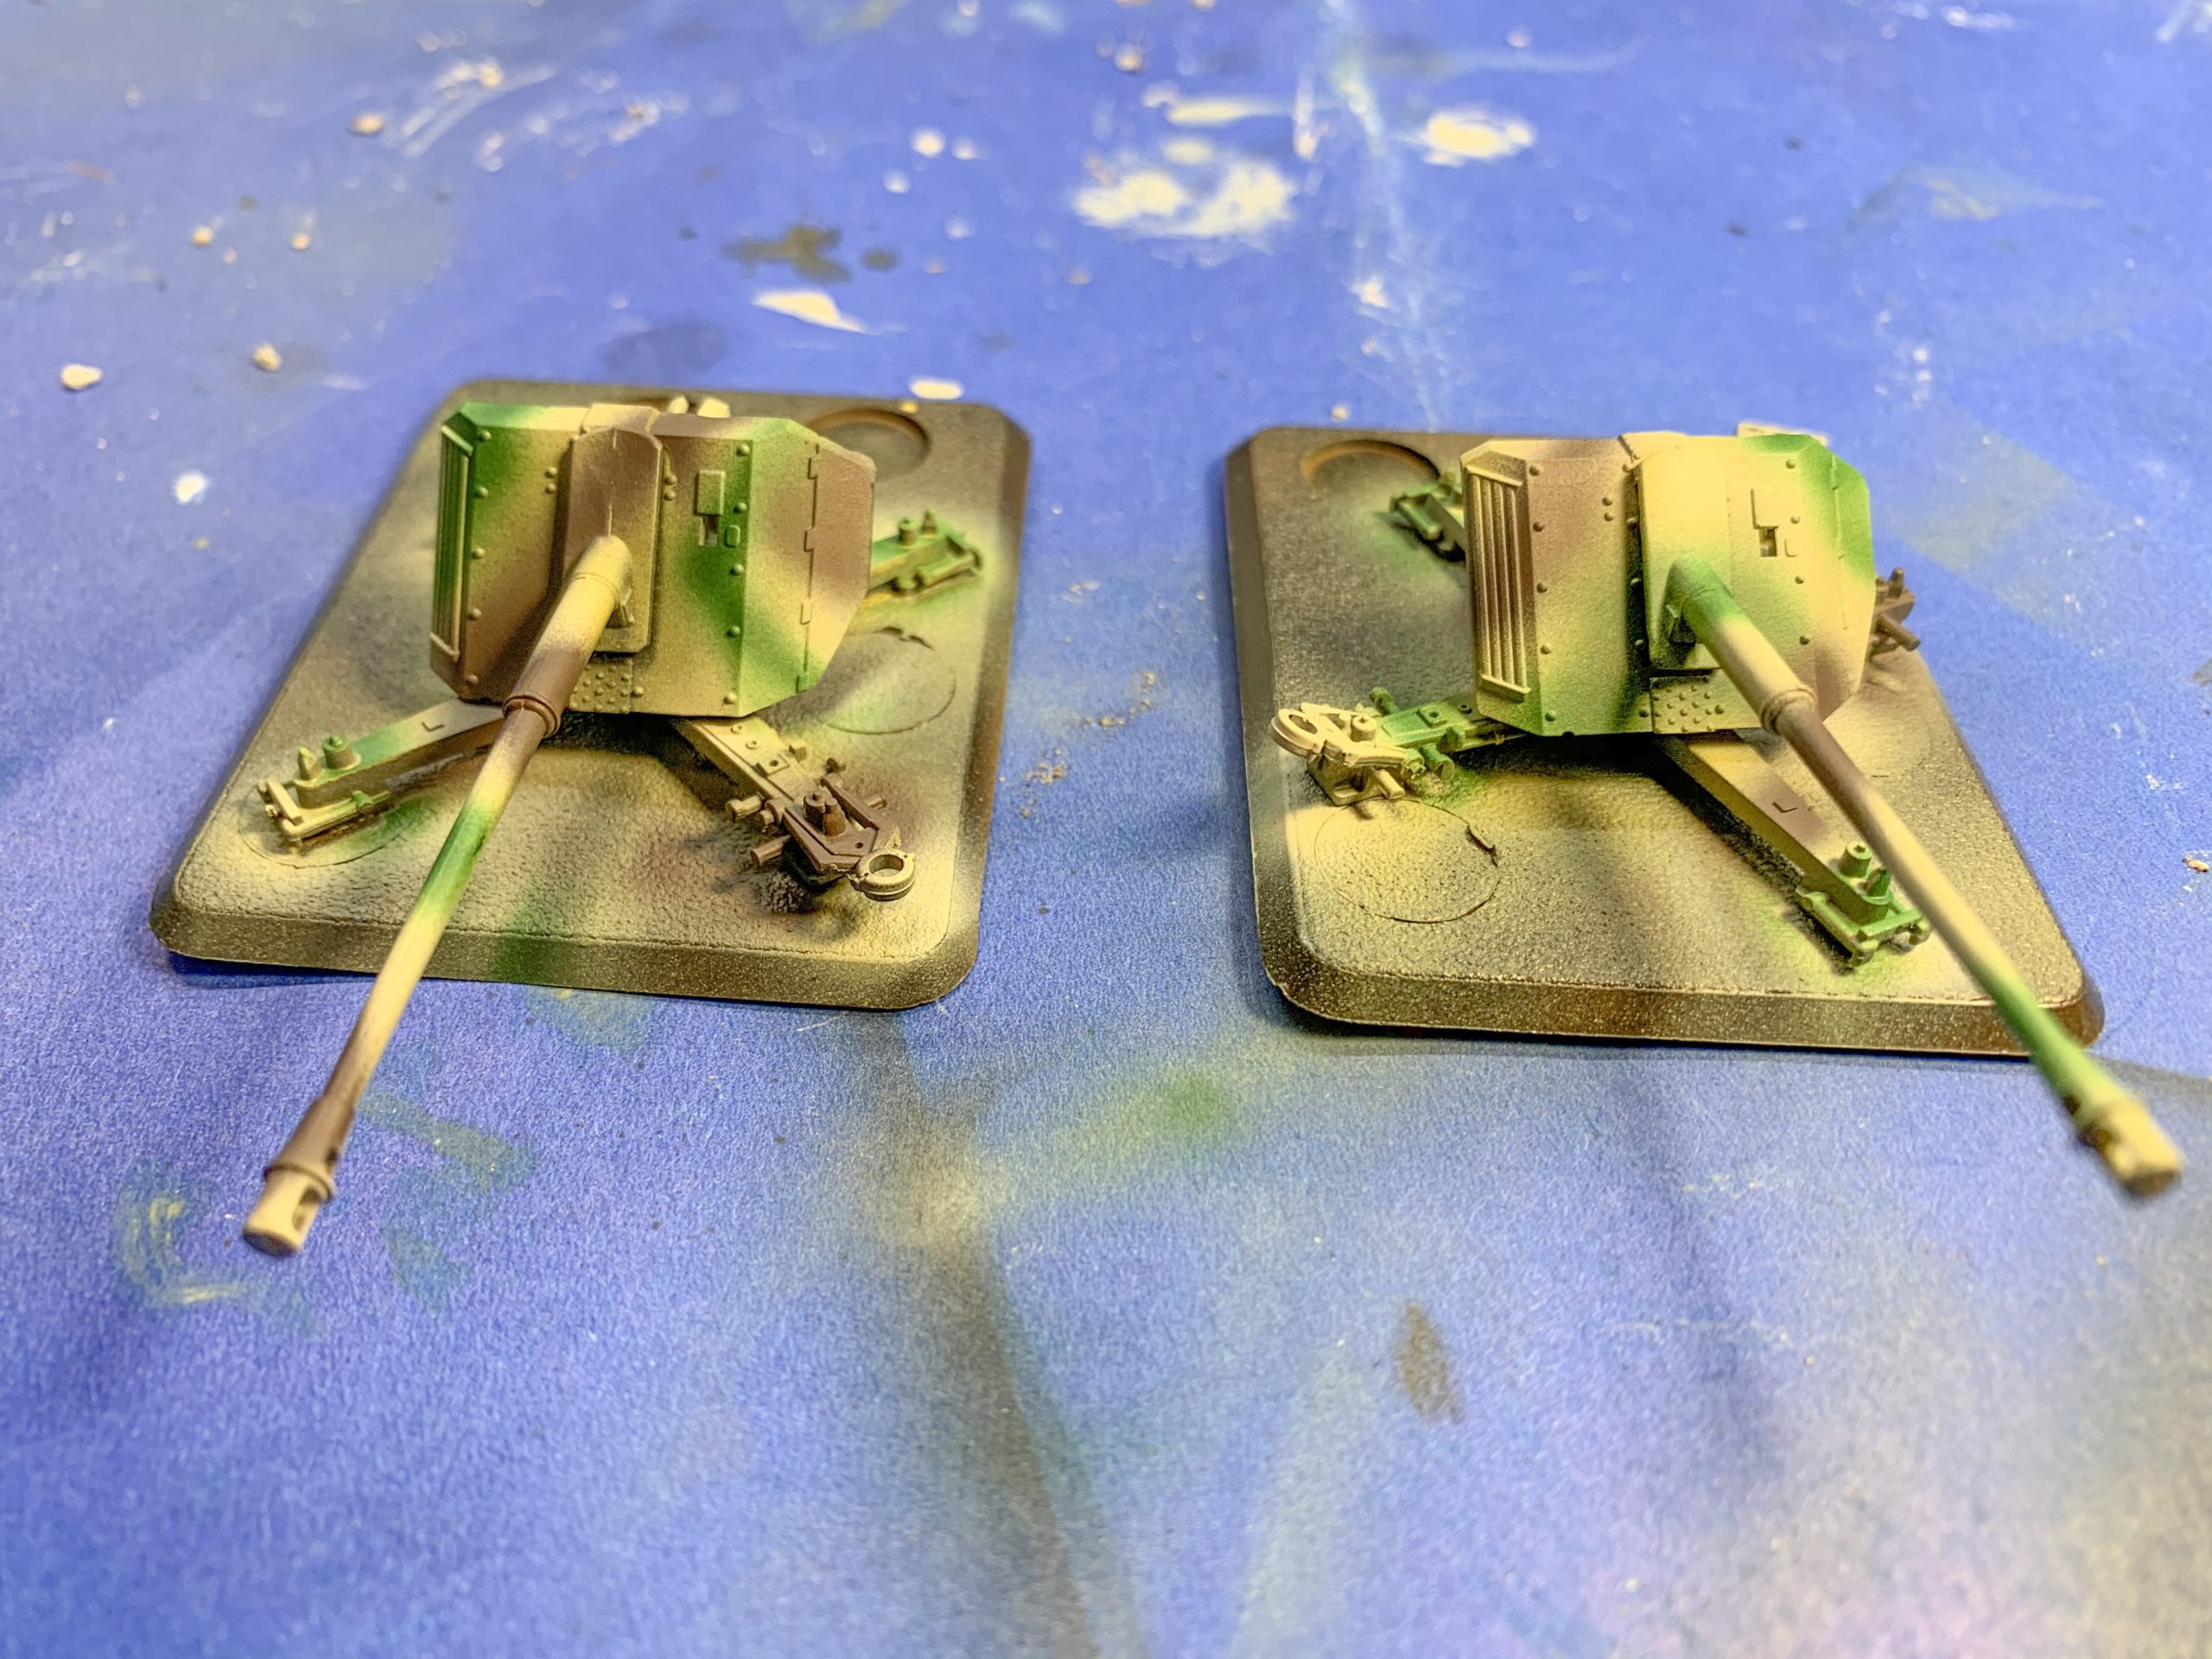
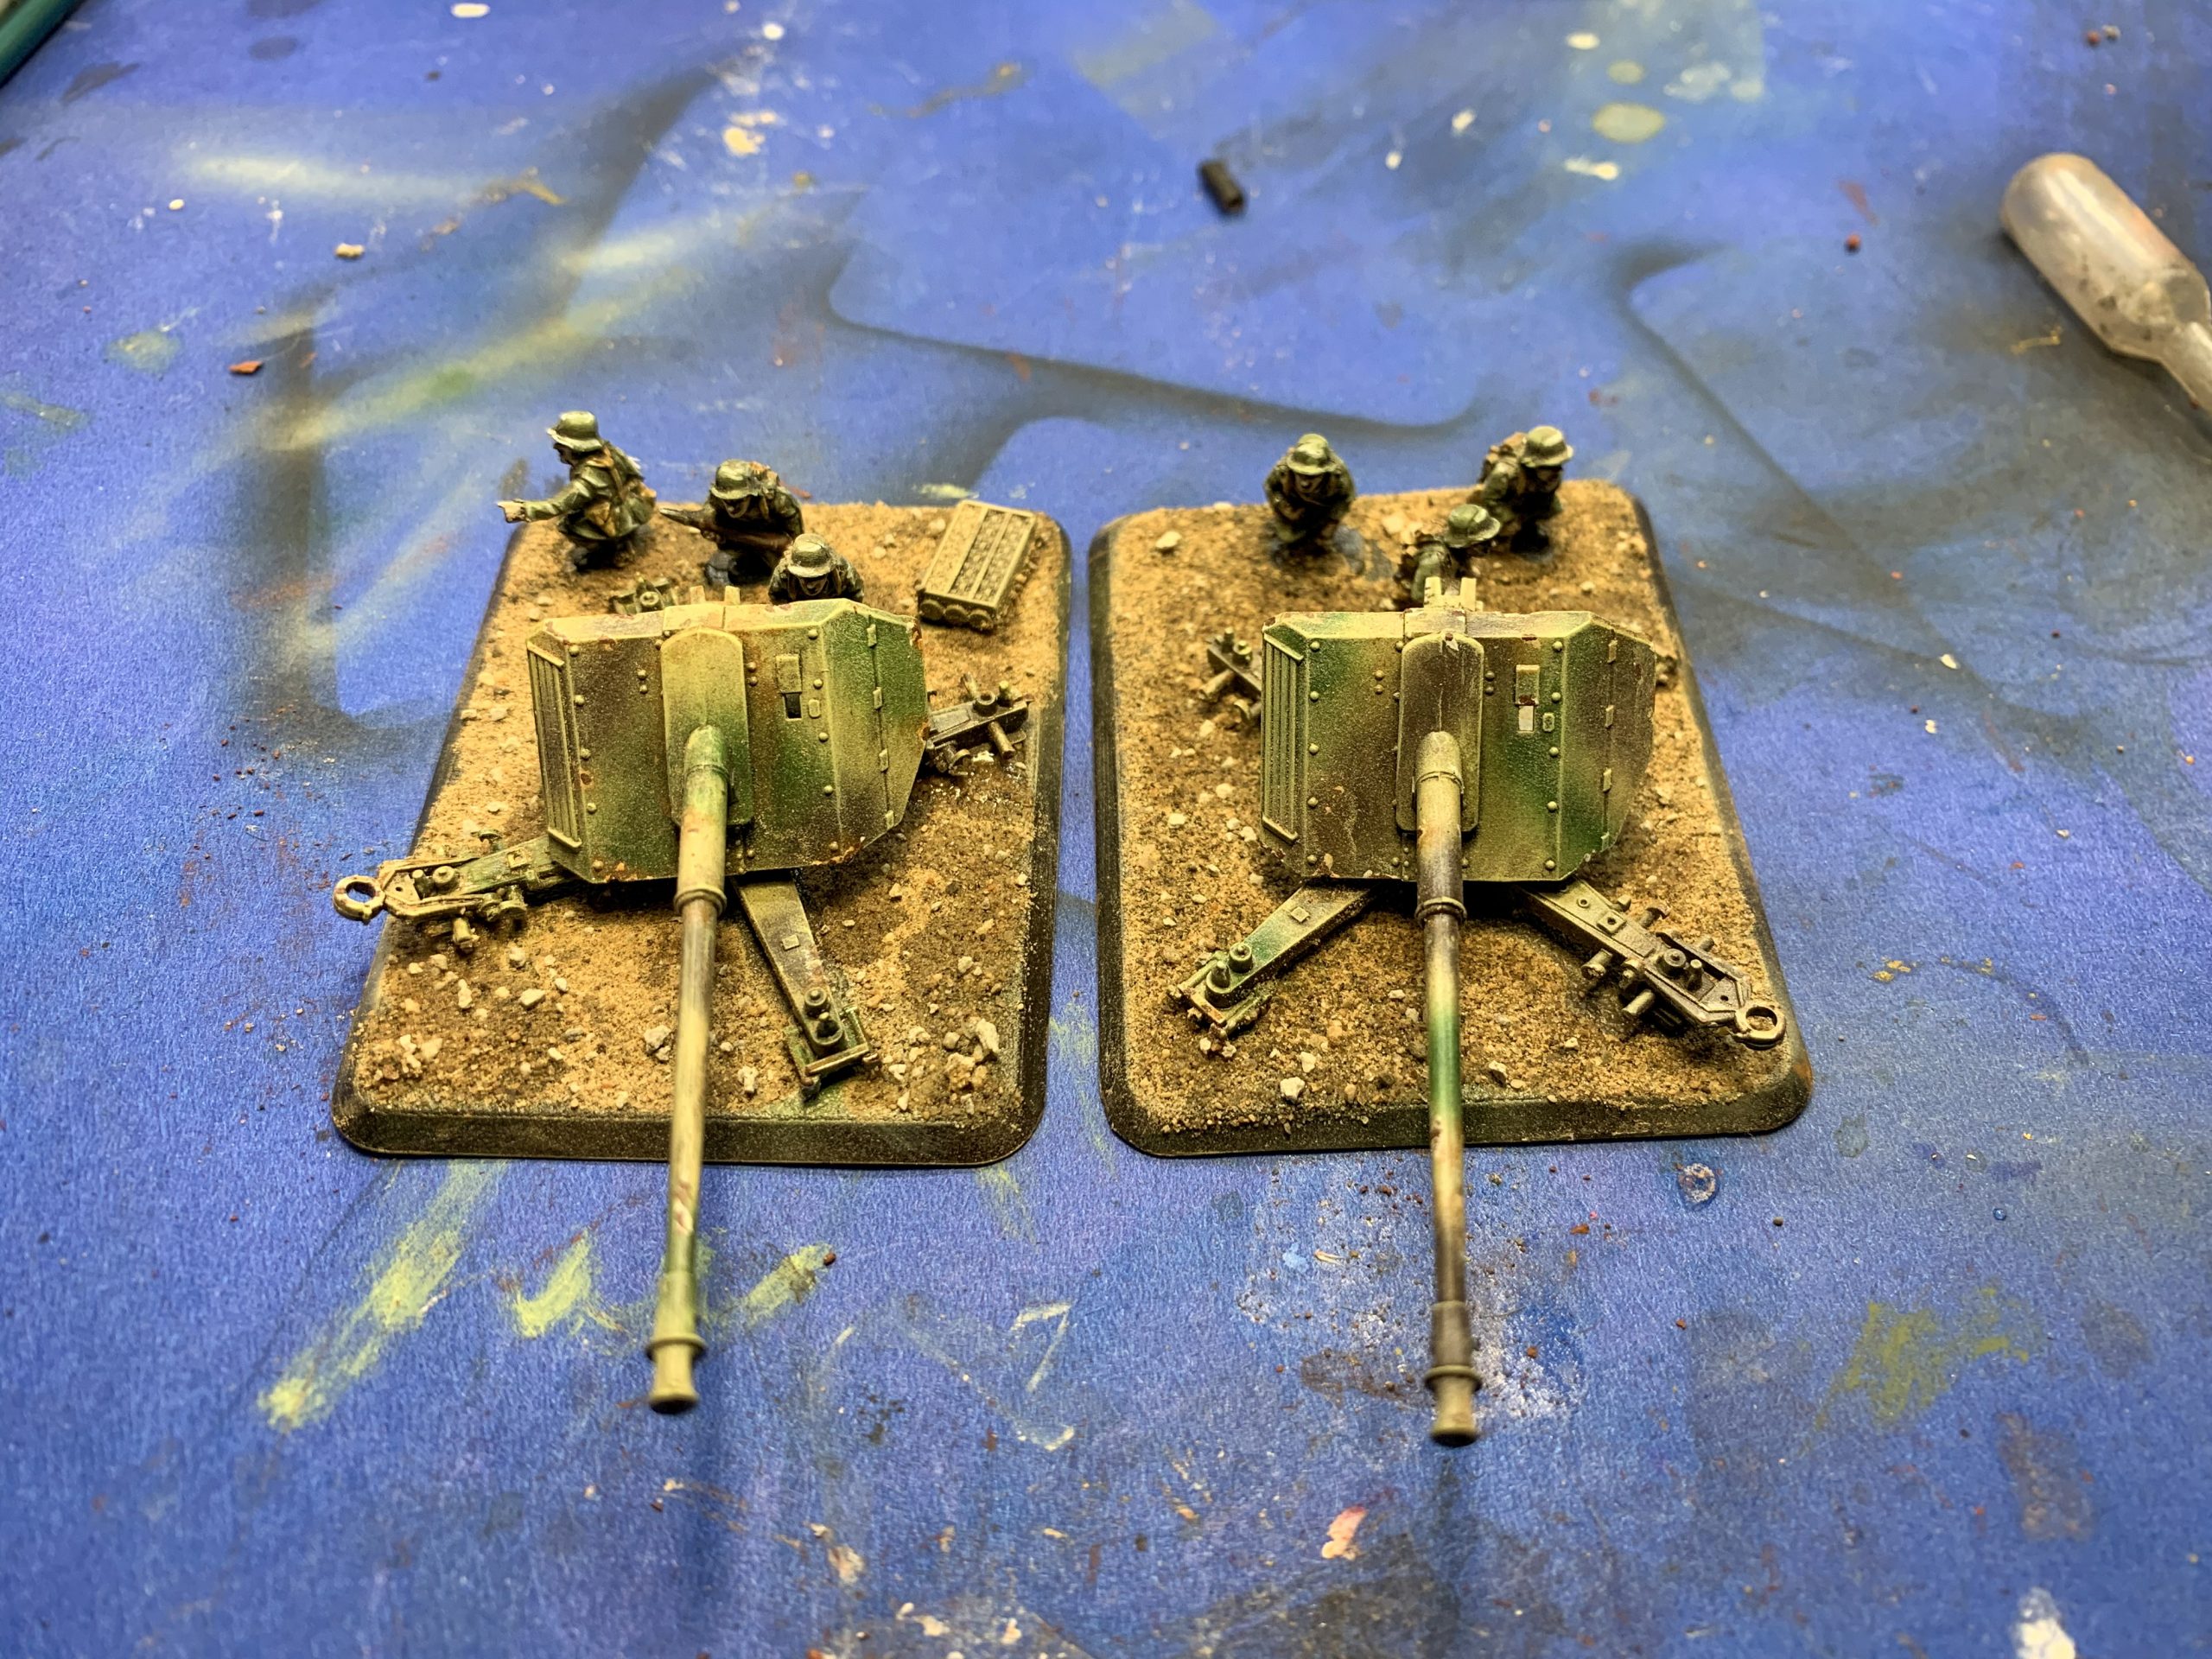
3. Canon Undercoat: Using the airbrush, spray Dark Yellow on the canons focusing on the edges and smooth surfaces and leaving the darker areas showing through in the shadowy areas.
4. Canon Mid-Tone and Highlight: Using the airbrush spray the canons lightly with Earth Yellow leaving it out of the deepest areas. Concentrate on the edges of panels and the upper surfaces. After this, repeat the process with Ivory Sand but keep the pattern confined to only the edges of the canon and anywhere light would fall directly on the model.
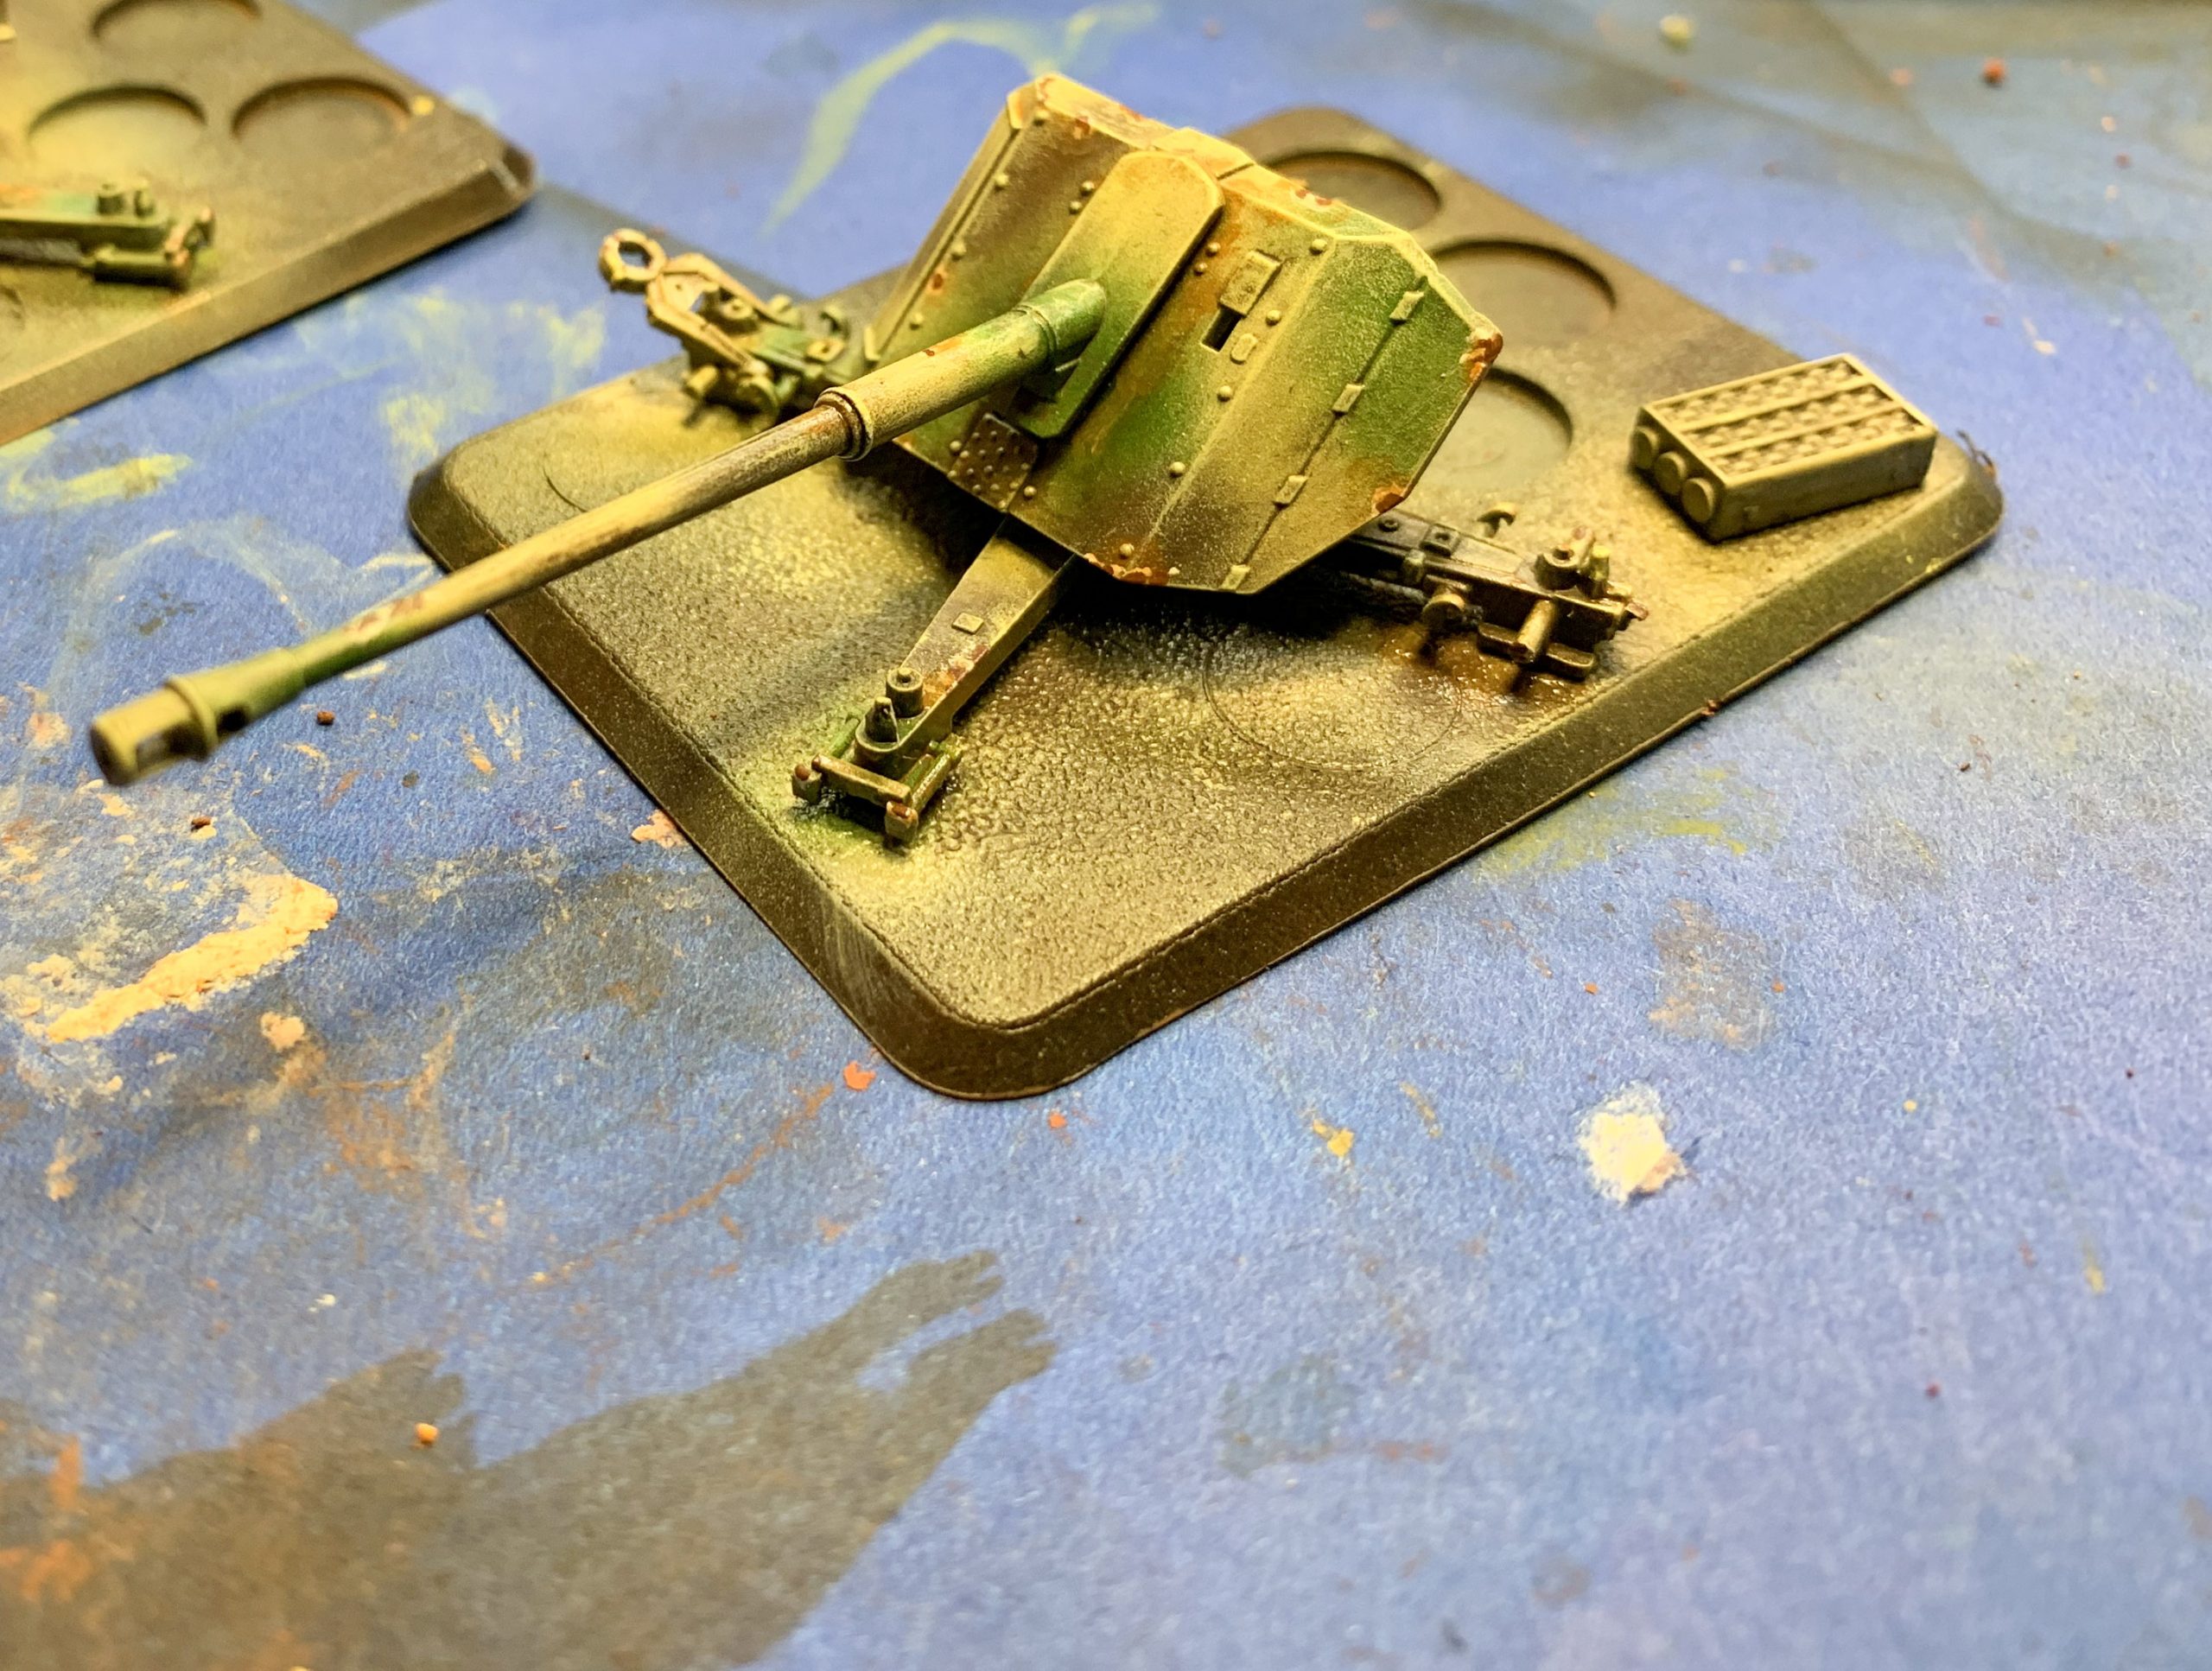
5. Camouflage: With the airbrush spray patches of Armour Brown and Olive green onto the canons.
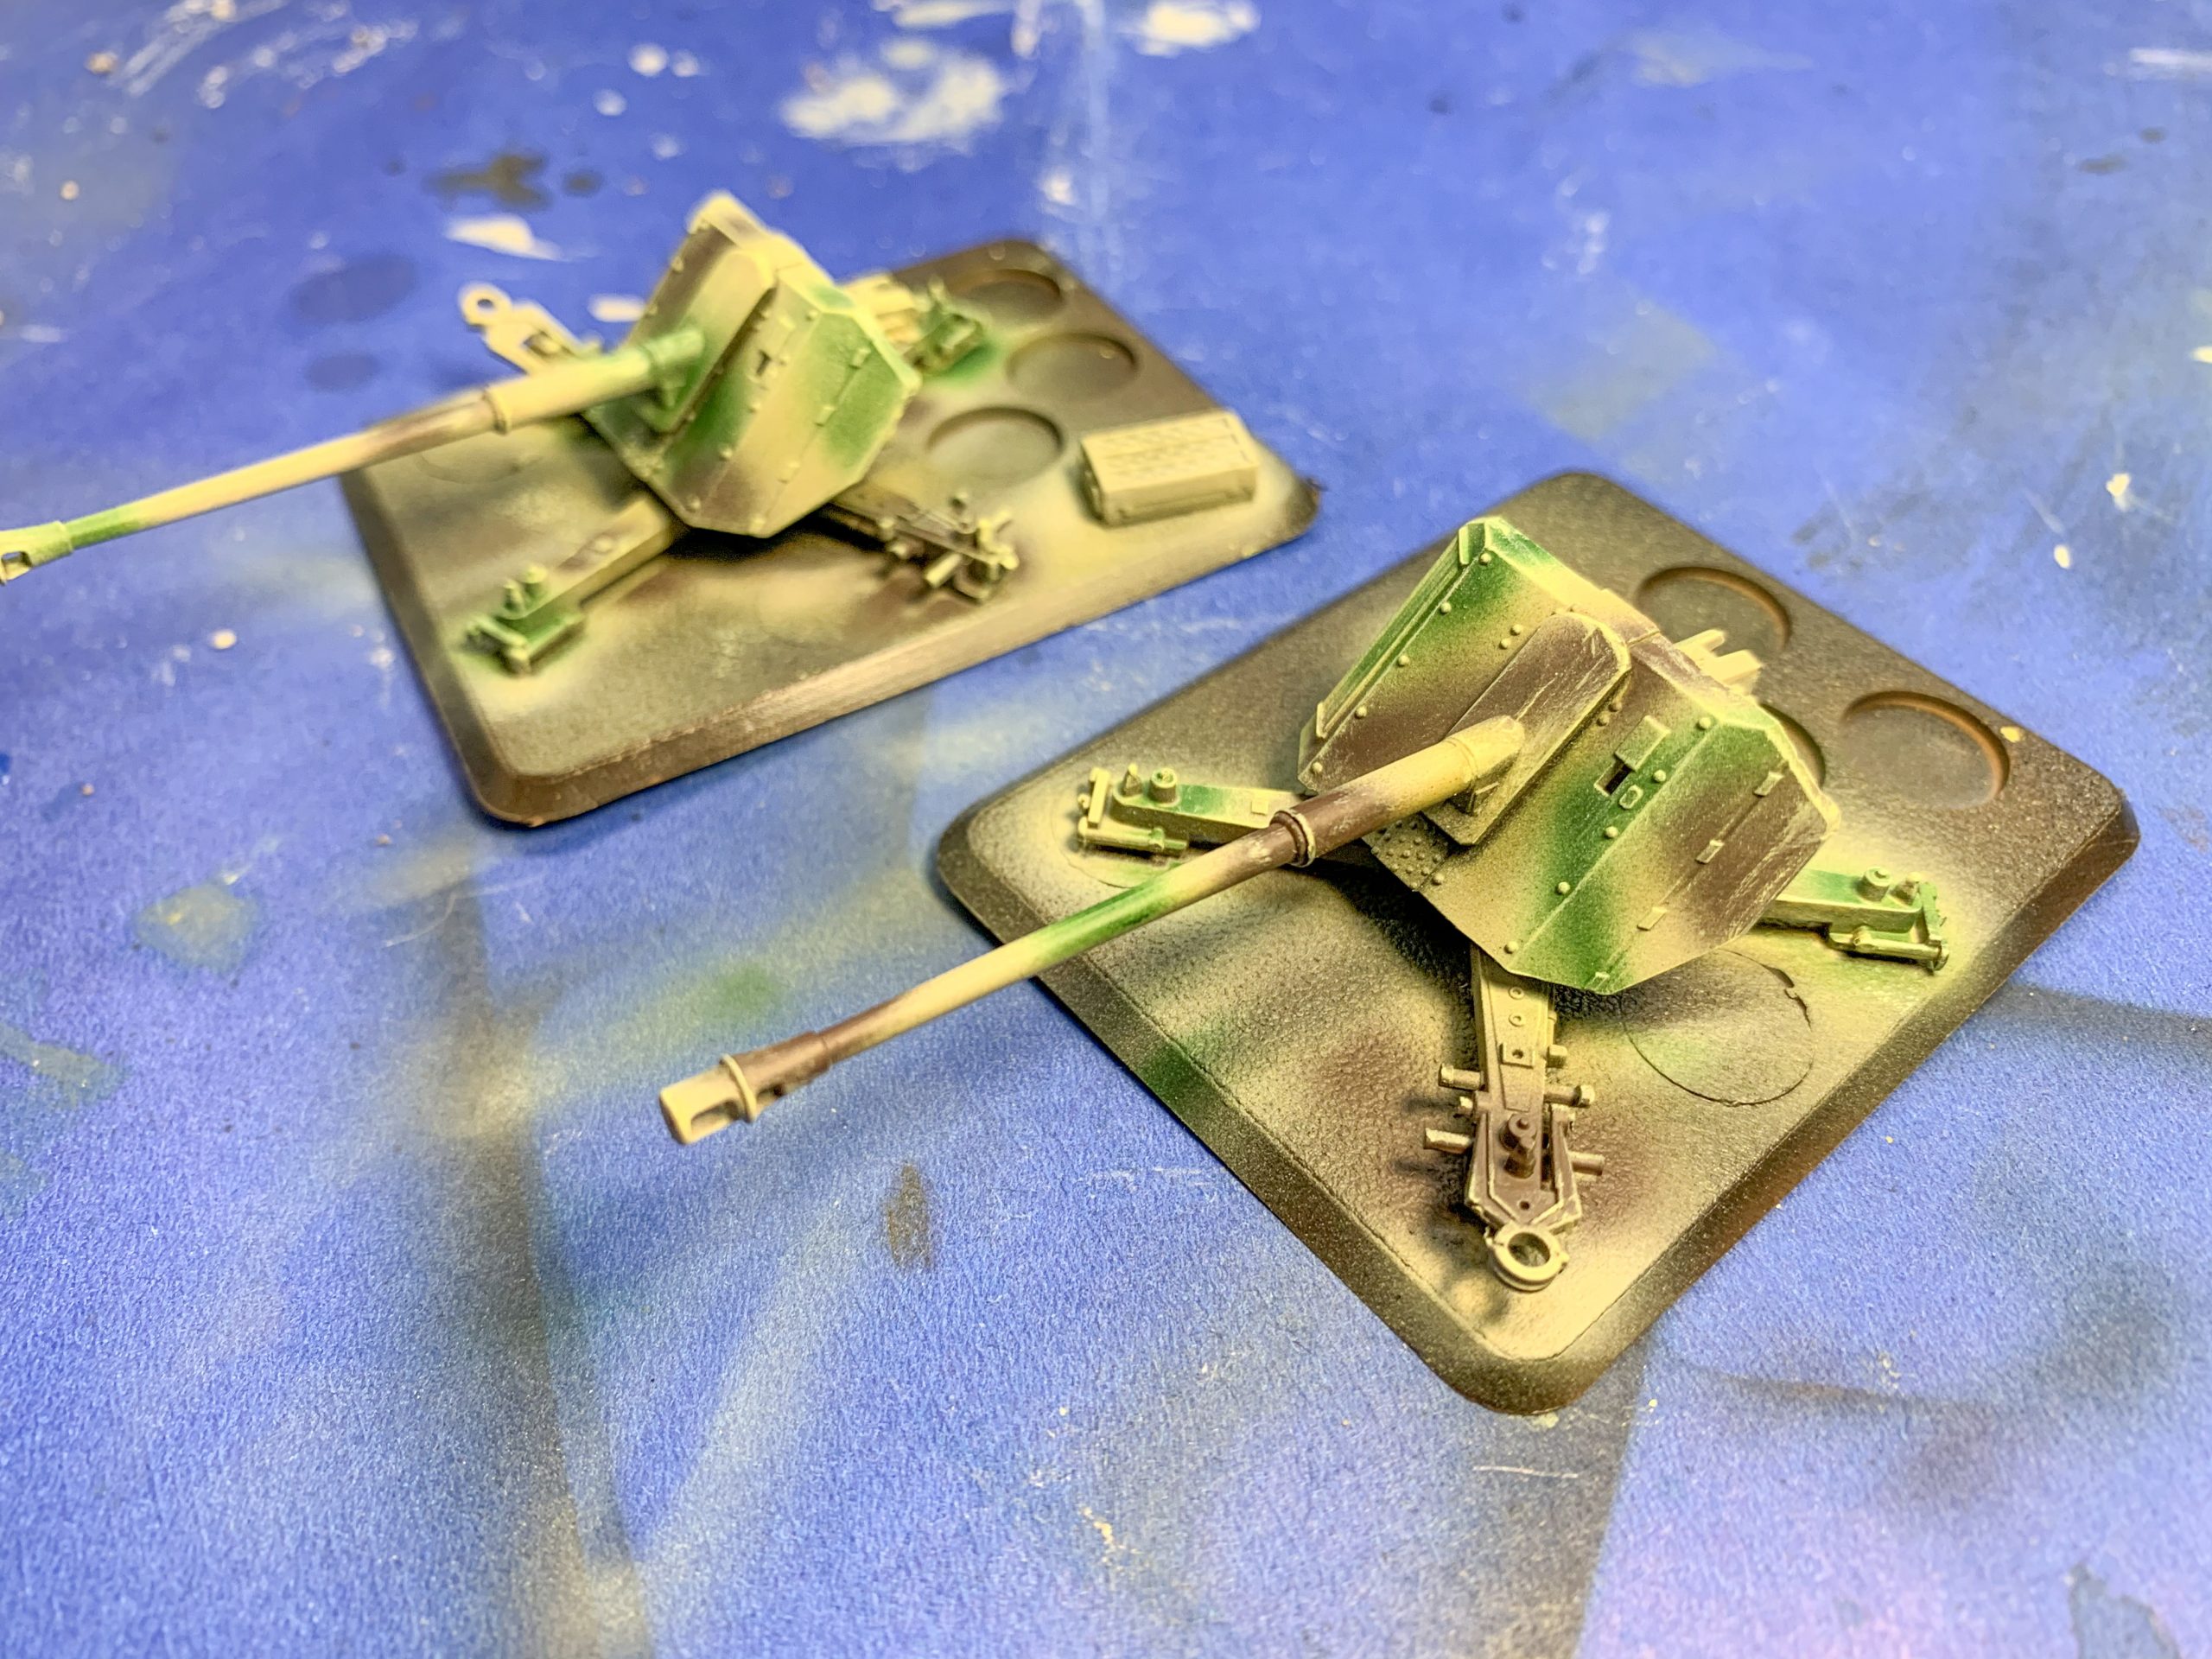
6. Top Highlight and Gloss Varnish: Using a large stiff bristle brush, take some German Yellow straight from the bottle and wipe it off on some paper towel. When there is just a slight amount of pigment left on the brush, drybrush it onto the canons focusing on the edges of the plates and raised details. When this has dried, load the airbrush Gloss Varnish and apply 2 coats to the entire model.
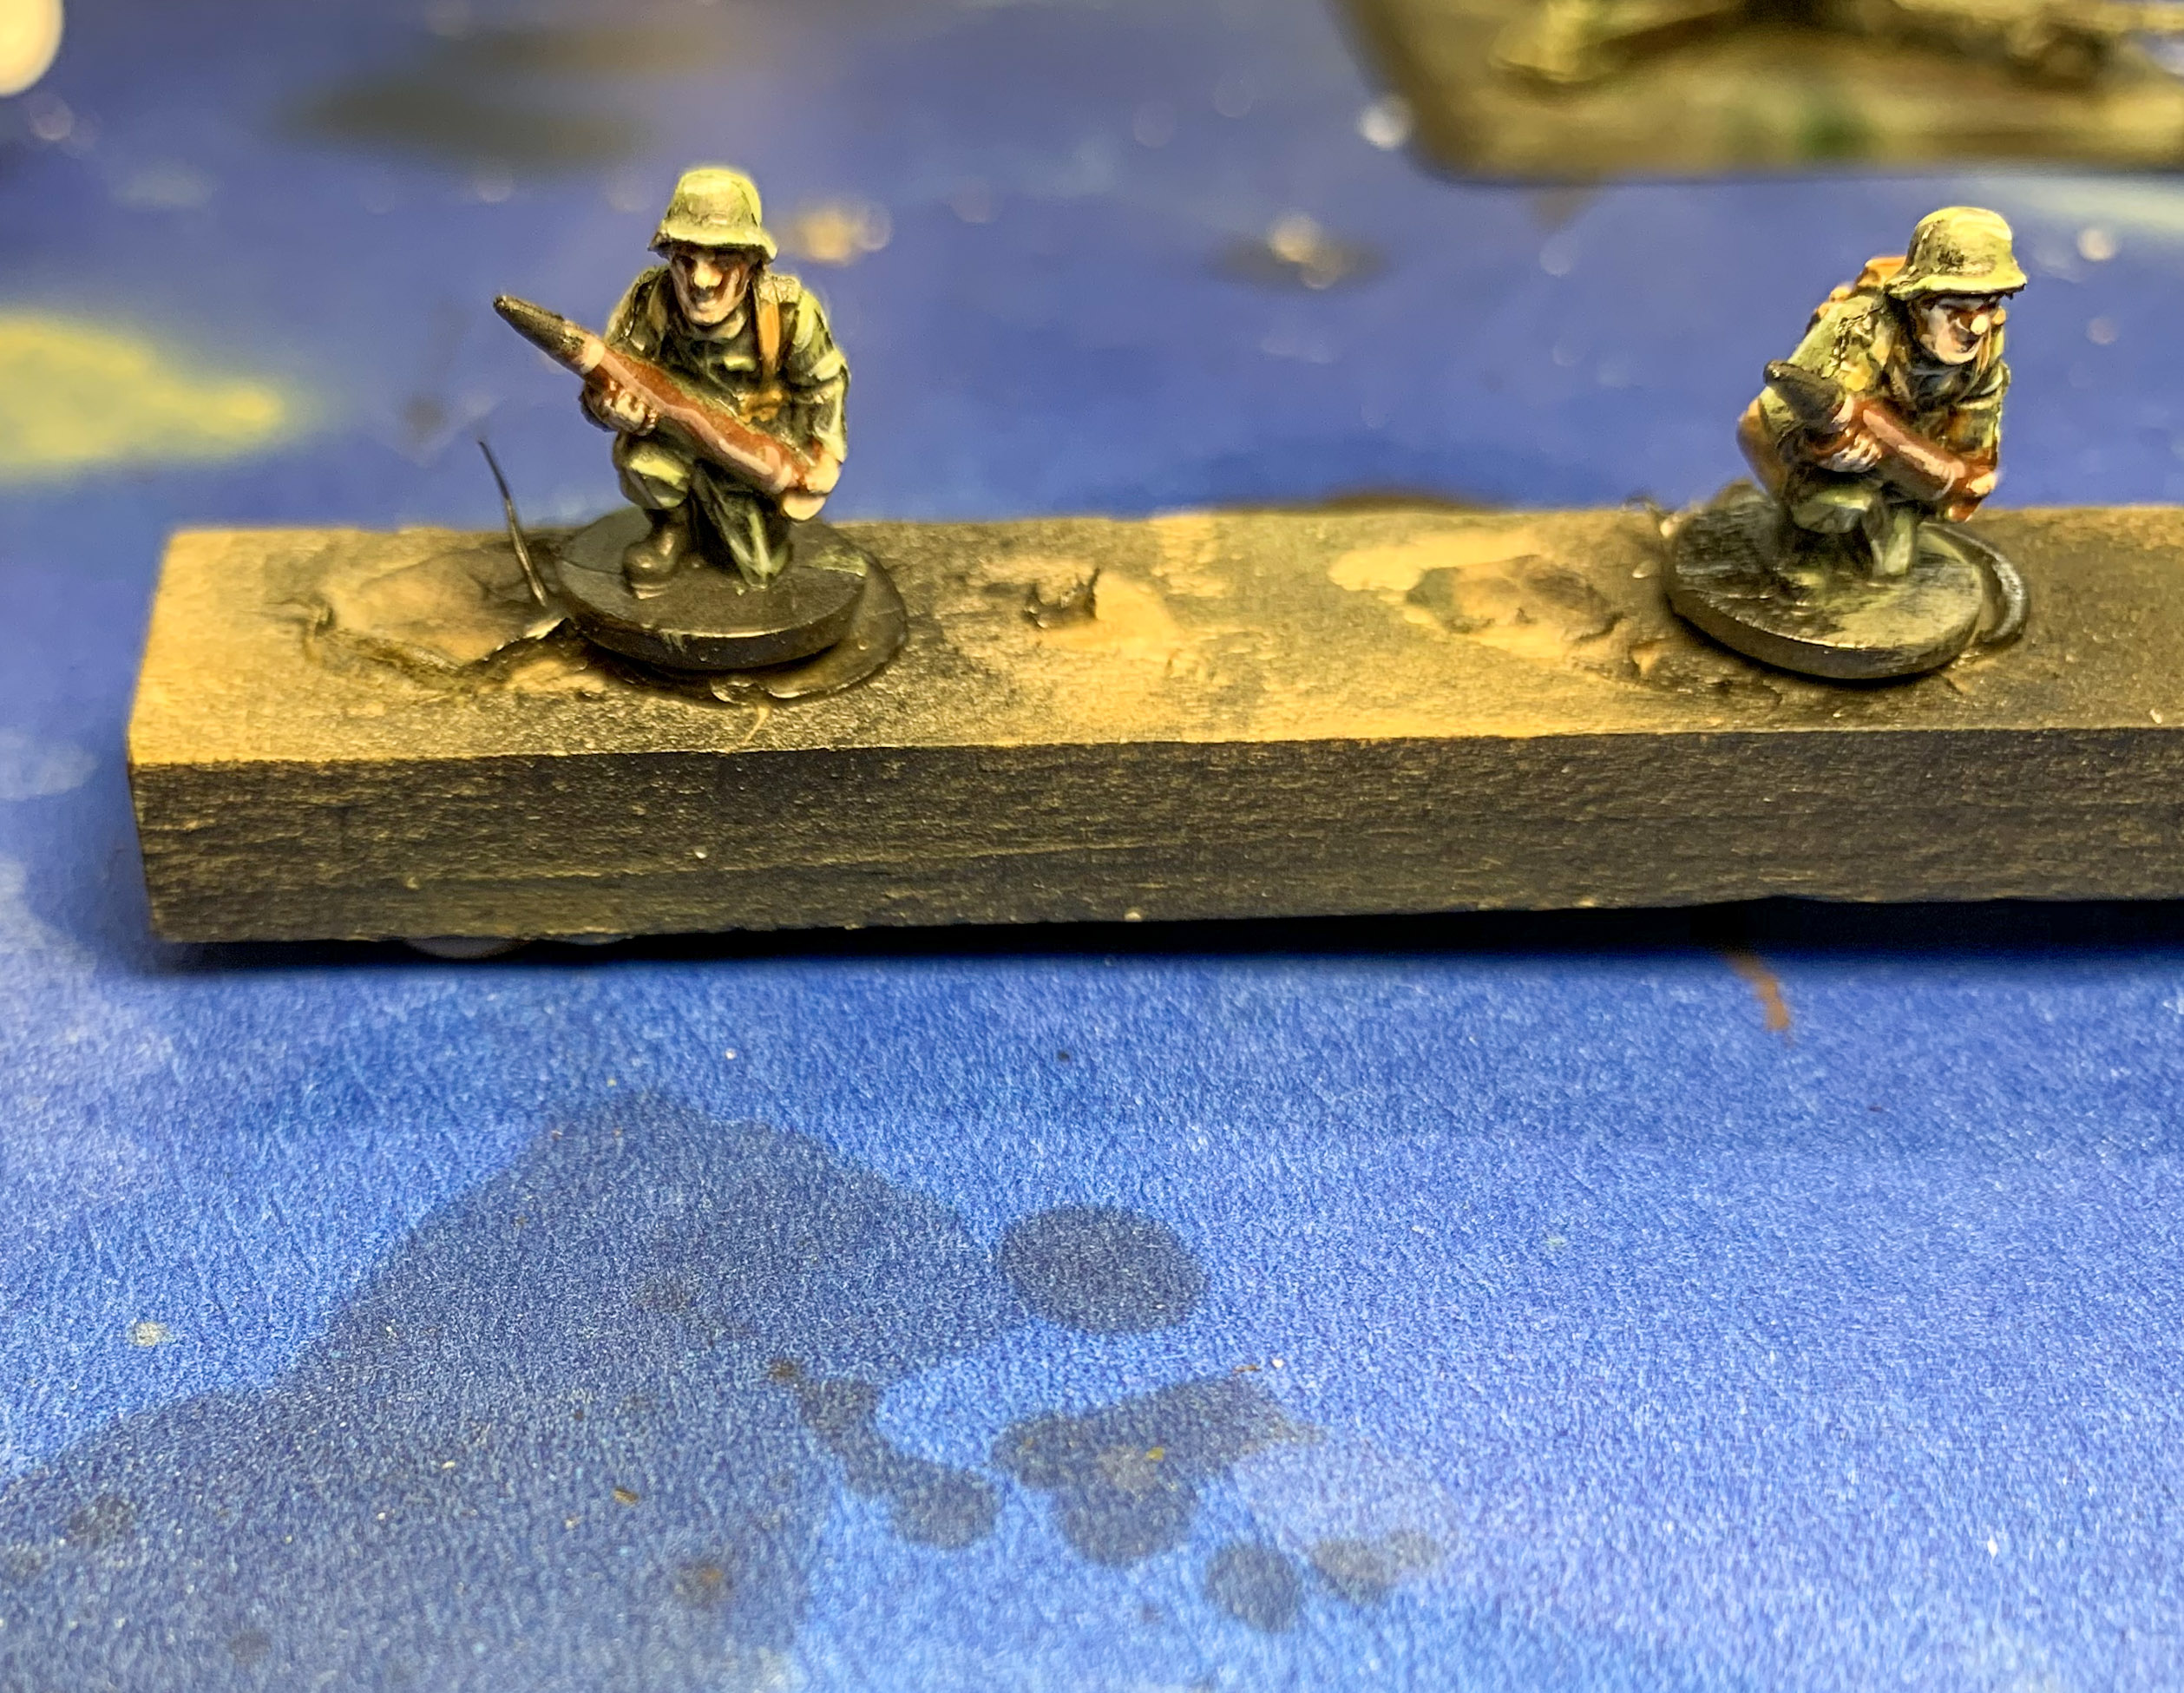
7. Crew Uniforms: While the Gloss Varnish dries, first heavily dry brush Field Grey onto the crew models clothing and helmets. Then follow up with a lighter dry brush of Africa Corps Uniform.
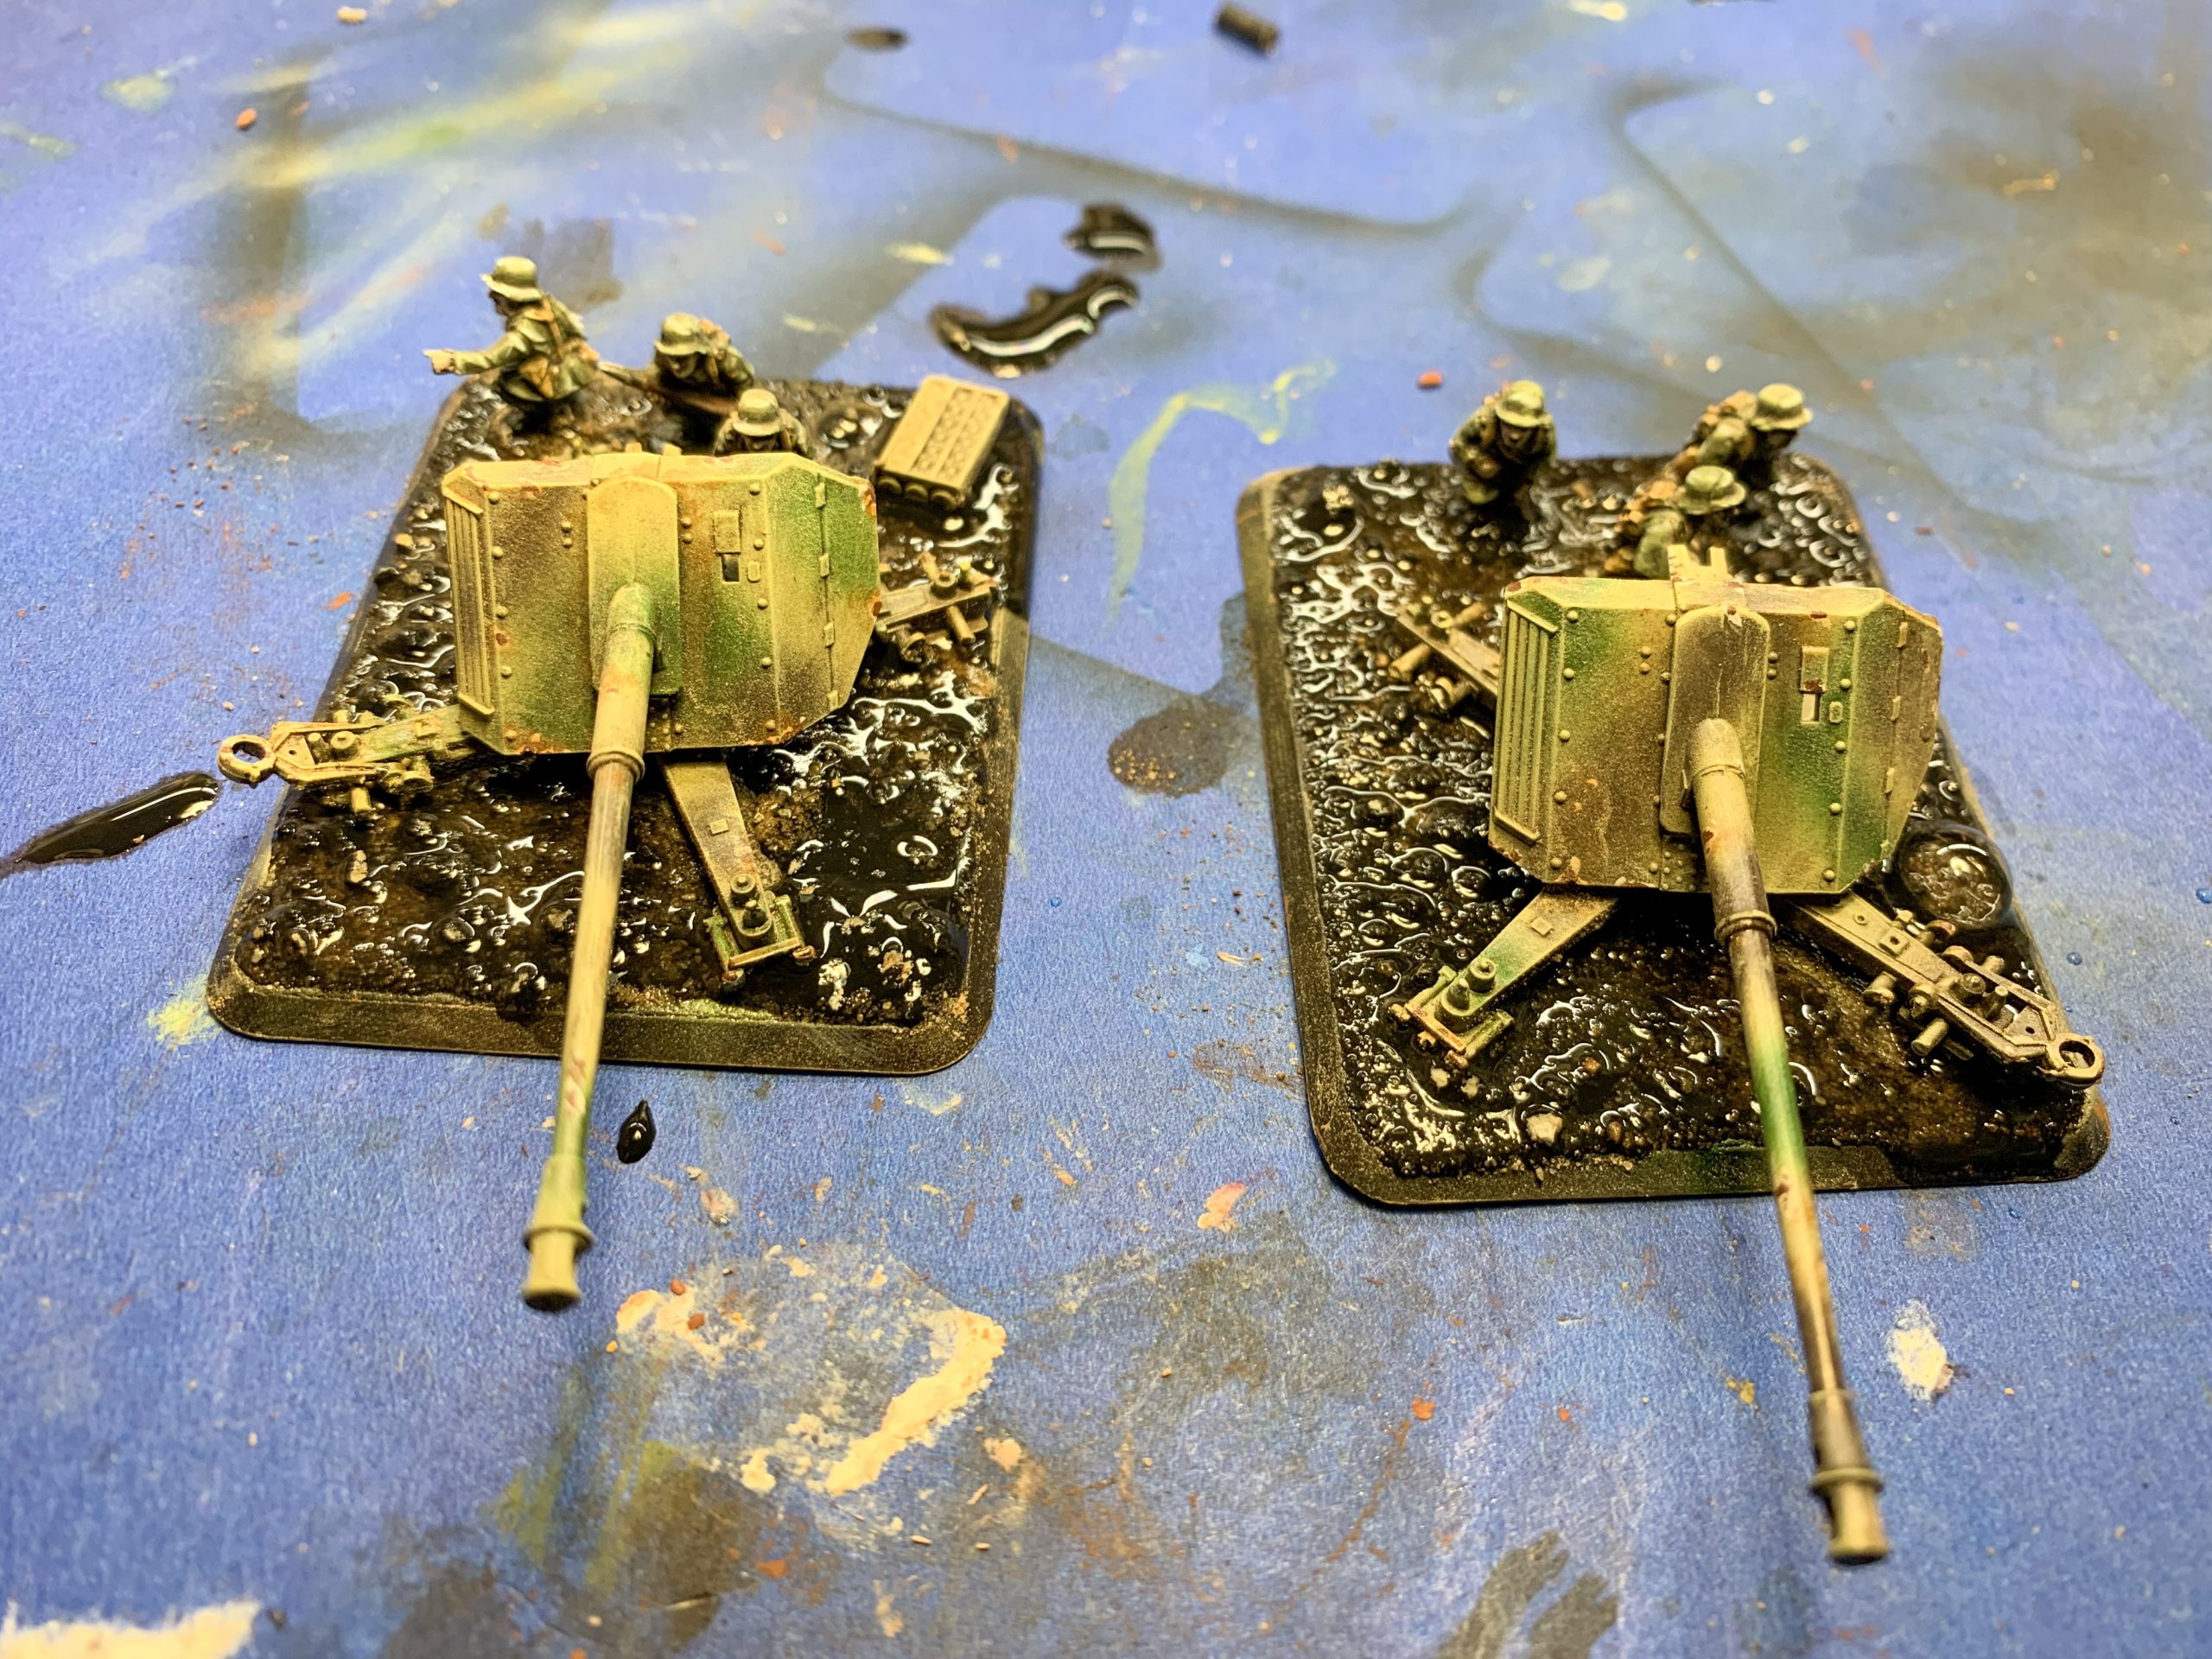
8. Apply Thinner and Wash: Once the gloss varnish is dry take, a large brush and apply enamel thinner over the entire canon model. Then while the thinner is still wet apply the Dark Wash enamel. The Thinner will carry most of the enamel into the crevices and lower areas of the model

9. Clean up Wash and Re-Highlight: Give the wash about 15 min to set then use a flat brush moistened with enamel thinner to remove the wash that has pooled on raised/flat surfaces. Using the brush, you can sweep the wash back into the crevices and the shadows or remove it entirely from raised areas or parts of the model that would be in direct sunlight. Allow the wash to dry then repeat the top highlight dry brush from step 6. Now that the model has been shaded with enamels and varnished, the highlights will be resisted slightly by the underlying layers, keeping the highlights sharp and reducing chalkiness.
10. Crew Details: Now paint the webbing and shells on the crew models Earth Brown and the skin Hull Red.
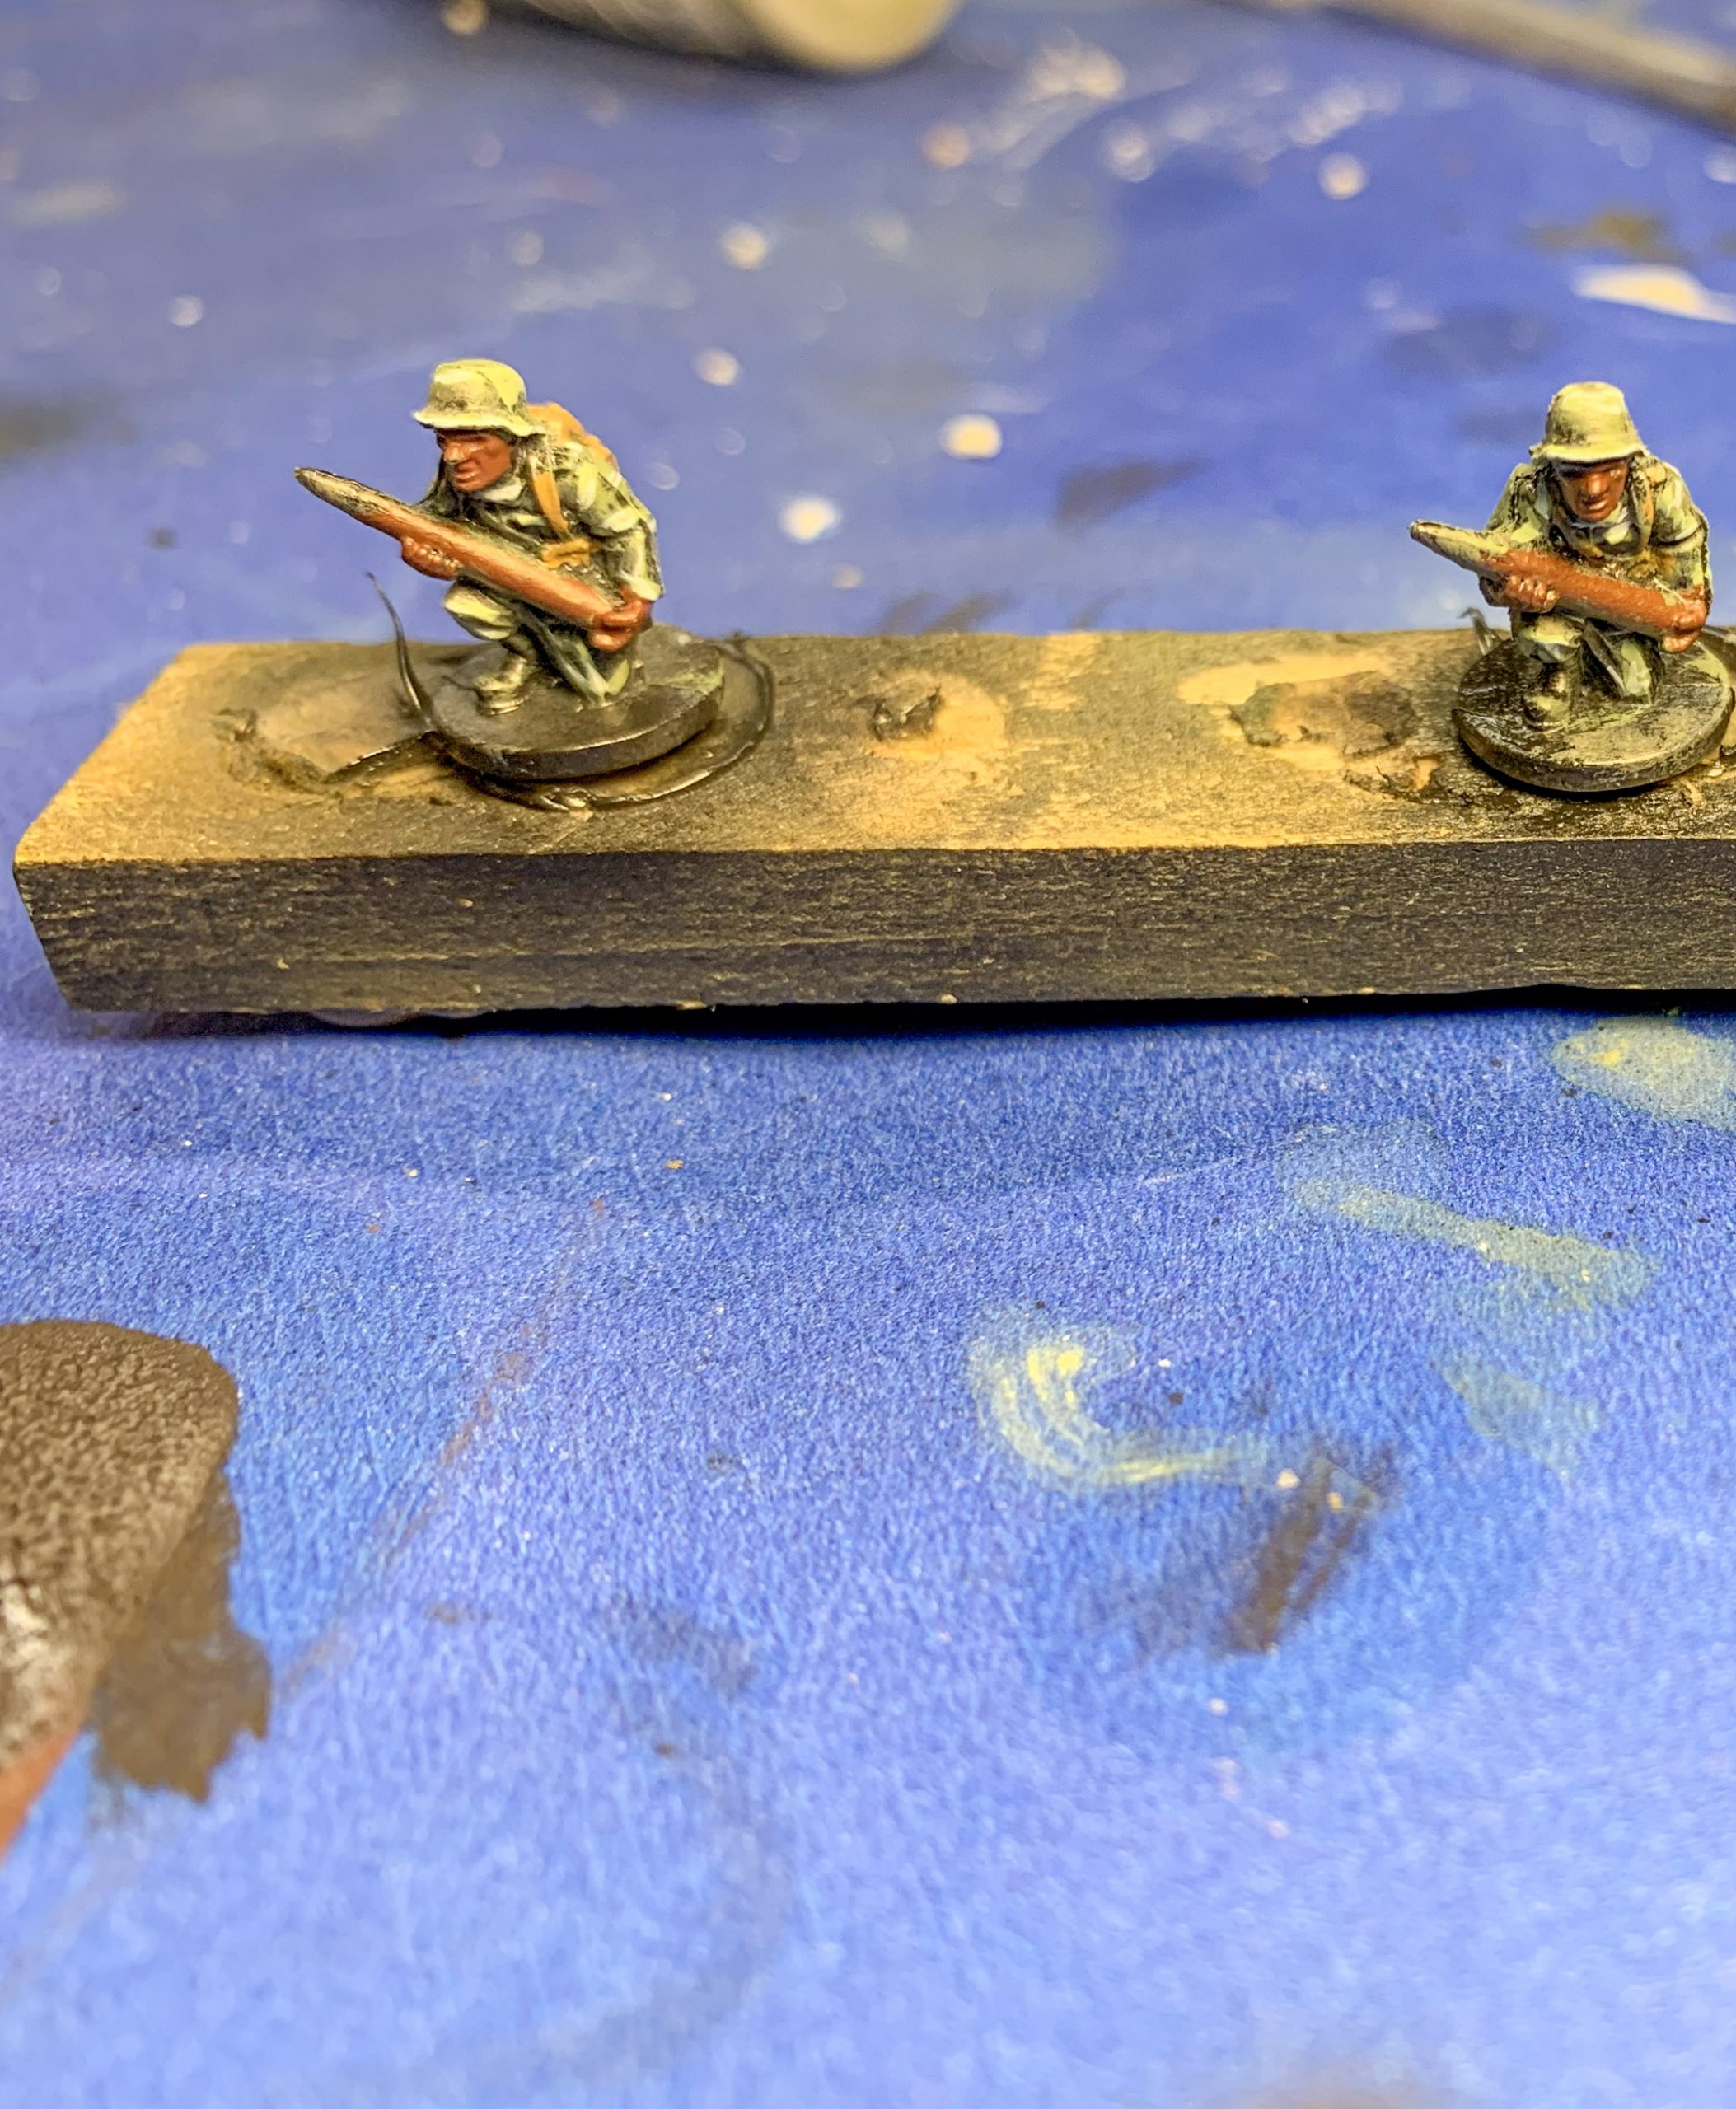
11. Skin Tones and Crew Highlights: Paint Light Flesh onto the skin areas of the crew leaving Hull Red showing in the recesses. Apply highlights to the webbing and shells with Iraqi Sand. When this has dried, wash the flesh areas and brown areas with Flesh Wash. When the wash dries, Highlight the skin with light flesh on raised areas like the chin and nose.
12. Chipping: going back to the canons, paint small streaks and dots of Light Flesh on the model where wear may occur such as at the corners of the armoured plates. After this dries, stipple dots of Hull Red into the centre of the Light Flesh to look like rusty chips. Now brush the enamel rust wash over the “chips” and when it is dried, clean it up with enamel thinner as in step #9. (Note: with chipping on models in 15mm scale less is more. This effect can be overpowering so use it sparingly to build depth and visual interest.)
13. Finish Crew: Paint the warhead of the shells, boots and gasmask canisters black. Follow this by applying Dark Sea Grey to the warheads and cannisters leaving the black in the recesses showing. After this has dried, make a fine highlight with Wolf Grey. Next mix Wolf Grey with Africa Corps uniform in a ration of 1:3 and with a fine brush, highlight any raised areas on the uniform and make sure to do the rim and top of the helmets. Finally, you can now use superglue to adhere the crew to the gun bases.
14. Texturing the Bases: Using an old brush spread a mix of 8 parts white glue to 2 parts water on the base. Next sprinkle this with a mix of kitty litter and sand and shake off any excess.
15. Fixing the Grit: While the glue is still wet, use a pipette and deposit a mix of 3 parts rubbing alcohol to 1 part black acrylic ink onto the base. Drop the mixture until the grit is coated and the capillary action draws the mixture into the crevices around the model. Next while everything remains wet, mix 8 parts water to 2 parts white glue and using a different pipette, layer this on top of the grit mixture. The rubbing alcohol will break the surface tension and everything will flow together to form a strong bond. Leave this overnight to dry.
16. Finishing the Base: When the grit has dried, dry brush various shades of dark and light brown onto the base working from dark to light. Then paint the rim of the base brown (Use 2 coats). When this has dried you can use watered down white glue to attach lichens and static grass. Finally, when all of the glue has dried, use an airbrush to spray on 2 layers of matt varnish.
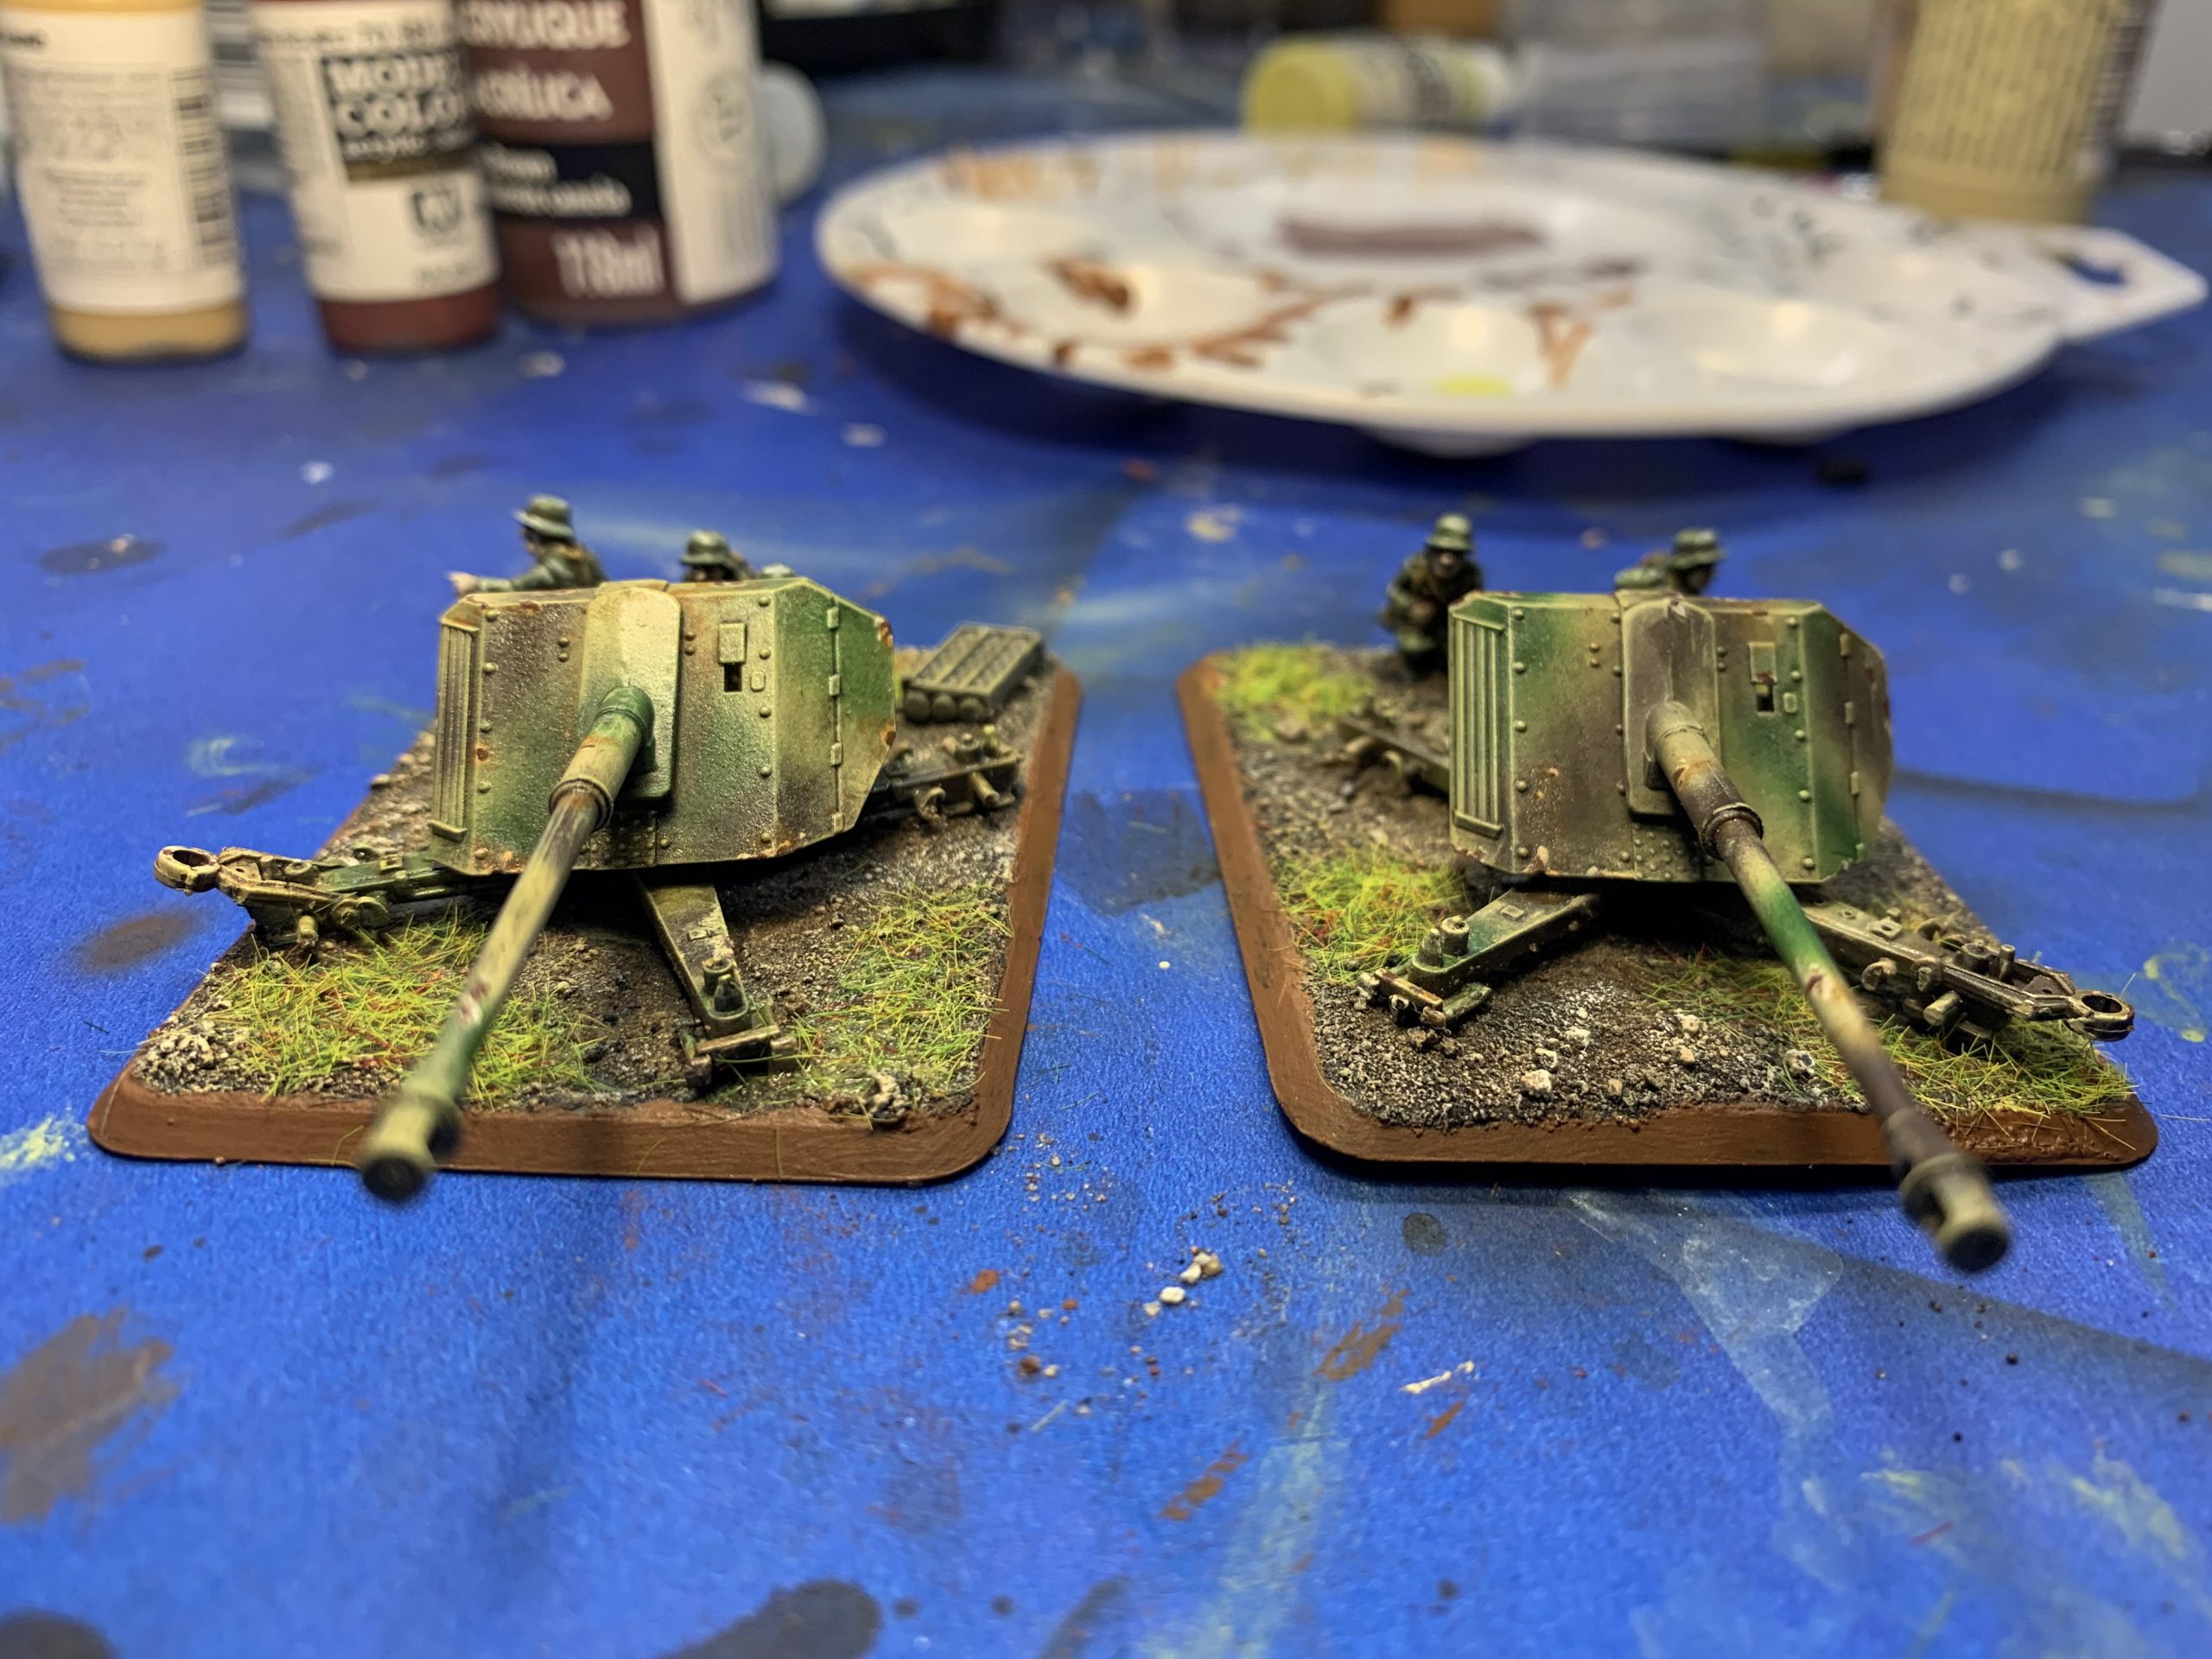
The Models are Now Complete
I hope this process gives you ideas for preparing your models for the launch of Bagration: German. With the sheer variety of paints and techniques for model painting available it is extremely unlikely that you will have the same products to achieve identical results as I have, but the challenge with the hobby is not to duplicate the work of others but travel your own artistic path. So, go ahead and create some exciting and unique paint schemes for your models then grab an opponent and get playing Flames of War!