
With John Lee
With the release of Bagration: Axis Allies, each nation gets one infantry formation in the book. Now you must be thinking what about the rest of them. Well, they are in the command cards. The premise is that you take the core infantry formation and then apply the command cards to create the formation you want to play. For the Romanians, there are seven infantry formations (well six and one cavalry but who is counting) in total you can take. So, let us explore the core infantry formation (Motorised Rifle) first then look at the six command card options – Pioneer, Rifle, Guard Division, Training Division, Mountain Rifle, Cavalry Squadron.
The Motorised Rifle Formation is comprised of the following: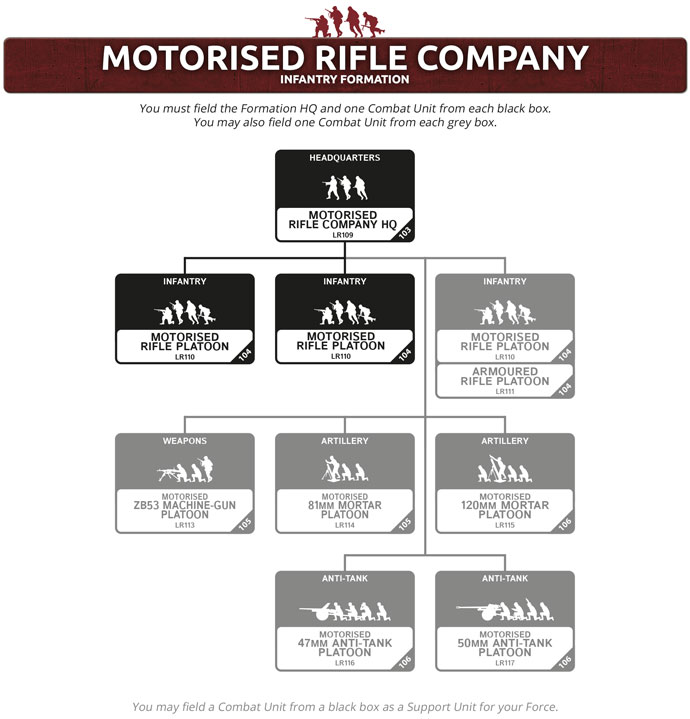
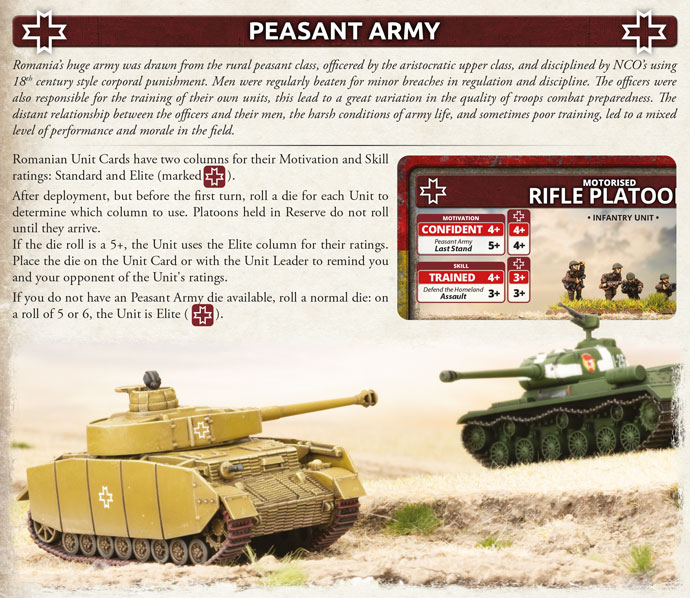
The Romanian infantry are rated Confident Careful Trained and have the special rule “Peasant Army”. This rule is “Each unit has two columns on their unit cards for Motivation and Skill – Standard and Elite. At the start of the game, roll a die and on a 5+ use the Elite column.” So, in the case of this formation, each unit that you roll a 5+ on (either at start of the game or as they come on from reserve), you have a better last stand rating of 4+ and veteran instead of trained. The other rating, they have is “Defend the Homeland”. This gives you a better assault rating – so on a 3+. Very handy for your infantry!
The HQ platoon comprises of two ZB24 rifle teams for 2pts. There are no addons such as panzerfausts. This is the basic HQ.
With the motorised rifle platoons, you have several options to optimise how you want the makeup of these platoons to look. Five ZB30 MG teams for 6pts, seven ZB30 MG teams for 8pts or nine teams for 11pts. Now what I like about these troops is that they are MG armed meaning ROF 3 (stationary) or 2 (moving/pinned) which is great for assaulting or defensive fire. You can add Panzerfausts for +2pts to the platoon and is a no brainer for me here regardless of team type or size. You can also beef up the platoons by adding a 60mm mortar team for 1pt or a Panzerschreck team for +1pt. I like to take the Panzerschreck, in my mind totally worth it if you have the points. Adds a second AT option for defending assaults or jumping out and having a go at a tank that wanders too close. Makes most tanks think twice about assaulting facing two AT11/12 teams.
The 60mm mortar is interesting, gives your platoons their own template – works like the US mortar. Yes, you need to reroll hits being only one weapon but sometimes all you need is one hit for the pin before you assault with the rest of your platoon.
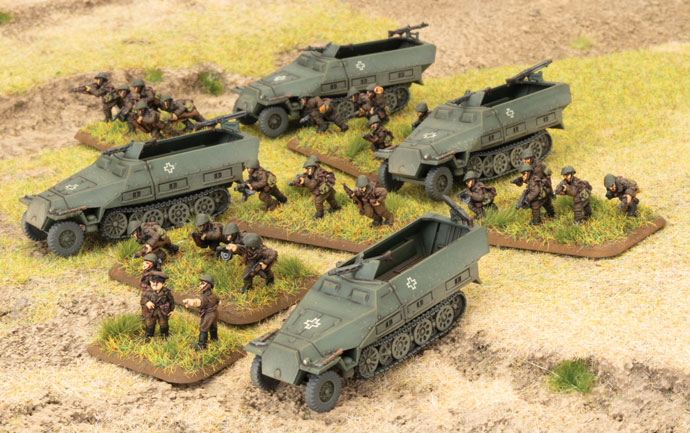
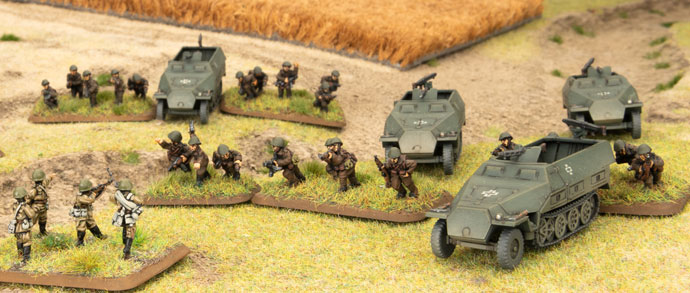
The Armoured Rifle Platoon is slightly different in that they have TB (German Sd Kfz 251) half-tracks to ride in and no 60mm mortars. The interesting thing here is that you now have a platoon that can be mounted in their half-tracks for assault or dismounted with additional MG firepower to support an assault or help with defensive fire. Five ZB30 MG teams with three TB half-tracks for 8pts, seven ZB30 MG teams with four TB half-tracks for 11pts or nine teams with five TB half-tracks for 15pts. That is right, FIVE half-tracks with a maxed-out platoon! You can add Panzerfausts for +2pts to the platoon and is a no brainer for me here regardless of team type or size. You can also beef up the platoons by adding a Panzerschreck team for +1pt.
This is an interesting option to take, I think. If you take the Armoured Rifle platoon instead of a Rifle Platoon as your third platoon, gives you another offensive option to either assault or come on from reserve to relieve pressure on a contested objective using their half-tracks speed to get there and if required, launch a mounted assault.
The next platoon to look at is the ZB53 Machine-Gun platoon where you can have four of these teams for 4pts. Something to consider taking, especially if you do not take the Armoured Rifle platoon. Adds another platoon for the formation count. I do not always take these but can be useful to bolster defending an objective or protect artillery.
Up next are the mortar platoons, starting with the 81mm Mortar Platoon – I think one of the best buys in the formation with two for 3pts, three for 4pts, four for 6pts. This is an absolute no brainer – range of 48” and can fire a smoke bombardment. This is one of my core units for this formation and three mortars are the best price point.
The 120mm Mortar Platoon is also a great option – two for 3pts, four for 6pts, and six for 9pts. Taking six allows you to reroll misses. Combined with repeat bombardments, can make your opponent squirm rerolling saves. If you roll 5+ for the peasant army rule for this unit, they become veteran allowing you to range in much easier. Another no brainer for me with a range of 56”, AT2 and FP3+ and can also fire a smoke bombardment! Another core one for me.
The final units to round out the formation are the Anti-tank Platoons. The 47mm Anti-tank Platoon has two guns for 3pts or four for 7pts. Useful AT8 FP4+ with a range out to 24”. The 50mm Anti-tank Platoon has two guns for 5pts or three for 7pts. Better AT9 FP4+ with a range out to 28”. Great little units to provide some AT support for defending assaults or keep your opponent’s recon elements honest and provide another unit for the formation break.
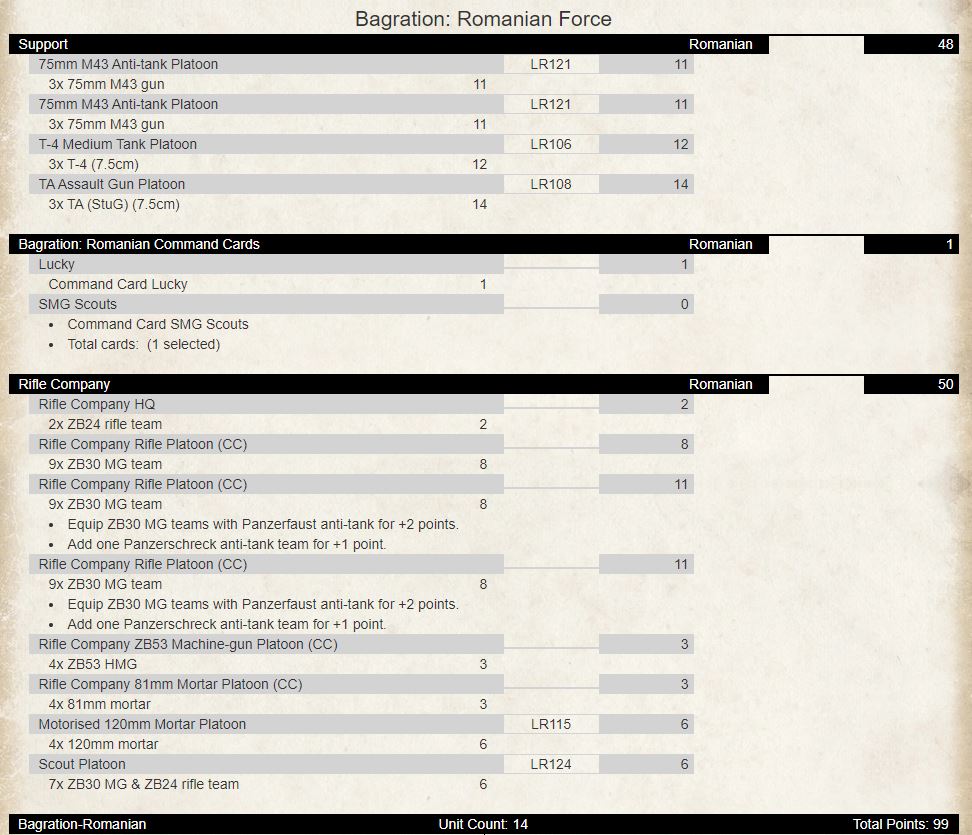
Whilst the Romanians do not have high end AT (14 or greater) in their force, they can take Soviet or German allies to help with that. I feel though that with the infantry formation, you may not even need it, as the 75mm M43 Anti-tank is AT13 out to 36” and you can take two platoons in your force! Let us look at two lists – one with allies and one without. Lists will be based on 105pts.
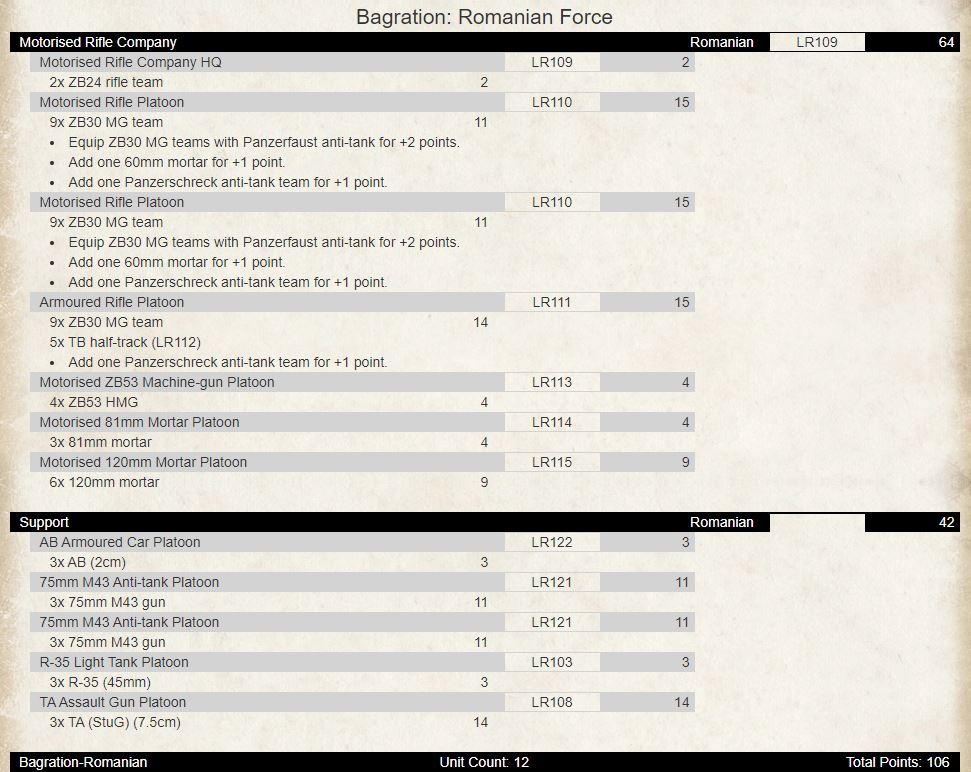
Seven units for the formation break. Four artillery templates. Six guns with AT13 and a unit with spearhead to get your Armoured Rifle platoon into assault range quickly with TA Assault Guns in support and some light tanks to run a diversion on the other flank or to help with the assault.

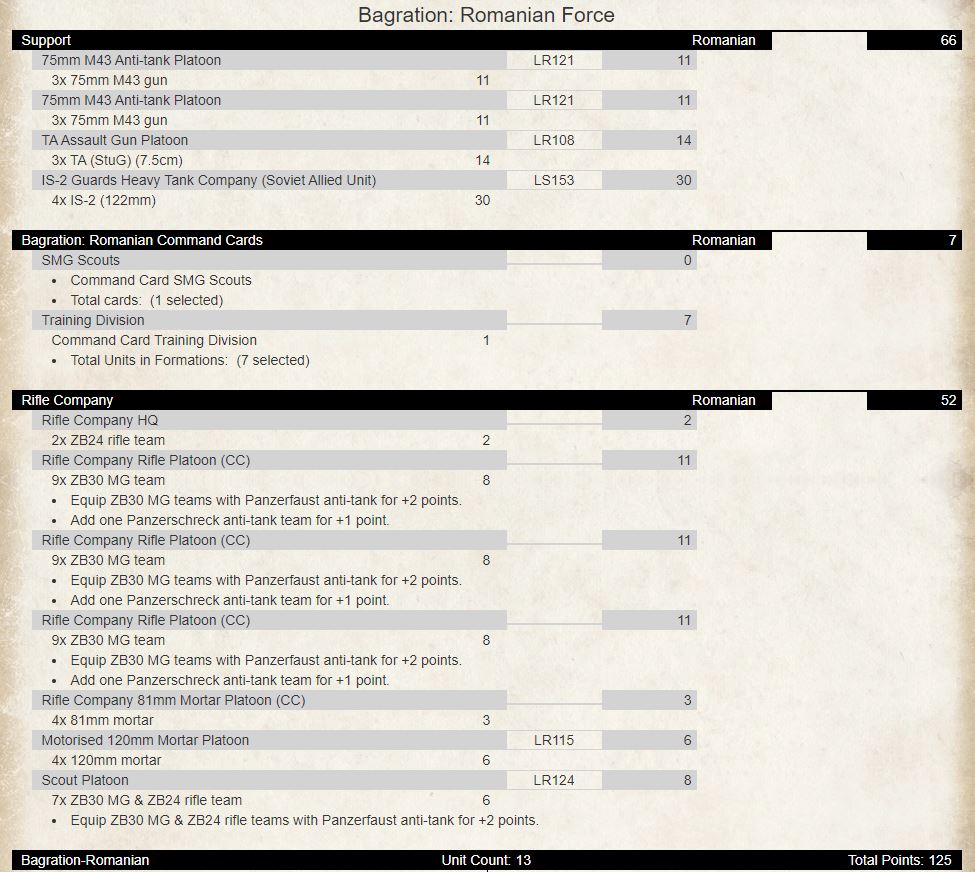
Now you have the AT14 you need and six units for the formation break. Had to drop the Armoured Rifle platoon and one of the 75mm M43 platoons but bring in a TACAM T-60 Tank-hunter platoon to do it though. A Soviet allied option would provide you with five IS-2 for one more point than the Tiger platoon in which we need to remove one of the 60mm mortar teams to achieve that. On reflection, I think that the IS-2 company of five tanks would suit this list – but again choose what suits your playstyle.
Now onto the six command card formations. First up is the Pioneer Company and is comprised of the following:
- 1 Infantry Company HQ
- 2-3 Pioneer Platoon
The platoons have the same characteristics as the core Motorised Rifle Formation. The difference is that you pay an additional 1pt for the formation. The HQ platoon and Pioneer platoons can dig in on a 2+ and cross minefields on a 2+. You also pay an extra 1pt for each Pioneer Platoon. There are no other units in the formation, so if you take it, you will probably want to take three platoons and maybe take some allied Soviet or German heavy armour, 75mm M43 AT guns, and some artillery would help too.
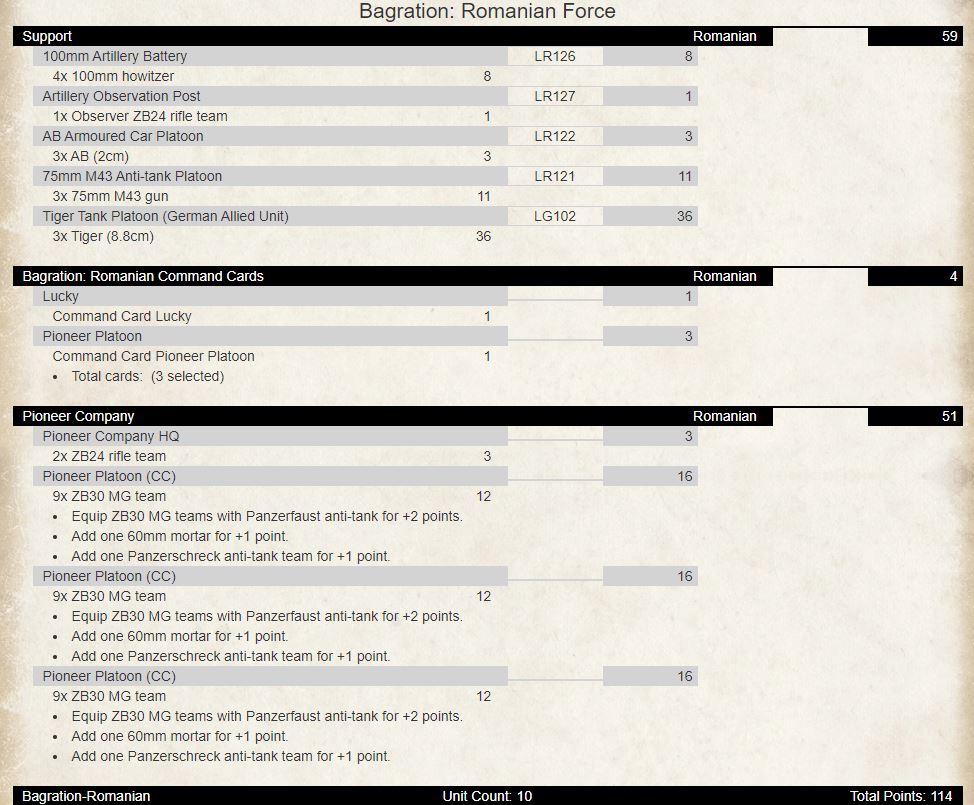
You have a maxed-out formation and can leave two platoons defending objectives if required. The Tigers for heavy AT work, four artillery templates, AB Armoured Cars for spearhead with AT13 AT guns to provide overwatch. If you want to swap out Tigers for five IS-2s then also remove the lucky card.
The next formation to look at is the Rifle Company. The units that make up this formation are:
- 1 Rifle Company HQ
- 2-3 Rifle Platoon
- 0-1 Rifle Company ZB53 Machine-Gun Platoon
- 0-1 Rifle Company 81mm Mortar Platoon
- 0-1 Motorised 120mm Mortar Platoon
- 0-1 Rifle Company 50mm Anti-tank Platoon or Rifle Company 47mm Anti-tank Platoon or 47mm Infantry Gun Platoon
- 0-1 Scout Platoon
 So, it is pretty similar to the Motorised Rifle Company in strength. The main differences are that they are rated Confident Aggressive Green with an assault rating of 4+ and keep the Peasant Army rule. The Rifle Platoons ROF drops from 3/2 to 2/1. The other differences are that you can now have an Infantry Gun Platoon as an option and the introduction of a Scout Platoon. The Infantry Gun Platoon has three 47mm guns without gun shields, a range of 24” AT6 FP4+ with HEAT for 3pts. The Scout Platoon can have either five Z30 MG and ZB24 teams for 4pts or seven teams for 5pts. You can upgrade them to have panzerfausts for +2pts. They have Scout and Spearhead attributes. This platoon is also available as a support option in the force diagram. There is also a command card SMG Scouts that allow you to replace the weapons for the platoon with SMG for no cost. For the rest of the units in the formation, the costs are:
- Rifle Platoon: -3 pts per unit
- Rifle Company ZB53 Machine-Gun Platoon: -1pt per unit
- Rifle Company 81mm Mortar Platoon: 2pts for two, 3pts for four
- Rifle Company 50mm Anti-tank Platoon: 3pts for two, 5pts for three
- Rifle Company 47mm Anti-tank Platoon: 3pts for two, 4pts for three
A cheaper formation and you get more into your list – just do not expect them to be assaulting.
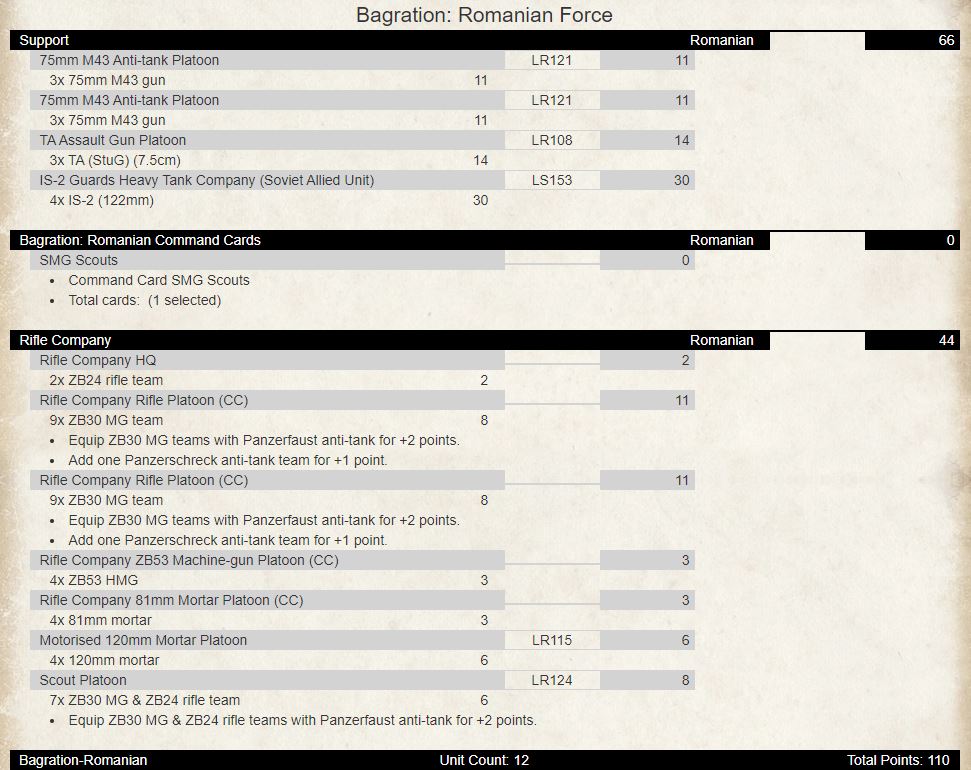
Seven platoons for the formation break. Two platoons backed up by two platoons of AT13 guns to anchor your defence along with HMGs. Scout platoon (armed with SMGs) is your either your reserve platoon to reinforce a defence or to spearhead your IS-2s into assault on turn 2 supported by Stugs and two artillery templates.
The next two formations are based on the Rifle Company and have either better or worse ratings. The first is the Guard Division. For +1pt per unit in the formation, they gain Fearless Careful (but still Green or whatever their skill is) and lose the Peasant Army rule. Unusual to have this combo but makes for an interesting formation – especially for assaulting the enemy.
With Fearless Careful Infantry, I have maxed it out with four platoons (including the scouts) that should be able to take on all comers backed by two platoons of AT13 guns and two templates. T-4s and Stugs to provide mobile support.
The second card that transforms the Rifle Company is the Training Division. For -1pt, all units in the formation become Reluctant Aggressive Green, and lose the Peasant Army rule. All gun and weapons teams now have assault 6.
Very similar to the Rifle Company but with an added rifle platoon and only dropping the HMGs – still seven units for the formation break. Still need the IS-2s for offensive operations or assaulting and use the scout platoon to spearhead them in.
The next formation is the Mountain Rifle Company. The units that make up this formation are:
- 1 Mountain Rifle Company HQ
- 2-3 Mountain Rifle Platoon
- 0-1 Motorised ZB53 Machine-Gun Platoon
- 0-1 Motorised Company 81mm Mortar Platoon
- 0-1 Motorised 120mm Mortar Platoon
- 0-1 Mountain 47mm Infantry Gun Platoon
- 0-1 Motorised 50mm Anti-tank Platoon or Motorised Company 47mm Anti-tank Platoon
- 0-1 Mountain 75mm Artillery Battery
Main differences here are the Mountain Platoons and the 75mm Artillery Battery in the formation. The Formation HQ and Mountain Rifle Platoons also have the attributes from the Mountaineer Command Card. The rule on the card is “Teams that start their Movement Step adjacent to a cliff or mountain side (or another similar Impassable terrain feature) roll a Skill Test. If successful, the Team may move using Terrain Dash across the terrain”.
The Mountain Rifle Platoons ROF drops from 3/2 to 2/1 for -2pts per unit. Mountain 47mm Infantry Gun Platoon has three guns for 4pts and no gun shield and is Confident Trained Careful. The Mountain 75mm Artillery Battery is a useful addition and provides some flavour to the formation. It has an indirect range of 64” with AT2 FP4+ and smoke bombardment. A direct fire range of 16” with AT5 FP3 and smoke capability. Two for 4pts or four for 8pts.
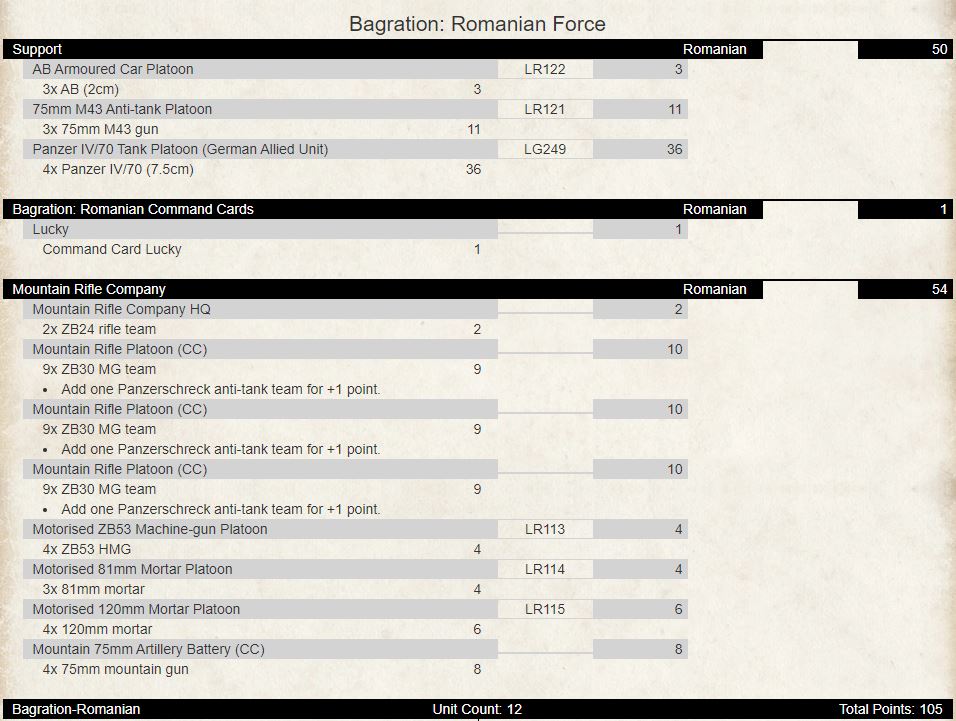
Eight units for the formation break, three templates, spearhead with the armoured cars and both static and mobile high end AT guns. This army is more suited to defence and manoeuvre with one platoon for defence mixed in with HMGs and AT guns with the remaining platoons to go on the offence.
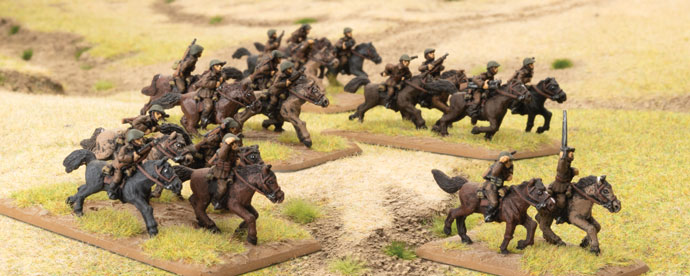
The final and most exciting formation is the Cavalry Squadron! The units that make up this formation are:
- 1 Company HQ
- 2 Cavalry Troop
- 0-1 Cavalry Troop or Cavalry Scout Troop
- 0-1 Motorised ZB53 Machine-Gun Platoon
- 0-1 Motorised Company 81mm Mortar Platoon
- 0-1 Motorised 50mm Anti-tank Platoon or Cavalry 45mm Anti-tank Platoon

The Company HQ is made up of two teams for 2pts. The Cavalry is Confident Careful Trained and has the Peasant Army Rule. ROF is 2/1 and assault on 3+. The Cavalry Troop is made up of four ZB30 MG & ZB24 rifle team for 4pts or seven teams for 6pts. Add panzerfaust for +2pts. Add a 60mm mortar for +1pt. The Cavalry Scout Troop costs an additional point and gain Scout and Spearhead and use rifles only so ROF is 1/1 slow firing. Cavalry 45mm Anti-tank Platoon is comprised of captured Soviet long 45mm guns. They have a 20” range with AT8 FP4+. Two guns for 3pts or three for 5pts.
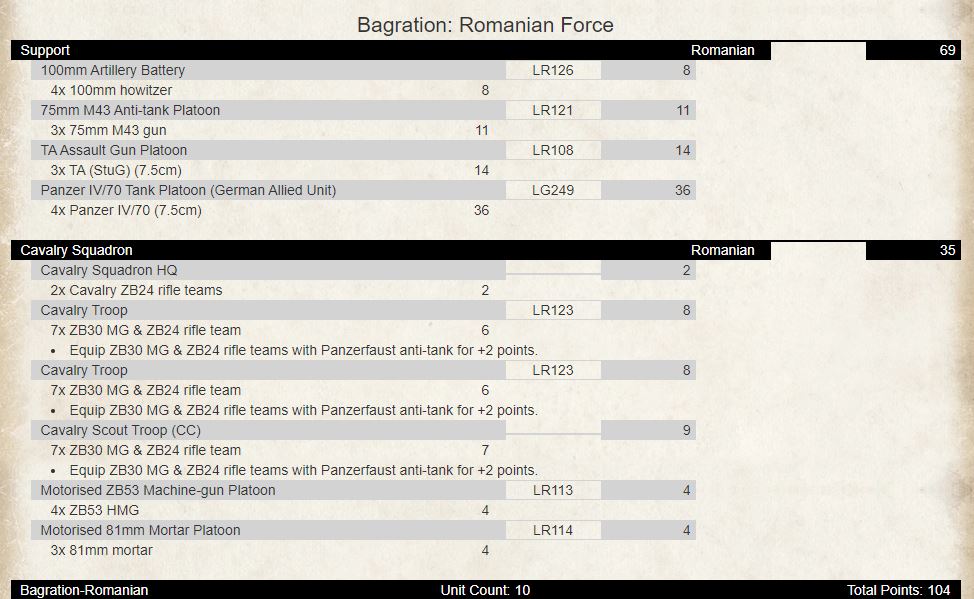
Six platoons for the formation break. Two templates and high-end AT. Maxed out cavalry troops including one Scout Cavalry Troop. Use that troop for spearhead to get all three troops into position using their speed to dismount and assault. 20” cross country move, whilst mounted and follow me extends another 4” will get you across the board quickly. Also if coming from reserve can get there quickly when mounted!
One last thing to look at before wrapping up. There is one warrior who you can take with either a Motorised Rifle Platoon or Rifle Platoon – Aurel Sandu.
Aurel Sandu Command Card: The unit leader may reroll their infantry save once per turn. Infantry teams cross minefields safely on 2+. Tactics rating of 3+. Costs 4pts.
So, there you have it – seven infantry formation options to choose from. Romanian Infantry have some uniqueness about them with Cavalry, Guards, Motorised Rifles that you can exploit in your games. I hope this has been of some help. Happy List Building!