
With Joe Saunders
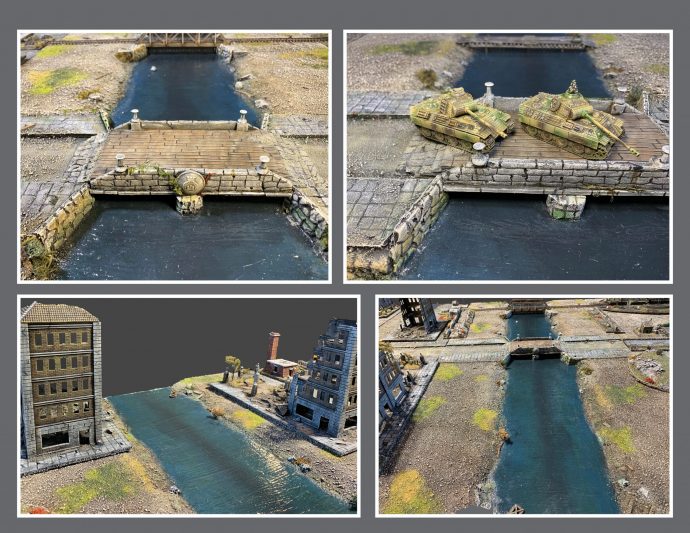
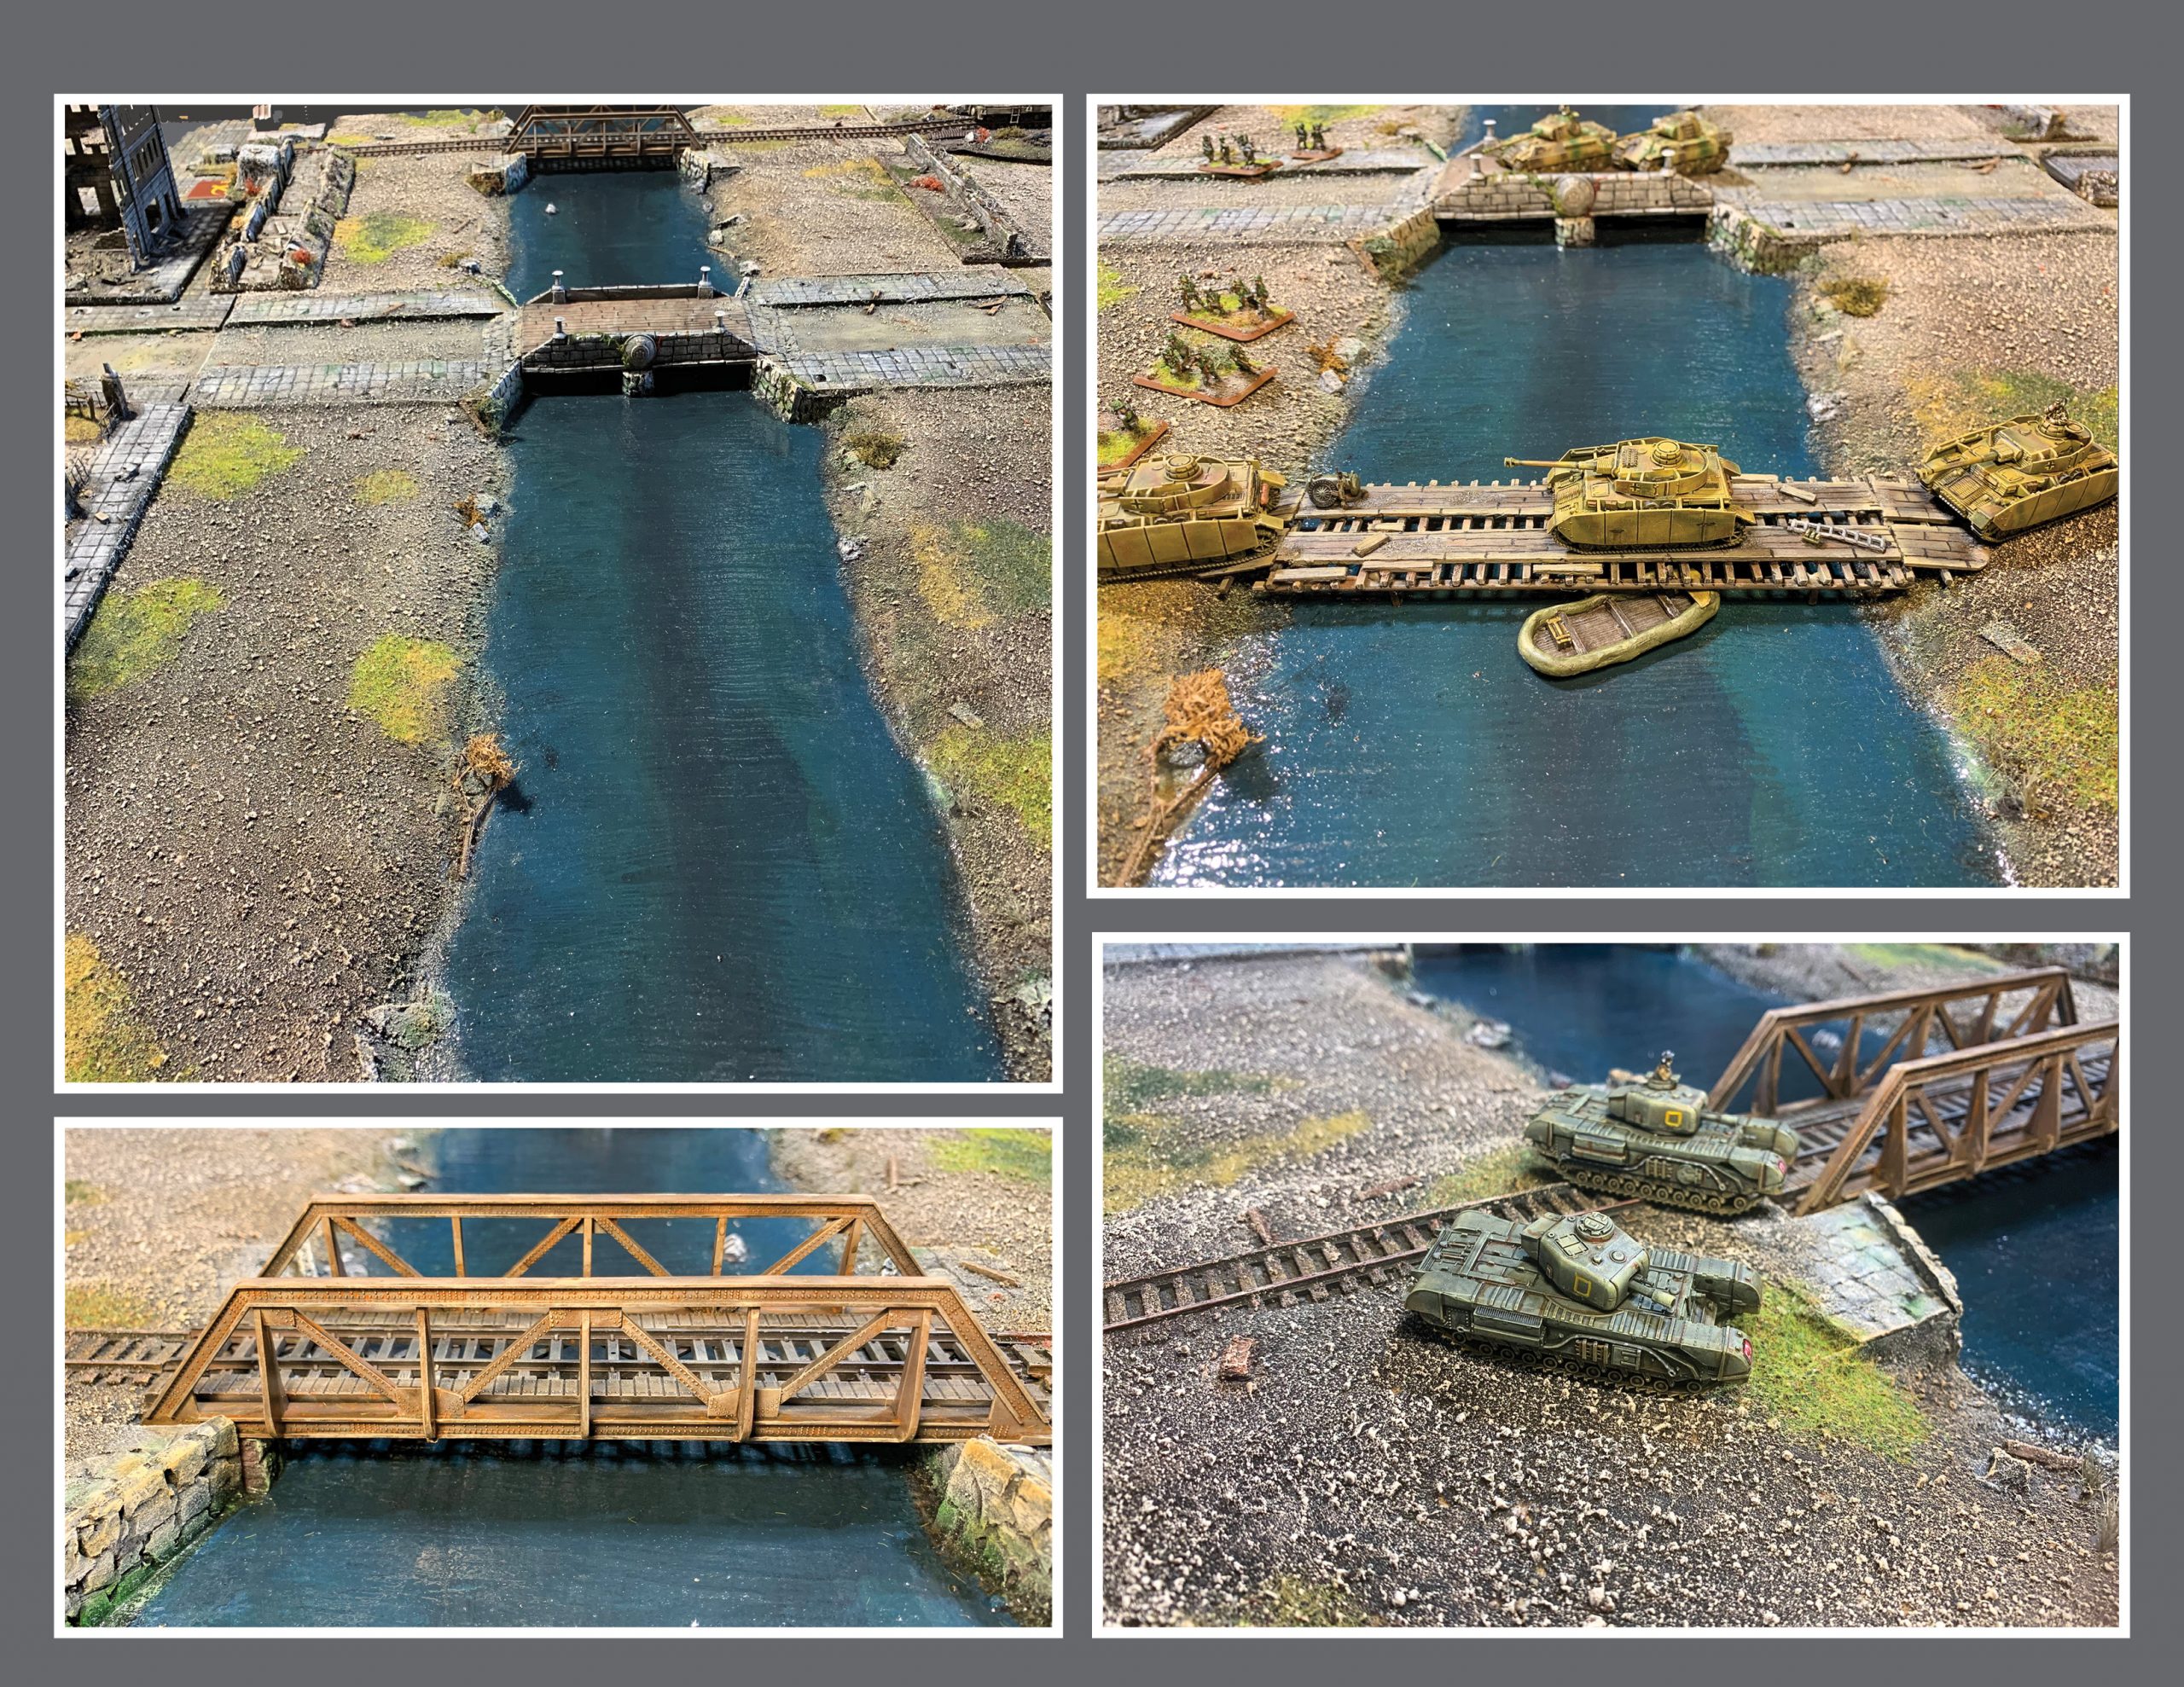
The launch of Bagration German combined with the Bagration Soviet now gives us a complete set of options for fighting some really dynamic Eastern Front themed games in Flames of War. Between the 2 books we have quite a few new scenarios adding attacks on both fortified cities and river crossings. In my previous articles we have explored the city fighting , so now I figured I should turn my attention to the river crossing scenarios.
In order to play the river scenarios, we obviously need river terrain to fight over. Battlefront makes the new Bagration: River Assault Mission Terrain Pack to handle this. It provides a ready-made battle matt, card counters including assault boats, bridges and weapon emplacements and all of the tokens for your scenarios. However, I decided to build my own river crossing board to use. If you are interested in building a special backdrop to put your shiny new Bagration themed models on, read on and I will describe the process.
Materials:
This project requires a wide range of tools and skills to build. If you don’t have a particular tool or product you can always substitute something similar or use a different technique. As there are a few chemicals involved, make sure to work in a ventilated space and be careful with the knives hot glue gun etc. Here is the list of materials for the build:
| Airbrush & Compressor | Water | Grey Acrylic paint |
| Paint Brushes (all sizes) | Tweezers | Black Acrylic ink |
| Craft Knife | Hot Glue Gun | Brown Acrylic paint |
| Sand & Kitty Litter | Metal Ruler | Green Acrylic Paints |
| 2x4ft Piece of Plywood | Black Matt Spray Paint | White Acrylic Paint |
| 2×4 Boards | Foam Core Board | Beige Acrylic Paints |
| Plastic Mixing Cups | Plaster/Spackle | Blue Acrylic Paint |
| Matt Spray Varnish | White Glue | Mod Podge Gloss |
| Static Grass | Gloss Acrylic varnish | Pen & Paper |
| Rubbing Alcohol | Match sticks | Wood Saw |
| Wood Screws | Push Pins | Foam Glue & Caulking Gun |
| 2x 4ft Insulation Foam | Drill | Tape Measure |
| 2 Spray Bottles | File | Masking Tape |
| Model Lichens | Rolls of Sand Paper | Keyhole Saw |
| Drop Cloth | Various Bits box Objects | Model Train Track |
| Balsa Wood Sheet | Cardboard | Plastic Wrap |
Steps:
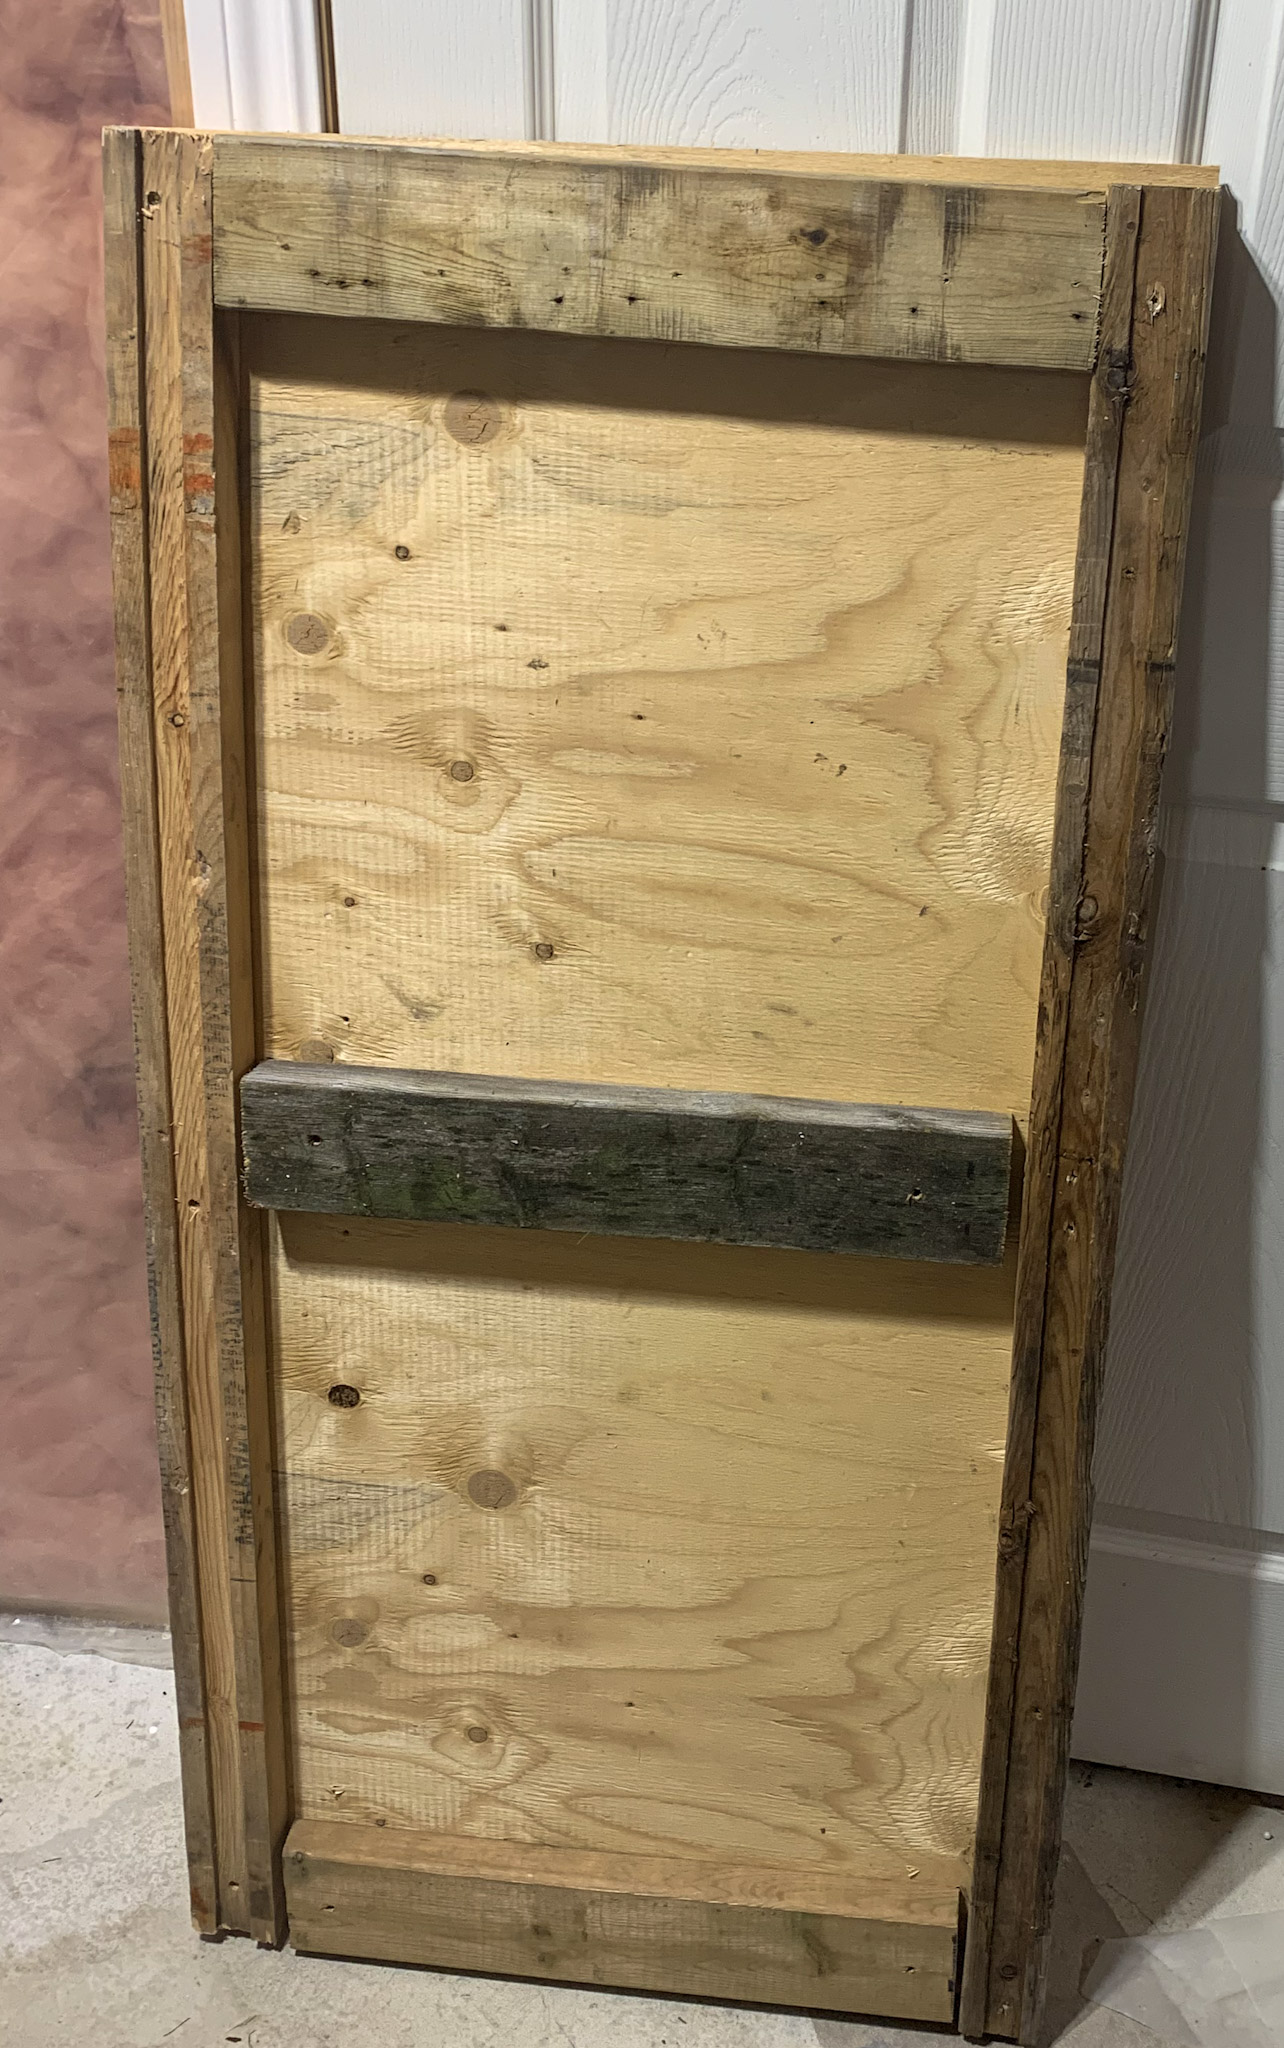
1. Building the Board: Using your tape measure rule out a 2ft by 4ft section of plywood. Cut this out with your wood saw. Next cut your 2×4 s into 2 4 ft long sections and 3 21-inch long sections. Place the 2 ft sections along the outside edges of the long side of the plywood and cap the ends with the 21-inch lengths. Place the third 21-inch length in the middle. Now using the wood screws and drill, screw the 2x4s onto the bottom of the plywood to create a supporting frame. Note: the picture shows the board from the bottom.
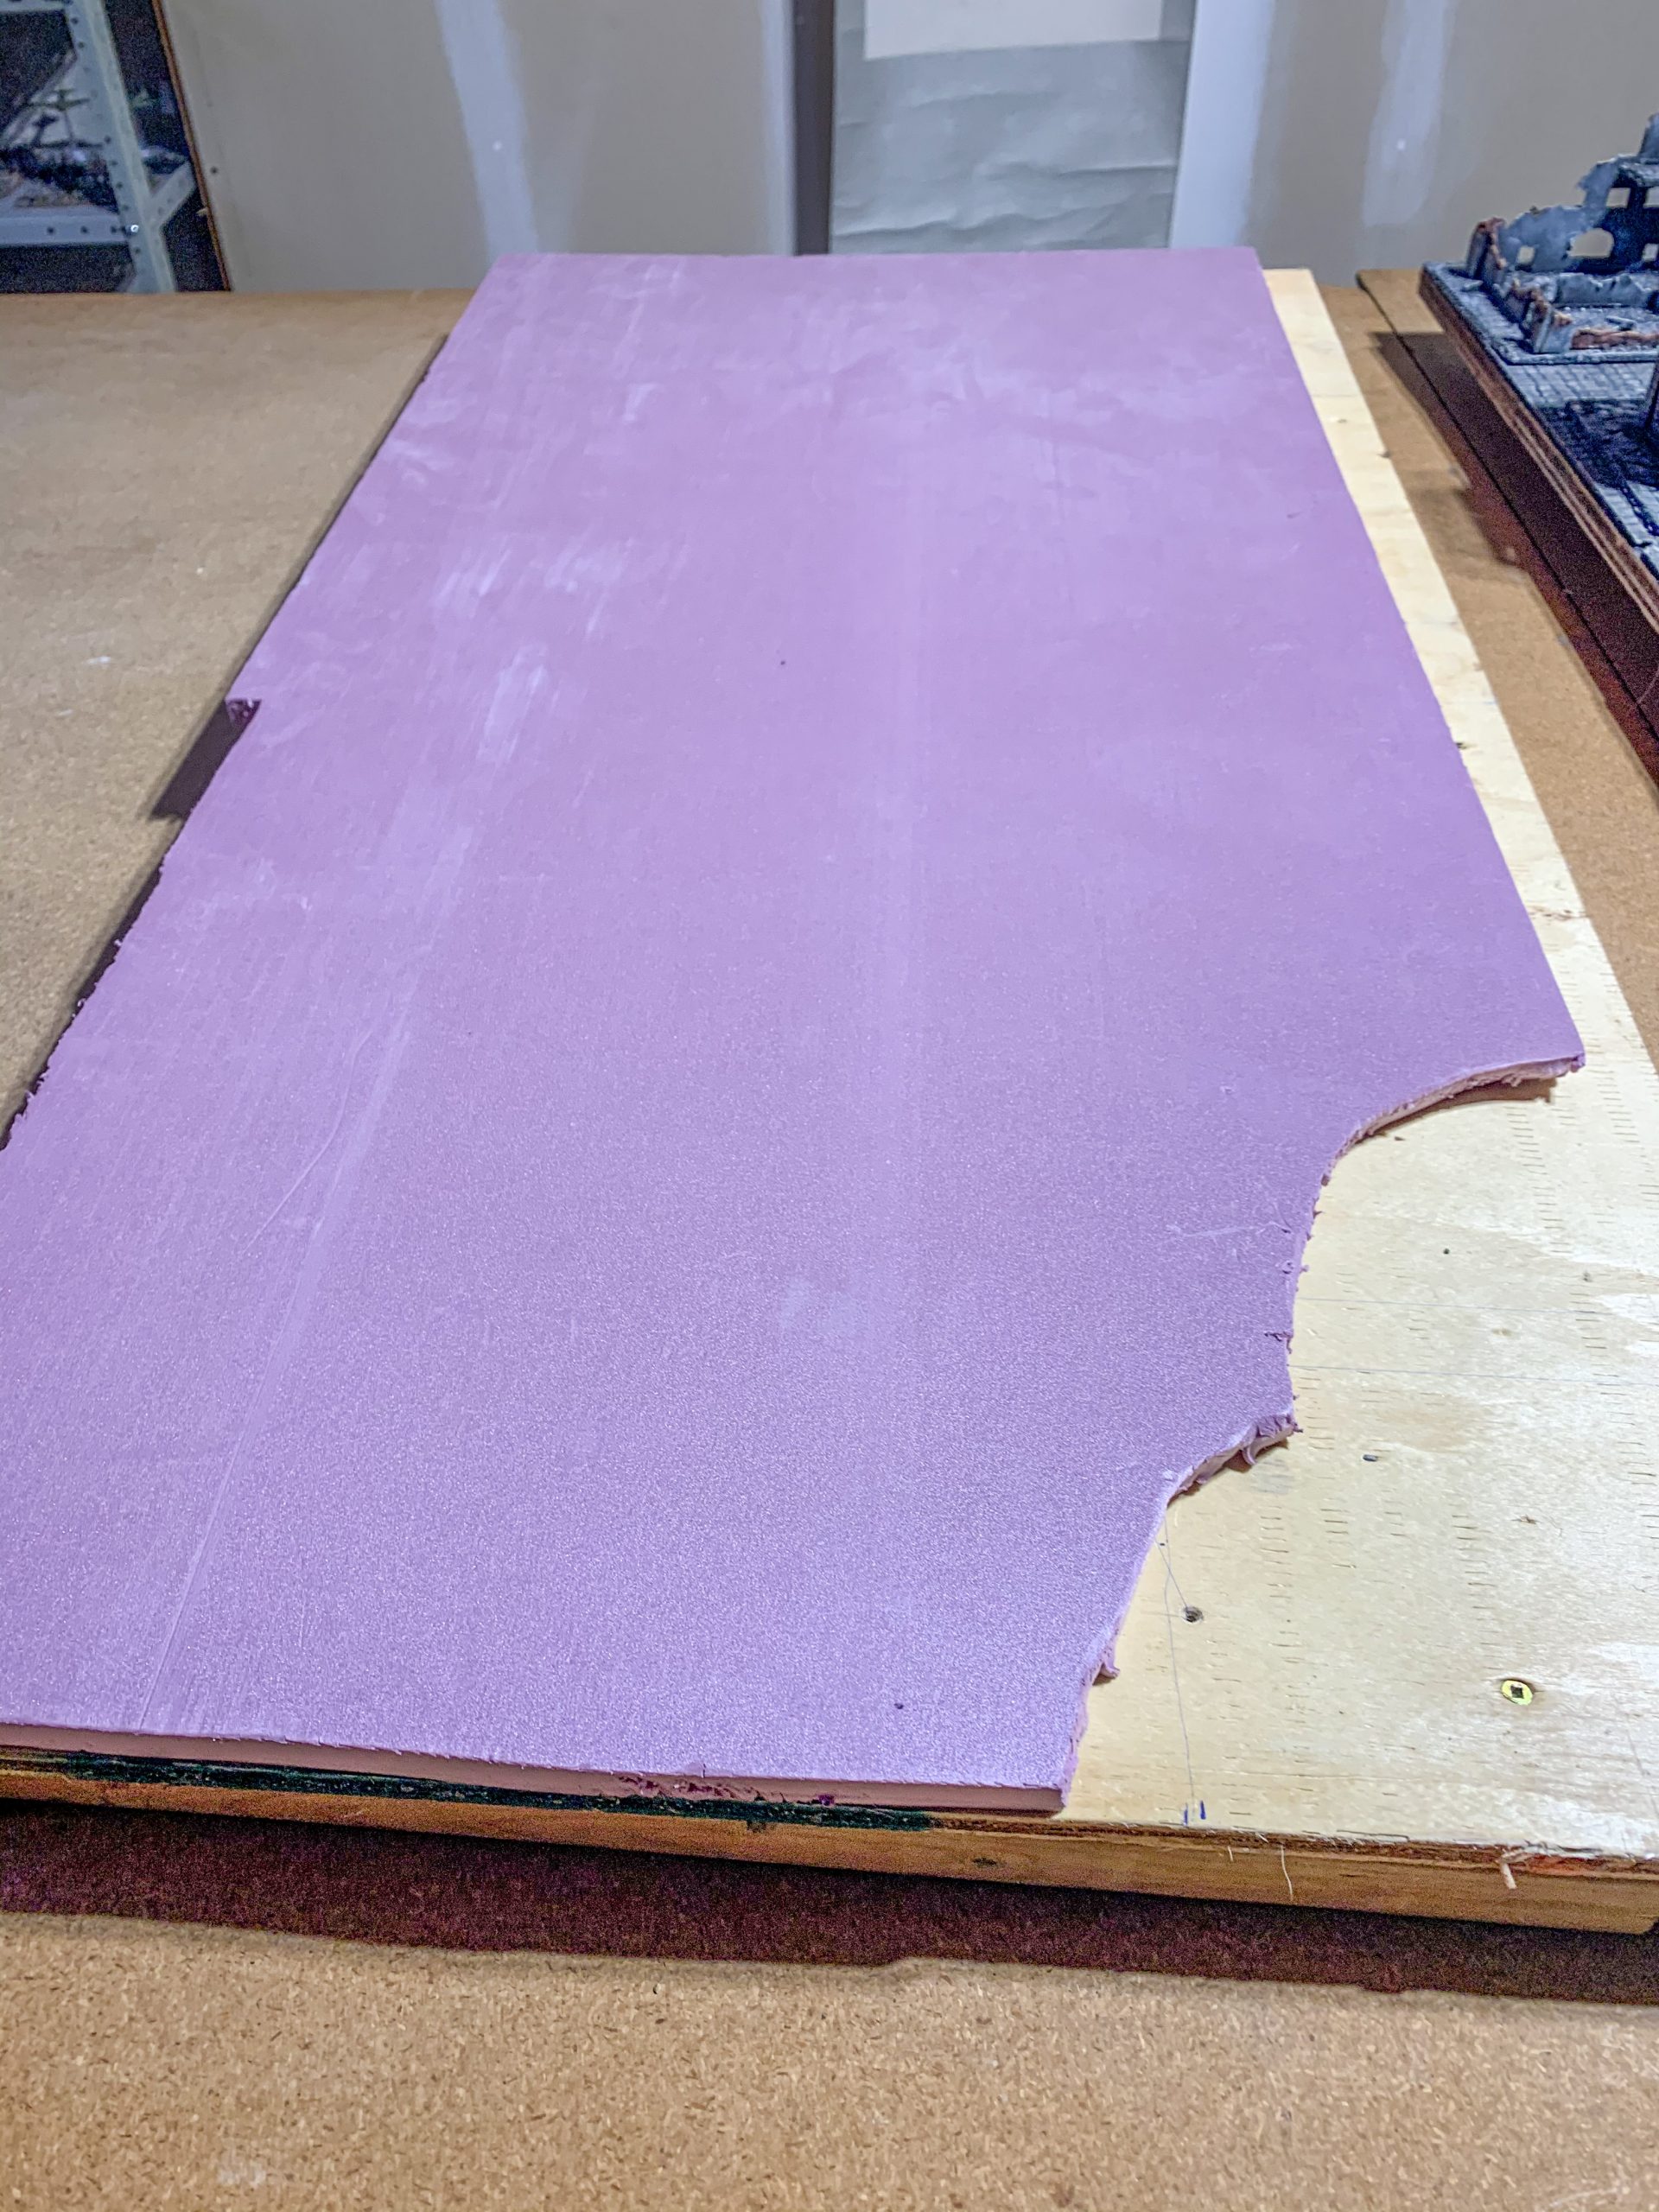
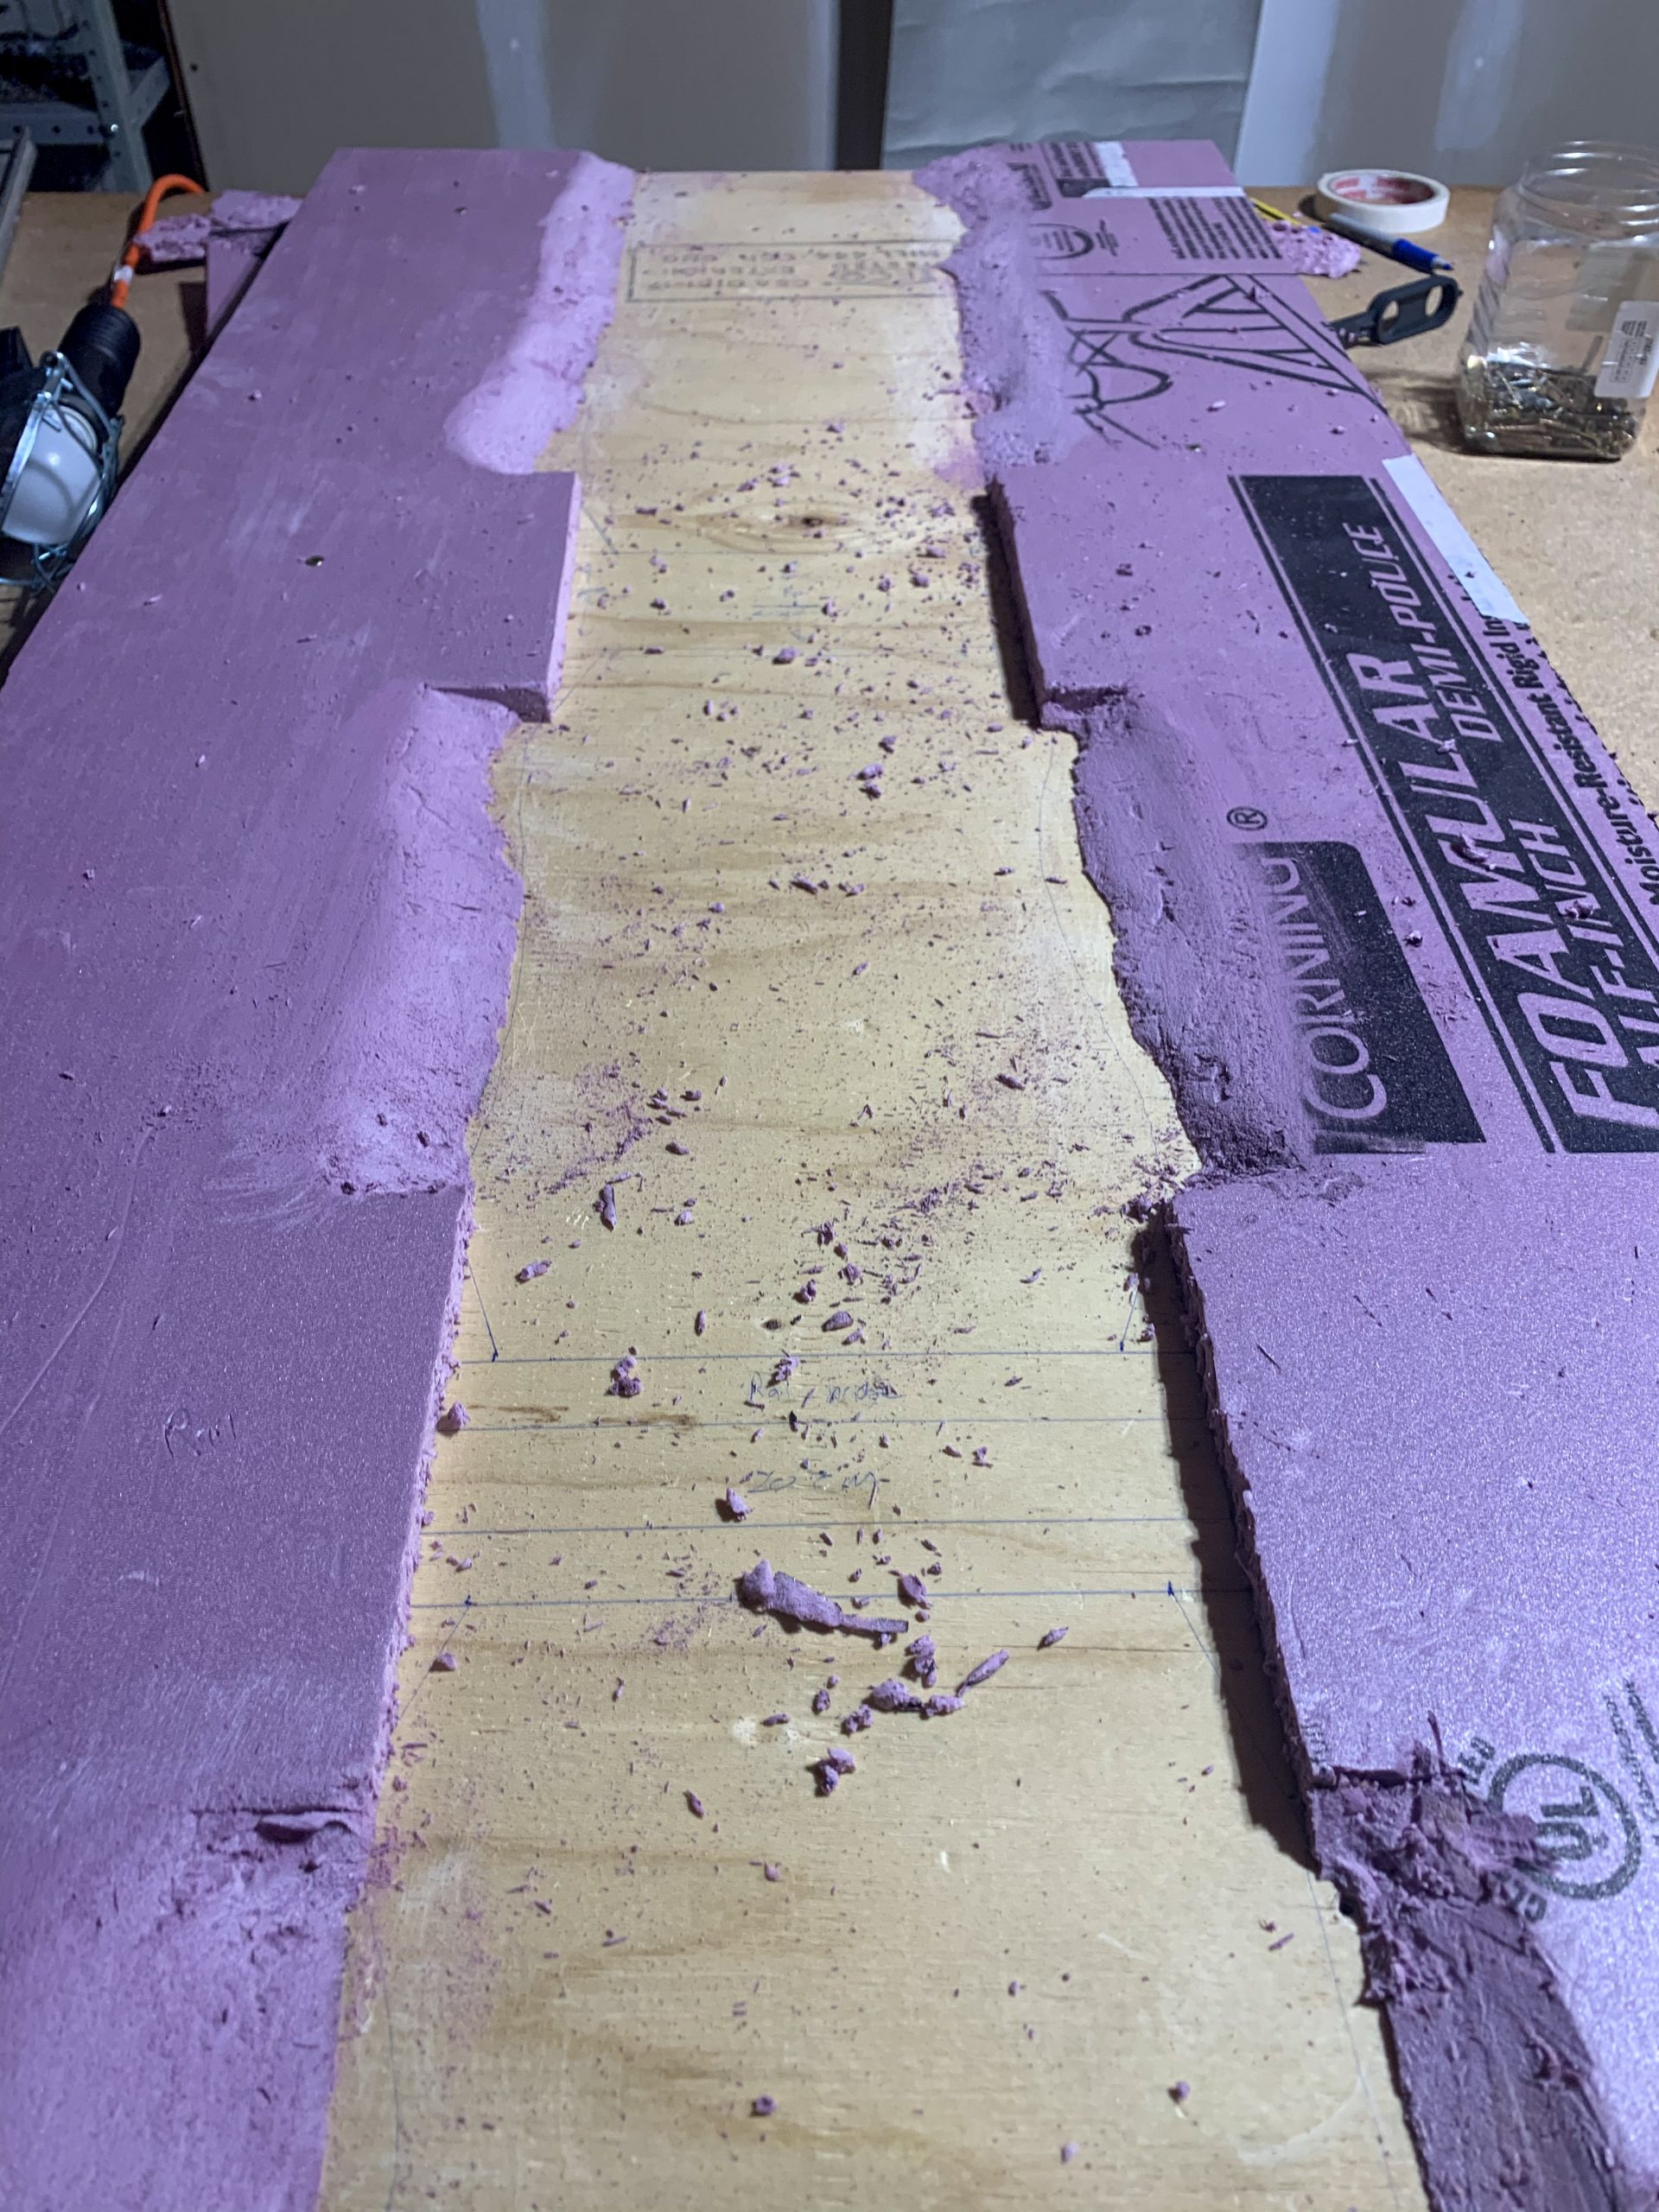
2. Preparing Insulation Foam: With the tape measure rule out the insulation foam to the same dimensions as the board. The laying this foam over the board us the drill to screw it onto the surface of the board. If the foam is not the same size, use your metal ruler and the key hole saw to cut out the foam to match the shape of the board. When this is done you can remove the screws and take the foam back off the top of the board. You may want to use the file and sandpaper to smooth out any rough edges from cutting the foam.
3. Planning: Tacking the ruler and pen I drew onto the board the measurements for the bridges and sketched a rough shape for the river. I designed each bridge to be slightly wider than the river at 20cm long and about 8 cm wide. I planned a stone embankment for the 2 bridges (1 is a rail bridge the other is a road bridge) that projects out 2.5 cm from the face of the river bank and with a 6cm wide retaining wall on either side of each bridge. After these measurements were drawn on the board, I duplicated them on paper for reference.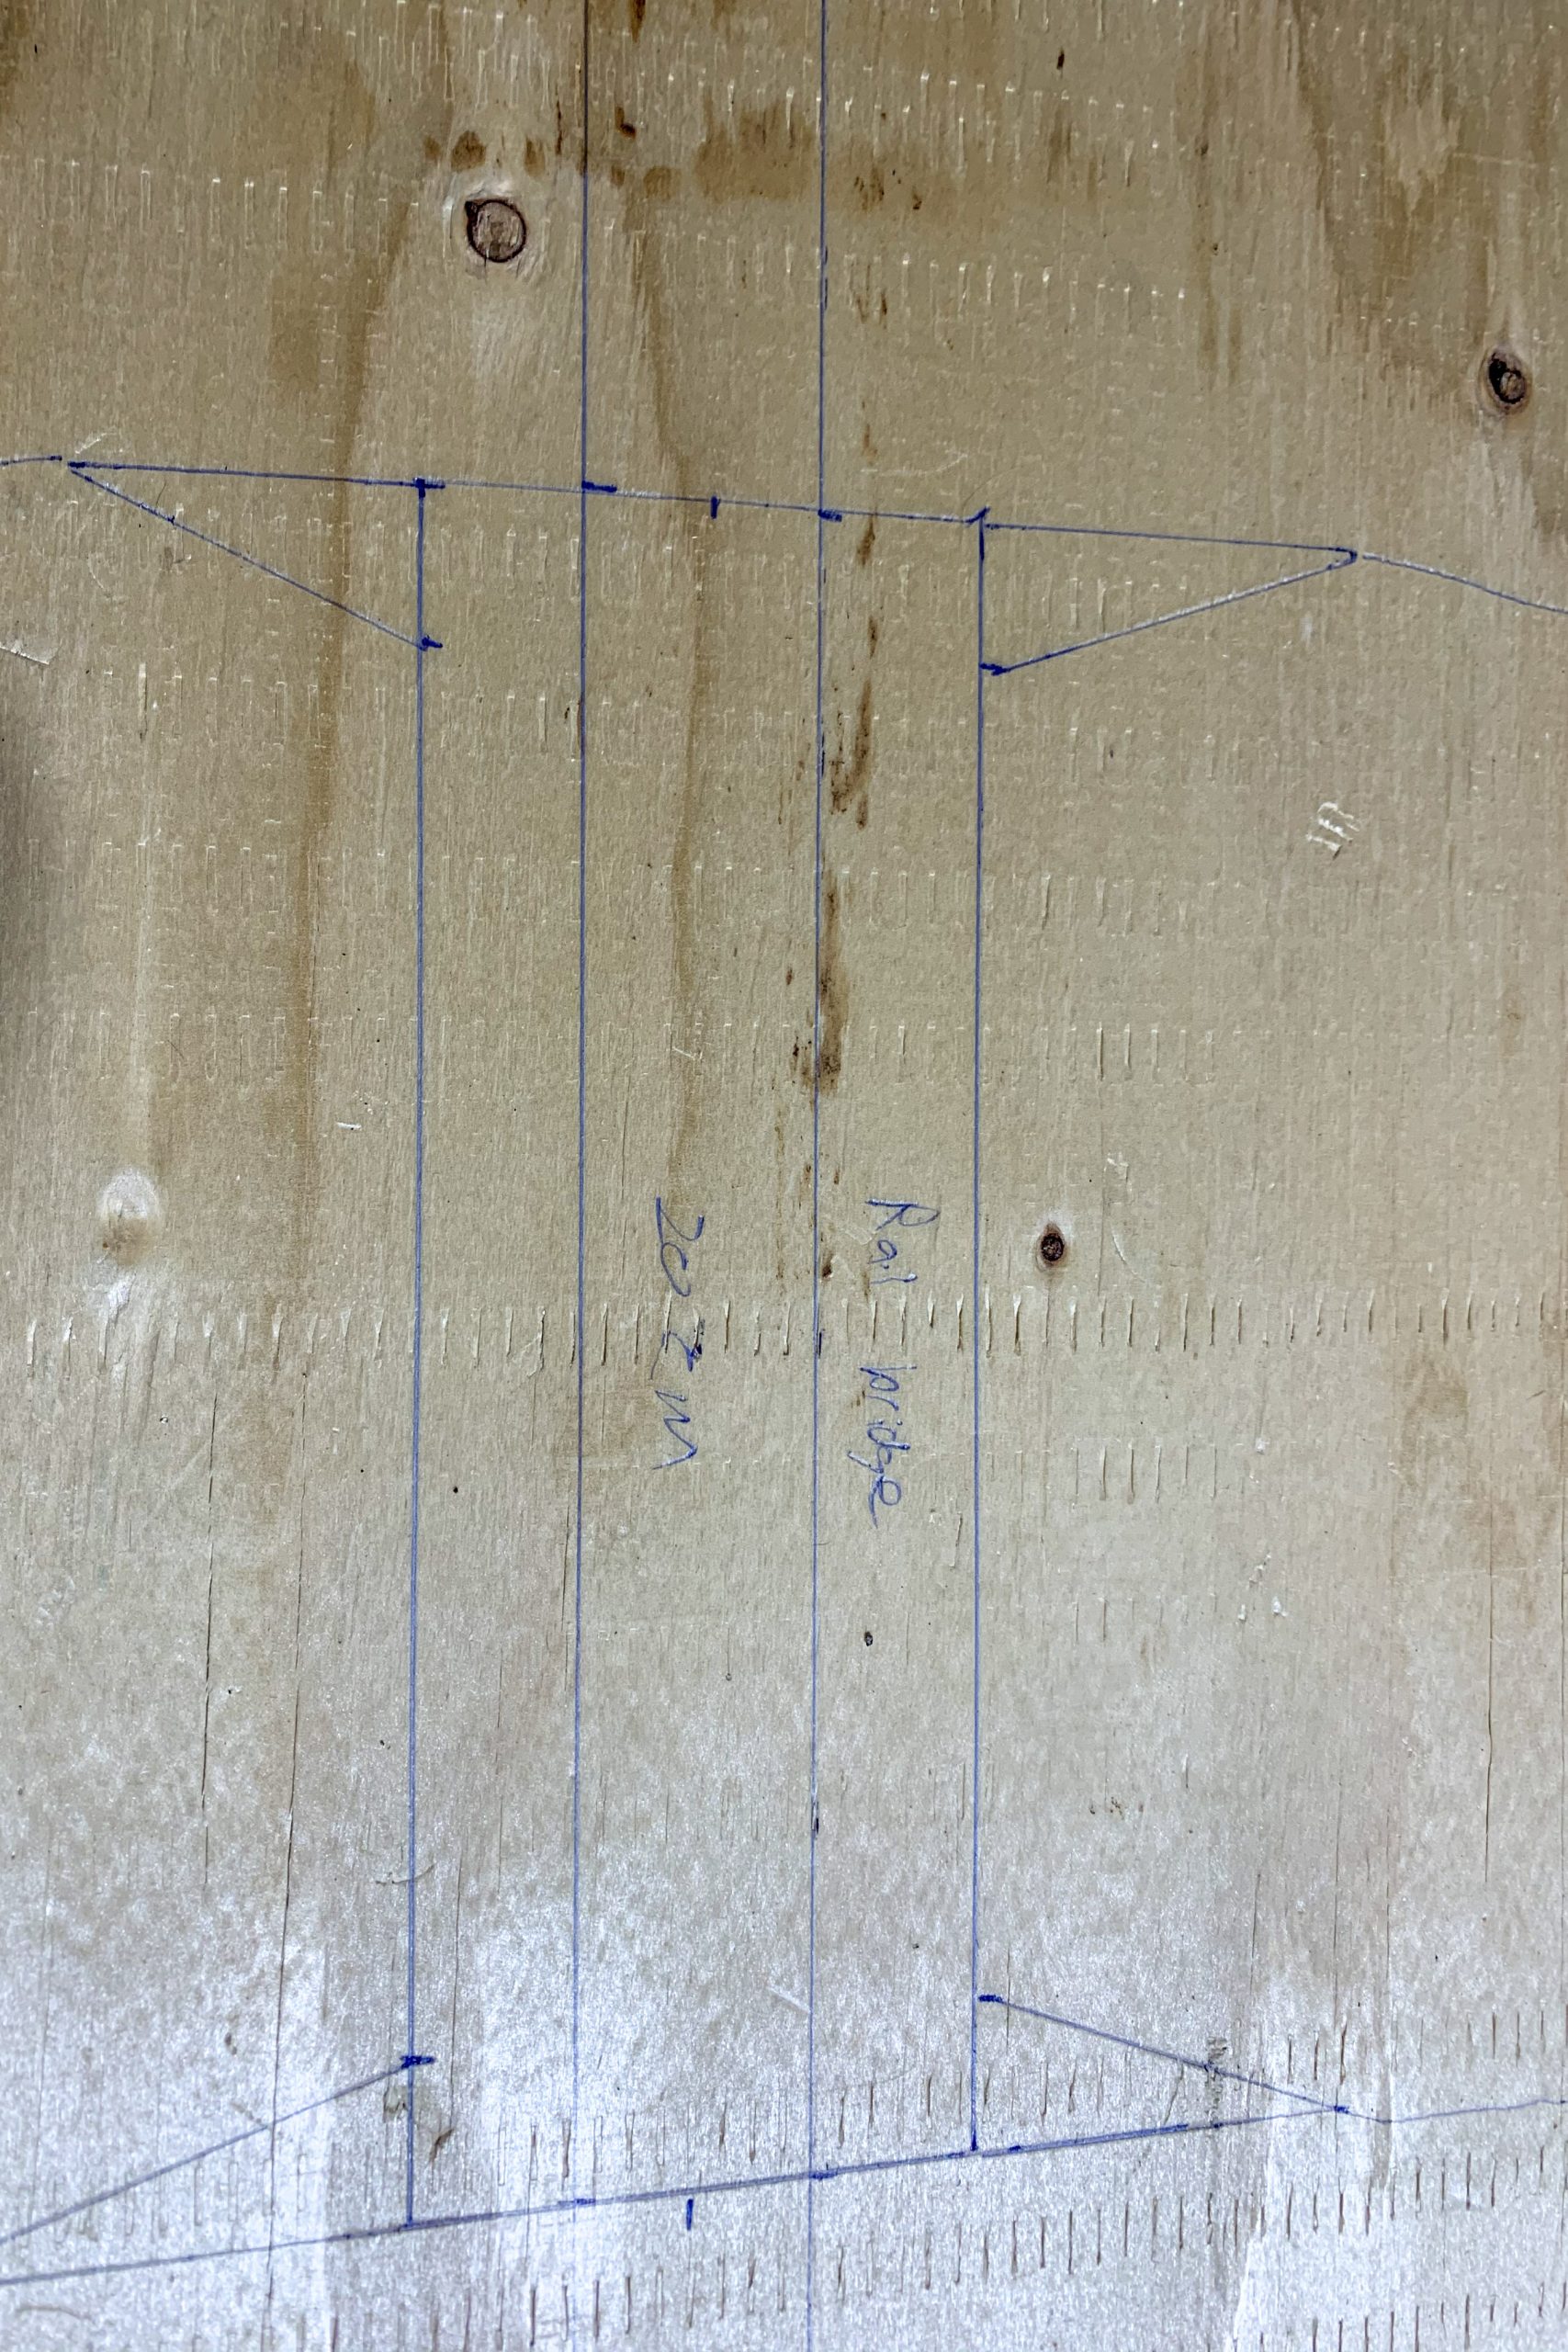
4. Cutting the River: Using the keyhole saw I cut the insulation foam to match the plan I drew on the board. Next, I replaced the screws to hold the foam in place on the plywood. Taking the knife, I cut downwards at an angle inserting the knife about 6 cm back from the river bank with the blade angled to protrude at the edge which was cut to form the river. I did this to form the river banks on both sides (making sure that the areas where the bridges and retaining walls would be remained squared off). This left a steep angle down to the river which I then smoothed out with my file and sandpaper. This formed a gradual slope to the edge of where the river would go.
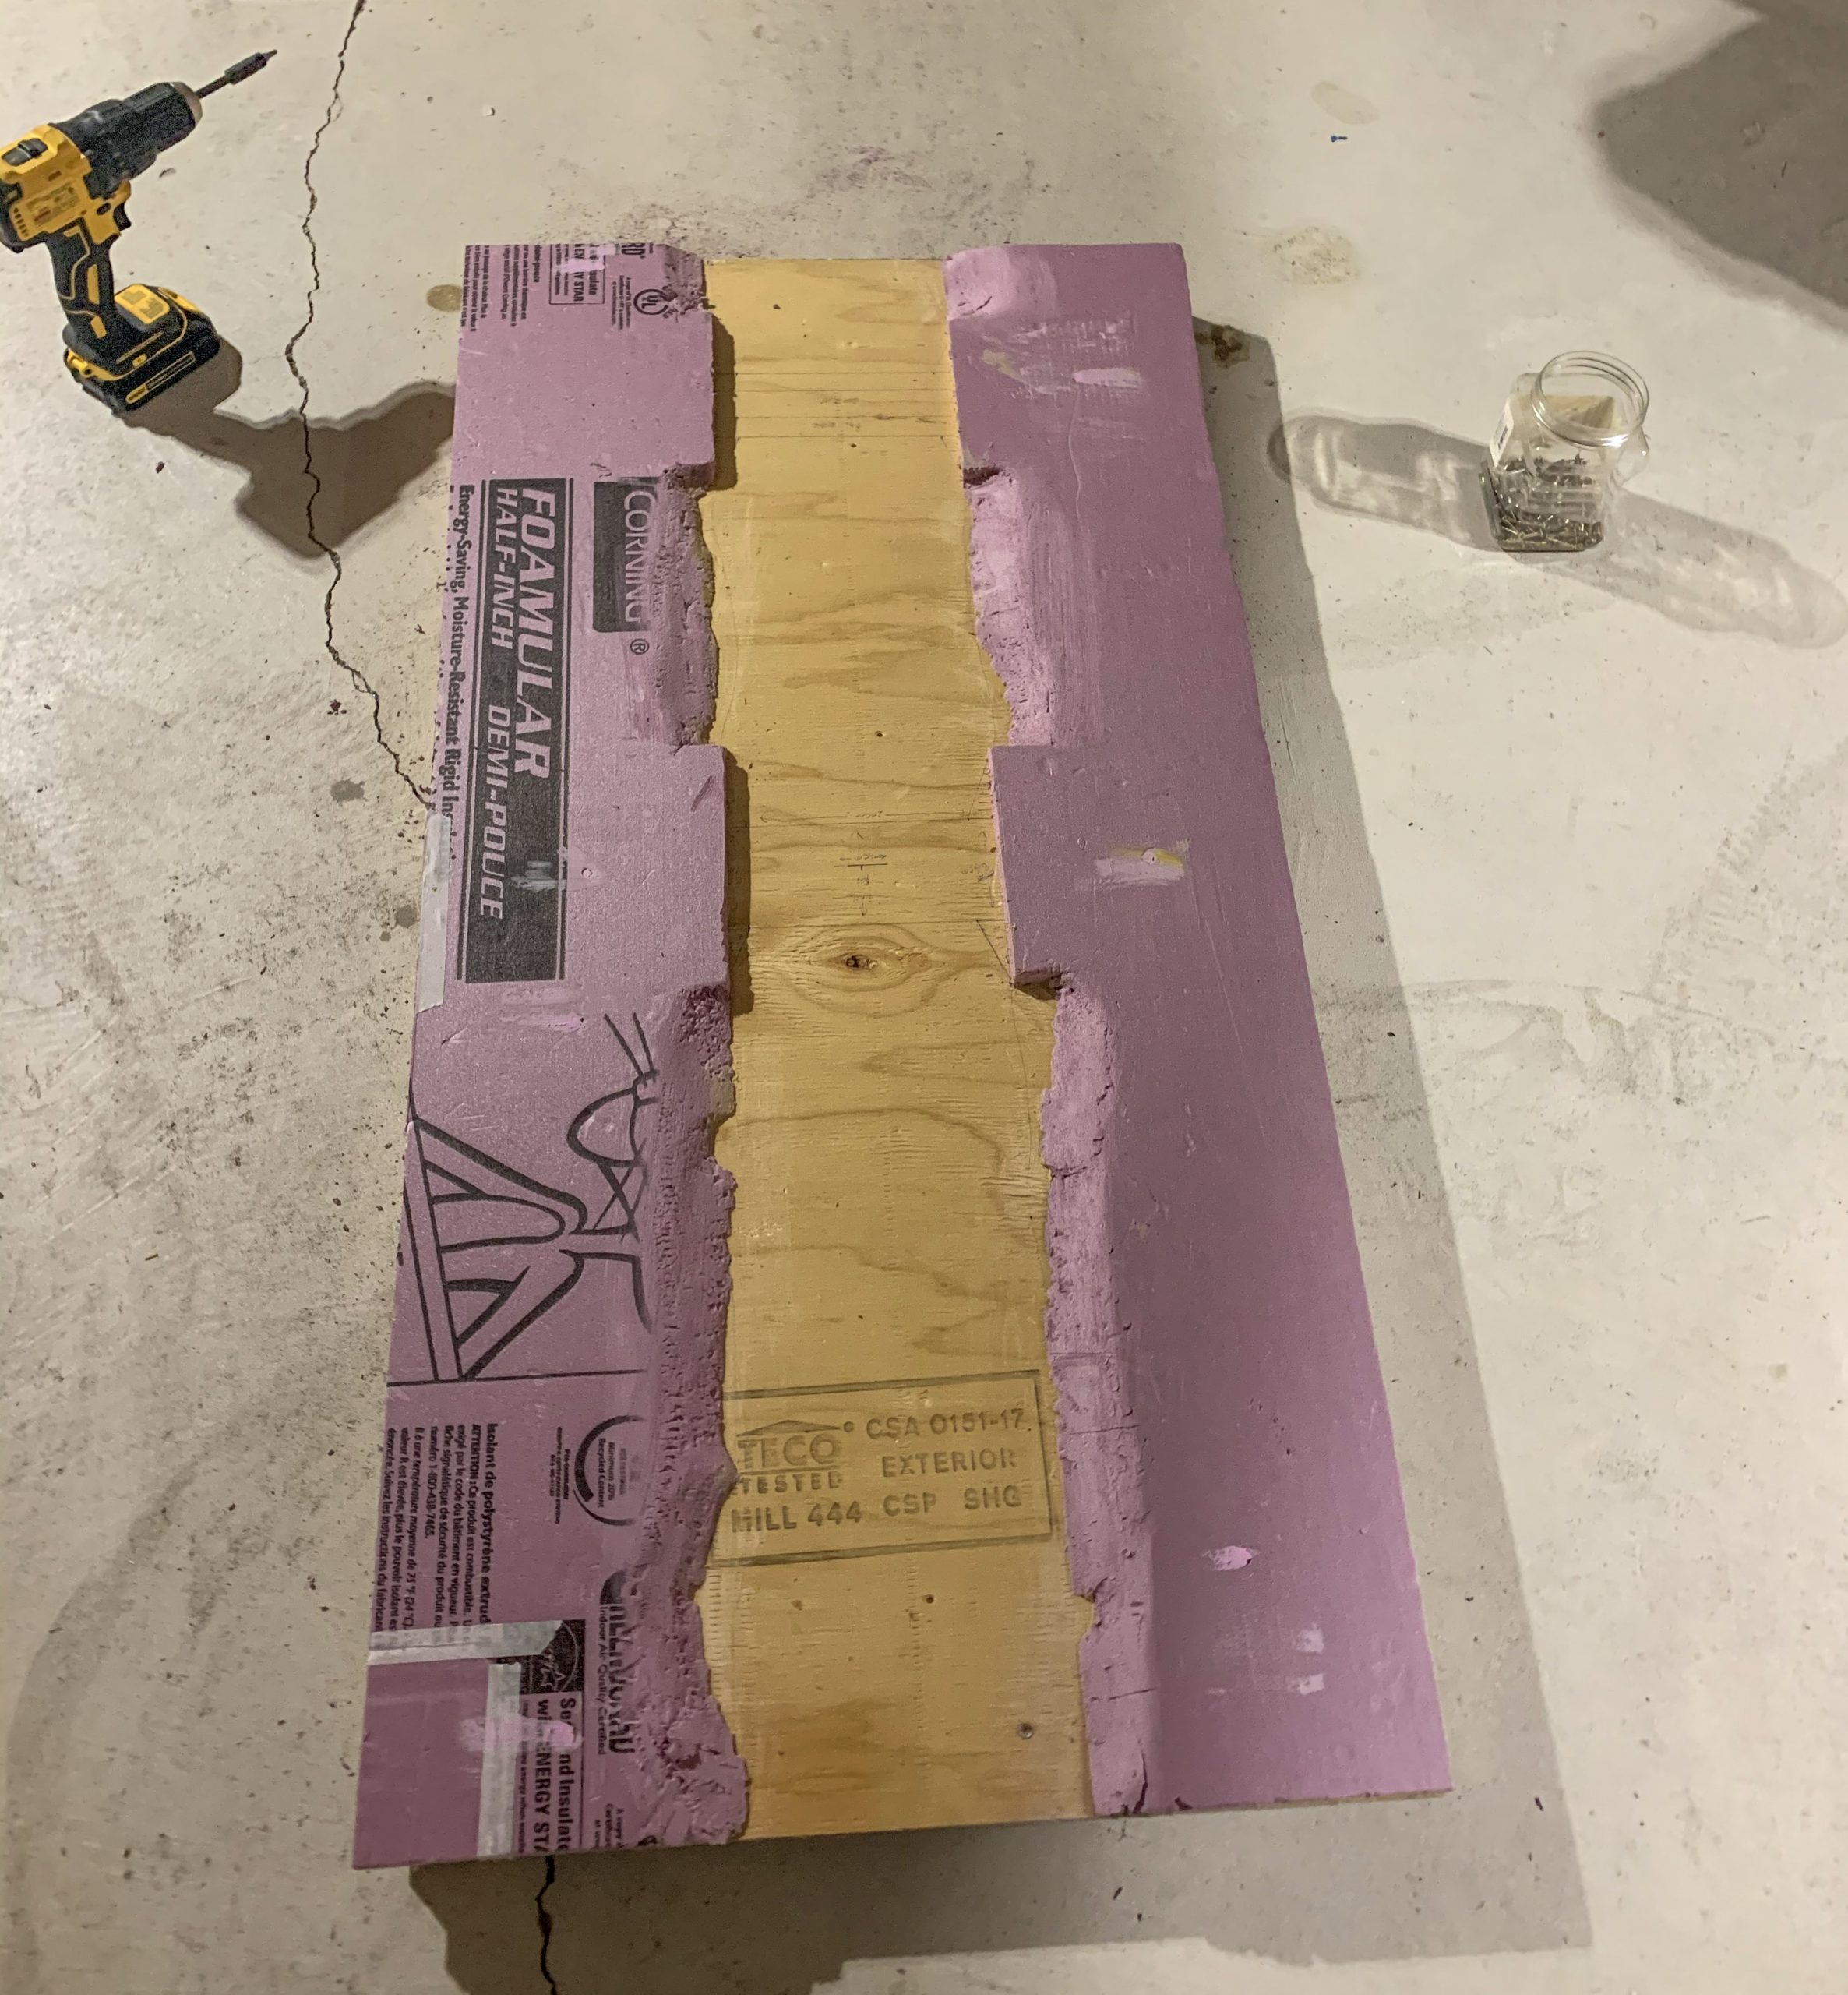
5. Gluing Down the Foam: First I removed the screws and took the foam river banks off of the board. Then taking the foam glue and putting it in the caulking gun, I spread adhesive evenly across the bottom of the foam. I then pressed the foam sections into place on the board and replaced the screws (again) and counter sunk them slightly. With this in place I filled the screw holes and any other blemishes on the foam surface with spackle and smoothed it down with sandpaper after it dried. Note: Do not use screws alone to hold the foam to the board. The foam will warp during the following steps if it is not held down securely
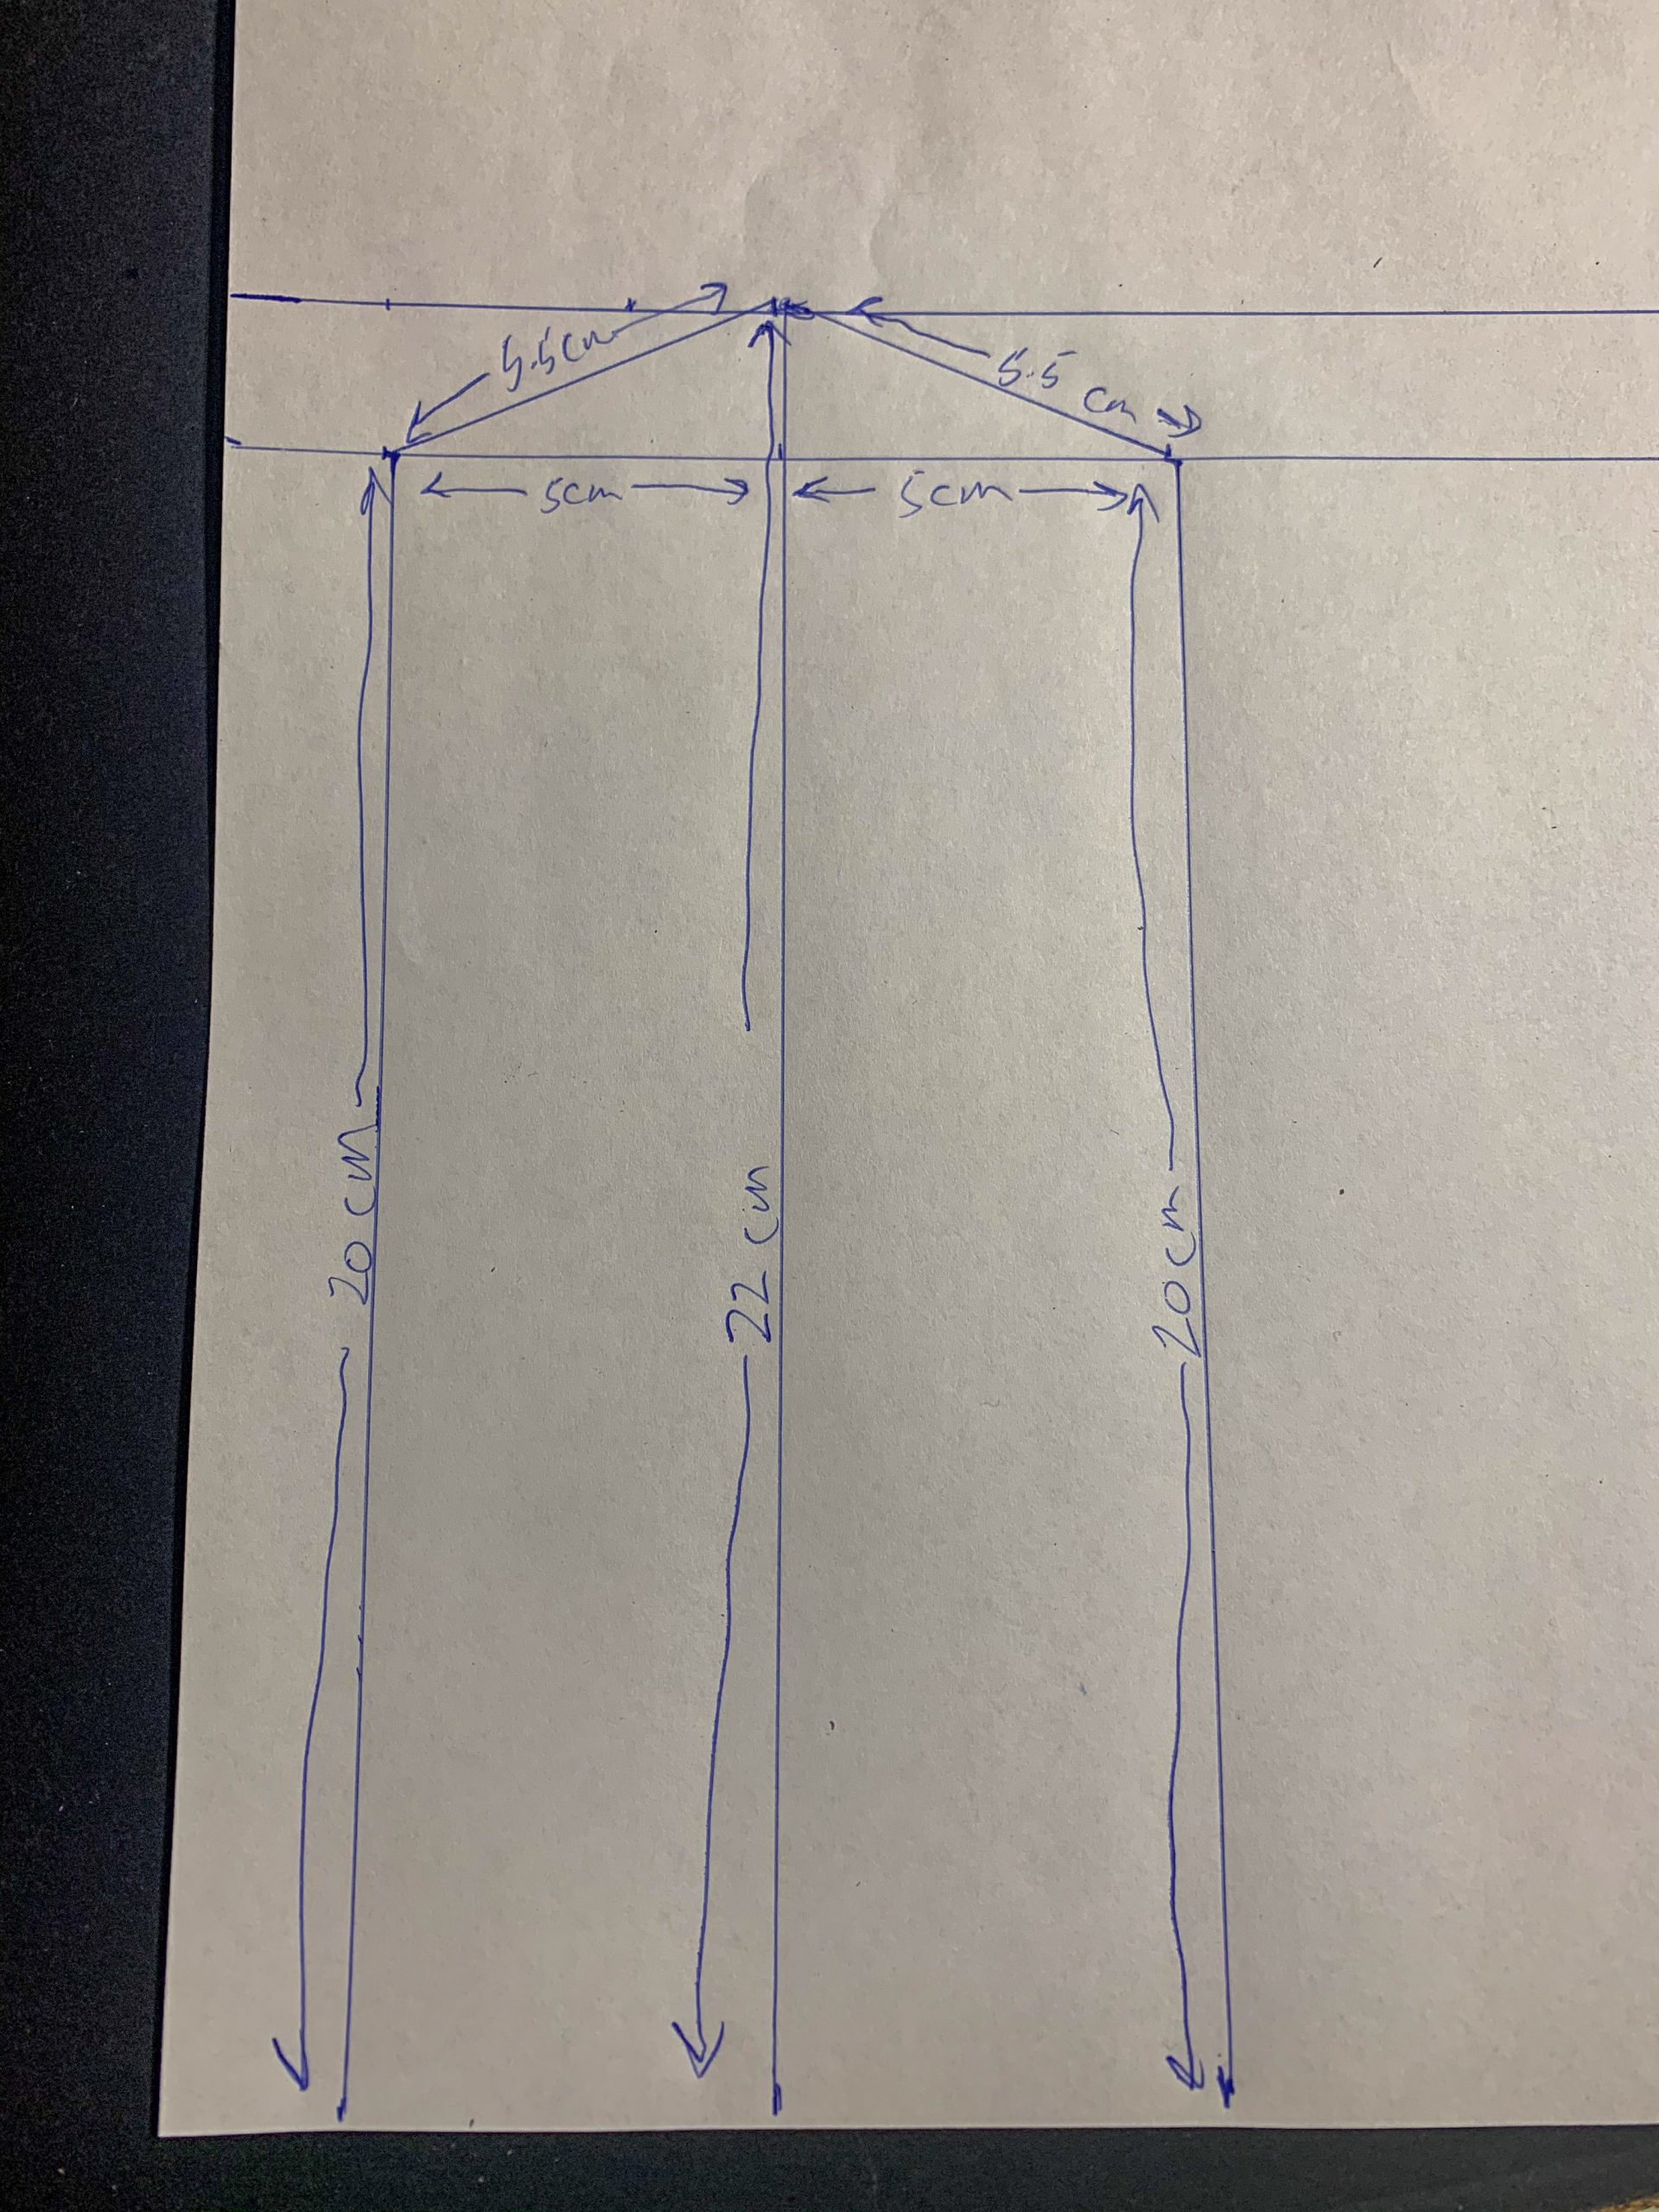
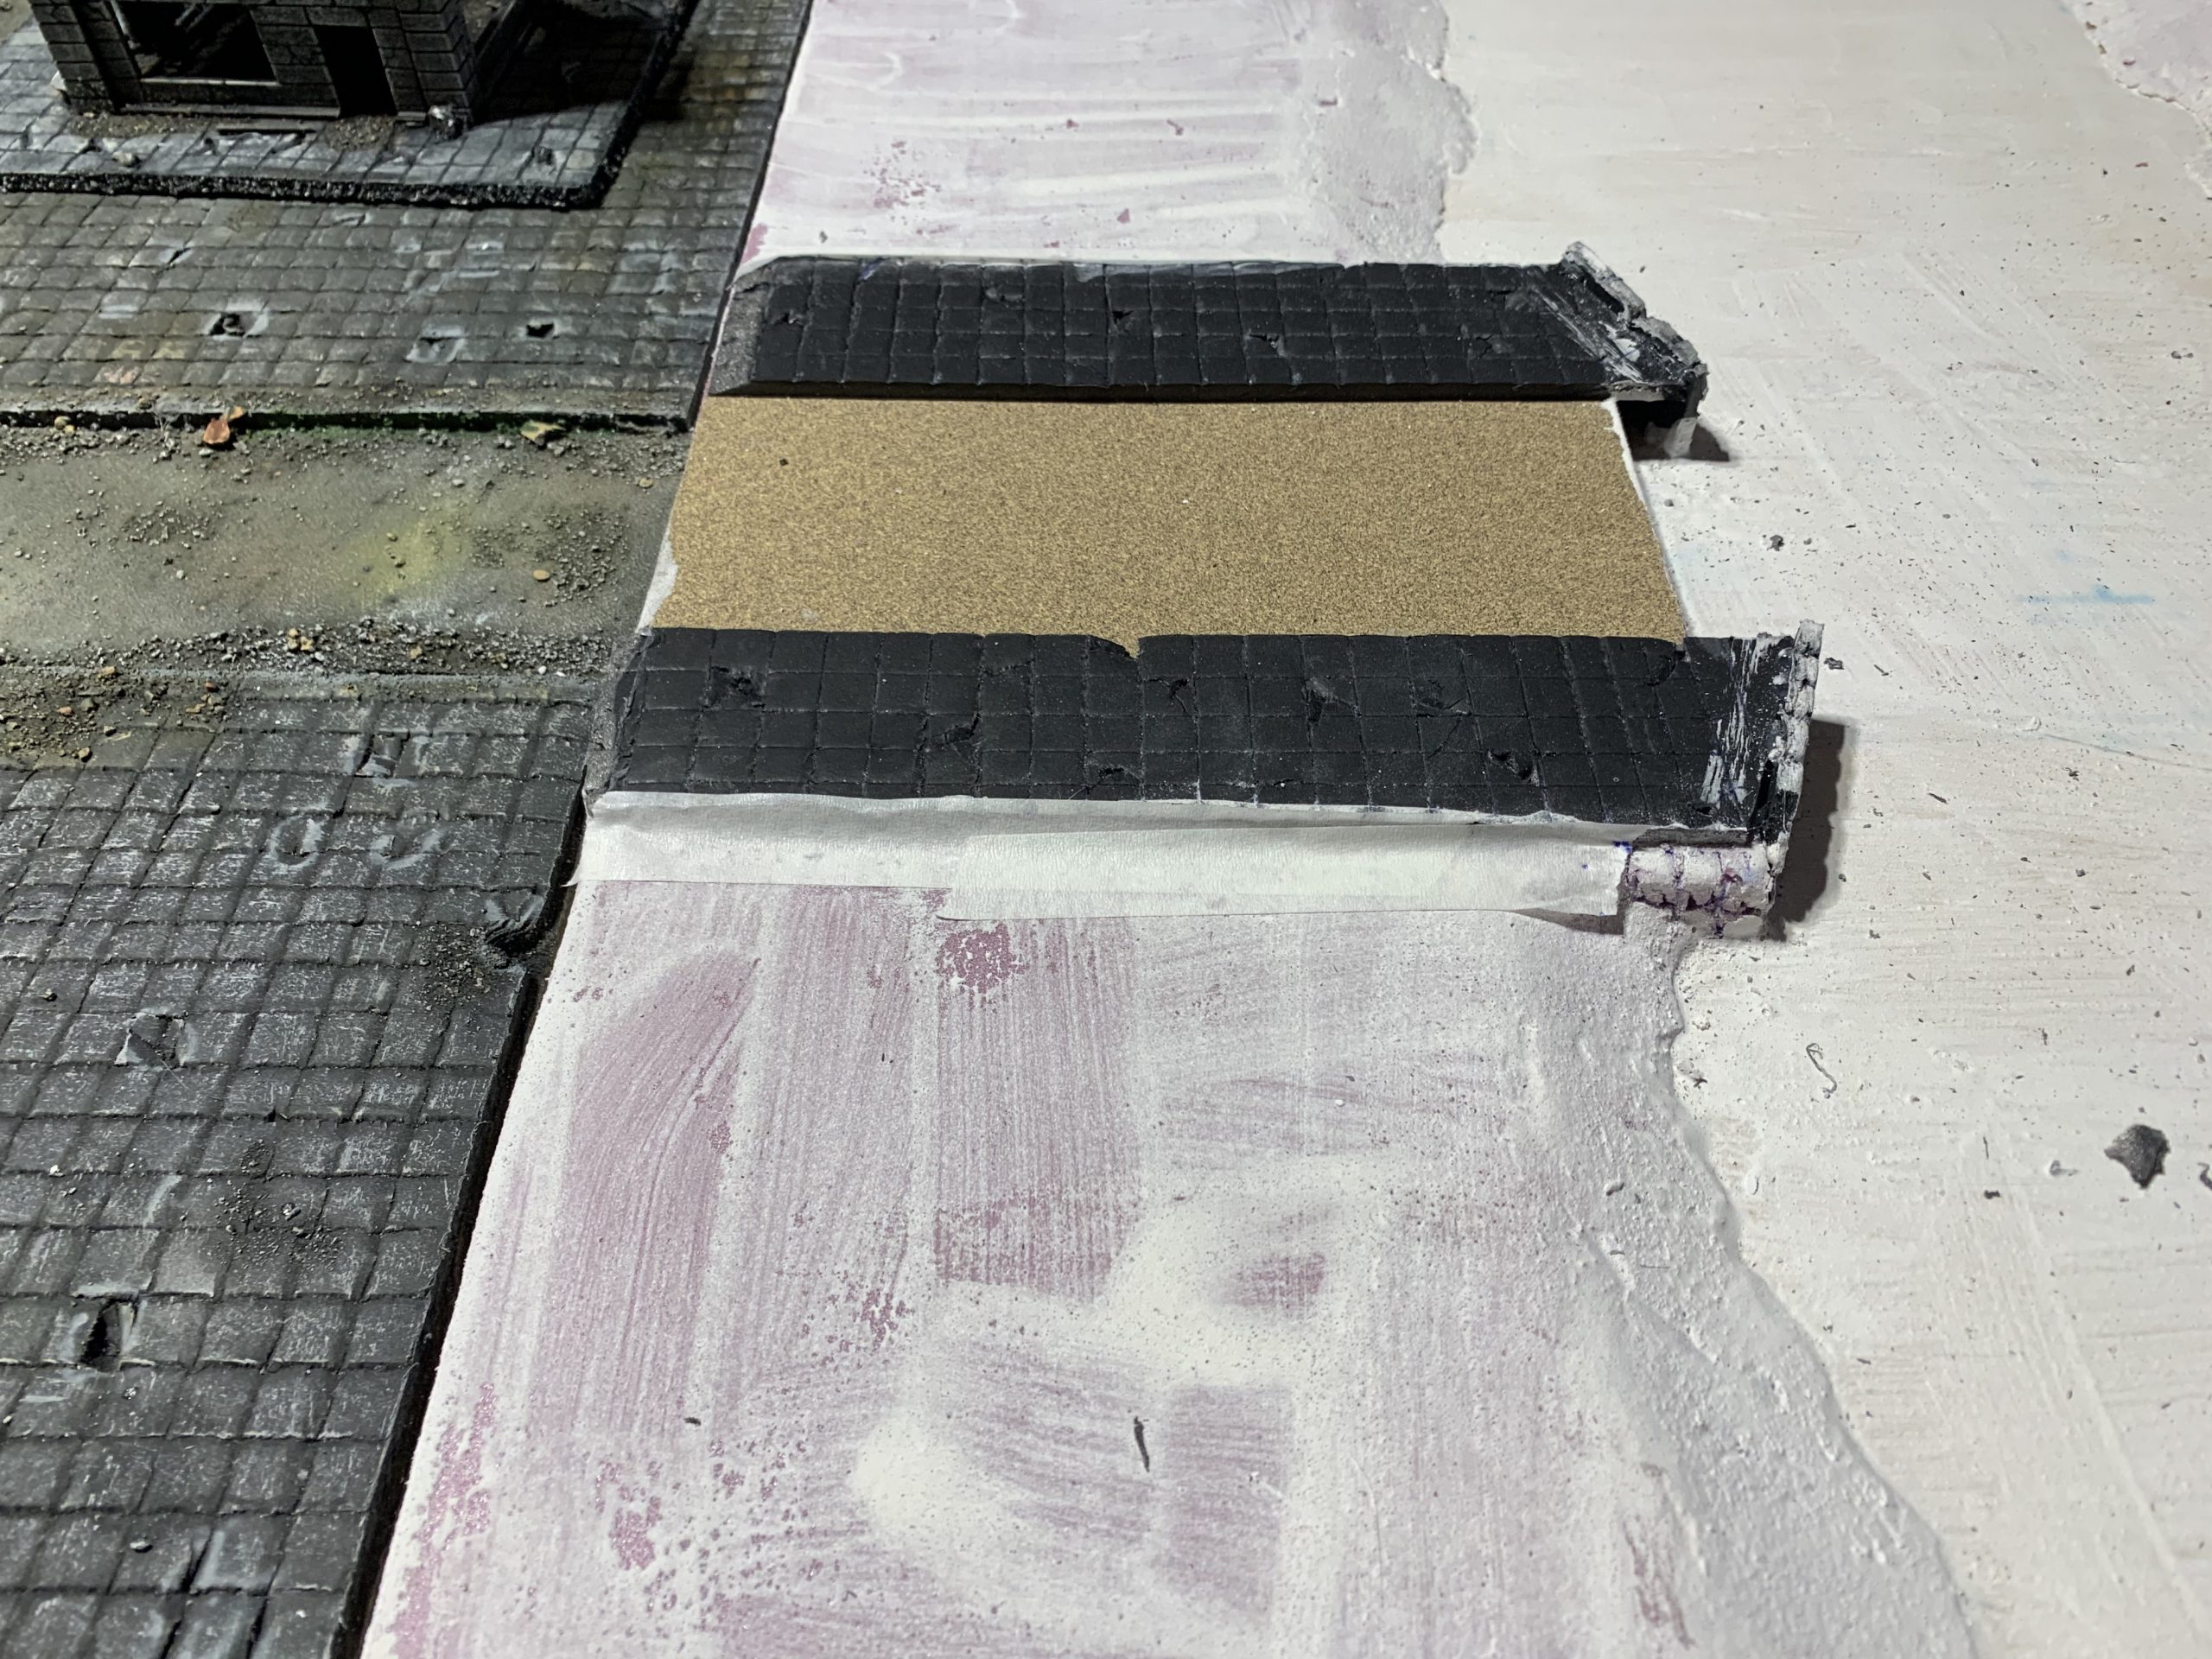
6. Roads & Curbs: It was now time to design the roads leading to the bridge. First, I measured 2 road sections from my sandpaper rolls, cutting each 8.5cm wide by 20 cm long. Using white glue, I adhered this to the surface of the foam running from the board edges to where the bridge will meet it at the retaining wall on either bank. Then I ruled out the curbs/sidewalks on either side of the road. I designed these to meet with the retaining wall on either side of the bridges. These worked out to be 5cm wide, 20cm long at the outer edge and 22cm long on the inner edge (creating a diagonal end on one side to meet with the retaining wall. I cut out 8 of these sections so I had 2 sets of 4 for each river bank. For the rail bridge, full curbs were not required so I cut 4 pieces short at about 5 cm on the long side and 2 cm on the short side. (The image below is a template I made for cutting out 2 of the curbs)
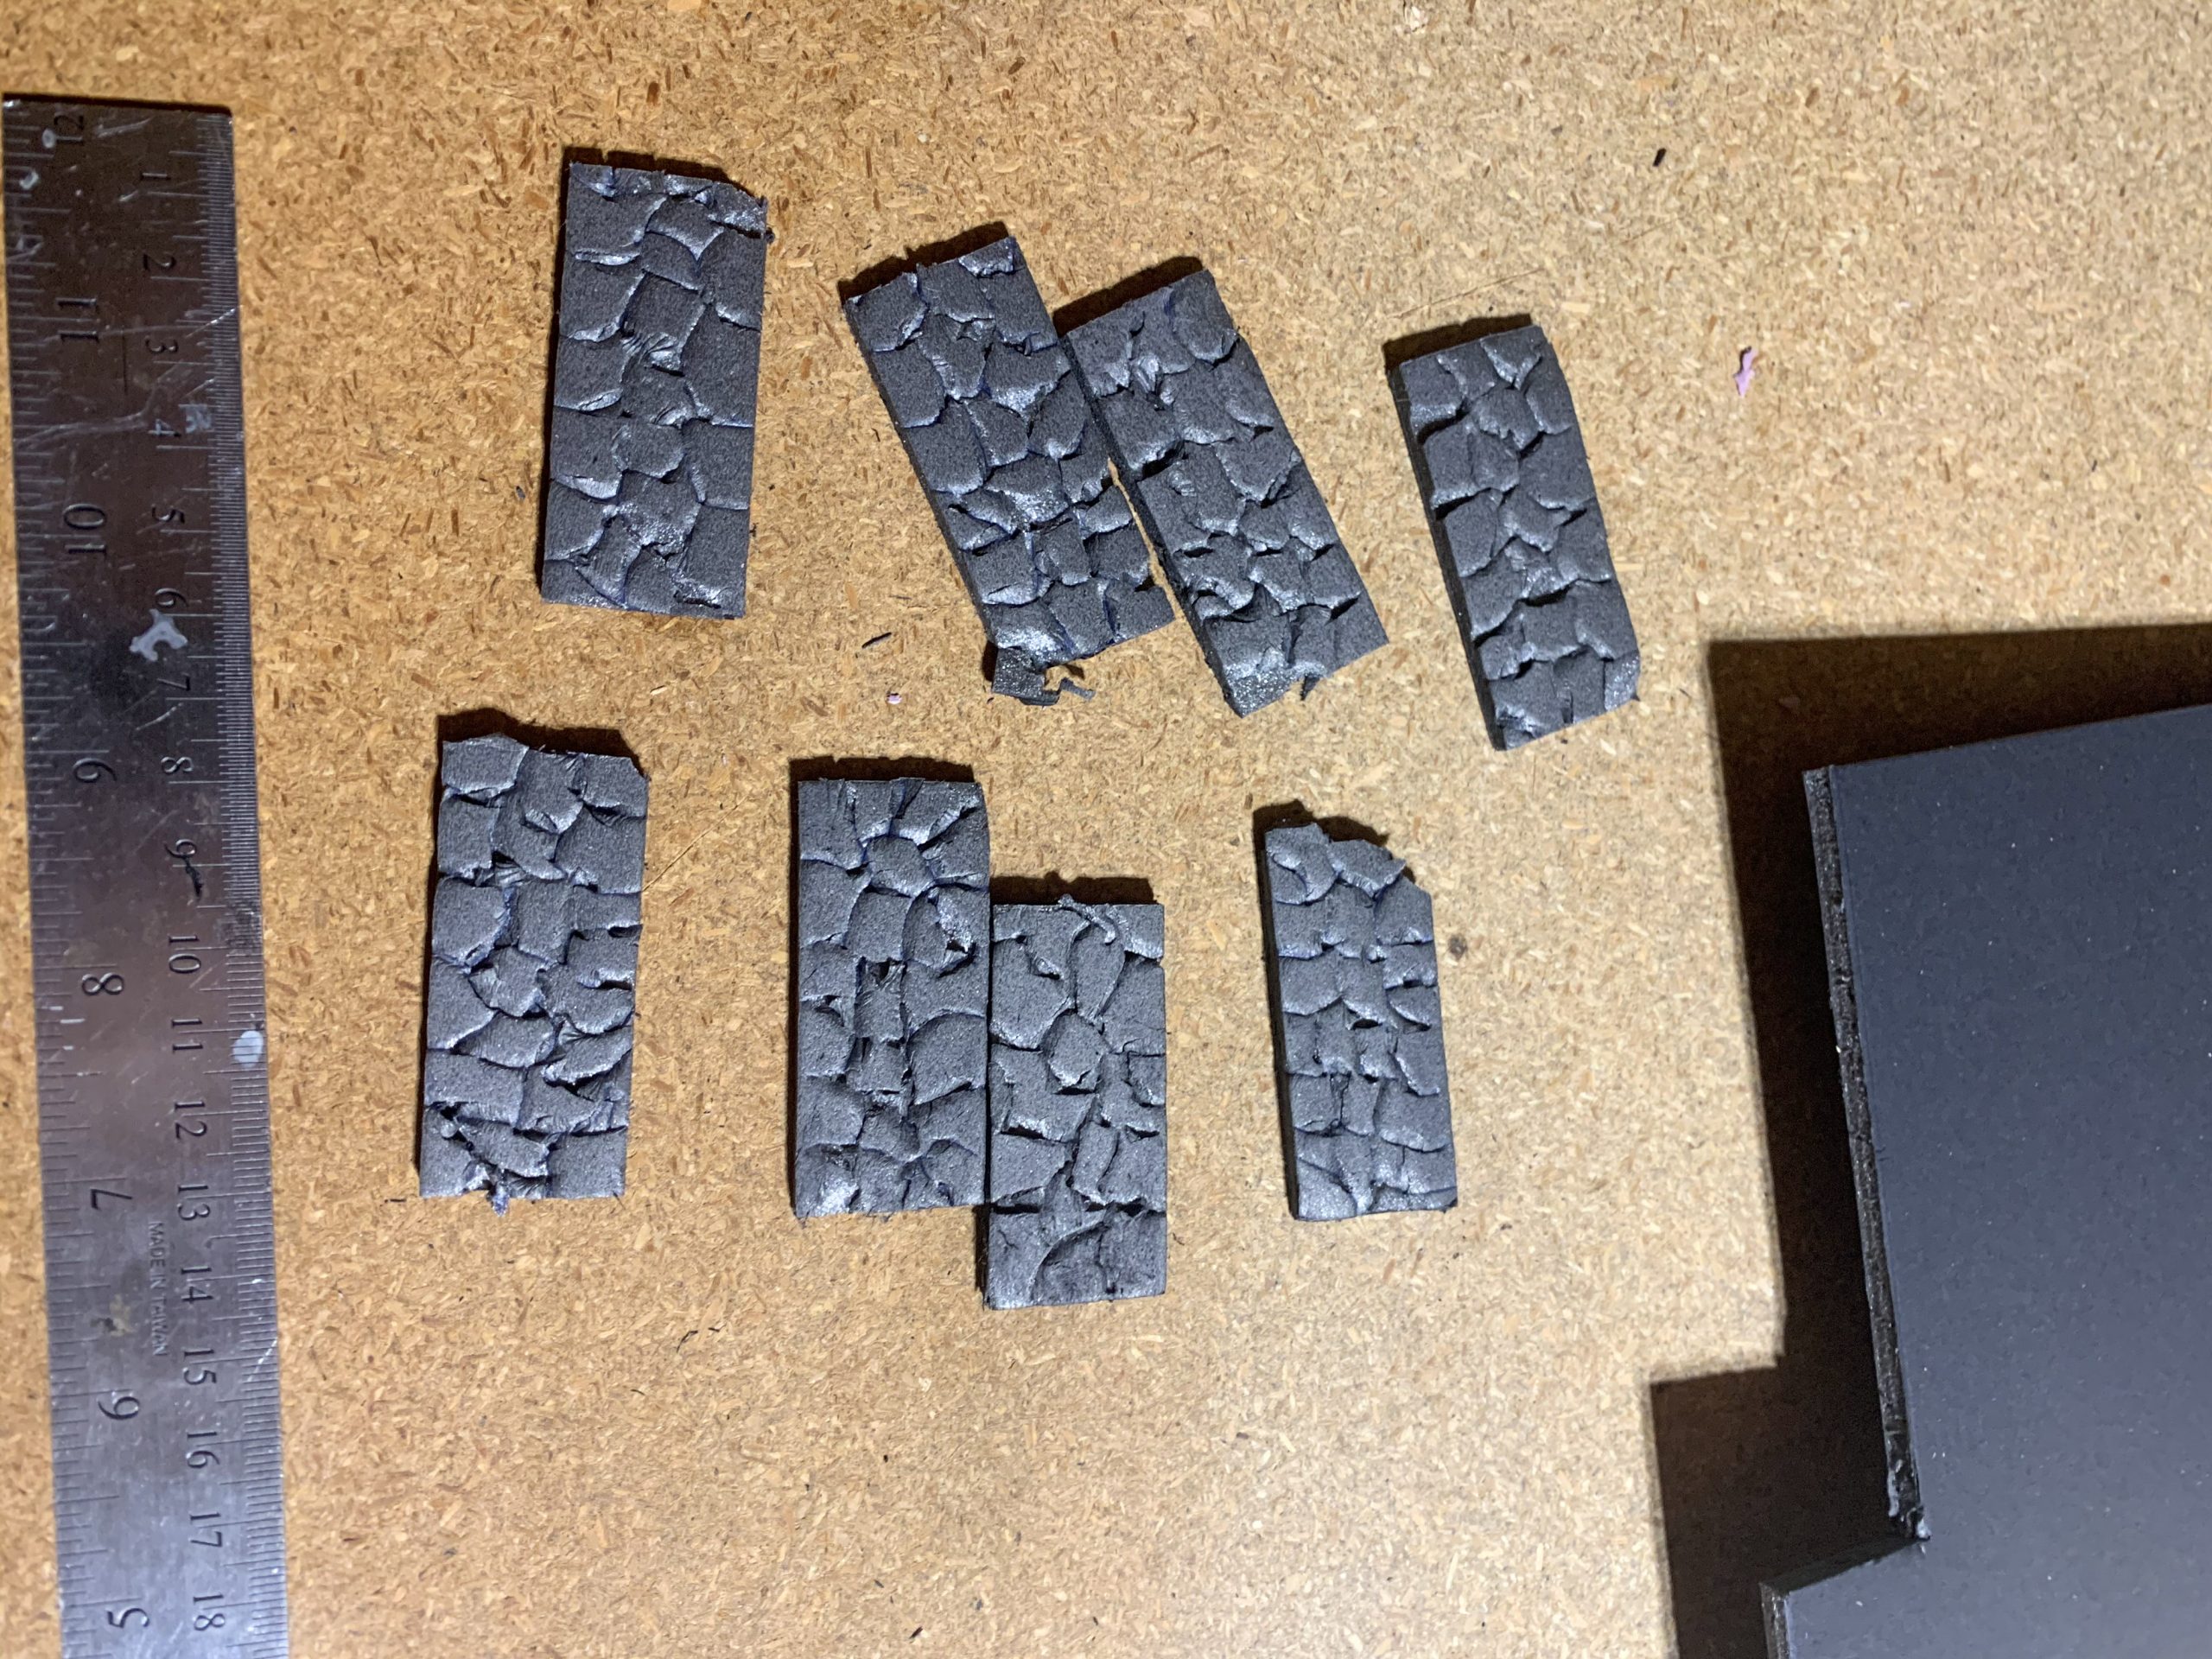
7. Retaining Walls: As I had already ruled out 2 retaining walls on either side of each bridge, I cut out 8 6cm long x 2.5 cm high (the river bank is approximately 2.5cm high) rectangles of foam core. I then filled a bowl with water and submerged the foam for about 10 minutes. After it soaked, I peeled the paper backing off one side of the foam core and scored a texture of stacked rocks into it with my pen.
8. Building the Curbs Walls & Surfaces: Now I used hot glue to adhere the curbs to either side of the retaining wall and glued the retaining walls (with the rock texture facing outward) to the ends of the curbs following the diagonal cut on the ends. Then I mixed a watered-down spackle mixture of about 8 parts water to 2 parts spackle in a mixing cup and painted this over all of the insulation foam and the riverbed. On the riverbed I tried to keep the brush strokes going at right angles to the shore to create a wave pattern. Then I left this overnight to dry.
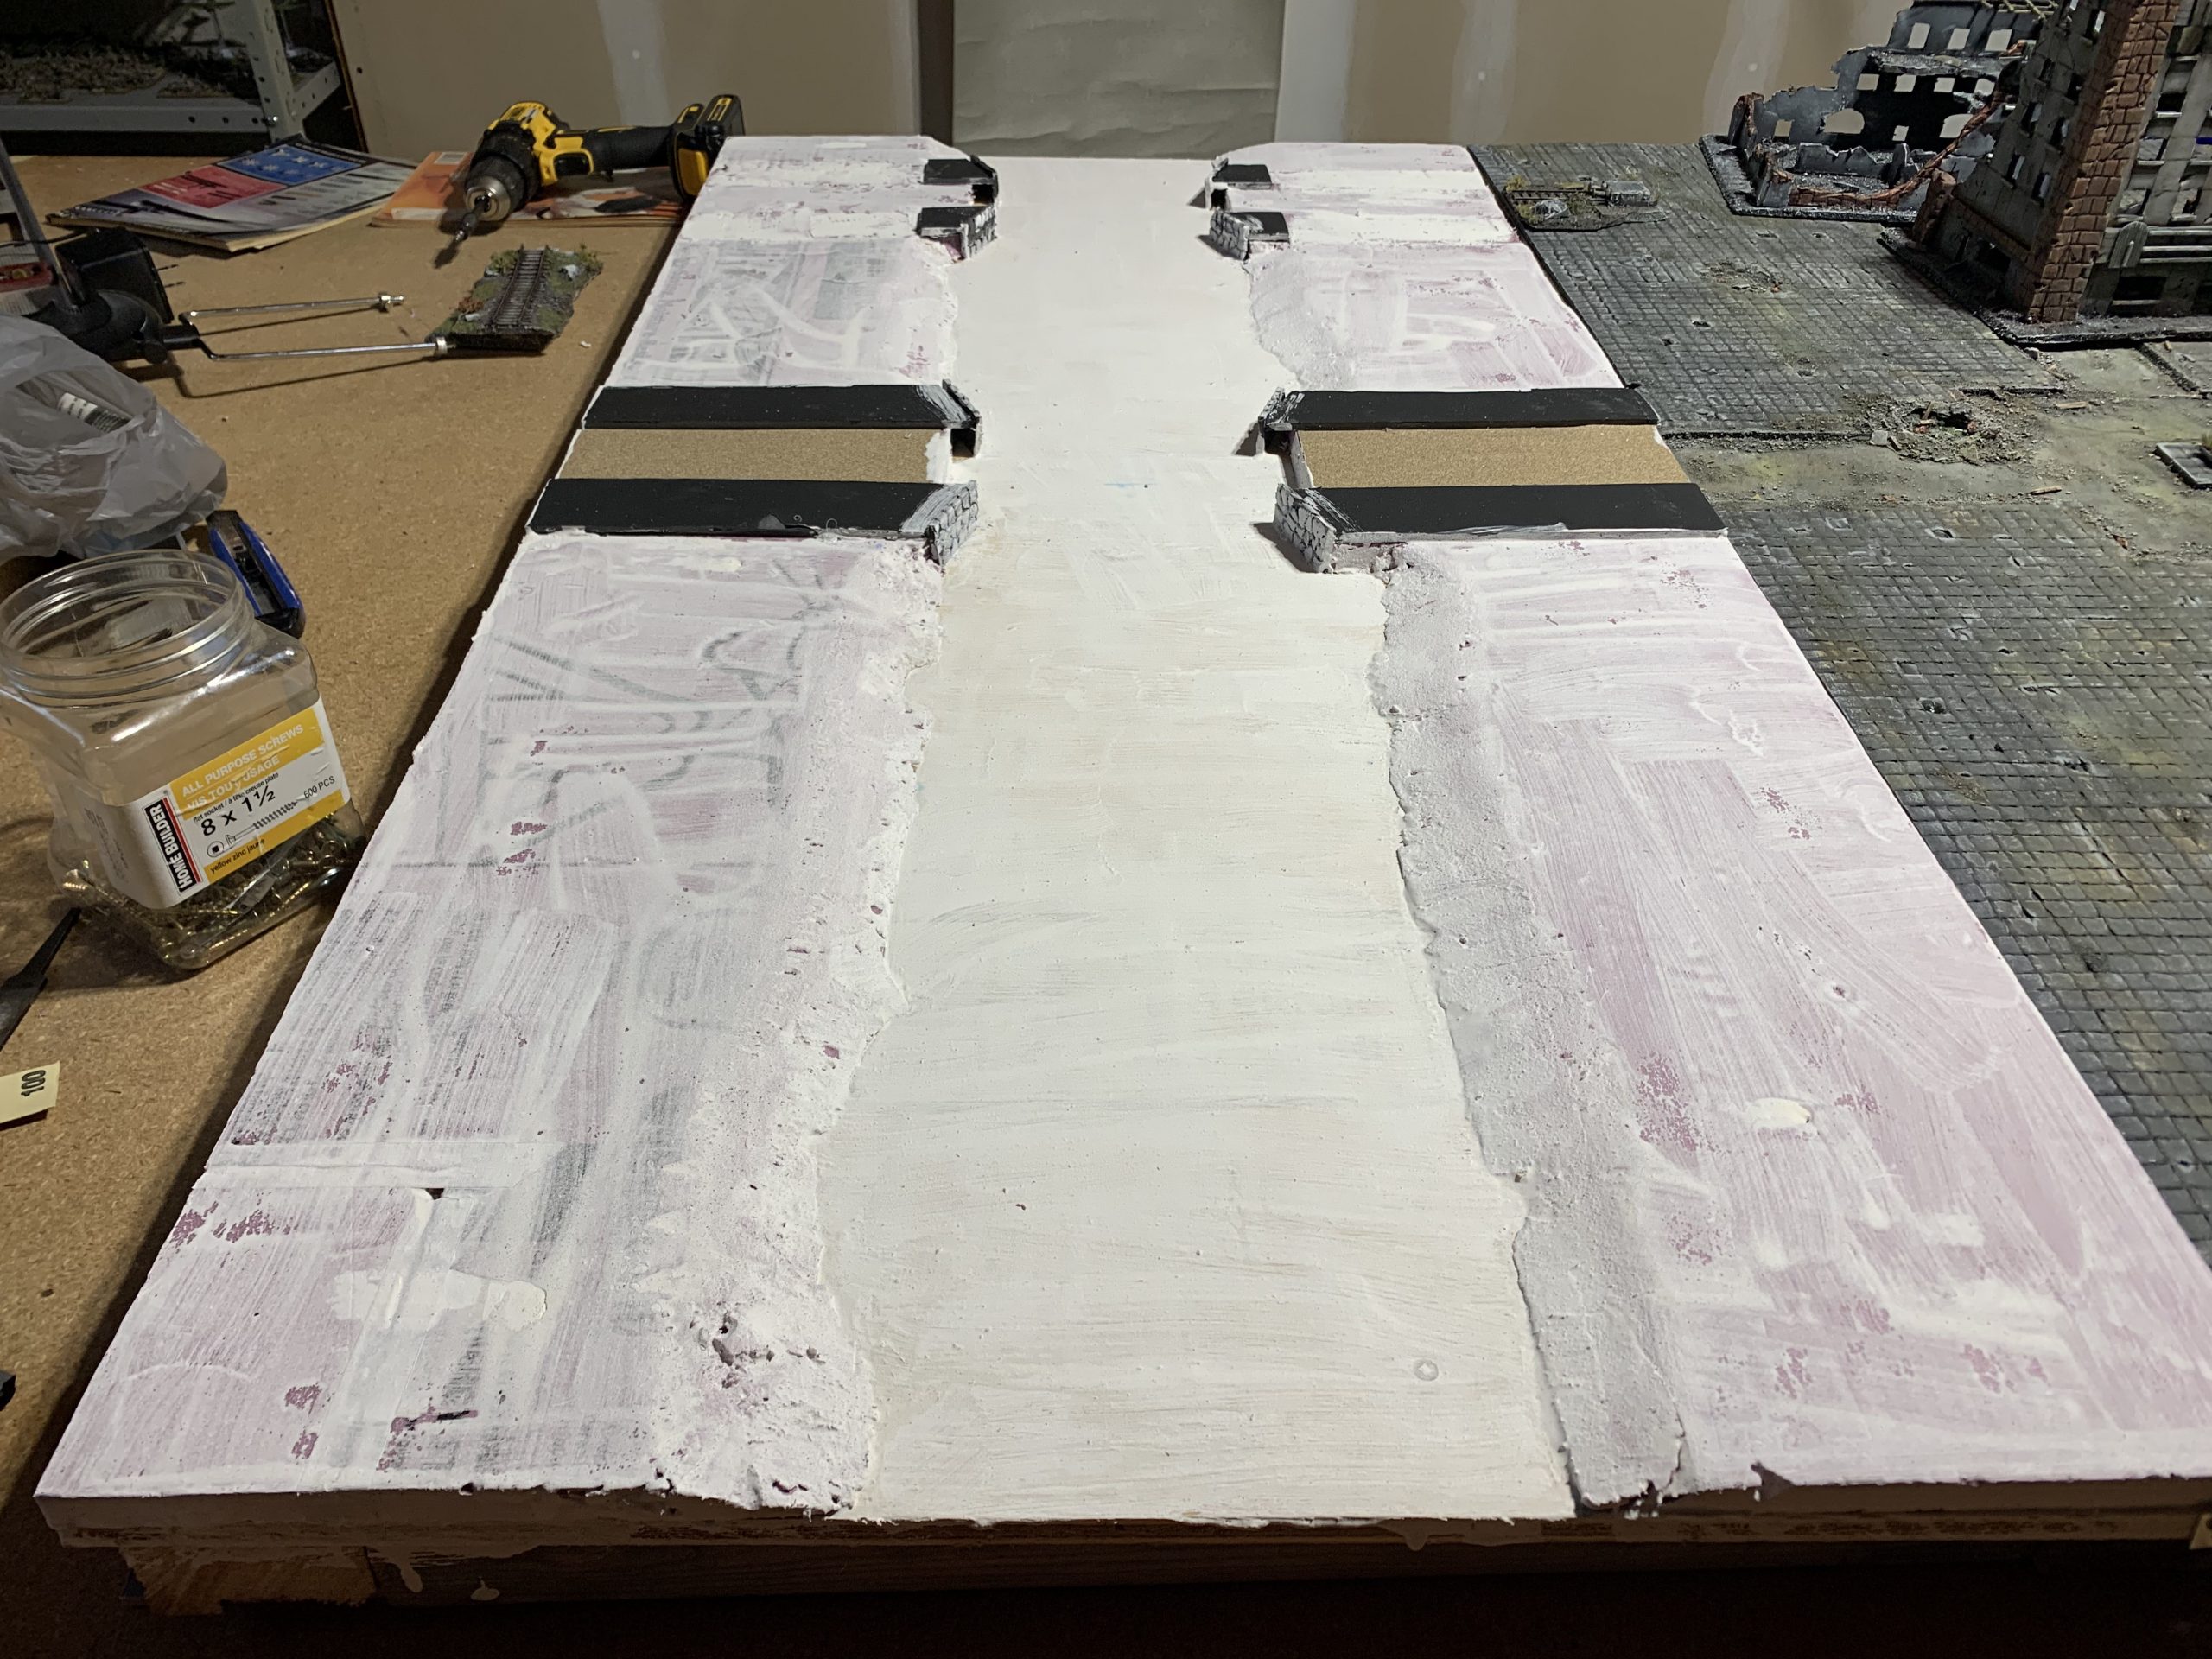
9. Texturing the Curbs: Taking the pen and ruler, I drew out a 1cm by 1cm grid on the surface of each curb. Then I scored this with the pen to form tiles. I randomly sculpted cracks and holes in the tiles as well. After this was done I put a piece of masking tape on the outer edge of each curb to level off the drop between the curb and the board surface.
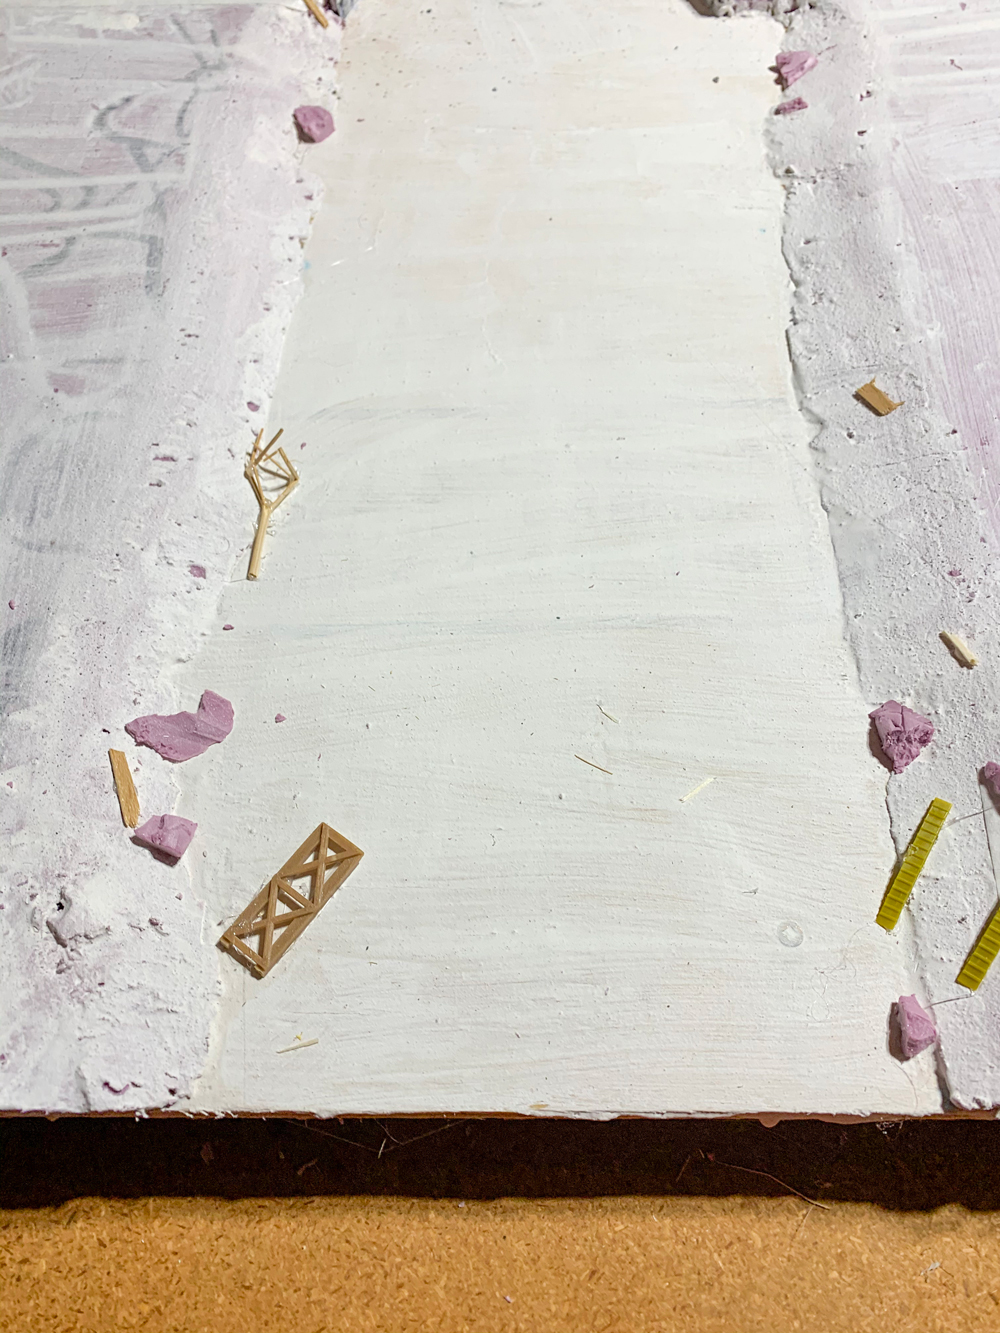
10. River Bank Details: Using foam chunks cut from leftover Insulation, I sliced them into random shapes, scoring them and shaping them in various ways to act as rocks and stones. Then I added more details by breaking match sticks and bamboo skewers into different lengths and chose some discarded objects like halftrack bridge runners and various building materials from my bits box to use as small details. I fixed these in place along the river edges and curb sides using hot glue. I put a few items and rocks in the “shallow” areas where the river will go as well. I also glued lengths of model railway track leading up to the rail bridge. With this done I took my tweezers and removed all of the loose strands of hot glue left over from the previous steps.
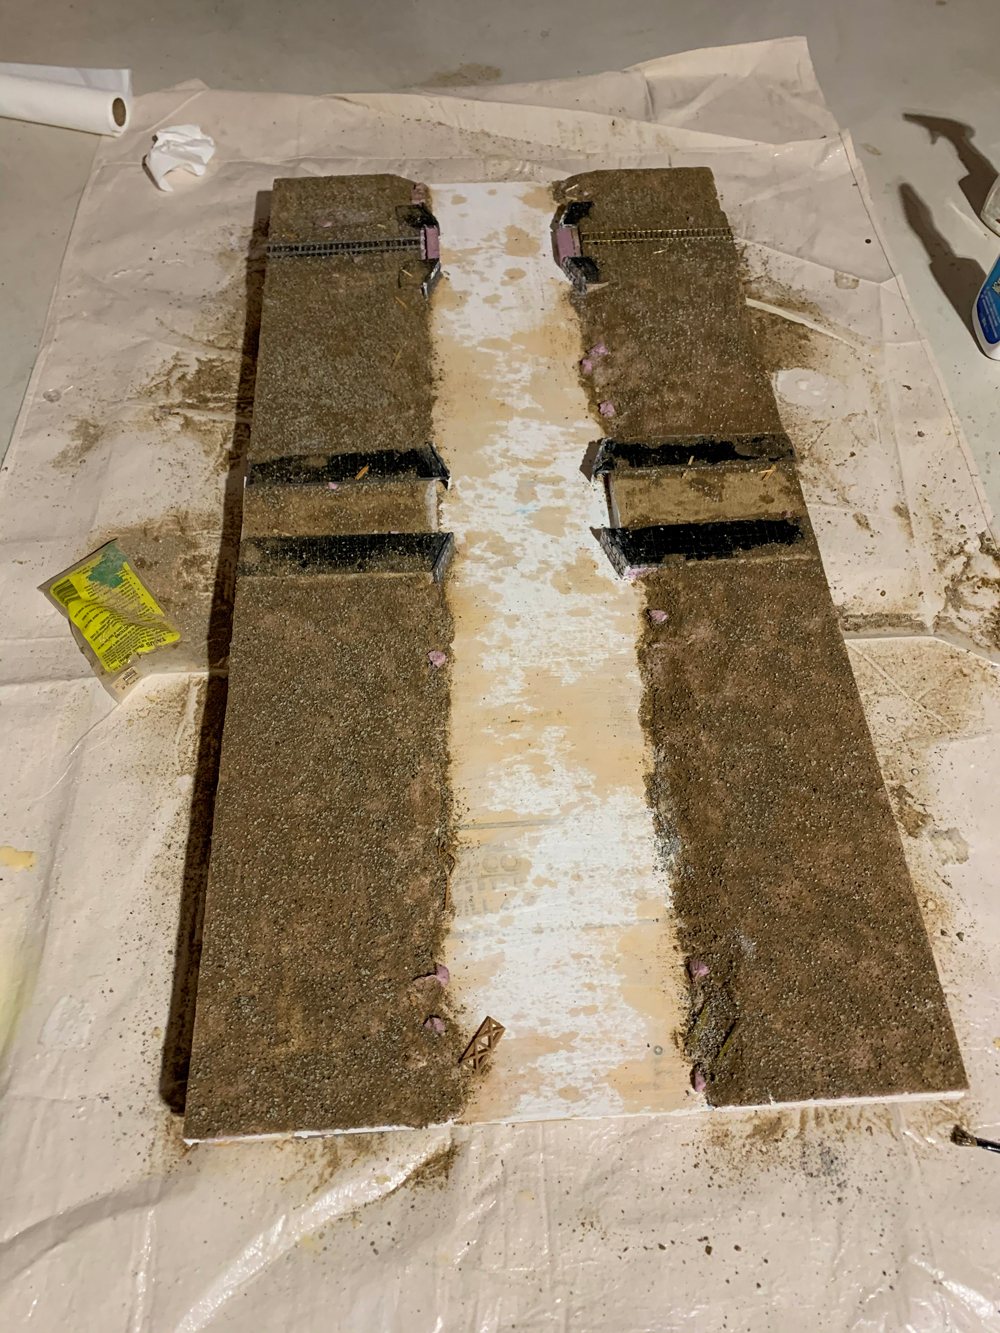
11. Grit: To begin this step I laid down a drop cloth and worked in a ventilated space. Then I prepared one spray bottle with about 9 parts water to one-part white glue, and the second bottle with 8 parts water to 2 parts rubbing alcohol. I also mixed a container with about 8 parts sand to 2 parts kitty litter. Finally, I filled a bowl with white glue with a few drops of water added to form a thick but spreadable paste. With the materials prepared I proceeded as follows:
- Using a large brush, I spread the glue paste over the surfaces avoiding the curbs, sandpaper “roads”, river beds and retaining walls. Using a small brush, I went back and dabbed random patches of glue on the roads and curbs for scattered dirt and debris. Make sure you spread the mixture over the foam rocks and any other exposed foam (to protect it from spray paints).
- I Sprinkled the sand/kitty litter mixture onto the glue paste. The foam rocks should each have a little grit on them but should not be coated entirely.
- While the glue paste was still wet, I misted the entire board with the rubbing alcohol mixture. This broke surface tension to help the glue flow.
- Following this I took the white glue/water mixture in the spray bottle and misted it over the whole board.
- Now I let the board to dry for 24 hours.
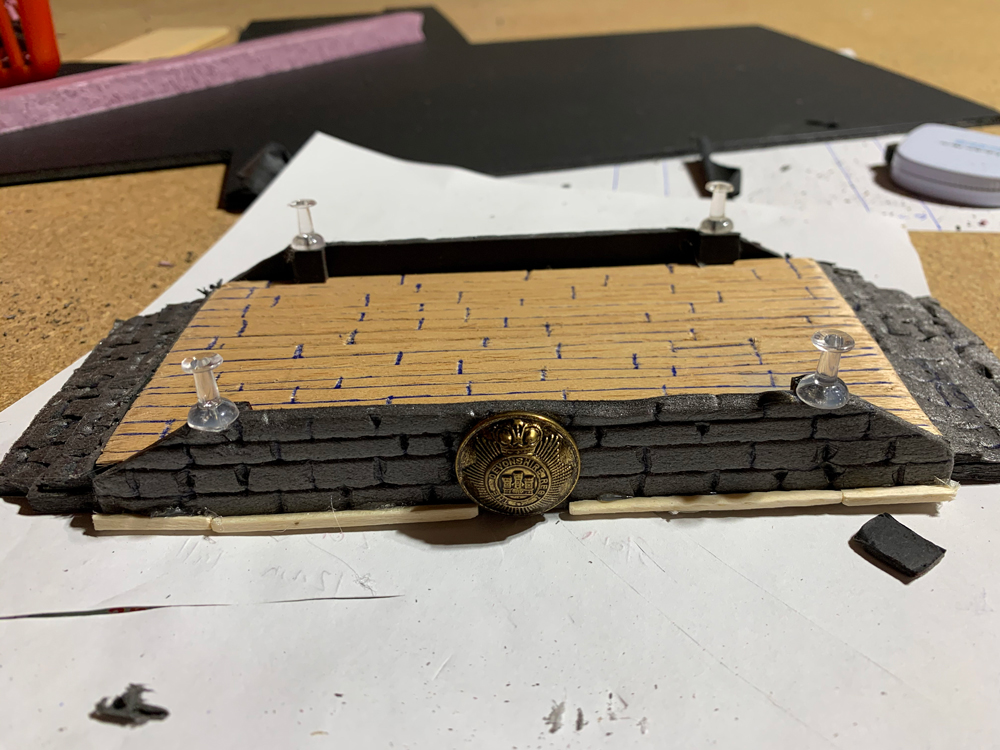
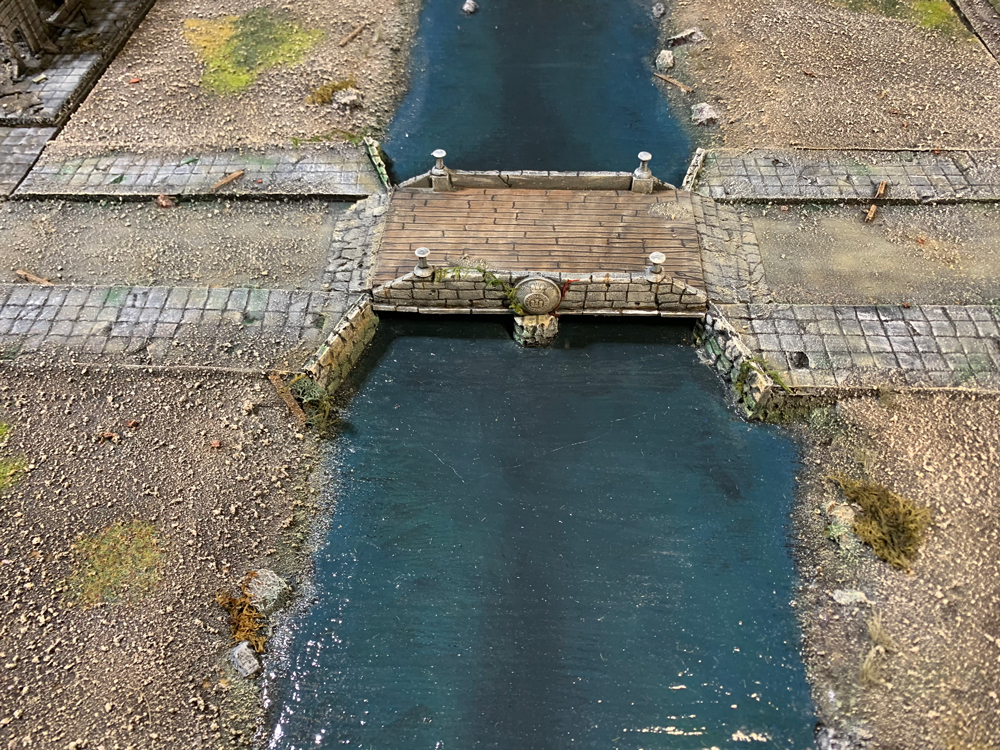
 12. Bridges: It was now time to build the bridges. If you wish to use a pre-made bridge there are many options and Battlefront/GF9 have some excellent bridge models you could use. I decided to build the road bridge and use an old HO scale model bridge which I had in my bits box for the rail bridge. For the Road bridge I cut 2 20 cm by 8cm wide layers of foam core and removed the paper layers by soaking them. Then I glued them together with hot glue and using a file tapered the ends to slope down to the road surface. I capped the sides with more foam core (with the paper peeled off) and scored a stone pattern in it with my pen. I surfaced the bridge with a sheet of balsa wood and scored wood planks in it. On the outer side of the bridge I added details with a spare button featuring a coat of arms (which my mother in law gave me!) and a few push pins. Finally, I brushed watered down spackle over the whole bridge (except the balsa wood).
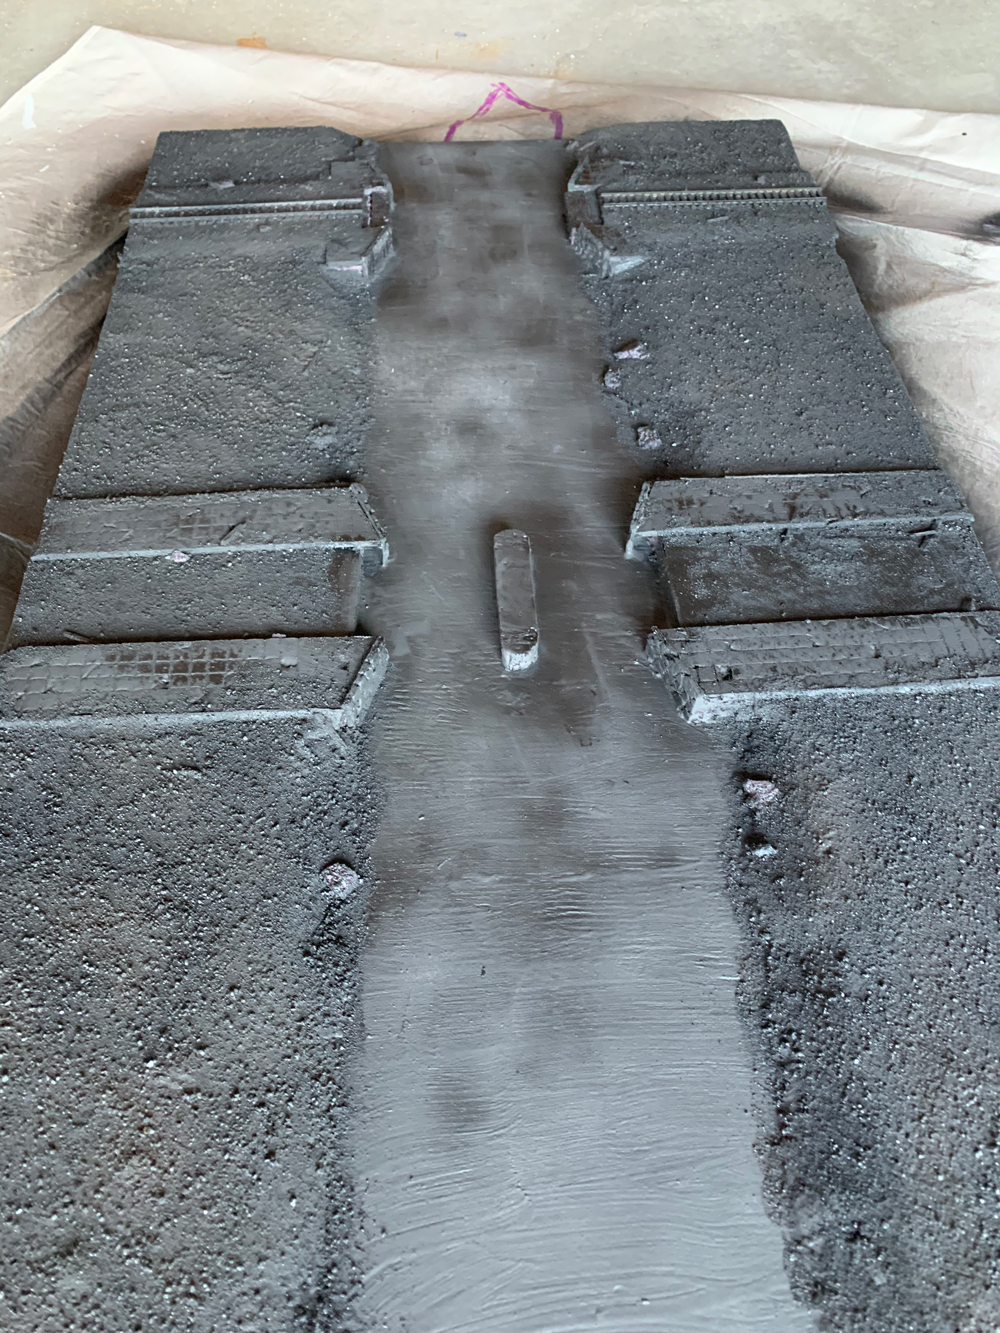
13. Under Coat: Putting down a drop cloth in a well-ventilated space I prepared to spray paint the board. (It is very important that any exposed insulation foam was coated with glue, sand, or spackle as foam can be destroyed by the propellant in spray cans.) Now I spayed several coats of matt black spray paint on the board varying the angles to get a full coverage. After this had dried, I sprayed the board with several coats of matt spray varnish. I then left this to dry for about 4 hours. At this time, I also sprayed and varnished the bridges.
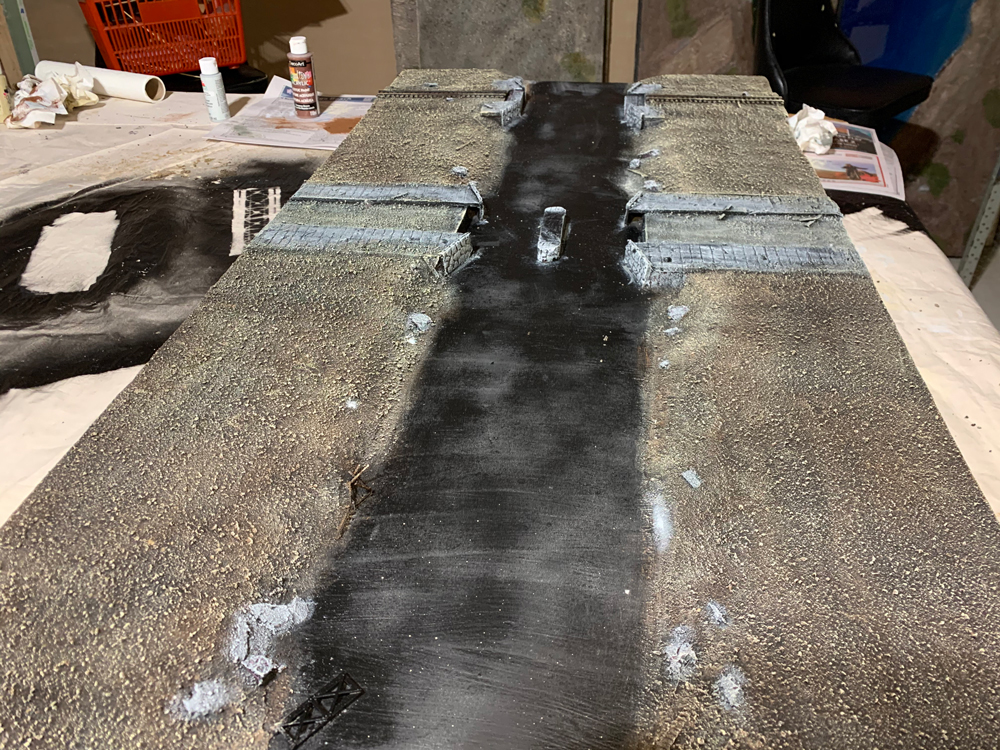
14. Painting the Banks and Bridges: Taking a large brush I dry brushed the grit areas starting with layers of dark brown and worked up to a very light layer of white. I then repeated this process with shades of grey on the retaining walls, curbs and roads. I prepared the bridges in a similar way using rust red tones on the rail bridge and train tracks and greys and browns on the road bridge.
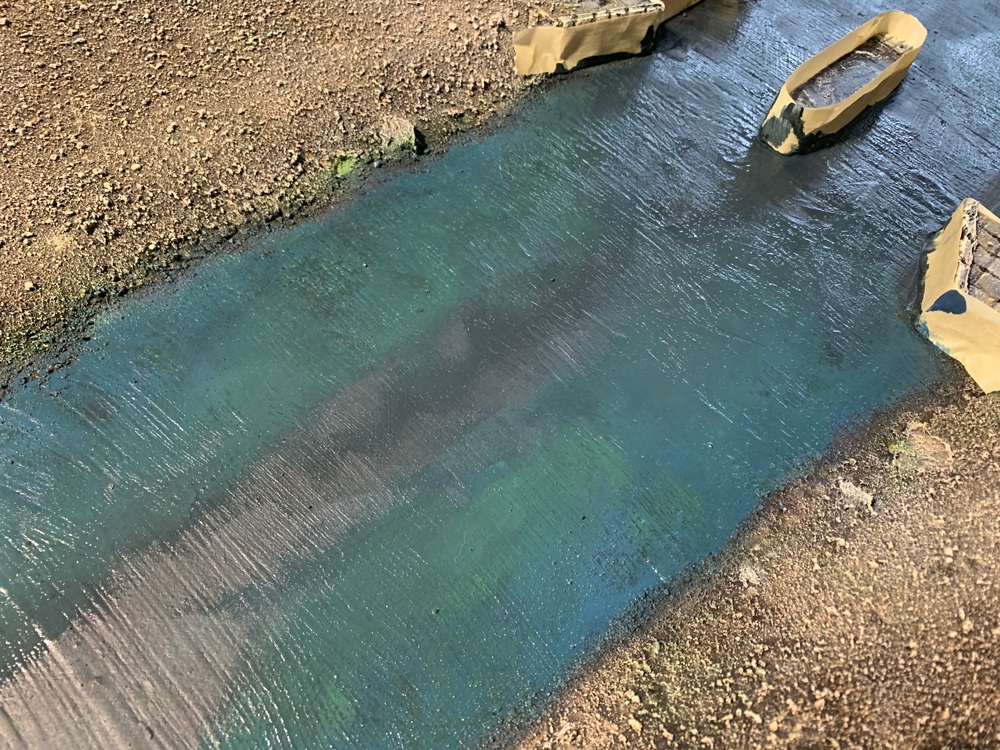
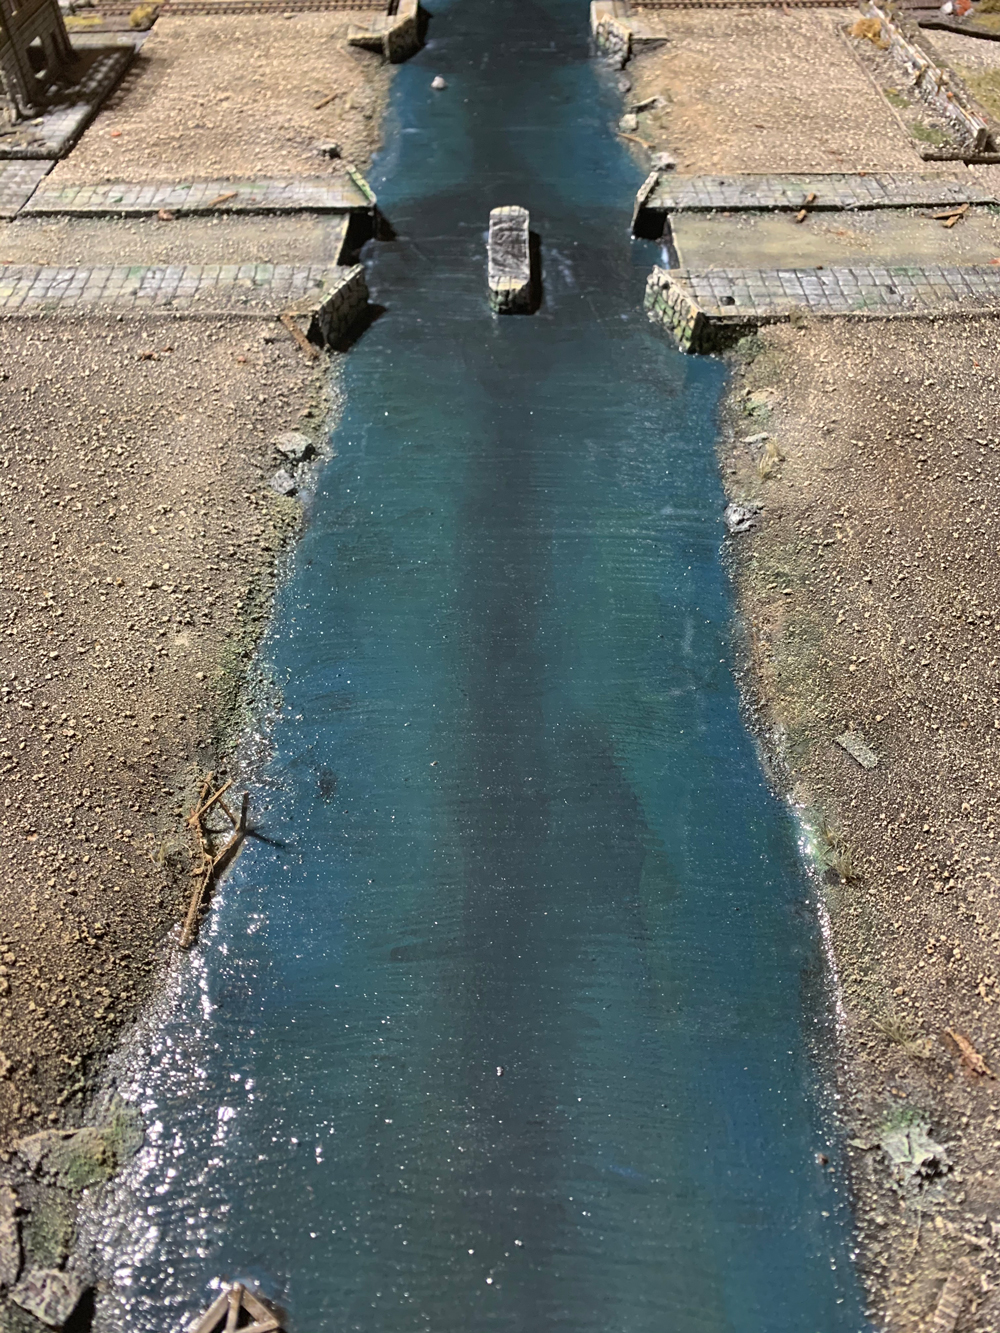
 15. Painting the River: First I used masking tape to protect the stonework and any features I did not want to paint the same colour as the river. Next, I mixed a dark shade of blue green which I brushed into the centre of the river. Following this I gradually blended the colours outward to the river banks with lighter colours of blue. My objective was to keep the centre where it is deepest dark, while the shallow areas would be lighter.
16. Preparing for Water Effects: Now it was time to prepare a dam at either end of the river to stop the Mod Podge from overflowing. First, I put down a large drop cloth then cut 2 pieces of carboard larger than the width and height of the ends of the river. I wrapped these in kitchen plastic wrap, then using push pins fastened it to the end of the board, pushing the pins into the foam and plywood. I then reinforced the join by adding masking tape around the edges.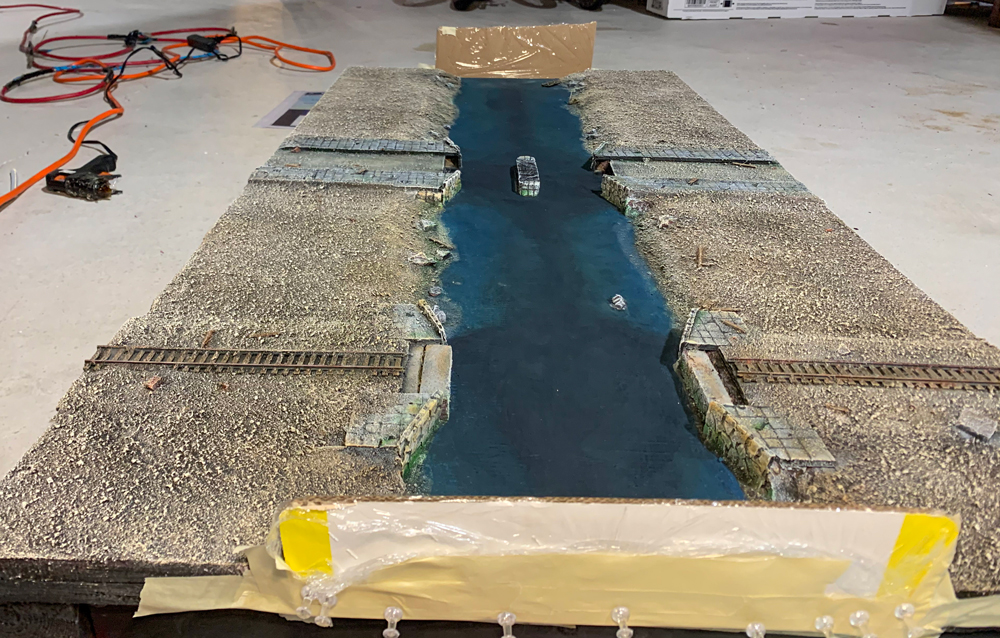
17. Adding the Mod Podge: Taking a large brush I painted Mod Podge Gloss thickly over the river. I kept the brush stokes oriented perpendicular to the shore to look like waves going up the river. Then I removed the masking tape but left the carboard/plastic wrap dams in place and left this to dry for 24 hours.
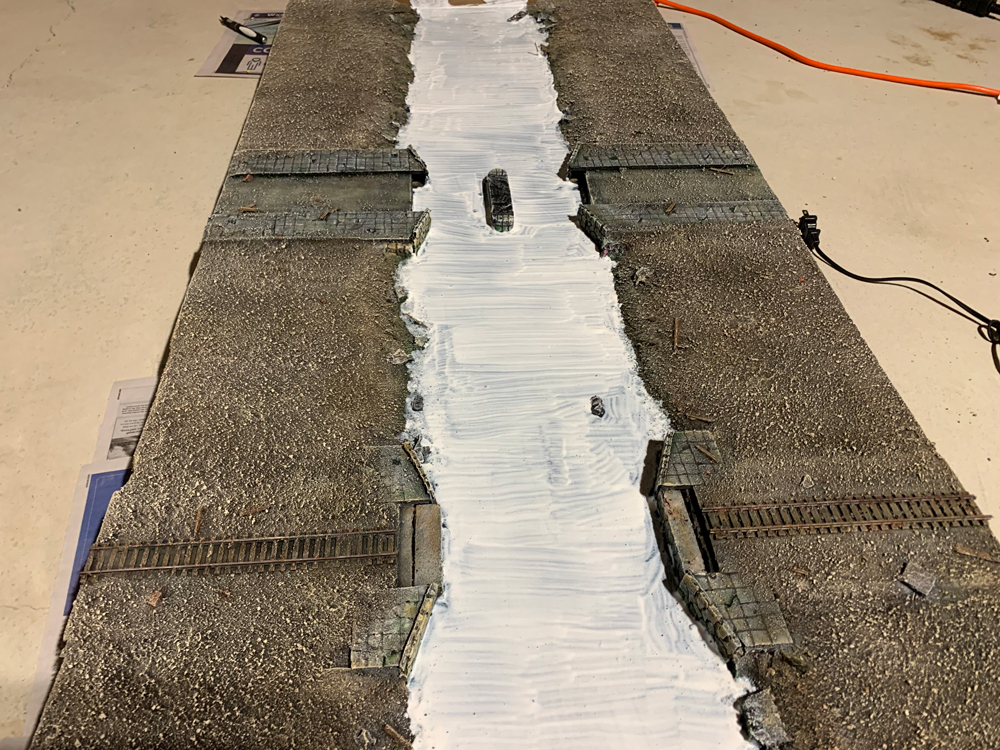
18. River Varnish and Details: After the Mod Podge was dry it remains slightly tacky so I coated it with 2 layers of gloss acrylic varnish. I intentionally painted varnish up slightly onto the river banks and retaining walls to make them appear wet. When this had dried I removed the cardboard/plastic wrap dams. Then I painted any remaining details like spare equipment, rocks and wood appropriate colours. Now I placed the bridges in their respective spots at the end of the retaining walls. (I did not glue them down so they were removable.)
19. Static Grass and Lichens: Mixing up a batch of white glue/water paste as in step 11, I spread random patches on the board and sprinkled these with various shades of static grass. I also used the glue paste to add a few model lichens on the board. Make sure you don’t put the lichens where you may want to put scatter terrain. When the glue was dried, I loaded my airbrush with matt varnish and sprayed the lichens and patches of grass with it to hold them in place and protect them. Where I sprayed near the glossy water I used a sheet of paper to mask against overspray.
The River Section is Now Complete!
Whether you use this tutorial as a guide to build something similar, or copy it step by step, I hope it gives you inspiration for your games of Flames of War. Combining your home-made terrain with some of Battlefront’s excellent range of scenery helps make the game unique and adds an added degree of artistry to the hobby. Moreover, when combined with special scenarios such as the river crossing missions, it helps make the game both visually impressive and introduces new, fun challenges to test your generalship.