
With John Lee
With several new artillery weapons being released I thought I would look at all the options available to me that I might have previously not even looked at plus the new stuff. To my surprise when I tallied up the number of units able to deliver an artillery or salvo template, it was at least twice to three times what I imagined! If you consider what is available in several formations, support, and command cards, the total number of different indirect weapon systems totals nineteen! That is right, nineteen! Here is the list of them:
| Formation Weapons | Support Options | Command Cards |
| 8cm Mortar Platoon | 10.5cm Artillery Battery | 21cm Neberwerfers |
| Armoured 8cm Mortar Section | Wespe Artillery Battery | 30cm Nebelwerfers |
| Reconnaissance 8cm Mortar Section | Hummel Artillery Battery | 7.5cm Mountain Artillery |
| 12cm Mortar Platoon | 15cm Nebelwerfer Battery | 10.5cm Mountain Artillery |
| 7.5cm Gun Platoon | Panzerwerfer 42 Battery | Stuka Zu Fuss |
| 15cm Gun Platoon | Brummbar Assault Tank Platoon | |
| Grille 15cm Gun Platoon | JU 87 Stuka Dive Bomber Flight |
Starting out with the formation weapons we look first at the mortars. These tend to be the cheapest artillery assets and can be taken by several infantry formations. As well as being cheaper, they also count towards keeping the formation from breaking.
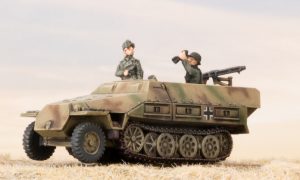 The humble 8cm mortar has a range of 40” AT1 and FP4+. It can also fire a smoke bombardment and useful to defend objectives if required as they can assault on fours. Two for 3pts, four for 6pts, or six for 9pts (no brainer to take six for rerolling misses). These are found in the Grenadier, Storm Grenadier, and Panzergrenadier (two tube option only) formations. The armoured versions of this mortar are mounted in the Sd Kfz 251 Half Tracks in the Armoured Panzergrenadier formation and are two for 3pts or four for 6pts. The advantage they have is that they are armoured and can keep up with tanks and easier to escape the counterbattery fire. The reconnaissance version is mounted in the smaller Sd Kfz 250 Half-Track and is two for 3pts or three for 5pts.
The next mortar is the 12cm variant. This mortar was a direct copy of the Soviet 120mm mortars that were captured earlier in the war. They have a range of 56” AT2 and FP3+. That 3+ FP is very useful for digging out enemy infantry and gun teams. Two for 4pts or four for 8pts. Another no-brainer here to take four if you can. You can get these in the Grenadier, Storm Grenadier, and Panzergrenadier formations.
The 7.5cm gun is the first dual-purpose artillery unit. Range of 48” AT2 FP4+ for indirect fire and can also fire directly out to 16” with AT8 FP3+ and smoke. Another great unit to put in the formation if you have spare points and can fire smoke directly. Can be used to deter light/medium tank assaults from objectives. Two for 6pts or four for 12pts. These are available in the Grenadier, Storm Grenadier, and Panzergrenadier formations.
Onto the heavy 15cm gun now. This comes in two variants, the Grille (armoured and mobile) and the towed version. The gun has a 56” range with AT3 and FP2+. You want something to stay down, you take these with the AT3 and FP2+. They can also fire direct out to 16” with AT7 and AUTO FP and Brutal. They only come in pairs mind you, so it’s 8pts for either version. The only caveat here is that you will automatically be rerolling hits with only two guns. Depends on whether you want FA4 and mobility or the ability to be dug in. All four infantry formations can take the towed variant with the Armoured Panzergrenadier and Panzergrenadier formations able to take the Grilles.
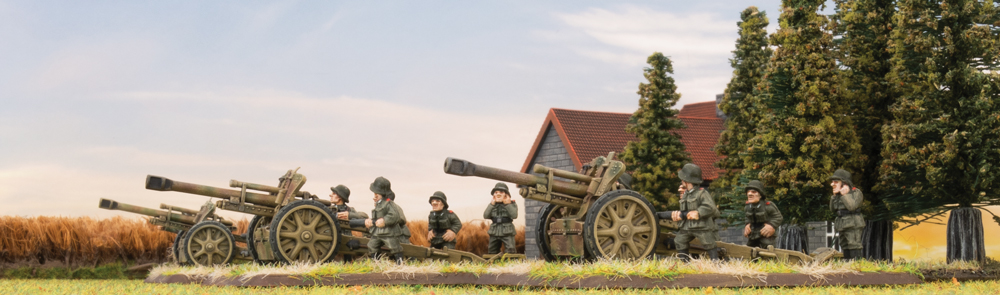
Moving onto the support options now we look at the guns first starting with the workhorse of the artillery – 10.5cm howitzers. Again, you have the choice of the towed version or self-propelled (Wespe). The range is 72” with AT3 and FP3+ with a smoke bombardment. Direct fire out to 24” AT9 FP2+ with Brutal and Smoke. Towed is two for 7pts and four for 14pts. Self-propelled is three for 9pts and six for 18pts.
Next up is the Hummel (self-propelled 15cm howitzer). Massive 80” range AT3 FP2+. Again, you want something to stay down, this is it. The gun can fire direct out to 16” with AT11 AUTO FP and Brutal. If you can afford these over the Wespes or 10.5cm towed guns, then do it. Three for 12pts or six for 24pts.

One of my favourites and almost an auto include for most of my lists is the 15cm Nebelwerfer Battery. Sporting a salvo template to keep your enemies hunkering in their foxholes, it has a range of 64” AT2 FP4+ with a smoke bombardment. Three for 9pts or six for 18pts.
The new kid on the block for this release is the armoured version of the nebelwerfer. This is your counterbattery rocket launcher battery. Able to lay down a devastating barrage and then move to take up alternative positions – can never be pinned. Same stats with 64” range and AT2 FP4+. Two for 8pts and four for 16pts.
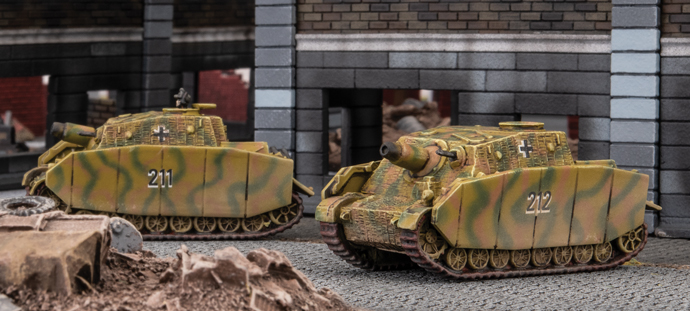
The Brummbar whilst is primarily an assault tank has the indirect capability. 56” range AT3 FP2+ that also has a direct range of 16” AT7 AUTO FP…and FA10. That is right, FA10 – can get right up in the enemy’s face and dig them out after bombarding them for a turn or two first from the range! Two for 14pts, three for 21pts, and four for 28pts.
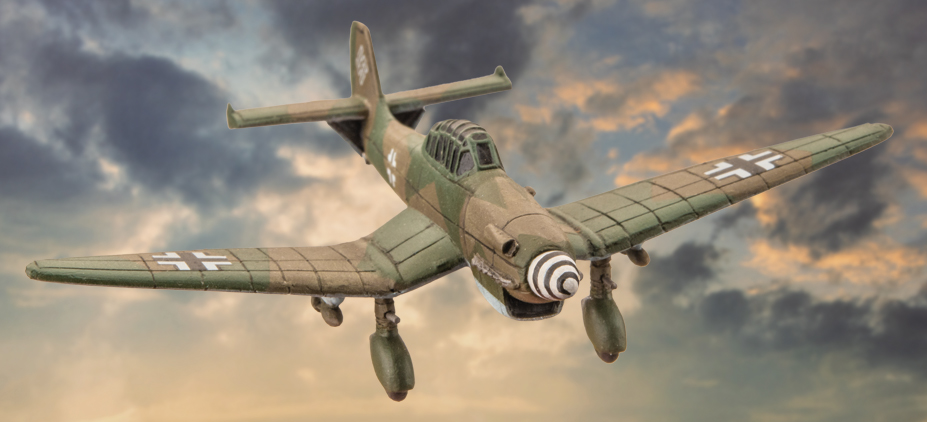
The final support option is the JU 87 Stuka Dive Bomber Flight. You can fly anywhere on the board and drop bombs on your opponent and with a template with AT4 and FP2+ this is probably the best artillery option for taking on tanks if you need to. The AT4 can even threaten heavy tanks such as the Tiger and IS-2s top armour. A flight of two costs 8pts. With the Bombs rule, even though you only have two planes, you are not penalised for having to reroll hits.
Surprisingly in this release, there are also several command upgrades if you want to take something a bit different. The first of these is the mountain guns – flavour for those who want to run Gebirgsjager Company Command Card (but can be used independently). The 10.5cm Mountain Artillery Command Card is basically the same stats as the standard 10.5cm battery with it being less than 1pt for the battery due to having no gun shields. A good option if you need a spare point back for something else and are taking 10.5cm guns anyway. If they are going to be dug in, then it saves you a point – the only issue is if you want to move them and risk getting fired at directly and no FP save due to no Gun Shield.
The 7.5cm Mountain Artillery Command Card allows you to field the 10.5cm Artillery Battery with better movement stats, ability to cross on a 3+, same indirect range but AT2 and FP4+. Direct fire out to 20” AT6 FP3+. All this for -1pt per gun in the battery. If you took a battery of two it would be 5 pts or the full battery would be 10pts.
For those who love their rocket launchers, you have a couple of options here too. The first is the 21cm Nebelwerfer Command Card. For an extra point per gun team, the range increases to 72” AT to 2, and FP improves to 3+. Something to consider if you have the points available. For me, the difference between 3+ and 4+ is the ability to remove something from the board if the target team fails its save. Three for 12pts or six for 24pts.
The 30cm Neberwerfer Command Card allows you to field the largest rocket launchers. I have the models for these – very cool looking! This card replaces the 15cm variant for an extra point per gun team. Same range as the 15cm version but AT3 and FP2+. Now we are talking – salvo goodness and removing enemy teams who fail saves on 2+! The caveat here is that it is a three-shot weapon only. Use it three times and it cannot fire anymore – so make those barrages count! Three for 12pts or six for 24pts.
The last command card is the Stuka Zu Fuss. This command card applies to the Panzer Pioneer Platoon only. This is a one-shot weapon for five points and allows you to fire one bombardment with your Sd Kfz 251 Half Tracks. Each Half-Track counts as one weapon. Stats are 36” range with AT3 FP2+. Another salvo option for 5pts if you take that platoon. Could be useful if you have the points and can shock your opponent if they do not look at your list in detail.
The tables below do a direct comparison across each of the weapon systems and will help you determine what you might want to include in your force.
Weapons using a standard artillery template:
| Weapon | Range | Anti-tank | Firepower | Notes |
| 8cm Mortar | 40”/cm | 1 | 4+ | Smoke Bombardment |
| 12cm Mortar | 56”/cm | 2 | 3+ | |
| 7.5cm Infantry Gun | 48”/cm | 2 | 4+ | |
| 7.5cm Mountain Gun | 72”/180cm | 2 | 4+ | |
| 15cm Infantry Gun | 56”/cm | 3 | 2+ | |
| 10.5cm Gun | 72”/cm | 3 | 3+ | Smoke Bombardment |
| 15cm Gun | 80”/cm | 3 | 2+ | |
| JU 87 Stuka | Anywhere | 4 | 2+ | Bombs |
Rocket launchers using the salvo template:
| Weapon | Range | Anti-tank | Firepower | Notes |
| 15cm | 64”/cm | 2 | 4+ | Smoke Bombardment |
| 21cm | 72”/180cm | 2 | 3+ | |
| 30cm | 56”/140cm | 3 | 2+ | |
| Stuka Zu Fuss | 36”/90cm | 3 | 2+ |
The last thing I want to cover off is using an observer. You have a choice of a Panzer II OP or Sd Kfz 250 OP if you wish to take an observer. Both cost 1pt. The Panzer III has more armour, so is probably more survivable, but if you already have Sd Kfz 250s in your force, it makes sense to use that option. Now you can only take an observer if you take one of the following artillery support units:
- 5cm Artillery Battery
- Wespe Artillery Battery
- Hummel Artillery Battery
- Panzerwerfer 42 Battery
- 15cm Neberwerfer Battery
If you take one of the command card options that replace one of the above, eg 7.5cm Mountain Artillery Battery, that also applies. Once you have an observer in your force, it can spot any artillery unit including any formation units except for the JU 87 Stuka Dive Bomber which must self-observe.
In summary, the Germans get a lot of artillery options to choose from with this release. Choose the best unit that suits your requirements and cost to fit into your force and enjoy list building!