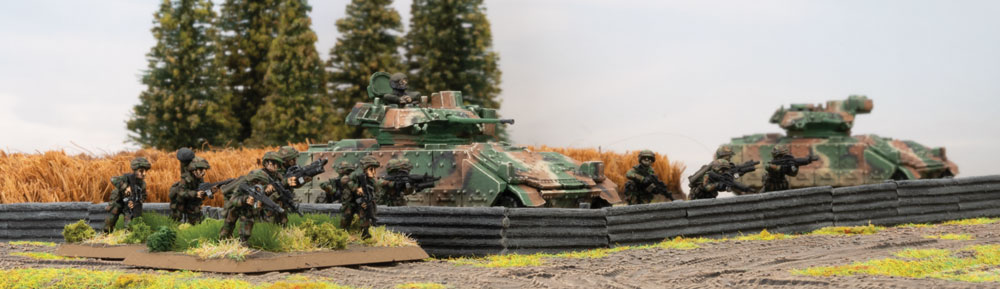
From its first incarnation in the first Team Yankee book, to Stripes, and now to World War III: American, I’ve wanted to do an American army but we were missing one key component: Bradleys, which put me off even starting them. In the meantime, I’ve made do with my West Germans and a smattering of British but now, after seeing the new American army book…
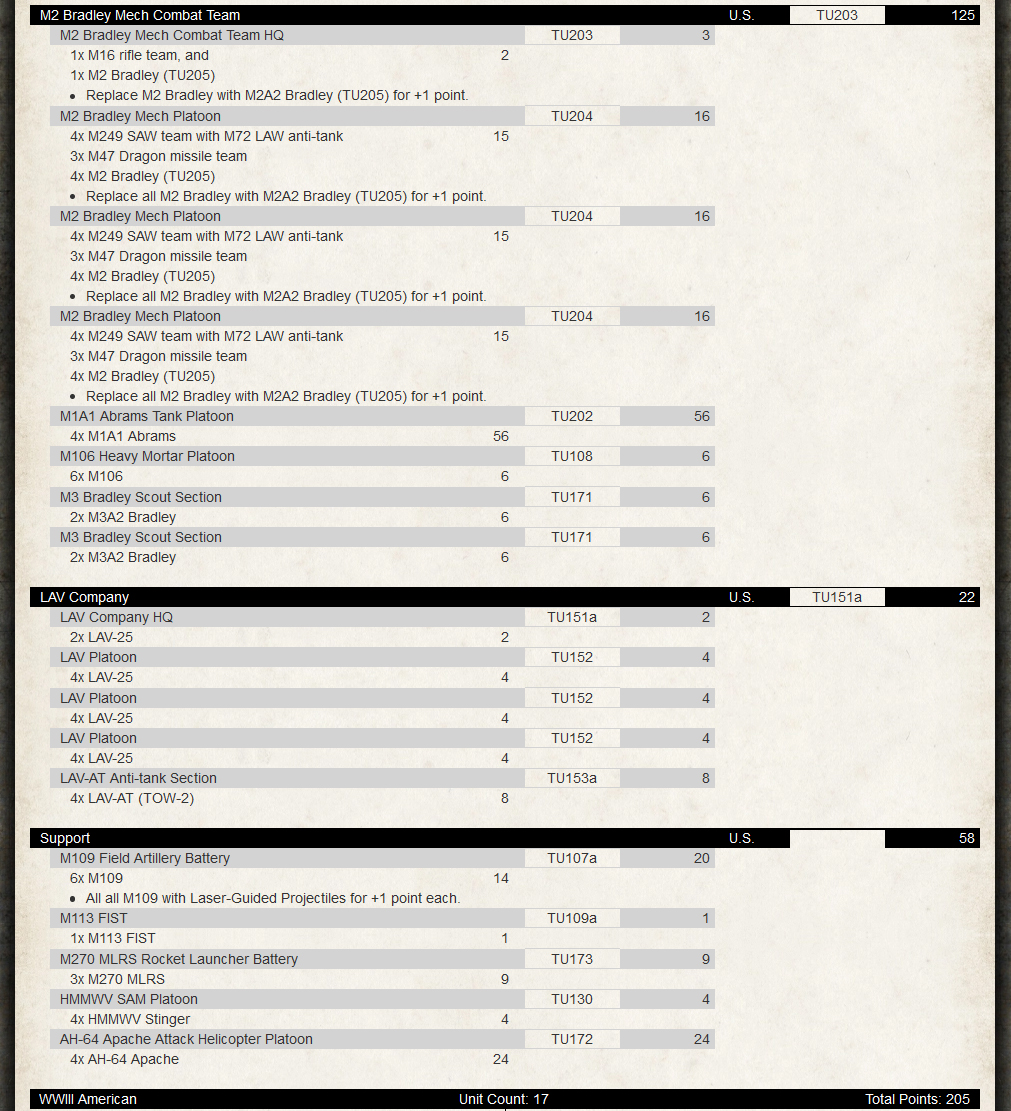
I’ve cleaned my hobby files, replaced the hobby knife blade, checked the plastic clippers, bought new glue, and am getting ready to fire up the old airbrush in anticipation of the upcoming American release for World War III:Team Yankee. And I’m building my force around an M2A2 Bradley Mech Combat Team backed up by a small contingent of Marines in an LAV Company. My force will consist of:
Click on the image for a bigger version.
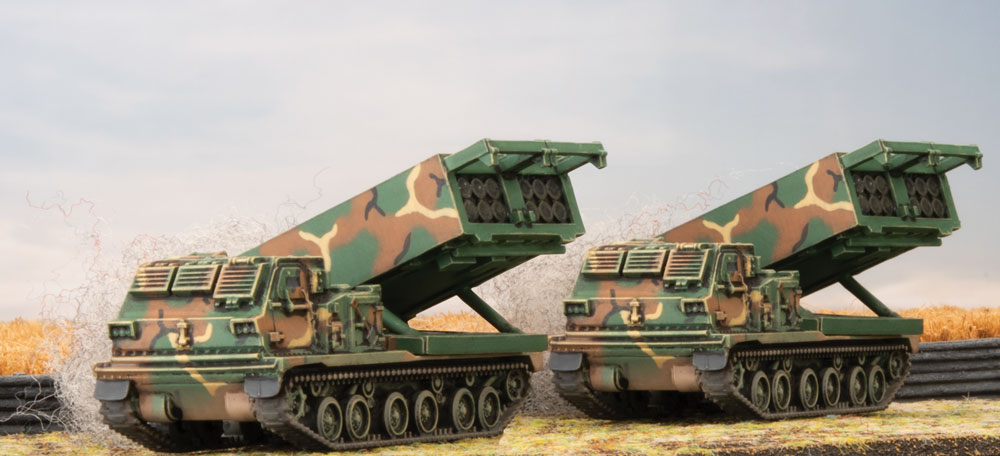
I know it’s a lot but it gives me the variety to play 25-point skirmishes to 200-point mega-battles. We’re waiting for most of the new product to get in but I’ve got my MLRS built and am working on my M109s, and can probably scrounge together some M106s and FIST to get me started before our shiny new Americans hit our dock.
I’ve gone artillery heavy in anticipation of loads of Soviet troops in their BMPs and the SPAM tactics that I’ve encountered, along with the ability to smoke up the battlefield for my own protection. Everything I have can put enough steel down-field to shred BMPs by the dozen and turn Soviet infantry into bloody wet smears and nearly all of my (army) vehicles have the ability to take out even the heaviest Soviet Armor and/or helicopters.
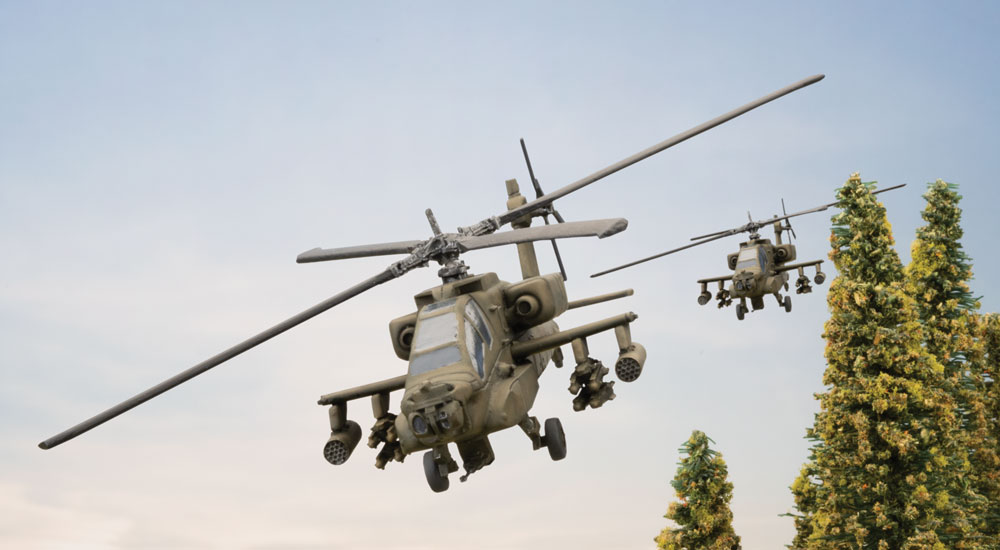
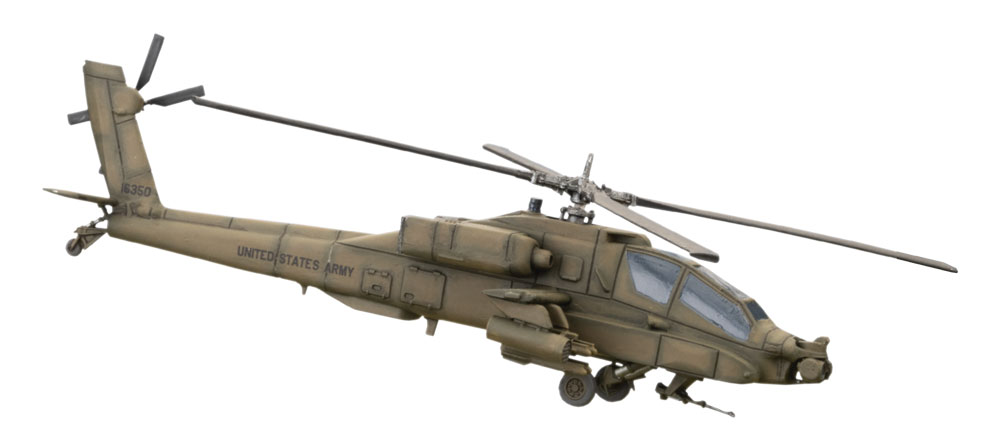
In 1975, the AH-64 Apache helicopter was born. It made it’s first flight as a prototype that year and by 1976, a full development contract was started. It was created as a replacement for the AH-1 Cobra and was built to be extremely tough in combat. It came equipped with night vision and other technology that helped support ground troops.
While it is heavily armed, it remains highly maneuverable in combat. Over the years, it has proven itself to be the backbone of the U.S. Army’s all-weather ground support team. It has continued to see advancements as time has passed to make it easier to maintain as well as more difficult to take down when the times get tough.
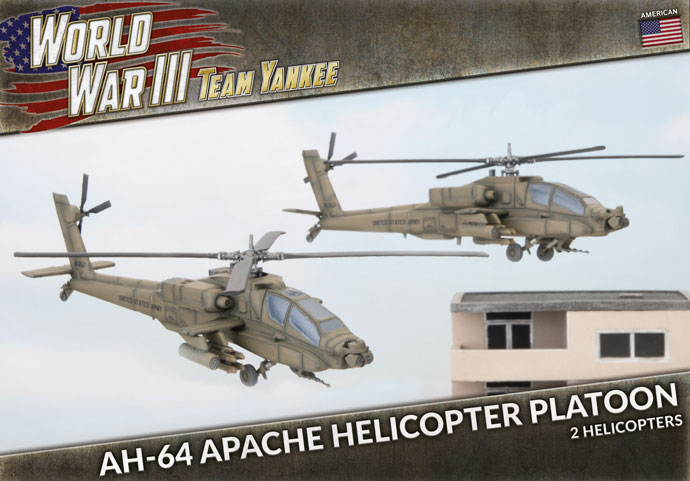
The technology used to weaponize this beautiful bird of prey makes this a must have when building your new American army for World War III: Team Yankee. With its 30mm M230 chain gun and 1200 rounds of ammunition, the chopper was already a force to be reckoned with even before adding 8 Hellfire missiles and 38 Hydra 70 rockets. You can tell your opponents to pack it up before they even start once you bring this bad boy into play along side the brand-new Bradley troops.
With unlimited movement and dashing ability in game, you can be sure that your enemies won’t know when or where your attack is going to come from. The Hellfire missiles are laser guided and the chain gun is perfect for taking out armored targets, whilst the rockets and chain gun are excellent for dealing with softer units.
Be sure to get your hands on the new Apache platoons when they hit shelves to ensure your opponents are left in the fetal position crying out for their mama by the end of the game! Catch you on the battlefield my friends.
~Kyle
And if you still don’t think that the AH-64 Apache is the coolest thing to hit World War III, then you clearly need to go and watch the Nicolas Cage movie, Fire Birds! It’s Top Gun but with more Apache and less volleyball.
Earlier this week I found myself building some Abrams so I could figure out and test my paint scheme. It has been a while since I built one and they were the original M1 Abrams versions for my “Bannon’s Team Yankee” force, straight out the novel.
Fast forward a few years and I was staring at the Abrams frame and thinking to myself, “there are some bits here I have never used….”. Between the assembly guide in the box and the very useful step-by-step guide on the website I managed to get my test models built and ready for a visit to the spray booth. But I thought it may be worth a quick primer for those of you that are about to embark on the assembly journey
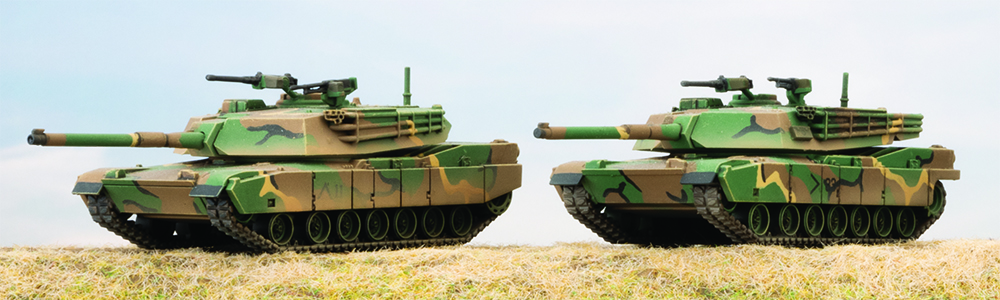
The M1 Abrams and IPM1 Abrams Personally, I feel that these two versions have the most obvious differences that you can see at a glance, thanks to the change in the stowage bins.
The M1 Abrams (below left) has:
• 105mm gun
• Short stowage bins on turret side
• Full length bazooka skirts
• Three part blow-out panel on the top of the turret
The IPM1 Abrams (above right) has:
• 105mm gun
• Long stowage bin on turret side
• Large stowage bustle on back of turret
• Bazooka skirt cut-out in front of rear drive wheel
• Smoke Discharger reload boxes below the dischargers • Three part blow-out panel on the top of the turret
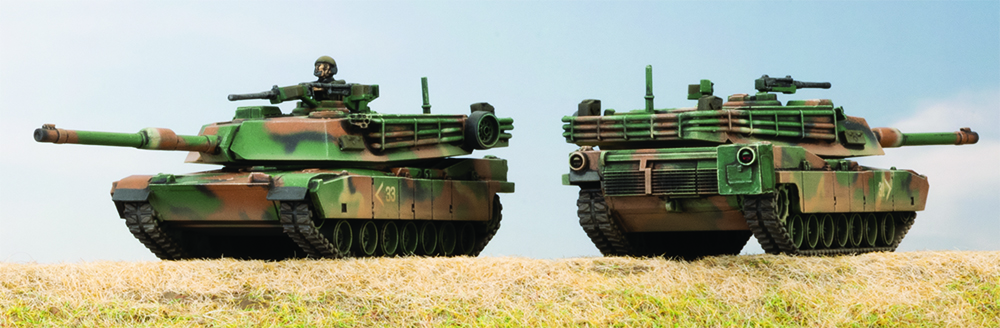
The M1A1 Abrams and M1A1HC Abrams These two tend to look a lot like the IPM1 at glance, especially if you are staring across the table at them, however there are a few key differences that once you know, will stand out.
The M1A1 Abrams (below left) has:
• 120mm gun • Long stowage bin on turret side • Large stowage bustle on back of turret • Bazooka skirt cut-out in front of rear drive wheel • Smoke Discharger reload boxes below the dischargers
• Two part blow-out panel on the top of the turret
• Circular cover (for where the Commanders CTIV would be installed on later models) on the top of the turret
The M1A1HC Abrams (above right) has:
• 120mm gun • Long stowage bin on turret side • Large stowage bustle on back of turret • Bazooka skirt cut-out in front of rear drive wheel • Smoke Discharger reload boxes below the dischargers • Two part blow-out panel on the top of the turret • Circular cover (for where the Commanders CTIV would be install on later models) on the top of the turret • APU (Auxiliary Power Unit) box on back right hand corner of hull
Hopefully this will help you spot the differences on the battlefield, but if you are looking for a little more help you can check out this handy guide that comes with the new Abrams box.
with Victor Pesch and Wayne Turner (Battlefront NZ)
To round out our D-Day: German coverage, Wayne and Victor threw down their expertly-painted forces on a stunner of a table and duked it out. There can be only one winner- check it out here…
Bloody Omaha Mini Campaign,
Game 1 Andrew Vs Ashleigh
Battle Report by Andrew
Today we decided to play a quick day long Bloody Omaha Ace Campaign! The plan was to use the Bloody Omaha deck to play three games, using our hobby league 50 point armies, playing among the NZ league members that I could. We decided to roll off the first mission in the campaign as we only had time to play three games. The Germans won the roll so I started my first game against Ashleigh (she was playing for the Germans). Her British army consisted of nothing but armor, a nasty match up for my 50 point 29th infantry division Assault Company. We were both running our 50 point hobby league armies.
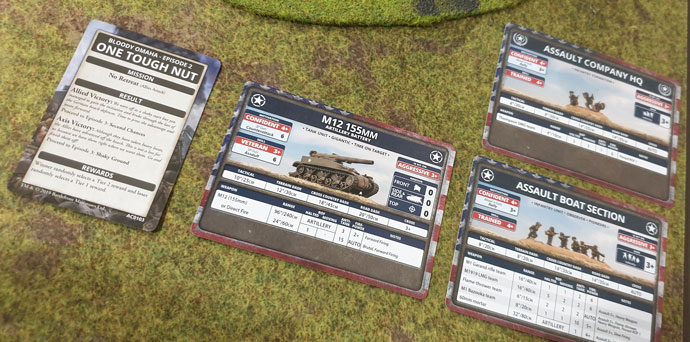
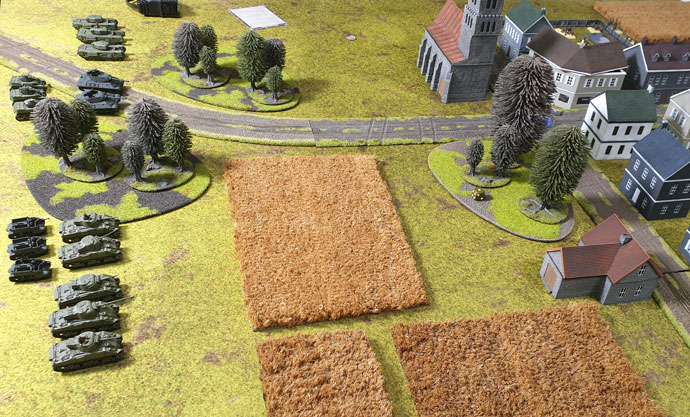
Setting up the game we were playing the Episode 2 card, One Tough Nut. This mission is No Retreat! Since both Ashleigh and I are playing Allied forces we rolled off to see who was defending, luckily I am defending. I quickly choose to defend the city thinking that was my best bet. The game started off as you would think, the tanks moved forward and took pot shots at range against my infantry. On my first turn I ambushed my 155 artillery to hit Ashleigh’s Churchill tanks, I managed to knock out one. Luckily Ash had one Churchill that stayed bailed and I was able to weather the return fire only suffering a few bailed out artillery tanks.| The game went on trading shoots with not much changing; I started moving my infantry through the buildings from reserves. This lasted until one turn when Ashleigh killed 5 infantry teams in one platoon with one round of shooting form her Carriers! I knew I would have to move! My next turn saw my artillery take out Ashleigh’s Churchill tanks and my bazookas getting lucky killing two Stuarts with moving shoots! Both the Churchill and Stuart tanks ran away! In reaction Ashleigh moved back and started shelling me from range, I responded by taking pot shots with artillery bombardments among her tanks, the third turn of bombardments I hit four of her tanks, all but one of them rolled a 1! With firepower 2+ my artillery took out the core of Ashleigh list, and it was just a matter of a few more morale rolls before her tanks retreated off the table. A victory for my 29th infantry Division. I would move on to my next game with Luke, due to having just played Hasty attack in our last game we played, Luke and I decided to play Dust Up instead.
Bloody Omaha Mini Campaign,
Game 2 Andrew Vs Luke
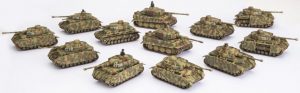
Battle Report by Andrew I also got to play in game two, this time I am playing against Luke. He brought his panzer IVs and again I was facing an all tank list.
I decided to do my normal reserves at 50 points for this match up even though I didn’t get to put my 155s in ambush. I stuck my two infantry units around the objectives and my 155 in the back comer prepping for an artillery strike.
Luke places a single Panzer IV unit in his deployment area and I was suddenly filled with hope, I only had to knock out one tank unit, then I could get to his objectives with my reserves! Turn one went to Luke and he rushed me, I was not expecting that, but I prepared myself for conflict sooner than I thought.
Turn one nothing really happened on turn two I saw that Luke was rushing for my 155s. He moved behind the church making hard for me to direct fire at him. I instead fired on him with infantry I had in the town, they moved forward through the buildings and opened up on his tanks, doing nothing. “Well”, I thought “That’s my artillery dead next turn”. Luke next turn had him wanting to Blitz around the building, 4 Panzer IVs would make quick work of my FA0 artillery tanks. But he failed the roll and then failed to hit me at all! Luck was on my side and I decided to open up on his tanks with my 155s! I knocked out two tanks! I really could not have asked for more.
Next turn I only lost two of my 155s, a bargain my 2 artillery for two Panzer IV tanks. On my turn I was able to bring in an infantry platoon from reserve, and they killed the last two tanks! Hurrah, now to deal with the rest of Luke’s tanks coming in from the other side of the table! Luke’s next turn he move his HQ and his other panzer 4 platoon up and destroyed the last of my 155s. ouch well it isup to my bazookas to hold him off.
On my turn I moved one of my infantry platoons to reinforce the forward objective and got one more reserved that made a beeline to Luke’s table edge getting 2 turns away from capturing the objective!
Feeling the pressure Luke assaults my infantry and two of me bazookas bail two of his tanks on their way in. He misses, my bazookas miss on their assault. Luke fails his counter assault and I take his two bailed tanks! His company command moves in to assault and my bazookas straight up killed both of Luke’s HQ tanks, winning me the game, and earning themselves a nice medal to boot! Another Victory for the 29th Infantry Division! We moved on from the Second Chances card to Rat Catchers, for this game Phil and Cameron are facing each other, Phil playing for the Allies and Cameron for the Axis. I’ll leave it to Phil to write up that final battle report.
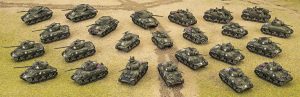
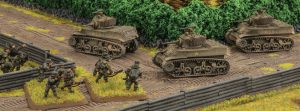
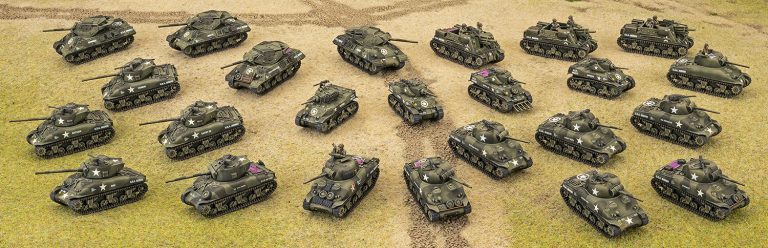
The Germans are coming and, not being a German player, I’m planning on beefing up my American D-Day Forces to counter the Panzer IVs, Panthers, and Tigers (oh my) that I hear Brian talking about and expect to be dealing with. I expect to be dealing with somewhere between 9 and 17 tanks so I’ve got to be smart about what I’m taking. I love the Armored Rifle Company but I just don’t have the time to paint that many infantry up fast enough for our league, having let my “paint figure quickly” skill atrophy over time. I don’t relish being hit on a 3+ so my plan is for a complete Veteran M4 Sherman Tank Company.
My force consists of 23 Sherman Tanks of various configurations and 2 support vehicles and is broken-down as follows: My 76mm tanks are going to be the biggest threat to any German armor I encounter and are thus, the most likely targets of enemy counter fire. That being said, all of the smoke that I can lay down with the 75mm and 105mm Sherman Tanks should be sufficient to protect my boys from too much steel coming their way and hitting them until they get into range. My hope for my screen of M5 Stuarts is that they get ignored until I’m able to exploit some weak points along the enemy lines; get enough of ‘em along the flanks of some Panzer IVs and there’s gonna’ be a lot of dead Panzer IVs (hopefully). The standard 75mm Sherman Tanks, when they’re not casting smoke down-range, are more than sufficient in knocking out Panzer IVs but really need the flank shots to have a hope of pinging any Panthers or Tigers; they’ll be operating mostly in support of the 76mms unless I see an opening I can exploit.
I’ve never used 105mm Sherman Tanks before but I’m eager to get them in the field. The idea of knocking out German Tanks with a Sherman from artillery fire at 48-inches from the top makes me giddy. And their anti-tank for direct fire isn’t too bad either. Lastly, just in case someone brings some aircraft, I’ve got a small contingent of AAA to handle that eventuality.
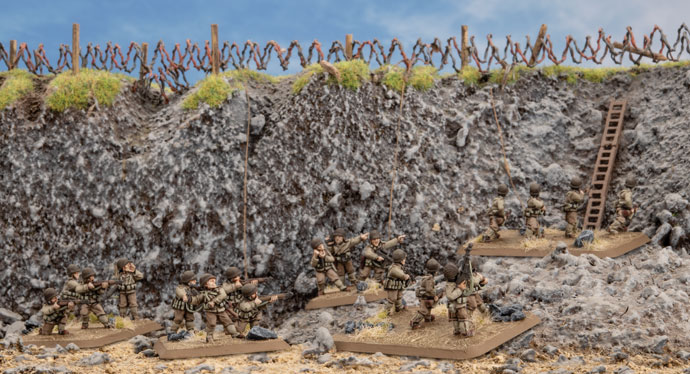
Wayne and I sat down to play a game of Flames Of War and we wanted to do a beach landing. Since I was still working my 29th Infantry Div beach landing Assault Company I decided to do something a little different than what I normally play for this Beach Landing game. I wanted to play Rangers. Rangers in V4 are incredibly cool. They are assault monsters and if they can get in close they will kill everything with their +2 to hit in Assaults.
Now, when brewing up a list for a Beach Landing mission, as an ally force you want to focus on the units that will cycle back onto the table: the infantry units, so I want at least 3 units, but the way the Rangers work I only get two per formation so I need to bring two formation. This is one of the strong aspects of the Rangers since their formations are small you can get multiple company commanders to help motivate your troops and keep your forces moving. With the core troops I wanted to add some artillery in the form of Mortars and Naval Gun Support. And since we are going D-Day let’s get some Duplex Drive tanks via the DD Sherman Command card.
Here is the list I ran against Wayne in our game:| Ranger Company 1
Ranger HQ 1 Point
Ranger Platoon 10 Points
Ranger Platoon 10 Points
Ranger Mortar platoon with 6 guns
Ranger Company 2 Ranger HQ 1 Point
Ranger Platoon 10 Points
Ranger Platoon 10 Points
Support
M4 Sherman Tank Platoon with 4 tanks 14 Points
Command Cards Lucky 1 Pont
Naval Gun Support 12 Points
Sherman DD 0 Points
If you add it up you can see we were playing below the normal 100 point level, at 75 points. This was due to the fact we were playing in a recorded battle report and we wanted to keep it short. But 100 points is where the game truly shines and if you wanted to add 25 more points to this list I would add the following,
Ranger Company 3 Ranger HQ 1 Point
Ranger Platoon 10 Points
Ranger Platoon 10 Points
Add a fifth tank to the M4 Sherman Platoon +4 Points
That gets you to 100 point easy and you will have even more troops on the table to harass your opponents.
Wayne and I were playing the FUBAR mission found in the D-Day: American book, we wanted to show off the basic mission and give players a look into how the mission is played. We could have played the Pointe Du Hoc Variant rules that would have let us play the beach landing the Rangers ran into on D-Day. Both missions work as FUBAR is a great representation of the Omaha beach landings.
I won’t tell you how the game went as you can watch our battle report video to find that out but I will go into the basic tactics of this list.
This list is all about attacking, you move your infantry in and you overwhelm your target with sheer numbers. During the FUBAR beach landing mission you have to take both objectives but your opponent’s resources are quite limited so try and mass up on both objectives. Your Shermans are limited resources so be careful with them and get them up the beach quickly and have them focus on taking out bunkers, start with the AT bunkers and once they are dealt with move on to the MG nests. Something else to keep in mind when building non-Ranger Tank forces, Rangers formations are cheap point wise to add to your force. For 21 points you get two full units of Rangers and an HQ, so you get re-rolls and some of the best Assaulting units the Americans have to offer. Its easy to build a well forces list and slot the Ranger platoon in, for example,
M4 Sherman Company M4 Sherman Company HQ with 2 Tanks 7 Points
M4 Sherman Tank Platoon with 5 tanks 18 points
M4 Sherman Tank Platoon with 5 tanks 18 points
M4 Sherman (76) Tank Platoon with 5 tanks 23 points
M4 81mm Armoured Mortar Platoon 2 Points
Ranger Company Ranger HQ 1 Point
Ranger Platoon 10 Points
Ranger Platoon 10 Points
Support
Priest Artillery Battery with 3 Priests 8 Points
Sherman OP 3 Points
There is a hundred points and the Rangers are the perfect include, if you have to defend well you get two full strength Ranger platoons to dig in on the objectives, with their 3+ moral rating they will rally and stay in the fight longer than most other American infantry units. Add in their 2+ to hit in assaults and you have a defending unit your opponent does not want to assault into. Ranger weakness to keep in mind, they are easy to hit, so HMGs and other high rate of fire hostiles are a big threat, you want to use your tanks and artillery to deal with those threats before the Rangers move into the assault.

 The game started off as you would think, the tanks moved forward and took pot shots at range against my infantry. On my first turn I ambushed my 155 artillery to hit Ashleigh’s Churchill tanks, I managed to knock out one. Luckily Ash had one Churchill that stayed bailed and I was able to weather the return fire only suffering a few bailed out artillery tanks.|
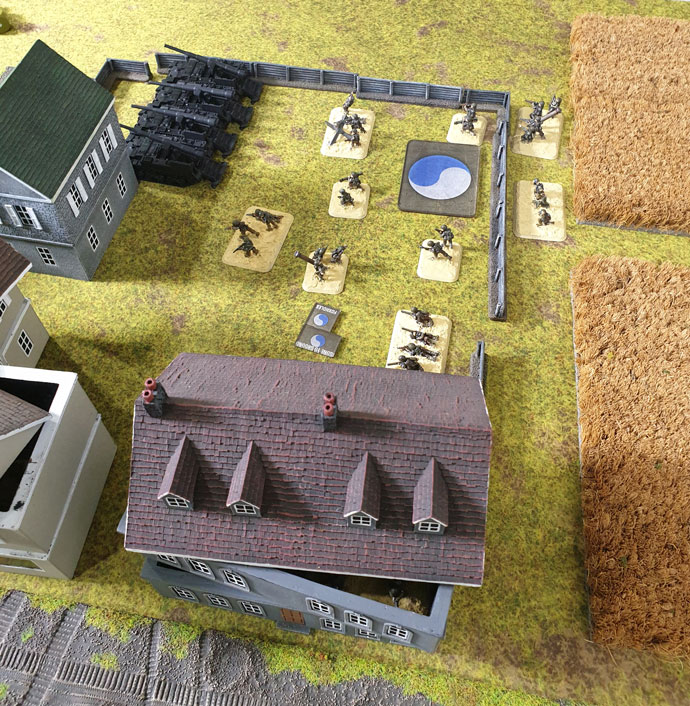 The game went on trading shoots with not much changing; I started moving my infantry through the buildings from reserves. This lasted until one turn when Ashleigh killed 5 infantry teams in one platoon with one round of shooting form her Carriers! I knew I would have to move!
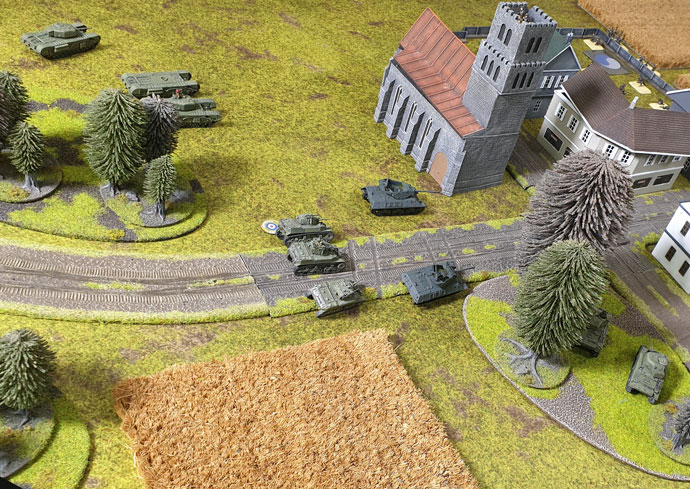 My next turn saw my artillery take out Ashleigh’s Churchill tanks and my bazookas getting lucky killing two Stuarts with moving shoots! Both the Churchill and Stuart tanks ran away! In reaction Ashleigh moved back and started shelling me from range, I responded by taking pot shots with artillery bombardments among her tanks, the third turn of bombardments I hit four of her tanks, all but one of them rolled a 1! With firepower 2+ my artillery took out the core of Ashleigh list, and it was just a matter of a few more morale rolls before her tanks retreated off the table.
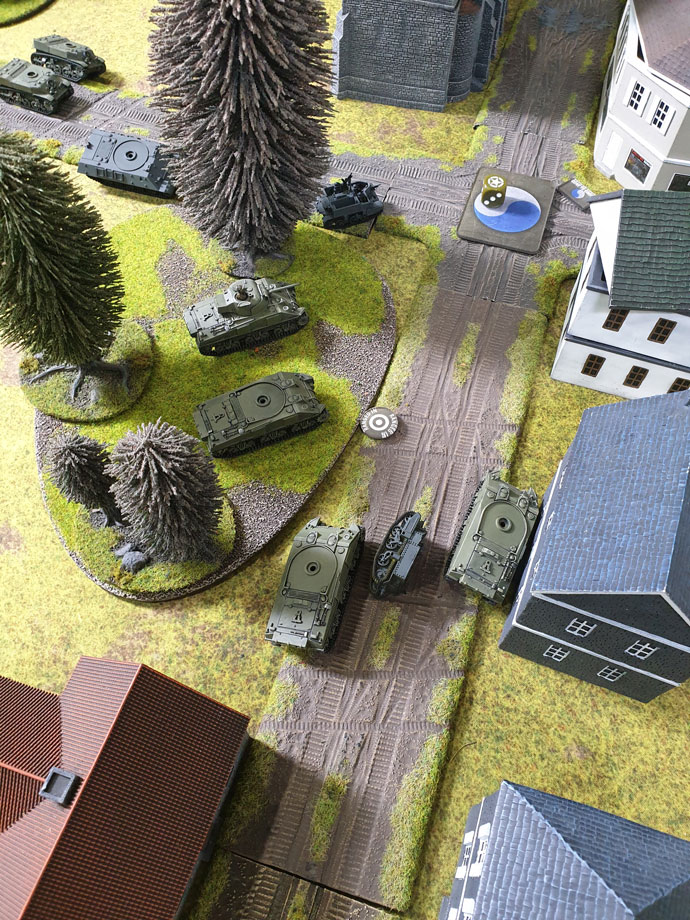 A victory for my 29th infantry Division. I would move on to my next game with Luke, due to having just played Hasty attack in our last game we played, Luke and I decided to play Dust Up instead.
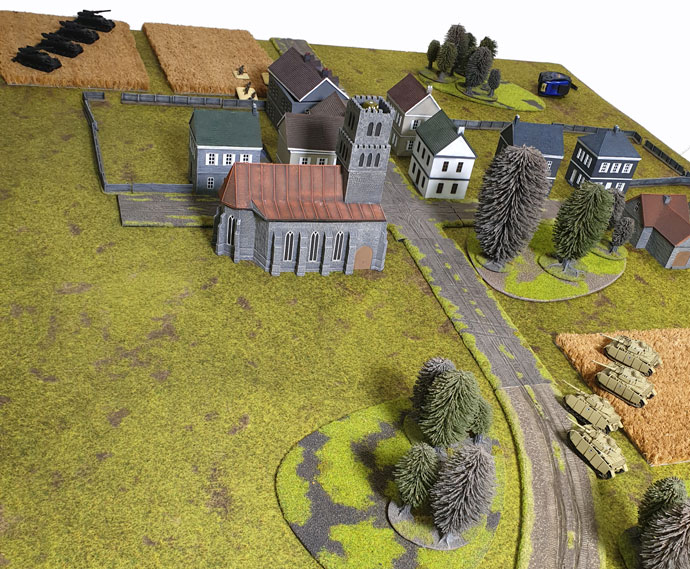 Turn one went to Luke and he rushed me, I was not expecting that, but I prepared myself for conflict sooner than I thought.
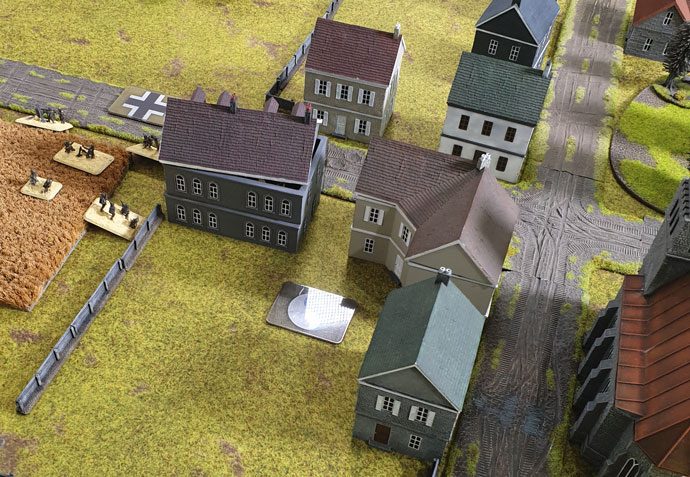 Luke next turn had him wanting to Blitz around the building, 4 Panzer IVs would make quick work of my FA0 artillery tanks. But he failed the roll and then failed to hit me at all! Luck was on my side and I decided to open up on his tanks with my 155s! I knocked out two tanks! I really could not have asked for more.
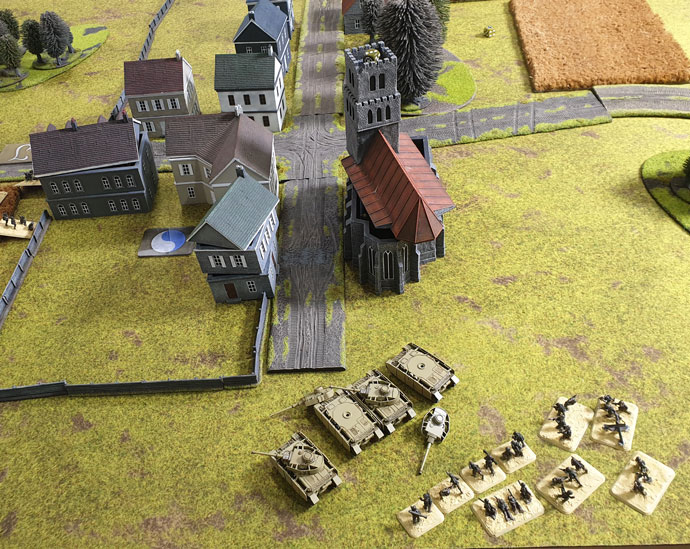 Luke’s next turn he move his HQ and his other panzer 4 platoon up and destroyed the last of my 155s. ouch well it isup to my bazookas to hold him off.
 Another Victory for the 29th Infantry Division! We moved on from the Second Chances card to Rat Catchers, for this game Phil and Cameron are facing each other, Phil playing for the Allies and Cameron for the Axis. I’ll leave it to Phil to write up that final battle report.
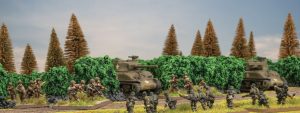 I love the Armored Rifle Company but I just don’t have the time to paint that many infantry up fast enough for our league, having let my “paint figure quickly” skill atrophy over time. I don’t relish being hit on a 3+ so my plan is for a complete Veteran M4 Sherman Tank Company.
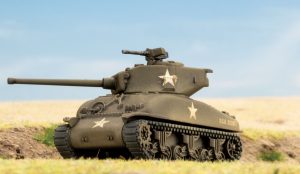 My 76mm tanks are going to be the biggest threat to any German armor I encounter and are thus, the most likely targets of enemy counter fire. That being said, all of the smoke that I can lay down with the 75mm and 105mm Sherman Tanks should be sufficient to protect my boys from too much steel coming their way and hitting them until they get into range.
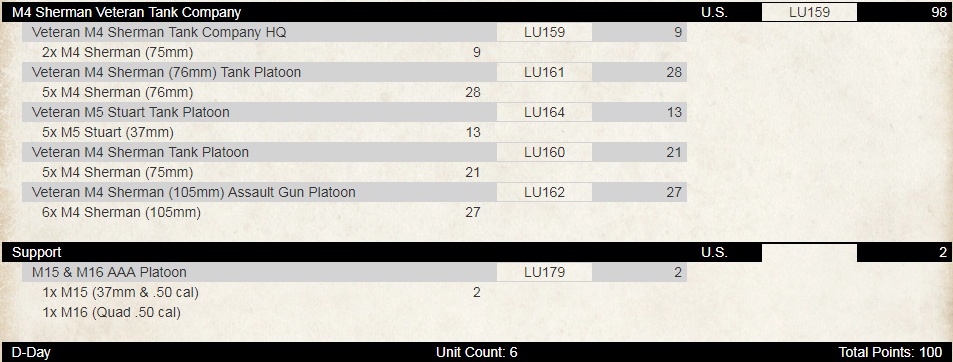
 The standard 75mm Sherman Tanks, when they’re not casting smoke down-range, are more than sufficient in knocking out Panzer IVs but really need the flank shots to have a hope of pinging any Panthers or Tigers; they’ll be operating mostly in support of the 76mms unless I see an opening I can exploit.
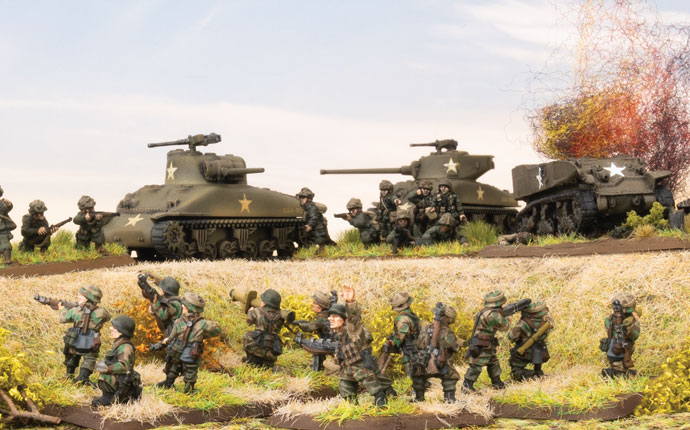 Lastly, just in case someone brings some aircraft, I’ve got a small contingent of AAA to handle that eventuality.
 Ranger Company 1
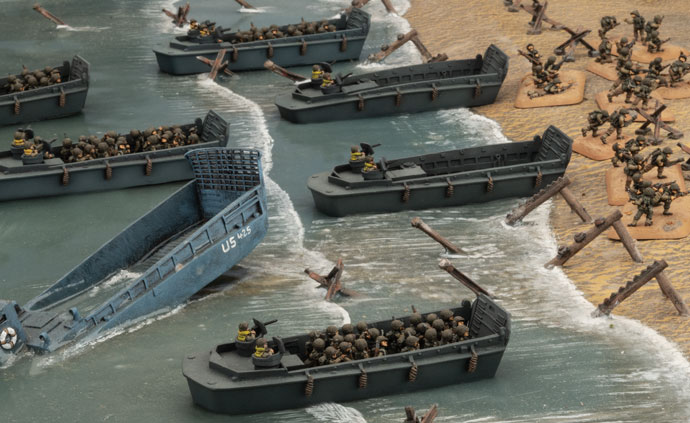 Something else to keep in mind when building non-Ranger Tank forces, Rangers formations are cheap point wise to add to your force. For 21 points you get two full units of Rangers and an HQ, so you get re-rolls and some of the best Assaulting units the Americans have to offer. Its easy to build a well forces list and slot the Ranger platoon in, for example,
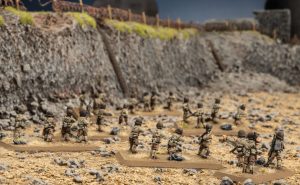 Ranger weakness to keep in mind, they are easy to hit, so HMGs and other high rate of fire hostiles are a big threat, you want to use your tanks and artillery to deal with those threats before the Rangers move into the assault.