Andrew’s Speedy Assaulters

with Andrew Haught

With another launch event I once again get a chance to dust off one of my old favourite armies and give it a bit of TLC and V4 update. This time I am going to dive into my old Rota Razvedki reconnaissance company.  I originally built the list for V3 Late War using the Red Bear book.  With their inclusion in the Red Banner book, I feel that I need to re-tweak the army so that I could run it in both Late and Mid War.

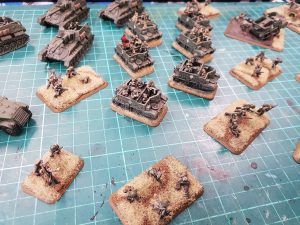
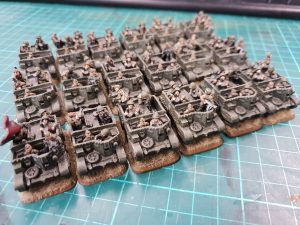
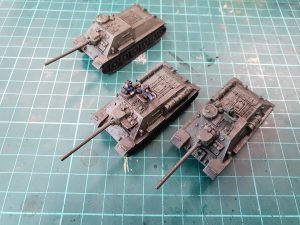
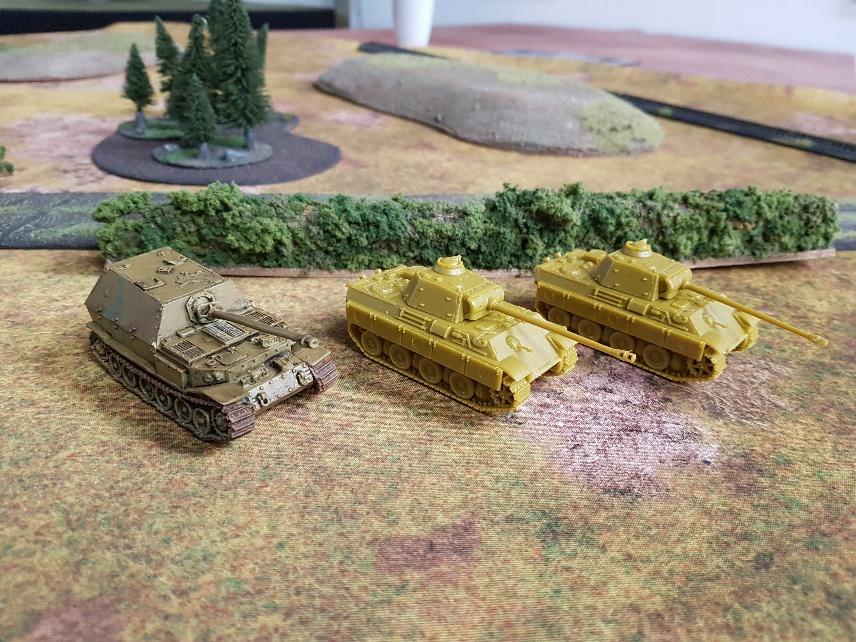
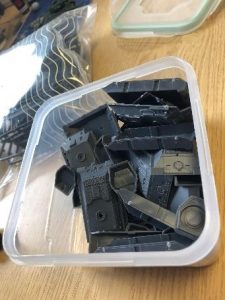
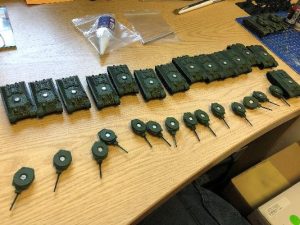
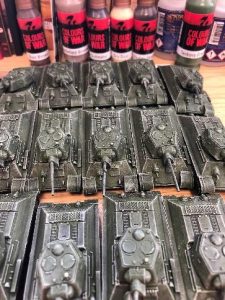
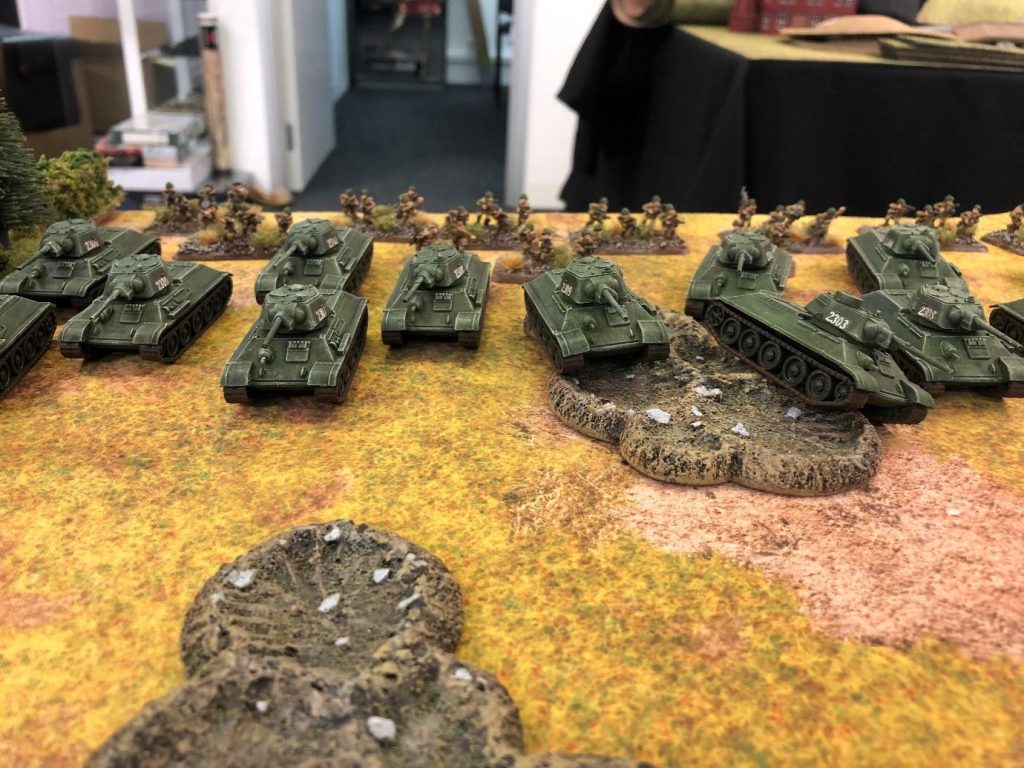
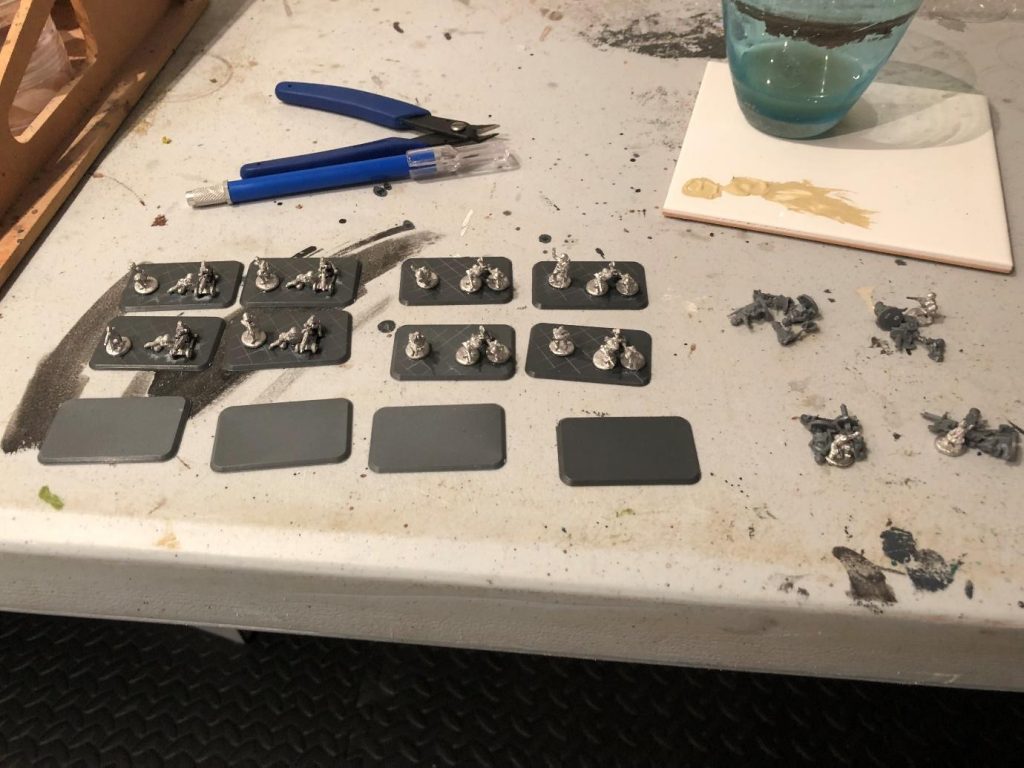
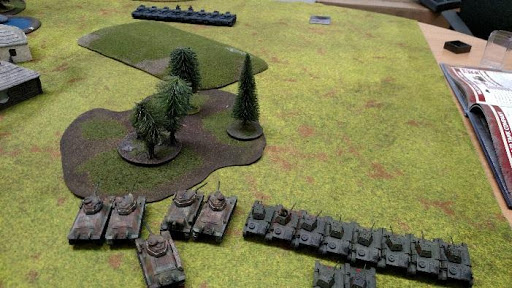
The Images in this article are in progress shots of my old list, I did the math and I think I painted this army originally seven years ago. I am planning to do some plastic updates to my army, over the release I will work on the ZIS-3 guns. After the release, I have further plans. First I am going to update the SU-85s to plastic and then I am going to rebase the infantry as some of the old basing has started to separate from the base.

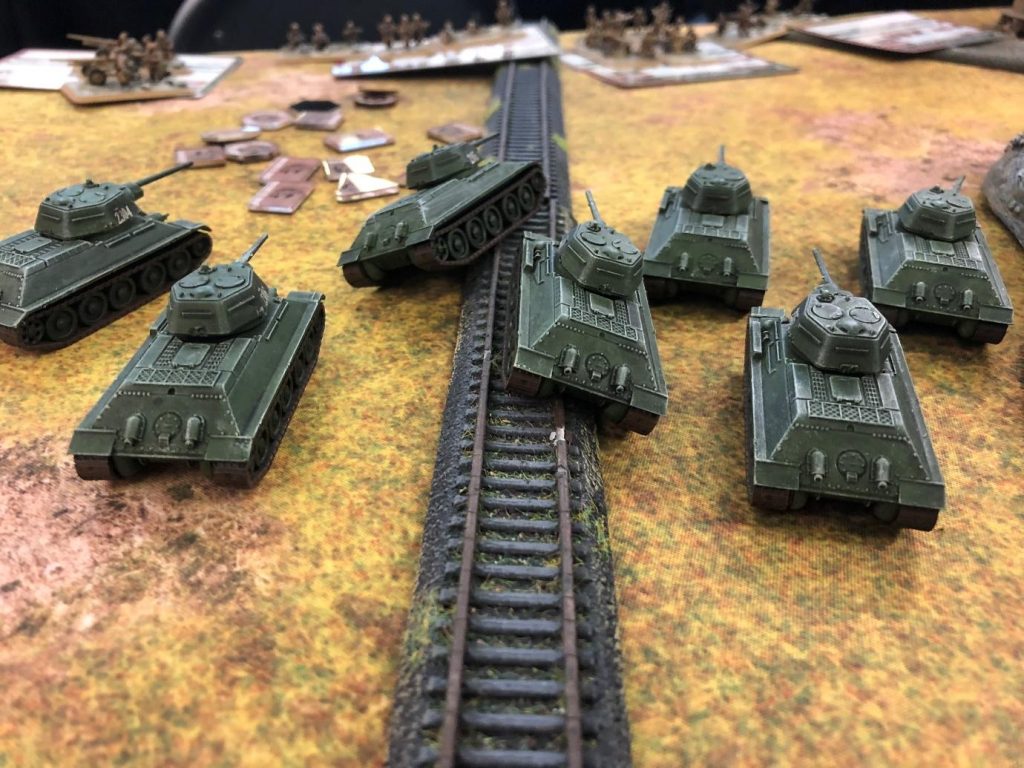
Full warning: I love Universal Carriers, and will use any excuse to put them on the table. There is just something about their design that clicks with me. Thanks to the Red Banner Command Cards I get to use Carriers in my army, and I am going to get as many as I can.

It’s All About That Speed
When I am running an aggressive list the first thing I think about how long it’s going to take to get my troops to the objective, and how many turns will my opponent get to shot my troops along the way. One of the features of the Reconnaissance Company is that their combat platoons all have Spearhead. This rule is massive, getting a free move before the game means that I can get a full turns worth of movement without risking any enemy fire.    

Deadly Assaulters
Now speed is worth nothing unless you have some sort of payoff. The Infantry units in the Reconnaissance platoons have a massive 2+ to hit in assaults, meaning that if they can get into an assault they will kill almost anything in their way. The formation does have a weakness you need to be prepared for—they are really small—so you do not have the ability to take on heavy losses. So getting the extra movement form Spearhead is critical to your aggressive strategy.

To make my troops more of a threat I added two Command Cards to my Company Commander, the first one, Tenacity gives my HQ and any platoon he is attached to counterassault 2+. The second card I added was Ferocious Valour, this card allows my Company Command team to roll two dice in assaults. These two cards make it worth it to risk my Company Commander in assaults, and on top of that the HQ will add two more deadly assaulters to my assaults.

Universal Carriers Are Just Too Cool Looking
Like I stated above I love Universal Carriers, but apart from looks there is a good reason to run these awesome transports in your list. When using the US or German halftracks you have two stands of infantry in each transports, so each time one is destroyed you may lose 1/3 of your platoon. If you take the extra Carriers when you lose one transport you are only risking one stand of infantry, only 1/6 of you platoon. Also they just look cooler, so yeah why wouldn’t you use them?

Support
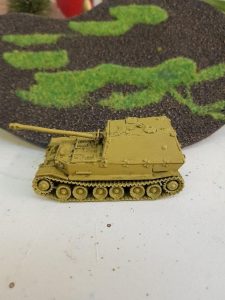
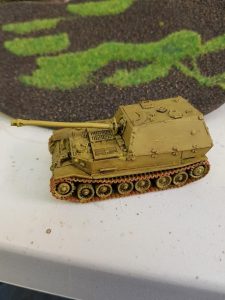
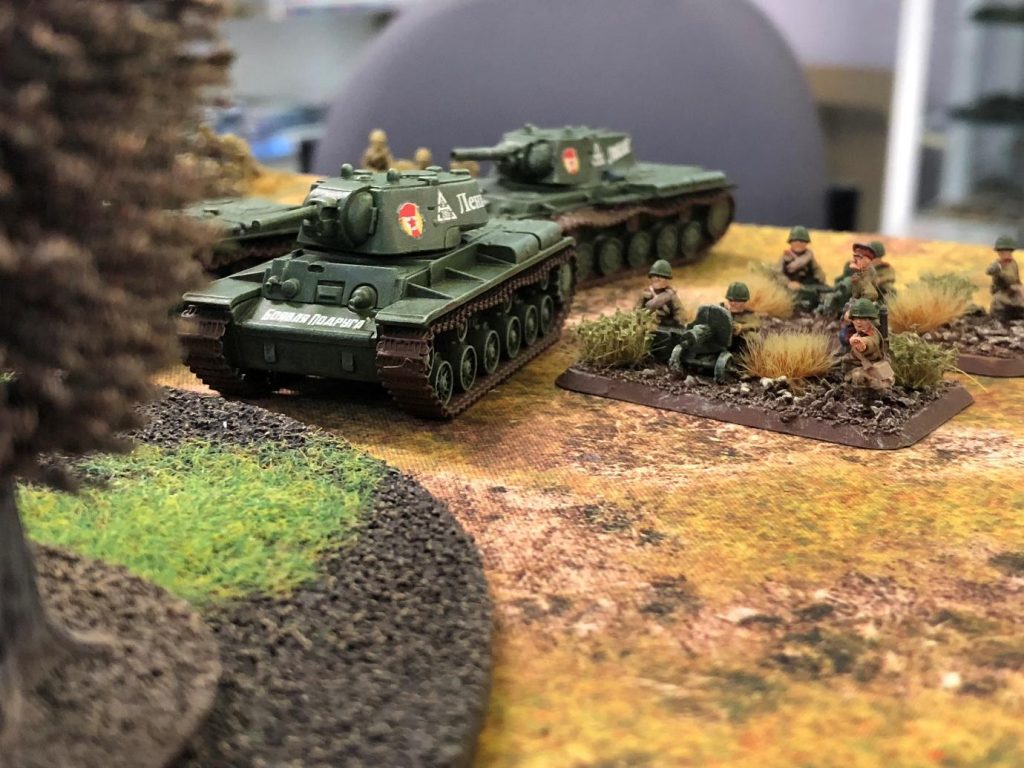
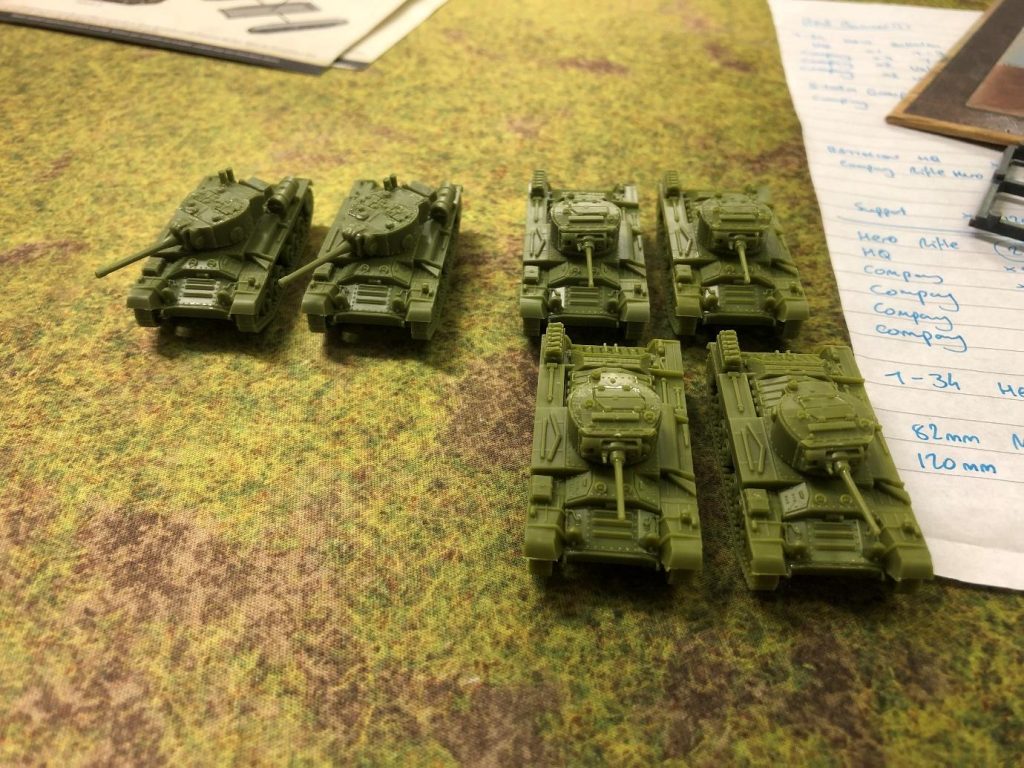
My troops are good at one thing: assaulting and shooting infantry. This leaves a big gap in the form of Anti-Tank (AT), so I really need to add some AT assets. I could also use an artillery battery to help get my assaults to go in. Luckily, the Soviets have a unit that can multitask as artillery and anti-tank: the 76mm Artillery Battery. The flexibility of the 76mm Artillery Battery makes it ideal for my list. But I don’t think  that will be enough AT, I think I want to add some mobile AT. First off I want to add the cheap and efficient SU-76s to my list, they have a great gun and are cheap enough to allow me to take the more expensive SU-85 option as well. SU-85s are a bit pricey but worth their points, they have a higher to hit stat as well as a massive Anti-Tank 12 gun, giving me the ability to threaten both Tigers and Panthers.

Andrew’s Speedy Assaulters
3 pts Reconnaissance Company HQ
1pt Tenacity Command Card
-Ferocious Valour (3 Point)

Armoured Reconnaissance Platoon(9 points)
– Universal Carriers 6x Universal Carriers (3 points)

Armoured Reconnaissance Platoon (9 points)
– Universal Carriers 6x Universal Carriers (3 points)

Armoured Reconnaissance Platoon (9 points)
– Universal Carriers 6x Universal Carriers (3 points)

Support
76mm Artillery Battery (8 points)
-4x 76mm guns

SU-76 Light SP Battery (13 points)
-4x SU-76

SU-85 Tank-Killer Battery (36 points)
-3x SU-85

Tactics
This is not an army that wants to sit back and defend objectives, it’s all about forward movement, a win fast or die fast kinda army. I plan on always choosing Maneuver or Attack when using More Missions to make sure I am never fully on the defence.

In games I plan to blitz my infantry towards the objectives, while having my SU tanks provide covering fire. The 76mm Artillery Battery role will be determined by my opponents forces, if they have a lot of infantry and gun teams I will be bombarding them as much as possible, if they have a massive tank army then I will use my spearhead to get them into a good position and use them to help thin out the opposing tanks.

Final Thoughts
I love the new life that V4 is giving my old armies, with the V4 formations I feel like I have more freedom to create the exact army I want. I am a really big fan of Build Command Cards, they let me as a designer add more interesting options that did not fit in the book while at the same time I get all the weird and wonderful things that I want. It’s a simple card pack but it adds so much to the game.

What eastern front armies interest you? How would you build a Soviet Reconnaissance Company? Why not tell us and join in the global discussions on our Facebook Flames of War group.

~Andrew

Gareth’s Ghost Panzers

with Gareth Richards

With the release of the upcoming books Ghost Panzers and Red Banner myself and Chris sat down and planned our next armies. Chris being the resident Soviet player grabbed the Red Banner book, meaning that I would be taking a German list: the first in a long time.

Taking the book over the weekend and having a read through (and also watching the great series on tanks on Netflix) my choices were narrowed down to a couple of the lists. As much as I loved the idea of a small but hard hitting Tiger or Panther force, I wanted a few more models on the table. So I jumped at the Mixed Panzer Company.

Using the upcoming Bӓke’s Fire Brigade as the core of my force my list was starting to take shape. I knew I wanted a couple of the big tanks—Panthers and one of my favourite tanks of the war, the mighty Ferdinand. So with a mix of Panzer III’s and IVs I feel that I have a good basic core to my force. Looking to the future I am planning on  Armoured Panzergrenadier Company.

Mixed Panzer Company
HQ
21 pts 1x Panzer IV, 1x Panzer III

Troops
27pts Panzer IV Platoon, 2 x Panzer IV 
25pts Panzer III Platoon, 3 x Panzer III
36 pts Panther Tank Platoon, 2x Panther 

Support
17pts Ferdinand Tank-Hunter Platoon, 1x Ferdinand 

Total 126 points

If I Could Turn Back Time…

with Luke Glover

I started my Flames Of War journey earlier this year when I was invited an joined in the annual Battlefront Staff trip down to Panzerschreck. The aftermath of the weekend of fun was I now had ten Panzer IVs all painted and ready to go. Ghost Panzers has introduced the German Panzer IV to Mid War so this seemed like a great chance to take parts of it into a Mixed Panzer Company, expand my Flames Of War collection and get a Mid War army all set.

I partnered up with Andrew for Panzerschreck and we sat down to plan out what sort of forces we’d be taking for the Late War doubles. Early on I decided I quite liked tanks and eventually I settled on Panzer IV Company. This paired up well with Andrew’s Finns who would bring mortars, guns and an infantry company to round out our force and cover all the bases. Our plan was to go all out offense and take our chances and win big or lose big. The aftermath of the weekend of fun was I now had ten Panzer IVs all painted and ready to go.  

My games at Panzerschreck taught me some much needed respect for the T-34 (Andrew and I lost to a pair running absolutely massive T-34 companies) but also a great deal of pride in the effectiveness Panzer IVs that they easily became my favourite German tank. With that in mind I will be making a 120 point force using the Mixed Panzer Company. I like slightly larger games and means I’ll get a few more goodies on the table (as will my opponents).

First step will be deciding just how many Panzer IV Lates I’m bringing. First step will be filling out my mandatory picks. My Commander will be riding along in his Panzer IV (this guy passed an unbelievable amount of saves) and I’ll be taking a platoon of four. With AT 11 and front armour 6 they’ll be able to take nearly all comers with very few questions outside of a KV or Churchill. To help out with those I’ll be bringing along two Panther tanks. Their tough armour is sure to attract some firepower but it will keep their eyes off the Panzer IVs with their aggressive +3 to be hit on working to my favour hopefully making the Panther a more tempting target to less powerful guns. Of course the downside is that those weapons that can penetrate the Panther reliably will be hitting more often so it’s a trade-off, but one I’m willing to try out since Panther tanks just look awesome.

With armour largely filling out the list (102 points to be exact) it’s time to look towards what else I need. Since I imagine the tanks will be the ones looking to take objectives I will need something that can hold the fort and take on infantry. For this I’ll be taking a full strength Grenadier Platoon in support and two sMG HMG teams. This will give me nice solid base of infantry with plenty of bodies and (hopefully) enough machine guns to deal with Soviet infantry based armies.

The overall battle plan for this list is fairly straightforward. The tanks themselves will be looking to take out the sorts of things that can destroy them ASAP. The Grenadiers will likely be expected to hold an objective, whether it’s in my own or if I have to take it from the enemy. I can’t rely on the Panthers for any tricks but hopefully they won’t need them

I expect this will be a fun army to paint up and model that adds on very well to my existing models. The new variety of tanks and infantry make this a hobby project I look forward to. I’m especially looking forward to seeing how the Panthers do on the table and start painting up the two I need. With some great results it could well suit me moving towards a Panther company but for now one project at a time!

~Luke

Beginning to Paint Ghosts

with Gareth Richards

After a busy week last week managed to get a little build time over the lunch breaks.

So up first are the armies big guns the Ferdinand and Panthers. I like to have a fairly dark scheme to my army so I start my undercoat with Grenadier Green before the base coat of Panther Yellow.


Next up is a wash and building the Panther Yellow back onto the tank before the camo and decals and then the weathering. I am a going for a dirty battle-worn tank rather than factory fresh.

Semovente 47/32 Unit Card

with Adam Brooker

The release of Avanti in Mid War allowed me to get back to my first love in Flames of War— Mid-War Italians (my first Flames of War force). I loved their cool special rules like Unknown Hero and their interesting equipment like Lancias, Semoventes, and Elefantino guns. But mostly, it was because by the time of Mid-War they were very much underdogs. So when you won, and won with style. it was an even better feeling, as you knew you it was your guts, skill, and a few lucky dice rolls that pulled it off even with your sub-par equipment.

One unit that didn’t make it to Avanti was the 47/32 Semovente, these little self-propelled anti-tank guns were great for hunting down armoured cars, knocking out machine gun nests, and generally annoying my opponent. Also as this was my first Italian unit I painted, I felt I had to have these in my list, so I put this Unit Card together. But first I looked a little more into the history of the Semovente da 47/32.

Brief History
In 1940 the Germans had shown the usefulness of the self-propelled gun in the invasions of Poland and France, their allies the Italians had noticed, and wanted to produce their own. By then they had also realised that their current tank designs were underpowered and obsolete compared to Allied designs, and needed a stop gap measure until the heavier Italian P40 tank reached production. By the start of 1941 they had plans to convert two different types of self-propelled guns (Semovente) based on tank chassis already in production, the Fiat-Ansaldo L6/40 light tank (which was ending its production run), and the larger Fiat-Ansaldo M14/41 medium tank.

Work was quickly started, fitting the 47mm Cannone da 47/32 inside the armoured but open topped superstructure built on the L6/40 chassis. This vehicle kept many of the characteristics of the L6/40, using its engine, drive train, tracks, and 30mm frontal armour. An armoured box was built on top of the chassis and mounted forward compared to the L6/40 hull, it was also roomier. This allowed the larger 47/32 gun to fit in the fighting compartment, which was still cramped, but the gun was compact enough to still be useable.

The 47mm Cannone da 47/32 was originally an Austrian anti-tank gun that was built under licence in Italy in the 1930s. It had a muzzle velocity of 630 m/s with AP shells, and 250 m/s with Italian Effecto Pronto (HEAT) rounds, with an effective range of 500m, where it could defeat 43mm of armour (up to 58mm at close range). Standard Semovente 47/32 carried around 70 rounds of ammunition and lacked a radio, but a platoon command variant was fitted a radio in exchange for less ammunition.

Production started in late 1941, but realistically given the smaller scale of Italian industry, the Semovente 47/32 was not available in great numbers before 1942, and was produced up until 1943 when the Italians surrendered. Around 280-300 had been produced in that time. There was also a company command vehicle produced which was equipped with long range radios and map tables, and the main gun was replaced with a Breda machine gun which was disguised as a 47mm gun.

When it entered service in 1942, some of these units were sent to replace the tank losses in Italian armoured divisions in North Africa. They operated with the Ariete and Litorrio Divisions from the second Battle of El Alamein, and up until the fall of Tunis in February 1943. Some others were also stationed in Italy, with units attached to the “Black Shirt” Divisions in Sicily. They saw action in defence of Sicily when the Allies invaded in  1943 with Operation Husky.

In both cases they faced newer allied tank designs, with better armour and firepower. The gun was ineffective against medium tanks like the M3 Lee or M4 Sherman, and barely adequate against smaller allied light tanks like the M3 ‘Honey’ Stuart at normal fighting ranges.

Another 38 Semovente 47/32 were shipped to the Eastern Front, and operated with the ARMIR (8th Italian Army). There, along with the L6/40, it was the most heavily armoured and Italian unit on that front. It had to contend with the much heavier and better designed T-34 and KV-1 tanks, where it was unless except at extremely close ranges as its gun could not penetrate their thick armour. As a result it was not very successful. By February in 1943, these units had been decimated by the Soviet counter-offensive Operation Little Saturn, where the Soviet forces actively targeted the weaker Italian and Romanian forces around Stalingrad.

With Iron Cross out this year and focussing on the Battles of Stalingrad, these would be a great historically accurate unit to field. Either as part of your ARMIR (Italian 8th Army) Force or as allies for your German Forces. Historically also after the surrender of the Italians in September 1943, the Germans commandeered many of these vehicles, and were designated StuG L6 47/32 630(i).

Making a Unit Card
So to field these little Italian pocket rockets, we need to see how their stats will carry over into V4. We will use the L6/40 light tank unit card as a base, as this is what it is based off in real life. So the armour will be the same, except as it is open-topped it will have a top armour of 0. The movement values will also be the same, except that is has a slightly better cross value (3+) due to the better vision the open topped vehicle affords the crew.

As far as firepower, it would have the same 47mm gun as the M14/41 Medium Tank with HEAT ammunition, but as it is a self-propelled gun with no turret, it would have the Forward Firing rule.

In terms of crew, you would use the same crew as the larger Semovente 75/18, so your To Hit On is 4+, Skill 4+ and Motivation is the is 3+.  But your Counter-attack 6+ and Remount 3+ are slightly worse, as the Semovente 47/32 is Open-Topped and lacked the Protected Ammo that the larger Semovente 75/18 had.

They would be taken in Platoons of 2 or 4.

To use this unit card in your Avanti force you would substitute the Semovente 47/32 for the 90mm Lancia platoon in your Formation Support slots. As in reality units would use either one or the other depending on what they were facing.

These assault guns can be used as a cheaper alternative when looking to take out MG/gun teams or small recon platoons of light tanks or armoured cars. Also as they come out of your support slots, it makes them a little more versatile, as you don’t need to take a whole formation to take them. Also they just look damn cool, for me I’ve always liked assault guns in all their forms. So if it hasn’t been the Stug Lyfe with my German Forces, it certainly has been the Semovente Vita with my Italians in V4. Semovente are one of the great Italian units in V4 and this allows you to field even more.

So if you have these carri armati lying around and looking sad and forlorn in your miniatures cabinets, pleading for a game, maybe this card will help you bring them out for a run.


Painting The Red Army

with Chris Potter

I am the first to admit that my painting skills rank as mediocre at best. However, the results which I manage to achieve against the battles of children, work and The Wife are more than acceptable for tabletop games. I’m happy with the results and what it looks like, and whilst not ever going to win me any awards, the schemes and methods I use allow me to have a completely painted army to game with, in not a lot of time. Which is key when having so many models to paint with an army such as Soviets!
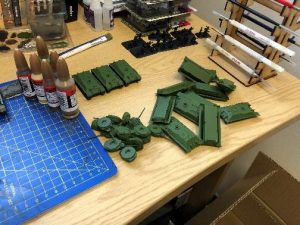
I might be starting to regret taking so many tanks in my list… There was so much clipping and gluing.

Tanks:
Step 1 after assembling the models and spraying them with a primer, I spray the models again with Tankovy Green for the hulls and turrets. I highly recommend leaving the tracks separate to the hull, as it’s easier to paint the tracks black now and then attach them later rather than risk getting excess paint onto my nicely sprayed, even-tone hulls, when I’m painting all the nooks and crevices.

Step 2 I wash the whole tank and road wheels on the tracks with Zhukov Shade, ensuring that none of the wash pools on the tank, but gets into all the details.

Step 3 Using Tankovy Green from the bottle, I use a mixture of drybrushing and layering to not only reduce the darkness of the wash but it serves to highlight the edges of the tank, and any straight lines to make them ‘POP’ Then, using Tankovy Green from the bottle, I paint the road wheels, ensuring that I don’t get any green on the tracks.

Step 4 is to apply decals anywhere you want them on the tank. Here I have applied them to the turrets. Whilst these are drying I used Boot Brown on the tracks to give them the illusion of being worn and used, over the black base coat.

Step 5 over the Green highlight, as well as the decals to help them blend onto the paintwork, I use Dry Dust as an extreme highlight on the top of the hull and the turret to create an instant bling to the tank.

Step 6 is to paint the exhausts and machine guns Dark Gunmetal. I then drybrush Dark Gunmetal over the tracks, leaving just a little Boot Brown showing through. After the exhausts and MG have dried, I apply a dilute wash of Ordnance shade over them to dull the shine down and create shading on the metal areas.

Step 7 after attaching the tracks to the hull and letting them dry, I complete a final drybrush/a light specking of Battlefield Brown in a random and haphazard pattern around the tracks, road wheels, front and rear of the hull, to simulate road dust and dirt splashes.

Step 8 finally, I use a small amount of delicate drybrushing to simulate cordite stains and exhaust stains on the front of the barrel and below the exhausts, with Black from the Quartermaster’s set. This is just an approximation, not exact, but rather to give the impression of.

~Chris

Chris’ Red Banner List

with Chris Potter

You may have seen some of my articles on the last live launch about how I chose my army for Enemy at the Gates and some of my ‘rationale’ behind why I took what I took.

For those who didn’t it went like this:
I wanted a tank army, but realised that Stalingrad wasn’t the place to deploy hordes of T-34’s. So after painting 100pts of T-34, KV-1 and Valentines, I switched and painted up 100pts of pure infantry (ok with a little support from Valentines and 76mm guns)

For Red Banner, I clearly didn’t learn from my mistakes, and like a kid in a sweet shop, took all over the best looking units and then thought about how well they would work.

Someone likes painting lots of tanks and infantry!

In a brief respite from the madness, some clarity resumed and I decided to use some of my Enemy at the Gates minis that were already painted. At least this meant my painting queue was considerably shorter!

Thankfully with the amount of models I already had completed, for me my list did include things I was really excited about.

I had to take my main formation as T-34’s. I had fallen in love with these plucky little medium tanks – and what better way to honour this love than by upgrading them to Hero status?

Better skill rating (+4 instead of +5) and also a better hit on rating (+3 instead of +2) meant a much hardier and survivable unit.

So I took a T-34 Hero Tank Battalion consisting of:

8pts T-34 Hero Tank Battalion HQ, 1x T-34
24pts T-34 Hero Tank Company, 3x T-34
10pts Valentine Hero Tank Company, x2 Valentine 2pdr & x1 Valentine 6pdr

Total 56pts

This was a great start to the army. Me being me, despite my clarity of the previous day, took the plunge and decided to paint up my new tanks individually, as befits their Hero status. Each T-34 and Valentine would receive distinct details, damage and even specific decals.

The infantry…

I had to take a Storm Group. These were invaluable in my games amongst the ruins of Stalingrad. Their 4+ hit on score meant that they were a lot more survivable than your average Soviet soldier. Combined with the ability to add flamethrowers  and PTRD AT rifle teams for a moderate score meant they became an all round unit, that could assault (Fearless 3+) and hold objectives.

Plus, with them being a compulsory (black box formation) from Enemy at the Gates meant I could take them with my Red Banner force as a support formation. Urrah!

Support:
19pts Storm Group, x7 PPSh teams, x2 Maksim HMG, x1 PTRD AT rifle & x1 50mm mortar
6pts x1 PTRD AT rifle 2pts & x2 Flamethrower (optional).

Total 27pts

At this point I have two solid choices that can, crucially, support each other (and one of them is even fully painted…)

Now to flesh out the remaining 17pts…

Easy!

After looking through the Red Banner book the old me popped up and wouldn’t relent until I took another support – this time artillery. SU-76 at just 10pts for x3 meant I was able to add some direct fire (AT9) and some artillery template that is survivable.

My remaining 7pts were spent on:
IL-2 Shturmovik Company x2 for 7pts

That’s a 100pts dead on.

Now to paint them up and play a game, work out my weaknesses and re-evaluate my choices!

Dave vs Brian – T-34s vs Panzers Battle Report

with David Griffin

Dave’s Forces:
6pts T-34 HQ
23pts T-34 Tank Company, 3x T-34
13pts T-70 Tank Company, 10x T-70
30pts SU-152 Heavy SP Battery,  2x SU-152
14pt Light Tank-Killer Company,  4x Long 45mm
9pts Heavy Tank-Killer Company, 2x 57mm

Brian’s Iron Cross Panzer III Company with Ghost Panzer Support
16pts Panzer III (Uparmoured) Tank Company HQ, 2x Panzer III
15pts Panzer III Tank Platoon, 3x Panzer III (short 5cm)
10pts Panzer II Light Tank Platoon, 5x Panzer II
39pts StuG (late) Assault Gun Platoon, 3x StuG (late 7.5cm)

We decide to try out some of the new lists and threw together an interesting Free For All.  I positioned the SU-152 in the middle with both AT gun groups on the left in cover facing the PzIIs and StuGs, both tank groups on the left facing his PzIII tanks. 

The 45s moved up through the trees with no problem on the left while the tanks moved forward to get shots on the right.  There must have been a brisk breeze because nothing hit on the first turn. Brian then blitzed every unit he had (successfully) and returned fire much more effectively, killing both 57s on the left, one T-34 in the middle and two T-70s on the right.


The 45s then blitzed to the side and engaged the Pz IIs killing one and bailing one.  The T-34s killed a Pz III in the Hq and the T-70s on the right moved forward to get side shots but missed entirely.  My SU-152s moved to the left side and engaged the Stugs, missing both shots.


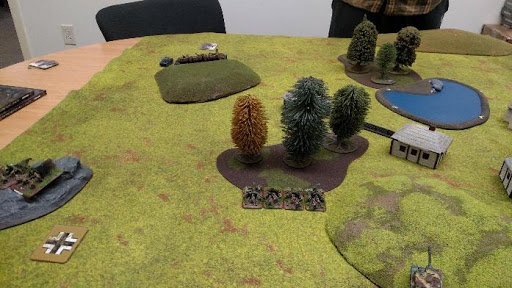
Brian then, in true form, killed one and bailed one with his Stugs. His Pz II attempted to get in the woods and assault the 45s, but only succeeded in getting one before breaking off.  On the right his PzIIIs kill three T-70s and bailed two.

Needless to say, with my luck, my SU-152 ran away, leaving two poor 45s all by themselves on the flank. Time to try to kill some platoons and break the company.  The 45s kill a Pz II and Bail another while the T-70s get in and bail one of the HQ Pz III. The T-34s move forward and kill two Pz IIIs in the send platoon. Return fire is substandard this time, but succeed in bailing all T-70s.


The T-70s run leaving only the T-34s on the field with a couple 45s, which drive off the Pz IIs. Unfortunately Brian makes all the rest of his morale rolls and the company stays intact with his Stugs on the objective.


8-1 victory to the Germans.  It will take some work to get used to the overworked issue on all the units, although the better save on the AT guns are a relief and kept them in the fight.

I don’t think I will let Brian use my dice again.