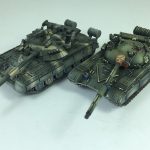
Be Bad With Your GBAD: Soviet Ground Based Air Defence

With Chris Allen

Successful Soviet Combat Operations are predicated on the effective and consistent use of the algorithm. Soviet military scientists applied rigorous consideration, and research to provide commanders with decision action tools. If you go through Soviet Doctrine you’ll find no shortage of these. They were made to be simple and effective means to plan operations. My personal favorite is a chart where you plot the speed of yourself, the enemy and the range you’re at and it pops out the time you have before the engagement starts. They are really useful and we now see the West today coming out with similar things on digital platforms. But where a million-dollar space pen was designed, a pencil still worked just fine. The same can be said of the Soviet algorithm tables and charts.

So how do you use this ‘calculator’ or algorithm chart?

First off you need to make a prediction of the enemy air power threat. There are two aspects to this process, first you understand your vulnerability to air power. What air power often does is reduce your freedom of movement. It seems weird at first, but follow me here. By having a bogey man of suddenly appearing threats, air reduces your freedom to move out of cover or away from air defence. It’s meant to scare you into smaller less advantageous action and then punish you when you don’t. The amount to which this can affect you is based on your own composition.

If your army is composed of BTR-60s, how much of a threat does air pose to this force? I would argue against something like this the threat of certain air platforms such as Apaches or Cobras is low. What is a hellfire or a TOW missile going to do that say a M242 Bushmaster isn’t? Not much. Turn this around and consider a force comprised of T-80s, where these high value tanks are vulnerable to high AT weapons with LOS to the whole table and you find yourself considering air weapons platforms as a high threat. This doesn’t mean that a force based on BTRs is always low threat, or that one with T-80s is always high. You need to understand your force and how you see the path to victory. The same BTR-60 formation could have a platoon of Shock T-80Us and that unit is needed to take the objective. This might then be a high threat consideration. But that part is up to you.

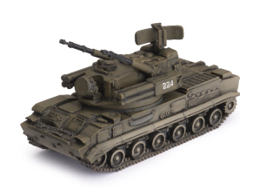
Once you’ve considered your vulnerability to air, to your force and your plan, you need to consider the threat that you expect. This can be difficult as it’s a prediction of the future and you’re working with very limited info. In casual play with friends you know your buddies, you know units they always take and if this includes air, it’s a good indication. Newly painted Hind platoon? Bet it’s showing up. Tournaments and other events like game nights are more difficult, but I find that if I expect at least one unit of air, be it strike aircraft or helicopters, I’m rarely disappointed in choosing to always bring ground-based air defence units. If you’re in a place where air is less common you can also consider taking platforms that are dual purpose like the ZSU-23-4 Shilka or the 2S6 Tunguska that can provide both anti air fire and suppress ground targets with their high rate of fire.

Once you’ve considered your vulnerability and the expected air threat, you should have an idea of what you’re going to see show up and how big a worry it is to you. This is where you start to prepare your force and how you are going to kill them. Using the table you can essentially add up the kill rate you believe you need to deal with a given threat by using the right hand column.

The table below gives you the expected normal output of full batteries of air defence weapons systems in service for the Soviets against expected targets based off their to hit and save values. So if you’re expecting a group of A-10s, consult the 3+ save sections, Hinds or Apaches look up the 4+ save areas based on their respective hit value. This will give you all of your relevant destruction data for the battery vs the target. If you are planning on using half platoons just reduce the expected kills per turn by half.

Vs to hit 3+ 5+ save
% chance to kill Shots to kill Shots per pl Kills per turn
Missile systems
Gaskin 14.81% 6.75 8 1.19
Gopher 22.22% 4.5 8 1.78
Gecko 29.63% 3.375 12 3.56
Tunguska 29.63% 3.375 8 2.37
Gun systems
Shilka 14.81% 6.75 24 3.56
Tunguska 14.81% 6.75

28

4.15
Vs to hit 3+ 4+ save
% chance to kill Shots to kill Shots per pl Kills per turn
Missile systems
Gaskin 11.11% 9 8 0.89
Gopher 16.67% 6 8 1.33
Gecko 22.22% 4.5 12 2.67
Tunguska 22.22% 4.5 8 1.78
Gun systems
Shilka 11.11% 9 24 2.67
Tunguska 11.11% 9

28

3.11
Vs to hit 4+ 5+ save
% chance to kill Shots to kill Shots per pl Kills per turn
Missile systems
Gaskin 11.11% 9 8 0.89
Gopher 16.67% 6 8 1.33
Gecko 22.22% 4.5 12 2.67
Tunguska 22.22% 4.5 8 1.78
Gun systems
Shilka 11.11% 9 24 2.67
Tunguska 11.11% 9 28 3.11
Vs to hit 4+ 4+ save
% chance to kill Shots to kill Shots per pl Kills per turn
Missile systems
Gaskin 8.33% 12 8 0.67
Gopher 12.50% 8 8 1.00
Gecko 16.67% 6 12 2.00
Tunguska 16.67% 6 8 1.33
Gun systems
Shilka 8.33% 12 24 2.00
Tunguska 8.33% 12 28 2.33
Vs to hit 4+ 3+ save
% chance to kill Shots to kill Shots per pl Kills per turn
Missile systems
Gaskin 5.56% 18 8 0.44
Gopher 8.33% 12 8 0.67
Gecko 11.11% 9 12 1.33
Tunguska 11.11% 9 8 0.89
Gun systems
Shilka 5.56% 18 24 1.33
Tunguska 5.56% 18 28 1.56
Vs to hit 5+ 5+ save
% chance to kill Shots to kill Shots per pl Kills per turn
Missile systems
Gaskin 7.41% 13.5 8 0.59
Gopher 11.11% 9 8 0.89
Gecko 14.81% 6.75 12 1.78
Tunguska 14.81% 6.75 8 1.19
Gun systems
Shilka 7.41% 13.5 24 1.78
Tunguska 7.41% 13.5 28 2.07
Vs to hit 5+ 4+ save
% chance to kill Shots to kill Shots per pl Kills per turn
Missile systems
Gaskin 5.56% 18 8 0.44
Gopher 8.33% 12 8 0.67
Gecko 11.11% 9 12 1.33
Tunguska 11.11% 9 8 0.89
Gun systems
Shilka 5.56% 18 24 1.33
Tunguska 5.56% 18 28 1.56
Vs to hit 5+ 3+ save
% chance to kill Shots to kill Shots per pl Kills per turn
Missile systems
Gaskin 3.70% 27 8 0.30
Gopher 5.56% 18 8 0.44
Gecko 7.41% 13.5 12 0.89
Tunguska 7.41% 13.5 8 0.59
Gun systems
Shilka 3.70% 27 24 0.89
Tunguska 3.70% 27 28 1.04
Vs to hit 6+ 5+ save
% chance to kill Shots to kill Shots per pl Kills per turn
Missile systems
Gaskin 3.70% 27 8 0.30
Gopher 5.56% 18 8 0.44
Gecko 7.41% 13.5 12 0.89
Tunguska 7.41% 13.5 8 0.59
Gun systems
Shilka 3.70% 27 24 0.89
Tunguska 3.70% 27 28 1.04
Vs to hit 6+ 4+ save
% chance to kill Shots to kill Shots per pl Kills per turn
Missile systems
Gaskin 2.78% 36 8 0.22
Gopher 4.17% 24 8 0.33
Gecko 5.56% 18 12 0.67
Tunguska 5.56% 18 8 0.44
Gun systems
Shilka 2.78% 36 24 0.67
Tunguska 2.78% 36 28 0.78

For example, if you want to destroy a unit of 4 Harriers before they can engage you with cluster munitions, you can consult the 4+ to hit column, or the 5+ to hit column if you expect to keep your ground-based air defence teams concealed in woods or behind buildings. With these inputs, we can see that a battery of Tunguskas should kill 3 Harriers, 2 if concealed, while two platoons of Shilkas will probably down 5 or 3-4 if concealed. Because the harrier has to get close to do it’s work, these gun systems are probably the best bet.

How about a pair of Cobras? Well consider that they will almost always be either a 5+ or 6+ to hit, and sitting in their own backfield you probably want to use a missile system. Geckos look to be the thing you need, but you could also consider taking Gophers, or even Tunguskas backed by Gaskins. This should give you coverage and enough scare factor to either keep the helicopters off the table until your air defence has been knocked out, or possibly have your opponent not fire for risk of losing their birds.

Purpose built or multi-tool?

Gun systems bring a lot to the table, and this includes the ability to fire at ground targets which is fairly amazing as anyone who’s ever run Shilkas can attest to. But while the gun systems have higher expected output than missile teams due to rate of fire, you need to remember that they also have a dramatically reduced range. This means you’ll have to escort units across the table if you want to protect them, or project your AA against long range missile systems like Apaches. If you want to take down these long-range systems, you need to either go get them or invest in missiles. Gaskins, Gophers, Geckos, even the lowly Gremlin (not included in the table but you can get the percentages from the Gaskin) can dominate the entire table being able to provide anti-aircraft fire to anything that shows up.

What the Shilka has going for it is its high rate of fire, albeit at a short range. With the introduction of the Tunguska you get the best of both worlds, an all-in-one package. It has missiles with the same profile (but lower rate of fire) as the Gecko and an amazing gun with a higher rate of fire than the Shilka and higher AT for all those ground targets. It’s kind of perfect.

The Soviet army had the largest most integrated and varied ground based air defence in the world, and this is no different in WWIII:Team Yankee. You can own the sky from the ground and gain freedom of movement for your forces to spread the Soviet Union’s ideals across Europe and beyond. Add to that the fact that these are some of the coolest models in the range, covered in guns and missiles,  and there’s pretty much no reason to leave home without them.

Happy Hunting.

BMP-3 the “Dzhek of all Trades”

With Adam Brooker

With the release of WWIII: Soviet, not only has there been a new tank, the T-80, a new AA vehicle – the excellent Tunguska, and the frankly massive TOS-1 – Thermobaric Rocket Launcher, there has also been a new vehicle added to the mechanised infantry company, the BMP-3.

Now given its designation, you would think this is just an upgrade or continuation of the BMP-1 and BMP-2 line, much like the BMP-2 was. But the BMP-3 (Object 688M) was actually originally a prototype for a light amphibious tank (Object 685), to replace the PT-76 light tank. This was ultimately not successful, but they did use the chassis and a new engine as a base for the successor to the BMP-2 to continue their line of infantry fighting vehicles.

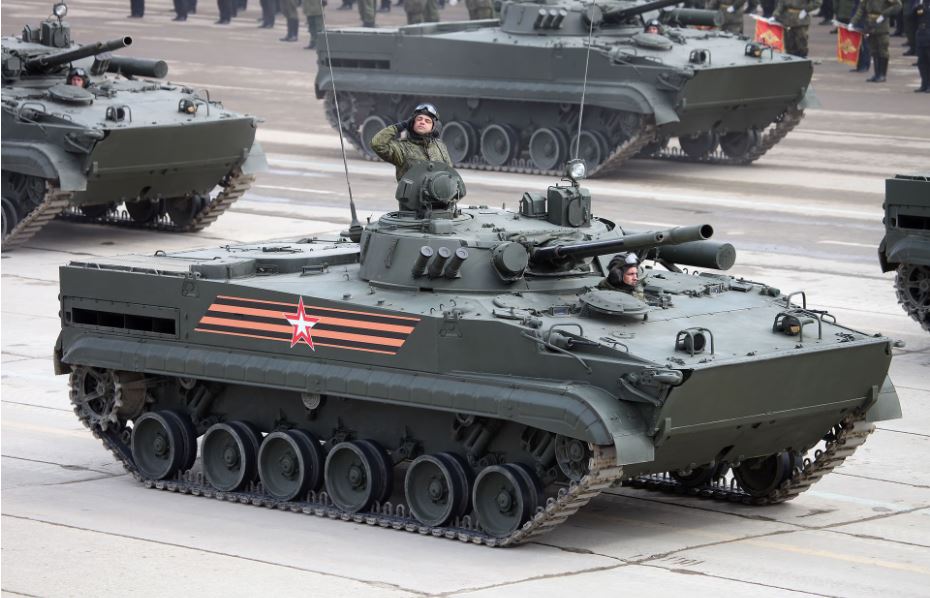
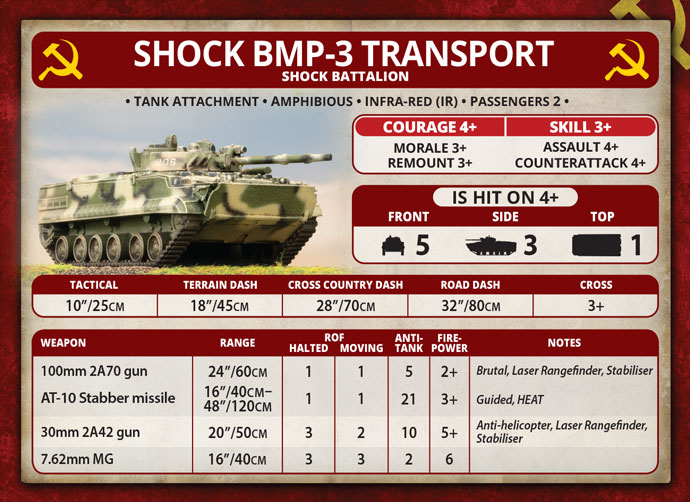
The BMP-3 is a significant upgrade on the BMP-2, it not only has thicker armour using a steel/ aluminium alloy and an upgraded turret, it also has a multitude of weapons systems and a laser rangefinder (which was lacking in the BMP-1 and BMP-2). It has a 100mm rifled 2A70 main gun capable of firing both conventional HE shells, or the 9M117 Bastion ATGMs (AT-10 Stabber) which is a laser guided anti tank missile fired from that same 100mm main gun. It also has the 30mm 2A72 Autocannon (which is mounted alongside the 100mm barrel) and 7.62mm PKT machine gun that were both on the BMP-2. With the BMP-3 the Soviets now have an infantry fighting vehicle that can now fight on par with the NATO IFVs and perhaps even surpass some of them.

As an aside, it is actually very cool how the main gun fired anti tank guided missiles work. The AT-10 Stabber is a 100mm round that resembles a normal 100 mm anti-tank round, and is loaded and fired in the same fashion. It uses a reduced explosive charge to launch the projectile out of the barrel of the gun at around 400 to 500 m/s. After leaving the barrel, a small cover falls away from the window on the rear of the missile for the laser guidance. A rocket motor ignites 1.5 seconds after firing the missile, and it burns for 6 seconds, and takes about 12 seconds to travel 4kms, its approximate max range.

So what does this mean in game? Well it means the BMP-3 goes up to FA 5, as compared to FA 2 for the BMP-2, and a side and rear armour of 3, compared to 2 on the BMP-2. This will give it some chance against the rapid fire multi-role AA platforms, like the Gepard, Sgt York and Marksman, especially at range, which would typically rip apart the BMP-2. Additionally it is marginally faster at dash speeds to the BMP-2 and it can also move and fire its AT-10 Stabber ATGM as well as its 100mm 2A70 main gun.

So most importantly, let’s look at the new guns! The AT10 Stabber has an AT of 21, a Firepower of 3+, and a range of 16” to 48” inches, which will allow it to penetrate most NATO tanks frontally, but if it is able to flank the enemy, it will have a very good chance of penetrating any NATO tank. The 100mm 2A70 gun will be excellent for the BMP-3 advancing on dug-in infantry, and should be able to support its attached assaulting infantry in blasting out dug-in NATO infantry. Its 24” range, stationary and moving ROF 1 main gun, is both stabilised and has a 2+ firepower, as well as Brutal. This should be very capable in digging-out enemy infantry, especially if combined with artillery like the new TOS-1 platform.

There are many ways you can field the BMP-3, either as a scout Platoon, as part of a BMP Motor Rifle Company, or as part of any Tank Company except the T-55AM Tank Company. I will add I do see them in the elite T-80 Shock Tank Company, which it the only way to field them with improved stats, eg. 4+ to hit.

If you are thinking of taking them as part of your reconnaissance screen, you can take up to four in the BMP-3 Recon Platoon, or up to three as your recon element in the Shock Tank Company. They are more expensive, but will be a little bit faster (improved dash speeds), and more mobile with their move and shoot AT-10 Stabber missiles for when jousting with armour.

If you want to take them as part of your BMP Motor Rifle Company, you can do so, but they will be very expensive, with three full BMP-3 Company and one HQ BMP-3 (37 BMP-3), costing 93 points, so it will not leaving much left for anything else. I would suggest in this formation to probably take one larger BMP-3 Company as your assaulting force, and one smaller BMP-2 Company to assist and another smaller BMP-1 or BMP -2 Company to defend your objectives. This should allow you a large assaulting force as well as enough of a force to defend the side you are not assaulting through. Remember this will not change the play style of the BMP Motor Rifle Company, which is a mass infantry assault, backed by BMPs, artillery and tanks. You will just have better tools now, but is very much still very similar to how you would use a BMP-2 list.

There is another important addition your forces in the WWIII Soviet book, the upgraded RPG7, the RPG7-VR. This is an upgraded RPG7 with a larger warhead, and a tandem charge to defeat ERA on tanks and other vehicles. It works by the first smaller warhead exploding the reactive armour block prematurely, this renders that particular block of ERA useless, and the larger full calibre warhead then explodes and penetrates the weak spot created by the precursor charge.

In game these are a unit upgrade available to all BMP and infantry companies, but be aware, if you take them for one unit, all units in the Formation with RPG-7s, must be upgraded to RPG-7VRs as well. So it can get very expensive, unless you only take one unit in your force with RPG-7s, say a large BMP unit in a Tank Company…

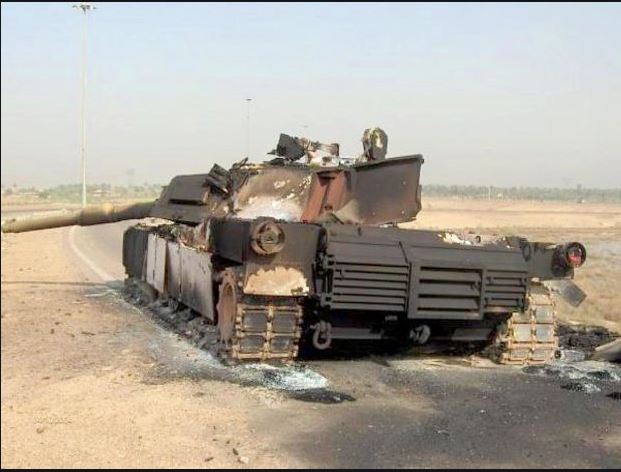
These types of weapons have been used in real combat, for example in Iraq in 2003, Iraqi Insurgents used it on a M1 Abrams, and achieved a mobility kill. It hit the left side hull next to the forward section of the engine compartment. It penetrated a fuel tank, and flooded the compartment with fuel. Several other allied tanks have been taken out with weapons the same or similar to these, including more M1 Abrams, a Challenger 2 tank and Israeli MBTs.

They can also be taken as a very useful addition to a Tank Company, to spearhead your assault on the enemy objective, just make sure to give your opponents options to shoot at. You would be much happier him focusing on your MBTs, instead of your weaker armoured BMP-3s. Try to use cover and concealment to get you as close as possible before your infantry makes its assault. I know as a West German Team Yankee Commander, I found the BMP Motor Rifle Company lists to be one of the hardest lists to play against. Especially the typical force of two large BMP-2 companies, backed up by a few MBTs, and Hinds. I could take on most of the list, but the two large infantry companies of up to 23 stands each, were very hard to stop. Now they are even better.

Out of all of the Formations that can use the BMP-3 I do find the elite T-80 Shock Tank Company to be the most interesting! This formation has been brought together from the best conscripts and officers coming through the training schools. They are constantly drilling and undertaking very realistic exercises, they are also given the best equipment the Soviet Military can muster. Containing mostly T-80, BMP-3s and BMP-2s, also veterans of the fighting in Afghanistan have been briefing them about their experiences, giving them first-hand knowledge of modern conflicts and tactics.

This Formation has given the Soviets a unit on par with the NATO units, as far as to-hit values and overall skill values. These will be very hard opponents for NATO Forces to face, but the trade off is smaller unit sizes, very similar to NATO platoon sizes. For example, the max BMP-3 Shock Recon Platoon size is 3 x BMP-3, and the largest BMP-3 Shock Motor Rifle Company is 6 x BMP-3, as compared to the 12 seen in the normal BMP-3 Motor Rifle Company. Similarly a Shock Company T-80 Platoon has a max unit size of 3x T-80, so if you have always wanted to find out how hard a NATO player has it, try this Tank Company out……

I think this will be a very popular list for many Soviet players, and is something they have been asking for, for a while, and it certainly cuts down on the painting time needed for a Soviet Force. In fact as a long time NATO player, I think this will be one of the lists I really want to try out, as you get all the toys, and some lovely BMP-3s to boot!!

I think the BMP-3 is a very good unit, while not excelling at anything in particular; it is very good at a lot of things, and a more versatile option than the BMP-2 and well as being better than the BMP-2 overall. It is very much a Dzhek (Jack) of all Trades, and something that will give NATO players more headaches! But I do think it is something that the Soviets needed to keep up with NATO, and we shall see how it affects the meta. It will be interesting the new Forces people will create with it!

~Adam

Building a T-80 Shock Company List

With John Lee

Like most Soviet players, I have been eagerly waiting for the WW3: Soviet release to usher in the new toys for the Soviet players especially the T-80 and BMP-3 – to take on the NATO heavyweights such as Leopard, Challenger and M1 Abrams.

What is even better, is the release of the T-80 Shock Company in the book – finally a formation that is like most NATO lists – hit on 4+ – music to my ears.

Let us have a look at what comprises the formation:

  • 1 T-80 Shock Tank Company HQ
  • 2-3 T-80 Shock Tank Platoon
  • 0-1 BMP Shock Motor Rifle Company
  • 0-1 BMP-3 Shock Recon Platoon
  • 0-1 ZSU-23-4 Shilka AA Platoon or 2S6 Tunguska AA Platoon
  • 0-1 SA-9 Gaskin SAM Platoon or SA-13 Gopher SAM Platoon
  • 0-1 2S1 Carnation SP Howitzer Battery

The T-80:

The core fighting units in the formation are “Shock” units (hit on 4+).  Smaller more elite units that allow you to play NATO tactics with new Soviet equipment.   Let us look at these in more detail.

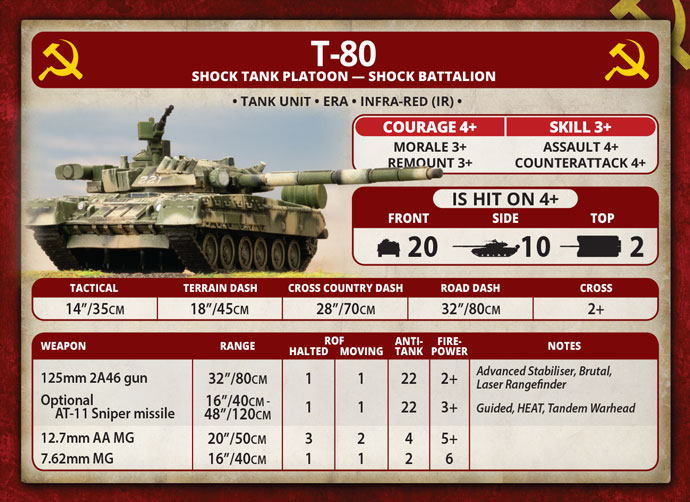
The T-80 tank has FA20 SA10 TA2, ERA (side 16 against HEAT), tactical 14” move, 32” range AT22 gun with advanced stabiliser, optional AT22 tandem warhead missile with range out to 48” that can be fired on the move!  Did I mention also hit on 4+?

The gun – AT22 with advanced stabiliser means moving up to 14” and able to fire its main gun on the move with no penalty.  So effectively its range is up to 46” if you move and fire.  Brutal – hit dug in infantry with it and that infantry team is re-rolling its saves!  Laser rangefinder – No +1 to hit targets over 16”.

The missile – AT22 that can be fired on the move with 16” – 48” range increases with tactical move of 14” to 62” range!  Guided – no +1 to hit over 16”.  HEAT – no +1 to armour save for over 16” range.  Tandem Warhead – if target has ERA, it is ignored so use the normal armour rating!  For those missions where you have scattered reserves and they turn up at the other end of the table – no problem anymore with coming on at tactical and firing your missile giving you 62” range.

The armour – 4+ to hit FA20 SA10 TA2.  Finally, frontal armour on par with the NATO MBTs such as Challenger and M1A1.  SA10 with ERA (effective against majority of HEAT weapons by increasing to SA16). Your tanks will be almost impervious to most infantry AT – assault at will!

The speed – 14” tactical speed means you will keep moving suffering no penalties for moving and firing.  2+ cross check which means you will pass them 83% of the time.  18” terrain dash and 28” cross country dash if you need it.

The stats – Skill 3+ so blitzing and shooting and scooting are useful orders.  Remount is also 3+ so easier to get back in.  Morale 3+ to stay in the battle.  Assault and counterattack on 4+ – so get those assaults in and get them won!  HQ has better stats of course, so you want the HQ close by for the assaults.

The Company HQ comprises one tank for 10pts and can add an optional missile for +1pt.

The Tank Platoon comprises either two tanks for 19pts or 29pts for three.  You can add an optional missile for 1pt per tank.  You can also fit a Mine Plough to one tank in the platoon for +1pt.

To me it is a no brainer to take an HQ tank plus two platoons of three tanks for 68pts as a minimum (unless playing smaller sided games where you take two platoons of two).

The Shock Motor Rifle Infantry:

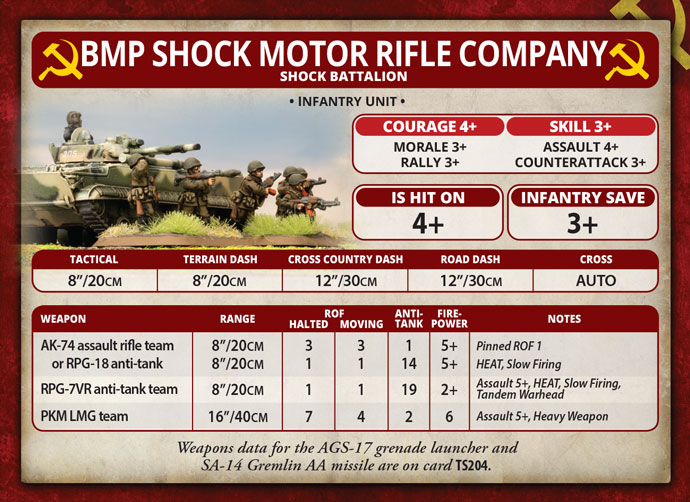
This is the most exciting unit for the T-80 Shock Tank Company.  4+ to hit infantry!  Very hard to dig out and you have options to take a medium or small sized unit and choose to carry them in either BMP-2s or BMP-3s.  This is a hard-hitting unit that will be difficult to dislodge or conversely stop during an assault – especially if combined with your Shock T-80s.

The weapons – stock standard AK-74s with 8” range ROF 3, RPG-18 with 8” range AT14 slow firing.  The new RPG7VR infantry team with 8” range AT19 FP2+ slow firing, HEAT and Tandem Warhead – watchout NATO tanks!  PKM LMG with range 16” ROF 7 to halt any infantry attacks or suppress infantry prior to assault.  Optional AGS-17 range 16” ROF 9 to add to PKM LMGs firepower.   Optional SA-14 range 48” ROF 3 AA SAM as intrinsic AA defence.

You can take either the medium size company for 24pts comprising of:

  • 6 x AK-74 with RPG-18 anti-tank team
  • 5 x RPG-7VR anti-tank team
  • 1 x PKM LMG team
  • 6 x Shock BMP-3

Or the small sized company for 15pts comprising of:

  • 4 x AK-74 with RPG-18 anti-tank team
  • 3 x RPG-7VR anti-tank team
  • 4 x Shock BMP-3

Options for either are:

  • 1 x AGS-17 grenade launcher team with BMP-3 for +3pts
  • 1 x SA-14 Gremlin AA missile team with BMP-3 for +3pts

Downgrade all BMP-3s to BMP-2s for -3pts for the company

The BMP-3:

This multi-purpose, multi-weapon platform gives you a lot of versatility – whether carrying your shock troops into battle or in the recon role with spearhead to get you assault force into a better launch position to get amongst it.

The guns – wow, two guns – a rapid fire 30mm cannon and a low powered 100mm gun for digging out infantry.  The 30mm cannon has a range of 20” ROF 3 AT10 with stabiliser, laser rangefinder and anti-helicopter!  Ideal for light vehicles, sneaky side shots into tanks and anti-infantry and helicopters.  The 100mm gun has a range of 24” ROF 1 AT5 with brutal, laser rangefinder and stabiliser.  Ideal for digging out infantry from their foxholes.

The missile – AT21 with a range of 16” – 48”.  58” actually as it can be fired on the move too with a 10” tactical move!

The armour – 4+ to hit – some say the best armour in the game. FA5 SA3 TA1.  Better than its predecessor of FA2.

The speed – 10” tactical speed means you will keep on the move, suffering no penalties for moving and firing.  With stabiliser on both guns, this means you can increase your tactical speed to 14” with a +1 to hit over 10”.  3+ cross check which means you will pass them 67% of the time.  18” terrain dash and 28” cross country dash if you need it.

So, the BMP-3 can be used to transport your Shock Motor Rifle Company or in the recon role performed by the Shock Recon Platoon.  You can get three for 9pts or two for 7pts.  Recon platoon gives you spearhead in certain missions to get your troops into a better position to launch your attack.

Army Building

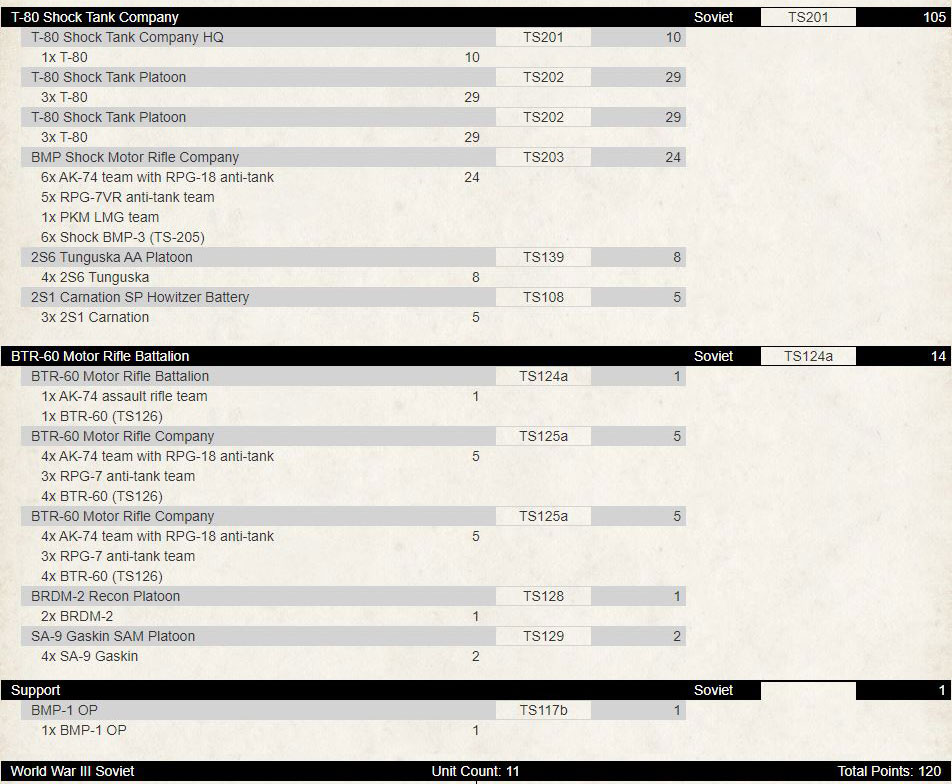
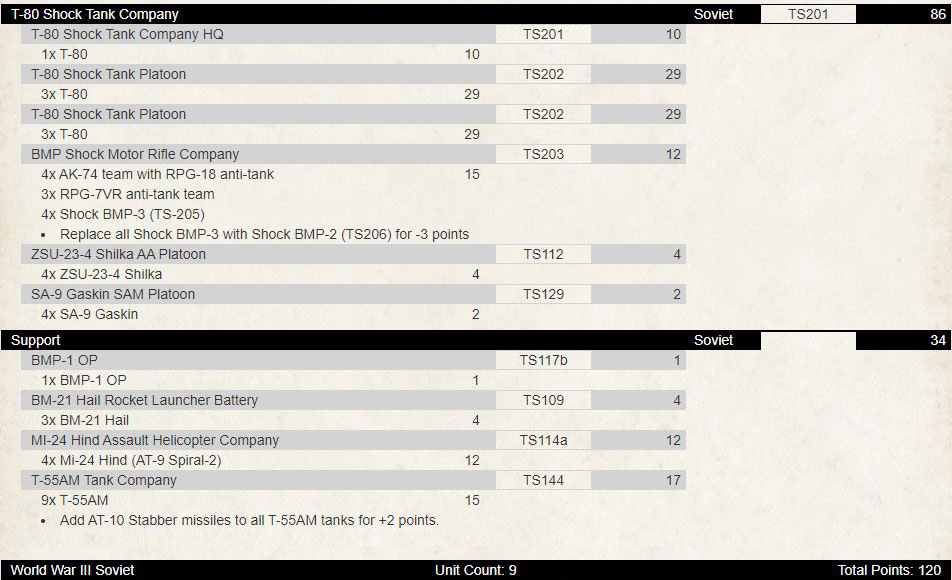
Now the next part of the article is building lists based on the T-80 Shock Company for three different points levels (75, 100 and 120) to get some idea of core formation options plus what else you can add for flavour or to suit you play style.   With version 2 of the rules, we have black box units for formation support now – so that provides us some interesting options for list building.  On the flipside for this formation, we can now have a T-80 Shock Tank Platoon supporting other formations.

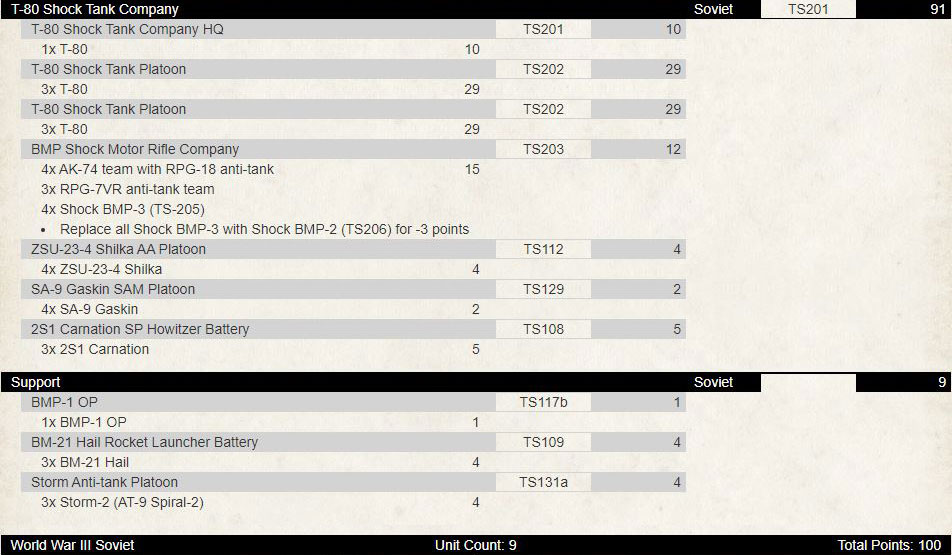
First option I look at is having a secondary formation for the extra 14pts.  It gives me a cheap spearhead option for my primary attack force to get into a better position for those missions that allow it.  I get two small infantry platoons to guard each of my objectives thus allowing my big Shock Motor Rifle Company to go on the offensive right away with my Shock T-80s.  I have AA coverage with the new dual weapon system 2S6 Tunguska and SA-9 Gaskin.  I have one artillery template (with backstop anti-tank if required with AT21 gun) with an observer to help range in better.  If you wanted a second artillery template, you could downgrade the 2S6 Tunguskas to ZSU-23-4 Shilkas and use the 4pts saved for a battery of three BM-21 Hail Rocket Launchers to complement your 2S1 Carnations.

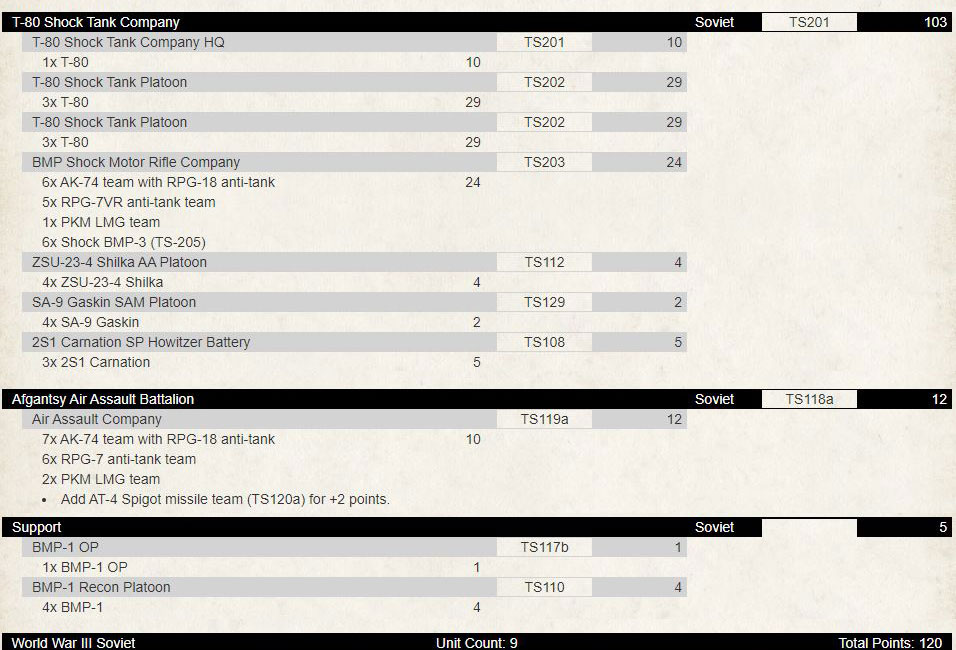
Another option is adding black box formation support units to your force instead of a secondary or allied formation.  I like to run balanced forces and a second infantry option would be useful – Afgantsy Air Assault Company fits the bill nicely.  Outside of the Shock Infantry, it is the best Soviet infantry available with 4+ skill and assault and 3+ everything else.

To fit in a medium Air Assault Company, and still allow the recon element, we downgraded the 2S6 Tunguskas to ZSU-23-4 Shilkas.

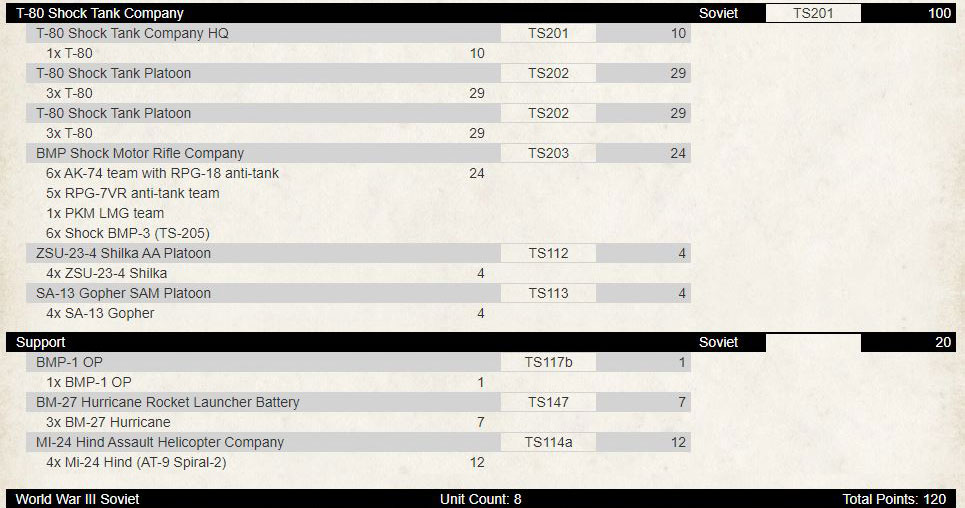
A third option where I do not want or need a cheap infantry formation or a second infantry company, but more surgical high-end firepower could be:

Adding in the BM-27 Hurricanes gives me access to minelets, which can ruin your opponent’s day plus with the salvo AT4 FP3+ makes it easier to shred their AA assets before you bring on your Hinds to kill their high end tanks with AT24 missiles, whilst your Shock T-80s and Motor Rifles mop up the rest and/or defend your own objectives.  Want a full complement of six MI-24 Hinds with AT24 missiles instead of four, downgrade Shock BMP-3s to BMP-2s for -3pts and downgrade the BM-27s to BM-21 Hails for -3pts to get those 2 extra helicopters.

Feel like adding some more tanks to the force?  We could add another new unit to supplement the T-80s – the new T-55AM.  A unit you can use to bum rush from reserves or use to try and flank opponents or with the optional missile hang back and have massed missile fire from range.  How could this look:

Tweaking the list by going with the small Shock Motor Rifle Company to add nine T-55AM with AT18 main gun (no slow firing rule!) and AT21 missile, gives you flexibility depending on the mission to outflank or hold back fire a missile barrage.

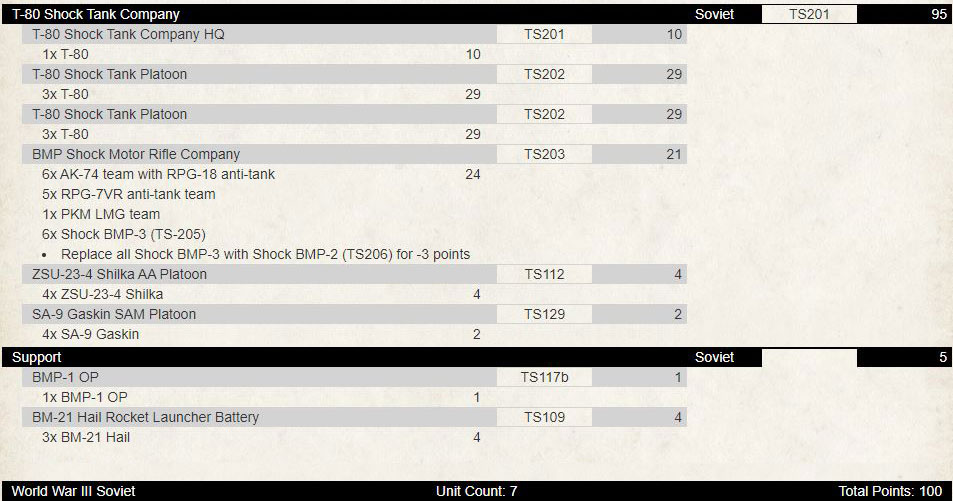
For 100pt lists we need to dial it back a bit as we lose 20pts so need to look at going with the smaller infantry unit as an option and compare it with the big unit option.   Looking at the big unit option first:

Downgrading the transports for Shock Motor Rifle Company, using SA-9 Gaskins and BM-21 Hails, we still fit everything in for 100pts.  Still a good list to play.  You have your shock elements with AA umbrella plus an artillery salvo unit with OP.  Here is an example list with the small infantry option:

By going with a small unit of Shock Motor Rifle infantry, you can add in a second unit of artillery and a high-end anti-tank unit with AT-24 that you can spring an ambush from.  Another alternative is to replace one unit of artillery with either a BMP-1 or BMP-2 recon platoon from the support box option.  Replace the BM-21 Hails with four recon BMP-1 or the 2S1 Carnations with three recon BMP-2s thus giving your force spearhead.

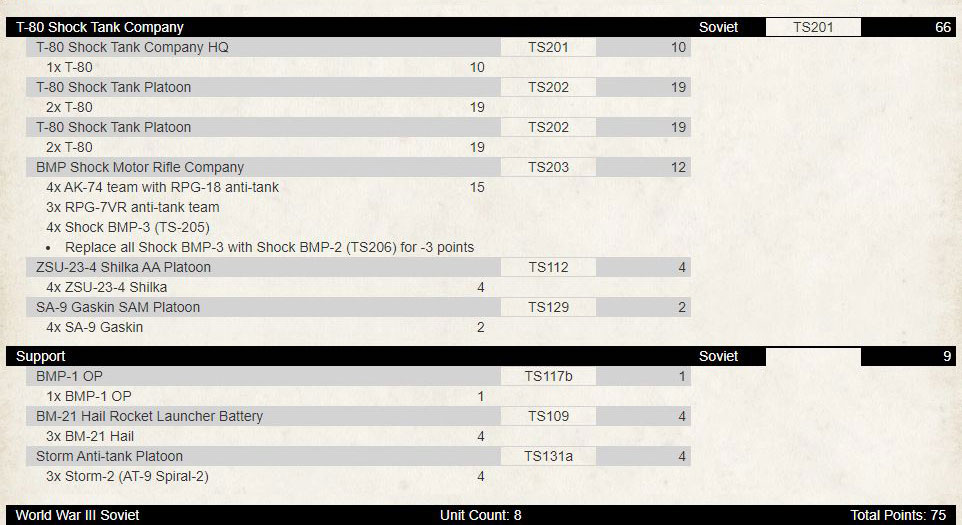
Having played at NukeCon here in Auckland a number of weeks ago, I thought I would see if I could get a T-80 Shock Company list together that I could have taken, if it was available then (I took an Iraqi T-72M force – was fun to play):

Taking the minimum T-80s you feel like a West German player taking Leopard 2s in platoons of two.  In this case it is definitely feasible – I would consider dropping the ZSU-23-4 Shilkas and getting recon BMP-1s to replace them in the support box option.  The Storm-2s give you AT24 – great ambush unit!

So, there you have it – this formation gives plenty of options depending on your play style and the points you are playing to.  I love all the options you can add from either black box formation support or the support options.  Do not forget you can also add allied formations too – Basij Infantry horde anyone?

What Is Soviet Green?

With Chris and Evan

Soviet Green, for modellers at least, has been one of the hardest colours to quite pin down as to what it is. For Flames Of War gamers it is a bit like trying to determine what is the correct for German Dunklegelb.

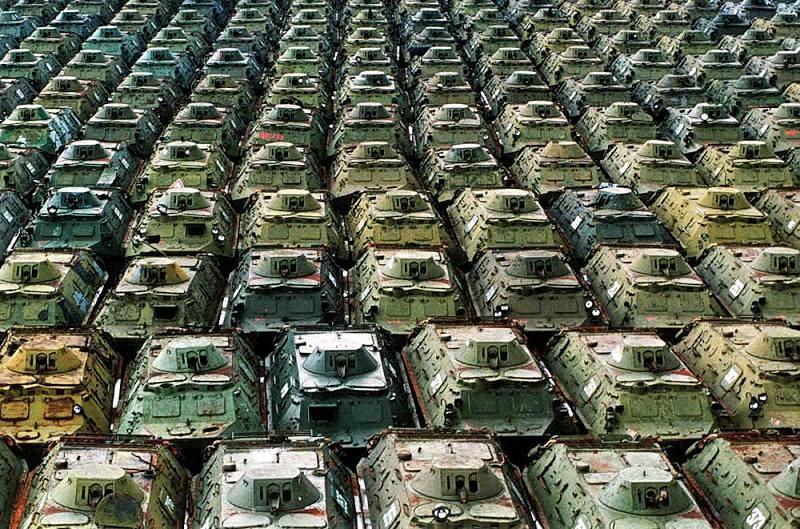
Factors such as the specific time period, where the tank was built, whether or not it had been repainted in the field, and the amount of sun, rain and general use it had seen all had an effect on the final colour. Not to mention the human element involved in mixing the paint, to the same chemical formula but not quite the same ratios for each batch, and you end up with some significant variations.

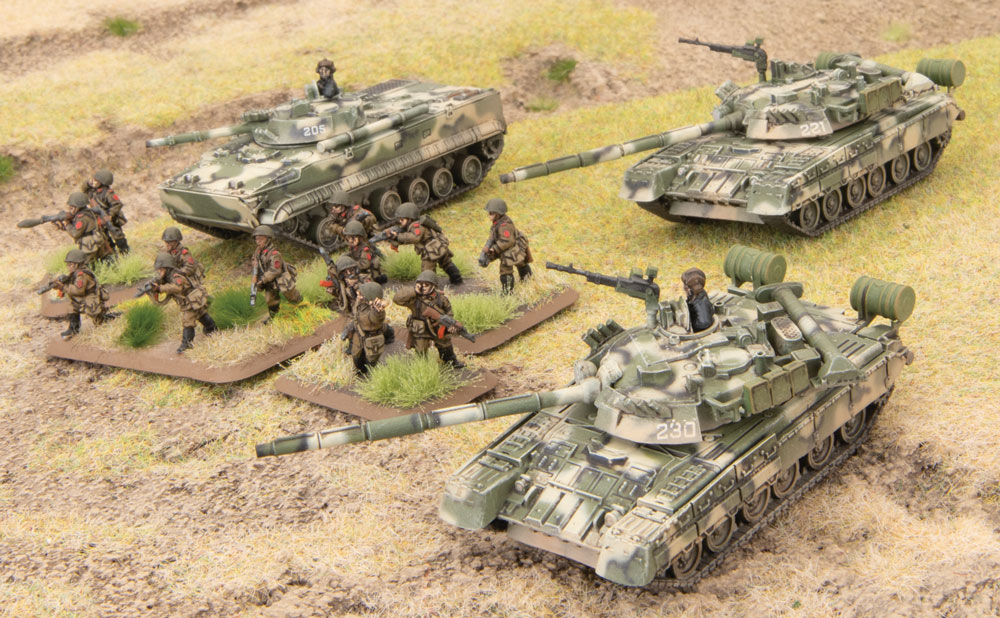
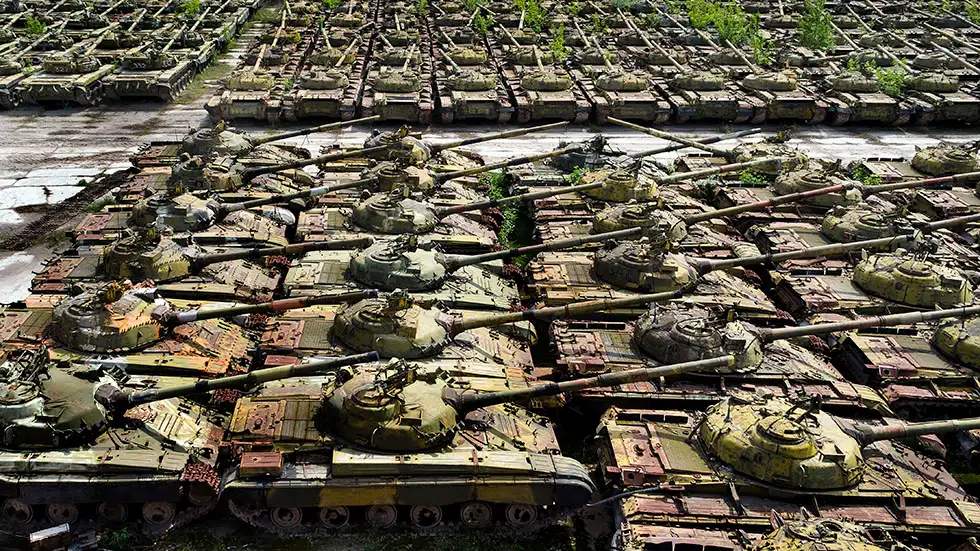
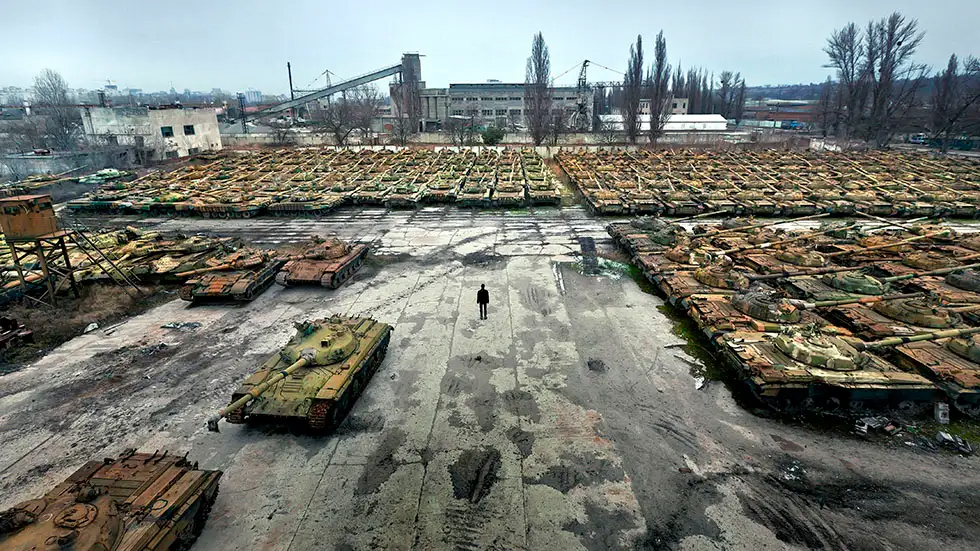
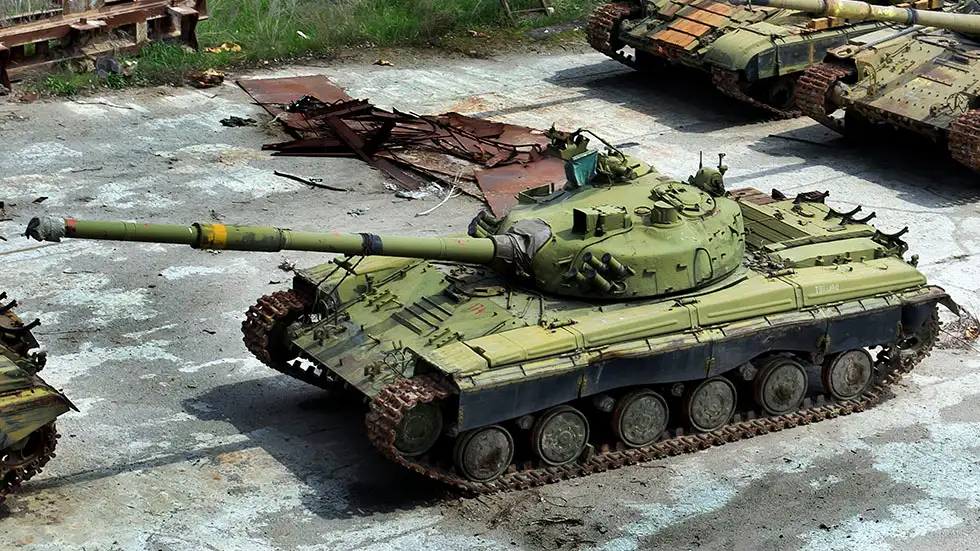
These pictures are a great example of how different the Russian Green can be once time (and weather) has taken its toll.

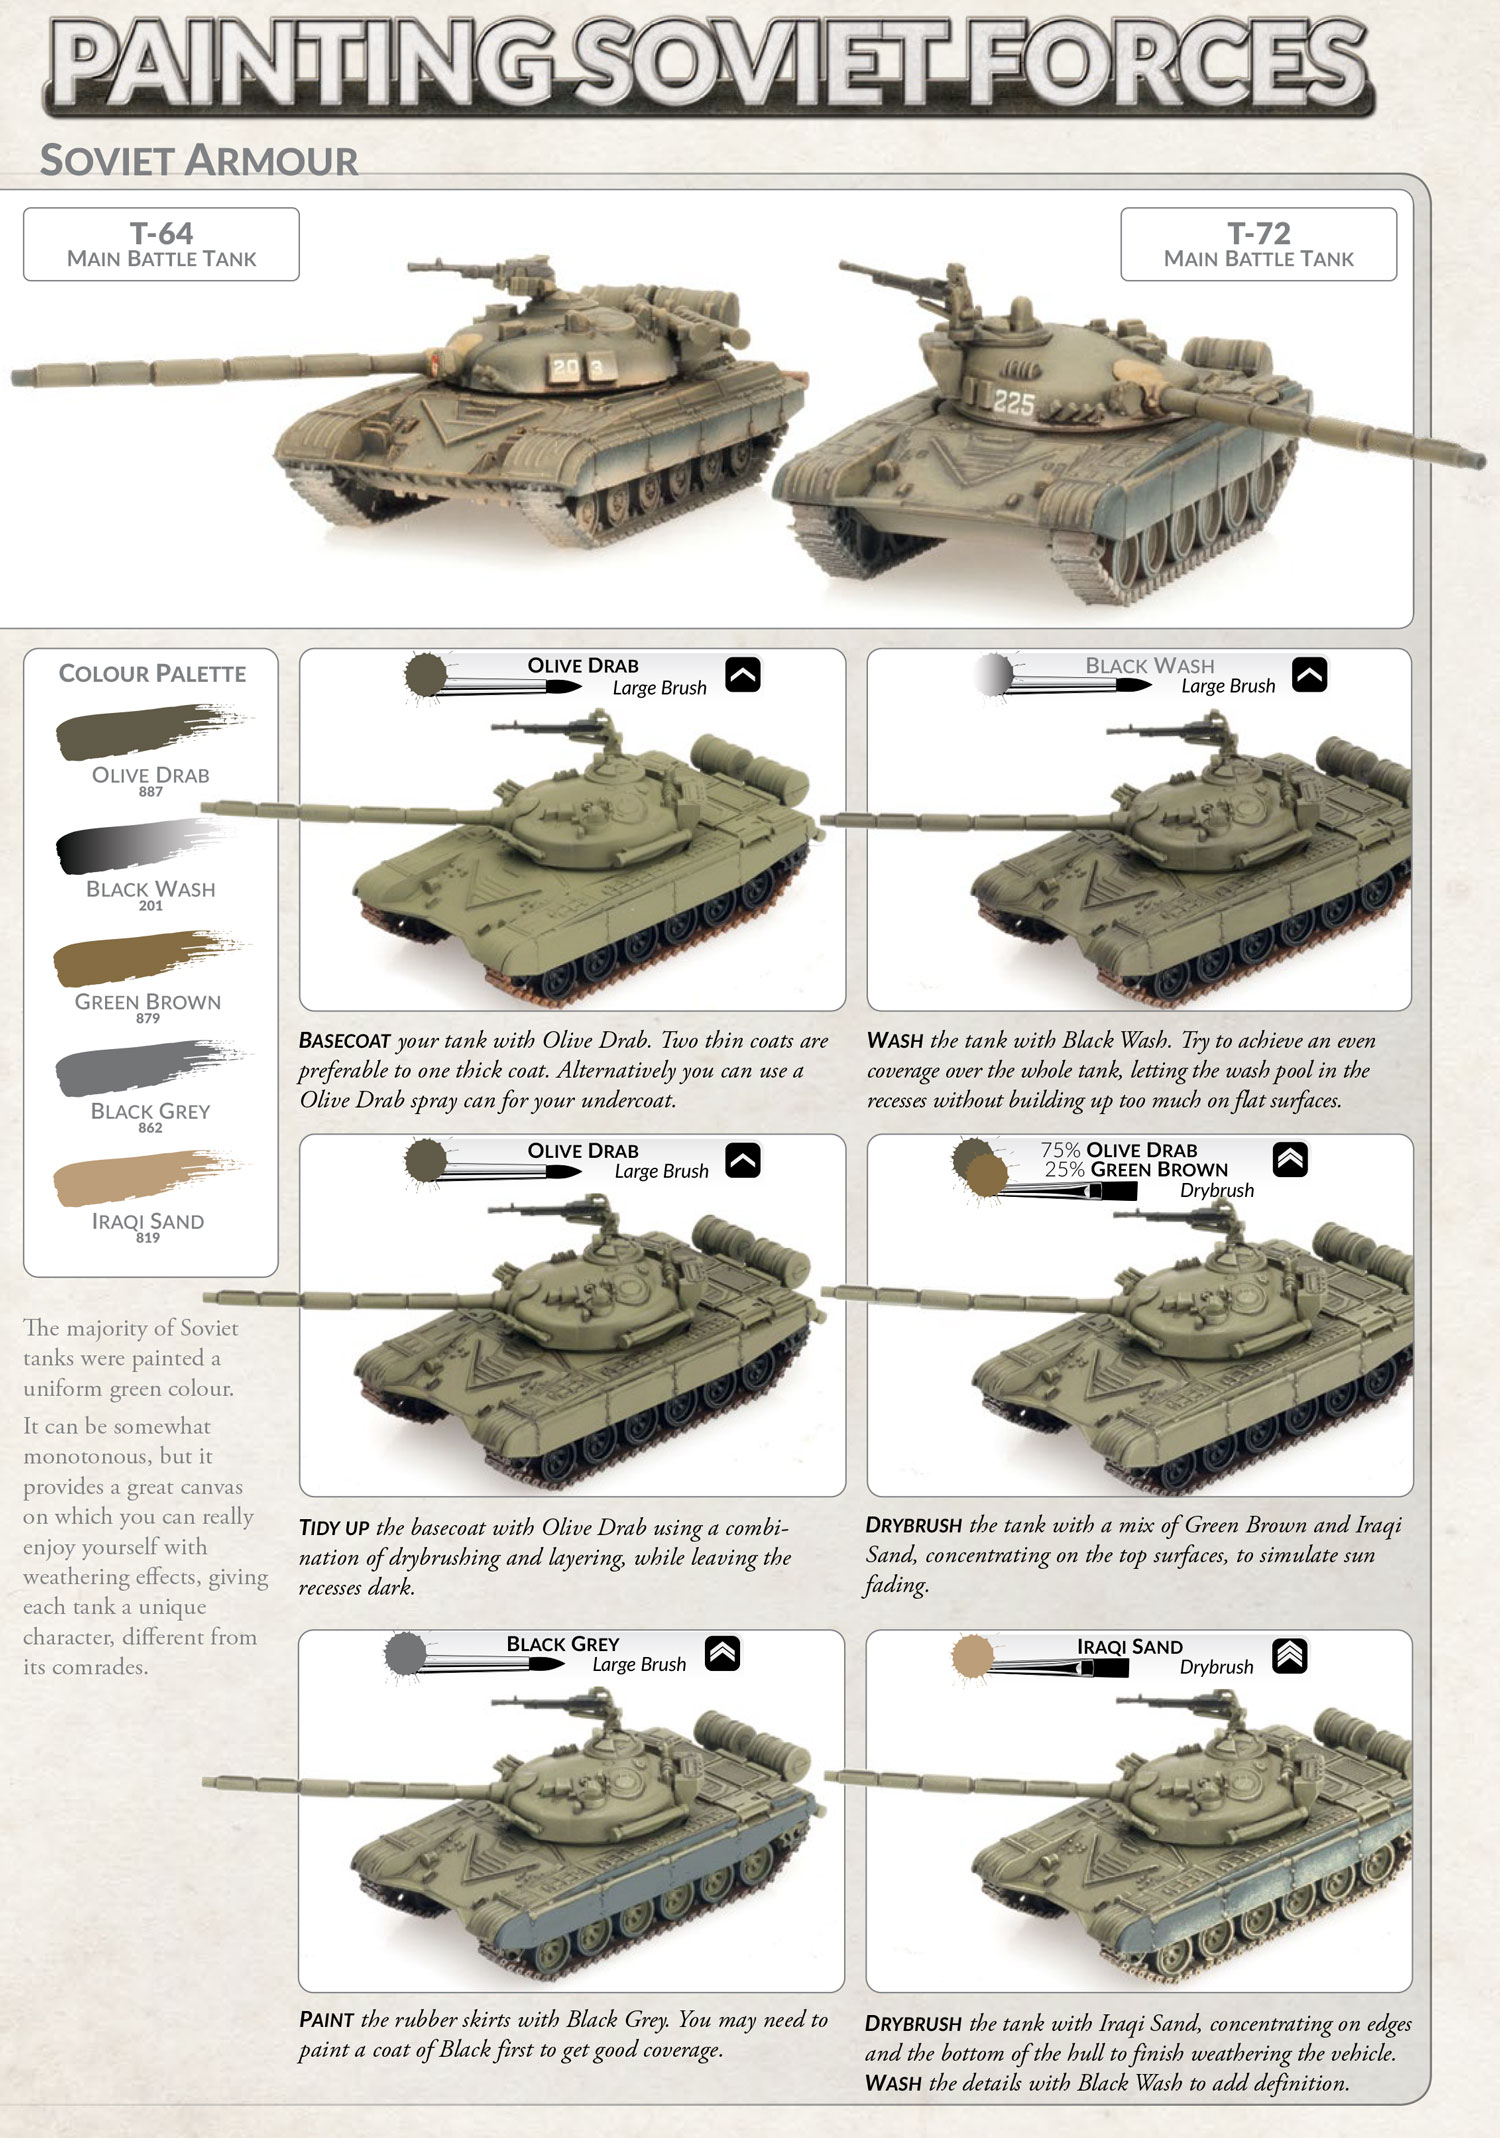
So with all that in mind what is the correct green? We’ve suggested Vallejo Olive Drab (887) with a drybush of Green Brown (879) as an easy way of replicating this colour.

Personally I’ve used a mixture of colours over the years and, in my opinion, you should feel free to do whatever you think looks good. Just check out this photo that Victor found…

~Chris

Evan’s Take On Painting Russian Armour

I’ve already got a significant Soviet force for WWIII Team Yankee and the vast majority is plain green in colour. I’ve painted some scout BMPs with a basic sand camouflage pattern just to make them different from the infantry BMPs on the table but, until now, I’ve relied on rubber skirts, lights and some serious dusty weathering to brighten them up.

I like to start with a base primer coat of Vallejo Soviet Green primer and then go from there with some panel modulation and the rest of my painting system. I use this to keep my armour coherent on the tabletop but as we all know there is no real Russian/Soviet green that you must use to be accurate.

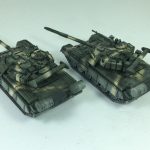
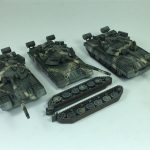
When the T-80 and BMP-3 arrived in the game I thought I would depart my tried and true plain green and go for a camouflage scheme to reflect the more modern AFVs in the game. I kept the Vallejo Russian green primer base but shifted to a more Olive Drab leaning green as a modulation colour to go with the sand and black camouflage pattern. The camouflage also extends down over the rubber skirts as well which is another first for my Russians.

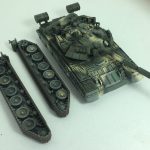
I like to paint my armour with the tracks off if at all possible and you can do this with the T-80.  After I’ve glued on the skirts I check fit the tracks to make sure they will fit later, to do this you need to insert the rear of the tracks at 90 degrees to the hull and then rotate upwards so the rear mudguard goes over the un-ditching log on the rear. Removing them is the opposite and the tracks will still be free to paint by themselves.

~Evan