D-Day: Waffen-SS Q&A

We asked people on our Facebook Group  to submit questions for a Q&A session with Phil (writer of the D-Day: SS book) and Chris (knows lots of things about what is going on round the company) with the intent of recording a fun video for you to watch. Unfortunately like any good plan, it didn’t plan on a devious and cunning adversary (COVID-19) staging a guerilla campaign and putting Auckland (the home of the Design Team) back under a lockdown. Instead we tied Phil to a chair and got him to answer these questions before he could return to his bunker (or fortress of mathematical calculations)…

General Questions

Phil preparing for enemy fire…

John Rick: How would you best describe the difference between the two different books for the Germans. What are the pros and cons of each? What are some general strategies for both?

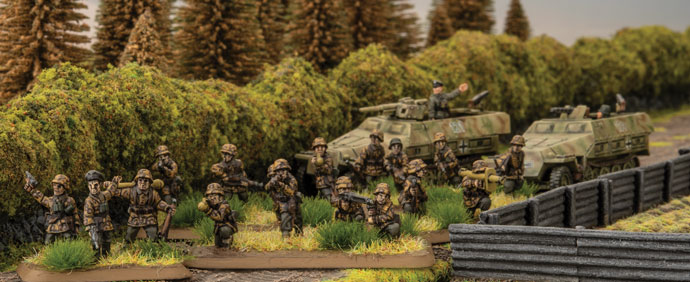
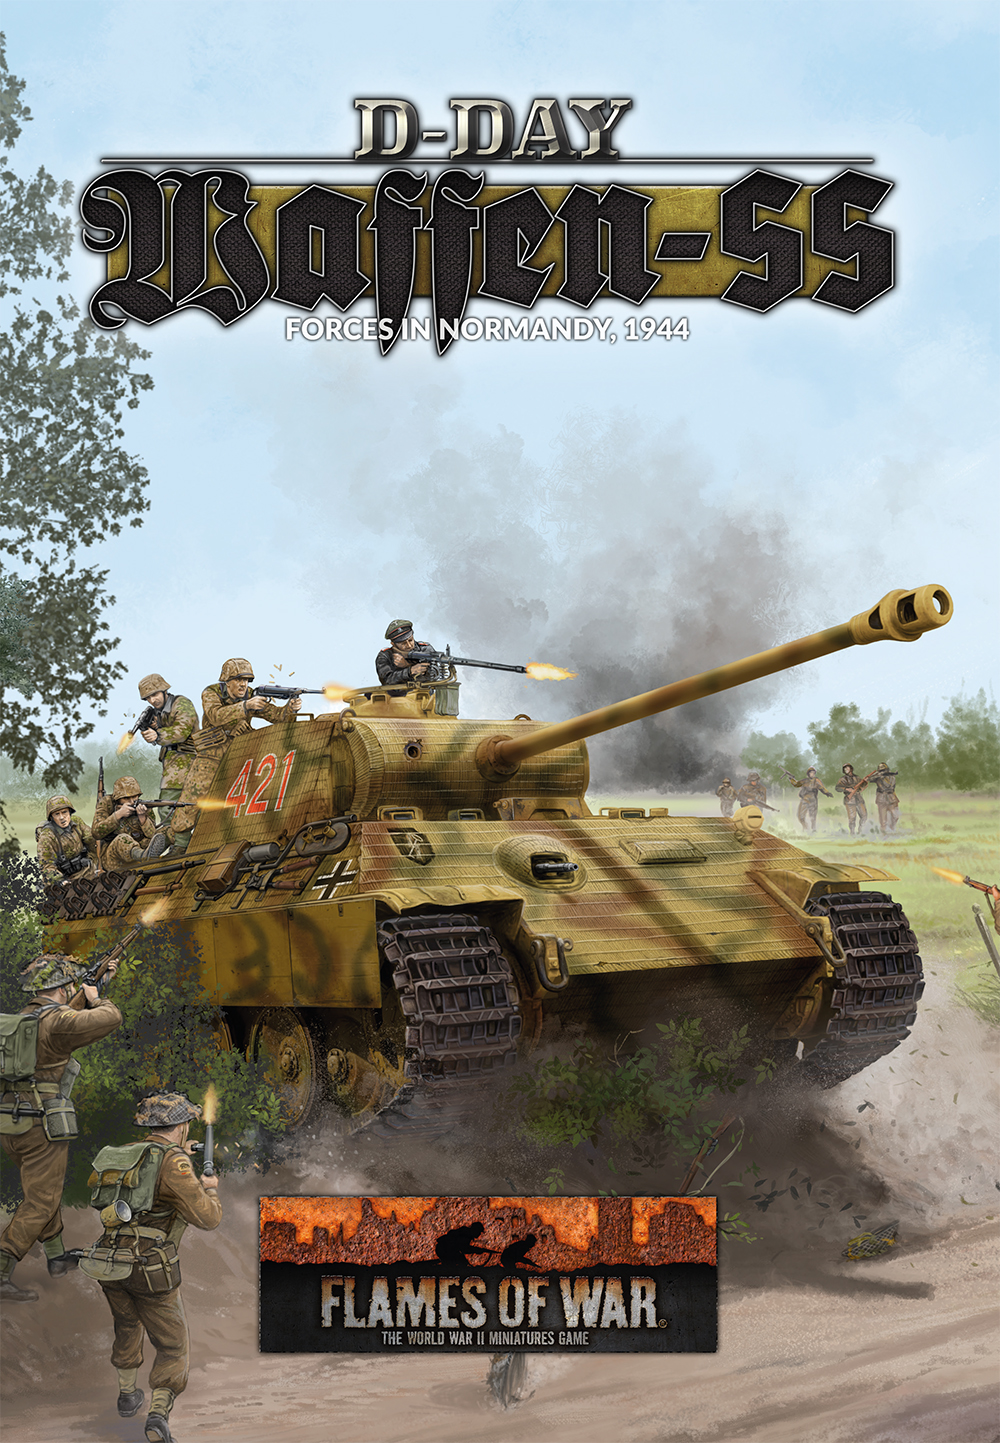
Phil – That’s a big question! The D-Day: German book covers a wide variety of troops from the unenthusiastic Beach Defence Grenadiers to the elite Fallschirmjäger paratroopers, with the veteran panzer troops in the middle. And then, the command cards increase the variety even further. 

The D-Day: Waffen-SS book is more focussed, just covering the SS-Panzer divisions, although once again, the command cards create a lot of variety. By and large though, most of the SS-Panzer divisions were in the middle of either building up for the first time or rebuilding after destructive combat on the Eastern Front. This means that their level of training is more on the level of the Beach Grenadiers than the fully-trained army Panzer divisions, but at the same time, their high level of motivation is similar to the Fallschirmjäger paratroopers.

The pros of this are that you get some really excellent kit with great morale ratings for a good points break. The cons are that the less experienced and still partly-trained Waffen-SS are hit on 3+ like green American units. The best strategy to handle this, for both the Americans and the Waffen-SS, is an aggressive approach to battle. Make use of your initially higher strength to gain the upper hand early, and keep pounding the enemy so hard that they can’t exploit your weaknesses, while focussing on taking the objectives as quickly as possible – pretty much what you’d expect from the SS really!

James MacMillan: Did the playtesting focus on the SS alone, or was the interaction of the D-Day: German and D-Day: Waffen-SS book a large part of the process?

Phil – While you can mix and match between the two books, I think most players are going to focus on one play style or the other. So, yes, some playtesting was done using mixed forces, but mostly players were looking to exploit the differences from the D-Day: German book.

Mark Feris: When is this going to be on Forces and in the Android bookstore?

Chris: By the time you read this answer, it will be up on both.

Ryan Gale: Which formation is your personal favourite?

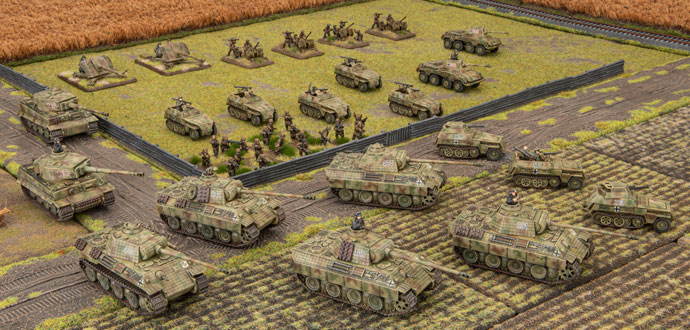
Phil – Well at the moment I’m exploring Panthers, both the army and Waffen-SS varieties. I’m still undecided as to which I like better. Having a few more tanks with the SS is great, but when things go wrong, they can go badly wrong, whereas the better-trained army Panthers have greater resilience and come back from setbacks more easily.

Chris – I would leave this to just Phil to answer, but I like my time in the spotlight too…. Tigers. Tigers. More Tigers. And maybe… Tigers. Plus I’d love to do a Sd Kfz 250 based force of armoured cars and infantry but that is definitely future Chris’ problem!

Units and Models in the Book

Oscar Mardones Schopflin and Petter Therén: Could we expect some new SS miniatures in Bagration: German or Bulge?

Chris – we have a new range of figures coming out as part of D-Day: Waffen-SS, designed by our talented sculptor Ales. These will be coming out in our new Thermoplastic. 

We are still nailing down a few of the finer points about what you can expect to see with the later books.

Nicholas Roche: Any careful formations? Or are they all aggressive (don’t-know-how-to-take-cover-stupid)?

Phil – The Waffen-SS are far from ‘don’t know how to take cover stupid’. In fact, they are middle of the road Is Hit On 3+, like many other troops. both Allied and Axis. But yes, there are command cards for the excellent 9th Hohenstaufen SS-Panzer Division that improve their rating to Careful (Is Hit On 4+).

Jean-Baptiste Piron: Will the 16. SS-Panzergrenadierdivision ‘Reichsführer SS’ , get their “Italian” StuGs back ?

Phil – Who stole them? Let me know the details and I’ll investigate.

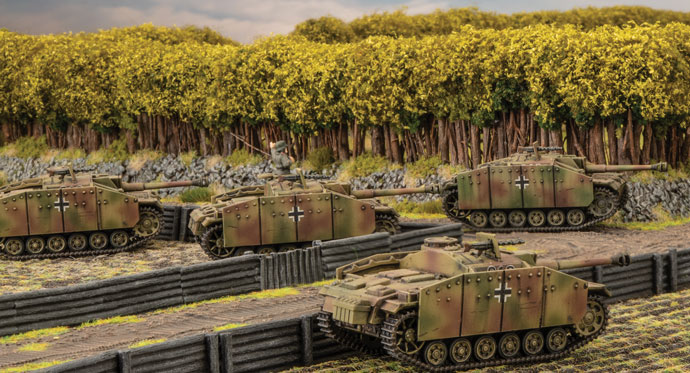
Dean Marquis: Did the SS have a mixture of StuG IV and Stug III

Phil – The StuG IV was used almost exclusively by infantry divisions. As such, the 17th Goetz Von Berlichingen SS-Panzergrenadier Division had them. The other SS divisions in Normandy that had StuGs all had StuG III. 

The good news is that, since there is little difference between the two types, it doesn’t matter too much which model you use for them, the newer plastic StuG III or the old metal and resin StuG IV. However, if you really want to distinguish them, you could support your 17th SS infantry with a Jagdpanzer IV tank-destroyer unit rather than a StuG unit since both the Jagdpanzer IV and StuG IV were based on the same chassis and had similar performance.

Command Cards

Dan Neal: Of the new D-Day SS Title Cards, which do you think creates the most unusual or distinctive style of play? Maybe something that hasn’t really been available for German forces from D-Day and Fortress Europe?

Phil – Yes. Every SS Division that fought in Normandy (other than the baseline 12th Hitler Youth SS-Panzer Division) has their own command cards.

Gergő Tóth: Is there a chance to see the return of the Panzerwerfer-42? Maybe as a command card?

Phil – I’m sure that it is a distinct possibility in future books. Meanwhile, you can simply field them as Nebelwerfer rocket launcher batteries.

Luke Shagrid Hazley: Will there be any command cards to make an SS unit veteran/careful? And will we see leaders like Wittman/Barkmann return as direct only orders?

Phil – Yes. The command cards for the 9th Hohenstaufen SS-Panzer Division have them rated as essentially Fearless Veteran and Careful.

As for direct-only warrior models, all I can say is … Chris stop slacking!

In The Future

Bob Anderson: I’m really excited about the high level approach to reimagine the SS. Any chance you might revisit the SS units in Mid War with the same approach? Perhaps via a pamphlet?

Phil – I don’t believe that there’s any need to change the representation of the Waffen-SS in the Mid War books. The ratings in D-Day: Waffen-SS aren’t about the SS as a whole, but rather about the specific divisions that fought in Normandy, and the state they found themselves in when called upon to do so.

In 1942 and 1943, the handful of Waffen-SS Panzergrenadier divisions were some of the best divisions in the German armed forces. Determined, experienced, and well trained. However, those very qualities were what saw them thrown into battle almost continuously between early 1943 and D-Day and ground down to a nub. They were barely given time to start rebuilding when they were thrown back into combat in Normandy, with weeks of training rather than the months of training that the army divisions had benefited from.

Kevin Malvaez: Will we be seeing future books with SS from the other fronts/formations/options or do the command cards for this release have options for SS divisions outside of France/Normandy?

Phil – Given that Hitler relied increasingly on the Waffen-SS as the war progressed, even as their quality declined from insufficient time to train and integrate the replacements that this policy demanded, you can definitely expect to see new varieties of SS as the war continues.

Aleksandr Varyvoda: Will the book on the SS on the Eastern front be like the Gray Wolf in the last edition?

Phil – If you mean, will Bagration: German be an outstanding addition to every gamer’s library giving them new ways of fielding their Germans and new and exciting models, then it definitely will be like Gray Wolf, but even better. While it won’t focus on the Waffen-SS like this book (half of the Panzer divisions in Normandy were SS, while only two battered SS battlegroups were left on the Eastern Front), Wayne has a plan for it to definitely include some SS content between the book and the command cards.

Benjamin Thomas Alkærsig Christensen: Are there any plans for Hitlerjugend and Volkssturm in the future? Either as a list of their own (Bulge or Berlin books) or as command card upgrades/downgrades?

Phil – Most definitely. What would the Battle of Berlin be without the old men of the Volksturm and the young boys of the Hitler Youth?

Stuart Whigham: Will we be seeing SS Cavalry units, that can fight on horseback if need be?

Phil – Absolutely! They are Battlefront’s highest priority!

Chris – If this was a video like we initially planned you would see Phil’s “I may not be telling the truth” face right now…

Eric Deutsch: What are the current plans for 5th SS

Phil – You might have to wait and see there. Wayne’s been concocting some interesting ideas on how to build their battered veteran battlegroups.

Ben Fouche: No more kubel, motorcycle or schwimmwagen scouts?

Phil – All of the reconnaissance companies in Normandy were equipped with half-tracks, either the older Sd Kfz 251 or the neat little Sd Kfz 250 that has just been released. When we get the Eastern Front book, we’ll see reconnaissance units in these sorts of transports reappear.

Stuart Whigham: Will there be any SS Gebirgsjager units?

Phil – You’ll have to interrogate Wayne to learn the answer to that. I’m not sure you’ll get much out of him until he’s ready to talk though. He’s a tough nut to crack.

Nicholas Roche: Stuka zu fuss? 3.7mm AA halftracks?

Phil – You might have to join Stuart in his interrogation!

Helge Macintyre: Will we see SS or in other ways aggressive Sturmpanzers (Brummbar) with a lower price… as the present Price makes Them unplayable

Phil – The few Sturmpanzer units ever built were all army units, and during the middle of 1944, all of them were veterans of the fighting at Kursk, so the answer is definitely ‘not yet’.

Lee Werling: A lot of what I see here are “wish lists” to be brought back from V3. I hope you do! Freiwilligen SS was my favorite from Grey Wolf Revised.

Phil – Many of the really niche and specific forces in the older books probably won’t make it into future books in such a direct way. However, the flexibility of Version 4 usually allows you to build these forces out of the available components. I suspect that you can build something very similar to your old favourite from the D-Day: Waffen SS book and command cards.


Thanks to everyone that took the time to submit questions, hopefully the answers were enough for now to give you a sense of where we are going…

D-Day: Waffen-SS Spotlight

With Phil Yates

Between mid 1943 and mid 1944, the German focus was on the Eastern Front. After the failure of the German Kursk Offensive, the Red Army went on the offensive, throwing hammer blow after hammer blow to drive the Germans back to the Russian border. The elite 1st and 2nd SS Panzer Divisions were rushed to wherever the Soviets broke through, counterattacking to seal the breach. By Christmas, the divisions were worn out, barely a regimental sized battlegroup remained. They desperately needed to be withdrawn to France to rebuild back to full strength.

Check out D-Day Waffen-SS in the online store here…

Then, as 1944 began, the Red Army attacked again. The two new divisions being formed in France, the 9th and 10th SS Panzer Divisions were rushed to the Eastern Front and the plans to rebuild the existing divisions were shelved. Finally, in March, the Spring rains turned the roads to mud and the Soviet offensives ground to a halt. All four divisions were returned to France for rebuilding, joining the 12th SS Panzer Division which was part way through its training. Six weeks into their training, still trying to bring large numbers of conscripted replacements up to scratch, the Allies invaded France on D-Day. Ready or not, the SS panzer divisions were rushed to the invasion front, counterattacking to drive the Allies back into the sea.

With a solid core of veteran leaders under your command, can your willing, but inexperienced troops defeat the Allies despite their massive superiority in numbers? Can you win a never-ending battle of attrition, or do you attack into the teeth of massed artillery, naval bombardments and airpower? Can you defeat the invasion and save your homeland?

Here are the forces you have available to you:

Tiger SS Tank Company

  • Fanatical veteran troops crewing the best heavy tanks available.
  • Thick armour and devastating 8.8cm gun, yet more mobile than most medium tanks.
  • Barge through terrain without a worry.
  • Almost immune to medium tanks, artillery, and infantry.
  • Integrated self-propelled anti-aircraft guns to protect from Allied aircraft.
  • Expensive, but the very best available.

Panther SS Tank Company

  • Fanatical veteran commanders to teach the replacements clever tactics.
  • Determined to succeed despite their inexperience.
  • Medium tanks with enough armour to stop Allied anti-tank guns, and a gun that easily penetrates any Allied tank.
  • Fast for a medium tank, almost as fast as a light tank.
  • Integrated self-propelled anti-aircraft guns to protect from Allied aircraft.
  • Flexibility. Can swap out platoons of Panther tanks for a platoon of Tiger heavy tanks and a platoon of Panzer IV medium tanks or StuG assault guns.
  • Easily outclasses all opposition, just watch out for your flanks.

Panzer IV SS Tank Company

  • Fanatical veteran commanders to teach the replacements clever tactics.
  • Determined to succeed despite their inexperience.
  • Solid medium tanks. Good armour and better guns than Allied medium tanks.
  • Protected ammunition storage and bazooka skirts limit effectiveness of US Bazookas, British PIATs, and Soviet anti-tank rifles.
  • Integrated self-propelled anti-aircraft guns to protect from Allied aircraft.
  • Flexibility. Can swap out a platoon of Panzer IV tanks for a platoon of Tiger or Panther tanks and a second one for StuG assault guns.

StuG SS Tank Company

  • Fanatical veteran commanders to teach the replacements clever tactics.
  • StuG assault gun has better front armour and the same gun as a Panzer IV medium tank, but has no turret so can’t shoot targets to the flanks, and is less effective when assaulting infantry.
  • Determined to succeed despite their inexperience
  • Integrated self-propelled anti-aircraft guns to protect from Allied aircraft.
  • Flexibility. Can swap out a platoon of StuG assault guns for a platoon of Tiger or Panther tanks and a second one for Panzer IV tanks.

SS Panzergrenadier Company

  • Fanatical veteran commanders to teach the replacements clever tactics.
  • Determined to succeed despite their inexperience.
  • MG teams give plenty of firepower.
  • Can add Panzerfaust anti-tank weapons and 7.5cm anti-tank guns to keep tanks at bay.
  • Plenty of integrated weapons, including heavy machine-guns, 8cm and 12cm mortars, 2cm AA, and 7.5cm and 15cm guns.
  • More mortars and infantry guns than an Army division for artillery support.
  • Flexibility to take a platoon in half-tracks as a mobile strike force.
  • Highly motivated assault troops who won’t give ground in the defence.

SS Reconnaissance Company Company

  • Fanatical veteran commanders to teach the replacements clever tactics.
  • Determined to succeed despite their inexperience.
  • Armoured panzergrenadiers mounted in smaller, sneakier, faster Sd Kfz 250 half-tracks.
  • Up to 7 half-tracks per platoon for maximum mounted firepower.
  • Sneaky scout versions of 8cm mortar and 7.5cm gun half-tracks.
  • Mix of old and new armoured cars including Puma 5cm and old 2cm eight-wheelers, and light 2cm wheeled or half-tracked armoured cars.
  • Armoured cars are integrated into formation.
  • Flexibility to take armoured and dismounted panzergrenadier platoons.
  • Can be integrated into armoured and dismounted panzergrenadier companies.
  • Sneak into position, then hit hard and fast.

Support

  • New Jagdpanzer IV tank-hunter. Cheap, effective, mobile.
  • Super-deadly long 8.8cm anti-tank guns on cruciform turntable have all-round field of fire.
  • Plenty of AA options to counter Allied aircraft. Self-propelled single and quad 2cm, or ground mounted 2cm light or 8.8cm heavy AA guns.
  • Lots of artillery choice, with Hummel 15cm and Wespe 10.5cm self-propelled guns, 10.5cm howitzers, and 15cm Nebelwerfer rocket launchers.
  • Allied air superiority prevents any German air support in Normandy

How Do The Waffen-SS Play?

You can build your Waffen-SS force in a variety of different ways. You can build a force of elite heavy Tiger tanks. With their heavy armour protecting them, these veterans have suffered few casualties while they learned their trade. Now they are deadly. Whether you take them as the core of your force, or as a backup to lighter troops, they are always effective.

You can build a panzer force, either mixing types to take advantage of their different capabilities, or focusing on one type to maximise its strengths. Panthers are cheaper than Tigers, but offer much of the same benefits, so long as you can protect your flanks. The Panzer IV and SuG are cheaper, but still good enough to outclass Allied medium tanks. With their fanatical crews, the Allies will have to knock out every tank.

Like the rest of the Waffen-SS options (other than the elite Tiger tanks) your panzers are less skilled than their Army counterparts, their commanders are Old Hands, so units close to the company commander can use his skill when making tactics rolls to do clever things like Blitz Move or Shoot and Scoot. This can mitigate their inexperience and counteract their tendency to get hit more often than their Army equivalents. Their lack of skill makes the Waffen-SS cheaper than Army troops, Make use of the greater numbers you get to overwhelm the enemy, and if necessary their determination to keep fighting to outlast the enemy and achieve victory.

Your other option is to go for a panzergrenadier force. Infantry as fanatical as these can be hard to beat. When attacking, they rarely remain pinned down, especially when their company commander is nearby giving them re-rolls, and in an assault they will fight until they’ve taken the objective or died trying. In defence, they are equally tenacious. The enemy will have to kill them all to clear the objective, something that can be dreadfully expensive given the amount of firepower they possess.

The key to any Waffen-SS force is to keep the pressure on the enemy using your excellent and plentiful equipment and rely on your superb morale to outlast them.

Normandy Campaign Missions

In common with the other D-Day books, D-Day: Waffen-SS has three new missions linked together with two of the standard missions into a campaign. The fighting is very fluid, from the counterattack on the Allied beachhead to a final dash to escape the Falaise Pocket. The first mission is Encirclement in which the Germans attack from the flanks trying to crush a salient formed by the Allied spearhead before more reinforcements can arrive from the beaches. The old standard No Retreat follows as the Germans attempt to keep the Allies penned in their beachhead.

The second new mission is Gauntlet, in which the Germans, cut off by the advance towards Caen, must dash down a narrow gap between two British forces to escape entrapment. With more units arriving from both sides as the game progresses, it’s an interesting challenge to hold the route open to extract your forces. Another standard mission, Bridgehead, follows as the Germans attempt to hold the Orne bridges open for the retreating forces to cross.

Finally, the third new mission is Into the Unknown, reflecting the loose fighting as the Waffen-SS attempted to delay the Allied forces pushing in the base of the Falaise Pocket in confused and open fighting. Like Dust Up, the fighting is across the diagonal of the table, but unlike that mission, neither side holds any objectives at the start of the battle. The combatants need to advance into No-Man’s Land to cover their own objectives and seize those of the enemy.

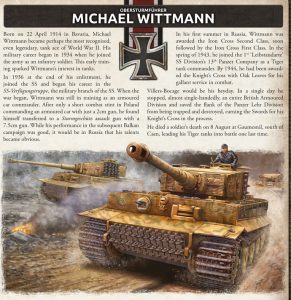
Who Are The Warriors

The D-Day: Waffen-SS command card pack includes six warriors: Ernst Barkmann, Emil Dürr, Adolf Peichl, Karl-Heinz Prinz, Rudolf Roy, and Michael Wittmann. All were awarded the Knight’s Cross. One of Germany’s highest awards.

Three of these soldiers were tankers in Normandy. Michael Wittmann, famed as Germany’s top-scoring tank ace, commanded the Tiger tank company that dramatically halted the British advance at Villers Bocage soon after D-Day. His elite crew make his tank truely deadly with its high rate of fire and re-rolls if it misses. In addition, his command tanks can be placed in ambush in addition to any normal ambushes!

Karl-Heinz Prinz led a Panzer IV company, making rapid and bold counterattacks to regain lost positions and stop British attacks. His card allows you to re-roll failed reserves rolls to bring his units onto the table. Ernst Barkmann was a Panther tank commander who had some interesting adventures when cut off by the American advance, claiming a number of M4 Sherman tanks before limping back to the German lines with a badly damaged tank. He’s a good shot and has a chance of surviving a hit that would destroy the tank of a lesser tank commander, giving him a chance to return to battle and fight on.

Rudolf Roy also commanded an armoured vehicle, a Jagdpanzer IV tank-hunter, with which he claimed 26 British, Canadian, and Polish tanks in five days, helping keep the Falaise Pocket open long enough for much of the German panzer force to escape to fight another day. His gunner’s shooting is deadly accurate and his careful use of cover makes him hard to hit as he stalks the enemy. Emil Dürr was also a tank-hunter, part of a unit of 7.5cm towed anti-tank guns. When his guns were knocked out, he gathered up Panzerfaust anti-tank launchers and hunted tanks on his own.

The final warrior is Adolf Peichl, a veteran of fifty close combats including the destruction of at least eleven tanks. When he’s fighting in an assault, he and any unit he’s leading will pretty much fight to the death, with him as a lethal whirlwind in the centre of the fight.

Ready For Battle

The D-Day: Waffen-SS book will give you some great new ways to use your existing D-Day: German army, as well as opening up new options for painting and army building.

~Phil

The D-Day: Waffen-SS Launch is Live!

Today we’ll be launching the final book in our D-Day series, with the Waffen-SS joining the battle!

Inside the book you will find:
• Background on Germany’s Waffen-SS during the events of D-Day and the breakout that followed.
• Instructions on how to build a Tiger SS Tank Company, Panther SS Tank Company, Panzer IV SS Tank Company, StuG SS Tank Company, SS Armoured Panzergrenadier Company, SS Panzergrenadier Company, and
SS Reconnaissance Company.
• A Painting and Basing Guide.
• Three new D-Day themed Missions.

Over the course of the day you can expect to see articles, list builds, videos, and plenty more, so by all means jump in and check it out.

The Battlefront Team

World War III: American Live Launch Round-Up

Intro to the WWIII: American Live Launch
WWIII: American Q&A
WWIII: American Model Rotations
Unboxing The New WWIII American Starter Army

Tactics and Gaming
Know Your Abrams
Fire Birds
Whispering Death
Every Anvil needs a Hammer: The M1A1HC
Black Hawk Down – A Rescue Mission
Big Games For Big Gamers
Fire In The Skies – The M109 vs M270
TOW Be or Not TOW-2 Be?

Forces and List Building
Bradleys. Lots of Bradleys
Eagle Troop Rides Again
WWIII: American Starter and Where to Next!
Historically Plausible
Bradley Hold The Line?
Everything But The Kitchen Sink

Modelling and Painting
How To Paint: AH-64 Apache
Chocolate Chip US Infantry
How To Paint: Forest Green
How To Paint: American Desert MERDC
How To Build: AH-64 Apache
How To Build: M2 Bradley
How To Build: MLRS
How To Build: M109

TOW Be or Not TOW-2 Be?

With Garry Wait

I have heard much confusion and discussion about the TOW missile and the new WWIII: American book. One of the most exciting things about the new book is not only the new toys but the options to get more mileage out of existing weapons systems. To my mind, the most fascinating upgrade is to TOW missile systems.

Let’s look briefly at what TOW actually is before discussing how to get the most out of your TOW system in World War III.

Initially produced by Hughes Helicopters and still produced to this day by US Company Raytheon, some fifty years after first produced.  The TOW system (which stands for “Tube-launched, Optically tracked, Wire Guided or TOW for short) was first produced in 1970, just in time to see trials in the tail end of the Vietnam War. The original BGM71A missile (to use it’s US designation) saw action in 1972 when it was used on 24 April against of all things, a captured US made M41 light tank.  The original use of TOW saw mainly helicopter firings used although a ground mount was also available initially. The armoured solutions you see in World War III came along much later.  This early version had a range of some 3,000 metres and reduced armour penetration.

During the Cold War the Improved TOW BGM71C came out with better range and better AT through a new warhead, with the BGM71B (known as TOW-ER or Extended Range) being identical to BGM7A except for having the improved range of 3,750m.  This Improved TOW BGM71C missile is what was sold to various NATO forces as well as Israel and Iran in the Oil Wars book and represents a hugely successful system. With the base sight being thermal imaging as standard using the AN/TAS-4, as an all-weather weapon it is unsurpassed for production levels (although there is debate about whether this night sight was supplied to Iran).

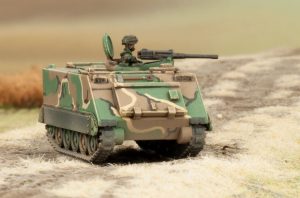
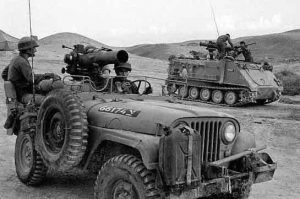
With AT21 and range 48”/120cm in game, the Improved TOW represents a threat to all but the most advanced tanks on the table and can account for anything up to Front Armour 18 reasonably in my experience.  The first outing for the Improved TOW was in Lebanon in 1982 where IDF General Peled’s TOW jeeps exploited the vulnerabilities of Syrian T72’s in spectacular fashion. This action saw up to nine T72’s destroyed for no tank losses on the Israeli side.

(Read more about Peled and his Special Manoeuvre Force here)

Apart from US forces, the Improved TOW system is also available in game to British (Lynx Helicopter), Canadians (M150 TOW tank destroyers), Netherlands (YPR765 PRAT), Iranians (on AH1 Cobra, M113 and Jeep), Israelis (AH1 Cobra, M113 and Jeep) and West Germans (Jaguar 2).

That makes it a very widespread system indeed. In all cases, apart from the Iranians, it provides a thermal imaging system for the firing post which incrementally improves the weapons performance.

Now, in the new United States World War III book, we see the new BGM71D system, also known colloquially as the TOW-2. This new weapon has the same range but a bigger enlarged warhead that provides significantly better hitting power. The Improved TOW missile warhead was 141 cm long while the newer TOW-2 adds an additional 10cm of length, all of which is heavy explosive filler although both have the same 152mm (6”) diameter warhead. This part is important as it means the TOW-2 is backwardly compatible with older launchers.

The new warhead offers AT23 which is a quantum leap forwards for democracy and freedom loving NATO forces and is introduced as standard on the M2 Bradley IFV (Infantry Fighting Vehicle) and M3 Bradley CFV (Cavalry Fighting Vehicle).  If you take any TOW-2, you must upgrade ALL other TOW launchers at a cost of one point extra per unit. So that means if you run AH-1 Cobras supporting a Bradley equipped Cavalry force, you need to up the cost by an additional one point per flight to accommodate the far more lethal TOW-2. Currently the TOW or TOW-2 system is available to the US Army in M2 and M3 Bradley, M901, HMMWV and AH-1 Cobra systems, while the USMC can use the same options in the HMMWV and the LAV-AT systems.

The only issue with the TOW system was the requirement to keep the seeker sight on the target to guide the weapon onto the unlucky focus of the operator. With a speed of 200 metres per second and two seconds to allow for the gyroscope stabilised warhead rocket to kick in, it is a nerve wracking 20 seconds to get to a target at maximum range, all the while with a heightened level of enemy attention upon the operator!

If you’re facing some serious frontline enemy – or are involved in a NATO training exercise versus Challengers or other US forces – where you will be facing front armour of 19 or more, I’d recommend this as a small price to pay to keep your grunts comfortable in their fox holes. A well-run US force can accommodate the best missile in the game and the TOW-2 is clearly this with excellent range, hitting power and night vision to suit.  Nothing will scare a T-64 commander more than facing TOW-2 missiles which can comfortably outrange their main gun rounds.

At a pinch, you can even use it to clear enemy out of bunkers OR engage helicopters although I only recommend this after you’ve cleaned up the enemy’s heavy armour.

If TOW-2 is so good, why wouldn’t you buy it, I hear you ask?

In many cases it will be overkill. Against most Oil Wars forces – apart from our good friends in the IDF – you won’t need the additional expense of the TOW-2. If facing T-72 or earlier model Soviet equipment, it’s a proven fact that the Improved TOW is more than sufficient to deal with 1960’s Soviet technology. Why waste a brand-new missile on an outdated ride?

When facing APC’s, even the much-vaunted British Warrior IFV won’t be any challenge for a US Improved TOW missile after all.

But much like the USSR in the Cold War, you need to balance the budget. TOW-2 is a lovely option to have available but may be a sledgehammer to smash open a walnut shell – capable but likely to leave a mess.

~Garry

Everything But The Kitchen Sink

With Chris Allen

“Sergeant Ferris!” Lieutenant Armstrong bellowed as he walked up to his platoon for the first time, just having arrived with the reinforcements.

“Sir” 

“I know I’m new here but we’ve got to police up these tanks.”

“Sir?”

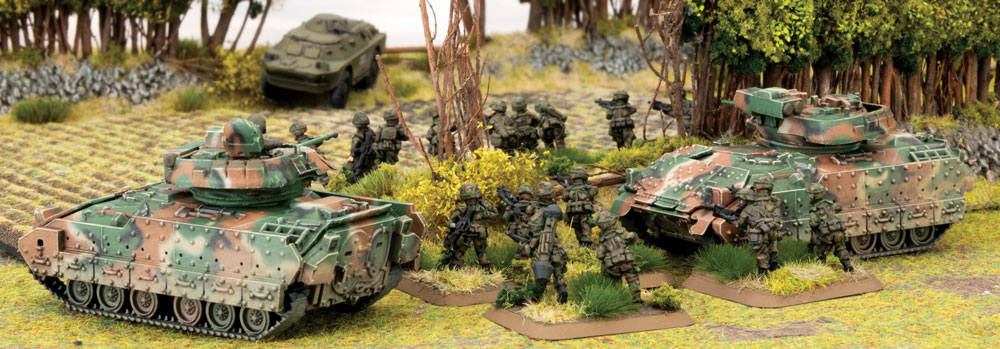
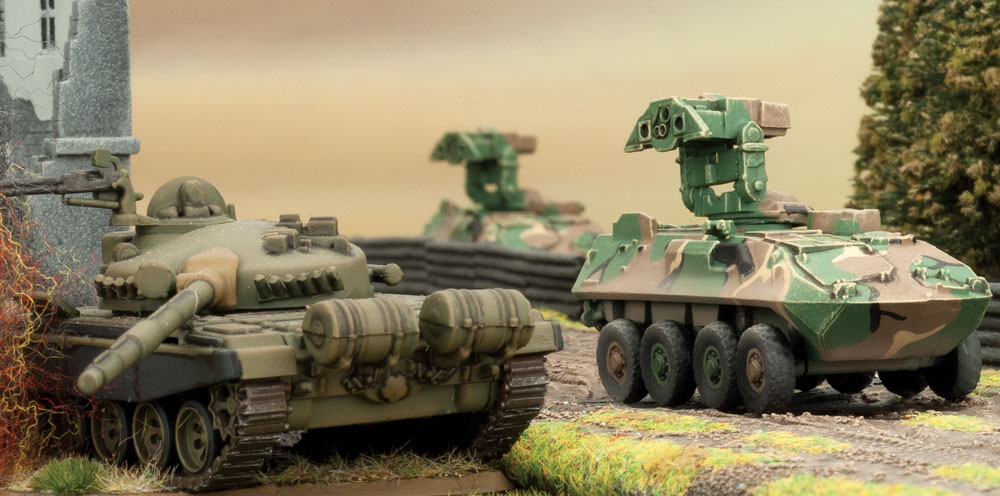
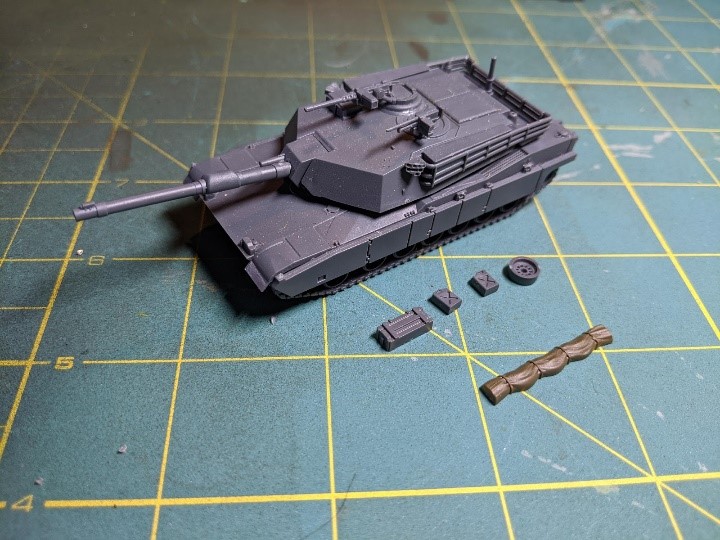
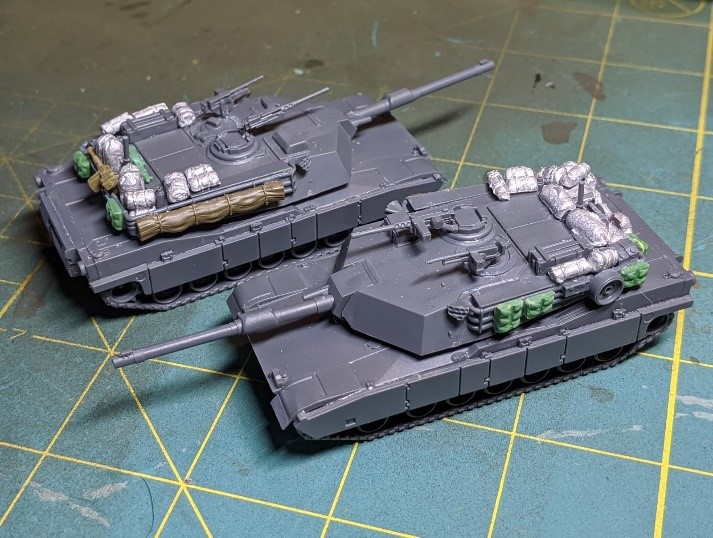
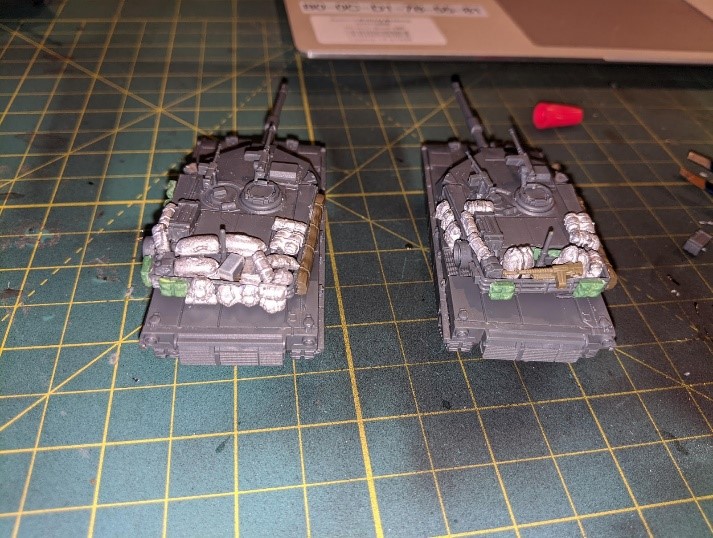
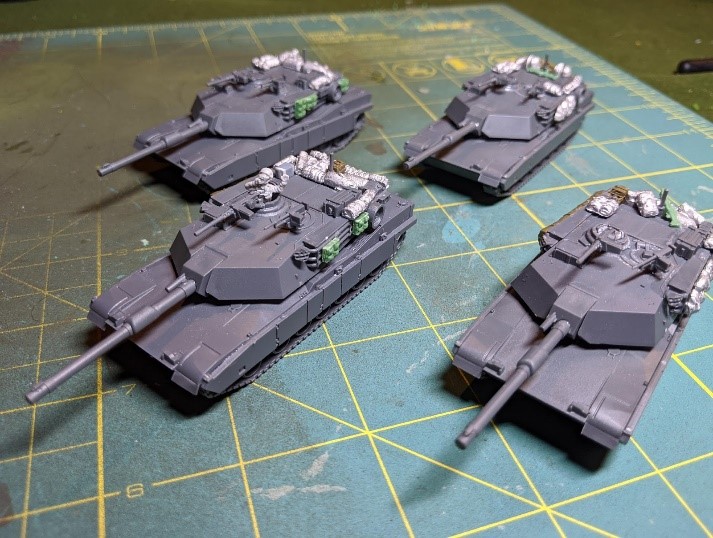
“Sergeant if you look at anyone else’s tanks they’re bare hulls, maybe a little kit in the bustle but our tanks, Sergeant there’s more kit on theses tanks than in the quartermasters shop, look at that one, does that tank have a DShK on it?

Sergeant Ferris blinked, looked up at the sun and looked back down, blinked again, “Sir, we could have left it for the commies to pick back up, but in all honesty it’s kinda a good luck charm. Plus you should have seen how confused they were when we opened up on them with it one time, the Int guys said there was comms chatter for days about friendly fire”

“Fine, but sergeant you can’t tell me we need that many Jerry’s on a tank, I’ve been assured we’ll receive nightly resupply, in my experience on course…”

“Lieutenant, I’m happy you’ve been assured, but in my experience in battle”, he let his word hang “when resup’ doesn’t show for two days because things get hot and we get caught behind the lines, those jerry’s keep us killing Ivan and get us back home.” 

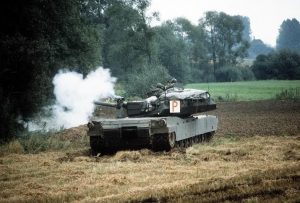
The Lt looked down, and then back at the tanks. “Sergeant, is that a case of beer on the back of that tank?” 

A head popped up from the back of the tank, the young man stared down from the tank “Sir, you ever tasted a beer after killing commies?” 

“No”

A wry and knowing smile crossed the sergeant’s lips as the Lt looked back down “You will” 

With some social distancing going on it’s a great time to not only start something new but spend a little extra time making it something special, something of your own. I’ve been playing Soviets since the introduction of the game, but after moving across the country I wanted to start a second force to help introduce the game to new players. There was no more appropriate or iconic force to pit against the Soviet threat than the might of the American military. So picking up a box of Bannons Boys I wanted to make something that really showed the differences in the two forces.

My Soviet force is a monument of simplicity, uniformity and application of conscript forces. So what better way to make the opposition stand out and show the divide of culture and doctrine than to make each vehicle individual. With this as the concept there was only one option, the M1A1 Abrams main battle tank.

With the new Team Yankee Americans book coming out, we all knew that the M1A1 Abrams was about to appear in the game, so what better opportunity to jump in ahead of the release to have built a model we all have access to but isn’t yet on the table!

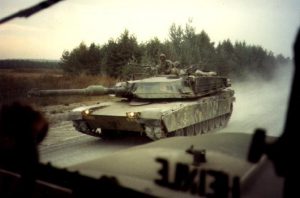
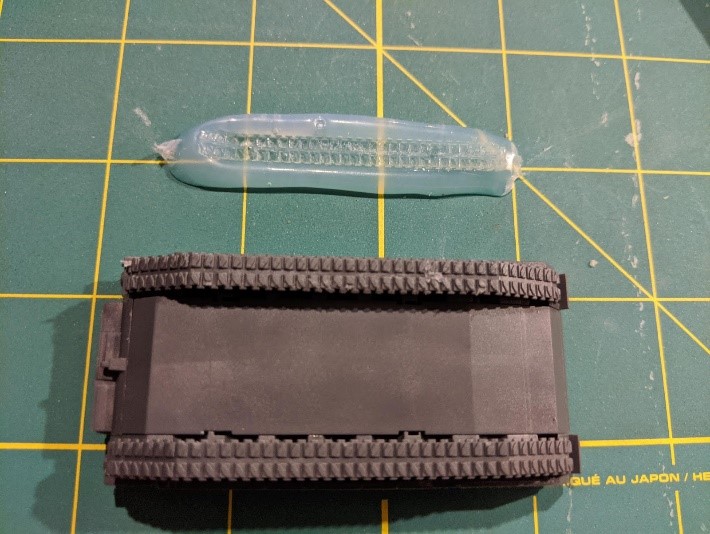
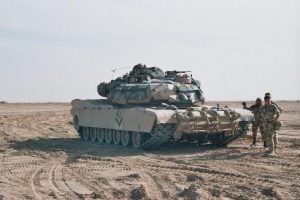
All you need to do is type in Abrams in google and you’ll find pages upon pages of pictures of Abrams tanks through the years, and every single one looks different. But the pictures give great inspiration for stowage, paintjobs and just getting the models on the table. I tried to find pictures from Operation Reforger and other major exercises but also looked for inspiration in the conflicts in Iraq. While I didn’t want to put on all the really modern pieces like recognition panels and such there were tons of examples of how to stow kit on a high speed tank.

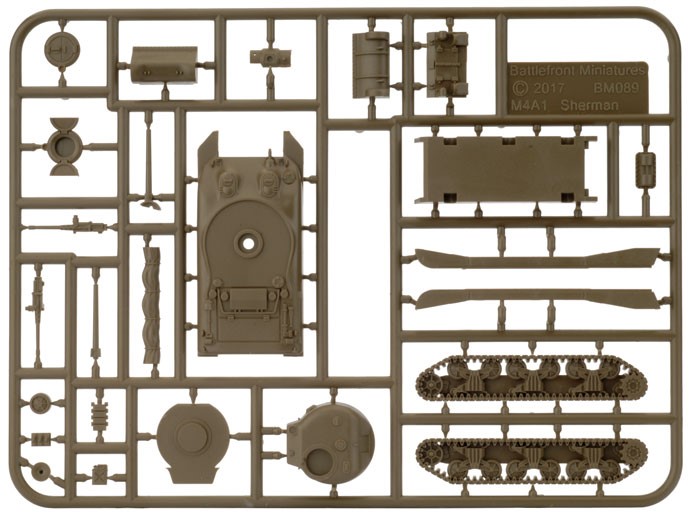
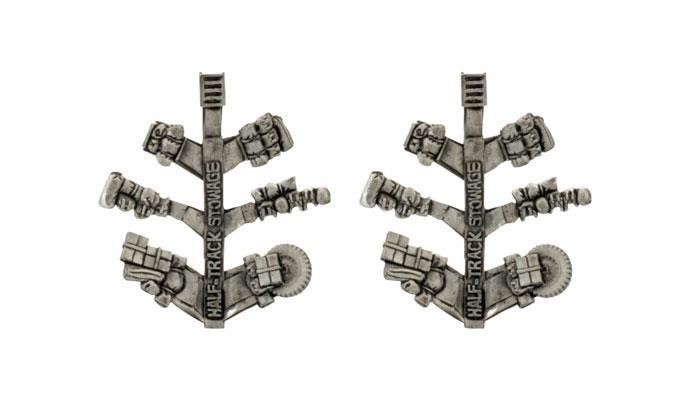
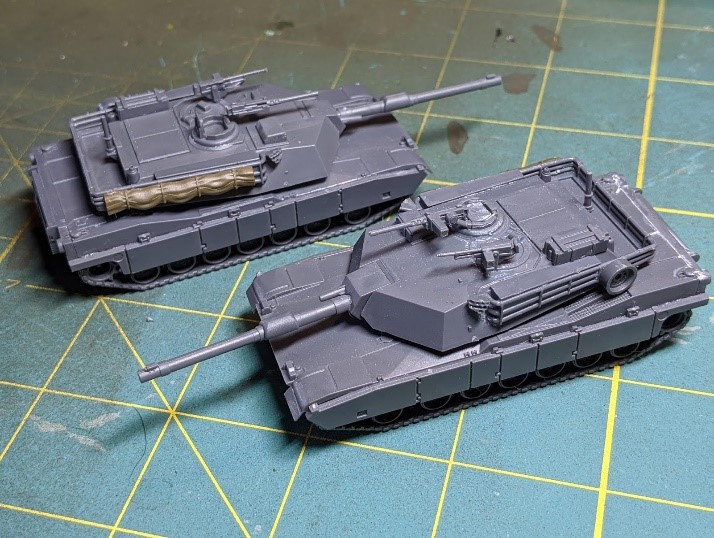
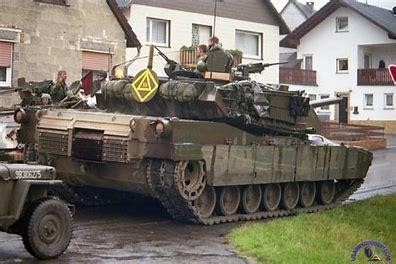
I didn’t have too look far to find what I needed to accomplish this. Battlefront is amazing at providing us with extra pieces of kit to customize our forces and make them not simply markers on the table but our own private armies to command. Looking at most sprues you’ll find extra pieces, boxes, road wheels, guns and such, all ripe for the picking and enabling us to make our toy tanks individual and our own.

For my Abrams I found some of the parts in the following places:

The Abrams sprue itself: Road wheels, jerry cans, tool boxes, even extra machine guns are all there.

The Sherman Sprue out of hit the beach: tarps, jerry cans, oil cans.

TUSO10 US Vehicle Stowage (below): This blister is life. With rucksacks, kit bags, ammo crates, road wheels, tarps and wrapped kit, this has a lot of everything you want. I need to order more to customize up my Americans as I expand the force.

USO212 Half-Track Stowage (above): This is full of wrapped kit and equipment and is pure gold for adding strapped down equipment to vehicles in any era and if you have it for your Mid or Late War Americans, you can use it to give a little love to your Team Yankee Americans.

These made up the mainstay of my bits, but I scrounged weapons like machine guns off of M113 and T-62 Sprues, there are literally great bits on almost every sprue that can work and add to your force being unique and your own.

The one bit I wanted but couldn’t get was spare tracks. There is spare track on the Leopard-2 sprue but it’s not quite right for the Abrams. So what’s a guy to do? Improvise, adapt, overcome.

To be honest I didn’t know if this was going to work, but it did.

I laid down a thick bead of hot glue onto my cutting mat and let it cool down to where it was starting to get that white colour back and I pushed the Abrams track down into it and let it fully cool. I carefully pulled the Abrams off of it and voila a push mold for an Abrams track.

I mixed up some GF9 green stuff and poured some water into the push mold  (poor mans release agent) and in a few minutes I had more track than I knew what to do with. If I was to do it again (Which I did) I’d of put the hot glue on a large Popsicle stick so I could reuse it and move it easily.

This is the mindset a modeler needs, everything can be a bit, or become one. I cut up and shaped sprues and squared them to become boxes of rations, and a case of beer.

Now came the fun part, adding it all together.

If you’re a Sergeants Major or First Sergeant, skip ahead a paragraph, you won’t care to follow where I’m about to lead you. Uniformity only goes so far. Every armoured vehicle I’ve ever lived out of was different. There were some key things in some key places, stretchers, admin boxes, tools. After that it was up to the vehicle commander, and each had their likes, wants and needs. This for an army on the table means variety but commonality and can make a cohesive army of individuals.

I started my Abrams platoon by picking what my key essential kit would be. For my vehicles it was an ammo box made into an admin box, two jerry cans, a road wheel and the vital sleeping tarp. I picked where these were going to go by test fitting with blue tac and glued them down on the four tanks. This gave me a base to work from and individualize further.

With that I was open to do what I like but I ensured to keep the blow out doors of the protected ammunition and the antenna mounting points free and clear of stowage. It’s a safety thing. And knowing is half the battle.

I wanted these tanks to be really lived in and so I made sure that each crew member would have not only a ruck but a kit bag, a bit much sure but the tanks doing all the lifting so who cares, might as well bring everything you might need.

I tested and moved around stowage to make each vehicle individual, but the common items and open space of the blowout panels made the platoon cohesive. They looked not uniform, but common.

Things really started to come together and each story started to tell its own story of the crew manning it. In the field I’ve seen no end to crazy things strapped to tanks by the crew so the machine guns, boxes of MREs or even a case of beer started to come together.

One thing I will note is that if you plan on putting this much stuff on your Abrams I suggest magnetizing the turrets. I didn’t. And then once I had more than doubled the weight of the model, all on the rear of the turret, I had to dig out the pins and insert magnets. They work amazingly well and I have no issue with the turrets tipping now. Learn from my pain.

In the end I’m really happy with how the platoon turned out. It’s my first American unit for Team Yankee and I think it’s going to set a trend for my force.

Now I just need to figure out if I’m adding camouflage nets and find a paint scheme I like. I’m thinking NATO 3 Colour so they can blend in with the allies.

The new Team Yankee American book is going to add a lot of fun and flavour to the game and I for one can’t wait to see the iconic M1A1s hitting the table. Some people love the look of stock tanks, stripped down to the essentials, ready to fight light and fast, I know I do with my Soviets. For my Americans I want a lived in tank that nobody is going to confuse as anyones but mine, and the M1A1 has the stowage capacity and cool factor to help make this happen.

Happy hobbying.

~Chris

Fire In The Skies – The M109 vs M270

With Chris Allen

With World War III: American being released there are a ton of new and exciting options available for players. From new Formations, to new variants and weapons players are spoiled for options and this definitely extends to the support options commanders can choose from. Few things are as connected to victory on the modern battlefield as artillery and so we’ll take a quick look at the new kid on the block the M270 MLRS and compare it to the workhorse of fire support the M109.

American players have had the supporting fire of M109s since the beginning of the game. It’s a tried and tested unit that provides a lot of flexibility for commanders. Its 155mm shells provide AT 4 artillery fire with a 2+ Firepower, it’s solid. It’s got pretty solid armour for a self-propelled artillery system, has smoke and the option for specialist rounds like DPICM, Minelets and copperhead rounds. Fully kitted out this unit is a high end swiss army knife, it can do it all, or be taken without upgrades to provide good old direct fire support to your combat teams.

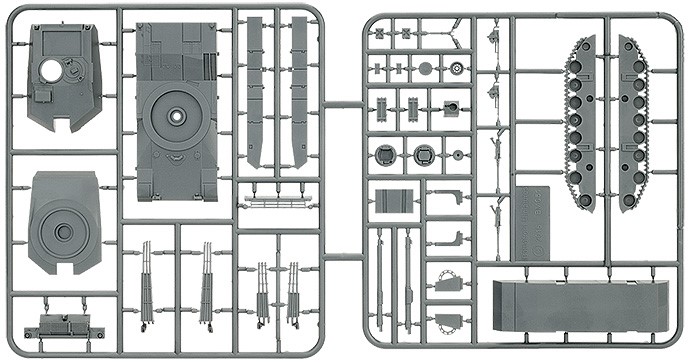
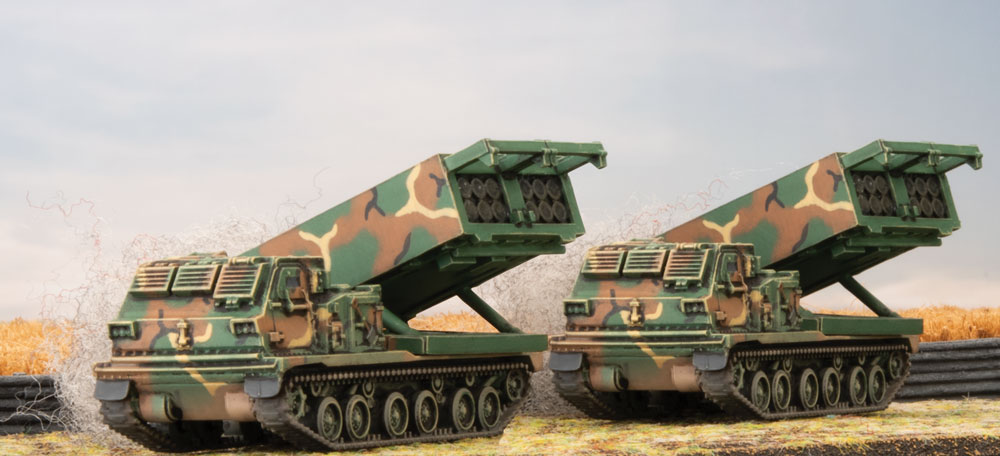
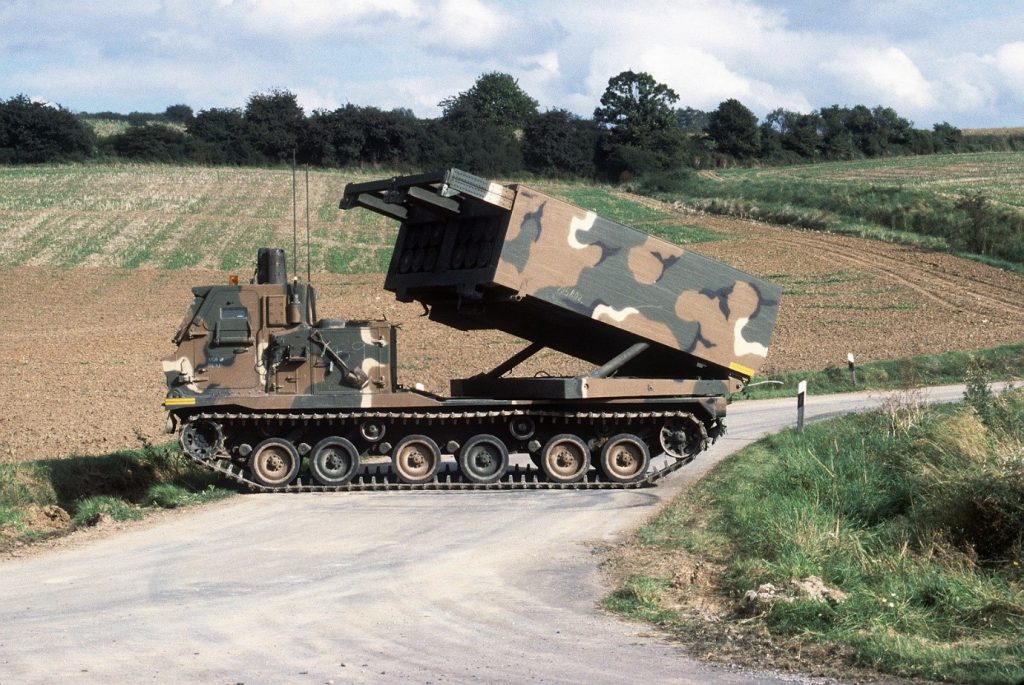
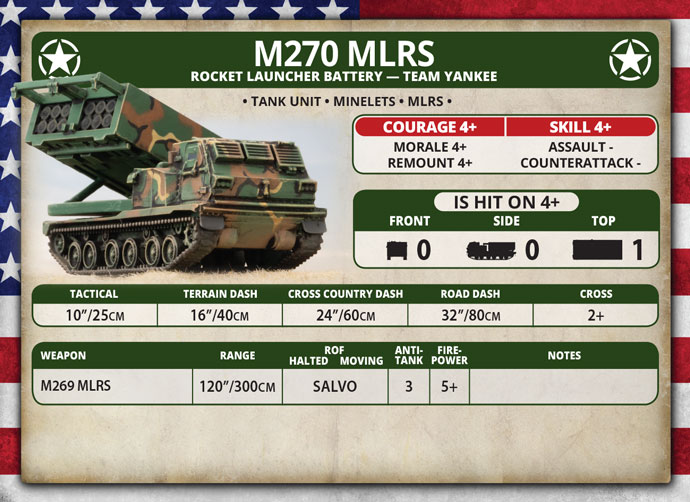
The M270 MLRS is the new big fire support option for U.S. forces. While it came out with Team Yankee British, the MLRS is going to be available for the British, American and German forces. This new artillery system provides a few things for the American forces in World War Three, not the least of which is a really sweet model. I’m a big fan of the look of MLRS systems and with the armoured cabin and huge rocket bank I was in from the moment it was released.

Looking at the M270 MLRS’ stats there’s nothing huge to immediately write home about. Lightly armoured it’s just beyond unarmoured with 0/0/1, it can take Minelets for 1 point and has a AT of 3 with a 5+ FP on it’s Salvo. This is where a lot of people write off this vehicle, but there is a lot more under the hood than most people see. In my opinion the largest negative is that the MLRS cannot provide a smokescreen and so loses some flexibility.

Another unit with mines is always amazing. The MLRS is about board control, plain and simple this unit helps you dominate table space more than anything else, and mines are a great way to do this. With the MLRS rule letting 3 teams count as 6 you can drop 2 minefield tokens and cover a key gap, or route forcing your opponent to make tough decisions.

Salvo fire is huge. People always forget just how big salvo fire is. An artillery template is 6”x 6” or 36 square inches, the Salvo template at 10”x 10” provides 100 square inches, or just under three times the area enabling it to hit a lot more targets. The downside to this is almost all of your shots will cover terrain features and as such will be harder to rang in. An MLRS battery really loves having an M113 FIST team to make sure it can range in on 4s if you’re planning on repositioning it or using the mines.

The MLRS rule makes each team firing count as 2 teams, so your three-team battery of MLRS for 9pts fires as six teams and rerolls all misses to hit. When you compare this to a similar pointed unit like the minimum M109 unit at 7pts you start to see how effective this system can be. Rerolling all misses in three times the area gives you dominating fires. This is especially effective against infantry and unarmoured tank teams that a single hit will also pin, but enough AT 3 against top armour will put dents in a lot of armoured units.

The firepower as we initially discussed is what commonly turns people off of the MLRS, at 5+ it looks like it’ll be ineffective but when you start to run the numbers the MLRS more than holds its own.

The table below describes the likelihood of any team under the respective artillery or salvo template being hit, infantry dying, dying to a repeat bombardment and the same for dug in against 3+ to hit and 4+ to hit infantry.

3+ to Hit
System To hit Inf Fail Repeat Dug in Repeat
MLRS X3 88.9% 29.6% 49.9% 9.9% 16.5%
M109 x3 66.7% 22.2% 37.0% 18.5% 30.9%
4+ to hit
System To hit Inf fail Repeat Dug in Repeat
MLRS X3 75% 25% 41.7% 8.3% 13.9%
M109 x3 50.0% 16.7% 27.8% 13.9% 23.1%

The MLRS rule drives your hit percentage up massively, and it provides a bigger advantage against harder to hit teams like 4+ infantry or teams out of line of sight. This translates to more infantry kills in the open, providing kills almost ⅓ of the time against Soviet and other 3+ to hit infantry and ¼ of the time against 4+ infantry. With the size advantage salvo brings, you are hitting almost 3 times as much area, letting you hit more teams, more often, potentially multiple units, and then killing more often.

Against dug in teams the 5+ fire power is a detriment, but hitting teams more often brings the numbers up and you find that the MLRS is roughly half as effective at killing dug in teams as the M109. When you remember that the system hits almost three times the area this evens out pretty nicely. The area advantage is where the MLRS shines, as it can almost completely cover the area where defenders can hold an objective from the start of the game. This lets you blanket the area and just bath the enemy in fires until they move or die. Few players will leave units to sit under a template all game, and those that do will regret it.

If an MLRS system is targeting an objective and given multiple turns to fire, there isn’t going to be much left to defend the objective and paired with robust reserves like the new M1A1 Abrams you can have a game winning combination that is very hard to deal with.

MLRS also excels as a cut-off for all of the above reasons. With 100 square inches of table space covered if you protect an objective or key terrain with the MLRS template and call a repeat, on average about 50% of Soviet teams are going to die. That is a crushing level of fire that few forces can accept to take, and being pinned under that template and having it continue basically spells death for anything that doesn’t make it out quickly. Making a no go zone for enemy infantry allows you to shape the battlefield and force players into a bad position.

The M270 MLRS is a gem of a unit that adds another key tool to the American arsenal. Does it replace the M109? Nope not even close. But what it does is give you another option for how you want to take apart your opponents. The M109 provides dominating specific fires and a toolbox of ways to assist your army with specialist munitions while the M270 MLRS provides board control, being a murder machine for troops in the open and can truly perform area denial on its own because of this. What does this mean for American commanders? There is the right system available to support your battle plan waiting to be called upon to hit the table.

~Chris